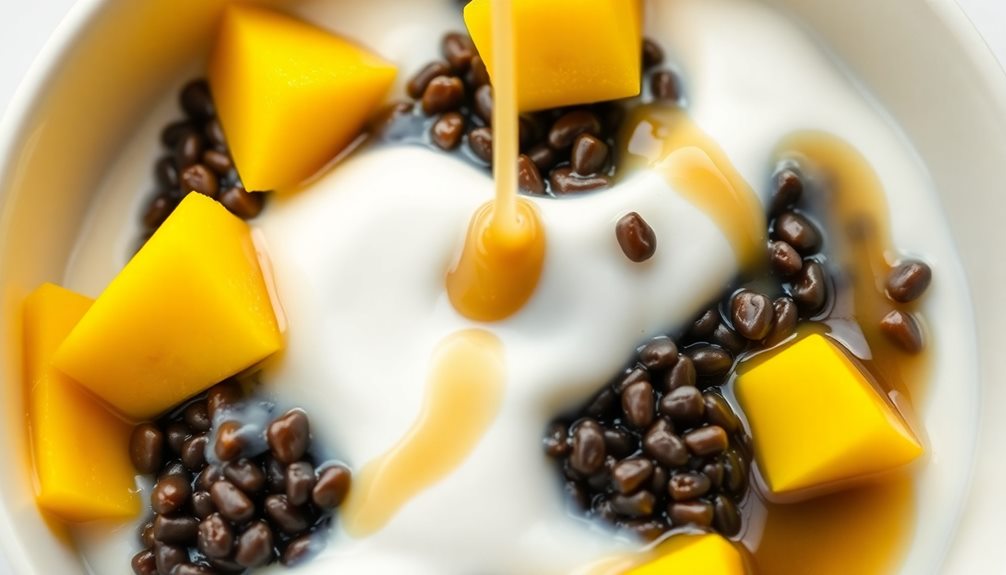

Sữa chua, the tantalizing Vietnamese yogurt, blends French and Vietnamese culinary traditions into a creamy, slightly sour delight. You'll find this probiotic-rich treat enjoyed as a snack or dessert across Vietnam. It's made by gently heating milk, then letting yogurt cultures work their magic to create the signature thick, silky texture. The key is chilling it overnight, allowing the flavors to meld perfectly. Top it with fruit, nuts, or sweetened condensed milk for a truly indulgent experience. Sữa chua's harmonious balance of tartness and sweetness will have you craving more. Learn even more about this captivating Vietnamese yogurt.
Key Takeaways
- Sữa chua is a traditional Vietnamese yogurt made from simple ingredients like milk, sugar, and yogurt culture, known for its creamy texture and slightly sour taste.
- The yogurt has a unique blend of flavors, textures, and cultural heritage, representing Vietnam's culinary ingenuity and tradition.
- The cooking process involves gently heating the milk, adding a yogurt starter, and carefully incubating the mixture to achieve the signature tangy flavor and silky-smooth consistency.
- Sữa chua is rich in probiotics, calcium, and vitamins, making it a healthy snack or light dessert option.
- The yogurt can be served with a variety of toppings and flavors, offering versatility and a harmonious balance of tartness and sweetness.
History

When did Vietnamese yogurt first emerge as a distinct culinary tradition? Well, it's a fascinating story that goes back centuries!
Vietnamese yogurt, known as sữa chua, has its roots in the rich dairy heritage of Vietnam's diverse regions.
Way back in the day, rural communities across the country would transform fresh milk into this tangy delight. They'd use traditional methods, letting the milk naturally ferment to develop that signature sour flavor.
Over time, sữa chua became a beloved part of Vietnamese culture, enjoyed as a refreshing snack or incorporated into all sorts of recipes.
Today, this age-old tradition lives on, with sữa chua finding its way into homes and cafes nationwide.
From the bustling streets of Hanoi to the serene countryside, people can't get enough of this uniquely Vietnamese treat. Its history is as rich and flavorful as the yogurt itself!
Cooking Steps

To begin the cooking process, gather your ingredients and necessary equipment. You'll need a large pot, a whisk, and a few simple ingredients like milk, yogurt, and sugar. Don't worry, this recipe is easy to follow!
First, pour the milk into the pot and heat it over medium heat, stirring occasionally, until it reaches a gentle simmer. Be patient and keep an eye on it, as you don't want the milk to boil over.
Once it's hot, remove the pot from the heat and let it cool slightly.
Next, stir in the yogurt and sugar, mixing well until the sugar has completely dissolved. The key is to make sure the mixture is well-blended and smooth.
Once that's done, cover the pot and let it sit at room temperature for 8 to 12 hours, or until the yogurt has thickened to your desired consistency.
Step 1. Heat Milk Gently
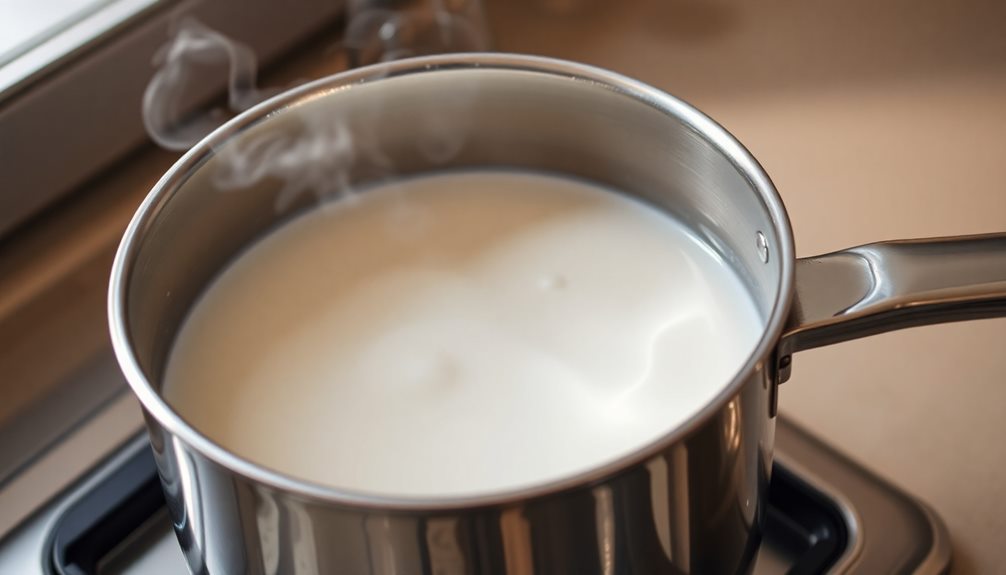
Gently bring the milk to a simmer over medium heat, taking care not to let it boil. This slow, gentle warming is key to creating the perfect Vietnamese yogurt. You don't want the milk to scorch or develop a skin on top.
Keep a close eye and stir occasionally, maintaining that gentle simmer. The milk should reach a temperature between 185°F and 195°F. Once it's there, remove the pot from the heat and let the milk cool slightly.
This gradual heating and cooling process helps develop the yogurt's signature tangy flavor and smooth, creamy texture.
Be patient during this step – it may take 15-20 minutes, but it's well worth it. Rushing through the heating can result in a grainy or separated yogurt, so take your time.
With the milk gently simmered, you're now ready for the next crucial step: inoculating it with the yogurt culture. Stay tuned for that!
Step 2. Cool the Milk

After removing the pot from the heat, let the milk cool down slightly.
You'll want to get it to around 110-115°F (43-46°C) before adding the yogurt cultures. This gentle cooling process is important – if the milk is too hot, it can kill the delicate bacteria needed to make yogurt.
Take your time and let the milk come down to the perfect temperature.
Once it's ready, it's time to stir in the yogurt starter. This special blend of live active cultures will transform the warm milk into thick, creamy yogurt.
Gently mix them together until fully incorporated. Be careful not to overmix, as that can impact the final texture.
With the milk cooled and the cultures added, all that's left is to let the yogurt do its thing.
Cover the pot and move it to a warm, draft-free spot. This cozy environment will allow the yogurt to slowly thicken over the next 4-8 hours.
Soon, you'll have a batch of tangy, homemade Vietnamese yogurt to enjoy!
Step 3. Add Culture Starter
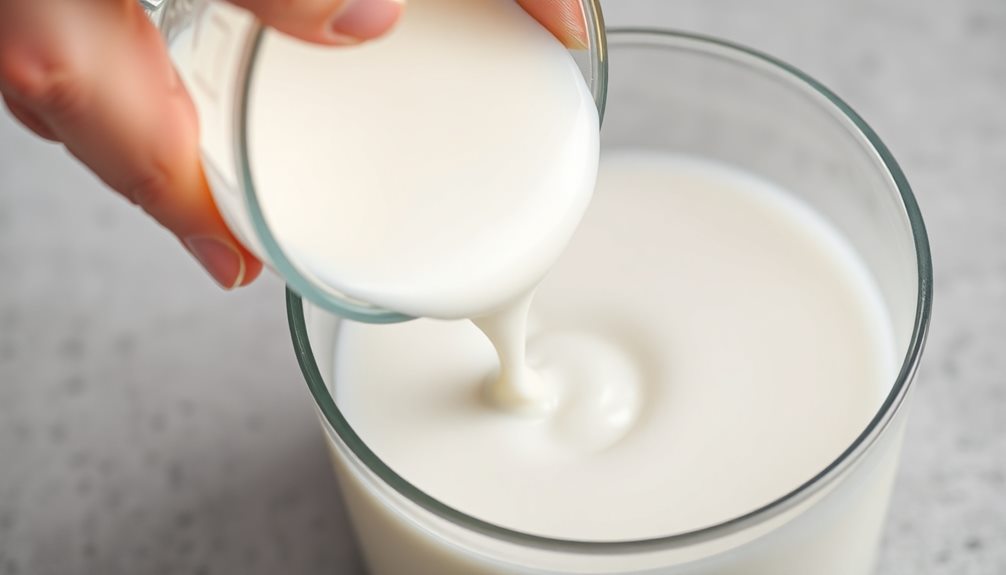
Adding the culture starter is the next crucial step. This is what gives your homemade yogurt its delicious tangy flavor! You'll need a small amount of store-bought yogurt with live active cultures. Simply stir a couple of tablespoons of the yogurt into your warm milk. Make sure to incorporate it well so the cultures can start doing their job.
Regular consumption of certain fermented foods, like yogurt, may enhance overall well-being and comfort, similar to how herbal teas can alleviate symptoms in various health conditions.
The live cultures in the yogurt starter will feed on the natural sugars in the milk, producing lactic acid. This is what gives yogurt its signature tang. As the cultures multiply, they'll also thicken the milk, transforming it into thick, creamy yogurt.
You'll want to let the mixture sit undisturbed for several hours, allowing the cultures to work their magic.
Once the yogurt has set, you can stir it gently and transfer it to the fridge. The cooling process will firm it up even more. Now you're well on your way to enjoying your very own homemade Vietnamese-style yogurt!
Step 4. Incubate the Mixture for Hours

Let the mixture sit undisturbed for several hours, allowing the cultures to work their magic. As the bacteria feast on the milk's natural sugars, they'll produce lactic acid, transforming the liquid into a thick, creamy yogurt.
The ideal temperature for this process is around 100-110°F (38-43°C), so you'll want to find a warm spot in your kitchen, like the oven with the light on or near a sunny window.
Check the mixture every now and then, but resist the urge to stir or disturb it – you don't want to disrupt the delicate fermentation. After 4-8 hours, the yogurt should thicken to your desired consistency.
Give it a gentle swirl and take a peek – the texture should be smooth and velvety, with a pleasantly tangy flavor. Once it's ready, you can transfer the yogurt to the fridge to cool and set further.
Now you've got a batch of homemade Vietnamese-style yogurt, just waiting to be enjoyed!
Step 5. Chill in Refrigerator Overnight

Once the yogurt has reached your desired thickness after the fermentation process, it's time to move on to the next step.
Gently transfer the tangy, creamy yogurt into a clean container, being careful not to disturb the delicate texture. Now, you'll want to place the yogurt in the refrigerator and let it chill overnight.
This is an important step, as the cold temperature helps the yogurt firm up and develop its signature thick, luscious consistency. As the hours pass, the yogurt will gradually transform, becoming even more rich and indulgent.
The chilling process also helps to meld all the flavors together, creating a harmonious balance of tang and creaminess.
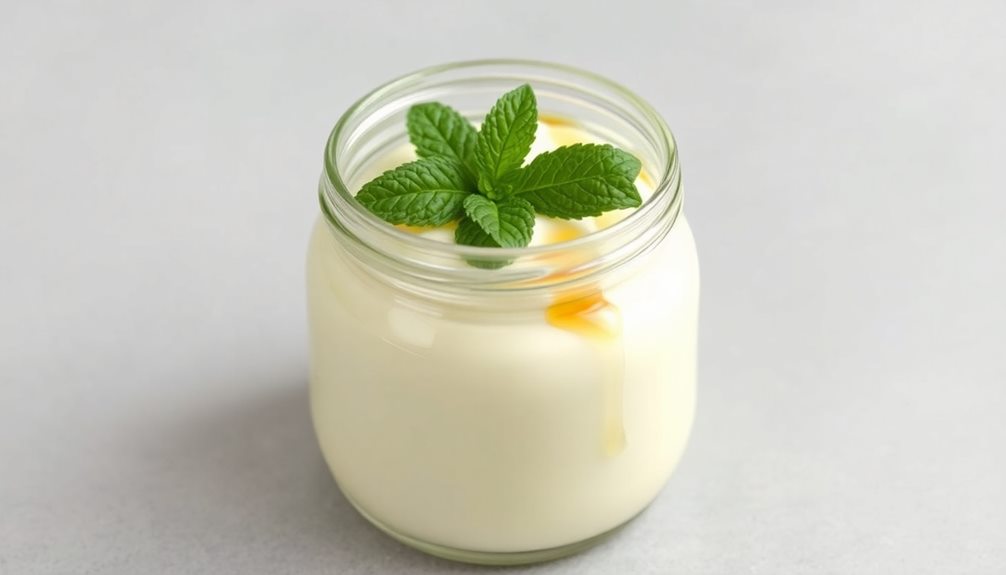
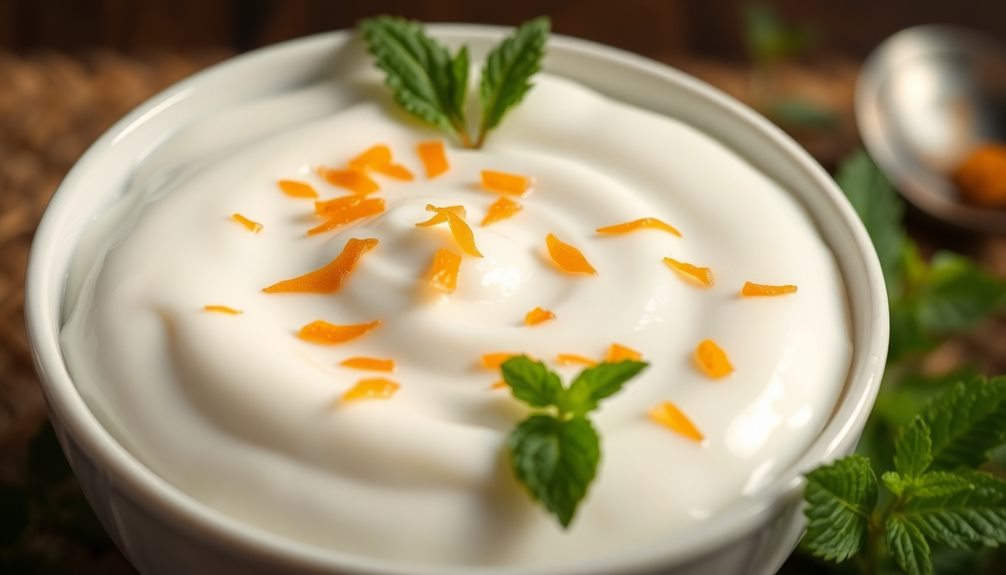
In the morning, you'll be rewarded with a perfectly chilled, silky-smooth Vietnamese yogurt, ready to be enjoyed on its own or paired with fresh fruit, honey, or other toppings of your choice.
Get ready for a truly delightful yogurt experience!
Final Thoughts
The Vietnamese yogurt journey has been a fascinating exploration of flavors, textures, and cultural traditions. You’ve learned how the unique combination of ingredients, such as milk, sugar, and probiotic cultures, creates a tangy and creamy delight. In Vietnam, yogurt is often enjoyed as a refreshing snack or dessert, especially when paired with the tangy Vietnamese green mango salad. The contrast of the creamy yogurt with the sharp flavors of the salad perfectly embodies the balance of sweet and sour that is so important in Vietnamese cuisine. This journey has truly opened your eyes to the diversity of flavors and the role of food in connecting people to their heritage.
The chilling process in the refrigerator overnight is crucial, allowing the yogurt to set and develop its signature texture.
Now, as you take a spoonful of the finished product, you can't help but marvel at the harmony of tastes. The tartness is balanced by the subtle sweetness, making every bite a delightful experience. This yogurt is more than just a dessert – it's a testament to the ingenuity and culinary heritage of Vietnam.
Moving forward, you might find yourself experimenting with various toppings or flavor combinations, further exploring the versatility of this unique treat.
Whether you enjoy it on its own or as part of a larger meal, the Vietnamese yogurt is sure to leave a lasting impression on your taste buds and your appreciation for global cuisine.
Frequently Asked Questions
What Is the Difference Between Vietnamese and Regular Yogurt?
The main difference between Vietnamese and regular yogurt is that Vietnamese yogurt has a distinct tangy flavor due to the unique fermentation process. It's thicker in texture and often sweetened with condensed milk, setting it apart from its Western counterparts.
How Long Does the Fermentation Process Take for SữA Chua?
The fermentation process for Vietnamese yogurt, or sữa chua, typically takes 12-24 hours. It's a longer fermentation compared to regular yogurt, which gives sữa chua its distinct tangy flavor and slightly thicker texture.
Can SữA Chua Be Used in Savory Dishes?
Yes, sữa chua can be used in savory dishes. You can incorporate it into marinades, dips, and even use it as a topping for grilled meats or vegetables to add a tangy, creamy flavor.
Is SữA Chua Suitable for Lactose-Intolerant Individuals?
Yes, sữa chua can be suitable for lactose-intolerant individuals. The fermentation process that creates sữa chua breaks down the lactose, making it easier to digest for those with lactose intolerance. It's a great dairy-based option for them to enjoy.
Where Can I Purchase the Traditional SữA Chua Starter Culture?
You can find traditional sữa chua starter cultures at Asian grocery stores or online specialty shops. Many Vietnamese communities also have local sources for this fermented dairy product.