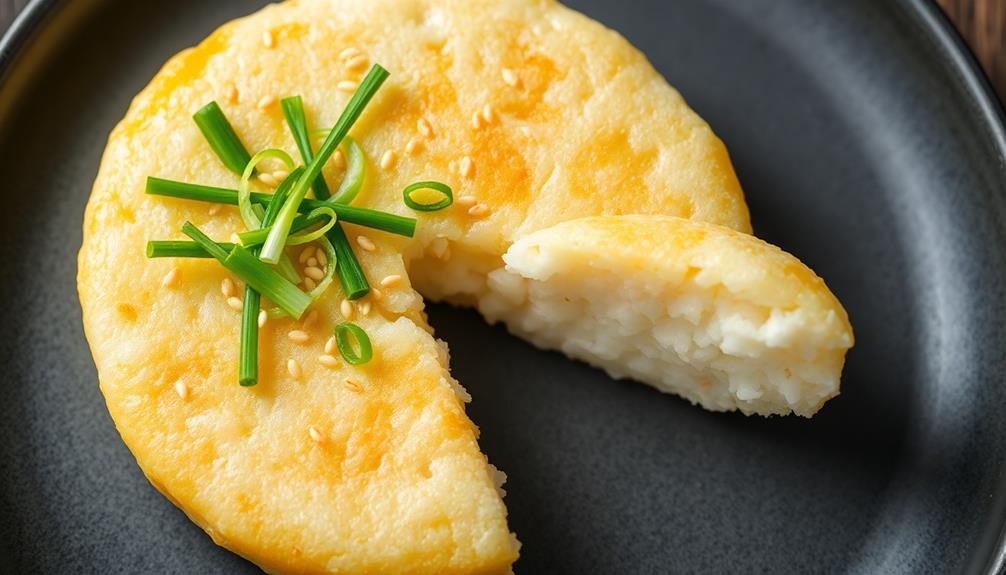
Dive into the vibrant street food culture of Vietnam with crispy, golden-brown Vietnamese spring rolls, known as "cha gio." These beloved delights have been a cherished part of the cuisine for generations. Filled with savory pork, shrimp, and fresh veggies, then fried to perfection, they'll delight your senses. Master the art of rolling and frying these crunchy rolls, and you'll be serving up authentic Vietnamese flavor that'll have your guests raving. With the right techniques and quality ingredients, you'll create spring roll bliss – a must-try for any food enthusiast. Let's dive deeper into crafting the ultimate spring roll experience.
Key Takeaways
- Ensure rice paper wrappers are properly softened before filling and rolling to prevent tearing.
- Maintain oil temperature at 350°F when deep-frying for a perfectly crispy exterior.
- Strike the right balance of fillings, including protein, vegetables, and herbs, to create a harmonious flavor profile.
- Experiment with different dipping sauces to enhance the overall dining experience.
- Practice the rolling technique to achieve tight, evenly shaped spring rolls that hold their form when fried.
Top picks for "roll crispy vietnamese"
Open Amazon search results for this keyword.
As an affiliate, we earn on qualifying purchases.
History
The origins of the crispy Vietnamese spring roll can be traced back to the vibrant street food culture of Vietnam. These delightful appetizers, known as chả giò, have been a beloved part of Vietnamese cuisine for generations.
Vendors in bustling city markets and along winding country roads have perfected the art of crafting these golden, crunchy rolls, filled with a savory blend of minced pork, shrimp, and an array of fresh vegetables.
The spring roll's history is intertwined with the diverse culinary influences that have shaped Vietnamese food over the centuries. Borrowed from neighboring cultures, the technique of deep-frying delicate rice paper wrappers to achieve a satisfying crunch has become a hallmark of these beloved snacks.
As families gathered around the table to share a meal, the spring roll became a cherished tradition, a delicious way to bring people together and celebrate the vibrant flavors of Vietnam.
Recipe
Vietnamese spring rolls, also known as "cha gio," are a popular appetizer or side dish that features a delightful blend of fresh vegetables, fragrant herbs, and savory fillings wrapped in a crispy outer shell.
These rolls aren't only visually appealing but also offer a satisfying crunch and a burst of flavors with every bite.
Preparing these spring rolls at home allows you to customize the ingredients to your taste and enjoy the freshness and authenticity of homemade cuisine.
Whether you're hosting a gathering or craving a taste of Vietnamese cuisine, this recipe will guide you through the steps to create crispy, delectable spring rolls.
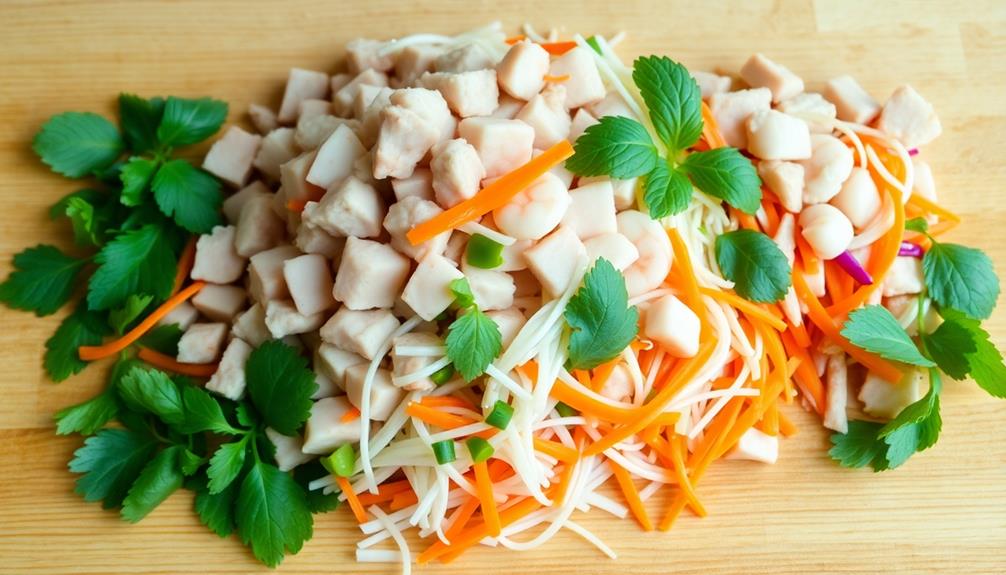
- Pork (ground or minced)
- Shrimp (peeled, deveined, and chopped)
- Vermicelli noodles
- Carrots (julienned)
- Bean sprouts
- Mint leaves
- Lettuce leaves
- Rice paper wrappers
- Fish sauce
- Lime juice
- Sugar
- Salt and pepper
To assemble the spring rolls, combine the pork, shrimp, vermicelli noodles, carrots, bean sprouts, and mint leaves in a bowl.
Season with fish sauce, lime juice, sugar, salt, and pepper, and mix well.
Lay a rice paper wrapper on a clean surface, place a small amount of the filling in the center, and roll the wrapper tightly, folding in the sides to enclose the filling.
Repeat with the remaining wrappers and filling.
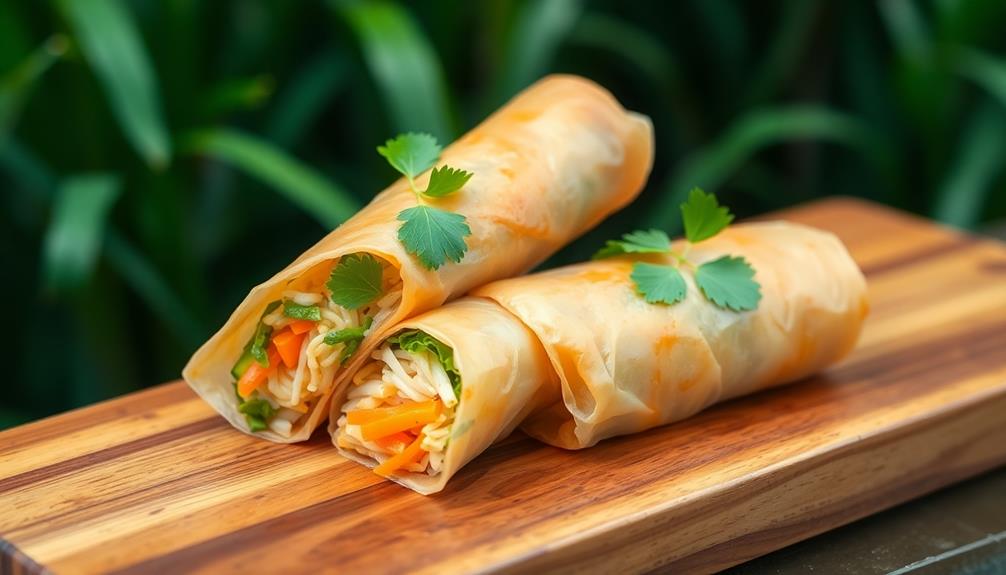
When ready to serve, heat a generous amount of oil in a pan or wok, and fry the spring rolls in batches until golden brown and crispy.
Drain the fried rolls on a paper towel-lined plate.
Serve the crispy Vietnamese spring rolls with a dipping sauce, such as a sweet and sour fish sauce, and fresh lettuce leaves for wrapping.
To ensure the best results, make sure to have all the ingredients prepped and ready before assembling the rolls.
Additionally, be mindful of the temperature of the oil, as it should be hot enough to create a crispy exterior without burning the wrapper.
Enjoy your homemade, authentic Vietnamese spring rolls!
Cooking Steps

Soak the rice paper wrappers in water until they're nice and soft, then get your filling ingredients ready.
Now, it's time to assemble and roll up those spring rolls!
Fry them up until they're golden brown and crispy, and serve them up hot and fresh.
Step 1. Soak Rice Paper Wrappers in Water
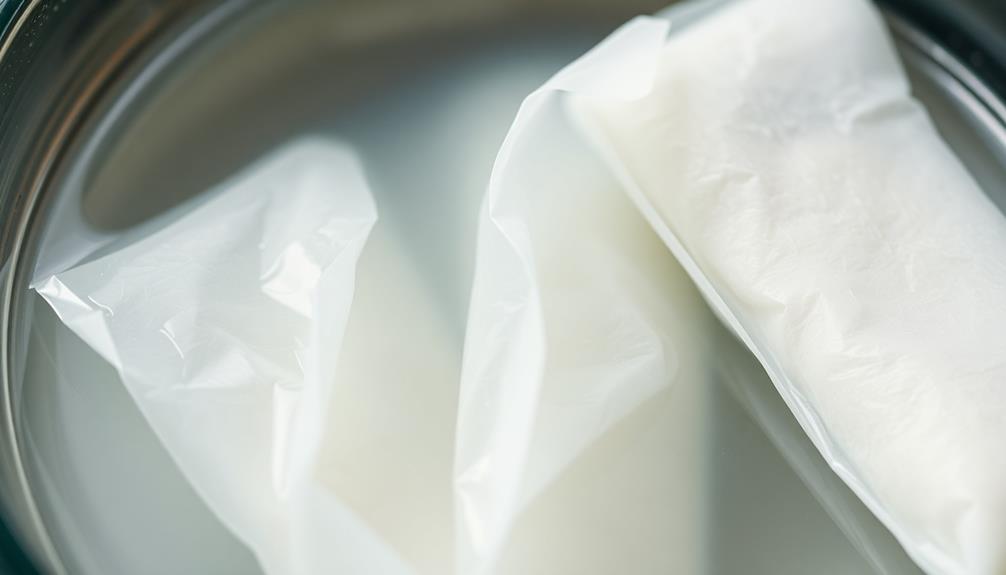
Grab a shallow dish and fill it with lukewarm water. Gently place the rice paper wrappers, one at a time, into the water. Let them soak for about 30 seconds, until they become soft and pliable.
Don't leave them in too long, or they'll become too soft and tear easily.
Once the wrappers are ready, lay them flat on a clean, damp surface. You can use a damp kitchen towel or a cutting board. This will prevent the wrappers from sticking to the surface.
Carefully place your filling in the center of the wrapper, leaving a few inches of space on the edges. Fold the bottom edge over the filling, then fold in the sides and roll it up tightly, like a burrito.
Be gentle when handling the wrappers, as they can tear easily. If a wrapper rips, simply start over with a new one.
With a little practice, you'll get the hang of it and be rolling up perfect spring rolls in no time!
Step 2. Prepare Filling Ingredients
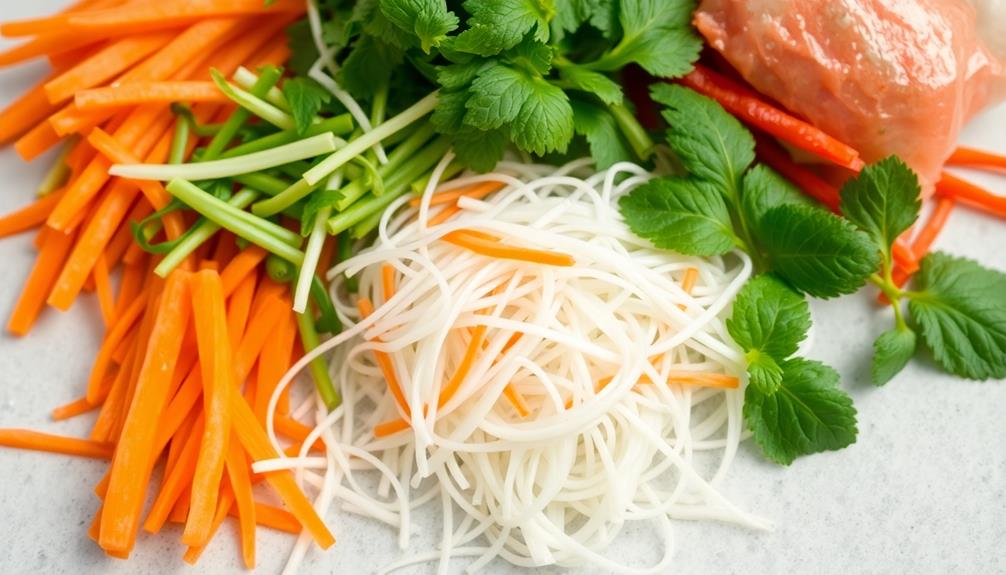
To prepare the filling, gather and chop the necessary ingredients. You'll need some crunchy vegetables like cabbage, carrots, and bean sprouts. Slice them into thin strips so they'll fit neatly inside the spring rolls.
Don't forget the fresh herbs – mint, cilantro, and Thai basil add vibrant flavor. Mince up some garlic and ginger too – they'll give the filling a zesty kick. If you're using pork or shrimp, cook them first and chop into small pieces.
Mix all the fillings together in a bowl, seasoning with a pinch of salt and pepper. Give it a good stir to combine everything evenly.
Now you're ready to start assembling your spring rolls! Lay a rice paper wrapper in a shallow dish of water to soften it up. Carefully transfer it to a clean work surface and pile on the flavorful filling.
Fold the sides over the filling, then tightly roll it up. Repeat with the remaining wrappers and fillings. Your crispy, veggie-packed spring rolls are almost ready to enjoy!
Step 3. Assemble and Roll Spring Rolls
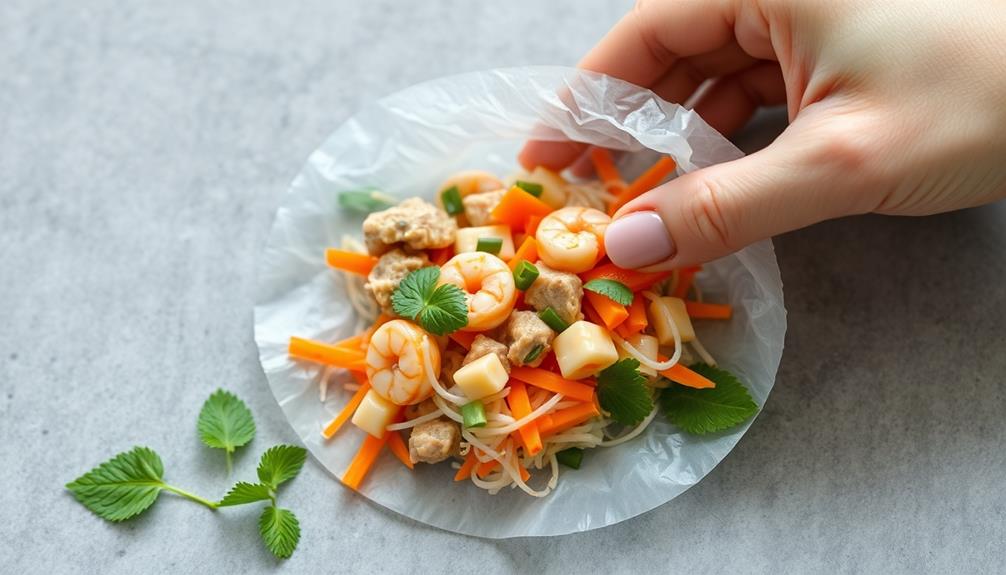
With rice paper wrappers softened in a shallow dish of water, transfer them one by one to a clean work surface.
Place a wrapper in front of you, and add about 2 tablespoons of the prepared filling onto the bottom third of the wrapper.
Fold the bottom edge up and over the filling, then fold in the sides and continue rolling tightly into a neat package.
Repeat this process with the remaining wrappers and filling, keeping the finished rolls covered to prevent drying.
Once all the rolls are assembled, you're ready to fry them to golden-brown perfection!
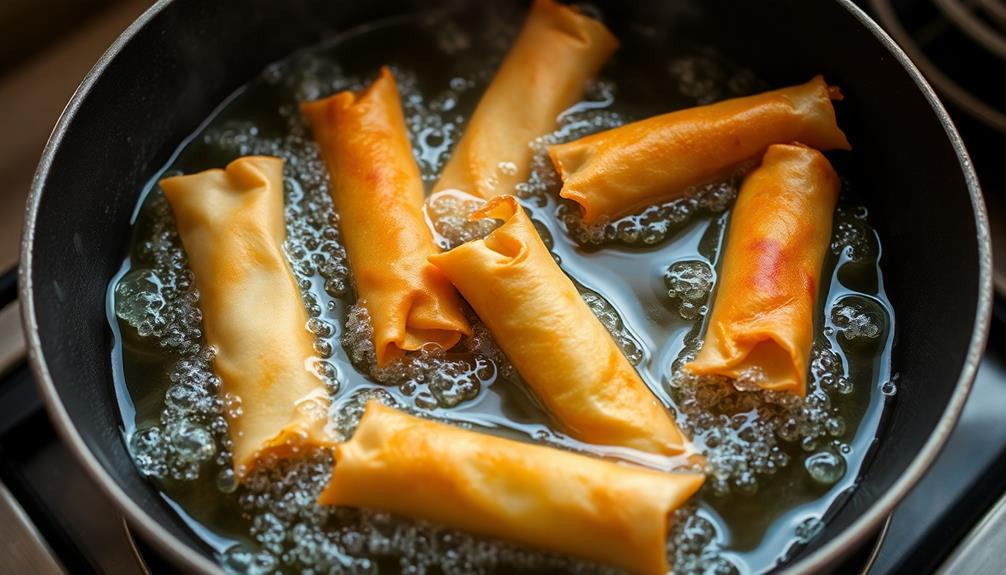
Heat 2 inches of oil in a large pot or Dutch oven to 350°F.
Gently lower the spring rolls into the hot oil and fry for 2-3 minutes, turning occasionally, until crispy and cooked through.
Drain the fried rolls on a paper towel-lined plate, then serve them hot, dipping in your favorite Vietnamese dipping sauce.
Enjoy the delightful crunch and flavor of your homemade Vietnamese spring rolls!
Step 4. Fry Spring Rolls Until Golden Brown
Once all the rolls are assembled, it's time to fry them to golden-brown perfection. Get ready for a fun and lively cooking session!
Heat up some oil in a large pan or wok over medium-high heat. When the oil is hot, gently place the spring rolls into the oil, making sure not to overcrowd the pan.
Fry the rolls for 2-3 minutes per side, turning them occasionally, until they're a beautiful golden brown. Mmm, can you smell that delicious aroma already? Be careful – the oil will be hot, so use tongs or a slotted spoon to handle the rolls.
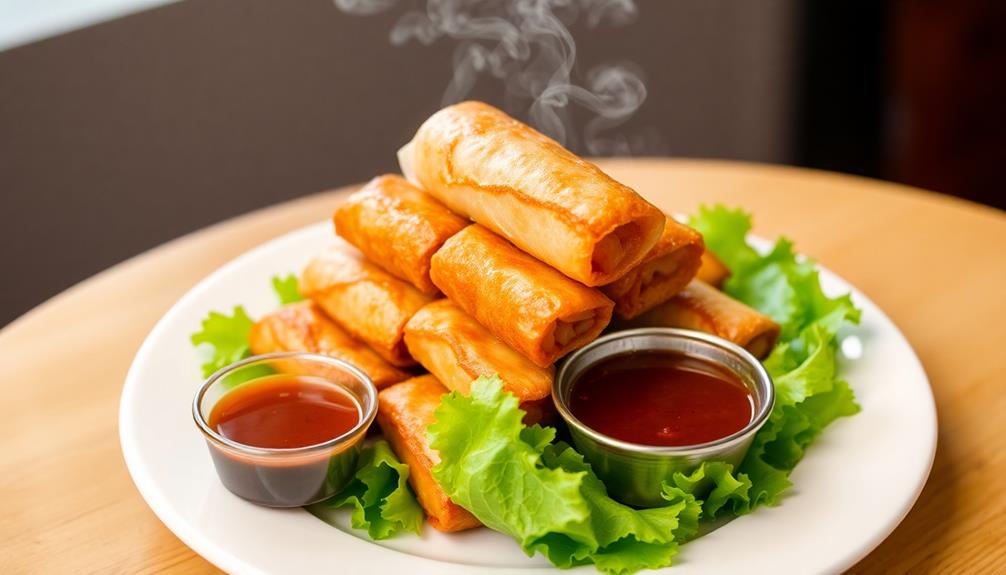
Once they're perfectly crispy, transfer the fried spring rolls to a paper towel-lined plate to drain any excess oil.
Now you can admire your handiwork – a batch of crispy, golden Vietnamese spring rolls, ready to be enjoyed! Serve them up hot, with your favorite dipping sauce on the side. Yum, get ready for a tasty and satisfying snack or appetizer. These crunchy bites pair perfectly with a fresh salad or a side of herbs to balance the flavors. For an even more authentic experience, why not try making a traditional Vietnamese sticky rice cake recipe to serve alongside? The savory depth of the rice cake would complement the light and crispy texture of the spring rolls beautifully.
Step 5. Serve Spring Rolls Immediately
Serve the crispy spring rolls immediately, as their texture and flavor are best enjoyed fresh out of the oil. Don't let them sit and get soggy!
Transfer the fried rolls to a paper towel-lined plate to drain off any excess oil. Arrange them on a serving platter or dish, ensuring they've a little breathing room between each one.
These spring rolls are the star of the show, so display them proudly. Garnish the platter with fresh herbs like mint, cilantro, or Thai basil. You can also serve them with a dipping sauce on the side, like nuoc cham or a sweet chili sauce. This allows your guests to customize their bites to their liking.
Be sure to serve the spring rolls piping hot, as that's when they'll be at their crispiest. Encourage your family and friends to dive in right away and savor the contrast of the warm, crunchy exterior and the fresh, flavorful filling.
Enjoy the delightful flavors and textures of your homemade Vietnamese spring rolls!
Final Thoughts

Ultimately, these crispy Vietnamese spring rolls are a delightful treat that'll surely impress your guests.
The perfect balance of flavors and textures is sure to have everyone raving. Serve them hot and fresh, and watch as they disappear in no time.
Don't be surprised if your guests ask for the recipe – these rolls are simply that good!
Frequently Asked Questions
What Is the Difference Between Vietnamese and Chinese Spring Rolls?
You'll find Vietnamese spring rolls tend to be lighter and fresher, with a focus on herbs and vegetables, while Chinese spring rolls often feature heavier fillings like pork and shrimp. The wrappers also differ in texture and preparation.
How Long Can Crispy Vietnamese Chả Giò Be Stored?
Crispy Vietnamese chả giò can be stored for up to 3 days in the refrigerator or up to 6 months in the freezer. Just be sure to store them properly in an airtight container.
Can I Use Ground Chicken Instead of Pork for the Filling?
You can absolutely use ground chicken instead of pork for the filling. The texture and flavor profile will be a bit different, but it'll still make a delicious crispy spring roll. Feel free to experiment!
How Spicy Are the Traditional Dipping Sauces for Chả Giò?
The traditional dipping sauces for chả giò can range from mild to quite spicy, depending on the balance of ingredients like fish sauce, chili peppers, and garlic. You'll want to start with a small amount and adjust to your preferred level of heat.
Do I Need to Use a Deep Fryer to Achieve the Perfect Crispness?
You don't need a deep fryer to achieve the perfect crispness. You can pan-fry or bake the spring rolls to get a crispy exterior without the hassle of a deep fryer. The key is to fry or bake them until they're golden brown.