Connect with us

Vietnamese Cuisine

Ca Kho To (Caramelized Fish in Clay Pot)

Captivating caramelized fish simmered to perfection in a clay pot, revealing a harmonious blend of flavors that will leave you craving more.

Published

on

caramelized fish clay pot

Ca Kho To, the beloved Vietnamese dish of caramelized fish simmered in a clay pot, is a true delight! This timeless recipe has been passed down through generations, celebrating the harmonious balance of flavors that make Vietnamese cuisine so captivating. You'll start by marinating the fish in a savory sauce, then simmer it in a caramelized sauce until the fish is melt-in-your-mouth tender. The charred edges add a delightful crunch, while the aromatic blend of sweet, salty, and umami flavors will have you coming back for more. Serve it over steaming rice, and you'll understand why this dish is a staple in Vietnamese culture. There's so much more to discover about this delicious delicacy!

Key Takeaways

  • Ca Kho To is a traditional Vietnamese dish featuring caramelized fish cooked slowly in a clay pot to infuse flavors.
  • The dish showcases the balance of sweet, savory, and umami flavors characteristic of Vietnamese cuisine.
  • Preparation involves marinating fish in a sauce mixture and simmering in a caramelized sauce with vegetables.
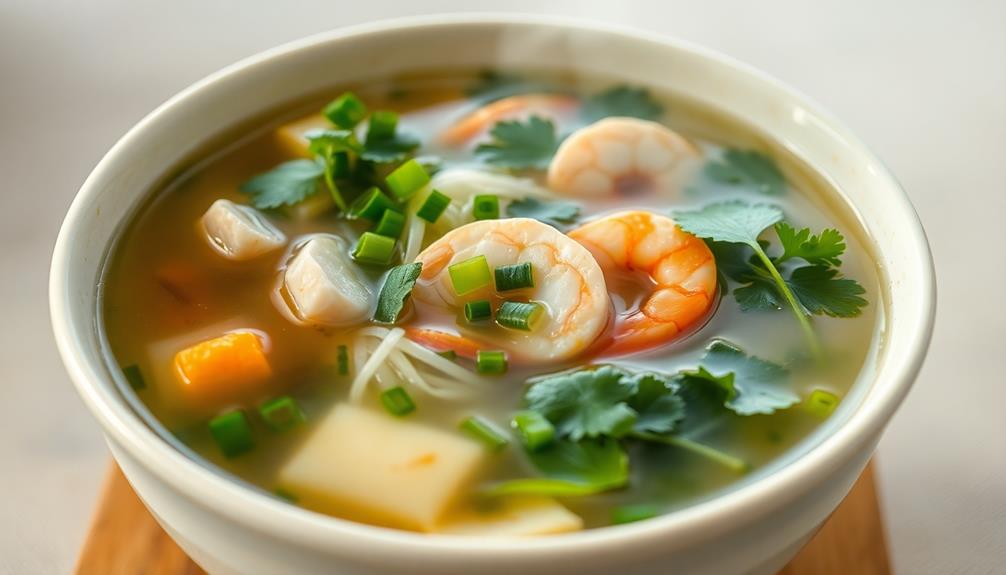
  • Ca Kho To is often served over steamed rice and garnished with fresh herbs, reflecting the importance of communal dining in Vietnamese culture.
  • The authentic cooking method and presentation in a clay pot add to the cultural significance and appeal of this traditional Vietnamese dish.

History

Ca Kho To, a beloved Vietnamese dish, has a rich history that traces back centuries. This mouthwatering delicacy was first enjoyed by the ancient Vietnamese, who discovered the magic of slow-cooking fish in a clay pot.

As the fish simmers in a savory, caramelized sauce, it absorbs all the flavors, creating a truly harmonious and unforgettable taste.

Over the years, the recipe has been passed down from generation to generation, with each family adding their own unique twist. Some might use different types of fish, while others might experiment with various spices and herbs.

But no matter the variation, the essence of Ca Kho To remains the same – a comforting, flavorful dish that warms the soul and brings people together.

Today, Ca Kho To is a beloved part of Vietnamese cuisine, enjoyed by people of all ages. Whether it's a special occasion or a simple family meal, this dish always brings a smile to the faces of those who savor its delicious goodness.

Advertisement

Recipe

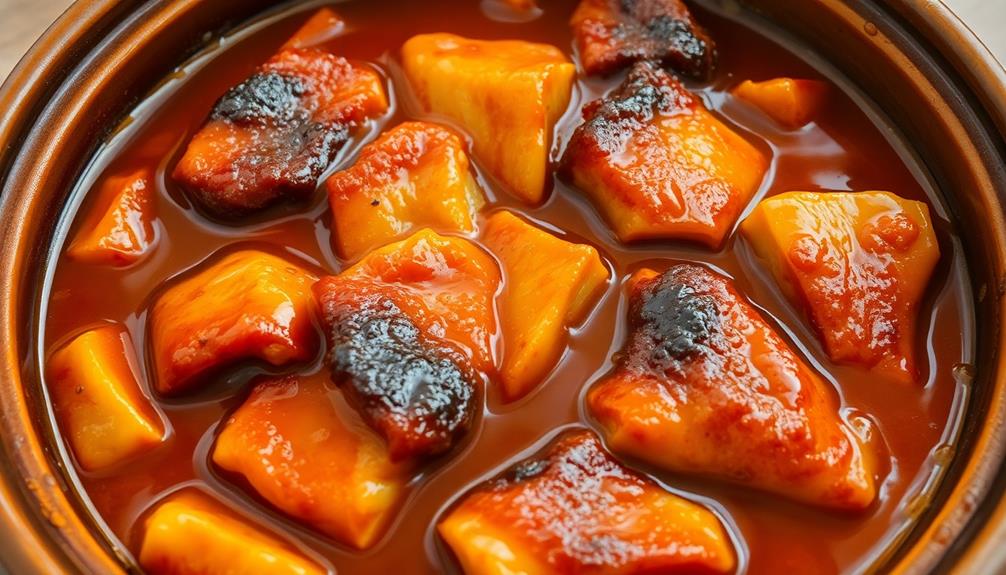
Ca Kho To (Caramelized Fish in Clay Pot) is a beloved Vietnamese dish that showcases the interplay of sweet, savory, and umami flavors. The caramelized fish simmers in a claypot, infusing the sauce with a depth of flavor that's simply irresistible.

The key to this dish is the use of a claypot, which helps to create the signature caramelized crust on the fish and intensifies the overall flavor profile. The gentle heat and enclosed environment of the claypot allow the fish to slowly absorb the complex sauce, resulting in a dish that's both comforting and elegant.

  • 1 lb firm white fish, such as catfish or tilapia, cut into chunks
  • 2 tablespoons fish sauce
  • 1 tablespoon brown sugar
  • 1 tablespoon soy sauce
  • 1 teaspoon ground black pepper
  • 2 cloves garlic, minced
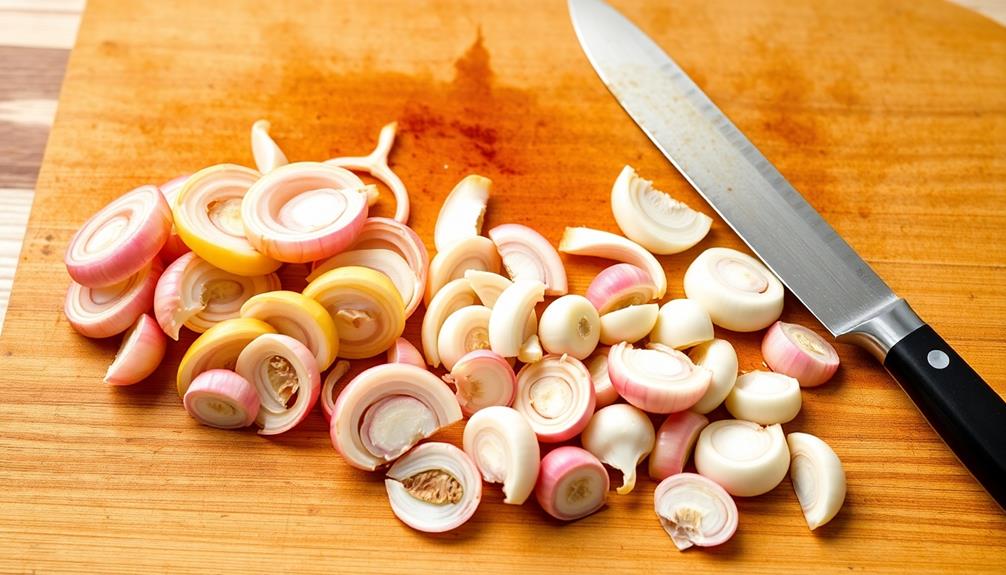
  • 1 shallot, thinly sliced
  • 1 red chili, thinly sliced (optional)
  • 2 tablespoons vegetable oil
  • 1 cup water

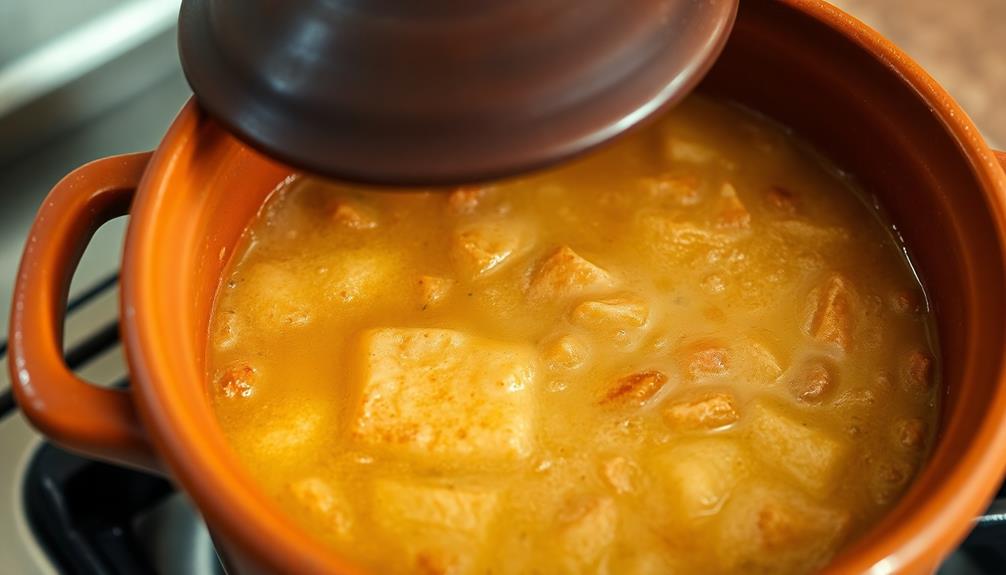
In a claypot, combine the fish, fish sauce, brown sugar, soy sauce, black pepper, garlic, shallot, and red chili (if using). Drizzle the vegetable oil over the top.

Pour in the water, making sure the fish is mostly submerged. Cover the claypot and place it over medium heat. Simmer the dish for 30-40 minutes, or until the fish is cooked through and the sauce has thickened and caramelized.

When serving, be sure to spoon the rich, caramelized sauce over the fish. This dish is best enjoyed with steamed rice, which helps to soak up all the delicious flavors.

For an extra touch of freshness, consider garnishing with chopped cilantro or green onions.

Advertisement

Cooking Steps

First, you'll need to marinate the fish in a savory sauce mixture.

Then, you'll add the caramelized sauce to the pot and toss in some veggies.

Finally, cover the pot and let it simmer until the flavors meld together.

Don't forget to top it off with some freshly chopped green onions for a pop of color and crunch!

Step 1. Marinate Fish in Sauce Mixture

marinate fish in sauce

After preparing the sauce mixture, it's time to marinate the fish. Grab those fresh fillets and give 'em a nice soak in all that savory goodness. The salty, sweet, and aromatic flavors will seep right into the fish, making each bite wonderfully tasty.

First, place the fish in a shallow dish or bowl. Then, pour the sauce mixture over the top, making sure to fully coat each piece. Use your hands to gently rub the sauce all over the surface – you want every inch covered!

Advertisement

Once the fish is nicely marinaded, cover the dish and pop it in the fridge. Let it hang out for about 30 minutes, allowing the flavors to really sink in. This extra step is key for developing that signature caramelized taste.

When the time's up, you're ready to start cooking! Get that clay pot heated and let's get this party started. Can you almost smell the savory aromas wafting through the air? Yum!

Step 2. Add Caramelized Sauce to Pot

add sauce to pot

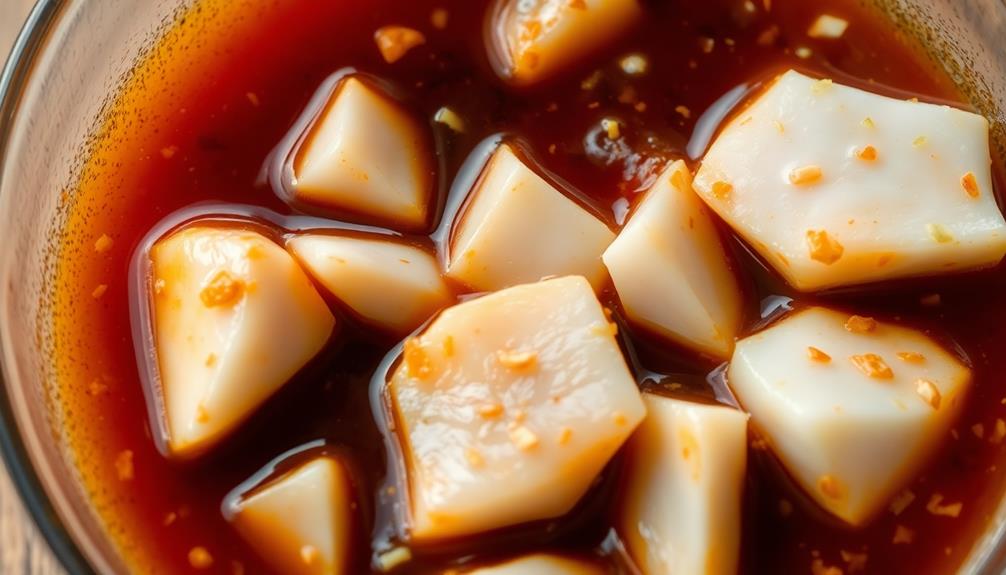
With the fish nicely marinated, it's time to start cooking! First, you'll need to prepare the caramelized sauce. In a small saucepan, combine the brown sugar, fish sauce, and water.

Bring the mixture to a simmer, stirring constantly, until the sugar has dissolved and the sauce has thickened, about 5 minutes. Mmm, can you just smell that delicious, sweet and savory aroma?

Now, transfer the marinated fish to a clay pot or other heavy-bottomed pot. Carefully pour the caramelized sauce over the fish, making sure to coat each piece.

Gently shake the pot to distribute the sauce evenly. Cover the pot with a lid and place it over medium heat. Let the fish simmer for about 20 minutes, turning the pieces occasionally, until the fish is cooked through and the sauce has reduced to a thick, glossy glaze.

Advertisement

Yum! Your kitchen is going to smell amazing as the flavors meld together.

Step 3. Add Vegetables

incorporate fresh vegetables now

Once the fish has simmered in the caramelized sauce, it's time to add the vegetables.

You'll want to prepare a few handfuls of fresh, crunchy vegetables like baby bok choy, sliced carrots, and crisp bean sprouts. Carefully add these veggies to the clay pot, making sure they're fully submerged in the delicious sauce. Give everything a gentle stir, and let the flavors meld together for a few minutes.

As the vegetables cook, you'll notice the sauce starting to thicken and the colors becoming even more vibrant. The bok choy will turn a deep, glossy green, and the carrots will add pops of bright orange. The bean sprouts will retain their fresh, crunchy texture, providing a nice contrast to the tender fish.

Now, take a deep breath and savor the heavenly aroma wafting from the pot. Your taste buds are in for a real treat!

With the addition of these flavorful vegetables, your Ca Kho To is really starting to come together.

Advertisement

Step 4. Cover Pot and Simmer

cover and simmer pot

Cover the clay pot with a lid and let the Ca Kho To simmer for about 15-20 minutes. The rich aromas of the caramelized fish, savory soy sauce, and fragrant spices will start to fill your kitchen, making your mouth water in anticipation.

As the dish simmers, the flavors will meld together, creating a delightful harmony on your palate. You can almost hear the gentle bubbling of the sauce, and see the steam gently escaping from the lid.

Be patient, as this slow cooking process is key to achieving the perfect balance of sweet, salty, and umami flavors. Soon, your Ca Kho To will be ready to enjoy!

Carefully remove the lid, being mindful of the hot steam. The fish should be fork-tender and the sauce thick and glossy.

Serve the Ca Kho To immediately, spooning the flavorful sauce over steamed rice. Get ready for an unforgettable taste of Vietnamese cuisine!

Step 5. Garnish With Chopped Green Onions

garnish with green onions

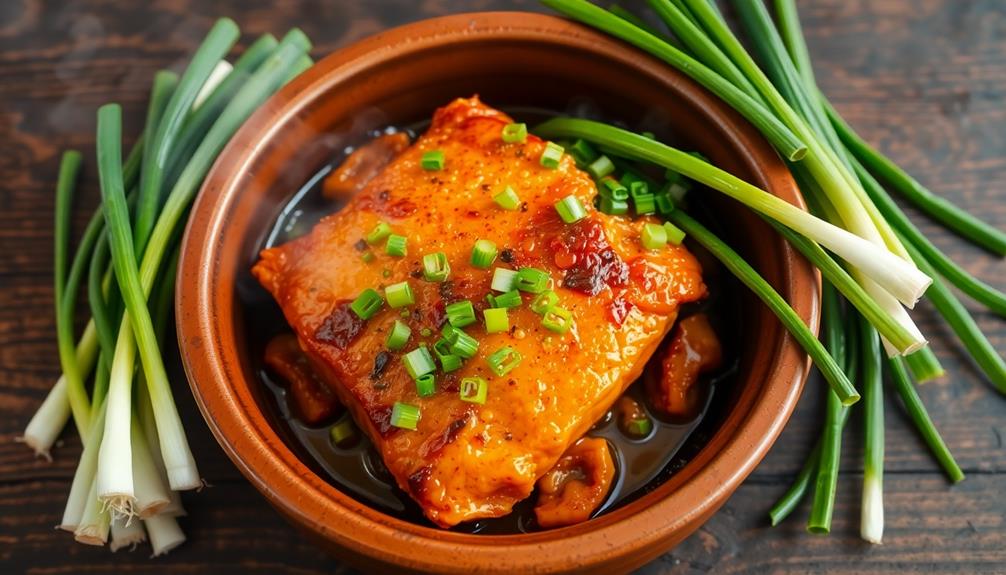
Just before serving, grab a handful of fresh green onions and give them a quick chop. The vibrant green pieces will add a lovely pop of color and a delightful crunch to your caramelized fish.

Sprinkle the chopped onions over the top of the sizzling fish, letting them fall haphazardly across the surface. Inhale the amazing aroma – the savory-sweet caramel notes of the fish, mixed with the fragrant green onions, will have your mouth watering.

Advertisement

Can't you just imagine taking that first bite? The tender, flaky fish contrasts beautifully with the crisp green onions. It's the perfect finishing touch to your homemade Ca Kho To.

Go ahead, dig in and enjoy! The combination of sweet, salty, and slightly charred flavors is simply irresistible. This dish is sure to please everyone at the table.

Final Thoughts

Ca Kho To (Caramelized Fish in Clay Pot) is a delicious Vietnamese dish that's sure to delight your taste buds!

You've made it this far, and now it's time to sit back, relax, and enjoy the fruits of your labor. The aroma of the caramelized fish and savory sauce will have your friends and family begging for more.

As you dig in, you'll be amazed by the harmonious blend of flavors – the sweetness of the caramelized fish, the saltiness of the fish sauce, and the subtle heat from the chili peppers.

Advertisement

The tender fish practically melts in your mouth, while the charred edges add a delightful crunch. And don't forget to scoop up every last drop of that irresistible sauce – it's the perfect accompaniment to steamed rice.

With your newfound cooking skills, you can now impress your loved ones with this authentic Vietnamese dish.

Ca Kho To is a true celebration of the vibrant flavors of Vietnamese cuisine. So, what're you waiting for? Grab a spoon and savor every bite!

Frequently Asked Questions

Can I Use a Regular Pot Instead of a Clay Pot?

You can certainly use a regular pot instead of a clay pot. The cooking process and results may vary slightly, but the dish will still turn out deliciously. Just be mindful of the differences in heat retention and cooking times.

How Long Will the Dish Last in the Refrigerator?

The dish will typically last 3-4 days in the refrigerator when stored properly in an airtight container. However, the exact shelf life can vary depending on the ingredients used and the temperature of your fridge.

Advertisement

Can I Substitute the Fish With Another Type of Protein?

Absolutely! You can substitute the fish with other proteins like chicken, pork, or even tofu. Just adjust the cooking time accordingly and be mindful of the flavors to ensure a harmonious dish.

What Is the Purpose of the Peppercorns in the Recipe?

The peppercorns in the recipe serve to add depth of flavor and a subtle heat to the dish. They provide a warm, aromatic element that complements the other ingredients, enhancing the overall taste experience.

Can I Adjust the Sweetness Level to My Preference?

Absolutely, you can adjust the sweetness level to your preference. Simply add or reduce the amount of sugar in the recipe to suit your taste. Don't be afraid to experiment until you find the perfect balance.

Continue Reading
Advertisement

Vietnamese Cuisine

Sugarcane Juice

You’ll be surprised by the refreshing, naturally sweet taste of homemade sugarcane juice, packed with essential vitamins and minerals.

Published

on

sweet refreshing tropical beverage

Sugarcane juice is a refreshing, naturally sweet beverage that's been cherished around the world for centuries. You can make it yourself by simply washing, peeling, and juicing fresh sugarcane – it's delightfully hydrating on a hot day! Packed with vitamins, minerals, and antioxidants, sugarcane juice is a healthy alternative to sugary sodas. While it's tasty on its own, you can also add a squeeze of lemon or lime for extra zing. Enjoyed by people of all ages, sugarcane juice is a beloved part of many cultures – and you're about to discover why it's such a celebrated drink.

Key Takeaways

  • Sugarcane juice is a popular and refreshing beverage derived from the sugarcane plant, primarily Saccharum officinarum, found in tropical and subtropical regions worldwide.
  • It is known for its natural sweetness and has been cultivated for thousands of years, transitioning from a luxury item to a widely enjoyed drink.
  • Sugarcane juice is rich in essential vitamins, minerals, and antioxidants, making it a healthier alternative to processed sugary drinks.
  • While sugarcane juice can provide hydration and energy, its high sugar content may not be suitable for individuals with diabetes without consultation.
  • The juice is typically prepared by washing, peeling, and juicing the fresh sugarcane, either using a juicer or a blender, and can be served over ice or flavored with ingredients like lemon, lime, or ginger.

History

Sugarcane, a tall, tropical grass, has a long and storied history that dates back thousands of years. From the rainforests of Southeast Asia to the sun-drenched fields of the Caribbean, this versatile plant has been cultivated and celebrated by cultures around the world.

You can imagine the sweet, earthy aroma of freshly pressed sugarcane juice, its amber liquid sparkling in the sunlight. Once a prized commodity traded along ancient trade routes, sugarcane has evolved from a luxury item to a beloved refreshment enjoyed by people of all ages.

Whether sipped straight from the cane or mixed into vibrant cocktails, this natural elixir has a way of transporting you to far-flung, exotic lands.

Marveling at its rich history, you can't help but feel a deep appreciation for the story of sugarcane and the countless generations who've cultivated and celebrated this remarkable plant.

Recipe

Sugarcane juice is a refreshing and healthy beverage enjoyed in many tropical and subtropical regions around the world. It's made by extracting the sweet juice from freshly harvested sugarcane stalks. This juice isn't only delicious but also offers a range of nutritional benefits, including vitamins, minerals, and antioxidants.

Advertisement

Preparing sugarcane juice at home is a simple process that allows you to enjoy this natural elixir in the comfort of your own kitchen. With just a few basic ingredients and a little bit of effort, you can create a glass of pure, unadulterated sugarcane goodness.

  • Fresh sugarcane stalks
  • Water
  • Ice (optional)
  • Lemon or lime (optional)

To make sugarcane juice, first, wash the sugarcane stalks thoroughly to remove any dirt or debris. Cut the stalks into manageable pieces and feed them through a juicer or sugarcane press. If you don't have either of these, you can use a blender and then strain the mixture through a fine-mesh sieve or cheesecloth to extract the juice.

Once you have the fresh sugarcane juice, you can serve it immediately over ice or add a squeeze of lemon or lime to enhance the flavor. Sugarcane juice is best consumed immediately, as it can quickly lose its freshness and sweetness.

If you have any leftover juice, store it in an airtight container in the refrigerator and consume it within a day or two.

Remember that the quality and sweetness of the sugarcane will vary depending on the variety, growing conditions, and time of harvest. Experiment with different types of sugarcane to find the one that best suits your taste preferences.

Enjoy your homemade sugarcane juice and revel in the refreshing and nourishing properties of this natural delight.

Advertisement

Cooking Steps

First, you'll want to wash and peel the sugarcane, then cut it into smaller pieces.

Next, pass the sugarcane through a juicer to extract that sweet, refreshing juice.

Step 1. Wash and Peel Sugarcane

prepare sugarcane for processing

Before you begin juicing the sugarcane, it's important to properly prepare it. First, give the sugarcane a good rinse under cool, running water. This will wash away any dirt or debris that might be clinging to the surface.

Next, use a sharp knife to peel off the tough, outer skin. Take your time and be careful, as the sugarcane can be quite fibrous. Try to remove as much of the skin as possible, as this will help the juice flow more freely.

Once the sugarcane is peeled, it's ready to be cut into manageable pieces. Slice the cane into 6-inch segments, making sure each piece is straight and even. This will help the sugarcane feed smoothly through your juicer.

With the cane prepped and ready, you can now start juicing and enjoy the sweet, refreshing taste of homemade sugarcane juice!

Advertisement

Step 2. Cut Sugarcane Into Smaller Pieces

cut sugarcane into pieces

With the sugarcane peeled and ready, you can now start cutting it into smaller pieces.

Grab a sharp knife and place the sugarcane on a sturdy cutting board. Carefully slice the sugarcane into 2-inch or 3-inch pieces, making sure to keep your fingers safe.

You'll want to create evenly-sized chunks so they can all cook at the same rate later on. As you work, you might notice the sweet, earthy aroma of the sugarcane filling the air. It's an exciting sign of the delicious juice to come!

Keep slicing until you've cut up the entire stalk. Once you have a pile of sugarcane pieces, you're ready for the next step – feeding them through the juicer.

Get ready to extract that amazing, nutrient-packed liquid gold! With a little effort, you'll have fresh, homemade sugarcane juice in no time.

Step 3. Pass the Sugarcane Through Juicer

juicing sugarcane process step

You'll need to have your juicer ready to go. Once you've cut the sugarcane into smaller pieces, it's time to get that sweet juice flowing!

Carefully place the prepared cane into the juicer's feeding chute. As the blades start spinning, the juice will begin to pour out, filling the container below.

Advertisement

Don't be afraid to push the cane down gently with the tamper to help the juicer extract every last drop. The fragrant, golden liquid will have a slightly thick, syrupy consistency that's absolutely heavenly.

Be sure to position the container close by to catch all that delicious nectar. The juicing process goes by quickly, so have your cups ready to fill up.

Once you've gotten all the juice out, you can set the leftover sugarcane pulp aside to use for other recipes.

With just a few simple steps, you'll have a refreshing glass of homemade sugarcane juice to enjoy!

Step 4. Add Ice

add ice to beverage

Once you have your freshly extracted sugarcane juice, it's time to add some ice. This is the perfect way to cool down and refresh on a hot day.

Grab a handful of ice cubes and gently drop them into the tall glass of vibrant, golden juice. Watch as the ice cubes sink and begin to melt, creating a slightly fizzy and chilly sensation.

Advertisement

The cold ice will instantly chill the juice, making it even more refreshing and delightful to sip. You'll love the way the icy coldness contrasts with the sweet, earthy flavor of the sugarcane. It's like taking a refreshing dip on a summer day, but in a glass!

As the ice melts, it will also slightly dilute the juice, creating the perfect balance of sweetness and coolness.

Stir the mixture gently with a spoon to distribute the ice evenly. Now, you're ready to enjoy this delightful and thirst-quenching treat!

Step 5. Serve Over Ice

serve chilled over ice

Serving sugarcane juice over ice is a refreshing way to enjoy this sweet treat. The cool, crisp ice perfectly complements the rich, tropical flavor of the sugarcane.

Simply fill a glass with plenty of ice cubes, then slowly pour the freshly extracted sugarcane juice over the top. The juice will cascade over the ice, creating a mesmerizing display of amber liquid and glistening ice crystals.

As you sip the chilled beverage, you'll be greeted with a burst of sweetness that quenches your thirst. The ice helps to mellow the intensity of the sugarcane, making it an incredibly refreshing and satisfying drink on a hot day.

Advertisement

The combination of cold and sweet is simply irresistible. Serve over ice and let the flavors of the tropics transport you to a peaceful oasis. This is the perfect way to savor the natural goodness of sugarcane juice.

Final Thoughts

While sugarcane juice may not be the most practical choice for everyday consumption, it's a refreshing and health-conscious alternative that's worth exploring.

The sweet, golden elixir offers a unique and flavorful experience, transporting you to tropical beaches and lush, verdant fields. Imagine the satisfying crunch as you bite into the fresh, vibrant green stalks, the aromatic scent of the juice filling the air.

As the cool, refreshing liquid touches your lips, you'll be treated to a burst of natural sweetness that invigorates the senses. Whether you're seeking a pick-me-up on a hot day or simply want to try something new, sugarcane juice is a delightful option that brings a touch of the exotic to your everyday.

Frequently Asked Questions

Is Sugarcane Juice Healthy for Diabetics?

You should be cautious about drinking sugarcane juice if you have diabetes, as it's high in natural sugars that can spike your blood sugar levels. It's best to consult your doctor before incorporating it into your diet.

Advertisement

Can I Store Leftover Sugarcane Juice?

You can store the leftover sugarcane juice, but it's best to consume it as soon as possible. Refrigerate it in an airtight container and it'll last for up to 3 days. Don't let it sit at room temperature.

How Long Does Sugarcane Juice Last?

Freshly squeezed sugarcane juice typically lasts 1-2 days when stored in the refrigerator. However, its shelf life can be extended to 3-5 days by immediately refrigerating it and keeping it tightly sealed. Proper storage is key to enjoying its refreshing flavor.

Can I Add Other Fruits to Sugarcane Juice?

You can certainly add other fruits to your sugarcane juice. It's a great way to enhance the flavor and nutritional value of your drink. Just be mindful of the sweetness levels when incorporating additional fruits.

Is Sugarcane Juice Good for Weight Loss?

Sugarcane juice can be a healthy part of a weight loss plan. It's low in calories and contains natural sugars and nutrients that may boost metabolism. However, it's important to consume it in moderation as part of a balanced diet.

Advertisement
Continue Reading

Vietnamese Cuisine

Iced Coffee With Condensed Milk

Opulent and indulgent, this Vietnamese iced coffee blends bold java with luscious condensed milk, creating a heavenly sip that will leave you craving more.

Published

on

sweetened iced coffee delight

Ah, a refreshing iced coffee with creamy condensed milk – what a delight! This Vietnamese classic blends bold coffee and sweet, velvety goodness, creating a heavenly sip that's perfect on a warm day. First, you brew the coffee using a special Vietnamese filter for a rich, intense flavor. Then, you stir in the luscious condensed milk, which adds a dreamy creaminess and pleasant sweetness. Finally, you top it off with plenty of ice cubes for a cool, satisfying crunch. It's a harmonious fusion of flavors that's sure to brighten your day. And there's so much more to explore about this beloved beverage!

Key Takeaways

  • Iced coffee with condensed milk is a popular Vietnamese beverage that combines brewed coffee, ice, and sweetened condensed milk for a rich, creamy, and refreshing taste.
  • The drink's origins can be traced back to the late 19th century during the French colonial era in Vietnam, reflecting the fusion of coffee traditions and local flavors.
  • The preparation involves brewing coffee using a traditional phin filter, adding sweetened condensed milk to taste, and then chilling the mixture with ice for a satisfying and balanced flavor profile.
  • Iced coffee with condensed milk is a versatile beverage that can be customized with additional flavors, such as vanilla or chocolate, to cater to diverse taste preferences.
  • While the drink offers a boost of caffeine, the high sugar content from the condensed milk should be considered, especially for those monitoring their sugar intake.

History

The origin of iced coffee with condensed milk can be traced back to Vietnam, where it has been a beloved beverage for decades. Known as "ca phe sua da," this delightful drink was first popularized in the late 19th century, during the French colonial era.

Back then, Vietnamese coffee growers needed a way to preserve their harvest, so they started mixing the freshly brewed coffee with sweetened condensed milk. This not only extended the shelf life of the coffee, but also created a rich, creamy, and refreshing taste that quickly became a local favorite.

Over the years, the recipe has remained largely unchanged, with the exception of serving it over ice to beat the tropical heat.

Today, ca phe sua da is a quintessential part of Vietnamese culture, enjoyed by people of all ages throughout the country. Whether sipped leisurely or gulped down quickly, this iced coffee delight remains a timeless treat that brings joy to all who try it.

Recipe

Iced coffee with condensed milk is a delightful Vietnamese-inspired treat that combines the rich creaminess of sweetened condensed milk with the refreshing bitterness of strong brewed coffee.

Advertisement

This simple yet indulgent beverage is the perfect pick-me-up on a hot day. The key to this recipe is to use a high-quality dark-roast coffee that can stand up to the bold flavors of the condensed milk.

The brewing method is also important, as the coffee needs to be strong enough to balance the sweetness of the milk.

Ingredients:

  • 1/2 cup strong brewed coffee, cooled
  • 1/4 cup sweetened condensed milk
  • Ice cubes

Directions:

Brew a strong batch of dark-roast coffee and allow it to cool completely. In a tall glass, combine the cooled coffee and sweetened condensed milk.

Stir well to combine. Add ice cubes and stir again to chill the drink. Serve immediately.

Advertisement

For best results, use freshly brewed coffee that has been allowed to cool to room temperature. The coffee should be strong and bold in flavor to provide a counterpoint to the rich, sweet condensed milk.

Adjust the ratio of coffee to condensed milk to suit your personal taste preferences.

Cooking Steps

Brew up a bold and flavorful cup of coffee using a traditional Vietnamese phin filter.

Then, stir in a generous helping of sweet and creamy condensed milk.

Finally, add some ice and give it all a good mix.

Advertisement

You're now ready to sip on this refreshing iced coffee treat!

Step 1. Brew Coffee Using a Phin Filter

brew coffee with phin

Brewing coffee with a phin filter is a straightforward process that yields a rich, aromatic result.

First, you'll place the metal filter into the phin's base, then add a couple of tablespoons of ground coffee. Gently tap the filter to level the grounds.

Next, slowly pour hot water over the coffee, making sure to wet all the grounds. Let it steep for about 2-3 minutes, then watch as the flavorful brew drips down into your waiting cup.

The phin filter creates a thick, concentrated coffee that's simply delightful. You can adjust the amount of coffee and steeping time to suit your personal taste preferences.

Whether you enjoy your iced coffee with a splash of condensed milk or black, the phin method delivers a wonderfully robust and smooth flavor in every sip.

Advertisement

Get ready to savor the authentic taste of Vietnamese-style iced coffee at home!

Step 2. Add Condensed Milk

add condensed milk now

Once you've brewed your coffee using the phin filter, it's time to add the signature ingredient that transforms it into authentic Vietnamese-style iced coffee – condensed milk.

This thick, sweet, and creamy milk is the secret to the rich and indulgent flavor of Ca Phe Sua Da. Grab your can of sweetened condensed milk and get ready to pour it in.

Slowly drizzle the condensed milk into your freshly brewed coffee, stirring gently to combine. Watch as the milk swirls and blends, creating a smooth and velvety texture. The sweet aroma will fill the air, making your mouth water in anticipation.

Once the condensed milk is fully incorporated, give your coffee a final stir to ensure everything is well-mixed.

Now, all that's left is to add ice and enjoy the perfect balance of bold coffee and decadent sweetness. Sip and savor this heavenly Vietnamese iced coffee creation!

Advertisement

Step 3. Add Ice

chill beverage with ice

After stirring in the condensed milk, it's time to add the ice.

You'll want to use plenty of ice cubes to get that nice, chilled iced coffee. Scoop a generous amount of ice into your glass, filling it up almost to the top. The cold, crunchy ice cubes will instantly cool down your freshly-brewed coffee, creating that perfect icy-cold beverage.

As the ice melts, it will dilute the coffee just a bit, balancing out the sweetness of the condensed milk. You'll end up with a smooth, refreshing iced coffee that's not too strong or too sweet.

The ice also adds a satisfying crunch with each sip, making the experience even more delightful.

Be sure to stir the iced coffee one more time before taking your first sip. This will ensure all the flavors are evenly distributed.

Now you can sit back, relax, and enjoy your perfectly chilled Ca Phe Sua Da!

Advertisement

Step 4. Stir to Combine Ingredients

combine ingredients by stirring

With the condensed milk added, give the iced coffee a good stir to fully incorporate all the ingredients.

You'll notice the liquid transform from a light, watery brown to a luscious, creamy tan color as the sweet, concentrated milk blends in.

The satisfying swish of the spoon against the glass creates a soothing, rhythmic sound, almost like a gentle rain shower.

As you stir, the aroma of the freshly brewed coffee grows stronger, mingling with the rich, decadent scent of the condensed milk.

Keep stirring until the mixture is thoroughly combined – no streaks or pockets of milk should remain.

Now, the iced coffee is ready to be enjoyed!

Advertisement

The smooth, velvety texture and perfect balance of coffee and sweetness will make each sip pure bliss.

Sit back, take a refreshing sip, and savor the delightful flavors of this classic Vietnamese iced coffee treat.

Step 5. Enjoy the Refreshing Beverage

savor your refreshing drink

Now that the ingredients are thoroughly combined, it's time to enjoy this refreshing Vietnamese iced coffee! Grab your glass and take a sip – the sweet, creamy condensed milk perfectly balances the bold, slightly bitter coffee. Mmm, can you taste the caramelized notes?

The ice cubes clink against the sides of the glass, creating a satisfying sound as the chilled liquid cools you down on a hot day. As you savor each sip, notice how the coffee's aroma wafts up, filling your nose with its enticing scent.

The smooth texture glides across your tongue, leaving behind a delightful aftertaste that'll have you reaching for another sip. This iced coffee is truly a taste of Vietnamese culture – a beloved tradition that's both refreshing and comforting.

Take your time and enjoy every moment of this delightful beverage. It's the perfect pick-me-up or afternoon treat. Sip, savor, and relax – you deserve this moment of pure refreshment!

Advertisement

Final Thoughts

Ultimately, the iced coffee with condensed milk stands as a delightful pick-me-up, a cool respite from the day's heat. Its rich, creamy texture and sweetness melt together in perfect harmony, creating a refreshing sensation that dances across your taste buds.

With each sip, you're transported to a quaint Vietnamese cafe, the bustling sounds of the city fading away as you savor the moment.

The contrasting temperatures of the iced coffee and the silky-smooth condensed milk make for a truly unique and satisfying experience. It's a beverage that can be enjoyed any time of day, whether you're seeking a morning boost or an afternoon pick-me-up.

The versatility of this drink is truly remarkable, appealing to a wide range of palates and preferences.

As you savor the final drops, you can't help but feel a sense of contentment and delight. The iced coffee with condensed milk is more than just a drink – it's a cultural experience that you'll want to revisit time and time again.

Advertisement

Frequently Asked Questions

How Do I Store Leftover Condensed Milk?

To store leftover condensed milk, keep it in the can or transfer it to an airtight container. Store it in the refrigerator for up to 2 weeks. Avoid leaving it at room temperature for extended periods to prevent spoilage.

Can I Use Other Types of Milk Besides Condensed Milk?

Yes, you can use other types of milk besides condensed milk. Try using regular milk, almond milk, or even coconut milk to create your own unique coffee beverage. Experiment with different flavors and see what you prefer.

What Is the Best Ratio of Coffee to Condensed Milk?

The best ratio of coffee to condensed milk depends on your personal taste preferences. Start with a 1:1 ratio and adjust to your desired level of sweetness and creaminess from there. Experiment until you find the perfect balance.

How Long Can the Iced Coffee Stay Fresh?

The iced coffee can stay fresh for up to 3-4 days when stored in an airtight container in the refrigerator. However, the flavor and quality may begin to degrade after 2 days, so it's best to consume it within that timeframe.

Can I Use Brewed Coffee Instead of Instant Coffee?

You can certainly use brewed coffee instead of instant coffee. The brewed coffee will have a richer, more robust flavor compared to instant. Just be sure to let the coffee cool before adding the condensed milk and ice.

Advertisement
Continue Reading

Vietnamese Cuisine

Tra Da (Iced Tea)

With its perfect balance of bold tea and creamy sweetness, Tra Da (Iced Tea) is a Vietnamese delight that will leave you craving more. Discover the captivating history behind this cherished beverage.

Published

on

refreshing iced tea beverage

You'll love sipping on the refreshing Vietnamese iced tea, known as tra da! This chilled delight blends bold black tea leaves with sweet and creamy condensed milk, creating a delightful flavor that's perfect for hot summer days. It's been a beloved beverage for generations, originating in the late 1800s and quickly spreading around the world. To make your own, simply steep the tea, chill it, and stir in the milk – easy as can be! And if you're curious to learn more about the rich history and diverse cultural traditions behind this thirst-quenching drink, there's plenty more to discover.

Key Takeaways

  • Tra Da, or Vietnamese iced tea, is a popular beverage made by combining strong black tea with sweetened condensed milk.
  • The brewing process involves steeping black tea leaves in hot water for 3-5 minutes, then chilling the tea before serving over ice.
  • Customization options for Tra Da include adjusting the tea strength and the amount of sweetened condensed milk to suit individual preferences.
  • Tra Da is a versatile drink that can be enjoyed year-round, often served at social gatherings and celebrations in Vietnam.
  • Iced tea, including Tra Da, offers potential health benefits such as providing hydration and containing antioxidants.

History

The origins of iced tea can be traced back to the late 19th century, when a pioneering entrepreneur introduced the refreshing beverage at the 1904 World's Fair in St. Louis, Missouri.

Visitors from all over the country were captivated by the cool, sweet taste of this unexpected delight, and the popularity of iced tea quickly spread across the United States.

Today, iced tea is a beloved summertime staple, enjoyed by people of all ages.

The crisp, invigorating flavor comes from steeping black or green tea leaves in cool water, then adding a touch of sugar or lemon to enhance the natural sweetness.

Whether you prefer it plain or with a twist, iced tea is the perfect way to quench your thirst on a hot, sunny day.

Advertisement

Its refreshing qualities have made it a fixture at picnics, barbecues, and outdoor gatherings, where friends and families can come together to savor the delicious taste of this timeless beverage.

Recipe

Tra Da, or Vietnamese Iced Tea, is a refreshing and popular beverage enjoyed throughout Vietnam. Its distinct flavor profile combines the robust taste of strong black tea with the sweetness of condensed milk, creating a delightful balance that's perfect for quenching thirst on a hot day.

The traditional method of preparing Tra Da involves steeping the tea leaves in boiling water to extract their full flavor. The resulting tea is then chilled and combined with sweetened condensed milk, creating a creamy and indulgent drink that's sure to delight the senses.

Ingredients:

  • 4 cups water
  • 4 teaspoons black tea leaves
  • 1/2 cup sweetened condensed milk

Instructions:

Bring the water to a boil in a saucepan. Remove from heat and add the tea leaves. Let the tea steep for 5-7 minutes, or until it reaches your desired strength. Strain the tea into a pitcher and refrigerate until completely chilled, about 2 hours.

Advertisement

When ready to serve, fill a glass with ice cubes. Pour the chilled tea over the ice and stir in the sweetened condensed milk until fully incorporated. Enjoy the refreshing and delightful flavor of Tra Da.

Additional Tips:

For a stronger tea flavor, use more tea leaves or steep the tea for a longer duration. Adjust the amount of condensed milk to suit your personal taste preferences. To make the drink extra creamy, consider using half-and-half or evaporated milk instead of condensed milk.

Cooking Steps

First, you'll need to boil some water for your tea leaves.

Once the water's nice and hot, go ahead and add those fragrant leaves.

Advertisement

Let 'em steep for 3 to 5 minutes, then strain the tea and transfer it to a pitcher.

Step 1. Boil Water for Tea Leaves

boil water for tea

Bring a pot of fresh, cold water to a rapid boil.

Once the water starts bubbling furiously, turn down the heat to maintain a gentle simmer. This is the perfect temperature to steep your fragrant tea leaves.

Carefully pour the hot water over the delicate leaves, filling your teapot to the brim. Cover the pot with a lid to trap the heat and let the tea steep for 3-5 minutes.

Breathe in the soothing aroma as the tea infuses the water with its rich flavor.

When the time is up, slowly pour the vibrant, amber-colored tea into your favorite glass or pitcher.

Advertisement

Add ice cubes to instantly chill the tea, making it refreshingly cool and perfect for a hot day.

Sip and savor the balanced, complex taste of your homemade iced tea. Enjoy!

Step 2. Add Tea Leaves

add tea leaves now

Once the water is at the perfect temperature, add 1-2 teaspoons of your preferred tea leaves directly to the hot water.

The choice of tea can significantly impact the flavor profile of your iced tea; for instance, brewing the perfect cup of tea can help you achieve the ideal taste.

Watch as the leaves dance and swirl, releasing their aromatic essence into the steaming liquid. The delicate tea leaves will slowly steep, infusing the water with their rich, bold flavor.

Gently stir the mixture to help the leaves fully submerge and distribute their taste throughout. As the tea steeps, the water will gradually deepen in color, transforming from a pale yellow to a vibrant amber hue.

Advertisement

Take a deep breath and savor the soothing, fragrant aroma wafting through the air. Allow the tea to steep for 3-5 minutes, depending on your desired strength.

When the tea has reached your preferred intensity, it's time to remove the leaves and prepare your refreshing glass of iced tea.

Step 3. Steep Tea Leaves for 3-5 Minutes

steep tea leaves minutes

After adding the tea leaves to the hot water, allow the mixture to steep for 3-5 minutes, depending on your desired strength. The longer you let it steep, the more intense the flavor will become.

You'll know it's ready when the water takes on a deep, rich color and the aroma of the tea fills the air. Gently lift the tea bag or strainer and watch as the liquid flows through, revealing the vibrant hues of the tea leaves. Inhale the inviting scent – it's almost time to enjoy your refreshing Tra Da!

As the tea steeps, the flavors and aromas will blossom, creating a truly delightful experience.

Feel free to adjust the steeping time to suit your personal preference. Some like it strong and bold, while others prefer a more delicate, nuanced flavor. Experiment and find the perfect balance that tantalizes your taste buds.

Advertisement

Get ready to savor the perfect cup of Tra Da, bursting with natural goodness.

Step 4. Strain and Transfer to Pitcher

strain and transfer pitcher

Once the tea has finished steeping, it's time to strain and transfer it to a pitcher. Carefully pour the fragrant, golden liquid through a fine mesh strainer, leaving behind those used tea leaves. Ah, doesn't the aroma just fill the air?

Now, you'll want to pour the freshly strained tea into a clean pitcher. Be sure to hold the strainer securely over the pitcher to catch every last drop of that delightful, flavorful tea.

With the tea now in the pitcher, it's ready to be chilled and enjoyed. Pop the pitcher into the fridge for about 30 minutes, or until it's nice and cold. Mmm, can you already imagine the refreshing sip of that icy, aromatic tea?

Once it's properly chilled, pour it over some ice and get ready to savor the perfect iced tea. Your thirst is about to be quenched in the most delightful way!

Step 5. Add Ice Cubes

add ice cubes now

Fill up your glass with the freshly brewed and chilled iced tea, then generously top it with crisp ice cubes.

Watch as the ice cubes clink against the sides of the glass, creating a refreshing melody. As the ice melts, it'll slowly dilute the tea, making it the perfect temperature to sip on a hot day.

Advertisement

The transparent ice cubes will also add a beautiful, sparkling effect to your beverage, making it look as tempting as it tastes.

Feel free to add as many ice cubes as you'd like – the more the merrier! The cold ice will perfectly complement the bold, flavorful tea, creating a delightful harmony of tastes and temperatures.

Enjoy taking that first, cool sip, savoring the refreshing blend of iced tea and ice.

It's the perfect way to quench your thirst and cool down on a warm afternoon. With the ice cubes in place, your homemade iced tea is now ready to be served and savored.

Final Thoughts

Although iced tea is a refreshing and versatile beverage that can be enjoyed year-round, it's important to consider a few final thoughts before savoring your next glass.

Advertisement

Remember, the beauty of iced tea is its customizability – you can experiment with different tea varieties, flavors, and sweeteners to find your perfect blend.

Why not try adding a twist of citrus or a sprig of mint for a burst of refreshing flavor?

And don't forget to share your creations with friends and family – iced tea is the perfect drink for making memories and creating special moments together.

So, the next time you pour yourself a glass of this delightful drink, take a moment to appreciate the art of iced tea and all the joy it can bring.

Cheers!

Advertisement

Frequently Asked Questions

How Long Does Tra Da Last Before Spoiling?

Iced tea will typically last 3-5 days when refrigerated. However, its shelf life can vary depending on factors like the ingredients, preparation method, and storage conditions. It's best to consume it within a few days for optimal freshness and safety.

Can Tra Da Be Made With Different Tea Types?

Yes, you can make iced tea with different tea types. Black tea, green tea, herbal tea – they all work well for creating refreshing iced tea. Experiment to find your favorite flavor profile.

What Are the Health Benefits of Drinking Tra Da?

Drinking iced tea offers several health benefits. It's packed with antioxidants that can boost your immune system, reduce inflammation, and even lower your risk of chronic diseases. Plus, it's a refreshing and hydrating beverage.

How Much Sugar Should Be Added to Tra Da?

You don't necessarily need to add a lot of sugar to your beverage. Start with a small amount and adjust to your taste preferences. Too much added sugar can negate the potential health benefits.

Can Tra Da Be Served Warm Instead of Iced?

Absolutely! You can certainly serve the beverage warm instead of iced. Simply heat it up to your desired temperature and enjoy the warm, flavorful drink. The choice is yours – iced or warm, it's a delightful refreshment either way.

Advertisement
Continue Reading
Advertisement

Affiliate Disclaimer
As an affiliate, we may earn a commission from qualifying purchases. We get commissions for purchases made through links on this website from Amazon and other third parties.

Advertisement

Latest

colorful rimmed beverages colorful rimmed beverages
Graduations/Birthdays1 min ago

Sprinkle-Rimmed Drinks

Whimsical and visually captivating, sprinkle-rimmed drinks transport you to a world of playful flavors and enchanting presentations that will leave...

festive puppy chow treats festive puppy chow treats
Graduations/Birthdays7 mins ago

Birthday Cake Puppy Chow

Uncover the captivating blend of crunchy Chex, creamy white chocolate, and vibrant sprinkles that make Birthday Cake Puppy Chow an...

magical colorful chocolate beverage magical colorful chocolate beverage
Graduations/Birthdays13 mins ago

Unicorn Hot Chocolate

Otherworldly and whimsical, unicorn hot chocolate transports you to a realm of vibrant colors and sweet indulgence, where the possibilities...

colorful skewered fruit delights colorful skewered fruit delights
Graduations/Birthdays18 mins ago

Rainbow Fruit Kebabs

Tantalizing and refreshing, these rainbow fruit kebabs offer a delightful twist on a classic snack, with a vibrant array of...

colorful cheese filled tortillas colorful cheese filled tortillas
Graduations/Birthdays24 mins ago

Confetti Quesadillas

Heighten your taste buds with the vibrant burst of color and flavor in confetti quesadillas, a fusion of Mexican cuisine...

celebratory dessert beverage fusion celebratory dessert beverage fusion
Graduations/Birthdays30 mins ago

Birthday Cake Milkshake

Fulfill your childhood nostalgia with the irresistible Birthday Cake Milkshake, a creamy, indulgent treat that's a celebration in every sip....

colorful cake batter dip colorful cake batter dip
Graduations/Birthdays35 mins ago

Funfetti Dip

Celebrate the vibrant and creamy delight of Funfetti Dip, the ultimate party treat that will captivate your taste buds and...

celebratory sweet snack treat celebratory sweet snack treat
Graduations/Birthdays41 mins ago

Birthday Cake Flavored Popcorn

Outrageous and irresistibly sweet, this birthday cake flavored popcorn promises a flavor explosion that will leave you craving more. Discover...

graduation jewelry and snacks graduation jewelry and snacks
Graduations/Birthdays47 mins ago

Class Ring Onion Rings

Feast on the nostalgic delight of Class Ring Onion Rings, a crispy, golden-brown treat that will transport you back to...

breadsticks resembling pencils breadsticks resembling pencils
Graduations/Birthdays53 mins ago

Pencil-Shaped Breadsticks

Harnessing the rich history and versatility of pencil-shaped breadsticks, explore how to craft these unique and captivating snacks that will...

colorful candy dessert layers colorful candy dessert layers
Graduations/Birthdays58 mins ago

Smarties Candy Parfaits

Observe the vibrant layers of creamy yogurt, pudding, and whipped cream, elevated by the delightful crunch of classic Smarties candies...

noodle shaped letter pasta noodle shaped letter pasta
Graduations/Birthdays1 hour ago

Alphabet Soup

Alphabet soup, a whimsical culinary delight that transports you back to childhood, boasts a rich history and a community-fostering experience...

Advertisement

Trending