Connect with us

Vietnamese Cuisine

Bun Rieu (Crab Noodle Soup)

Bun Rieu, the beloved Vietnamese crab noodle soup, blends sweet crab, tangy tomatoes, and comforting broth in a dish that captivates the senses – but there’s more to explore.

Published

on

crab noodle soup delight

You're in for a real treat with Bun Rieu, the beloved Vietnamese noodle soup that's been delighting diners for generations! This savory dish blends the sweet and tender flavors of fresh crab with tangy tomatoes, all nestled in a comforting broth and slurpable rice vermicelli noodles. From its historical origins in northern Vietnam to the unique regional variations found across the country, Bun Rieu is a true representation of the diverse culinary traditions of Vietnam. Grab your spoon and get ready to experience the harmony of flavors and textures that make this dish so captivating – there's even more to discover about this Vietnamese classic!

Key Takeaways

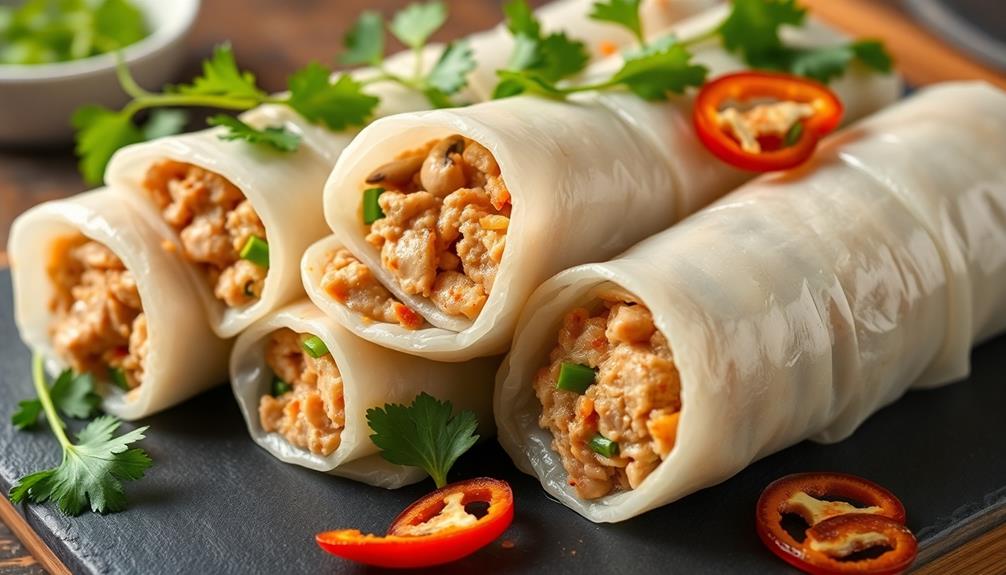
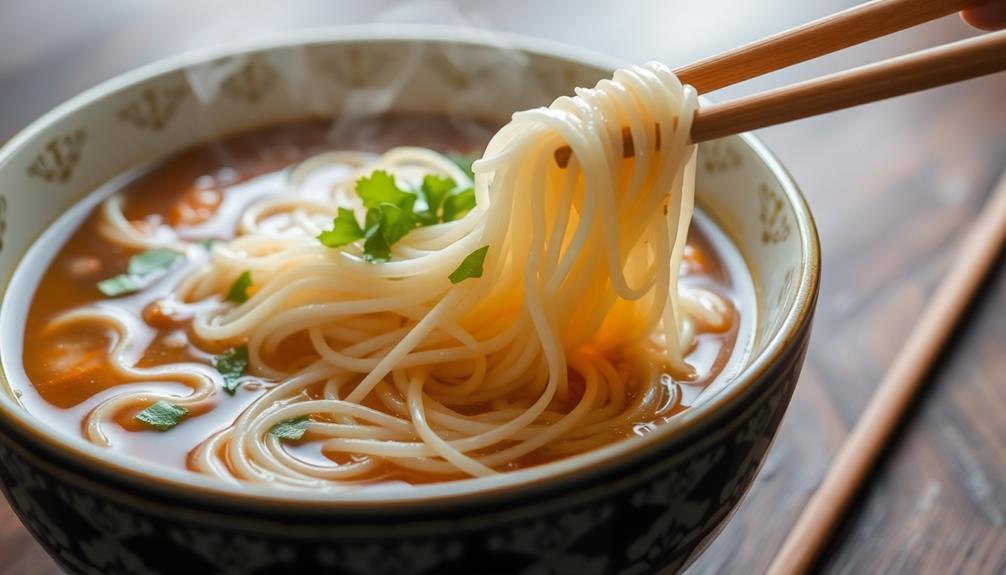
  • Bun Rieu is a traditional Vietnamese noodle soup featuring a savory broth, rice vermicelli noodles, and fresh lump crab meat.
  • The dish originated in northern Vietnam and has evolved over generations, reflecting diverse regional culinary traditions.
  • Authenticity relies on carefully prepared broth with spices and aromatics, as well as the inclusion of ground pork or shrimp for richness.
  • Each spoonful of Bun Rieu offers a harmonious blend of flavors and textures, including crunchy vegetables and tender crab.
  • Bun Rieu is typically served hot, garnished with fresh herbs, and often accompanied by lime wedges and chili for customization.

History

Bun Rieu, the beloved Vietnamese crab noodle soup, has a rich history that spans generations. This comforting dish originated in the northern regions of Vietnam, where crab fishing has been a way of life for centuries.

Over time, the recipe evolved, combining the savory flavors of crab with the heartiness of rice noodles and the freshness of aromatic herbs.

As families passed down their cherished recipes, each region developed its own unique twist on Bun Rieu. From the delicate, clear broth of the central provinces to the robust, tomato-based version of the south, the variations reflect the diverse culinary traditions of Vietnam.

Today, this beloved soup can be found in homes and restaurants across the country, bringing people together through the sharing of a beloved and time-honored dish.

Recipe

Bun Rieu, or Vietnamese Crab Noodle Soup, is a beloved dish that combines the savory flavors of crab and the comforting essence of a warm, hearty broth. Originating from the northern regions of Vietnam, this dish has become a staple in Vietnamese cuisine, cherished for its complex and balanced flavors.

Advertisement

The key to a truly authentic Bun Rieu lies in the careful preparation of the broth, which is simmered with a variety of spices and aromatics to create a depth of flavor that's both subtle and captivating. The addition of freshly-picked crab meat and the chewy, slurp-worthy rice noodles make this dish a true delight for the senses.

  • 1 lb fresh crab meat, preferably lump crab
  • 1 lb ground pork or ground shrimp
  • 4 cups chicken or pork broth
  • 2 tablespoons fish sauce
  • 1 tablespoon tomato paste
  • 1 teaspoon sugar
  • 1 teaspoon ground black pepper
  • 8 oz rice vermicelli noodles
  • 2 cups water

In a large pot, bring the chicken or pork broth to a simmer. Add the fish sauce, tomato paste, sugar, and black pepper. Gently stir in the crab meat and ground pork or shrimp, and let the mixture simmer for 10-15 minutes, or until the pork is cooked through.

Meanwhile, prepare the rice noodles according to the package instructions. To serve, place the cooked noodles in a bowl and ladle the hot crab and pork broth over the top. Garnish with additional fresh herbs, such as cilantro or Thai basil, for added flavor and aroma.

When preparing Bun Rieu, it's important to use the freshest crab meat available to ensure the best possible flavor and texture. Additionally, experiment with different types of noodles, such as vermicelli or bun, to find your personal preference.

Lastly, don't be afraid to adjust the seasoning to your taste, adding more fish sauce, sugar, or black pepper as desired.
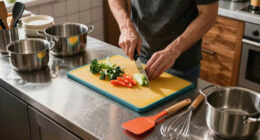
Cooking Steps

First, you'll need to soak the dried shrimp for 30 minutes to soften them up.

Advertisement

Next, you'll prepare the delicious crab and pork broth that'll be the base of your Bun Rieu.

Then, get ready to add the fragrant fried shallots and fresh dill, followed by the juicy sliced tomatoes and finally, the tender vermicelli noodles – yum!

Step 1. Soak Dried Shrimp for 30 Minutes

soak shrimp for 30 minutes

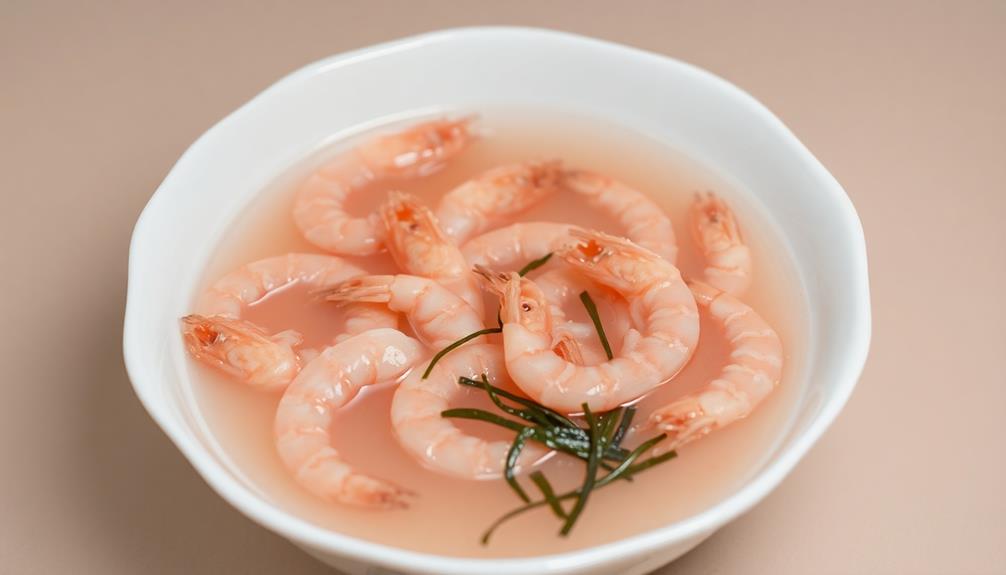
Soaking the dried shrimp for 30 minutes is a crucial step in preparing the authentic Bun Rieu (Crab Noodle Soup). This simple task helps to soften the shrimp and unlock its delightful flavor.

Start by placing the dried shrimp in a bowl and covering them completely with water. Let them soak for about half an hour, giving the shrimp time to plump up and become tender.

As the shrimp soaks, you'll notice the water turning a light pink color. That's the shrimp releasing its tasty juices, which will add wonderful depth to your broth.

When the time is up, drain the shrimp and set them aside. They're now ready to be added to the other ingredients, like crab meat and pork, to create the flavorful base of your Bun Rieu.

Advertisement

This extra step may seem small, but it makes a big difference in the overall taste and texture of your delicious noodle soup.

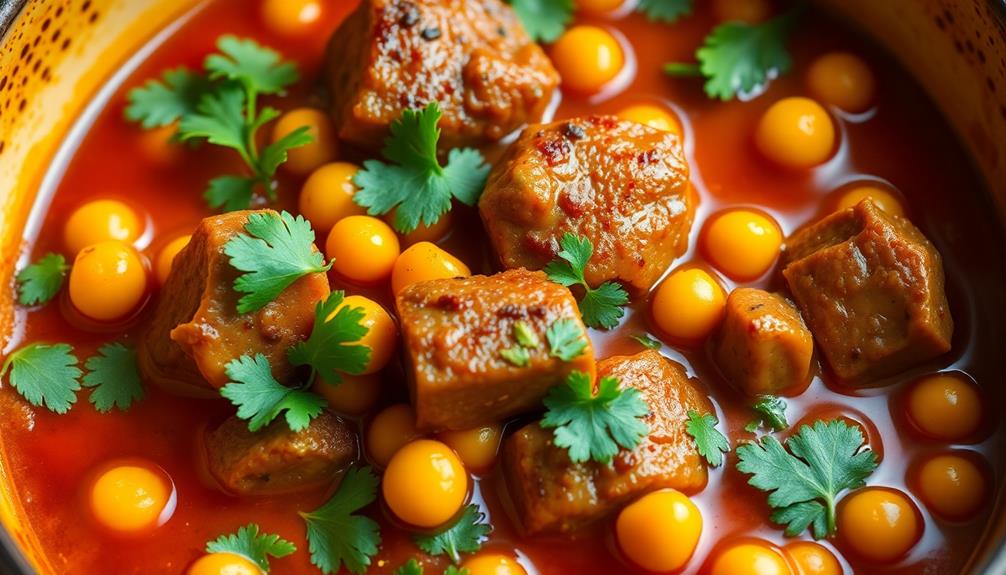
Step 2. Prepare Crab and Pork Broth

prepare crab pork broth

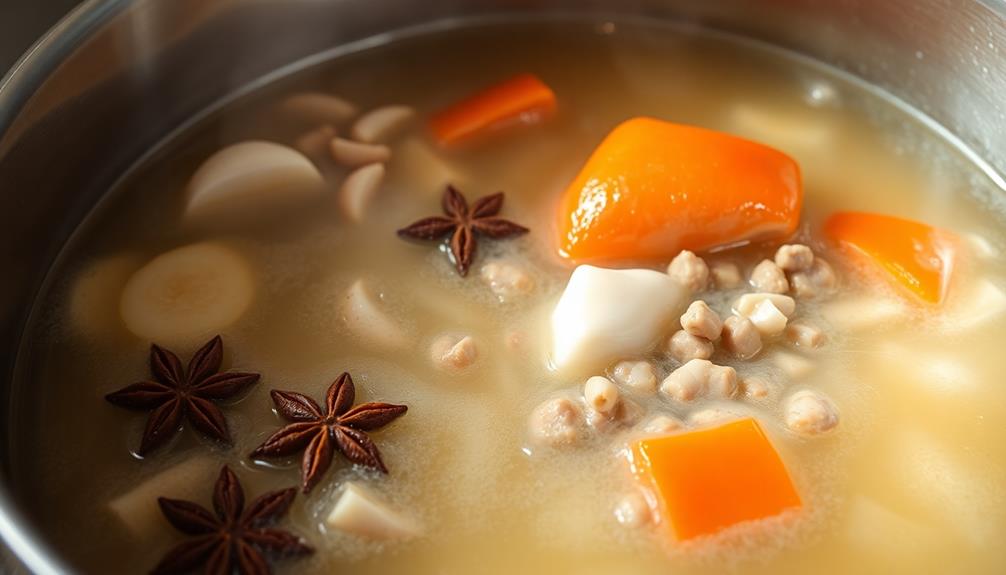
With the dried shrimp prepped, you can now start building the rich crab and pork broth that forms the foundation of Bun Rieu. In a large pot, combine chicken stock, pork bones, and shrimp shells.

Bring the mixture to a boil, then reduce the heat and let it simmer for 2 hours. This long simmering process will extract all the wonderful flavors from the ingredients, creating a deeply savory and aromatic broth.

Next, it's time to add the crab. Gently drop fresh lump crabmeat into the simmering pot and let it cook for 10 more minutes.

The crab will infuse the broth with its sweet, delicate flavor, while the pork bones lend a hearty, comforting touch. Don't forget to taste the broth and adjust the seasoning with a pinch of salt and a squeeze of fresh lime juice.

With the flavorful crab and pork broth ready, you're one step closer to enjoying a steaming bowl of authentic Bun Rieu.

Advertisement

Step 3. Add Fried Shallots and Dill

add shallots and dill

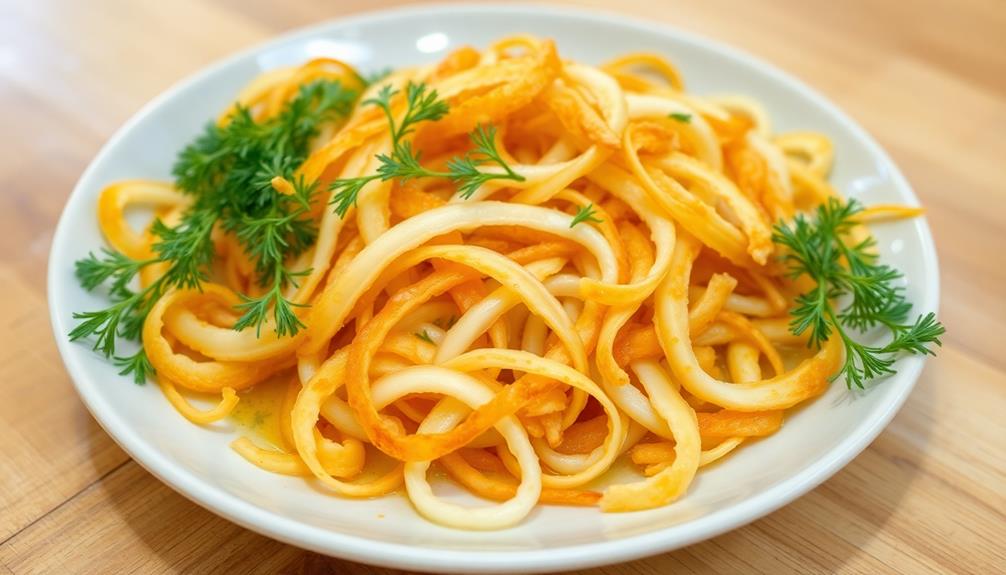
Once the crab and pork broth is ready, you'll want to add the fried shallots and dill to complete the flavor profile of the Bun Rieu. The crispy, golden-brown fried shallots will add a delightful crunch and sweetness, while the fresh, fragrant dill will brighten up the entire dish.

Start by heating a small amount of oil in a pan over medium heat. Carefully add the thinly sliced shallots and fry them until they turn a gorgeous golden-brown color, about 2-3 minutes. Be sure to keep a close eye on them, as they can burn quickly.

Once they're perfectly crispy, remove the shallots from the oil and let them drain on a paper towel-lined plate.

Now, take a handful of fresh dill and roughly chop it. Sprinkle the chopped dill over the top of the hot, steaming broth. The aroma of the dill will instantly waft up, filling your kitchen with its herbaceous scent.

The combination of the fried shallots and dill is the perfect finishing touch to your delectable Bun Rieu.

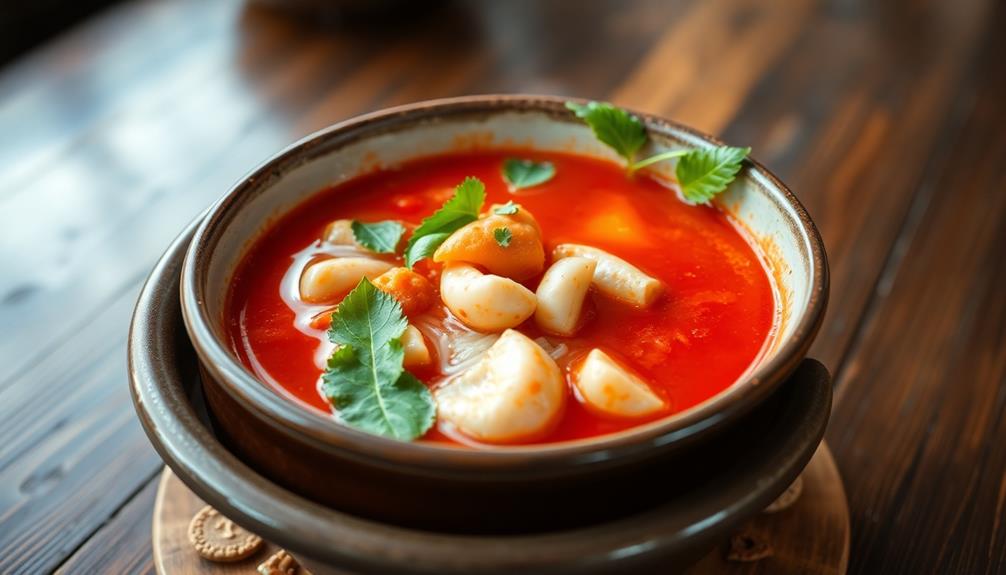
Step 4. Add Sliced Tomatoes

incorporate sliced tomatoes

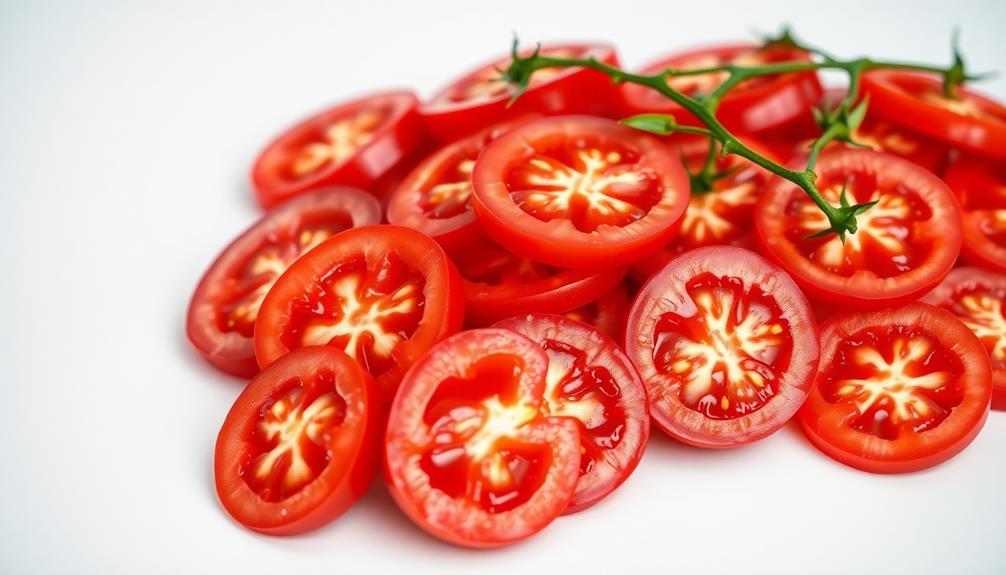
After adding the fried shallots and dill, you'll want to incorporate sliced tomatoes into the Bun Rieu.

Tomatoes add a lovely burst of juiciness and freshness that complements the savory broth and tender crab meat. Simply slice some ripe, red tomatoes and gently drop them into the soup.

Advertisement

Watch as they float on the surface, their vibrant colors mingling with the green dill and crispy shallots. The tomatoes will soften slightly, releasing their sweet and tangy flavors into the mix.

Their soft texture provides a nice contrast to the chewy rice noodles. Be sure to scoop up a few tomato slices in each spoonful to enjoy the full symphony of flavors.

The addition of tomatoes brightens the dish, making it even more appetizing and refreshing. Get ready for an explosion of taste in every bite!

Step 5. Add Vermicelli Noodles

add vermicelli noodles now

Now that you've added the vibrant tomatoes, it's time to focus on the vermicelli noodles. These delicate, thin rice noodles are the perfect base for this delicious crab noodle soup.

Gently lower the noodles into the simmering broth, watching as they slowly unfurl and become tender. The aroma of the warm, savory broth will have your mouth watering in anticipation.

Swirl the noodles around, ensuring they're fully submerged and absorbing all those wonderful flavors. As the noodles cook, their texture will transform from firm and slightly chewy to soft and slurp-worthy.

Advertisement

Be careful not to overcook them – you want them to still have a satisfying bite. Once they're done, use your chopsticks to portion the noodles into bowls, making sure each serving gets a generous helping.

Now you're one step closer to enjoying a truly authentic and comforting bowl of bun rieu!

Final Thoughts

Bun rieu is a delightful Vietnamese crab noodle soup that's worth exploring. The combination of tender crab, savory broth, and slurpable noodles creates an unforgettable flavor experience. Even if you've never tried it before, you'll be pleasantly surprised by how well the ingredients complement each other.

As you dive into this dish, you'll notice the vibrant colors and aromas that dance across your senses. The bright red crab meat, the emerald green herbs, and the golden noodles come together in a symphony of tastes and textures.

Each spoonful is a delightful adventure, with the crunchy vegetables, the rich broth, and the tender crab meat creating a harmonious blend that will leave you craving more.

Advertisement

Whether you're a seasoned Vietnamese cuisine enthusiast or a curious newcomer, bun rieu is a must-try dish that will transport you to the bustling streets of Vietnam with every bite. Dive in and let the flavors of this captivating soup enchant your taste buds.

Frequently Asked Questions

Can I Use Canned Crab Meat Instead of Fresh?

You can certainly use canned crab meat instead of fresh. While the flavor won't be quite as fresh, it's a convenient and affordable substitution that can still work well in your recipe.

Is There a Vegetarian or Vegan Version of Bun Rieu?

Yes, you can make a vegetarian or vegan version of this dish. Instead of crab meat, you can use tofu, mushrooms, or a combination of plant-based proteins to create a flavorful broth and hearty noodle soup.

How Do I Adjust the Spice Level in Bun Rieu?

To adjust the spice level in your dish, you can add more or less chili peppers, sriracha, or other hot sauces to suit your preference. Start with a small amount and gradually increase until you reach your desired level of heat.

Can I Freeze Leftover Bun Rieu for Later?

Yes, you can absolutely freeze leftover bun rieu for later. Just be sure to store it in an airtight container, and it'll keep for several months in the freezer. Reheating is easy – simply thaw and reheat on the stovetop.

Advertisement

What Are Some Common Garnishes or Toppings for Bun Rieu?

You can top it with various garnishes like fresh herbs, bean sprouts, lime wedges, crispy fried shallots, and chili sauce to add flavor and texture to your dish.

Continue Reading
Advertisement

Vietnamese Cuisine

Sugarcane Juice

You’ll be surprised by the refreshing, naturally sweet taste of homemade sugarcane juice, packed with essential vitamins and minerals.

Published

on

sweet refreshing tropical beverage

Sugarcane juice is a refreshing, naturally sweet beverage that's been cherished around the world for centuries. You can make it yourself by simply washing, peeling, and juicing fresh sugarcane – it's delightfully hydrating on a hot day! Packed with vitamins, minerals, and antioxidants, sugarcane juice is a healthy alternative to sugary sodas. While it's tasty on its own, you can also add a squeeze of lemon or lime for extra zing. Enjoyed by people of all ages, sugarcane juice is a beloved part of many cultures – and you're about to discover why it's such a celebrated drink.

Key Takeaways

  • Sugarcane juice is a popular and refreshing beverage derived from the sugarcane plant, primarily Saccharum officinarum, found in tropical and subtropical regions worldwide.
  • It is known for its natural sweetness and has been cultivated for thousands of years, transitioning from a luxury item to a widely enjoyed drink.
  • Sugarcane juice is rich in essential vitamins, minerals, and antioxidants, making it a healthier alternative to processed sugary drinks.
  • While sugarcane juice can provide hydration and energy, its high sugar content may not be suitable for individuals with diabetes without consultation.
  • The juice is typically prepared by washing, peeling, and juicing the fresh sugarcane, either using a juicer or a blender, and can be served over ice or flavored with ingredients like lemon, lime, or ginger.

History

Sugarcane, a tall, tropical grass, has a long and storied history that dates back thousands of years. From the rainforests of Southeast Asia to the sun-drenched fields of the Caribbean, this versatile plant has been cultivated and celebrated by cultures around the world.

You can imagine the sweet, earthy aroma of freshly pressed sugarcane juice, its amber liquid sparkling in the sunlight. Once a prized commodity traded along ancient trade routes, sugarcane has evolved from a luxury item to a beloved refreshment enjoyed by people of all ages.

Whether sipped straight from the cane or mixed into vibrant cocktails, this natural elixir has a way of transporting you to far-flung, exotic lands.

Marveling at its rich history, you can't help but feel a deep appreciation for the story of sugarcane and the countless generations who've cultivated and celebrated this remarkable plant.

Recipe

Sugarcane juice is a refreshing and healthy beverage enjoyed in many tropical and subtropical regions around the world. It's made by extracting the sweet juice from freshly harvested sugarcane stalks. This juice isn't only delicious but also offers a range of nutritional benefits, including vitamins, minerals, and antioxidants.

Advertisement

Preparing sugarcane juice at home is a simple process that allows you to enjoy this natural elixir in the comfort of your own kitchen. With just a few basic ingredients and a little bit of effort, you can create a glass of pure, unadulterated sugarcane goodness.

  • Fresh sugarcane stalks
  • Water
  • Ice (optional)
  • Lemon or lime (optional)

To make sugarcane juice, first, wash the sugarcane stalks thoroughly to remove any dirt or debris. Cut the stalks into manageable pieces and feed them through a juicer or sugarcane press. If you don't have either of these, you can use a blender and then strain the mixture through a fine-mesh sieve or cheesecloth to extract the juice.

Once you have the fresh sugarcane juice, you can serve it immediately over ice or add a squeeze of lemon or lime to enhance the flavor. Sugarcane juice is best consumed immediately, as it can quickly lose its freshness and sweetness.

If you have any leftover juice, store it in an airtight container in the refrigerator and consume it within a day or two.

Remember that the quality and sweetness of the sugarcane will vary depending on the variety, growing conditions, and time of harvest. Experiment with different types of sugarcane to find the one that best suits your taste preferences.

Enjoy your homemade sugarcane juice and revel in the refreshing and nourishing properties of this natural delight.

Advertisement

Cooking Steps

First, you'll want to wash and peel the sugarcane, then cut it into smaller pieces.

Next, pass the sugarcane through a juicer to extract that sweet, refreshing juice.

Step 1. Wash and Peel Sugarcane

prepare sugarcane for processing

Before you begin juicing the sugarcane, it's important to properly prepare it. First, give the sugarcane a good rinse under cool, running water. This will wash away any dirt or debris that might be clinging to the surface.

Next, use a sharp knife to peel off the tough, outer skin. Take your time and be careful, as the sugarcane can be quite fibrous. Try to remove as much of the skin as possible, as this will help the juice flow more freely.

Once the sugarcane is peeled, it's ready to be cut into manageable pieces. Slice the cane into 6-inch segments, making sure each piece is straight and even. This will help the sugarcane feed smoothly through your juicer.

With the cane prepped and ready, you can now start juicing and enjoy the sweet, refreshing taste of homemade sugarcane juice!

Advertisement

Step 2. Cut Sugarcane Into Smaller Pieces

cut sugarcane into pieces

With the sugarcane peeled and ready, you can now start cutting it into smaller pieces.

Grab a sharp knife and place the sugarcane on a sturdy cutting board. Carefully slice the sugarcane into 2-inch or 3-inch pieces, making sure to keep your fingers safe.

You'll want to create evenly-sized chunks so they can all cook at the same rate later on. As you work, you might notice the sweet, earthy aroma of the sugarcane filling the air. It's an exciting sign of the delicious juice to come!

Keep slicing until you've cut up the entire stalk. Once you have a pile of sugarcane pieces, you're ready for the next step – feeding them through the juicer.

Get ready to extract that amazing, nutrient-packed liquid gold! With a little effort, you'll have fresh, homemade sugarcane juice in no time.

Step 3. Pass the Sugarcane Through Juicer

juicing sugarcane process step

You'll need to have your juicer ready to go. Once you've cut the sugarcane into smaller pieces, it's time to get that sweet juice flowing!

Carefully place the prepared cane into the juicer's feeding chute. As the blades start spinning, the juice will begin to pour out, filling the container below.

Advertisement

Don't be afraid to push the cane down gently with the tamper to help the juicer extract every last drop. The fragrant, golden liquid will have a slightly thick, syrupy consistency that's absolutely heavenly.

Be sure to position the container close by to catch all that delicious nectar. The juicing process goes by quickly, so have your cups ready to fill up.

Once you've gotten all the juice out, you can set the leftover sugarcane pulp aside to use for other recipes.

With just a few simple steps, you'll have a refreshing glass of homemade sugarcane juice to enjoy!

Step 4. Add Ice

add ice to beverage

Once you have your freshly extracted sugarcane juice, it's time to add some ice. This is the perfect way to cool down and refresh on a hot day.

Grab a handful of ice cubes and gently drop them into the tall glass of vibrant, golden juice. Watch as the ice cubes sink and begin to melt, creating a slightly fizzy and chilly sensation.

Advertisement

The cold ice will instantly chill the juice, making it even more refreshing and delightful to sip. You'll love the way the icy coldness contrasts with the sweet, earthy flavor of the sugarcane. It's like taking a refreshing dip on a summer day, but in a glass!

As the ice melts, it will also slightly dilute the juice, creating the perfect balance of sweetness and coolness.

Stir the mixture gently with a spoon to distribute the ice evenly. Now, you're ready to enjoy this delightful and thirst-quenching treat!

Step 5. Serve Over Ice

serve chilled over ice

Serving sugarcane juice over ice is a refreshing way to enjoy this sweet treat. The cool, crisp ice perfectly complements the rich, tropical flavor of the sugarcane.

Simply fill a glass with plenty of ice cubes, then slowly pour the freshly extracted sugarcane juice over the top. The juice will cascade over the ice, creating a mesmerizing display of amber liquid and glistening ice crystals.

As you sip the chilled beverage, you'll be greeted with a burst of sweetness that quenches your thirst. The ice helps to mellow the intensity of the sugarcane, making it an incredibly refreshing and satisfying drink on a hot day.

Advertisement

The combination of cold and sweet is simply irresistible. Serve over ice and let the flavors of the tropics transport you to a peaceful oasis. This is the perfect way to savor the natural goodness of sugarcane juice.

Final Thoughts

While sugarcane juice may not be the most practical choice for everyday consumption, it's a refreshing and health-conscious alternative that's worth exploring.

The sweet, golden elixir offers a unique and flavorful experience, transporting you to tropical beaches and lush, verdant fields. Imagine the satisfying crunch as you bite into the fresh, vibrant green stalks, the aromatic scent of the juice filling the air.

As the cool, refreshing liquid touches your lips, you'll be treated to a burst of natural sweetness that invigorates the senses. Whether you're seeking a pick-me-up on a hot day or simply want to try something new, sugarcane juice is a delightful option that brings a touch of the exotic to your everyday.

Frequently Asked Questions

Is Sugarcane Juice Healthy for Diabetics?

You should be cautious about drinking sugarcane juice if you have diabetes, as it's high in natural sugars that can spike your blood sugar levels. It's best to consult your doctor before incorporating it into your diet.

Advertisement

Can I Store Leftover Sugarcane Juice?

You can store the leftover sugarcane juice, but it's best to consume it as soon as possible. Refrigerate it in an airtight container and it'll last for up to 3 days. Don't let it sit at room temperature.

How Long Does Sugarcane Juice Last?

Freshly squeezed sugarcane juice typically lasts 1-2 days when stored in the refrigerator. However, its shelf life can be extended to 3-5 days by immediately refrigerating it and keeping it tightly sealed. Proper storage is key to enjoying its refreshing flavor.

Can I Add Other Fruits to Sugarcane Juice?

You can certainly add other fruits to your sugarcane juice. It's a great way to enhance the flavor and nutritional value of your drink. Just be mindful of the sweetness levels when incorporating additional fruits.

Is Sugarcane Juice Good for Weight Loss?

Sugarcane juice can be a healthy part of a weight loss plan. It's low in calories and contains natural sugars and nutrients that may boost metabolism. However, it's important to consume it in moderation as part of a balanced diet.

Advertisement
Continue Reading

Vietnamese Cuisine

Iced Coffee With Condensed Milk

Opulent and indulgent, this Vietnamese iced coffee blends bold java with luscious condensed milk, creating a heavenly sip that will leave you craving more.

Published

on

sweetened iced coffee delight

Ah, a refreshing iced coffee with creamy condensed milk – what a delight! This Vietnamese classic blends bold coffee and sweet, velvety goodness, creating a heavenly sip that's perfect on a warm day. First, you brew the coffee using a special Vietnamese filter for a rich, intense flavor. Then, you stir in the luscious condensed milk, which adds a dreamy creaminess and pleasant sweetness. Finally, you top it off with plenty of ice cubes for a cool, satisfying crunch. It's a harmonious fusion of flavors that's sure to brighten your day. And there's so much more to explore about this beloved beverage!

Key Takeaways

  • Iced coffee with condensed milk is a popular Vietnamese beverage that combines brewed coffee, ice, and sweetened condensed milk for a rich, creamy, and refreshing taste.
  • The drink's origins can be traced back to the late 19th century during the French colonial era in Vietnam, reflecting the fusion of coffee traditions and local flavors.
  • The preparation involves brewing coffee using a traditional phin filter, adding sweetened condensed milk to taste, and then chilling the mixture with ice for a satisfying and balanced flavor profile.
  • Iced coffee with condensed milk is a versatile beverage that can be customized with additional flavors, such as vanilla or chocolate, to cater to diverse taste preferences.
  • While the drink offers a boost of caffeine, the high sugar content from the condensed milk should be considered, especially for those monitoring their sugar intake.

History

The origin of iced coffee with condensed milk can be traced back to Vietnam, where it has been a beloved beverage for decades. Known as "ca phe sua da," this delightful drink was first popularized in the late 19th century, during the French colonial era.

Back then, Vietnamese coffee growers needed a way to preserve their harvest, so they started mixing the freshly brewed coffee with sweetened condensed milk. This not only extended the shelf life of the coffee, but also created a rich, creamy, and refreshing taste that quickly became a local favorite.

Over the years, the recipe has remained largely unchanged, with the exception of serving it over ice to beat the tropical heat.

Today, ca phe sua da is a quintessential part of Vietnamese culture, enjoyed by people of all ages throughout the country. Whether sipped leisurely or gulped down quickly, this iced coffee delight remains a timeless treat that brings joy to all who try it.

Recipe

Iced coffee with condensed milk is a delightful Vietnamese-inspired treat that combines the rich creaminess of sweetened condensed milk with the refreshing bitterness of strong brewed coffee.

Advertisement

This simple yet indulgent beverage is the perfect pick-me-up on a hot day. The key to this recipe is to use a high-quality dark-roast coffee that can stand up to the bold flavors of the condensed milk.

The brewing method is also important, as the coffee needs to be strong enough to balance the sweetness of the milk.

Ingredients:

  • 1/2 cup strong brewed coffee, cooled
  • 1/4 cup sweetened condensed milk
  • Ice cubes

Directions:

Brew a strong batch of dark-roast coffee and allow it to cool completely. In a tall glass, combine the cooled coffee and sweetened condensed milk.

Stir well to combine. Add ice cubes and stir again to chill the drink. Serve immediately.

Advertisement

For best results, use freshly brewed coffee that has been allowed to cool to room temperature. The coffee should be strong and bold in flavor to provide a counterpoint to the rich, sweet condensed milk.

Adjust the ratio of coffee to condensed milk to suit your personal taste preferences.

Cooking Steps

Brew up a bold and flavorful cup of coffee using a traditional Vietnamese phin filter.

Then, stir in a generous helping of sweet and creamy condensed milk.

Finally, add some ice and give it all a good mix.

Advertisement

You're now ready to sip on this refreshing iced coffee treat!

Step 1. Brew Coffee Using a Phin Filter

brew coffee with phin

Brewing coffee with a phin filter is a straightforward process that yields a rich, aromatic result.

First, you'll place the metal filter into the phin's base, then add a couple of tablespoons of ground coffee. Gently tap the filter to level the grounds.

Next, slowly pour hot water over the coffee, making sure to wet all the grounds. Let it steep for about 2-3 minutes, then watch as the flavorful brew drips down into your waiting cup.

The phin filter creates a thick, concentrated coffee that's simply delightful. You can adjust the amount of coffee and steeping time to suit your personal taste preferences.

Whether you enjoy your iced coffee with a splash of condensed milk or black, the phin method delivers a wonderfully robust and smooth flavor in every sip.

Advertisement

Get ready to savor the authentic taste of Vietnamese-style iced coffee at home!

Step 2. Add Condensed Milk

add condensed milk now

Once you've brewed your coffee using the phin filter, it's time to add the signature ingredient that transforms it into authentic Vietnamese-style iced coffee – condensed milk.

This thick, sweet, and creamy milk is the secret to the rich and indulgent flavor of Ca Phe Sua Da. Grab your can of sweetened condensed milk and get ready to pour it in.

Slowly drizzle the condensed milk into your freshly brewed coffee, stirring gently to combine. Watch as the milk swirls and blends, creating a smooth and velvety texture. The sweet aroma will fill the air, making your mouth water in anticipation.

Once the condensed milk is fully incorporated, give your coffee a final stir to ensure everything is well-mixed.

Now, all that's left is to add ice and enjoy the perfect balance of bold coffee and decadent sweetness. Sip and savor this heavenly Vietnamese iced coffee creation!

Advertisement

Step 3. Add Ice

chill beverage with ice

After stirring in the condensed milk, it's time to add the ice.

You'll want to use plenty of ice cubes to get that nice, chilled iced coffee. Scoop a generous amount of ice into your glass, filling it up almost to the top. The cold, crunchy ice cubes will instantly cool down your freshly-brewed coffee, creating that perfect icy-cold beverage.

As the ice melts, it will dilute the coffee just a bit, balancing out the sweetness of the condensed milk. You'll end up with a smooth, refreshing iced coffee that's not too strong or too sweet.

The ice also adds a satisfying crunch with each sip, making the experience even more delightful.

Be sure to stir the iced coffee one more time before taking your first sip. This will ensure all the flavors are evenly distributed.

Now you can sit back, relax, and enjoy your perfectly chilled Ca Phe Sua Da!

Advertisement

Step 4. Stir to Combine Ingredients

combine ingredients by stirring

With the condensed milk added, give the iced coffee a good stir to fully incorporate all the ingredients.

You'll notice the liquid transform from a light, watery brown to a luscious, creamy tan color as the sweet, concentrated milk blends in.

The satisfying swish of the spoon against the glass creates a soothing, rhythmic sound, almost like a gentle rain shower.

As you stir, the aroma of the freshly brewed coffee grows stronger, mingling with the rich, decadent scent of the condensed milk.

Keep stirring until the mixture is thoroughly combined – no streaks or pockets of milk should remain.

Now, the iced coffee is ready to be enjoyed!

Advertisement

The smooth, velvety texture and perfect balance of coffee and sweetness will make each sip pure bliss.

Sit back, take a refreshing sip, and savor the delightful flavors of this classic Vietnamese iced coffee treat.

Step 5. Enjoy the Refreshing Beverage

savor your refreshing drink

Now that the ingredients are thoroughly combined, it's time to enjoy this refreshing Vietnamese iced coffee! Grab your glass and take a sip – the sweet, creamy condensed milk perfectly balances the bold, slightly bitter coffee. Mmm, can you taste the caramelized notes?

The ice cubes clink against the sides of the glass, creating a satisfying sound as the chilled liquid cools you down on a hot day. As you savor each sip, notice how the coffee's aroma wafts up, filling your nose with its enticing scent.

The smooth texture glides across your tongue, leaving behind a delightful aftertaste that'll have you reaching for another sip. This iced coffee is truly a taste of Vietnamese culture – a beloved tradition that's both refreshing and comforting.

Take your time and enjoy every moment of this delightful beverage. It's the perfect pick-me-up or afternoon treat. Sip, savor, and relax – you deserve this moment of pure refreshment!

Advertisement

Final Thoughts

Ultimately, the iced coffee with condensed milk stands as a delightful pick-me-up, a cool respite from the day's heat. Its rich, creamy texture and sweetness melt together in perfect harmony, creating a refreshing sensation that dances across your taste buds.

With each sip, you're transported to a quaint Vietnamese cafe, the bustling sounds of the city fading away as you savor the moment.

The contrasting temperatures of the iced coffee and the silky-smooth condensed milk make for a truly unique and satisfying experience. It's a beverage that can be enjoyed any time of day, whether you're seeking a morning boost or an afternoon pick-me-up.

The versatility of this drink is truly remarkable, appealing to a wide range of palates and preferences.

As you savor the final drops, you can't help but feel a sense of contentment and delight. The iced coffee with condensed milk is more than just a drink – it's a cultural experience that you'll want to revisit time and time again.

Advertisement

Frequently Asked Questions

How Do I Store Leftover Condensed Milk?

To store leftover condensed milk, keep it in the can or transfer it to an airtight container. Store it in the refrigerator for up to 2 weeks. Avoid leaving it at room temperature for extended periods to prevent spoilage.

Can I Use Other Types of Milk Besides Condensed Milk?

Yes, you can use other types of milk besides condensed milk. Try using regular milk, almond milk, or even coconut milk to create your own unique coffee beverage. Experiment with different flavors and see what you prefer.

What Is the Best Ratio of Coffee to Condensed Milk?

The best ratio of coffee to condensed milk depends on your personal taste preferences. Start with a 1:1 ratio and adjust to your desired level of sweetness and creaminess from there. Experiment until you find the perfect balance.

How Long Can the Iced Coffee Stay Fresh?

The iced coffee can stay fresh for up to 3-4 days when stored in an airtight container in the refrigerator. However, the flavor and quality may begin to degrade after 2 days, so it's best to consume it within that timeframe.

Can I Use Brewed Coffee Instead of Instant Coffee?

You can certainly use brewed coffee instead of instant coffee. The brewed coffee will have a richer, more robust flavor compared to instant. Just be sure to let the coffee cool before adding the condensed milk and ice.

Advertisement
Continue Reading

Vietnamese Cuisine

Tra Da (Iced Tea)

With its perfect balance of bold tea and creamy sweetness, Tra Da (Iced Tea) is a Vietnamese delight that will leave you craving more. Discover the captivating history behind this cherished beverage.

Published

on

refreshing iced tea beverage

You'll love sipping on the refreshing Vietnamese iced tea, known as tra da! This chilled delight blends bold black tea leaves with sweet and creamy condensed milk, creating a delightful flavor that's perfect for hot summer days. It's been a beloved beverage for generations, originating in the late 1800s and quickly spreading around the world. To make your own, simply steep the tea, chill it, and stir in the milk – easy as can be! And if you're curious to learn more about the rich history and diverse cultural traditions behind this thirst-quenching drink, there's plenty more to discover.

Key Takeaways

  • Tra Da, or Vietnamese iced tea, is a popular beverage made by combining strong black tea with sweetened condensed milk.
  • The brewing process involves steeping black tea leaves in hot water for 3-5 minutes, then chilling the tea before serving over ice.
  • Customization options for Tra Da include adjusting the tea strength and the amount of sweetened condensed milk to suit individual preferences.
  • Tra Da is a versatile drink that can be enjoyed year-round, often served at social gatherings and celebrations in Vietnam.
  • Iced tea, including Tra Da, offers potential health benefits such as providing hydration and containing antioxidants.

History

The origins of iced tea can be traced back to the late 19th century, when a pioneering entrepreneur introduced the refreshing beverage at the 1904 World's Fair in St. Louis, Missouri.

Visitors from all over the country were captivated by the cool, sweet taste of this unexpected delight, and the popularity of iced tea quickly spread across the United States.

Today, iced tea is a beloved summertime staple, enjoyed by people of all ages.

The crisp, invigorating flavor comes from steeping black or green tea leaves in cool water, then adding a touch of sugar or lemon to enhance the natural sweetness.

Whether you prefer it plain or with a twist, iced tea is the perfect way to quench your thirst on a hot, sunny day.

Advertisement

Its refreshing qualities have made it a fixture at picnics, barbecues, and outdoor gatherings, where friends and families can come together to savor the delicious taste of this timeless beverage.

Recipe

Tra Da, or Vietnamese Iced Tea, is a refreshing and popular beverage enjoyed throughout Vietnam. Its distinct flavor profile combines the robust taste of strong black tea with the sweetness of condensed milk, creating a delightful balance that's perfect for quenching thirst on a hot day.

The traditional method of preparing Tra Da involves steeping the tea leaves in boiling water to extract their full flavor. The resulting tea is then chilled and combined with sweetened condensed milk, creating a creamy and indulgent drink that's sure to delight the senses.

Ingredients:

  • 4 cups water
  • 4 teaspoons black tea leaves
  • 1/2 cup sweetened condensed milk

Instructions:

Bring the water to a boil in a saucepan. Remove from heat and add the tea leaves. Let the tea steep for 5-7 minutes, or until it reaches your desired strength. Strain the tea into a pitcher and refrigerate until completely chilled, about 2 hours.

Advertisement

When ready to serve, fill a glass with ice cubes. Pour the chilled tea over the ice and stir in the sweetened condensed milk until fully incorporated. Enjoy the refreshing and delightful flavor of Tra Da.

Additional Tips:

For a stronger tea flavor, use more tea leaves or steep the tea for a longer duration. Adjust the amount of condensed milk to suit your personal taste preferences. To make the drink extra creamy, consider using half-and-half or evaporated milk instead of condensed milk.

Cooking Steps

First, you'll need to boil some water for your tea leaves.

Once the water's nice and hot, go ahead and add those fragrant leaves.

Advertisement

Let 'em steep for 3 to 5 minutes, then strain the tea and transfer it to a pitcher.

Step 1. Boil Water for Tea Leaves

boil water for tea

Bring a pot of fresh, cold water to a rapid boil.

Once the water starts bubbling furiously, turn down the heat to maintain a gentle simmer. This is the perfect temperature to steep your fragrant tea leaves.

Carefully pour the hot water over the delicate leaves, filling your teapot to the brim. Cover the pot with a lid to trap the heat and let the tea steep for 3-5 minutes.

Breathe in the soothing aroma as the tea infuses the water with its rich flavor.

When the time is up, slowly pour the vibrant, amber-colored tea into your favorite glass or pitcher.

Advertisement

Add ice cubes to instantly chill the tea, making it refreshingly cool and perfect for a hot day.

Sip and savor the balanced, complex taste of your homemade iced tea. Enjoy!

Step 2. Add Tea Leaves

add tea leaves now

Once the water is at the perfect temperature, add 1-2 teaspoons of your preferred tea leaves directly to the hot water.

The choice of tea can significantly impact the flavor profile of your iced tea; for instance, brewing the perfect cup of tea can help you achieve the ideal taste.

Watch as the leaves dance and swirl, releasing their aromatic essence into the steaming liquid. The delicate tea leaves will slowly steep, infusing the water with their rich, bold flavor.

Gently stir the mixture to help the leaves fully submerge and distribute their taste throughout. As the tea steeps, the water will gradually deepen in color, transforming from a pale yellow to a vibrant amber hue.

Advertisement

Take a deep breath and savor the soothing, fragrant aroma wafting through the air. Allow the tea to steep for 3-5 minutes, depending on your desired strength.

When the tea has reached your preferred intensity, it's time to remove the leaves and prepare your refreshing glass of iced tea.

Step 3. Steep Tea Leaves for 3-5 Minutes

steep tea leaves minutes

After adding the tea leaves to the hot water, allow the mixture to steep for 3-5 minutes, depending on your desired strength. The longer you let it steep, the more intense the flavor will become.

You'll know it's ready when the water takes on a deep, rich color and the aroma of the tea fills the air. Gently lift the tea bag or strainer and watch as the liquid flows through, revealing the vibrant hues of the tea leaves. Inhale the inviting scent – it's almost time to enjoy your refreshing Tra Da!

As the tea steeps, the flavors and aromas will blossom, creating a truly delightful experience.

Feel free to adjust the steeping time to suit your personal preference. Some like it strong and bold, while others prefer a more delicate, nuanced flavor. Experiment and find the perfect balance that tantalizes your taste buds.

Advertisement

Get ready to savor the perfect cup of Tra Da, bursting with natural goodness.

Step 4. Strain and Transfer to Pitcher

strain and transfer pitcher

Once the tea has finished steeping, it's time to strain and transfer it to a pitcher. Carefully pour the fragrant, golden liquid through a fine mesh strainer, leaving behind those used tea leaves. Ah, doesn't the aroma just fill the air?

Now, you'll want to pour the freshly strained tea into a clean pitcher. Be sure to hold the strainer securely over the pitcher to catch every last drop of that delightful, flavorful tea.

With the tea now in the pitcher, it's ready to be chilled and enjoyed. Pop the pitcher into the fridge for about 30 minutes, or until it's nice and cold. Mmm, can you already imagine the refreshing sip of that icy, aromatic tea?

Once it's properly chilled, pour it over some ice and get ready to savor the perfect iced tea. Your thirst is about to be quenched in the most delightful way!

Step 5. Add Ice Cubes

add ice cubes now

Fill up your glass with the freshly brewed and chilled iced tea, then generously top it with crisp ice cubes.

Watch as the ice cubes clink against the sides of the glass, creating a refreshing melody. As the ice melts, it'll slowly dilute the tea, making it the perfect temperature to sip on a hot day.

Advertisement

The transparent ice cubes will also add a beautiful, sparkling effect to your beverage, making it look as tempting as it tastes.

Feel free to add as many ice cubes as you'd like – the more the merrier! The cold ice will perfectly complement the bold, flavorful tea, creating a delightful harmony of tastes and temperatures.

Enjoy taking that first, cool sip, savoring the refreshing blend of iced tea and ice.

It's the perfect way to quench your thirst and cool down on a warm afternoon. With the ice cubes in place, your homemade iced tea is now ready to be served and savored.

Final Thoughts

Although iced tea is a refreshing and versatile beverage that can be enjoyed year-round, it's important to consider a few final thoughts before savoring your next glass.

Advertisement

Remember, the beauty of iced tea is its customizability – you can experiment with different tea varieties, flavors, and sweeteners to find your perfect blend.

Why not try adding a twist of citrus or a sprig of mint for a burst of refreshing flavor?

And don't forget to share your creations with friends and family – iced tea is the perfect drink for making memories and creating special moments together.

So, the next time you pour yourself a glass of this delightful drink, take a moment to appreciate the art of iced tea and all the joy it can bring.

Cheers!

Advertisement

Frequently Asked Questions

How Long Does Tra Da Last Before Spoiling?

Iced tea will typically last 3-5 days when refrigerated. However, its shelf life can vary depending on factors like the ingredients, preparation method, and storage conditions. It's best to consume it within a few days for optimal freshness and safety.

Can Tra Da Be Made With Different Tea Types?

Yes, you can make iced tea with different tea types. Black tea, green tea, herbal tea – they all work well for creating refreshing iced tea. Experiment to find your favorite flavor profile.

What Are the Health Benefits of Drinking Tra Da?

Drinking iced tea offers several health benefits. It's packed with antioxidants that can boost your immune system, reduce inflammation, and even lower your risk of chronic diseases. Plus, it's a refreshing and hydrating beverage.

How Much Sugar Should Be Added to Tra Da?

You don't necessarily need to add a lot of sugar to your beverage. Start with a small amount and adjust to your taste preferences. Too much added sugar can negate the potential health benefits.

Can Tra Da Be Served Warm Instead of Iced?

Absolutely! You can certainly serve the beverage warm instead of iced. Simply heat it up to your desired temperature and enjoy the warm, flavorful drink. The choice is yours – iced or warm, it's a delightful refreshment either way.

Advertisement
Continue Reading
Advertisement

Affiliate Disclaimer
As an affiliate, we may earn a commission from qualifying purchases. We get commissions for purchases made through links on this website from Amazon and other third parties.

Advertisement

Latest

sweet fruity unique grapes sweet fruity unique grapes
Graduations/Birthdays46 seconds ago

Cotton Candy Grapes

Satisfy your sweet tooth with the captivating flavor of Cotton Candy Grapes, a unique fruit that replicates the taste of...

colorful rimmed beverages colorful rimmed beverages
Graduations/Birthdays6 mins ago

Sprinkle-Rimmed Drinks

Whimsical and visually captivating, sprinkle-rimmed drinks transport you to a world of playful flavors and enchanting presentations that will leave...

festive puppy chow treats festive puppy chow treats
Graduations/Birthdays12 mins ago

Birthday Cake Puppy Chow

Uncover the captivating blend of crunchy Chex, creamy white chocolate, and vibrant sprinkles that make Birthday Cake Puppy Chow an...

magical colorful chocolate beverage magical colorful chocolate beverage
Graduations/Birthdays18 mins ago

Unicorn Hot Chocolate

Otherworldly and whimsical, unicorn hot chocolate transports you to a realm of vibrant colors and sweet indulgence, where the possibilities...

colorful skewered fruit delights colorful skewered fruit delights
Graduations/Birthdays23 mins ago

Rainbow Fruit Kebabs

Tantalizing and refreshing, these rainbow fruit kebabs offer a delightful twist on a classic snack, with a vibrant array of...

colorful cheese filled tortillas colorful cheese filled tortillas
Graduations/Birthdays29 mins ago

Confetti Quesadillas

Heighten your taste buds with the vibrant burst of color and flavor in confetti quesadillas, a fusion of Mexican cuisine...

celebratory dessert beverage fusion celebratory dessert beverage fusion
Graduations/Birthdays35 mins ago

Birthday Cake Milkshake

Fulfill your childhood nostalgia with the irresistible Birthday Cake Milkshake, a creamy, indulgent treat that's a celebration in every sip....

colorful cake batter dip colorful cake batter dip
Graduations/Birthdays41 mins ago

Funfetti Dip

Celebrate the vibrant and creamy delight of Funfetti Dip, the ultimate party treat that will captivate your taste buds and...

celebratory sweet snack treat celebratory sweet snack treat
Graduations/Birthdays46 mins ago

Birthday Cake Flavored Popcorn

Outrageous and irresistibly sweet, this birthday cake flavored popcorn promises a flavor explosion that will leave you craving more. Discover...

graduation jewelry and snacks graduation jewelry and snacks
Graduations/Birthdays52 mins ago

Class Ring Onion Rings

Feast on the nostalgic delight of Class Ring Onion Rings, a crispy, golden-brown treat that will transport you back to...

breadsticks resembling pencils breadsticks resembling pencils
Graduations/Birthdays58 mins ago

Pencil-Shaped Breadsticks

Harnessing the rich history and versatility of pencil-shaped breadsticks, explore how to craft these unique and captivating snacks that will...

colorful candy dessert layers colorful candy dessert layers
Graduations/Birthdays1 hour ago

Smarties Candy Parfaits

Observe the vibrant layers of creamy yogurt, pudding, and whipped cream, elevated by the delightful crunch of classic Smarties candies...

Advertisement

Trending