Radish wraps are a super fun and refreshing way to munch on veggies! Start by washing and slicing radishes into thin pieces. Then, spread a layer of cream cheese or hummus on them. Get creative by adding crunchy vegetables, like carrots or cucumbers, and your favorite protein, such as turkey or beans! Roll them up tightly, chill for a bit, and serve with dipping sauces for an extra flavor punch. Not only are these wraps delicious, but they're also a great way to share food with friends and family. Discover more about this tasty treat and how to make it shine!
Key Takeaways
- Radish wraps offer a crunchy, zesty alternative to traditional wraps, making them a refreshing vegetable option.
- They are customizable, allowing for a variety of fillings like soft cheese, veggies, and proteins to suit personal tastes.
- Chilling the wraps enhances their flavors and creates a refreshing, enjoyable eating experience.
- Dipping sauces can elevate radish wraps, adding extra flavor and encouraging culinary experimentation.
- Making and sharing radish wraps fosters creativity and connection during gatherings, making them a fun activity for friends and family.
Top picks for "radish wrap light"
Open Amazon search results for this keyword.
As an affiliate, we earn on qualifying purchases.
History
Radish wraps have a surprisingly rich history that dates back centuries. You mightn't know this, but radishes were first cultivated in ancient Egypt, where they were prized for their crunchy texture and zesty flavor. People loved using them in various dishes, and they quickly spread across Europe and Asia.
As cultures mixed and shared their culinary secrets, radishes found new homes in many recipes. Interestingly, the nutrition found in radishes, including vitamins and minerals, contributes to overall well-being, which is essential for children's healthy eating habits.
In the Middle Ages, radishes became popular in European gardens. Farmers grew them not only for their taste but also for their health benefits. They were believed to help with digestion and boost energy.
Fast forward a bit, and you'll find that in Japan, people even began wrapping ingredients in radish leaves, creating a delightful dish that inspired the modern radish wrap!
Today, you can enjoy radish wraps in countless ways. They're not just healthy and delicious; they also connect us to a long tradition of creativity in cooking.
Cooking Steps
To make delicious radish wraps, you'll want to gather your ingredients and prepare for a quick and satisfying cooking process. First, wash your fresh radishes and slice them thinly. You'll need about five or six radishes, depending on how many wraps you want to make.
For a quick breakfast option, consider adding a touch of protein with soft cheese, like cream cheese or goat cheese, which can provide a protein-rich start to your day. Spread a thin layer over each radish slice; this will add a creamy texture that balances the crunch of the radish!
Now, it's time to add some veggies! Choose your favorites, such as cucumber, bell peppers, or carrots, and cut them into thin strips.
Place a few strips on top of the cheese-covered radish. If you like a little kick, sprinkle on some herbs or spices, like dill or paprika.
Step 1. Prepare the Radish Wraps
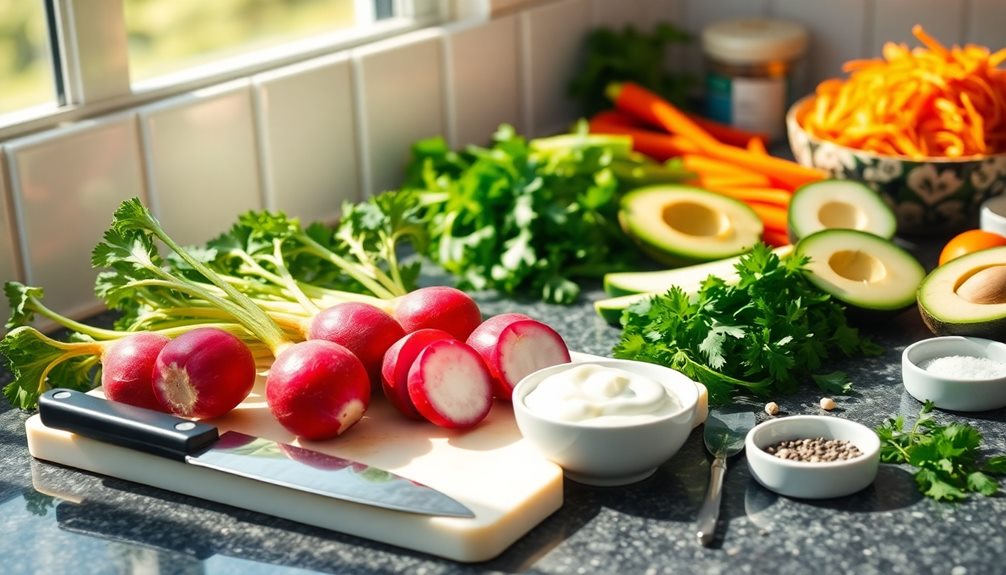
For a fresh and flavorful bite, start by washing the radishes thoroughly under cold water. Make sure to remove any dirt or grit.
Once they're clean, you'll want to trim the tops and tails off each radish. This step is important because it gives your wraps a nice, neat look.
Next, it's time to slice the radishes into thin, flat pieces. You're aiming for about a quarter-inch thickness, which makes them flexible enough to wrap around all sorts of tasty fillings. If you have a mandoline slicer, it's a great tool for this job, but a sharp knife works just fine too!
After slicing, place the radish pieces on a plate or cutting board. You can sprinkle a little salt on them to enhance the flavor, but this isn't necessary.
Let them sit for a few minutes to soften up slightly, making them easier to fold.
Now that your radishes are prepped, you're all set to create delicious and colorful wraps! This simple preparation is the key to enjoying the crisp, refreshing taste of radishes in a fun way.
Get ready for the next exciting step!
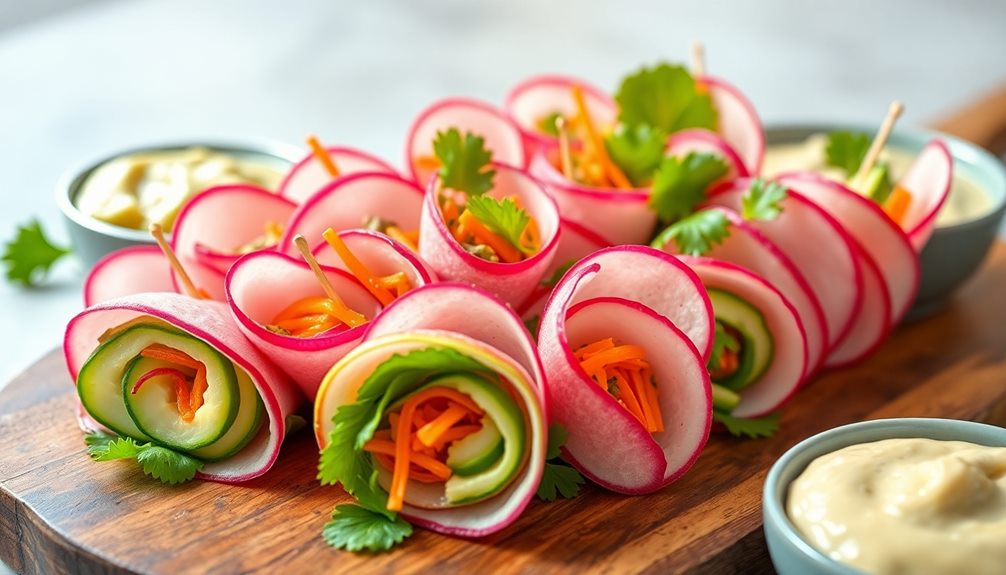
Step 2. Add Fillings to Wraps

Now that you've prepared your radish slices, it's time to fill them with delicious ingredients! Think about what flavors you enjoy.
You can start with a layer of cream cheese or hummus spread on the radish—this adds creaminess and helps hold everything together. For a healthier option, consider using organic spreads that align with eco-friendly practices in toy selection.
Next, add some crunchy veggies like shredded carrots or cucumber slices. These will give your wrap a nice texture! If you're feeling adventurous, you can toss in some sliced bell peppers or even avocado for a creamy twist.
For protein, consider adding thinly sliced turkey, chicken, or even some black beans. They'll make your wraps filling and hearty.
Don't forget to sprinkle some cheese on top, like feta or shredded cheddar, for an extra burst of flavor!
Step 3. Roll the Wraps Tightly

Once you've added all your favorite fillings to the radish slices, it's time to roll them up tightly. Grab a radish slice, and make sure the fillings are evenly spread out. This way, every bite will be bursting with flavor!
Now, gently lift one edge of the radish and start rolling it towards the opposite end. Keep the fillings tucked in as you go; think of it like rolling a burrito, but with a fun, crunchy twist!
As you roll, use your fingers to help guide the wrap and keep it tight. Don't worry if it feels a little tricky at first; practice makes perfect! If the radish cracks a bit, just embrace it—those little imperfections add character to your wraps.
Once you've rolled it up completely, give it a gentle squeeze to secure everything inside. You can also use a toothpick to hold it together if you want to be extra sure they stay rolled.
Repeat this process with your remaining radish slices. Before you know it, you'll have a colorful platter of delicious radish wraps, ready to impress your family and friends! Enjoy the fun of wrapping!
Step 4. Chill Before Serving

After rolling up your radish wraps, chilling them before serving enhances their taste and texture. It's like giving them a mini-vacation in the fridge! This step helps all the flavors blend together beautifully, making each bite even more delicious.
Plus, who doesn't love a nice, cool treat on a warm day?
To chill your wraps, simply place them in an airtight container or wrap them in plastic wrap. Make sure they're snug, so they don't dry out. Then, slide them into the refrigerator for about 30 minutes. This little wait is worth it!
While they chill, you can clean up your workspace or even get the table ready for a fun meal.
When you take the wraps out, you'll notice how refreshing they look and feel. The coolness makes the veggies crispier, and the flavors pop! It's a simple step that makes a big difference. So, don't skip it!
Once your radish wraps are chilled, you'll be all set to impress your friends and family with this light and tasty dish. Enjoy every bite; you deserve it!
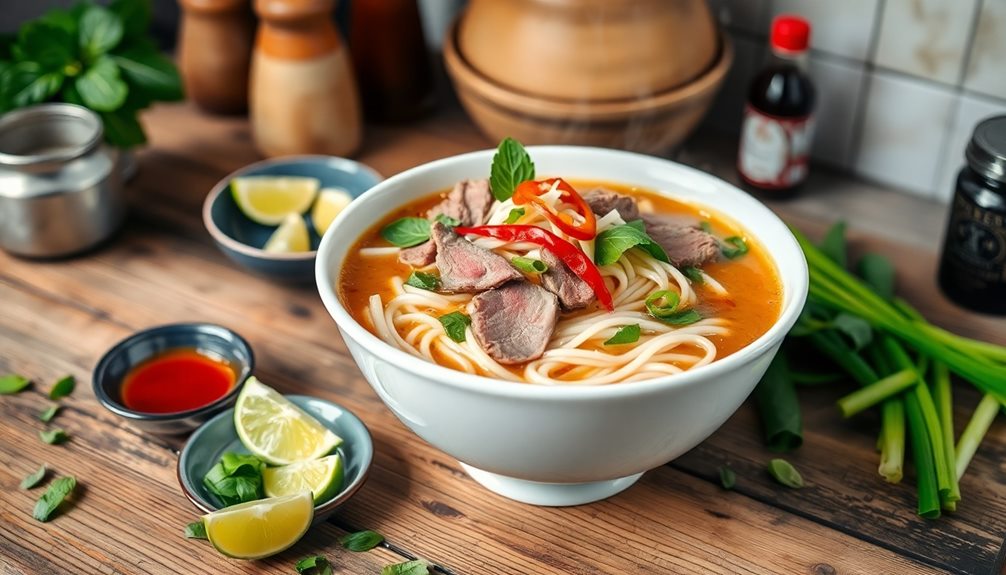
Step 5. Serve With Dipping Sauce
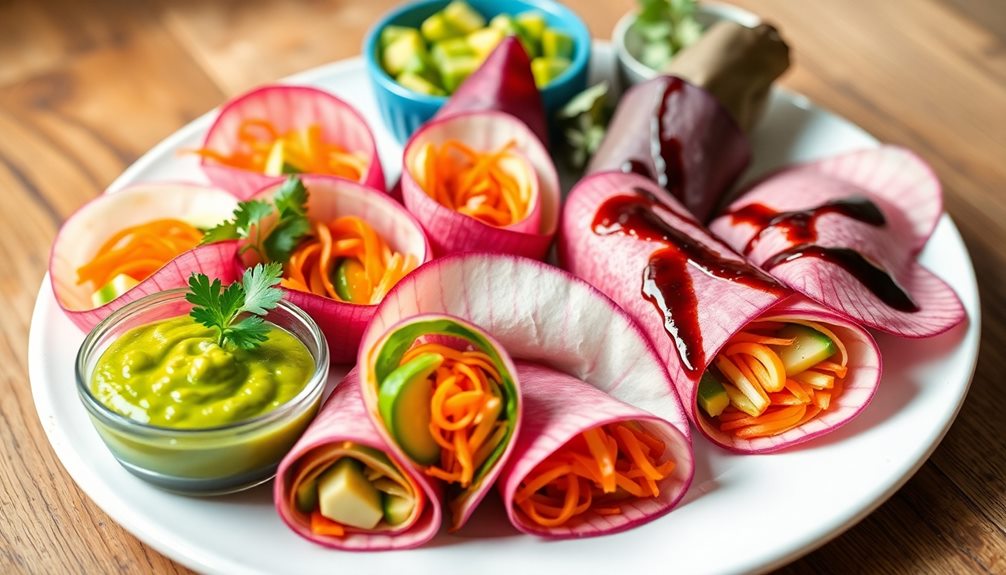
Serving your radish wraps with a dipping sauce takes them to the next level of flavor. Dipping sauces can make your wraps even more exciting and delicious! You can choose from a variety of sauces, but let's focus on a few easy ones you can whip up at home.
First, try a simple soy sauce mixed with a dash of sesame oil for a savory twist. Just mix one tablespoon of soy sauce with half a teaspoon of sesame oil, and you're ready to go! You can even sprinkle some sesame seeds on top for extra crunch.
Another great option is a tangy yogurt dip. Combine one cup of plain yogurt with a squeeze of lemon juice and a pinch of salt. Stir it all together until it's smooth, and you've got a refreshing sauce that pairs perfectly with your fresh radish wraps.
Don't forget to serve your wraps on a nice platter and provide small bowls for each dipping sauce. Watching your friends dip and enjoy will make your meal feel extra special.
Final Thoughts
Ultimately, creating radish wraps offers a delightful blend of flavors and textures that enhances any meal. You'll love how these colorful wraps brighten your plate and your taste buds!
They're not just pretty; they're also packed with nutrients, making them a smart choice for a healthy diet.
Imagine biting into a crispy radish, filled with creamy avocado and crunchy veggies. It's a fun and tasty way to enjoy your favorite ingredients. Plus, you can customize your wraps with whatever fillings you like! Whether you prefer spicy, sweet, or savory flavors, the possibilities are endless.
Sharing these wraps with family or friends can turn any gathering into a celebration. You'll find that everyone loves getting involved in the wrapping process, making it a fun activity that brings people together.
And don't forget the dipping sauce—it adds an extra zing that'll have everyone reaching for more!
Frequently Asked Questions
Can I Use Different Types of Radishes for Wraps?
Absolutely, you can use different types of radishes for wraps! Each variety brings a unique flavor and texture, so experiment with what you like best. Just slice them thin for easy wrapping and enjoy!
How Do I Store Leftover Radish Wraps?
To store leftover radish wraps, wrap them tightly in plastic wrap or place them in an airtight container. Keep them in the fridge and enjoy within two to three days for the best freshness.
Are Radish Wraps Suitable for Meal Prep?
Yes, radish wraps are great for meal prep! You can easily assemble them ahead of time, and they'll stay fresh in the fridge for a quick, healthy snack or lunch option throughout the week.
What Are Some Good Dipping Sauces for Radish Wraps?
When you're enjoying radish wraps, consider dipping them in a zesty yogurt sauce, spicy sriracha, or a tangy sesame dressing. Each adds a unique flavor, enhancing your wraps while keeping things light and fresh.
Can I Add Proteins to My Radish Wraps?
Absolutely, you can add proteins to your radish wraps! Try grilled chicken, tofu, or chickpeas for added texture and flavor. It'll make your wraps more filling and satisfying while still keeping them light and refreshing.