Roti canai, the beloved Thai-style flatbread, is a delightful fusion of Indian and Malay culinary traditions. This light, flaky delight originated from the Indian subcontinent, introduced to Malaysia by traders and immigrants. The term "canai" comes from the Tamil word meaning "to spread or flatten." Roti canai features a rich, buttery flavor achieved through careful kneading and stretching techniques. You'll find it enjoyed as a comforting breakfast or snack, often paired with curries. With consistent practice, you can master the art of roti canai and share its cultural significance with friends and family. The journey of exploring this beloved dish is just getting started.
Key Takeaways
- Roti canai is a beloved breakfast and snack food in Malaysia, representing a fusion of Indian and Malay culinary traditions.
- The dish is characterized by a light, flaky texture and rich, buttery flavor, achieved through kneading and resting the dough.
- Cooking roti canai requires a hot, flat griddle or pan, with oil or ghee applied to enhance flavor and crispiness.
- Roti canai pairs well with various curries, and can also be served plain or with sweet fillings for dessert options.
- Consistent practice and experimenting with different fillings and cooking methods are key to mastering the art of roti canai.
Top picks for "roti canai thai"
Open Amazon search results for this keyword.
As an affiliate, we earn on qualifying purchases.
History
The origins of roti canai can be traced back to the Indian subcontinent, where flatbreads have been a staple for centuries.
As Indian traders and immigrants settled in Malaysia, they brought their culinary traditions with them, including the art of making roti. Over time, the Malaysian version of this flatbread evolved, incorporating local ingredients and cooking techniques.
The word "canai" is believed to have derived from the Tamil word "canai," meaning "to spread or flatten." This reflects the process of hand-stretching the dough into thin, lacy layers before cooking.
The addition of ghee or oil gives roti canai its distinctive flaky texture and rich flavor.
Today, roti canai is a beloved breakfast and snack food across Malaysia, enjoyed for its versatility and ability to pair with a variety of accompaniments, from curries to sweet toppings.
Recipe
Roti Canai is a beloved flatbread originating from Malaysia, often served as a breakfast or snack. The light, flaky texture and rich, buttery flavor make it a delightful accompaniment to a variety of dishes or enjoyed on its own. In addition to being served with curry or dal, Roti Canai is also perfect for soaking up the flavorful sauces in dishes like Indonesian nasi campur. Its versatility makes it a staple in many Malaysian households and a popular street food option. Whether enjoyed plain or with a savory filling, Roti Canai is a must-try for anyone visiting Malaysia.
The process of making roti canai involves a delicate dance of stretching and folding the dough, creating the signature layers that make this bread so special. With a bit of practice, you can master the art of roti canai and bring the flavors of Malaysia into your own kitchen.
- 2 cups all-purpose flour
- 1/2 teaspoon salt
- 3/4 cup warm water
- 2 tablespoons ghee or melted butter, plus more for cooking
In a large bowl, combine the flour and salt. Gradually add the warm water, stirring until a shaggy dough forms. Turn the dough out onto a lightly floured surface and knead for 5-7 minutes, until smooth and elastic. Cover the dough and let it rest for 30 minutes.
Divide the dough into 8 equal pieces. Working with one piece at a time (keeping the others covered), use your hands to stretch and pull the dough, rotating it, until it forms a thin, round flatbread, about 8 inches in diameter.
Heat a large non-stick skillet over medium-high heat and add a small amount of ghee or butter. Cook the roti canai for 1-2 minutes per side, or until golden brown and blistered. Repeat with the remaining dough, adding more ghee or butter as needed.
Roti canai is best served warm, often with a side of curry, dhal, or your choice of dipping sauce. For an extra indulgent touch, you can brush the freshly cooked roti with additional ghee or butter before serving.
Cooking Steps
Knead the dough thoroughly to develop the gluten structure.
Stretch and fold the dough to create those signature layers.
Brush the dough with melted butter before cooking it over medium heat for the perfect roti canai.
Step 1. Knead the Dough Thoroughly

After thoroughly mixing the ingredients, it's time to really get your hands into the dough. Kneading is an essential step in making perfect roti canai, as it develops the gluten and creates the signature flaky texture.
Dive in with both hands, pressing, folding, and stretching the dough. Knead vigorously for about 10 minutes, or until the dough becomes smooth, elastic, and no longer sticks to the surface.
As you knead, you'll feel the dough transform from a shaggy mass into a supple, cohesive ball. Don't be afraid to really put some muscle into it – the more you knead, the better the roti will turn out.
Once the dough is ready, cover it and let it rest for at least 30 minutes. This resting period allows the gluten to relax, making the dough easier to stretch and shape later on.
With the dough kneaded to perfection, you're one step closer to flaky, buttery roti canai bliss.
Step 2. Stretch and Fold the Dough
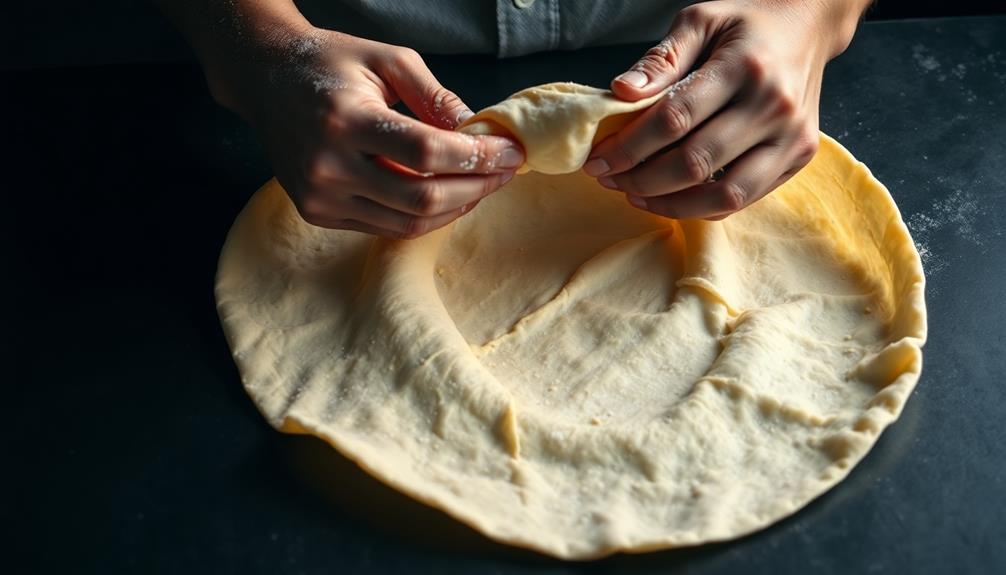
With the dough rested and ready, it's time to put your newly-developed kneading skills to the test. Grab the dough and start stretching it out, using your hands to gently pull and flatten the dough into a large, thin circle.
Don't be afraid to use a bit of flour if the dough starts sticking. Once it's stretched out, fold the dough in half, then in half again, creating a neat little package.
Gently pick up the folded dough and place it back on the work surface. Repeat this stretching and folding process a few more times, being careful not to overwork the dough. This technique helps develop the gluten strands, making the roti more pliable and easy to stretch even thinner later on.
After a few rounds of stretching and folding, you'll notice the dough becoming smoother and more supple. Congratulations, you're well on your way to perfectly flaky, pillowy roti canai!
Step 3. Brush Dough With Melted Butter

Having stretched and folded the dough, grab a clean pastry brush and dip it into a small bowl of melted butter. Gently brush the butter all over the surface of the dough, ensuring every inch is covered. This will help the dough become extra crispy and golden-brown once cooked.
Now, take the buttered dough and place it onto a clean, lightly floured surface. Use your hands to stretch and thin the dough even further, working from the center outwards. Aim to create a thin, even layer that's translucent in spots. Be careful not to tear the dough as you stretch it.
Once the dough is paper-thin, it's time to cook the roti canai. Fold the dough into quarters and transfer it to a hot, lightly oiled skillet or griddle. Cook for 1-2 minutes per side, flipping gently, until the roti is puffed up and golden-brown.
Serve the warm, flaky roti canai immediately, with your favorite dipping sauces on the side.
Step 4. Cook Over Medium Heat

Once the dough is delicately stretched, it's time to cook the roti canai.
Place a large skillet or griddle over medium heat. You'll want the surface nice and hot, but not scorching. When the pan is ready, gently lay the stretched dough round into the pan. Let it cook for about 2 minutes, or until the bottom is lightly golden.
Flip the roti canai over and cook the other side for another 2 minutes. You'll see lovely bubbles forming on the surface as it cooks. Keep a close eye to ensure it doesn't burn.
Once both sides are nicely browned, remove the roti from the heat. Brush the top lightly with melted butter or ghee. Fold the roti in half, then in half again to create a triangle shape.
Serve the roti canai hot, with your choice of dipping sauces on the side. Enjoy this flaky, buttery Malaysian delight!
Step 5. Serve Hot With Curries

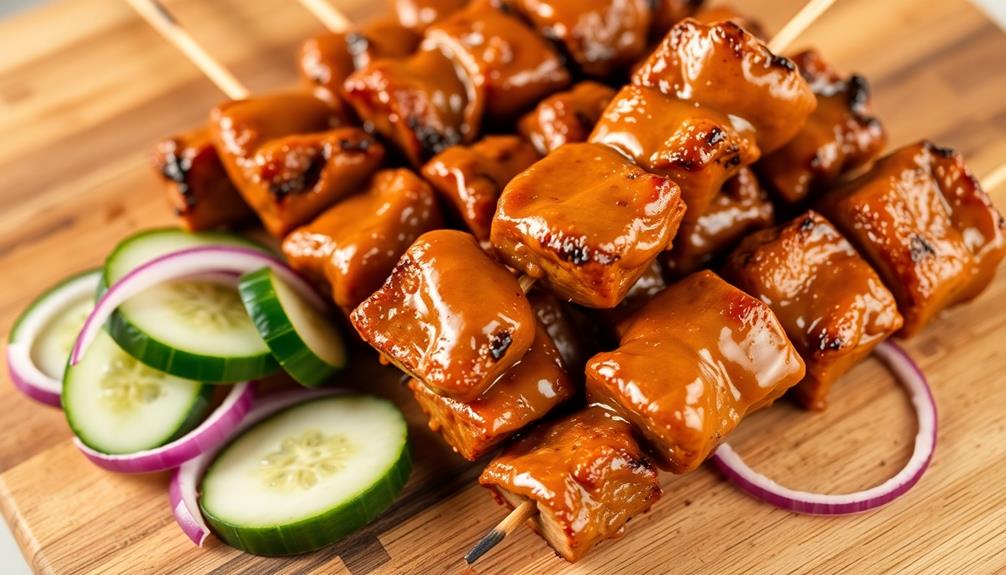
Roti canai is traditionally served hot, paired with spicy and fragrant Malaysian curries. The soft, pillowy flatbread acts as the perfect vehicle for sopping up every last drop of the bold, aromatic sauce.
Once you've cooked up your roti to golden perfection, it's time to present your masterpiece. Gently transfer the roti to a serving plate, being careful not to tear the delicate layers. Accompany the roti with small bowls of your chosen curries, such as chicken or vegetable.
The contrast of the warm, comforting bread and the complex, savory curries is simply divine. Invite your guests to tear off pieces of the roti and dunk them directly into the curry, allowing the flavors to mingle on their palates.
Roti canai is meant to be enjoyed communally, so encourage everyone to dig in and savor the experience. The combination of textures and tastes will have your tastebuds dancing with joy.
Serve the roti canai hot, and prepare for rave reviews from your satisfied diners.
Final Thoughts
Ultimately, roti canai is a beloved Malaysian staple that transcends mere sustenance.
This versatile flatbread is a testament to the rich culinary traditions of the region, blending Indian, Malay, and Chinese influences into a delightful and satisfying dish.
While the process of making roti canai from scratch may seem daunting, the rewards are well worth the effort.
The tender, flaky layers and the way the dough stretches and folds create a truly unique texture that's both comforting and indulgent.
Whether you enjoy it with a fragrant curry, a sweet filling, or simply on its own, roti canai is a true taste of Malaysia that will leave you craving more.
So why not try your hand at mastering this beloved delicacy?
With a little practice and the right techniques, you'll be whipping up perfect roti canai in no time, ready to share with family and friends.
Frequently Asked Questions
Is Roti Canai the Same as Malaysian Roti?
Yes, roti canai is the same as Malaysian roti. They're both flaky, flatbread dishes typically served with curry or dipping sauces. The names may be different, but the core dish is the same across cuisines.
Can I Use All-Purpose Flour Instead of Bread Flour?
You can use all-purpose flour instead of bread flour, but the texture won't be as chewy and light. The dough may be a bit tougher to work with, but it'll still make a tasty roti.
How Long Does the Dough Need to Rest Before Cooking?
You'll want to let the dough rest for at least 30 minutes before cooking. This allows the gluten to relax, making the dough easier to stretch and roll out. Don't skip this crucial resting step – it'll pay off in the final result.
Can I Freeze the Cooked Roti Canai for Later?
Absolutely! You can freeze the cooked roti canai for later use. Simply let it cool completely, then store it in an airtight container or freezer bag. When ready to enjoy, simply reheat it in the oven or on the stovetop.
What Are Some Common Dipping Sauces for Roti Canai?
Some common dipping sauces you can enjoy with roti canai are curry sauce, dhal (lentil) curry, and Sambal – a spicy chili condiment. These flavorful dips complement the soft, flaky texture of the roti perfectly.