Connect with us

Thai Street Food

Khanom Kai Nok Krata (Bird’s Nest-Shaped Dessert)

Perched atop a rich, custard-like base, Khanom Kai Nok Krata is a captivating Thai dessert that has enchanted palates for centuries, beckoning you to unravel its captivating story.

Published

on

bird s nest dessert recipe

Khanom Kai Nok Krata is a traditional Thai dessert with a distinctive bird's nest-shaped presentation that's delighted palates for centuries. This delicate treat combines eggs, coconut milk, fish sauce, sugar, and salt, resulting in a creamy, custard-like texture. The key is using high-quality, fresh ingredients and mastering the intricate folding techniques to achieve the addictive aroma and eye-catching appearance. Served during special occasions, this dessert symbolizes prosperity and good luck, making it a gem of Thai culinary heritage. To dive deeper into this unique dessert's history, recipe, and cultural significance, keep reading.

Key Takeaways

  • Khanom Kai Nok Krata is a traditional Thai dessert with a rich history, originating in the Ayutthaya period and representing cultural heritage and local ingredients.
  • The dessert features a unique presentation in the shape of a bird's nest, often served during special occasions as a symbol of prosperity and good luck.
  • The key ingredients include eggs, coconut milk, fish sauce, sugar, and salt, resulting in a creamy, custard-like texture achieved through meticulous steaming.
  • The preparation involves intricate folding techniques and attention to detail, emphasizing the artistry and craftsmanship of Thai culinary traditions.
  • Khanom Kai Nok Krata is gaining recognition among food enthusiasts worldwide, appealing to both locals and tourists as a must-try Thai dessert.

History

According to historical records, khanom kai nok krata, a traditional Thai dessert, has been enjoyed for centuries. This unique treat, shaped like a bird's nest, is believed to have originated in the central region of Thailand.

The recipe likely developed during the Ayutthaya period, when Thai cuisine flourished and incorporated influences from neighboring countries. Over time, the preparation of khanom kai nok krata has been passed down through generations, with families perfecting their own variations.

The key ingredients, which include eggs, sugar, and coconut milk, are carefully combined to create the delicate, sweet, and fragrant confection. Traditionally, the dessert was often served during special occasions, such as weddings or religious ceremonies, as a symbol of prosperity and good luck. The process of making this dessert is typically passed down through generations, with each family having their own unique recipe for swan egg dessert. The dessert is often seen as a labor of love, requiring patience and attention to detail to produce the perfect texture and flavor. In some cultures, it is also believed that consuming this sweet treat brings about blessings and good fortune.

Today, khanom kai nok krata continues to be a beloved part of Thai culinary heritage, enjoyed by both locals and visitors alike.

Recipe

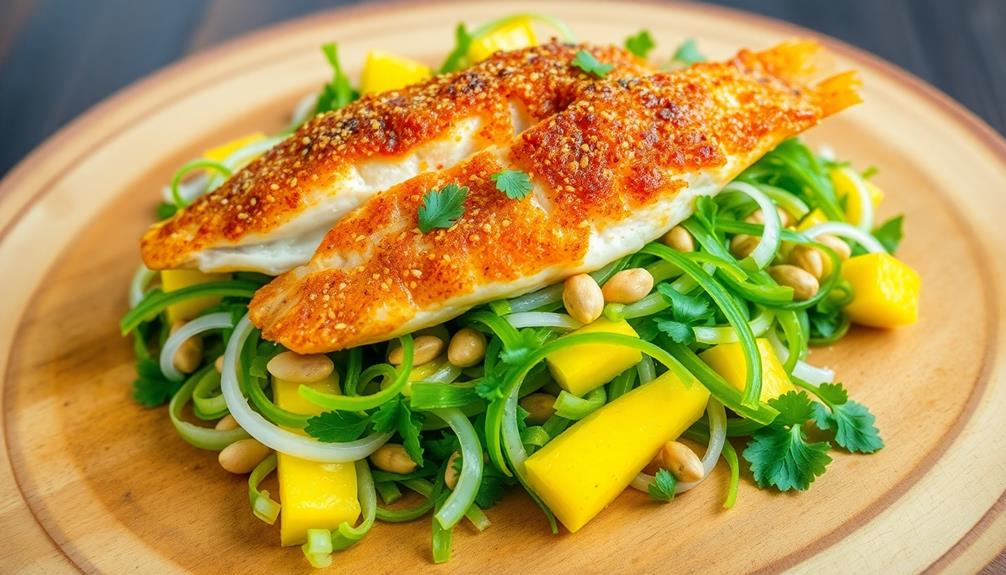
Khanom Kai Nok Krata, also known as Thai Steamed Eggs, is a delightful and simple dish that originated in Thailand. It offers a delicate balance of flavors and a smooth, custard-like texture that makes it a beloved breakfast or snack.

Advertisement

The creation of this dish is a harmonious dance between eggs, coconut milk, and a subtle blend of seasonings. The end result is a silky and comforting dish that can be enjoyed on its own or paired with various accompaniments to suit different tastes.

  • Eggs
  • Coconut milk
  • Fish sauce
  • Sugar
  • Salt

To prepare Khanom Kai Nok Krata, begin by lightly whisking the eggs in a bowl. Gradually add the coconut milk, fish sauce, sugar, and salt, and whisk until the mixture is well combined. Strain the mixture through a fine-mesh sieve to ensure a smooth and silky texture.

Pour the strained mixture into ramekins or a steaming dish. Place the ramekins or dish in a steamer and steam for 15-20 minutes, or until the custard has set and a knife inserted in the center comes out clean.

When cooking this dish, it's important to use fresh, high-quality ingredients and to pay attention to the steaming time to achieve the desired consistency. Oversteaming can result in a dry or rubbery texture, while understeaming may leave the custard too soft.

Serve Khanom Kai Nok Krata warm, and consider garnishing it with a drizzle of coconut milk or a sprinkle of toasted coconut flakes for an extra touch of flavor and texture.

Cooking Steps

First, toast the glutinous rice until golden, then knead the toasted flour to form a smooth dough.

Advertisement

Next, shape the dough into small, bite-sized balls and gently fry them until they're crispy.

Step 1. Prepare and Toast the Glutinous Rice

toast glutinous rice preparation

To prepare the glutinous rice, you'll need to rinse it thoroughly under running water until the water runs clear. This helps remove any excess starch.

Once rinsed, transfer the rice to a heavy-bottomed pan and toast it over medium heat, stirring constantly, for 5-7 minutes. You'll know the rice is ready when it's lightly golden and fragrant.

Now, you'll want to soak the toasted rice in water for 2-3 hours, or until it's soft and pliable.

Drain the rice well, squeezing out any excess moisture with your hands. This step is crucial, as the rice needs to be dry enough to mold into the desired bird's nest shape.

With the rice prepped, you're ready to move on to shaping the little nests.

Advertisement

Remember to work quickly, as the rice can dry out easily. Keep a bowl of water nearby to dip your hands in as needed to prevent sticking.

Enjoy the satisfying process of crafting these delightful treats!

Step 2. Knead the Toasted Rice Flour

knead toasted rice flour

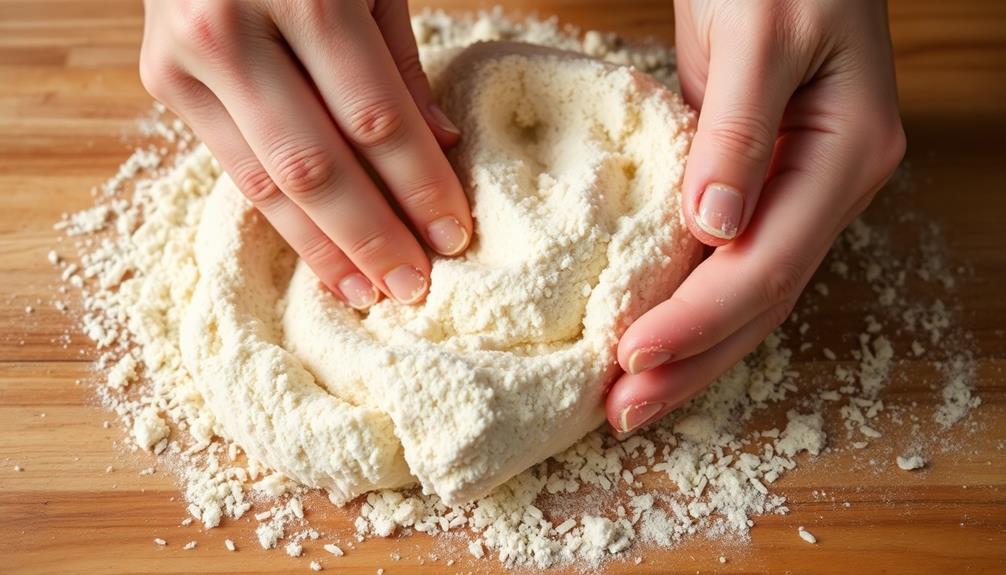
With the glutinous rice prepped, you can now start kneading the toasted rice flour. First, transfer the warm rice flour to a clean work surface.

Using your hands, begin gently kneading the flour, pressing and folding it over itself. As you knead, the flour will start to clump together and form a soft, pliable dough. Keep kneading for about 5 minutes, or until the dough is smooth and malleable.

If the dough feels too dry, you can sprinkle in a small amount of water, a teaspoon at a time, and continue kneading until you achieve the right consistency. The key is to work the dough until it's easy to handle and shape.

Once it's properly kneaded, the rice flour dough is ready to be formed into the signature bird's nest shape. Take your time and enjoy the process – the more you knead, the better the final texture will be.

Advertisement

Step 3. Form Small Balls

form small balls now

Forming the small balls is the next step. Take a small amount of the toasted rice flour mixture and roll it gently between your palms to create a smooth, round ball. The size should be about that of a large marble or small grape. Work quickly, as the mixture can dry out and become difficult to shape.

Once you've formed a ball, place it on a clean surface. Repeat this process, rolling and shaping the remaining dough into uniform balls. Try to work efficiently, maintaining a consistent size for all the balls. This will ensure an even, attractive appearance for your dessert.

As you form the balls, be gentle but firm. Apply just enough pressure to bind the ingredients without compacting the mixture too tightly. The goal is a delicate, airy texture.

When you've finished shaping all the balls, you're ready for the next step – steaming the khanom kai nok krata.

Step 4. Fry the Rice Balls Gently

gently fry rice balls

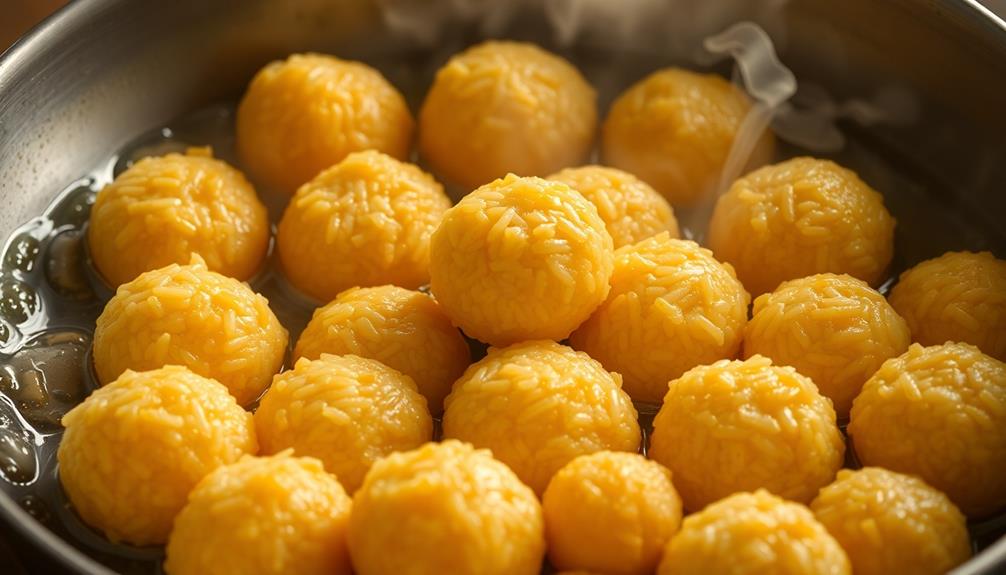
Next, you'll fry the rice balls gently to achieve the perfect texture and golden color.

Heat a few inches of oil in a pan over medium heat. Once the oil is hot, carefully add the rice balls, working in batches to avoid overcrowding.

Gently roll and rotate the balls as they cook, ensuring even browning on all sides. The key is to fry them at a gentle pace, taking your time to allow the interiors to cook through without burning the outsides.

Advertisement

You'll know they're ready when they're a lovely golden-brown hue. Drain the fried rice balls on a paper towel-lined plate to absorb any excess oil.

Be cautious, as the oil will be hot. With the right frying technique, you'll end up with crispy exteriors and soft, fluffy interiors – the hallmarks of well-executed khanom kai nok krata.

Proceed to the next step once all the rice balls have been fried.

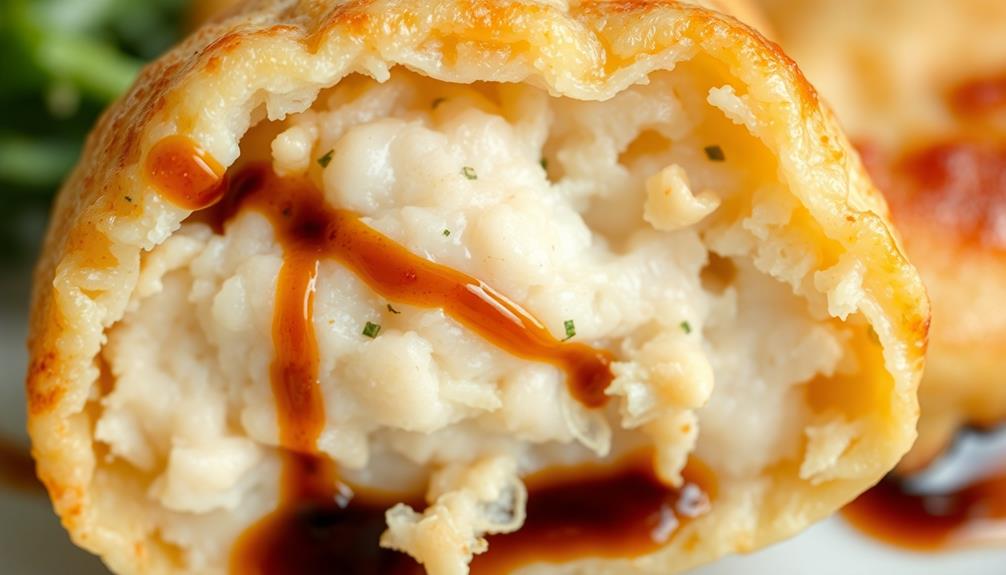
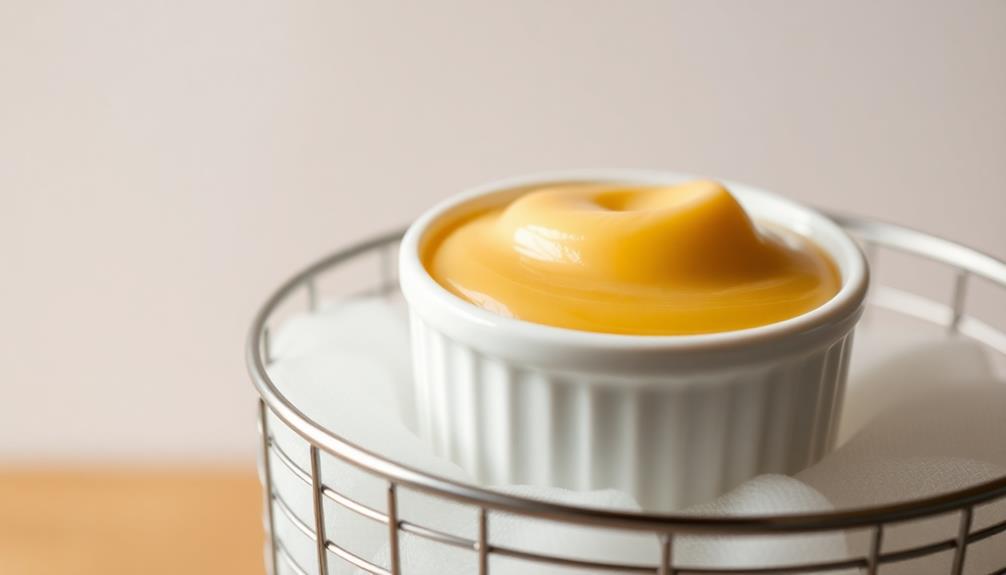
Step 5. Drizzle With Sweet Coconut Sauce

drizzle sweet coconut sauce

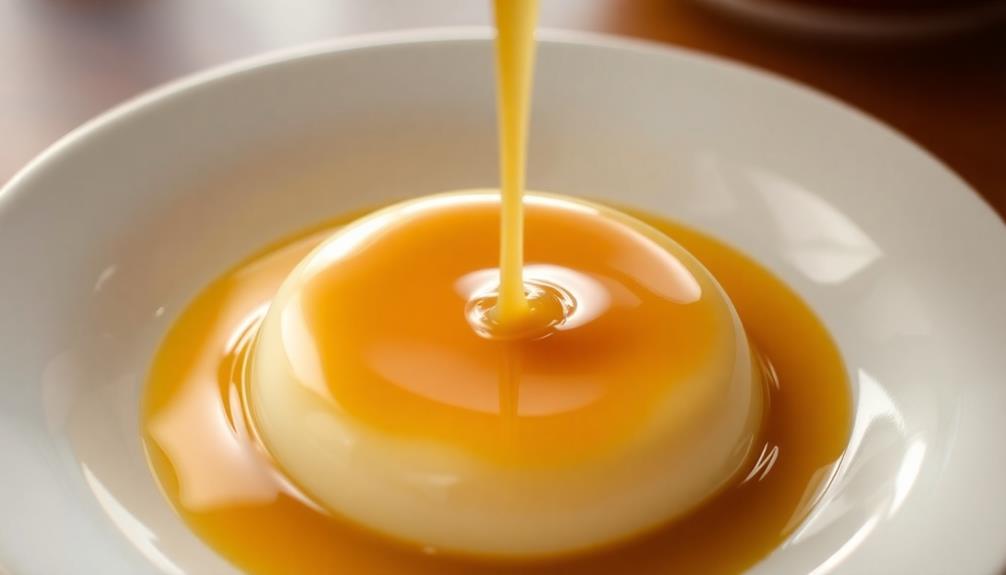
Now that the rice balls are perfectly fried, it's time to drizzle them with a sweet coconut sauce.

First, in a small saucepan, combine the coconut milk, sugar, and a pinch of salt. Whisk the ingredients together and place the pan over medium heat. Simmer the sauce, stirring occasionally, until it thickens slightly and the sugar has fully dissolved, about 5 minutes.

Be careful not to let it boil, as that could make the sauce split.

Advertisement

Once the sauce is ready, remove the pan from the heat and let it cool for a minute or two.

Then, using a spoon, drizzle the warm coconut sauce over the fried rice balls in a sweeping, zigzag motion. The sweet, creamy sauce will beautifully complement the crispy exterior of the rice balls.

Make sure to drizzle the sauce all over the top and sides of the dessert for maximum flavor and presentation.

Serve the Khanom Kai Nok Krata immediately, while the sauce is still warm and glistening.

Final Thoughts

As you've explored the fascinating world of Khanom Kai Nok Krata, you may have developed a deeper appreciation for this unique Thai delicacy. This intricate dessert, with its delicate bird's nest-shaped exterior and creamy, lightly sweet interior, is truly a work of edible art.

Advertisement

While the preparation may seem daunting at first, the rewards of mastering this traditional recipe are well worth the effort. From the intricate folding techniques to the perfect balance of flavors, each step in the process contributes to the overall elegance and flavor profile of Khanom Kai Nok Krata.

Whether you choose to serve it as a special occasion treat or incorporate it into your regular dessert rotation, this dessert is sure to delight and impress all who try it.

With its rich history and delectable taste, Khanom Kai Nok Krata is a true gem of Thai cuisine that deserves a place in every food lover's repertoire.

Frequently Asked Questions

Where Can I Purchase High-Quality Bird's Nest?

You can purchase high-quality bird's nest at specialized Asian grocery stores or online retailers that specialize in traditional Chinese medicine and ingredients. Do your research to find reputable suppliers offering authentic, ethically-sourced bird's nest.

Is Khanom Kai Nok Krata Gluten-Free?

Yes, you can enjoy a gluten-free version of khanom kai nok krata. The traditional recipe doesn't contain any wheat-based ingredients, so it's naturally gluten-free. Just be sure to check the specific ingredients used in any pre-made versions.

Advertisement

How Long Can Khanom Kai Nok Krata Be Stored?

You can typically store the dessert for up to 3 days at room temperature. To extend its shelf life, refrigerate it and it'll last for up to a week. Just be sure to bring it back to room temperature before serving.

Can I Substitute the Bird's Nest With Other Ingredients?

Yes, you can substitute the main ingredient with other items. Feel free to get creative and experiment – just be sure the replacement complements the overall dish and maintains the desired texture and flavor profile.

Is Khanom Kai Nok Krata Suitable for Vegetarians or Vegans?

You can absolutely make a vegetarian or vegan version of this dessert. Instead of bird's nest, you can use ingredients like shredded coconut, rice paper, or even tofu to create a similar shape and texture.

Advertisement

Thai Street Food

Thai Pad Thai: Street Food Royalty

Discover the captivating history and unparalleled flavors that have made Pad Thai Thailand’s iconic street food, a culinary experience like no other.

Published

on

pad thai street food

Pad Thai, Thailand's legendary street food, has captured hearts and taste buds worldwide! This iconic noodle dish traces its roots back to the early 20th century, when it was known as "kway teow pad." Later, the Thai government promoted it as a national dish, cementing its status. Pad Thai's signature blend of sweet, sour, and savory flavors comes from key ingredients like tangy tamarind, nutty peanuts, and fresh herbs. The quick stir-fry technique ensures the noodles are perfectly coated. Whether enjoyed on bustling Bangkok streets or in your own kitchen, Pad Thai offers a sensational culinary experience – and there's more to discover about this beloved street food royalty.

Key Takeaways

  • Pad Thai originated in Thailand during the early 20th century, gaining popularity as a common street food enjoyed by all.
  • The dish is a fusion of Chinese stir-fried noodles and Thai flavors, with key ingredients like rice noodles, shrimp, eggs, and tamarind.
  • Street food vendors played a crucial role in popularizing Pad Thai across urban Thailand, leading to its recognition as a symbol of Thai cuisine globally.
  • Pad Thai is known for its balanced flavors, combining sweet, sour, and savory notes, and is often garnished with crushed peanuts, herbs, and lime.
  • Pad Thai is recognized by UNESCO as an Intangible Cultural Heritage and is a beloved dish that represents the vibrant Thai street food culture.

History

Originating in Thailand, the dish now known as Pad Thai gained popularity during the early 20th century. Back then, it was called "kway teow pad" and was a common street food enjoyed by people from all walks of life.

The dish got its current name when the Thai government launched a campaign to promote it as a national dish in the 1930s. They wanted to encourage patriotism and pride in Thai cuisine.

Today, Pad Thai is one of the most beloved and recognized Thai dishes around the world. The mix of rice noodles, shrimp, eggs, bean sprouts, and a savory-sweet sauce makes it a truly mouthwatering experience.

Whether you're enjoying it from a bustling street vendor or a cozy restaurant, each bite transports you to the vibrant streets of Thailand. So dig in and let the flavors of Pad Thai delight your taste buds! And if you want to recreate the magic at home, try your hand at a homemade Pad Thai with a traditional thai meatballs recipe. The combination of fragrant herbs and spices in the meatballs perfectly complement the tangy and savory flavors of the Pad Thai noodles. With each bite, you’ll feel like you’re right back in the heart of Thailand, enjoying the authentic and mouthwatering cuisine.

Recipe

Pad Thai is a classic Thai noodle dish that's both flavorful and satisfying. The combination of sweet, sour, and savory flavors makes it a beloved dish among locals and tourists alike. This recipe will guide you through the steps to create an authentic Pad Thai right in your own kitchen.

Advertisement

The key to a delicious Pad Thai lies in the balance of the ingredients. Each component plays a vital role in creating the signature taste that has made this dish so iconic. From the tangy tamarind to the nutty peanuts, every element comes together to create a harmonious symphony of flavors.

Ingredients:

  • 8 oz rice noodles
  • 2 tbsp vegetable oil
  • 2 cloves garlic, minced
  • 1 lb shrimp, peeled and deveined
  • 2 eggs, lightly beaten
  • 2 tbsp fish sauce
  • 2 tbsp brown sugar
  • 2 tbsp tamarind paste
  • 2 cups bean sprouts
  • 1/2 cup chopped roasted peanuts
  • 2 green onions, sliced
  • 1 lime, cut into wedges

In a large wok or skillet, heat the vegetable oil over medium-high heat. Add the garlic and sauté for 30 seconds, or until fragrant. Add the shrimp and cook for 2-3 minutes, or until they're pink and opaque.

Push the shrimp to the side of the wok and pour the beaten eggs into the empty space. Scramble the eggs until they're cooked through, then mix them with the shrimp.

Add the noodles, fish sauce, brown sugar, and tamarind paste to the wok. Toss everything together, using tongs or chopsticks to ensure the noodles are evenly coated and heated through, about 2-3 minutes.

Finally, stir in the bean sprouts, peanuts, and green onions. Serve immediately with the lime wedges on the side.

Advertisement

When cooking Pad Thai, it's important to have all the ingredients prepped and ready to go before you start cooking. The dish comes together quickly, so you'll want to work efficiently.

Additionally, be mindful of the balance of flavors – you may need to adjust the amounts of fish sauce, sugar, or tamarind to suit your personal taste preferences.

Cooking Steps

Soak those noodles in warm water to get them nice and soft.

Then, stir-fry the noodles and all the tasty ingredients until everything is perfectly combined.

Don't forget to add the soy sauce and fish sauce to give it that authentic Thai flavor.

Advertisement

Top it off with your favorite garnishes, serve it up hot, and enjoy this delicious Pad Thai right away!

Step 1. Soak Noodles in Warm Water

soak noodles in water

First, you'll want to soak the dried rice noodles in warm water for about 30 minutes. This will help soften them up so they're nice and pliable, perfect for tossing in the wok later.

You can use a large bowl or even the pot you'll be cooking the Pad Thai in. Just make sure the water is warm, not too hot, and that the noodles are fully submerged.

Give them a gentle stir every now and then to ensure even soaking. After half an hour, the noodles should be nice and supple, ready to take on all the delicious flavors of the Pad Thai.

Now you can drain them and start prepping the rest of your ingredients. The noodles are the foundation, so getting this step right is key to making an authentic, mouthwatering Pad Thai at home.

Step 2. Stir-Fry Noodles and Ingredients

stir fry noodles with ingredients

With the noodles ready, it's time to fire up the wok and stir-fry your ingredients!

Heat a generous amount of oil over high heat until it's shimmering. Toss in the chopped garlic and stir it around until it becomes fragrant and golden.

Advertisement

Now, add your protein – whether it's chicken, shrimp, or tofu – and let it sizzle and brown.

Next, throw in the soaked noodles and give everything a good stir. The noodles will start to soften and absorb all the delicious flavors. Keep stirring and tossing so the noodles don't stick together.

Then, pour in the fish sauce, tamarind sauce, and a sprinkle of sugar. Toss it all together, letting the sauces coat the noodles evenly.

Step 3. Add Soy Sauce and Fish Sauce

add soy and fish sauces

Next, generously drizzle in the fish sauce and soy sauce. These two essential ingredients will bring a burst of umami flavor to your Pad Thai.

The salty, savory notes of the soy sauce perfectly complement the tangy, slightly sweet fish sauce. Go ahead and add a good amount – you want that signature Thai taste to shine through!

Stir everything together, making sure the noodles are fully coated in the flavorful sauce. The more you mix, the better the flavors will meld.

Advertisement

You'll start to notice the noodles softening and the colors becoming more vibrant as the sauces work their magic. Keep stirring until the Pad Thai looks glossy and tempting.

Now it's time to add the final touches that will make your dish truly authentic.

Step 4. Add Garnishes

garnish your dish creatively

What makes a truly authentic Pad Thai? The secret lies in the garnishes! Once you've added the soy sauce and fish sauce, it's time to get creative with the toppings.

Adding a sprinkle of health benefits of honey can also elevate your dish, as honey can enhance the flavors and provide a touch of natural sweetness.

First, sprinkle on some freshly chopped cilantro. Its bright, herbal flavor will really make the dish pop.

Next, add a handful of crushed peanuts. Their crunchy texture and nutty taste provide the perfect contrast to the soft noodles.

Advertisement

Don't forget the lime wedges! Squeezing a bit of tangy lime juice over the top brightens up the whole plate.

For a bit of color and crunch, toss on some bean sprouts. Their refreshing snap will keep your taste buds guessing.

Step 5. Serve Hot, Enjoy Immediately

serve hot enjoy now

Once you've garnished your Pad Thai with the fresh herbs, crunchy nuts, and tangy citrus, it's time to serve it hot and enjoy it immediately.

The dish is best when it's piping hot, so don't let it sit around. Grab your chopsticks and dive in!

The combination of the warm, soft noodles, the savory sauce, and the burst of flavors from the toppings is simply irresistible. As you take that first bite, you'll be transported to the bustling streets of Bangkok, where Pad Thai is a beloved street food.

The aroma will fill your senses, and the textures will dance on your tongue. Remember to savor every bite, as Pad Thai is meant to be relished slowly.

Advertisement

Don't be afraid to get a little messy – that's all part of the fun! So, go ahead and indulge in this Thai delicacy while it's at its absolute best.

Final Thoughts

Ultimately, Pad Thai is a cherished dish that epitomizes the vibrant flavors and culinary traditions of Thailand.

Whether you're savoring it on the bustling streets of Bangkok or recreating it in your own kitchen, this iconic noodle dish is sure to delight your taste buds and transport you to the heart of Thai culture.

The perfect balance of sweet, sour, and savory notes, combined with the satisfying crunch of bean sprouts and the delightful chewiness of the noodles, make Pad Thai a true sensory experience.

As you take that first bite, you'll be captivated by the complex interplay of textures and flavors that have made this dish a beloved classic around the world.

Advertisement

Frequently Asked Questions

What Makes Pad Thai Distinct From Other Thai Noodle Dishes?

What sets pad thai apart from other Thai noodle dishes is its unique blend of flavors – the sweet, sour, and savory notes that come from the tamarind, fish sauce, and palm sugar. It's a harmonious dance of textures and tastes.

How Long Does It Take to Prepare Authentic Pad Thai?

Preparing authentic Pad Thai can take around 15-20 minutes, as you must carefully balance the flavors, textures, and cooking times of the noodles, proteins, vegetables, and sauce. It's a delicate dance that requires practice to perfect.

What Special Ingredients Are Typically Used in Traditional Pad Thai?

Traditional pad thai typically includes ingredients like rice noodles, shrimp, bean sprouts, crushed peanuts, a sweet and sour sauce, and sometimes scrambled egg. These distinct flavors and textures come together to create the signature taste of this iconic Thai dish.

Can Pad Thai Be Made Vegetarian or Vegan?

Yes, you can absolutely make pad thai vegetarian or vegan. Simply swap out the typical shrimp or chicken for tofu, and use vegetable broth instead of fish sauce. The classic flavors can easily be replicated with plant-based ingredients.

How Does the Flavor of Pad Thai Vary Across Different Regions of Thailand?

The flavor of pad thai varies across different regions of Thailand. In the north, it's sweeter, while in the south, it's spicier. You'll find unique regional twists that reflect local ingredients and cooking styles.

Advertisement

Continue Reading

Thai Street Food

Yam Pla Duk Fu (Crispy Catfish With Green Mango Salad)

Indulge in the mouthwatering harmony of crispy golden-brown catfish and a refreshing green mango salad in the captivating Thai dish Yam Pla Duk Fu.

Published

on

crispy catfish mango salad

Yam Pla Duk Fu is a mouthwatering Thai dish featuring crispy, golden-brown catfish alongside a refreshing green mango salad. First, you'll fry the catfish until it's perfectly crispy, then toss the shredded green mangoes with a tangy, sweet dressing. The firm, flaky texture of the catfish complements the crunchy salad for a harmonious balance. Be sure to use a light batter and monitor the oil temperature for the best results. With its vibrant colors and contrasting flavors, Yam Pla Duk Fu is a true culinary gem – and there's more to discover about this delightful dish.

Key Takeaways

  • Yam Pla Duk Fu is a traditional Thai dish featuring crispy, golden-brown catfish paired with a refreshing green mango salad.
  • The firm, flaky texture of the catfish complements the crisping technique, while the green mango salad adds tart and crunchy elements.
  • Proper frying technique, such as monitoring oil temperature and avoiding overcrowding, is essential for achieving the desired crispy texture.
  • The green mango salad provides vitamins A and C, while the crispy catfish offers protein essential for muscle repair and growth.
  • Fresh herbs, such as cilantro and Thai basil, are used as garnishes to enhance the dish's flavor and visual appeal.

History

Catfish has been a staple in many cultures across the world for centuries. This hardy, versatile fish has been a valuable food source, prized for its delicious flavor and nutritional benefits. From the ancient Egyptians to the modern-day Mississippi Delta, catfish has been a cherished ingredient in countless traditional dishes.

In Asian cuisine, the vibrant personalities of dishes, much like orange cat cartoon names, add a playful touch to meals, making them memorable and enjoyable.

In Asia, the crispy, pan-fried preparation of catfish, known as Yam Pla Duk Fu, has been a beloved street food for generations. This technique of crisping the fish's exterior while keeping the interior moist and flaky allows the natural sweetness of the catfish to shine. Paired with a tangy, refreshing green mango salad, it's a harmonious balance of textures and flavors that has stood the test of time.

The history of this dish reflects the ingenuity and resourcefulness of the cultures that have embraced it. From humble beginnings as a simple, nourishing meal, Yam Pla Duk Fu has evolved into a cherished culinary tradition, showcasing the versatility and enduring appeal of this remarkable fish. This dish has stood the test of time and remains a staple in Thai cuisine. The Thai fish cake recipe is a testament to the culinary expertise of the Thai people, who have refined and perfected the dish over generations. This beloved dish continues to bring people together, celebrating the rich flavors and vibrant ingredients that define Thai cuisine.

Recipe

Crispy, golden-brown catfish is the star of this vibrant dish, complemented by the tangy and refreshing flavors of a green mango salad. The combination of textures and tastes creates a harmonious balance that will delight your senses.

Advertisement

Geothermal heat pumps, much like this dish, offer a unique blend of efficiency and sustainability, utilizing the Earth's stable temperature for optimal performance and energy savings significantly outperforming traditional HVAC systems.

Catfish is an excellent choice for this recipe, as its firm, flaky texture holds up well to the crisping technique. The green mango salad provides a lively contrast, with its tart and crunchy elements adding a delightful freshness to the overall dish.

  • 4 (6-ounce) catfish fillets
  • 1/2 cup all-purpose flour
  • 1 teaspoon salt
  • 1/2 teaspoon black pepper
  • 2 tablespoons vegetable oil
  • 2 green mangoes, peeled, pitted, and julienned
  • 1/2 cup thinly sliced red onion
  • 1/4 cup chopped fresh cilantro
  • 2 tablespoons fresh lime juice
  • 1 tablespoon fish sauce
  • 1 teaspoon sugar

Preheat your oven to 400°F (200°C). In a shallow dish, combine the flour, salt, and black pepper. Dredge the catfish fillets in the seasoned flour, coating them evenly on both sides.

Heat the vegetable oil in a large skillet over medium-high heat. Carefully add the coated catfish fillets and cook for 3-4 minutes per side, or until they're crispy and golden brown. Transfer the fried catfish to a baking sheet and place it in the preheated oven to keep warm while you prepare the salad.

In a medium bowl, toss together the julienned green mangoes, sliced red onion, chopped cilantro, lime juice, fish sauce, and sugar. Gently mix until the flavors are well combined.

Serve the crispy catfish fillets immediately, topping them with the refreshing green mango salad. Enjoy this delightful combination of textures and flavors.

Advertisement

Cooking Steps

Slice the catfish into bite-sized pieces for optimal crispiness.

Fry the catfish in batches until it's golden and crispy, ensuring that you achieve that perfect crunch.

While preparing the salad, consider pairing it with a refreshing herbal tea, as some varieties, like chamomile, can complement the dish beautifully.

Whip up a zesty dressing for the green mango salad, then toss the salad with the dressing and garnish with fresh herbs.

Step 1. Slice Catfish Into Bite-Sized Pieces

slice catfish into pieces

Start by cutting the catfish into bite-sized pieces. Use a sharp knife to slice the fillet into chunks around one inch in size. Be careful to keep your fingers clear as you work.

It's important to cut the fish into uniform pieces so they cook evenly, much like how top projectors for gaming enthusiasts require precise settings for optimal performance.

Advertisement

Next, pat the catfish pieces dry with paper towels. This helps the exterior get extra crispy when fried. Arrange the catfish pieces in a single layer on a clean plate or baking sheet. You'll want them to be spaced apart so they don't stick together.

Once the catfish is prepped, you're ready for the next step – frying the fish to golden brown perfection. Heat up your oil in a skillet or wok, then carefully add the catfish pieces. Fry for 2-3 minutes per side until crispy.

Transfer the fried catfish to a paper towel-lined plate to drain off any excess oil. Now you've got deliciously crunchy catfish, ready to top your green mango salad!

Step 2. Fry Catfish Pieces Until Crispy

crispy fried catfish pieces

Heat the oil in a large skillet or wok over medium-high heat. Once the oil is hot, carefully add the sliced catfish pieces. Fry the catfish, flipping occasionally, until golden brown and crispy, about 3-4 minutes per side.

Be careful not to overcrowd the pan – work in batches if needed to maintain the oil temperature.

To ensure you're managing your cooking expenses effectively, consider creating a detailed budget that includes ingredient costs and potential savings from cooking at home a plan for managing income.

Advertisement

The key to achieving that satisfying crunch is to fry the catfish at the right temperature. If the oil isn't hot enough, the fish will absorb too much oil and end up greasy. But if the oil is too hot, the outside will brown too quickly before the inside is fully cooked. Keep an eye on the color and adjust the heat as necessary.

Once the catfish is perfectly crispy, transfer the pieces to a paper towel-lined plate to drain off any excess oil. Serve the crispy catfish immediately, while it's hot and crunchy, alongside the refreshing green mango salad for a delightful contrast of flavors and textures.

Step 3. Make Dressing for Salad

prepare salad dressing ingredients

While the catfish crisps up, prepare the dressing for the green mango salad. In a small bowl, whisk together 2 tablespoons of lime juice, 1 tablespoon of fish sauce, 1 teaspoon of sugar, and a pinch of salt.

Understanding the importance of diversification in investing can also enhance your financial stability, much like how a well-balanced dressing brings harmony to the salad. Taste and adjust the seasoning as needed – you want a balance of sour, salty, and sweet flavors.

Next, thinly slice 1 small shallot and add it to the dressing. The shallot will lend a nice pungent note that complements the bright, tangy flavors.

For extra crunch and texture, sprinkle in a handful of crushed roasted peanuts. The peanuts will also add a subtle nutty essence to the dressing.

Advertisement

Lastly, finely chop a few sprigs of fresh cilantro and stir them into the dressing. The cilantro will brighten up the whole salad with its aromatic, herbaceous notes.

Give the dressing a final whisk to fully incorporate all the ingredients. Your vibrant, flavor-packed salad dressing is now ready to toss with the crisp mango and catfish.

Step 4. Toss Salad With Dressing

toss salad with dressing

With the aromatic dressing ready, it's time to bring the salad together. Start by adding the shredded green mango to a large mixing bowl. Pour the prepared dressing over the mango and give it a good toss, ensuring every piece is coated.

The addition of fermented vegetables can elevate the flavor profile while enhancing the salad's nutritional value. Next, add the thinly sliced shallots, chili peppers, and chopped cilantro. Gently mix everything together until the salad is evenly dressed.

Be sure not to overmix, as you don't want to bruise the delicate mango. Taste the salad and adjust the seasoning if needed, adding a pinch more salt or a squeeze of lime juice to balance the flavors. The goal is a vibrant, crunchy salad that perfectly complements the crispy catfish.

Once you're satisfied with the seasoning, transfer the dressed salad to a serving platter or bowl. Arrange the crispy catfish fillets on top, or serve them alongside. This fresh and zesty green mango salad is the perfect accompaniment to the indulgent fried fish.

Advertisement

Step 5. Garnish With Fresh Herbs

garnish with fresh herbs

A generous garnish of fresh herbs can elevate the crispy catfish and green mango salad, adding both flavor and visual appeal. Choose a variety of aromatic herbs like cilantro, mint, and Thai basil to sprinkle over the top of the dish.

These herbs not only enhance the taste but also provide health benefits, as many herbal teas, like chamomile and ginger, are known for their soothing properties. The crisp, vibrant greens will complement the golden-brown catfish and the tart, crunchy salad beautifully.

For best results, pluck the herb leaves from their stems and tear them into bite-sized pieces using your fingers. This will help release their essential oils and maximize the aroma.

Distribute the herb garnish evenly over the plated dish, covering as much of the surface as possible. The contrast of the green herbs against the catfish and salad will make the dish pop on the plate.

Final Thoughts

Ultimately, this crispy catfish dish with a refreshing green mango salad is a delightful fusion of flavors that's sure to impress.

The crunchy texture of the fried catfish pairs beautifully with the bright, tangy notes of the mango salad, creating a harmonious and satisfying meal. Additionally, if you're mindful of your diet, you might consider how certain foods can affect your overall health, much like understanding the importance of gout-friendly diets.

Advertisement

Don't be intimidated by the seemingly complex preparation – the steps are straightforward, and the results are well worth the effort.

The key is to pay close attention to the frying technique to ensure the fish develops that perfect golden-brown crust.

And the salad comes together quickly, with the fresh herbs and zesty dressing providing a wonderful contrast.

This dish is a fantastic way to showcase your culinary skills and impress your family and friends.

Frequently Asked Questions

Is Catfish a Common Ingredient in Thai Cuisine?

Yes, catfish is a common ingredient in Thai cuisine. You'll often find it used in various dishes, from fried or grilled preparations to salads and curries. It's a popular choice for its versatility and distinctive flavor.

Advertisement

How Long Can the Green Mango Salad Be Stored?

The green mango salad can typically be stored for 2-3 days in the refrigerator. However, it's best to consume it as soon as possible to enjoy its freshness and vibrant flavors.

Can I Substitute the Catfish With Another Type of Fish?

You can absolutely substitute the catfish with another type of fish. Many white fish like tilapia, cod, or halibut would work well in this dish, providing a similar texture and flavor profile.

What Is the Ideal Texture of the Crispy Catfish?

The ideal texture of the crispy catfish should be light, crunchy, and golden-brown. You'll want a delicate, crisp exterior that gives way to tender, moist flesh when you take a bite.

Is This Dish Suitable for Vegetarians or Vegans?

As this dish contains catfish, it's not suitable for vegetarians or vegans. You'd need to find a plant-based alternative to the catfish to enjoy this dish without any animal products.

Advertisement

Continue Reading

Thai Street Food

Khanom Tan (Palm Sugar Dessert)

You’ll be enchanted by the harmonious blend of rich caramelized notes and creamy coconut milk in Thailand’s iconic palm sugar dessert, Khanom Tan. Learn more about this centuries-old confection.

Published

on

sweet palm sugar delight

Khanom Tan, Thailand's iconic palm sugar dessert, enchants with its harmonious blend of rich caramelized notes and creamy coconut milk. Originating from central Thailand's abundant palm trees, this centuries-old confection reflects the country's vibrant culinary heritage. To make it, you'll gently steam sticky rice, then coat it in a luscious palm sugar syrup. You can even garnish the chewy bites with a salted egg yolk or toasted coconut flakes for contrasting flavors. Cherished during festivals and special occasions, this beloved Thai treat promises to delight your senses. And if you'd like to learn more about its rich history and preparation, keep reading.

Key Takeaways

  • Khanom Tan is a traditional Thai dessert made from palm sugar, rice flour, and coconut milk, reflecting the country's culinary heritage.
  • The dessert's name "Khanom Tan" translates to "palm sugar dessert," indicating its main ingredient and cultural significance.
  • Khanom Tan features a rich caramelized flavor from palm sugar and a balance of chewy and creamy textures.
  • The recipe for Khanom Tan has remained largely unchanged for centuries, highlighting its enduring cultural value in Thailand.
  • Khanom Tan is often served at festivals and special occasions, showcasing the diversity of Southeast Asian desserts.

History

Across Thai culinary history, the origins of Khanom Tan can be traced back centuries. This beloved palm sugar dessert has long been a cherished part of Thai culture, with its sweet, caramel-like flavors and delicate texture.

What's fascinating is that the basic recipe has remained largely unchanged over the generations, a testament to its timeless appeal.

Historians believe Khanom Tan emerged from the central regions of Thailand, where palm trees were plentiful and the local communities had perfected the art of extracting and cooking down the sap to make palm sugar.

Over time, creative home cooks began experimenting, adding rice flour, coconut milk, and other ingredients to create the delectable Khanom Tan we know and love today. They discovered that adding rice flour and coconut milk to the traditional recipe resulted in a softer and more flavorful treat. Today, the coconut pancake recipe has become a popular dish at Thai markets and street food stalls, delighting locals and tourists alike with its sweet and slightly salty taste. Its versatility also makes it a favorite dish for special occasions and family gatherings.

The name "Khanom Tan" itself is derived from the Thai words for "dessert" (khanom) and "palm sugar" (tan), reflecting the dish's core ingredients and its status as a traditional Thai sweet treat.

Advertisement

Whether enjoyed as a snack or a dessert, Khanom Tan continues to delight palates across the Kingdom and beyond.

Recipe

Khanom Tan, or Palm Sugar Dessert, is a beloved Thai sweet treat that showcases the rich, caramelized flavor of palm sugar. This dessert is a delightful balance of chewy and creamy textures, with a pronounced sweetness that's characteristic of Thai cuisine. The use of coconut milk adds a creamy richness, while the palm sugar provides a unique depth of flavor that sets this dessert apart.

Additionally, incorporating ingredients with high antioxidant properties, like celery juice, can enhance the overall health benefits of your meal.

The key to a successful Khanom Tan lies in the careful preparation of the palm sugar custard and the dexterity required to shape the dough into intricate, bite-sized morsels. The result is a dessert that's both visually appealing and deliciously satisfying.

Ingredients:

Advertisement
  • 1 cup (200g) palm sugar, grated or chopped
  • 1 cup (240ml) coconut milk
  • 1/4 teaspoon salt
  • 1 cup (120g) all-purpose flour
  • 2 tablespoons (30g) tapioca flour
  • 1/4 cup (60ml) water

Instructions:

In a saucepan, combine the grated palm sugar, coconut milk, and salt. Cook over medium heat, stirring constantly, until the sugar has completely dissolved and the mixture has thickened to a custard-like consistency, about 10-15 minutes. Remove from heat and let cool slightly.

In a separate bowl, mix together the all-purpose flour and tapioca flour. Gradually add the water and knead the mixture until a smooth, pliable dough forms. Divide the dough into small, equal-sized pieces and shape them into your desired Khanom Tan forms, such as balls or crescents.

Tips:

When working with the dough, keep your hands lightly oiled to prevent sticking. Additionally, be mindful of the consistency of the palm sugar custard – it should be thick enough to hold its shape when piped or formed, but not too thick or it will be difficult to work with.

Serve the Khanom Tan chilled or at room temperature for the best texture and flavor experience.

Advertisement

Cooking Steps

First, you'll need to soak the sticky rice overnight and drain and rinse it well.

Next, steam the rice until it's tender and fluffy.

Then, make a delicious palm sugar syrup to combine with the cooked rice.

With these simple steps, you'll have a traditional and tasty Khanom Tan dessert ready to enjoy.

Step 1. Soak Sticky Rice Overnight

soak rice overnight thoroughly

Begin the soaking process by placing the sticky rice in a large bowl. Cover the rice with water and let it sit overnight. This long soak helps soften the rice, making it easier to work with later on.

The exact soaking time can vary, but aim for at least 8 hours or up to 12 hours. A well-prepared sticky rice can enhance your overall culinary experience, much like how high refresh rates enhance gaming experiences.

Advertisement

When you're ready to move on, drain the rice through a fine-mesh sieve. Give it a gentle rinse under cool running water to remove any excess starch.

Then, transfer the drained sticky rice to a clean bowl, ready for the next step. Soaking the rice is a simple but crucial part of this traditional dessert recipe. Take the time to do it right, and you'll be well on your way to creating an authentic and delicious Khanom Tan.

Step 2. Drain and Rinse Sticky Rice

drain and rinse rice

Draining and rinsing the soaked sticky rice is a crucial next step. You'll want to drain the rice in a fine-mesh strainer or colander, letting the excess water run off.

Once drained, give the rice a gentle rinse under cool, running water. This helps remove any remaining surface starch, which can make the rice gummy. Additionally, ensuring that your cooking environment is free from strong odors can help maintain the purity of the rice's flavor, much like how certain essential oils can enhance your mood. Gently stir and toss the rice with your fingers to ensure even rinsing.

After rinsing, let the rice sit in the strainer for a few minutes to allow the remaining water to drip off. You don't want the rice to be completely dry, but you also don't want it to be sopping wet. The goal is to have the rice slightly damp, which will help it cook evenly later on.

Once drained, the rice is ready for the next step in the Khanom Tan recipe. Proper draining and rinsing will set you up for success in creating the perfect palm sugar dessert.

Advertisement

Step 3. Steam Sticky Rice

steam sticky rice preparation

Once the sticky rice has been drained and rinsed, you'll want to steam it. This step is crucial for getting the perfect texture – you don't want the rice to be too hard or too mushy. Proper steaming techniques can significantly enhance the overall quality of your dish, similar to how regular vacuuming impacts carpet longevity by preventing dirt accumulation.

First, set up your steamer. You can use a traditional bamboo steamer or a metal steamer insert that fits into a pot. If you're using a pot, make sure to add enough water so it doesn't boil dry during the steaming process.

When the water is simmering, carefully add the rinsed sticky rice to the steamer. Cover and steam for 25-30 minutes, stirring occasionally, until the rice is tender and translucent. Keep an eye on the water level and add more as needed to prevent burning.

Once the rice is perfectly steamed, it's ready to be used in the Khanom Tan recipe. The fluffy, slightly sticky texture will be perfect for absorbing the sweet palm sugar syrup. Get ready for a delightful Thai dessert!

Step 4. Make Palm Sugar Syrup

prepare palm sugar syrup

To make the palm sugar syrup, gather the palm sugar, water, and a saucepan. In the saucepan, combine the palm sugar and water.

Place the saucepan over medium heat and stir the mixture until the sugar has fully dissolved. Once the sugar has dissolved, let the syrup simmer for about 5-7 minutes, stirring occasionally, until it thickens slightly. Be careful not to let it boil too vigorously, as that can cause the syrup to crystallize.

Herbal teas can be beneficial for digestion, so consider enjoying a cup while making this syrup.

Advertisement

When the syrup has reached the desired consistency, remove the saucepan from the heat and let it cool slightly. The palm sugar syrup should have a rich, caramel-like flavor and a thick, syrupy texture.

You can use this syrup immediately to drizzle over the steamed sticky rice, or store it in an airtight container in the refrigerator for up to 1 week. The palm sugar syrup adds a wonderful depth of flavor and sweetness to the Khanom Tan dessert.

Step 5. Combine Sticky Rice and Palm Syrup

combine rice and syrup

Next, grab the steamed sticky rice and the prepared palm sugar syrup. In a large bowl, gently combine the rice and syrup until the rice is evenly coated.

The rich, glossy coating creates a delightful presentation, reminiscent of the fun and colorful treats found in ice cream recipes like Cotton Candy Ice Cream. Don't overmix, or you'll risk breaking down the delicate grains. The syrup should cling to the rice, creating a rich, glossy coating.

Now, grab small handfuls of the sweetened rice and shape them into bite-sized balls or oval shapes. Wet your hands lightly to prevent the rice from sticking.

Arrange the formed khanom tan on a serving plate or platter.

Advertisement

To finish, you can gently press a small piece of salted egg yolk or a toasted coconut flake into the center of each dessert, if desired. This adds a lovely contrast of flavors and textures.

Serve the khanom tan at room temperature, and enjoy the sweet, sticky, and satisfying combination of rice and palm sugar.

Final Thoughts

Ultimately, Khanom Tan is a captivating Thai dessert that showcases the richness of palm sugar. The combination of sticky rice, palm syrup, and coconut milk creates a harmonious balance of flavors and textures.

For those looking to indulge in a delicious treat while keeping an eye on their diet, there are options to enjoy desserts with low carb alternatives. Whether you're a seasoned chef or a curious home cook, this traditional treat offers a unique culinary experience.

As you've learned, the key to perfecting Khanom Tan lies in the careful preparation and attention to detail. From selecting the right ingredients to mastering the cooking techniques, each step plays a crucial role in achieving the desired outcome.

Advertisement

Don't be discouraged if your first attempt doesn't turn out exactly as expected – practice makes perfect, and the joy of learning and experimenting in the kitchen is all part of the journey.

Ultimately, Khanom Tan is a delightful reminder of the rich cultural heritage of Thailand and the enduring appeal of its time-honored desserts. Enjoy this special treat, and let it transport you to the vibrant flavors of the Southeast Asian nation.

Frequently Asked Questions

What Is the Nutritional Value of Khanom Tan?

You're curious about the nutritional value of this dessert. While it may contain some vitamins and minerals, it's likely high in sugar and calories, so it's best enjoyed in moderation as part of a balanced diet.

How Long Can Khanom Tan Be Stored?

Khanom tan can typically be stored for 3-5 days when kept in an airtight container in the refrigerator. However, the exact shelf life may vary depending on the ingredients used and storage conditions.

Can Khanom Tan Be Made Without Palm Sugar?

You can make this dessert without palm sugar, but it won't have the same distinct flavor. You'll need to experiment with alternative sweeteners to find a suitable replacement that works for your taste preferences.

Advertisement

What Are the Common Variations of Khanom Tan?

There are several common variations of this dessert. You can make it with brown sugar, coconut sugar, or even white sugar in place of palm sugar. Some versions also include nuts, coconut, or other ingredients for added texture and flavor.

Where Can I Buy the Ingredients for Khanom Tan?

You can purchase the ingredients for this dessert at local Asian markets or online specialty stores. Look for palm sugar, rice flour, coconut milk, and any additional flavorings the recipe calls for.

Continue Reading

Affiliate Disclaimer
As an affiliate, we may earn a commission from qualifying purchases. We get commissions for purchases made through links on this website from Amazon and other third parties.

Advertisement

Vetted

top local car washes top local car washes
Vetted2 months ago

14 Best Car Washes Near You for a Sparkling Clean Ride

I discovered the 14 best car washes near you that promise a sparkling clean ride, and you won't want to...

top mops for 2024 top mops for 2024
Vetted2 months ago

The 15 Best Mops of 2025 – Your Ultimate Guide to a Spotless Home

Find the perfect mop for your cleaning needs in 2025, and discover how these top choices can revolutionize your home...

top women s fragrances 2024 top women s fragrances 2024
Vetted2 months ago

15 Best Perfumes for Women in 2025 – A Fragrance Guide You Can’t Miss

Keen to discover the top 15 perfumes for women in 2025? Uncover unique scents that will elevate your fragrance game!

top local bars guide top local bars guide
Vetted2 months ago

14 Best Bars Near You for an Unforgettable Night Out

Looking for the perfect bar to elevate your night out? Discover the 14 best spots that promise unforgettable experiences!

luxurious beard oil selection luxurious beard oil selection
Vetted2 months ago

15 Best Beard Oils for a Luxurious Grooming Experience in 2025

Shop the 15 best beard oils for a luxurious grooming experience in 2025 and discover which ones will elevate your...

top college laptops 2024 top college laptops 2024
Vetted2 months ago

15 Best College Laptops of 2025: The Ultimate Guide for Students

With our guide to the 15 best college laptops of 2025, discover which powerful models will elevate your academic experience...

waterproof mascaras for tears waterproof mascaras for tears
Vetted2 months ago

15 Best Waterproof Mascaras That Will Survive Any Tear-Jerker

Outstanding waterproof mascaras await to keep your lashes flawless through any emotional moment; discover which ones made the top 15...

top flavorful disposable vapes top flavorful disposable vapes
Vetted2 months ago

15 Best Disposable Vapes of 2025: Top Picks for Flavor and Convenience

Prepare to discover the 15 best disposable vapes of 2025 that blend exceptional flavor and convenience, but which ones truly...

refreshing lunch salad ideas refreshing lunch salad ideas
Vetted2 months ago

15 Best Salads Near You That Will Freshen Up Your Lunch Routine

Transform your lunch with the 15 best salads nearby that will tantalize your taste buds and leave you craving more...

top convertible car seats top convertible car seats
Vetted2 months ago

15 Best Convertible Car Seats of 2025 – Safety and Comfort for Your Little One

Get ready to discover the top 15 convertible car seats of 2025 that blend safety and comfort—find out which models...

delicious fast food breakfast delicious fast food breakfast
Vetted2 months ago

15 Best Fast Food Breakfast Options That Will Make Your Mornings Delicious

Uncover the 15 best fast food breakfast options that will transform your mornings into a delicious experience you won't want...

stylish contacts for vision stylish contacts for vision
Vetted2 months ago

14 Best America’s Contacts for Clear Vision and Style

Browse through the 14 best contact lenses in America for clear vision and style, and discover which one perfectly complements...

Trending