Pumpkin pie is a classic American dessert that's perfect for fall and winter holidays. You'll love its smooth, spiced custard filling nestled in a flaky pastry crust. To make one, you'll need canned pumpkin, condensed milk, eggs, and warm spices like cinnamon and nutmeg. Mix these ingredients, pour into a prepared crust, and bake until set. The result is a creamy, aromatic treat that's best served with a dollop of whipped cream. Whether you're celebrating Thanksgiving or just craving a comforting dessert, pumpkin pie is sure to satisfy. Discover the rich history and creative variations of this beloved dish.
Key Takeaways
- Pumpkin pie is a classic autumn dessert traditionally associated with Thanksgiving celebrations.
- The pie features a creamy filling made from pumpkin puree, eggs, condensed milk, and warm spices like cinnamon and nutmeg.
- Its origins trace back to Native Americans and early European settlers, evolving into a beloved American culinary tradition.
- The dessert is typically baked in a flaky pie crust and often served with whipped cream or ice cream.
- Homemade pumpkin pie recipes generally involve preparing the crust, mixing the filling, and baking until set with a slightly jiggly center.
Top picks for "pumpkin"
Open Amazon search results for this keyword.
As an affiliate, we earn on qualifying purchases.
History
Throughout the history of pumpkin pie, this beloved dessert has evolved from its humble beginnings. You might be surprised to learn that the first pumpkin pies weren't actually pies at all! Native Americans would roast long strips of pumpkin on the open fire, and early European settlers adapted this practice by filling hollowed-out pumpkins with milk, honey, and spices before baking them in hot ashes.
It wasn't until the 1650s that recognizable pumpkin pie recipes began to appear in English cookbooks. These early versions often included sliced pumpkin layers, apples, rosemary, and thyme. As time went on, the recipe was simplified and sweetened, becoming more like the dessert you know and love today.
In America, pumpkin pie became a symbol of harvest celebrations and eventually a Thanksgiving staple. It's believed that the pie's popularity soared after Abraham Lincoln declared Thanksgiving a national holiday in 1863.
Since then, you've likely enjoyed this classic dessert at countless autumn gatherings, carrying on a tradition that spans centuries and continents.
Recipe
Pumpkin pie is a beloved autumn dessert that captures the essence of the season with its warm spices and creamy texture. This classic American treat is often associated with Thanksgiving celebrations but can be enjoyed throughout the fall and winter months. Its comforting flavors and rich, velvety filling make it a favorite among both young and old. For those looking to switch things up, a sweet potato pie recipe can provide a delightful twist on the traditional pumpkin pie. By using the naturally sweet and creamy flesh of the sweet potato, this pie offers a unique flavor profile that is just as satisfying. Whether you prefer the familiar taste of pumpkin or the exciting taste of sweet potato, both pies are sure to bring a sense of warmth and nostalgia to any gathering.
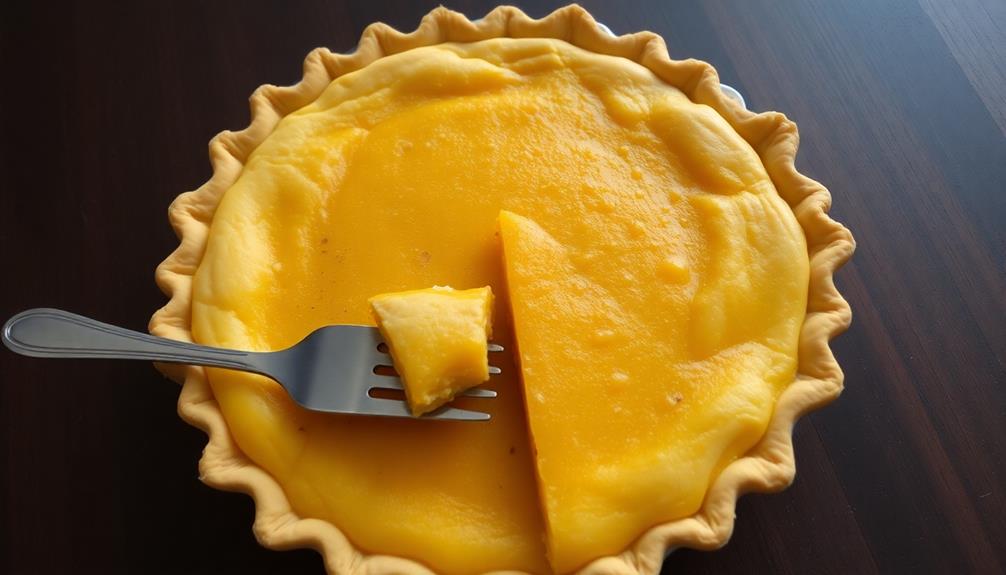
This recipe yields a perfectly spiced pumpkin pie with a flaky, buttery crust. The filling is made with a combination of pumpkin puree, eggs, condensed milk, and a blend of aromatic spices that create a harmonious balance of flavors. The result is a smooth, custard-like filling that sets beautifully when baked and pairs wonderfully with a dollop of whipped cream.
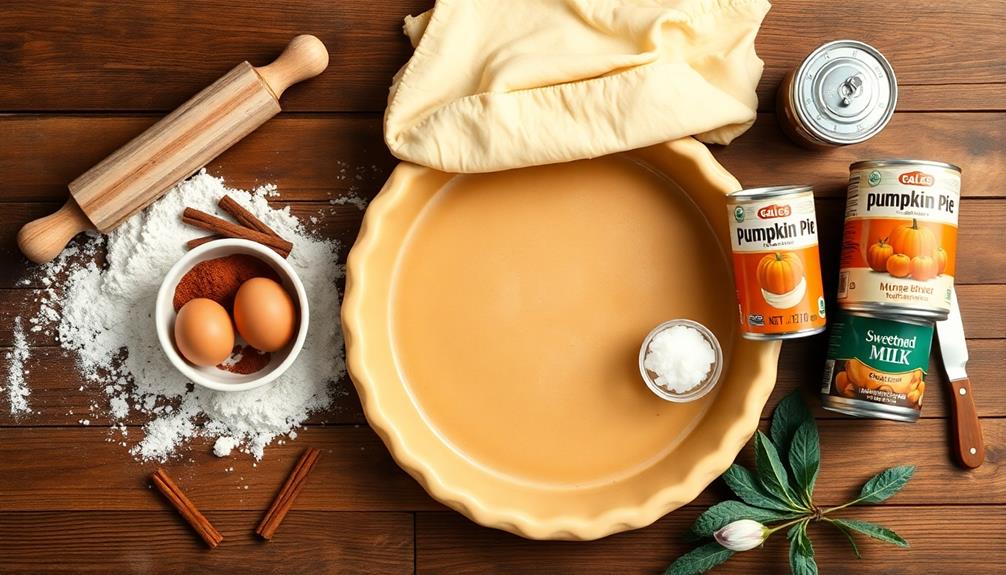
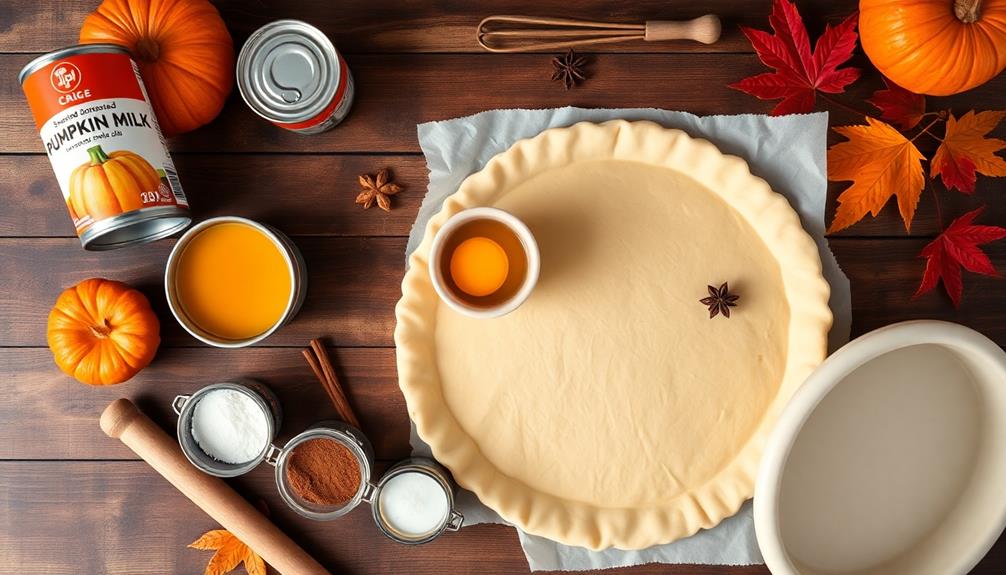
- 1 9-inch unbaked pie crust
- 1 can (15 oz) pumpkin puree
- 1 can (14 oz) sweetened condensed milk
- 2 large eggs
- 1 tsp ground cinnamon
- 1/2 tsp ground ginger
- 1/2 tsp ground nutmeg
- 1/2 tsp salt
Preheat the oven to 425°F (220°C). In a large bowl, whisk together the pumpkin puree, sweetened condensed milk, eggs, cinnamon, ginger, nutmeg, and salt until smooth. Pour the mixture into the unbaked pie crust and smooth the top with a spatula. Bake for 15 minutes, then reduce the oven temperature to 350°F (175°C) and continue baking for 35-40 minutes, or until a knife inserted near the center comes out clean. Allow the pie to cool completely on a wire rack before serving.
For best results, chill the pie crust in the refrigerator for at least 30 minutes before filling and baking. This helps prevent the crust from shrinking during baking. If the edges of the crust start to brown too quickly, cover them with strips of aluminum foil.
To achieve a perfectly smooth filling, consider straining the mixture through a fine-mesh sieve before pouring it into the crust. For an extra touch of indulgence, serve the pie with freshly whipped cream or a scoop of vanilla ice cream.
Cooking Steps
To make your perfect pumpkin pie, you'll need to follow a series of essential steps.
Begin by preparing the pie crust, then mix your pumpkin filling ingredients before pouring the mixture into the crust.
You'll bake the pie until it's set, and after cooling, you can add a dollop of whipped cream for the finishing touch.
Step 1. Prepare Pie Crust
For a perfect pumpkin pie, start with a flaky, golden crust. You'll need:
- 1 1/4 cups all-purpose flour
- 1/4 teaspoon salt
- 1/2 cup cold unsalted butter, cubed
- 3-4 tablespoons ice water
Begin by whisking the flour and salt in a large bowl. Add the cold butter cubes and use a pastry cutter or your fingertips to work it into the flour until you have pea-sized pieces.
Gradually add the ice water, stirring with a fork until the dough begins to come together.
Turn the dough onto a lightly floured surface and shape it into a disk. Wrap it in plastic and refrigerate for at least an hour. This resting period allows the gluten to relax, ensuring a tender crust.
When you're ready to bake, roll out the dough on a floured surface until it's about 12 inches in diameter. Carefully transfer it to your pie dish, trim the edges, and crimp them decoratively.
For the best results, chill the crust again before filling and baking. This extra step helps prevent shrinkage and maintains that perfect flaky texture.
Step 2. Mix Pumpkin Filling Ingredients
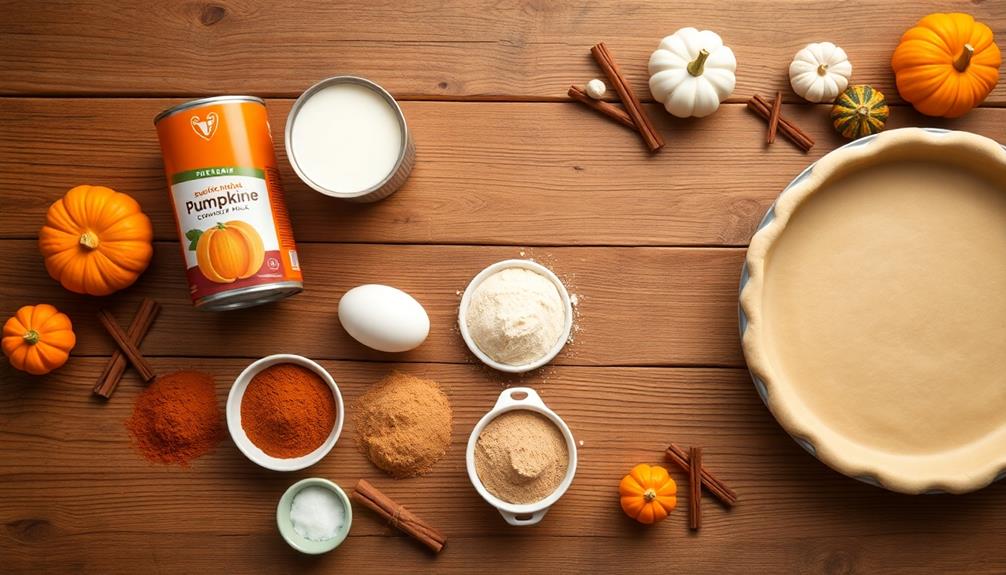
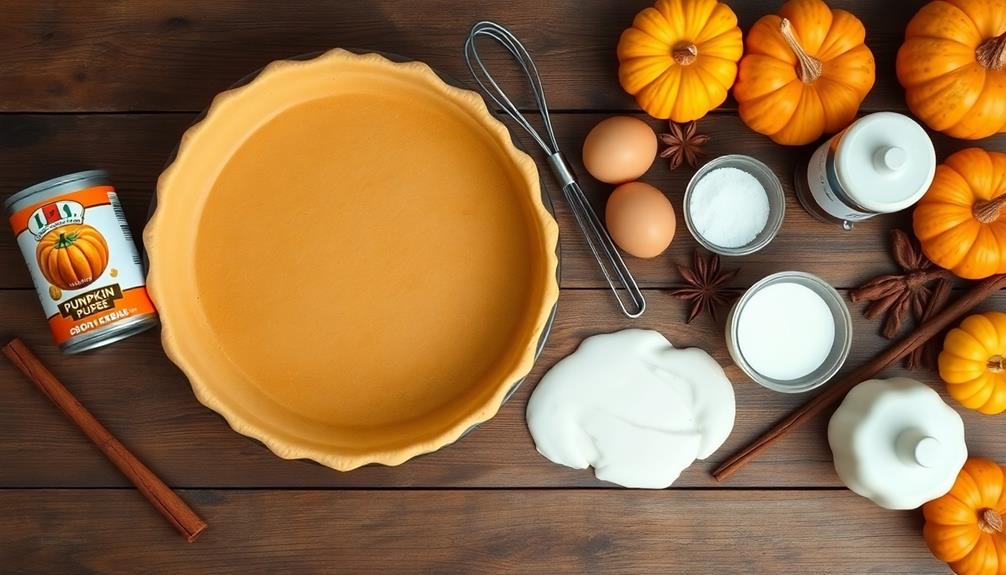
Now that your pie crust is ready, it's time to focus on the star of the show: the pumpkin filling. In a large bowl, you'll combine the key ingredients that give pumpkin pie its signature taste and texture.
Start by whisking together 15 ounces of canned pumpkin puree, 1 can of sweetened condensed milk, and 2 large eggs until smooth.
Next, add your spices to create that warm, comforting flavor profile:
- 1 teaspoon ground cinnamon
- 1/2 teaspoon ground ginger
- 1/2 teaspoon ground nutmeg
- 1/4 teaspoon ground cloves
Whisk these spices into the pumpkin mixture, ensuring they're evenly distributed. The aroma that fills your kitchen will be heavenly!
Don't forget to add 1/2 teaspoon of salt to enhance all the flavors.
For a silky-smooth consistency, pour the mixture through a fine-mesh strainer. This step removes any lumps or fibrous bits from the pumpkin puree.
Once strained, give the filling one final stir. Your pumpkin pie filling is now ready to be poured into the prepared crust, bringing you one step closer to a delicious homemade dessert.
Step 3. Pour Filling Into Crust
The moment of truth has arrived. It's time to pour your lovingly prepared pumpkin filling into the waiting crust. Here's how to do it:
- Grab your mixing bowl with the pumpkin filling and give it one final stir to ensure everything's well combined.
- Place your pie crust on a stable, flat surface. If you're using a store-bought crust in a disposable tin, set it on a baking sheet for added stability.
- Slowly pour the filling into the crust, starting from the center and working your way outward. This helps distribute the filling evenly.
- Fill the crust almost to the top, leaving about 1/4 inch of space. Don't overfill, as the filling will expand slightly during baking.
- Gently tap the pie dish on the counter a few times to release any air bubbles trapped in the filling.
- Use a spatula to smooth the top of the filling if needed.
- Check the edges of the crust. If they're looking a bit thin or fragile, you can cover them with strips of aluminum foil to prevent over-browning during baking.
Your pie is now ready for the oven!
Step 4. Bake Pie Until Set

With your pie filled and ready, it's time to bake it to perfection. Preheat your oven to 425°F (218°C) and place the pie on the middle rack. You'll want to bake it at this high temperature for about 15 minutes to help set the crust and prevent a soggy bottom.
After the initial 15 minutes, reduce the oven temperature to 350°F (175°C) and continue baking for an additional 40 to 50 minutes. The exact time may vary depending on your oven, so keep a close eye on it.
You'll know your pie is done when the filling is mostly set but still slightly jiggly in the center. It should wobble like gelatin when gently shaken.
To test for doneness, you can also:
- Insert a knife near the center; it should come out clean.
- Look for small cracks around the edges of the filling.
- Check that the crust is golden brown.
Step 5. Cool and Add Whipped Cream
Once your pie is baked to perfection, it's time to let it cool and add the finishing touch. Remove the pie from the oven and place it on a wire rack to cool completely. This process usually takes about 2 to 3 hours, so be patient!
As the pie cools, it'll continue to set, ensuring that perfect slice when you're ready to serve. While waiting, you might consider preparing a delightful treat for your furry friends, as safe snacks for hamsters can be a fun addition to your kitchen adventures.
While you wait, prepare your whipped cream. For the best results, use heavy whipping cream that's been chilled in the refrigerator. In a large bowl, whip the cream until soft peaks form, then add a touch of vanilla extract and powdered sugar to taste.
Whip until stiff peaks form, but be careful not to overbeat, or you'll end up with butter!
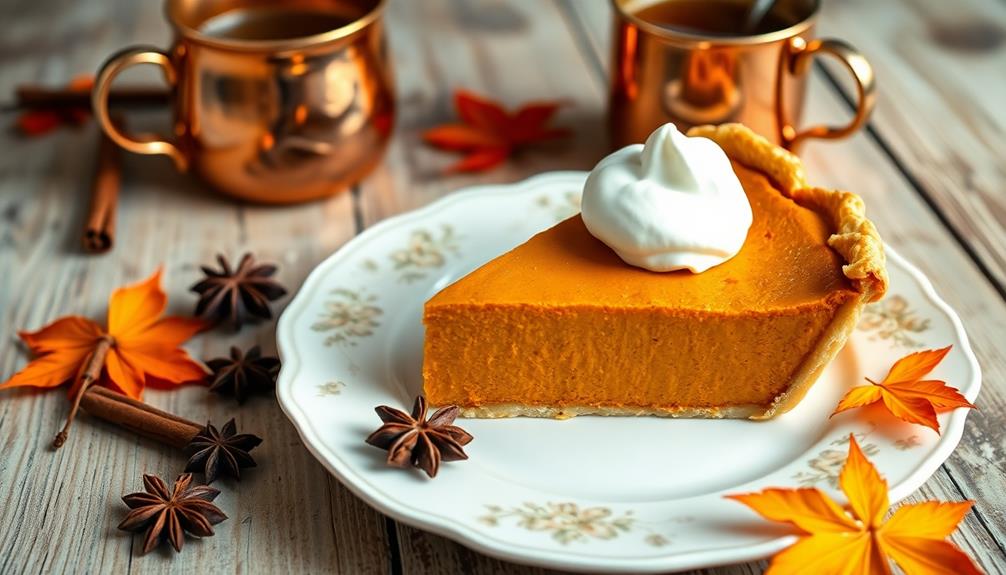
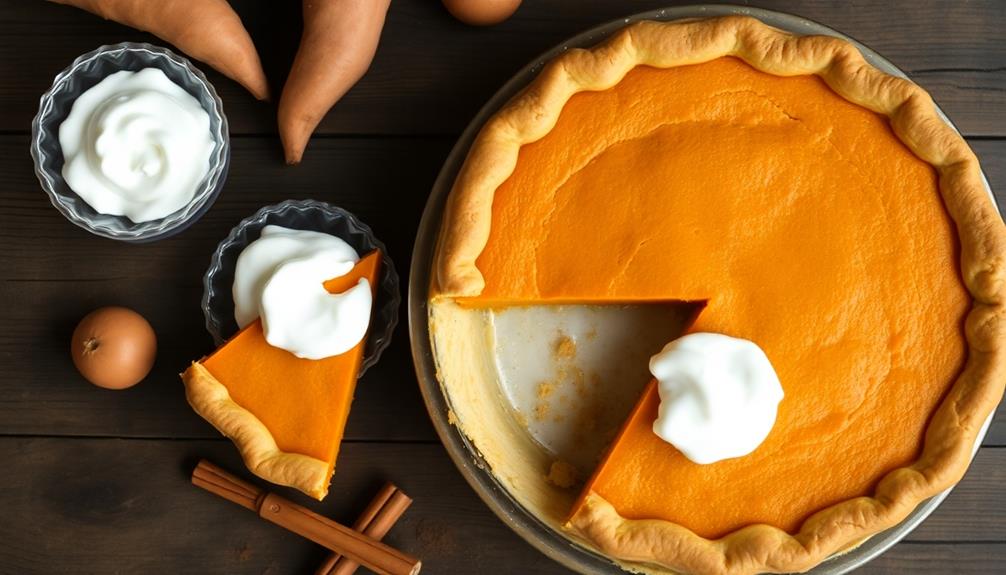
Once your pie has cooled, it's time for the grand finale. Spread the whipped cream generously over the top of the pie, creating beautiful swirls and peaks.
For an extra special touch, you can dust the top with a sprinkle of cinnamon or nutmeg. Your pumpkin pie is now ready to be the star of your dessert table!
Final Thoughts
Pumpkin pie remains a beloved dessert that's far more than just a seasonal treat. Its rich history and comforting flavors make it a staple in many households year-round.
As you've learned, creating the perfect pumpkin pie requires attention to detail and a bit of patience, but the results are well worth the effort.
Remember these key points for a successful pumpkin pie:
- Use fresh or high-quality canned pumpkin for the best flavor
- Don't skip the pre-baking step for the crust
- Avoid overmixing the filling to prevent cracks
- Keep an eye on the baking time and temperature
With practice, you'll develop your own tricks and preferences for making this classic dessert.
Whether you're serving it at a holiday gathering or enjoying a slice on a quiet evening, your homemade pumpkin pie is sure to impress.
Don't be afraid to experiment with different spice combinations or toppings to make it your own.
And most importantly, savor each bite of your delicious creation – you've earned it!
Frequently Asked Questions
Can Pumpkin Pie Be Frozen?
Yes, you can freeze pumpkin pie! It's a great way to save time and enjoy this tasty treat later. Here's what you need to know:
- Cool the pie completely before freezing
- Wrap it tightly in plastic wrap, then aluminum foil
- Label and date the package
- Freeze for up to 1-2 months
When you're ready to eat, thaw the pie in the refrigerator overnight. You'll find that the texture might be slightly different, but it'll still be delicious!
How Long Does Homemade Pumpkin Pie Last in the Refrigerator?
You'll want to enjoy your homemade pumpkin pie within 3-4 days for the best taste and quality.
After baking, let it cool completely, then cover it tightly with plastic wrap or aluminum foil before refrigerating.
Don't leave it out at room temperature for more than 2 hours.
Remember, the filling contains eggs and milk, which can spoil quickly.
If you're not planning to eat it within this timeframe, consider freezing it for longer storage.
Is Canned or Fresh Pumpkin Better for Pumpkin Pie?
When it comes to making pumpkin pie, you'll find that both canned and fresh pumpkin have their merits.
Canned pumpkin offers convenience and consistency, ensuring a reliable flavor and texture every time. It's also pre-cooked, saving you time and effort.
Fresh pumpkin, on the other hand, can provide a more vibrant flavor and allows you to control the texture. However, it requires more preparation and can be less consistent.
Ultimately, the choice depends on your preferences and the time you're willing to invest.
What Can I Substitute for Evaporated Milk in Pumpkin Pie?
You've got several options to replace evaporated milk in your pumpkin pie recipe. Here are some great substitutes:
- Heavy cream: It'll give your pie a rich, creamy texture.
- Whole milk: This works well, but you might need to reduce the liquid slightly.
- Coconut milk: For a dairy-free option with a subtle tropical flavor.
- Half-and-half: A good middle ground between milk and cream.
- Condensed milk: Remember to reduce the sugar in your recipe if you use this.
Each substitute will slightly alter the taste and texture, so choose based on your preferences.
Why Does My Pumpkin Pie Crack on Top?
Your pumpkin pie might crack on top due to a few reasons:
- Overbaking: If you cook it too long, the eggs in the filling can overcook and cause cracks.
- Cooling too quickly: Sudden temperature changes can lead to cracking.
- Overmixing: This can incorporate too much air, causing the pie to puff up and then crack as it cools.
To prevent cracks, try baking at a lower temperature, cooling slowly, and mixing your filling just until ingredients are combined.
Don't worry though – even cracked pies are delicious!