Apple cider has captivating origins dating back to ancient Europe, where early civilizations first cultivated apples and experimented with fermentation. Over time, this beloved beverage was introduced globally by settlers, becoming a popular alternative to unsafe drinking water for colonial Americans. To make your own delicious cider at home, you'll need high-quality apples, a food mill, and optional sweeteners and spices. The process involves boiling, mashing, and straining the fruit, then pasteurizing and bottling the juice. Cider offers a versatility of flavors, from classic to seasonal variations, and supports local agriculture when sourced from regional orchards. If you'd like to learn more, keep reading for a deeper dive into the history and craft of apple cider.
Key Takeaways
- Apple cider has a long history, dating back to ancient times, and was a popular beverage among early American colonists.
- Homemade apple cider can be made by boiling, mashing, and straining apples, and can be customized with spices and sweeteners.
- The cider-making process includes pasteurization, bottling, and proper storage to ensure food safety and develop the desired flavor profile.
- Apple cider offers unique flavor variations, including the incorporation of fruits, spices, and spirits, catering to individual preferences.
- Purchasing apple cider from local orchards supports regional agriculture and strengthens community ties through local commerce.
Top picks for "apple cider"
Open Amazon search results for this keyword.
As an affiliate, we earn on qualifying purchases.
History
The origins of apple cider can be traced back to ancient times, with evidence of fermented apple beverages dating as far as 55 B.C. in Europe.
Cider's history is deeply intertwined with the cultivation and consumption of apples, which were a dietary staple for many early civilizations. As settlers spread across the globe, they brought apple trees and cider-making knowledge with them, introducing the drink to new regions.
In the United States, cider became a popular alternative to water, which was often unsafe to drink. Cider's alcohol content also made it a favorite among colonists and early Americans.
Recipe
Apple cider is a refreshing beverage that can be enjoyed year-round. It's a perfect way to celebrate the cozy fall season or to savor the crisp, cool days of winter. The process of making homemade apple cider is relatively simple and can be a fun activity for the whole family.
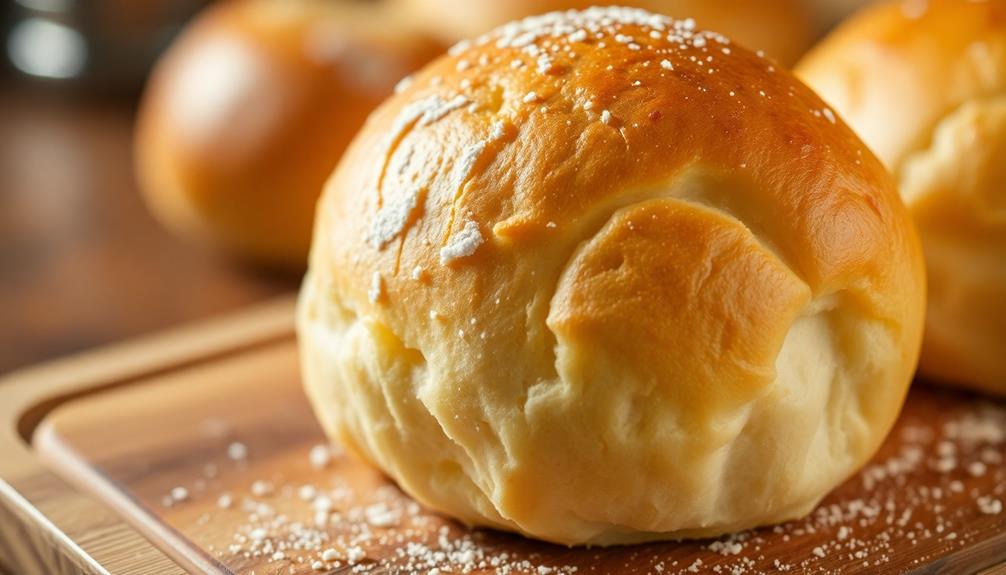
The key to delicious apple cider is to start with high-quality, ripe apples. Choose a variety that's both sweet and tart, such as Honeycrisp, Fuji, or Gala. The combination of flavors will result in a well-balanced and flavorful cider.
Ingredients:
- 8-10 lbs of apples, washed and cut into quarters
- 1 cup of water
- 1/4 cup of brown sugar (optional)
- 1 cinnamon stick (optional)
- 1 tsp of whole cloves (optional)
Instructions:
In a large pot, combine the quartered apples and water. Bring the mixture to a boil over high heat, then reduce the heat to medium-low and let it simmer for about 45 minutes to 1 hour, or until the apples are very soft.
Carefully mash the apples with a potato masher or the back of a wooden spoon. Strain the cider through a fine-mesh sieve or cheesecloth, pressing on the solids to extract as much liquid as possible.
If you desire a sweeter cider, you can add the brown sugar and stir until it has dissolved. For a spiced cider, tie the cinnamon stick and cloves in a small cheesecloth bag and add it to the cider during the simmering process. Remove the spice bag before serving. Another popular variation is a mulled cider which includes adding a mixture of spices such as nutmeg, allspice, and orange peel. This gives the cider a warm, comforting flavor that is perfect for cold winter nights. If you’re looking for a wonderful side dish to accompany your cider, try this delicious candied yams recipe. It pairs perfectly with the sweet and spicy flavors of the cider.
Tips:
For a smoother, more refined cider, you can run the strained liquid through a food mill or a high-powered blender before serving. This will help to remove any remaining pulp or sediment.
Additionally, you can experiment with different apple varieties to find the perfect flavor profile that suits your taste preferences.
Cooking Steps
First, you'll need to wash and chop the apples.
Next, press the apples in a cider press to extract the juice.
After that, you'll want to pasteurize the pressed apple juice and strain it before bottling for storage.
Step 1. Wash and Chop Apples

How do you prepare the apples for making cider? First, thoroughly wash the apples under cool running water. This helps remove any dirt, debris, or pesticide residue that may be on the surface.
Next, take a sharp knife and carefully slice the apples into quarters or smaller pieces, removing the core, seeds, and stem. This will help the apples break down more efficiently during the cider-making process.
Once the apples are washed and chopped, you'll want to place them in a large, sturdy container, such as a food-grade plastic bin or stainless steel pot. This will make it easier to transport the apples to your cider press or grinder.
If you plan to make the cider the same day, leave the chopped apples uncovered at room temperature. However, if you need to store them for a day or two, cover the container and refrigerate the apples to keep them fresh.
With the apples prepped, you're one step closer to enjoying homemade apple cider.
Step 2. Press Apples in Cider Press

Once you've washed and chopped the apples, it's time to press them in your cider press. This crucial step extracts the precious apple juice, which will become the foundation of your homemade cider.
First, place the prepared apples into the press. Ensure the fruit is evenly distributed, filling the press to the recommended capacity.
Now, begin slowly turning the press handle, applying gradual pressure to the apples. As you turn, the juice will start to flow, dripping into the collection tray below.
Continue turning the handle, increasing the pressure, until you've extracted as much juice as possible. Depending on the size of your press, this process may take several minutes of steady, consistent effort.
Once the flow of juice slows to a trickle, you've pressed the apples to their limit.
Carefully remove the press cake, the leftover apple pulp, and discard or compost it. Your freshly pressed apple cider is now ready for the next step in the cider-making process.
Step 3. Pasteurize Pressed Apple Juice

With your freshly pressed apple cider now ready, the next step is to pasteurize it. Pasteurization is a crucial process that helps eliminate harmful bacteria and extends the shelf life of your cider.
To pasteurize, you'll need to heat the cider to a specific temperature and hold it there for a set amount of time. The recommended temperature is 160°F (71°C), which you should maintain for at least 10 minutes. This will effectively kill off any potential pathogens without compromising the cider's flavor or quality.
You can use a stovetop or a large pot to heat the cider. Stir the cider frequently to ensure even heating. Once it reaches 160°F, set a timer and maintain the temperature for 10 minutes.
After the time is up, quickly cool the cider by placing the container in an ice bath. This rapid cooling helps preserve the cider's fresh taste.
Once pasteurized and cooled, your apple cider is ready to enjoy or store for later use.
Step 4. Strain Pressed Apple Juice

After pasteurizing your freshly pressed apple juice, the next step is to strain it. This process removes any remaining pulp, sediment, or impurities, ensuring a smooth, clear cider.
Begin by setting up a fine-mesh strainer or cheesecloth-lined colander over a clean container. Slowly pour the pasteurized juice through the strainer, allowing it to gradually filter down. You may need to stir or gently press the solids to help the liquid pass through.
Once the initial straining is complete, you can repeat the process, this time using a finer filter, such as a coffee filter or paper filter. This second pass will further refine the cider, leaving you with a beautifully clear and polished end product.
Be patient during the straining, as it may take some time, but the resulting cider will be well worth the effort.
With your strained, pasteurized apple cider ready, you can now enjoy its fresh, crisp flavor or move on to the next step in the cider-making process.
Step 5. Bottle Pressed Apple Juice
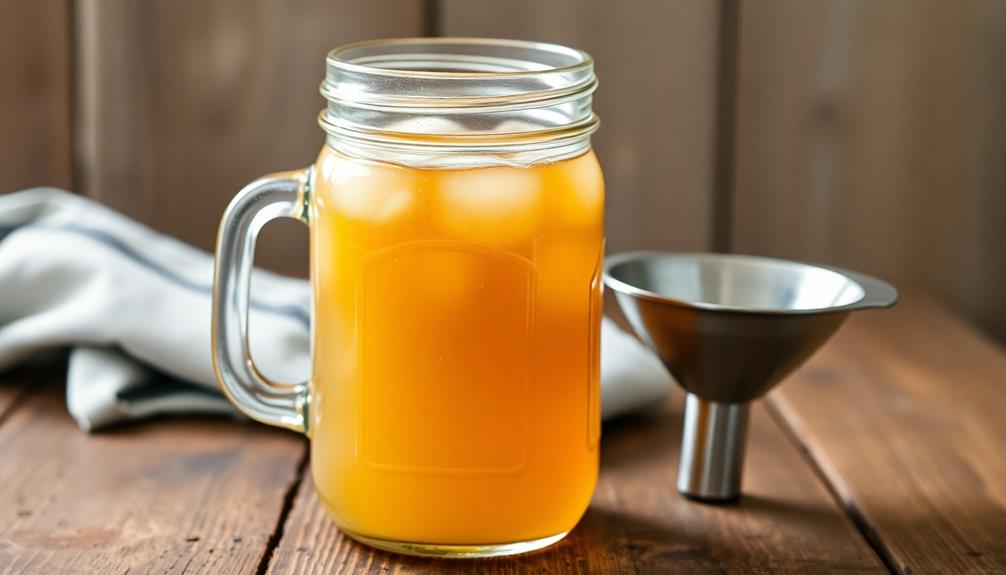
Now that you've strained your freshly pressed apple cider, it's time to bottle it. Bottling your cider is an essential step to preserve its freshness and ensure a longer shelf life.
Start by thoroughly cleaning and sanitizing your bottles, caps, and any other equipment you'll be using. This will help prevent the growth of harmful bacteria and maintain the quality of your cider.
Next, use a funnel to carefully pour the strained cider into your clean bottles, leaving about an inch of headspace at the top. This allows room for the cider to expand as it matures.
Secure the caps tightly, ensuring a proper seal.
Store your bottled cider in a cool, dark place, such as a cellar or refrigerator. The ideal temperature range is between 55-65°F.
Over time, the cider will naturally carbonate and develop a richer, more complex flavor. Enjoy your homemade bottle-pressed apple cider as a refreshing and versatile beverage.
Final Thoughts
Apple cider is a versatile and delightful beverage that can be enjoyed year-round. Whether you prefer it piping hot, served over ice, or mixed into your favorite cocktail, the final thoughts on this beloved drink are sure to leave you longing for more.
One of the best things about apple cider is its adaptability. You can experiment with different spices, fruits, and even a splash of spirits to create unique flavor profiles that cater to your personal taste.
Additionally, apple cider can be enjoyed as a cozy treat on a chilly autumn evening or as a refreshing thirst-quencher on a warm summer day.
Beyond its versatility, apple cider is also a wonderful way to support local agriculture and small businesses. By purchasing cider from your regional orchards and farmstands, you're not only ensuring the freshest and most flavorful product, but you're also investing in your community.
Frequently Asked Questions
How Long Does Homemade Apple Cider Last?
Homemade cider typically lasts 1-2 weeks when refrigerated. The exact shelf life depends on factors like the ingredients, pasteurization, and storage conditions. To maximize freshness, consume your homemade cider within the first week.
Can You Drink Expired Apple Cider?
You shouldn't drink expired apple cider. It can go bad and potentially make you sick. Check the expiration date, and if it's past that, it's best to discard it rather than risk your health.
Is Apple Cider Good for Weight Loss?
While apple cider may not directly contribute to weight loss, consuming it in moderation can be part of a balanced diet. The natural sugars and fiber in cider can help you feel full, potentially aiding your weight management goals.
Can You Freeze Apple Cider?
You can definitely freeze apple cider. It's a great way to store it for later use. Just pour it into an airtight container or ice cube trays, and it'll keep for months in the freezer.
How Do You Make Apple Cider Vinegar?
To make apple cider vinegar, you'll need to ferment apple cider. Start by allowing the cider to ferment until it becomes alcoholic, then let it continue fermenting to transform the alcohol into acetic acid, the main component of vinegar.