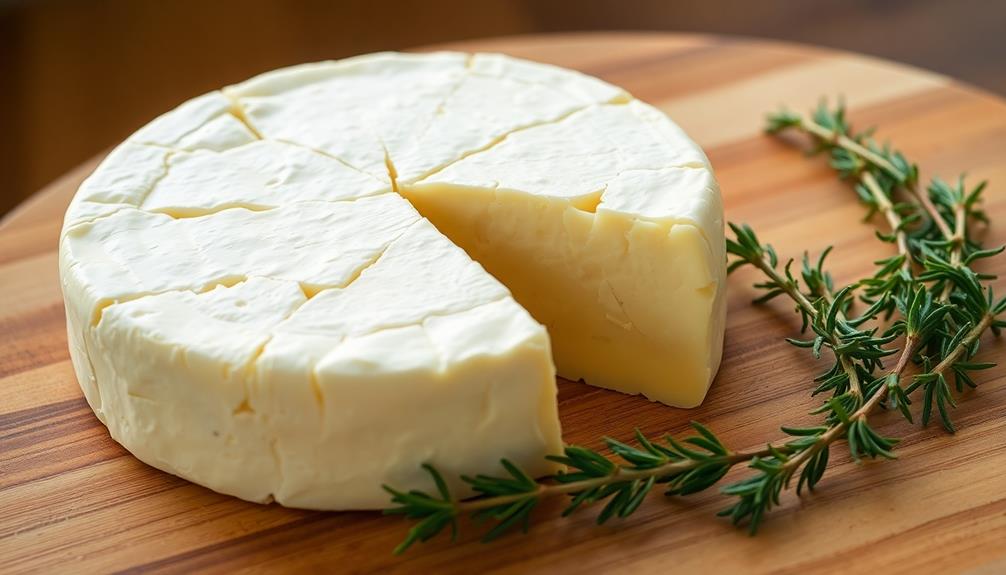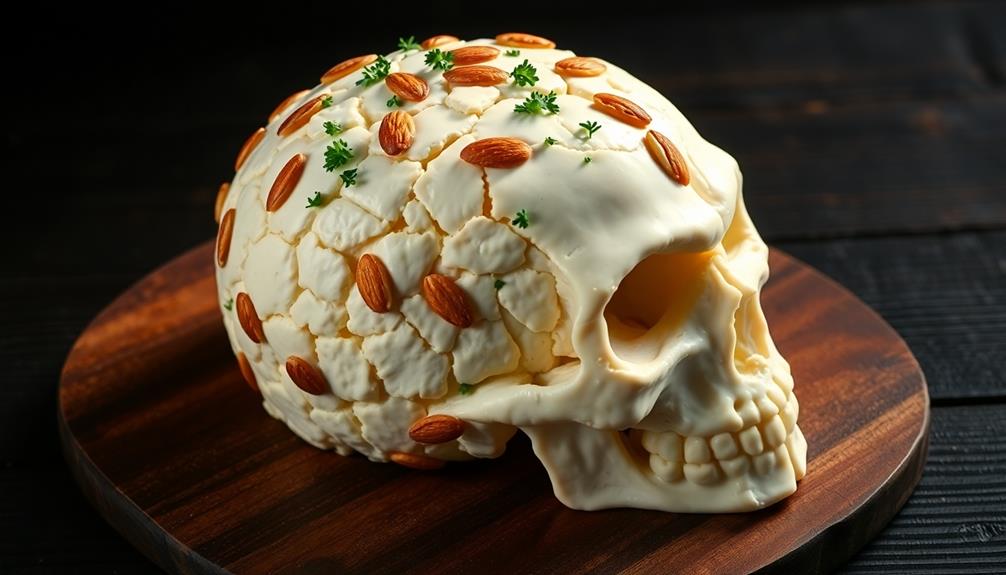

Transform your Halloween celebration into a spooky delight with a skull-shaped cheese ball, a classic culinary tradition that has delighted party-goers for decades. This savory and creamy cheese creation, featuring a blend of flavorful cheeses and aromatic seasonings, offers a delightfully eerie twist on the traditional cheese and cracker platter, sure to capture the attention of your guests and add a touch of haunting charm to your festive gathering. With a few simple steps, you can craft this ghoulish delight that will have everyone raving – and you'll discover even more about this festive treat.
Key Takeaways
- The Skull Shaped Cheese Ball originated in the 1970s as a Halloween culinary tradition, featuring a round cheese ball resembling a human skull.
- The recipe combines savory flavors of cheese with a creepy skull presentation, making it ideal for Halloween parties and themed events.
- The cheese ball is made by blending cream cheese with various seasonings, shaping it into a skull form, and coating it with black food coloring and sesame seeds.
- Serving suggestions include pairing the cheese ball with an assortment of crunchy crackers or fresh baguette slices, and offering a variety of dips to complement the flavors.
- The preparation process encourages creativity, teamwork, and a memorable experience for participants, making it a popular activity for Halloween celebrations.
Top picks for "skull shap cheese"
Open Amazon search results for this keyword.
As an affiliate, we earn on qualifying purchases.
History
The skull-shaped cheese ball is a Halloween culinary tradition that has been delighting party hosts and guests for decades. This whimsical treat has its roots in the 1970s, when home cooks began experimenting with creative ways to serve cheese and crackers at their spooky celebrations.
The simple yet effective design of a round cheese ball decorated to resemble a human skull quickly became a hit, capturing the imagination of partygoers and adding a touch of ghoulish fun to any Halloween gathering.
Over the years, the skull-shaped cheese ball has evolved, with bakers and cooks finding new ways to enhance the design and flavor. Some might add herbs or spices to the cheese mixture, while others experiment with different shapes and sizes to create unique and eye-catching presentations.
Regardless of the variations, the skull-shaped cheese ball remains a beloved Halloween classic, a delicious and playful way to bring a touch of spooky spirit to any celebration.
Recipe
The Skull Shaped Cheese Ball is a festive and spooky appetizer that will surely impress your guests.
It's a fun and easy-to-make dish that combines the savory flavors of cheese with the creepy presentation of a skull. This recipe is perfect for Halloween parties, theme nights, or any occasion where you want to add a touch of ghoulish charm to your spread.
The combination of creamy cheese, crunchy crackers, and savory seasonings creates a delectable and visually stunning centerpiece for your table.
Ingredients:
- 2 (8 oz) packages of cream cheese, softened
- 2 cups shredded cheddar cheese
- 1/2 cup grated parmesan cheese
- 1/4 cup mayonnaise
- 1 teaspoon garlic powder
- 1/2 teaspoon onion powder
- 1/4 teaspoon cayenne pepper
- 1/2 teaspoon salt
- 1/4 teaspoon black pepper
- Crackers or baguette slices, for serving
Instructions:
In a large bowl, combine the softened cream cheese, cheddar cheese, parmesan cheese, mayonnaise, garlic powder, onion powder, cayenne pepper, salt, and black pepper.
Mix until well blended and smooth. Transfer the mixture to a skull-shaped mold or a baking dish. Smooth the top and refrigerate for at least 2 hours, or until firm.
Unmold the cheese ball onto a serving plate and serve with crackers or baguette slices.
For a more detailed skull shape, use a toothpick to create the eye sockets, nose, and teeth. This recipe can be made a day in advance, making it a convenient and stress-free party dish.
Cooking Steps
First, you'll blend the cream cheese and seasonings until they're nice and smooth.
Then, you'll shape the cheesy mixture into a spooky skull shape.
Finally, you'll coat it in black food coloring and cover it with crunchy black sesame seeds before popping it in the fridge to firm up.
Get ready for a deliciously creepy treat!
Step 1. Blend Cream Cheese and Seasonings
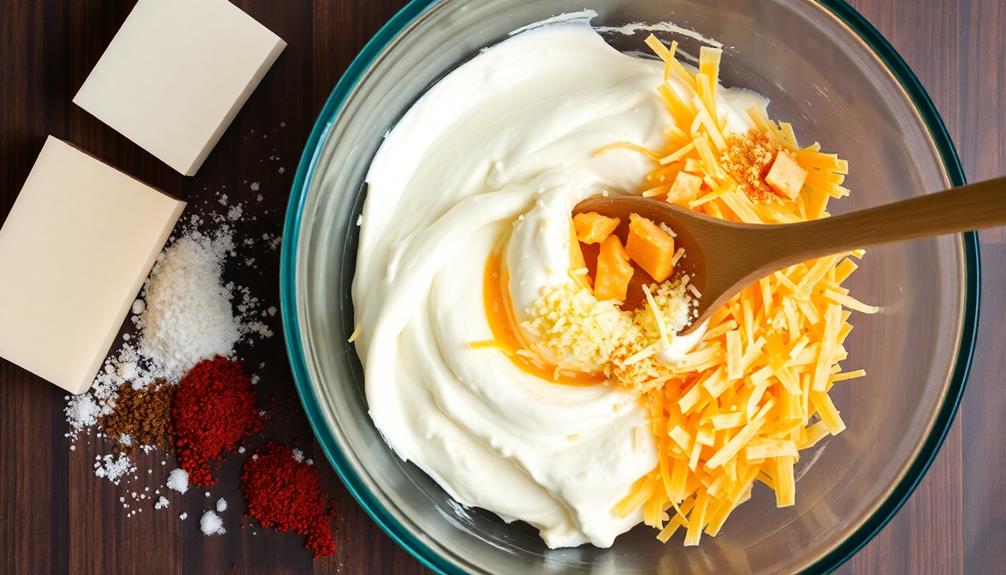
To create the creamy base for your skull-shaped cheese ball, simply blend the cream cheese and seasonings in a medium-sized bowl until they're fully incorporated.
The rich and velvety texture of the cream cheese provides the foundation, while the flavorful seasonings, like garlic powder, onion powder, and a dash of cayenne, add a delightful kick.
Be sure to mix everything together thoroughly, scraping down the sides of the bowl as needed, until the mixture is smooth and uniform.
This blend of flavors and textures is the key to crafting a truly irresistible skull-shaped cheese ball.
Once the base is ready, you'll be one step closer to creating a festive and eye-catching appetizer that's sure to impress your guests.
Get ready to wow them with your culinary skills!
Step 2. Shape Cheese Mixture
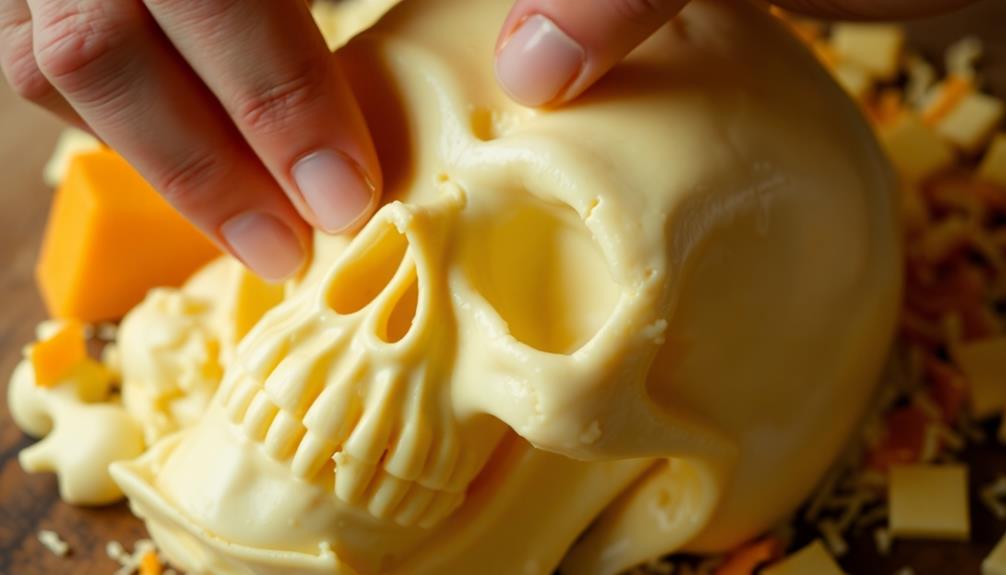
With the creamy base ready, it's time to shape your skull-shaped cheese ball. Grab a large bowl and scoop the seasoned cream cheese mixture into it.
Using your hands, gently shape the mixture into a round ball. Be careful not to overwork the cheese, as that could make it dense and stiff.
Once the ball takes shape, it's time to add the details. Use your fingers to create the eye sockets, nose, and mouth of the skull.
Pinch and mold the cheese to form these distinct features. Don't be afraid to get a little messy – the more texture you create, the more realistic your skull will appear.
When you're satisfied with the shape, use a spoon to smooth out any rough edges. If needed, you can refrigerate the cheese ball for 30 minutes to help it firm up.
Then, it's ready to serve with your favorite crackers or crudités. Your skull-shaped cheese ball is sure to be the spooky star of any Halloween gathering.
Step 3. Coat in Black Food Coloring

After shaping your skull-shaped cheese ball, you'll want to coat it in black food coloring to achieve that spooky, skeletal look.
Start by mixing a few drops of black food coloring in a small bowl. Dip a clean paintbrush into the coloring and gently apply it to the surface of the cheese ball. Be sure to cover the entire shape, paying close attention to any crevices or details.
Work in thin, even layers, adding more coloring as needed to achieve a deep, dramatic black hue. Rotate the cheese ball as you go to ensure even coverage. If any areas look patchy, go back and fill them in. You can even use your fingertips to gently dab on more color for a smoother finish.
Once the cheese ball is fully coated, step back and admire your spooky creation! The black coloring will make the skull shape stand out, giving your Halloween party a hauntingly delicious centerpiece.
Step 4. Cover in Black Sesame Seeds

Covering the skull-shaped cheese ball in a layer of black sesame seeds is a simple yet effective way to enhance its spooky appeal. The dark, toasted seeds create a striking contrast against the pale cheese, mimicking the shadowy look of a real skull.
To apply the seeds, start by pouring them out onto a flat surface, like a plate or baking sheet. Gently roll the cheese ball in the seeds, pressing lightly to help them adhere. Be sure to cover the entire surface, leaving no gaps.
The nooks and crannies of the skull shape will catch the seeds, creating an uneven, texturized appearance. Once fully coated, the cheese ball is ready to serve.
The black sesame seeds not only look creepy and cool, but they also add a delightful crunch and nutty flavor to each bite. This simple step takes the skull cheese ball from ordinary to spooktacular!
Step 5. Refrigerate Until Firm

Once the skull-shaped cheese ball has been coated in the black sesame seeds, it's time to refrigerate it until it's firm. This step is crucial to ensure the cheese ball holds its spooky shape.
Pop the cheese ball in the fridge and let it chill for at least 2 hours, or until it's completely set. During this time, the cheese will firm up, and the sesame seeds will adhere nicely to the surface.
This step helps the cheese ball maintain its creepy, skull-like appearance. You'll know it's ready when you can gently touch the surface without it feeling soft or sticky.
Once it's nice and firm, you can take it out of the fridge and get ready to serve this ghoulishly good appetizer. The cheese ball will be perfectly chilled and ready for all your Halloween festivities.
Just be careful not to let it sit out too long, or it may start to soften up again. Refrigerate any leftovers to keep that bone-chilling shape.
Final Thoughts
The skull-shaped cheese ball undoubtedly captured the attention of guests, leaving a lasting impression at your Halloween gathering. The unique and eye-catching design was a true conversation starter, sparking excitement and intrigue among your friends and family.
Not only did it look impressive, but the delicious blend of cheeses and seasonings was a hit with everyone who tried it.
Creating this spooky treat was a fun and engaging activity that brought everyone together. The process of shaping the cheese ball and decorating it with the features of a skull allowed for creativity and collaboration.
It was a great way to get everyone involved and add a personal touch to your Halloween celebration.
Frequently Asked Questions
Can This Cheese Ball Be Made in Other Shapes?
You can certainly make cheese balls in various shapes beyond just a skull. Get creative and shape them into spheres, cubes, or even fun animal forms to suit your occasion and preferences.
How Long Can the Skull-Shaped Cheese Ball Be Stored?
You can store the shaped cheese ball for up to a week in the fridge. Make sure to wrap it tightly in plastic wrap or place it in an airtight container to prevent drying out.
Is the Cheese Ball Suitable for Vegetarians or Vegans?
The cheese ball may not be suitable for vegetarians or vegans, as it likely contains dairy products. To determine if it's compatible with your dietary needs, you should check the ingredient list carefully before consuming.
Can I Use Alternative Cheese Types in This Recipe?
You can absolutely use alternative cheese types in this recipe. While the original may call for a specific cheese, you can experiment with various plant-based or dairy-free options to accommodate vegetarian and vegan dietary needs.
What Are Some Serving Suggestions for the Skull Cheese Ball?
You can serve the cheese ball with a variety of crackers, bread sticks, or fresh veggies. Consider arranging it on a platter with complementary garnishes like olives, dried fruit, or fresh herbs to enhance the presentation and flavor.
Conclusion
You'll absolutely love whipping up this spooky, skull-shaped cheese ball! It's the perfect festive snack for your upcoming Halloween party. Just follow the simple steps, and you'll have a deliciously creepy centerpiece that'll impress all your guests. Serve it with your favorite crackers or veggies, and get ready to enjoy the oohs and aahs. This cheesy treat is a real scream! Looking for more Halloween-inspired dishes? Try pairing your spooky cheese ball with a creepy spiderweb nacho spread recipe. This deliciously eerie dip is perfect for adding some extra fright to your party spread. Simply follow the recipe and watch as your guests are equally impressed by both the tasty treats and the spooky presentation.