Connect with us

Graduations/Birthdays

Pigs in a Blanket

Irresistible and comforting, these pigs in a blanket have a rich history and easy-to-follow recipe that will have you craving more.

Published

on

savory sausage wrapped pastry

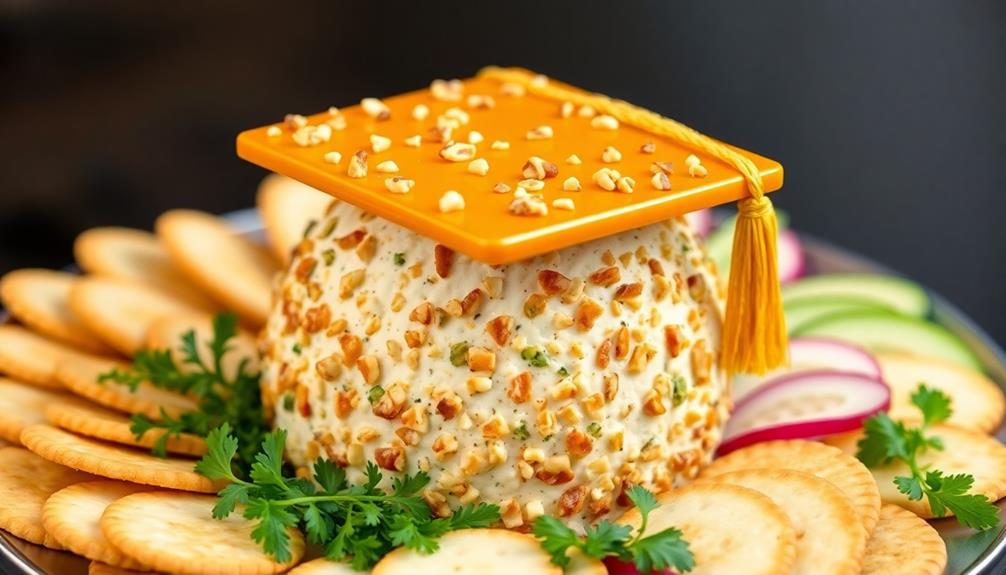
Pigs in a blanket have a rich history, tracing back to German immigrants who first introduced savory pork sausages wrapped in soft, flaky dough in the late 1800s. Over time, regional variations emerged, including cocktail franks and diverse dough types. Today, these beloved comfort foods are enjoyed as snacks or appetizers at gatherings across America. The classic recipe combines the savory flavors of sausage with the buttery goodness of crescent roll dough, making them easy to prepare with simple ingredients. Let's dive into the step-by-step instructions to learn how to create this irresistible treat yourself.

Key Takeaways

  • Pigs in a Blanket are a classic American snack or appetizer featuring savory sausages wrapped in flaky pastry, with origins traced to German immigrants in the late 19th century.
  • The dish has evolved over time, with regional variations including cocktail franks and diverse dough types, becoming a beloved staple across the United States.
  • The recipe is easy to prepare, using refrigerated crescent roll dough and cocktail-size sausages, baked for 12-15 minutes at 375°F (190°C) until golden brown.
  • The cooking process involves unrolling the dough, placing the sausages, rolling them up tightly, and baking until the dough is puffed and the cheese melts.
  • Pigs in a Blanket are versatile, enjoyed as appetizers, snacks, or quick meals, and are a popular choice for parties, gatherings, and lunchboxes.

History

The origin of pigs in a blanket can be traced back to the late 19th century, when German immigrants to the United States began incorporating their traditional sausage-wrapped-in-dough recipes into American cuisine.

These early versions featured savory pork sausages encased in a soft, pillowy dough, creating a delightful combination of flavors and textures.

As the dish grew in popularity, it started appearing on menus across the country, with each region adding its own unique twist. Some used cocktail franks instead of full-sized sausages, while others experimented with different types of dough, from crescent rolls to biscuits.

Today, pigs in a blanket are a beloved snack or appetizer, enjoyed at parties, family gatherings, and even as a quick and satisfying meal.

Whether you prefer the classic pork sausage or enjoy trying new fillings, this versatile dish continues to delight and bring people together.

Advertisement

Recipe

Pigs in a Blanket is a classic comfort food that's perfect for gatherings, parties, or even a quick snack. The combination of savory sausages wrapped in a flaky pastry is a crowd-pleaser that's easy to prepare and oh-so-delicious.

Whether you're a seasoned cook or a beginner in the kitchen, this recipe is sure to impress. With just a few simple ingredients and easy-to-follow instructions, you'll have a batch of piping hot pigs in a blanket ready to enjoy in no time.

  • Refrigerated crescent roll dough
  • Cocktail-size smoked sausages or hot dogs
  • Grated cheese (optional)

Preheat your oven to 375°F (190°C). Unroll the crescent roll dough and separate it into triangles. Place a sausage or hot dog at the wide end of each triangle, and then roll it up, enclosing the sausage completely.

Place the wrapped sausages on a lightly greased baking sheet. If desired, top each roll with a sprinkle of grated cheese.

Bake the pigs in a blanket for 12-15 minutes, or until the dough is golden brown and the sausages are heated through. Serve warm and enjoy the perfect balance of flaky pastry and savory sausage in every bite.

For an extra touch, you can serve them with your favorite dipping sauces, such as mustard, ketchup, or ranch dressing.

Advertisement

Cooking Steps

Unroll the crescent dough sheets and lay them flat.

Place your favorite sausages along the center of each sheet, then roll them up nice and tight.

Pop them in the oven and bake until they're a beautiful golden brown.

Don't forget to brush them with a bit of egg wash for that extra special touch!

Step 1. Unroll Crescent Dough Sheets

unroll crescent dough sheets

Once you have your crescent dough sheets ready, you'll want to gently unroll them onto a clean work surface. Be careful not to stretch or tear the dough as you unfurl it.

Lay the dough sheets flat, making sure there are no creases or folds.

Advertisement

Next, use a sharp knife or pizza cutter to cut the dough into long, rectangular strips. These will be the "blankets" that will wrap around your "pigs" – the sausages or hot dogs you'll be using.

Try to cut the strips evenly, so they're all about the same size. This will help them bake up nice and uniform.

With your dough strips ready, you can now start assembling your pigs in a blanket. Simply place a sausage or hot dog at the end of a dough strip, then tightly roll it up.

Pinch the seam to seal the dough around the "pig." Repeat this process until you've wrapped all your pigs snugly in their crescent dough blankets.

Step 2. Place Sausages on Dough

sausages positioned on dough

With your dough strips neatly prepared, it's time to place the sausages or hot dogs onto them. Gently lay each sausage or hot dog down the center of a dough strip.

You'll want to leave a bit of room on the sides so you can wrap the dough around the filling.

Advertisement

Next, carefully wrap the dough around the sausage, overlapping the edges to create a neat, tidy package. Be sure not to stretch the dough too thin, or it might tear.

Repeat this process with the remaining sausages and dough strips.

Once you've wrapped all the sausages, it's time to transfer them to a baking sheet. Arrange them with a bit of space between each one so they don't stick together as they bake.

Now you're ready to pop them in the oven and let the magic happen! Soon, you'll have piping hot, delicious pigs in a blanket ready to enjoy.

Step 3. Roll up Tightly

roll up tightly step

After carefully placing the sausages or hot dogs on the prepared dough strips, it's time to roll them up tightly.

Grab the end of the dough closest to you and begin rolling it over the sausage, tucking it snugly. Continue rolling until the entire sausage is wrapped in the dough. Be sure to roll it up tightly, so the sausage is fully encased.

Advertisement

As you roll, you may need to gently stretch or pull the dough to ensure it covers the entire length. Once rolled, pinch the seam to seal it, then place the rolled-up pigs in a blanket seam-side down on the prepared baking sheet.

Repeat this process with the remaining dough and sausages, spacing them evenly on the sheet. With all the pigs in a blanket rolled up and ready, you're one step closer to enjoying this delicious treat!

Step 4. Bake Until Golden Brown

bake until golden brown

Preheat your oven to the recommended temperature, typically around 400°F (200°C).

Once your oven is hot, it's time to bake those delicious pigs in a blanket! Carefully place the rolled-up dough pieces onto a baking sheet, making sure they're not touching. This will allow them to bake evenly and achieve that perfect golden-brown color.

Keep a close eye on them as they bake, which should take around 15-20 minutes. The dough will puff up and the cheese (if you added any) will melt, creating a heavenly aroma.

When the tops are a gorgeous golden brown, they're ready to come out of the oven. Be careful, as the pigs in a blanket will be hot!

Advertisement

Let them cool for a few minutes before serving. Enjoy your homemade pigs in a blanket – the perfect bite-sized treat that's sure to delight your taste buds.

Step 5. Brush With Egg Wash

apply egg wash evenly

Before popping those pigs in a blanket into the oven, you'll want to give them a quick egg wash. This simple step adds a beautiful golden-brown sheen to the dough, making your homemade treats look extra appetizing.

To get started, crack an egg into a small bowl and beat it lightly with a fork until it's nice and smooth. Grab a pastry brush, then gently brush the top of each dough-wrapped sausage with the egg mixture. Be sure to cover the entire surface evenly – you don't want any dry spots.

Once you've brushed on the egg wash, your pigs in a blanket are ready for the oven. The egg will help the dough achieve that perfect color as it bakes.

In just 15-20 minutes, you'll have a tray of warm, flaky pigs in a blanket that are impossible to resist. The egg wash brings the whole dish together, making every bite a delight.

Final Thoughts

Ultimately, pigs in a blanket are a versatile and comforting dish that can be enjoyed year-round.

Advertisement

Whether you prefer them as an appetizer, snack, or even a quick meal, these little bundles of joy are sure to delight. The combination of the savory sausage or hot dog wrapped in a fluffy, buttery dough is simply irresistible.

Plus, they're easy to make, which means you can whip them up in no time for any occasion. Imagine serving them at your next party or family gathering – they'll be the talk of the event!

And don't forget, they also make a great lunchbox treat for the kids.

Frequently Asked Questions

What Is the Origin of the Name "Pigs in a Blanket"?

The name "pigs in a blanket" likely comes from the dish's appearance – small sausages or hot dogs wrapped in a soft dough or pastry, resembling pigs snugly tucked into a blanket. This cozy visual likely led to the dish's enduring name.

Are There Any Vegetarian or Vegan Variations of Pigs in a Blanket?

Certainly! There are plenty of vegetarian and vegan alternatives to the classic pigs in a blanket. You can use plant-based sausages, mushrooms, or even tofu wrapped in flaky dough for a meat-free twist on this beloved snack.

Advertisement

How Long Can Pigs in a Blanket Be Stored Before They Spoil?

You can store the pigs in a blanket in the refrigerator for up to 3-4 days. Make sure to keep them in an airtight container to prevent spoilage.

Can I Use Different Types of Sausages or Hot Dogs in Pigs in a Blanket?

You can definitely use different types of sausages or hot dogs in your pigs in a blanket. Feel free to experiment with various types of meat to find your favorite combination.

Is It Possible to Freeze Pigs in a Blanket for Later Use?

Sure, you can freeze pigs in a blanket for later use. Wrap them tightly in foil or freezer-safe plastic, and they'll keep for up to 3 months. Just reheat in the oven when you're ready to enjoy them.

Conclusion

Pigs in a blanket are a classic snack that'll bring a smile to your face. They're easy to make and so darn delicious – the perfect combination of savory sausage and fluffy dough. Once you try 'em, you'll be hooked! Serve 'em up at your next party or enjoy 'em as a tasty afternoon treat. Trust me, these little piggies are a crowd-pleaser that'll have you coming back for more.

Advertisement
Continue Reading
Advertisement

Graduations/Birthdays

Lemon Bars

Unlock the secrets to making the perfect lemon bars, a classic American dessert that combines a buttery crust with a tangy, creamy filling.

Published

on

tangy citrus dessert squares

You'll love lemon bars! These classic American treats combine a buttery, flaky crust with a tangy, creamy lemon filling – it's a heavenly balance of flavors. Originating in the Southwest, lemon bars became popular at bake sales and family gatherings, and they're still a favorite today. The key is perfecting the ratio of sweetness and tartness in the filling. You'll need just a few simple ingredients like butter, sugar, flour, eggs, and fresh lemon juice and zest. The preparation is easy, too – just mix the crust, whisk the filling, and bake. Top it off with a dusting of powdered sugar, and you've got a delightful dessert that's sure to impress. Let's dive into making these irresistible lemon bars!

Key Takeaways

  • Lemon bars are a beloved American dessert originating in the Southwest, characterized by a buttery shortbread crust and tangy, creamy lemon filling.
  • The first known lemon bar recipe appeared in the Chicago Tribune in 1925, and the dessert gained popularity at bake sales, picnics, and family gatherings.
  • The recipe requires a balance of sweetness and tartness, with key ingredients including unsalted butter, granulated sugar, all-purpose flour, eggs, fresh lemon juice, and optional lemon zest.
  • The cooking process involves preparing the crust, whisking the eggs, adding the lemon components, and baking the filling, with a final dusting of powdered sugar for presentation.
  • Lemon bars can be stored in an airtight container in the refrigerator for up to a week and can also be frozen for longer storage.

History

Originating from the American Southwest, lemon bars have been a beloved dessert for generations.

These tangy treats have a rich history that stretches back to the early 20th century. The first known recipe for lemon bars appeared in a 1925 edition of the Chicago Tribune, though variations likely existed even earlier.

As the popularity of lemon-flavored sweets grew, lemon bars became a staple at bake sales, picnics, and family gatherings across the United States.

What makes lemon bars so special? It's the perfect balance of a buttery, flaky crust and a tangy, creamy lemon filling.

The contrast of flavors and textures creates a delightful experience with each bite. Over the years, bakers have experimented with different twists, like adding a dusting of powdered sugar or a drizzle of lemon glaze, but the classic recipe remains a timeless favorite.

Advertisement

Today, lemon bars continue to delight taste buds and evoke nostalgic memories for people of all ages.

Their enduring popularity is a testament to the simple joys of this beloved dessert.

Recipe

Lemon bars are a classic dessert that combine a buttery shortbread crust with a tangy, creamy lemon filling. These bright, refreshing treats are perfect for any occasion, from casual gatherings to elegant dinner parties.

The key to successful lemon bars is balancing the sweetness and the tartness. The crust should be rich and buttery, providing a sturdy base for the tangy filling. The filling, in turn, should be silky smooth and bursting with fresh lemon flavor.

Ingredients:

Advertisement
  • 1 cup (2 sticks) unsalted butter, softened
  • 1/2 cup granulated sugar
  • 2 cups all-purpose flour
  • 1/4 teaspoon salt
  • 4 large eggs
  • 1 1/2 cups granulated sugar
  • 1/4 cup all-purpose flour
  • 1/2 cup fresh lemon juice (about 3-4 lemons)
  • 1 tablespoon grated lemon zest
  • Powdered sugar for dusting

Instructions:

In a medium bowl, cream the softened butter and 1/2 cup of granulated sugar until light and fluffy. Gradually add in the 2 cups of all-purpose flour and the 1/4 teaspoon of salt, mixing until a dough forms. Press the dough evenly into a 9×13 inch baking pan. Bake at 350°F for 20-25 minutes, or until the crust is lightly golden.

While the crust is baking, prepare the filling. In a large bowl, whisk together the 4 eggs and the 1 1/2 cups of granulated sugar until combined. Whisk in the 1/4 cup of all-purpose flour, the fresh lemon juice, and the lemon zest until smooth.

Pour the filling over the hot crust and return the pan to the oven. Bake for an additional 20-25 minutes, or until the filling is set.

Allow the lemon bars to cool completely, then dust the top generously with powdered sugar. For the best texture, refrigerate the bars for at least 2 hours before cutting and serving. Store any leftovers in the refrigerator.

Cooking Steps

Preheat your oven to 350°F.

Advertisement

In a large bowl, whisk the eggs, then add the lemon juice and zest.

Finish by sprinkling powdered sugar on top before baking until the filling is set.

Step 1. Preheat Oven to 350°F

preheat oven 350 f

First, preheat your oven to 350°F. This is an important first step in making delicious lemon bars. By heating the oven to the right temperature, you'll ensure your treats bake evenly and develop a perfect golden-brown crust.

Take a moment to double-check that your oven is set to 350°F. You can use the dial or digital display to confirm the temperature. Once you've verified it's ready, you can move on to the next steps. Preheating the oven typically takes 10-15 minutes, so use this time to gather the rest of your ingredients and prepare your baking pan.

When the oven is fully heated, you'll be ready to pop in the lemon bar batter and let the baking begin!

The preheat step may seem simple, but it's crucial for getting the best possible results. With your oven at the right temperature, you're one step closer to enjoying deliciously tart and sweet lemon bars.

Advertisement

Step 2. In a Large Bowl, Whisk Eggs

whisk eggs in bowl

In a large bowl, whisk the eggs until they're light and frothy. This step is crucial for creating the perfect lemon bar texture. The whisking incorporates air into the eggs, making them light and airy.

Be sure to whisk vigorously for about a minute to really get those eggs nice and fluffy.

Next, add the granulated sugar to the whisked eggs and whisk again until the mixture is smooth and well combined. The sugar will help to thicken and set the lemon filling once the bars are baked.

Don't be afraid to give it a good whisk to make sure everything is evenly distributed.

Step 3. Add Lemon Juice and Zest

incorporate lemon juice zest

After whisking the eggs and sugar together, it's time to add the lemon juice and zest. Lemon juice and zest are the stars of the show when it comes to lemon bars. The bright, tangy flavor is what everyone loves!

First, grab a lemon and use a zester or the small holes on a cheese grater to grate the yellow peel. Be careful not to grate too deep, as you only want the thin, flavorful outer layer. The zest is packed with lemon oil, giving the bars an intense citrus punch.

Next, squeeze the lemon to extract the fresh juice. You'll need about 1/4 cup of lemon juice. The juice adds even more zing and tartness to balance the sweetness.

Advertisement

Whisk the lemon juice and zest into the egg mixture until fully combined. The lemon components are crucial for making these bars irresistible.

With the eggs and sugar already whisked, you're well on your way to creating the perfect lemon bars!

Step 4. Add Powdered Sugar to Top

sprinkle powdered sugar topping

Once the lemon bars have fully baked and cooled, it's time to add the finishing touch – a generous dusting of powdered sugar on top. This final step is the perfect way to elevate the already delicious lemon bars. The powdered sugar creates a beautiful snowy-white topping that contrasts beautifully with the bright yellow of the lemon filling.

To apply the powdered sugar, simply take a fine-mesh sieve and hold it about 6 inches above the bars. Gently tap the side of the sieve, allowing the powdered sugar to drift down in a gentle shower over the entire surface.

Make sure to cover every inch for an even, consistent coating. The powdered sugar will melt slightly, creating a lovely glazed effect.

Once the bars are dusted, they're ready to serve. The powdered sugar adds a wonderful sweetness that perfectly balances the tangy lemon flavor.

Advertisement

Dig in and enjoy the irresistible combination of tart and sweet in every bite!

Step 5. Bake Until Filling Is Set

bake until filling set

Preheat your oven to 350°F and prepare the baking pan by lightly greasing it or lining it with parchment paper.

Once your oven is ready, carefully pour the lemon filling into the prepared pan. Be sure to spread it out evenly so it bakes consistently.

Now, it's time to bake the lemon bars until the filling is set. This will take about 20-25 minutes. Keep an eye on them, as you want the edges to be lightly golden, but the center should still have a slight jiggle when you gently shake the pan.

The filling should be firm to the touch when it's done. Don't worry if it looks a little soft in the middle – it will continue to set as it cools.

Once the bars are baked, remove them from the oven and let them cool completely on a wire rack. This step is crucial, as it allows the filling to fully set and the bars to develop their perfect texture.

Advertisement

With patience, your delicious lemon bars will be ready to enjoy!

Final Thoughts

Lemon bars are a delightful treat that can brighten up any occasion. These tangy and sweet desserts are the perfect balance of flavors, making them a crowd-pleasing favorite.

Baking them to perfection can take a bit of practice, but the final result is well worth the effort.

Once the lemon bars have cooled and the filling is set, it's time to slice and serve them. The combination of the buttery crust and the tart lemon filling is simply divine.

Whether you're enjoying them with family, bringing them to a potluck, or treating yourself to an indulgent snack, lemon bars are sure to put a smile on your face.

Advertisement

Frequently Asked Questions

Can I Use a Different Type of Citrus Fruit?

You can certainly use a different type of citrus fruit in place of lemons. Try substituting limes, oranges, or grapefruit for a unique twist on the classic recipe. The key is to adjust the sweetness to your taste.

How Long Do Lemon Bars Last on the Counter?

How long they last depends on the recipe, but you can typically keep homemade lemon bars on the counter for 3-5 days. Just be sure to store them in an airtight container to maintain their freshness.

Can I Use a Premade Crust Instead of Homemade?

Sure, you can use a pre-made crust instead of homemade. It'll save you time and effort, and the final result will still be delicious. Just be sure to follow the instructions on the pre-made crust package.

What Can I Do if the Lemon Filling Is Too Tart?

If the lemon filling is too tart, you can try adding a bit more sugar to balance out the acidity. You can also consider adding a touch of cream or milk to mellow the flavor.

Is It Possible to Make Lemon Bars Gluten-Free?

You can certainly make lemon bars gluten-free. Use gluten-free flour, such as almond or coconut flour, in the crust and adjust the ingredient ratios to achieve the desired texture and flavor. With a few simple substitutions, you can enjoy gluten-free lemon bars.

Advertisement

Conclusion

You've gotta try these lemon bars – they're the perfect balance of sweet and tart! The buttery crust and creamy lemon filling make for a heavenly treat. Whip up a batch and enjoy them with friends and family. These lemon bars are sure to become a new favorite. Just one bite, and you'll be hooked! Get ready for a burst of sunshine in every delectable morsel.

Continue Reading

Graduations/Birthdays

Brownies

Joyful and decadent, the story of brownies dates back to a historic culinary mishap, unveiling a rich legacy of chocolate-infused delights that continue to captivate taste buds worldwide.

Published

on

delicious chocolate dessert squares

Brownies have a delightful history dating back to the early 20th century, when a chef's mistake in a Chicago hotel kitchen led to the creation of a dense, fudgy square that quickly gained widespread popularity. Today, this chocolate-based dessert comes in countless variations, from walnut to cream cheese, found in bakeries and cafes worldwide. The key to making the perfect brownie lies in balancing the right ingredients and following precise preparation methods. With rich chocolate flavor and a melt-in-your-mouth texture, homemade brownies offer a rewarding baking experience and a delectable treat to share with family and friends. There's much more to discover about these beloved squares.

Key Takeaways

  • Brownies originated in the early 20th century due to a chef's mistake in a Chicago hotel kitchen, leading to their widespread popularity.
  • The classic chocolate-based dessert features a balance of ingredients like unsalted butter, sugar, eggs, flour, cocoa powder, and optional additions like chocolate chips.
  • The key to success in making brownies lies in proper preparation methods, such as melting the chocolate and butter, mixing the batter thoroughly, and baking at the right temperature.
  • Brownies can be sliced into uniform squares and presented with optional toppings like powdered sugar or caramel sauce for added elegance.
  • Baking and sharing brownies can be a rewarding communal experience, allowing for personal variations and the enjoyment of a beloved treat.

History

Tracing the origins of brownies takes us back to the early 20th century, when a chef's mistake in a Chicago hotel kitchen led to the creation of this beloved chocolate treat.

You see, the chef was trying to make a chocolate cake, but they forgot to add the flour. Instead of throwing it out, they decided to bake it anyway. The result was a dense, fudgy square that quickly became a hit with hotel guests.

From that humble beginning, brownies have evolved into a worldwide phenomenon.

Bakers have experimented with different ingredients, creating endless variations like walnut brownies, cream cheese brownies, and even brownies with chunks of chocolate bar mixed in.

Today, you can find brownies in bakeries, cafes, and even the aisles of your local grocery store.

Advertisement

Whether you prefer them cakey or fudgy, plain or loaded with extras, one thing's for sure – brownies have a special place in the hearts and stomachs of chocolate lovers everywhere.

Recipe

Brownies are a classic and beloved chocolate-based dessert that have been enjoyed for generations. These rich, fudgy treats are the perfect indulgence for any occasion, from casual gatherings to special events.

The key to making the perfect brownie lies in the balance of ingredients and the method of preparation. With the right recipe and a little bit of care, anyone can create a batch of brownies that will satisfy even the most discerning sweet tooth.

Ingredients:

  • 1 cup (2 sticks) unsalted butter, melted
  • 2 cups granulated sugar
  • 4 large eggs
  • 1 cup all-purpose flour
  • 3/4 cup unsweetened cocoa powder
  • 1 teaspoon salt
  • 1 teaspoon baking powder
  • 1 cup semi-sweet chocolate chips (optional)

Instructions: Preheat the oven to 350°F (180°C). Grease a 9×13-inch baking pan. In a large bowl, whisk together the melted butter and sugar until combined. Add the eggs, one at a time, mixing well after each addition.

In a separate bowl, sift together the flour, cocoa powder, salt, and baking powder. Gradually add the dry ingredients to the wet ingredients, mixing just until combined. Fold in the chocolate chips, if using. Pour the batter into the prepared baking pan and spread it evenly.

Advertisement

Bake for 25-30 minutes, or until a toothpick inserted into the center comes out clean. Allow the brownies to cool completely before cutting and serving.

To ensure the best results, be sure to use high-quality ingredients and follow the recipe closely. For an extra rich and fudgy texture, consider adding a touch of espresso powder or a splash of vanilla extract to the batter.

Additionally, experiment with different mix-ins, such as nuts, caramel, or even a swirl of peanut butter, to create your own unique twist on this classic dessert.

Cooking Steps

Preheat your oven to 350°F – this gets it ready for baking.

Next, melt the chocolate and butter together, creating a smooth, rich base.

Advertisement

Now, add the eggs and mix well, blending everything nicely.

Time to stir in the sugar and vanilla, bringing in that classic brownie flavor.

Step 1. Preheat Oven to 350°F

preheat oven to 350 f

First, preheat your oven to 350°F. This crucial step ensures your brownies bake evenly and reach the perfect texture. Simply turn the dial on your oven to 350 degrees Fahrenheit and allow it a few minutes to reach the desired temperature.

Once your oven is hot and ready, grab your baking pan. Greasing or lining it with parchment paper will make removing the brownies a breeze later on.

Next, gather all your ingredients so they're within easy reach. This will help the baking process flow smoothly.

Now that your oven is preheated and your pan is prepared, you're one step closer to delicious homemade brownies! The next phase involves mixing the batter, which is where the real magic happens.

Advertisement

Pay close attention to the mixing instructions, as proper technique is key for that perfect fudgy texture. Soon, the aroma of freshly baked brownies will fill your kitchen, leaving you hungry for that first irresistible bite.

Step 2. Melt Chocolate and Butter Together

melt chocolate with butter

To make the perfect brownies, begin by melting the chocolate and butter together. In a medium-sized saucepan, gently heat the chocolate and butter over low heat, stirring constantly.

Be careful not to let the mixture boil, as that can cause the ingredients to separate. Instead, you want to melt them together slowly and smoothly, creating a rich, velvety base for your brownies.

Once the chocolate and butter have fully melted and combined, remove the saucepan from the heat. This step is crucial, as you don't want the mixture to overcook or burn.

Carefully pour the melted chocolate and butter into a large mixing bowl. This will make the next steps easier and help the brownies bake evenly.

Take your time with this process, as properly melting the chocolate and butter is the foundation for creating delicious, fudgy brownies. With the chocolate and butter ready, you can now move on to the next step in the recipe.

Advertisement

Step 3. Add Eggs and Mix Well

incorporate eggs mix thoroughly

Having melted the chocolate and butter together, you can now crack the eggs into the bowl and mix everything well.

Gently crack 2 to 3 eggs directly into the melted mixture. Be careful not to let any eggshells fall in.

Once the eggs are in, use a spoon or whisk to stir the batter together. Mix thoroughly until the eggs are fully incorporated and the batter is smooth and uniform.

Don't overmix, or the brownies could turn out tough. Just mix until everything is well blended. The eggs will help hold the brownies together and give them a fudgy, moist texture.

Keep stirring until the batter looks rich and glossy.

Now that the chocolate, butter, and eggs are mixed, you're ready for the next step: adding the dry ingredients.

Advertisement

Step 4. Stir in Sugar and Vanilla

add sugar and vanilla

Now, stir in the sugar and vanilla. This is where the brownies start to come together!

First, add the granulated sugar. Stir it in gently until it's fully incorporated. The sugar will dissolve into the batter, adding sweetness and a lovely shine.

Next, pour in the vanilla extract. Vanilla is a classic flavor that pairs so well with chocolate. Give the batter another good stir to mix the vanilla throughout. You'll start to smell that delicious aroma filling the kitchen.

The sugar and vanilla work together to create a rich, fudgy texture in the final brownies. Keep stirring until the batter is smooth and homogeneous. Be careful not to overmix, though – you don't want to develop too much gluten, which can make the brownies tough.

Once the sugar and vanilla are evenly distributed, you're ready for the next step!

Step 5. Add Flour and Bake

flour addition and baking

Next, add the flour to the batter. Gently fold it in until no dry pockets remain. Be careful not to overmix, or your brownies will turn out tough and dry.

Once the flour is fully incorporated, your batter is ready for the oven.

Advertisement

Preheat your oven to 350°F (175°C). Grease an 8×8 inch baking pan or line it with parchment paper. Carefully pour the batter into the prepared pan, smoothing the top with a spatula.

Now, it's time to bake! Place the pan in the preheated oven and set a timer for 25-30 minutes. Keep an eye on the brownies, as oven temperatures can vary.

They're done when a toothpick inserted in the center comes out clean or with just a few moist crumbs.

Remove the brownies from the oven and let them cool completely before cutting into squares. Enjoy your delicious homemade treats!

Final Thoughts

As you put the finishing touches on your homemade brownies, take a moment to savor the accomplishment.

Advertisement

You've created a delectable treat that's sure to delight your family and friends. The rich, chocolatey aroma filling the air is a testament to your baking prowess.

Now, let's talk about the final steps. Once your brownies have cooled, it's time to slice them into perfect squares.

Be gentle and use a sharp knife to ensure clean, even cuts. You can even get creative with the presentation, adding a dusting of powdered sugar or a drizzle of caramel sauce for an extra touch of elegance.

As you stack the brownies on a serving plate, take pride in your work.

These brownies aren't just a dessert – they're a reflection of your culinary skills. Enjoy the fruits of your labor, and don't be afraid to share your recipe with others.

Advertisement

After all, the joy of baking is in the sharing.

Frequently Asked Questions

Are Brownies Gluten-Free?

No, brownies are typically not gluten-free. Most recipes for brownies contain wheat flour, which is a source of gluten. If you require a gluten-free dessert, you'll need to find a recipe that specifically uses gluten-free flour or ingredients.

Can Brownies Be Made Vegan?

Yes, you can absolutely make brownies vegan. Simply substitute the eggs and butter with plant-based alternatives like flax or chia eggs and vegan butter or oil. The result will be a delicious, dairy-free and egg-free treat.

How Long Do Homemade Brownies Last?

Homemade brownies typically last 3-5 days when stored properly at room temperature in an airtight container. Their shelf life can be extended to 5-7 days in the refrigerator. Proper storage is key to maintaining their freshness and texture.

Can I Freeze Baked Brownies?

You can freeze baked brownies. Once cooled, wrap them tightly in plastic wrap or aluminum foil, then place in a freezer-safe bag or container. Frozen brownies can last up to 3 months, making them a convenient treat to have on hand.

Advertisement

What Are the Best Toppings for Brownies?

When considering toppings for your sweet treats, you have a wealth of options to make them even more irresistible. From classic chocolate chips to decadent caramel drizzle, the possibilities are endless to personalize and elevate your homemade or store-bought brownies.

Conclusion

You've made it to the end of our brownie adventure! Now it's time to savor the delicious, chocolatey treats you've created. Grab a glass of milk, and dive in. These brownies are sure to bring a smile to your face and satisfy your sweet tooth. Enjoy every bite – you've earned it! Brownies are the perfect indulgence, and you know how to make them just right.

Continue Reading

Graduations/Birthdays

Chocolate Chip Cookies

Homemade chocolate chip cookies with their buttery, crispy edges and soft, chewy centers have captivated taste buds for generations, but their intriguing history is what truly sets them apart.

Published

on

delicious homemade chocolate treats

Chocolate chip cookies are a beloved American classic with a fascinating history! They originated in the 1930s when Ruth Wakefield accidentally created the first batch at the Toll House Inn in Massachusetts. The recipe quickly gained popularity and became a household favorite, with Nestlé printing it on their chocolate bar packages. Over time, the recipe has evolved into various styles, but the timeless combination of buttery, crispy edges and soft, chewy centers remains a universal delight. With just a few simple ingredients, you can easily make these iconic cookies at home – and discover why they've captured hearts (and stomachs!) for generations.

Key Takeaways

  • Chocolate chip cookies originated in the 1930s at the Toll House Inn in Massachusetts, created by Ruth Wakefield.
  • The classic recipe consists of all-purpose flour, baking soda, salt, butter, granulated and brown sugar, eggs, vanilla, and semi-sweet chocolate chips.
  • Proper preheating of the oven and creaming of the butter and sugar are crucial steps for achieving the desired texture and appearance.
  • Gently folding in the chocolate chips ensures even distribution throughout the dough, resulting in a delightful flavor experience.
  • Chocolate chip cookies have become a timeless tradition, fostering a sense of community and evoking happiness when shared.

History

The chocolate chip cookie's origins can be traced back to the 1930s, when Ruth Wakefield, the owner of the Toll House Inn in Whitman, Massachusetts, accidentally created the now-iconic treat.

While preparing a batch of chocolate cookies, Wakefield chopped up a Nestlé chocolate bar, thinking the pieces would melt into the dough. Instead, the chocolate held its shape, resulting in the first chocolate chip cookies. Word of this delicious discovery quickly spread, and the recipe was soon printed on the back of Nestlé chocolate bar packages, making it a household favorite.

Over the years, the chocolate chip cookie has become a beloved classic, with countless variations and recipes.

From soft and chewy to crispy and crunchy, these cookies have captured the hearts and taste buds of people around the world. The simple yet irresistible combination of chocolate and dough has stood the test of time, making the chocolate chip cookie a timeless treat that continues to delight and inspire bakers of all ages.

Recipe

Chocolate chip cookies are a classic dessert that are beloved by people of all ages. These cookies are a delightful combination of buttery, slightly crispy edges and a soft, chewy center. Baking these cookies is a fun and easy way to satisfy your sweet tooth. The rich, creamy flavor of butter enhances flavor and adds to the overall deliciousness of the cookies.

Advertisement

The key to making the perfect chocolate chip cookies is to use high-quality ingredients and to pay attention to the baking time. By following a few simple steps, you can create a batch of cookies that are sure to impress.

  • 2 cups (250g) all-purpose flour
  • 1 teaspoon baking soda
  • 1/2 teaspoon salt
  • 1 cup (230g) unsalted butter, softened
  • 1 cup (200g) granulated sugar
  • 1 cup (220g) light brown sugar
  • 2 large eggs
  • 2 teaspoons vanilla extract
  • 2 cups (340g) semi-sweet chocolate chips

Preheat your oven to 375°F (190°C). Line two baking sheets with parchment paper. In a medium bowl, whisk together the flour, baking soda, and salt.

In a large bowl, beat the butter and both sugars until light and fluffy, about 2-3 minutes. Beat in the eggs one at a time, then stir in the vanilla. Gradually add the dry ingredients to the wet ingredients and mix until just combined. Fold in the chocolate chips.

Scoop the dough by the tablespoonful onto the prepared baking sheets, spacing them about 2 inches apart. Bake for 10-12 minutes, or until the edges are golden brown and the centers are still slightly soft.

Allow the cookies to cool on the baking sheets for 5 minutes before transferring them to a wire rack to cool completely. Enjoy your freshly baked chocolate chip cookies!

Cooking Steps

Preheat your oven to 375°F.

Advertisement

Next, cream the butter and brown sugar until they're light and fluffy.

Now, add the eggs and vanilla, mixing them in until they're well combined.

Step 1. Preheat Oven to 375°F

preheat oven to 375 f

Preheat your oven to a toasty 375°F. This crucial step kickstarts the baking process, ensuring your cookies bake to golden-brown perfection. Heating the oven to the right temperature is key – too low, and your cookies won't rise properly; too high, and they may burn on the outside while remaining doughy inside.

Once the oven reaches 375°F, it's time to slide your cookie dough-filled baking sheet right on in. The intense heat will begin working its magic, causing the dough to spread and rise, creating those mouthwatering chocolate chip cookies you've been craving.

Be sure to set a timer, as baking time is typically around 8-12 minutes for standard-sized cookies. Keep an eye on them, though, as oven temperatures can vary. When the edges turn lightly golden and the centers look just set, your cookies are ready to be removed from the oven.

With the oven preheated, you're one step closer to enjoying warm, gooey chocolate chip cookies.

Advertisement

Step 2. Cream Butter and Brown Sugar

cream butter and sugar

To begin the cookie-making process, cream the butter and brown sugar together in a large mixing bowl. Using an electric hand mixer or a sturdy wooden spoon, blend the two ingredients until they're light and fluffy.

This step is crucial as it incorporates air into the mixture, creating a soft and chewy cookie texture.

Ensure you're using room-temperature butter for the best results. The warmth helps the butter and sugar combine seamlessly.

Cream them together for about 2-3 minutes, pausing occasionally to scrape down the sides of the bowl. You'll know it's ready when the mixture turns a paler shade of brown and has a smooth, creamy consistency.

Once the butter and sugar are perfectly blended, you're ready to move on to the next step in the cookie-making process.

Get excited – the delicious reward of warm, homemade chocolate chip cookies is just around the corner!

Advertisement

Step 3. Add Eggs and Vanilla

incorporate eggs and vanilla

Next, crack the eggs into the creamed butter and sugar mixture, one at a time, beating well after each addition. This helps the eggs incorporate fully, giving the cookies a soft, tender texture. Be sure to use large eggs for the best results.

Once the eggs are mixed in, it's time to add the vanilla extract. This fragrant ingredient will infuse the dough with a delightful vanilla aroma and flavor. Just a teaspoon or two is all you need. Stir the vanilla in gently until it's evenly distributed.

The eggs and vanilla work together to create a wonderfully rich and flavorful cookie dough. The eggs provide structure and moisture, while the vanilla enhances the overall taste.

With these key ingredients added, your chocolate chip cookie dough is really starting to come together. Get ready for the next step – mixing in the dry ingredients!

Step 4. Mix in Dry Ingredients

incorporate dry ingredients thoroughly

With the wet ingredients incorporated, it's time to mix in the dry ones. In a separate bowl, whisk together the flour, baking soda, and salt.

These dry ingredients will give your cookies the perfect structure and texture. Slowly add the dry mixture to the wet ingredients, mixing gently until just combined. Be careful not to overmix, as this can make your cookies tough.

Fold in the chocolate chips, making sure they're evenly distributed throughout the dough. The chocolate chips are the star of the show, so you'll want to make sure there's a delicious chip in every bite!

Advertisement

Once the dough is ready, it's time to scoop and bake. Use a cookie scoop or spoon to portion the dough onto your prepared baking sheets. This will help ensure all your cookies are the same size, baking evenly.

Now your chocolate chip cookie dough is ready for the oven! Get ready for the mouthwatering aroma of freshly baked cookies filling your kitchen.

Step 5. Fold in Chocolate Chips

fold in chocolate chips

Fold the chocolate chips into the cookie dough gently, ensuring they're evenly distributed throughout. You want those delectable morsels in every bite!

Slowly incorporate the chips, using a rubber spatula or wooden spoon to carefully fold them in. Be patient and take your time – you don't want to overmix and risk tough cookies.

With the chips now folded in, your dough is ready for scooping and baking. Use a cookie scoop or spoon to portion out the dough, placing the balls of dough on your prepared baking sheet.

Make sure to leave a bit of space between each one, as the cookies will spread as they bake.

Advertisement

Now you're all set to pop those cookie sheets in the oven. Bake until the edges are golden brown and the centers are still soft.

The aroma of warm, chocolate-studded cookies will fill your kitchen, making it nearly impossible to resist a taste straight from the oven!

Final Thoughts

The perfect chocolate chip cookie is a testament to the power of simplicity. With just a handful of classic ingredients, you can create a treat that delivers pure joy in every bite. As you savor that first warm, gooey cookie, you'll be reminded that the best things in life are often the most straightforward.

The joy of baking chocolate chip cookies goes beyond the final product. The process itself is a delightful sensory experience, from the aroma of melted butter to the satisfying thud of the dough as you scoop it onto the baking sheet.

Each step, from creaming the butter to folding in the chocolate chips, is a chance to connect with the timeless tradition of cookie-making.

Advertisement

Whether you're baking for yourself, your family, or to share with friends, these cookies are sure to bring a smile to everyone's face.

Frequently Asked Questions

How Do I Store Leftover Chocolate Chip Cookies?

To store leftover cookies, place them in an airtight container at room temperature. This will help them stay fresh for up to 5 days. Avoid refrigerating or freezing, as this can dry them out.

Can I Use a Different Type of Chocolate Chip?

Yes, you can use a different type of chocolate chip. Try swapping in dark chocolate, milk chocolate, or even white chocolate chips to change up the flavor profile of your cookies. Experiment to find your favorite!

How Can I Make My Cookies Chewier or Crunchier?

To make your cookies chewier, use more brown sugar and less white sugar. For crunchier cookies, bake them longer and use less moisture in the dough. Experiment with different ingredient ratios to achieve your desired texture.

Can I Freeze the Cookie Dough for Later Use?

Yes, you can freeze the cookie dough for later use. Simply scoop the dough into balls, place them on a baking sheet, and freeze until firm. Then, transfer the frozen dough balls to an airtight container or bag for up to 3 months.

Advertisement

What Are Some Creative Ways to Customize Chocolate Chip Cookies?

You can get creative with chocolate chip cookies by adding crushed nuts, drizzling them with caramel or chocolate, rolling them in cinnamon sugar, or even using different chocolate chips like white, dark, or peanut butter.

Conclusion

You've made it to the end, and what a delicious journey it's been! Chocolate chip cookies are a true classic – the perfect combination of sweet, gooey, and irresistible. Now that you've mastered the recipe, you can whip up a batch anytime you're craving that homemade goodness. Enjoy the warm, freshly-baked cookies, and don't be surprised if they disappear in a flash. These treats are simply too good to resist!

Continue Reading
Advertisement

Affiliate Disclaimer
As an affiliate, we may earn a commission from qualifying purchases. We get commissions for purchases made through links on this website from Amazon and other third parties.

Advertisement

Latest

tangy citrus dessert squares tangy citrus dessert squares
Graduations/Birthdays2 seconds ago

Lemon Bars

Unlock the secrets to making the perfect lemon bars, a classic American dessert that combines a buttery crust with a...

delicious chocolate dessert squares delicious chocolate dessert squares
Graduations/Birthdays5 mins ago

Brownies

Joyful and decadent, the story of brownies dates back to a historic culinary mishap, unveiling a rich legacy of chocolate-infused...

delicious homemade chocolate treats delicious homemade chocolate treats
Graduations/Birthdays11 mins ago

Chocolate Chip Cookies

Homemade chocolate chip cookies with their buttery, crispy edges and soft, chewy centers have captivated taste buds for generations, but...

celebratory dessert for gatherings celebratory dessert for gatherings
Graduations/Birthdays17 mins ago

Sheet Cake

Discover the delectable world of sheet cake, a versatile and crowd-pleasing dessert that has captured the hearts of celebrations for...

delicious baked sweet treats delicious baked sweet treats
Graduations/Birthdays22 mins ago

Cupcakes

Baking cupcakes is a delightful endeavor that unveils a world of endless possibilities, from classic flavors to imaginative creations.

creamy egg salad delight creamy egg salad delight
Graduations/Birthdays28 mins ago

Egg Salad Sandwiches

Unlock the secrets to crafting the perfect egg salad sandwich, a timeless classic that delights the senses and satisfies the...

fresh mozzarella tomato basil fresh mozzarella tomato basil
Graduations/Birthdays33 mins ago

Caprese Sandwiches

Indulge in the irresistible blend of creamy mozzarella, juicy tomatoes, and fragrant basil that makes the Caprese sandwich a beloved...

turkey avocado wrap recipe turkey avocado wrap recipe
Graduations/Birthdays38 mins ago

Turkey and Avocado Wraps

Craving a quick, nutritious, and delicious lunch that satisfies your taste buds? Discover the irresistible combination of Turkey and Avocado...

stuffed flatbread delights stuffed flatbread delights
Graduations/Birthdays43 mins ago

Pita Pockets

Juicy fillings, crisp veggies, and savory grilled meats come together in these versatile pita pockets that are easy to prepare...

bacon lettuce tomato delight bacon lettuce tomato delight
Graduations/Birthdays48 mins ago

BLT Sandwiches

A timeless classic, the BLT sandwich captivates with its harmonious blend of crisp bacon, fresh lettuce, and juicy tomatoes, leaving...

artisanal melted cheese delight artisanal melted cheese delight
Graduations/Birthdays54 mins ago

Gourmet Grilled Cheese

Mouth-watering gourmet grilled cheese sandwiches with artisanal breads and premium cheeses that transform this lunchtime classic into an indulgent culinary...

delicious italian sub sandwiches delicious italian sub sandwiches
Graduations/Birthdays59 mins ago

Italian Sub Sandwiches

Perennially popular for their blend of savory Italian cured meats, creamy cheeses, and crisp veggies, Italian sub sandwiches are a...

Advertisement

Trending