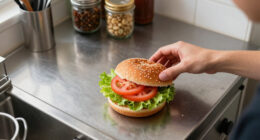

Whether you're hosting a party or craving a tasty snack, mini quiches are the perfect solution! These bite-sized delights have a flaky pastry crust and a creamy egg filling that you can customize with your favorite ingredients. From savory ham and cheese to veggie-packed spinach and mushroom, the options are endless. Pop them in the oven for a quick and easy prep, then enjoy these portable treats warm or at room temperature. Mini quiches are a versatile and scrumptious way to satisfy your cravings – and if you're curious to learn more, keep reading!
Key Takeaways
- Mini quiches are individual-sized versions of the classic French quiche, offering a convenient and customizable format for entertaining and snacking.
- They feature a flaky pastry crust filled with a creamy egg custard, and can be prepared in advance to be served at room temperature.
- Common preparation techniques include using muffin tins, whisking eggs and milk for the base mixture, and filling the tins with desired ingredients.
- Mini quiches are high in protein and can be customized to include healthy vegetables, making them suitable for various diets and occasions.
- They can be served warm or at room temperature, and are ideal for parties, gatherings, or meal prep due to their ease of preparation and versatility.

Instant Pot Duo 7-in-1 Electric Pressure Cooker, Slow Cooker, Rice, Steamer, Sauté, Yogurt Maker, Warmer & Sterilizer, Includes App With Over 800 Recipes, Stainless Steel, 6 Quart
- 7-in-1 Cooking Functions: Pressure, slow, sauté, steam, rice, yogurt, warm
- Smart One-Touch Programs: 13 customizable cooking options
- Safe Steam Release: Easy-Release switch for safety and convenience
As an affiliate, we earn on qualifying purchases.
History
The origins of mini quiches can be traced back to the classic French quiche, a savory open-faced tart with a custard-like filling. This beloved dish has been enjoyed for centuries, with its roots dating back to the Middle Ages in the Lorraine region of France.
Over time, the traditional quiche evolved, and clever cooks began experimenting with individual-sized versions, creating the delightful mini quiches we know and love today.
These bite-sized treats offer the same delicious flavors as their larger counterparts, but in a more convenient and portable form. Mini quiches are perfect for entertaining, picnics, or a quick snack. For a tasty recipe for mini corn dogs, simply coat bite-sized pieces of hot dog in a cornmeal batter and fry until golden brown. These mini corn dogs are a fun and easy snack for kids and adults alike, and they are sure to be a hit at any gathering. Their small size makes them perfect for dipping in your favorite sauces, adding an extra layer of flavor to this classic appetizer.
Their versatility allows for endless flavor combinations, from classic Lorraine with bacon and cheese to creative options like spinach and feta or roasted vegetable.
Whether served warm or at room temperature, mini quiches are a crowd-pleasing delight that have stood the test of time.
Recipe
Mini Quiches
Mini quiches are a delightful bite-sized treat that can be enjoyed as an appetizer, snack, or even a light meal. These savory tarts feature a flaky pastry crust filled with a rich, creamy egg custard and your choice of tasty toppings. Perfect for entertaining or anytime you crave a satisfying, portable indulgence.
The versatility of mini quiches makes them a crowd-pleasing option. They can be prepared in advance and served at room temperature, making them an ideal choice for parties and gatherings. Plus, the individual serving size allows you to easily customize the fillings to accommodate various dietary preferences and personal tastes.
- 1 sheet refrigerated pie crust
- 6 large eggs
- 1 cup half-and-half
- 1/2 teaspoon salt
- 1/4 teaspoon black pepper
- 1 cup shredded cheese (such as cheddar, Swiss, or Gruyère)
- Desired toppings (such as diced ham, cooked bacon, sautéed mushrooms, or caramelized onions)
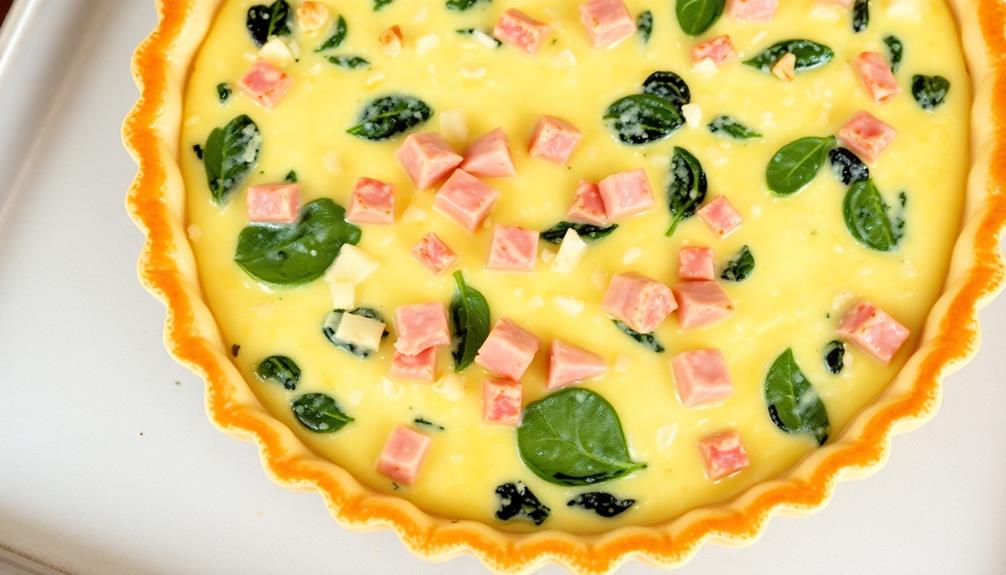
Preheat your oven to 375°F (190°C). Grease a 12-cup mini muffin tin. Unroll the pie crust and use a 3-inch round cutter to cut out 12 circles. Gently press the circles into the prepared muffin cups.
In a medium bowl, whisk together the eggs, half-and-half, salt, and pepper. Divide the egg mixture evenly among the prepared muffin cups. Sprinkle the shredded cheese and desired toppings over the top.
Bake the mini quiches for 20-25 minutes, or until the centers are set and the edges are lightly golden. Allow them to cool in the muffin tin for 5 minutes before carefully removing them. Serve the mini quiches warm or at room temperature. For best results, enjoy them within a day of baking.
Cooking Steps
Preheat that oven to 375°F – that's where the magic starts!
Next, roll out the pie crust and cut it into rounds.
Pop those dough rounds right into your muffin tin, then you can fill 'em up with all the yummy ingredients.
Let's get cookin'!
Step 1. Preheat Oven to 375°F
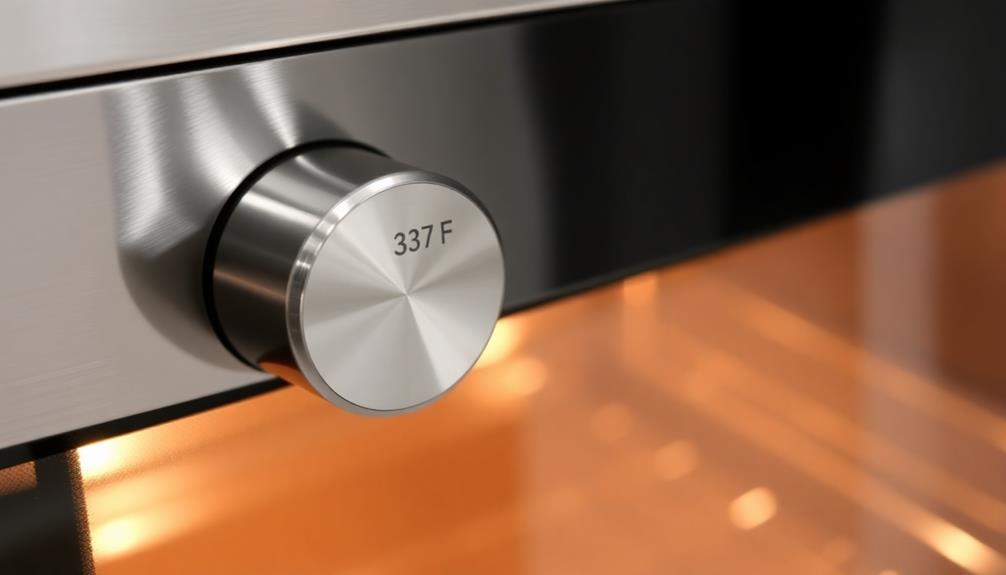
Preheat your oven to 375°F. This temperature is perfect for baking the delicious mini quiches you'll be making. It's an important first step to ensure your quiches cook evenly and turn out flaky and golden brown.
Once your oven is preheated, you can start preparing the other ingredients. Make sure to gather all your tools and materials ahead of time so you're ready to go. Having everything organized will help the process go smoothly.
As the oven heats up, you can start mixing the filling for your quiches. The warmth will make it easier to blend the ingredients together into a smooth, creamy mixture.
Pay close attention to the oven temperature, though – you don't want to start baking until it's reached 375°F. Once it's ready, you can confidently slide your quiche pans into the oven and let the baking begin!
Step 2. Roll Out Pie Crust
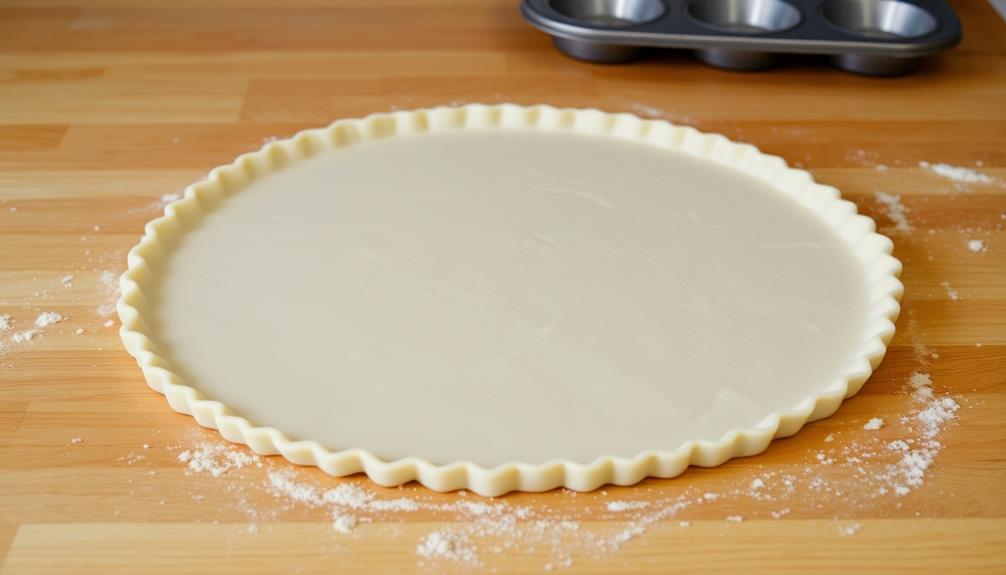
With your oven preheated and ready to go, let's turn our attention to the pie crust.
You'll want to lightly flour your work surface before rolling out the dough. Gently place the chilled pie crust on the floured surface and use a rolling pin to roll it out into a thin, even circle.
Make sure to roll from the center outward, applying even pressure. As you roll, periodically lift the dough and add a light dusting of flour to prevent sticking.
Once the dough is the right size, carefully transfer it to your muffin tin, pressing it firmly into the cups. Trim any excess dough from the edges.
Now you're ready to fill your mini quiche cups and bake them to perfection! The key is to work quickly and lightly to ensure a flaky, tender crust.
With a little practice, you'll be rolling out pie dough like a pro.
Step 3. Cut Dough Into Rounds
Using a lightly floured surface, cut the rolled-out pie dough into rounds using a circular cookie cutter or biscuit cutter. The key is to press the cutter straight down, not twisting it, to ensure clean, even cuts.
Gently lift the rounds and place them into the wells of a greased mini muffin tin. You'll want to fill each well about three-quarters full to allow room for the quiche filling.
Be sure to use a cutter that's the right size for your mini muffin tin. If the rounds are too small, the quiches will be skimpy. Too big, and they'll overflow.
Work quickly, as you don't want the dough to get too warm and lose its shape. Any scraps can be gathered, re-rolled, and cut again.
With a little practice, you'll be cutting perfect rounds in no time. Now you're ready to add the quiche filling and bake your delicious mini quiches!
Step 4. Place Dough Rounds in Muffin Tin

Gently place the cut dough rounds into the wells of the greased mini muffin tin. Careful not to stretch or tear the delicate dough as you nestle it into each cup. You want a smooth, even layer that will bake up into a perfect little quiche shell.
Once all the dough rounds are in place, use your fingers to gently press the dough into the sides and bottom of each well, ensuring an even thickness throughout.
Now that your mini quiche bases are ready, it's time to add the tasty fillings! Get excited to pour in the creamy egg mixture and sprinkle with your favorite toppings. The possibilities are endless – bacon, cheese, veggies, herbs, the list goes on.
Soon, the aroma of baking quiche will fill your kitchen, and you'll have a batch of adorable, bite-sized treats ready to enjoy. Let's keep going – the best part is coming up next!
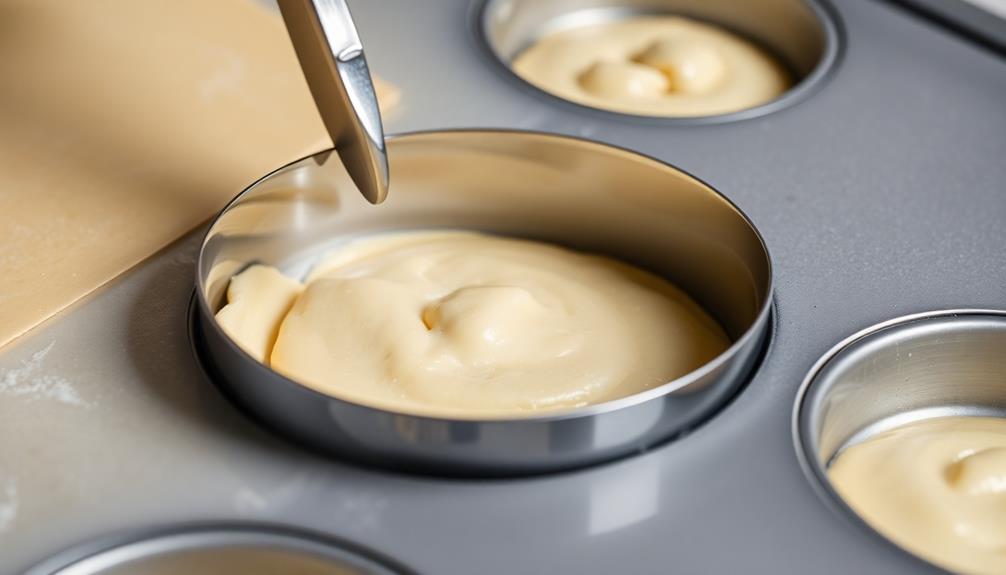
Step 5. Fill Filling

Next, pour the prepared egg mixture into each of the mini quiche shells, filling them about three-quarters full. Be careful not to overfill, as the quiches will puff up during baking. Gently shake the muffin tin to help the filling settle evenly.
Now, it's time to add your favorite toppings! Sprinkle some shredded cheese over the top of each quiche. You can use cheddar, Swiss, or any other variety you enjoy.
Then, add a small amount of your chosen filling ingredients, such as diced ham, crumbled bacon, or sautéed veggies.
The mini quiches are now ready for the oven! Carefully place the muffin tin on the middle rack and bake for 18-22 minutes, or until the tops are golden brown and the centers are set.
Keep an eye on them to ensure they don't overbake. Once the quiches are done, let them cool for a few minutes before removing them from the tin.
Final Thoughts
Overall, mini quiches make for a delightful and versatile snack or appetizer. You can whip up a batch in no time, and they're perfect for everything from casual gatherings to fancy parties.
The best part? They're endlessly customizable, so you can experiment with different fillings and flavors to suit your taste.
Whether you prefer a classic cheese and egg combination or something more adventurous, mini quiches are a great way to get creative in the kitchen.
And don't forget, they're not just for breakfast or brunch – they can be enjoyed as a tasty appetizer or even a light lunch.
Frequently Asked Questions
How Long Do Mini Quiches Last in the Fridge?
Leftover mini quiches can typically last 3-4 days in the fridge when stored properly in an airtight container. Be sure to consume them within this timeframe for optimal freshness and food safety.
Can I Freeze Mini Quiches for Later Use?
Yes, you can freeze mini quiches for later use. They'll keep in the freezer for up to 3 months. Just make sure to let them cool completely before freezing, and reheat them thoroughly before serving.
What's the Best Way to Reheat Mini Quiches?
The best way to reheat mini quiches is by preheating your oven to 350°F (175°C) and placing the frozen quiches on a baking sheet. Bake for 10-15 minutes, or until they're heated through and the crust is crispy.
Can I Use Different Types of Cheese in Mini Quiches?
You can absolutely use different types of cheese in your mini quiches. Feel free to experiment with cheddar, Swiss, feta, or even a blend of cheeses to find your perfect flavor combination.
Do Mini Quiches Need to Be Served Immediately?
Mini quiches don't necessarily need to be served immediately. You can make them ahead of time and reheat them when ready to serve. However, for the best texture and flavor, it's best to serve them as soon as possible.
Conclusion
You'll love baking these mini quiches! They're so easy to make and perfect for any occasion. Just pop them in the oven, and you'll have a delicious, bite-sized treat in no time. The flaky crust and creamy filling are a winning combination that'll have your family and friends coming back for more. Give these mini quiches a try – you won't be disappointed!