Connect with us

Graduations/Birthdays

Mini Pies

Mini pies, the bite-sized delights, offer a world of flavor in every mouthwatering morsel, captivating taste buds with their flaky crusts and irresistible fillings.

Published

on

delicious bite sized desserts

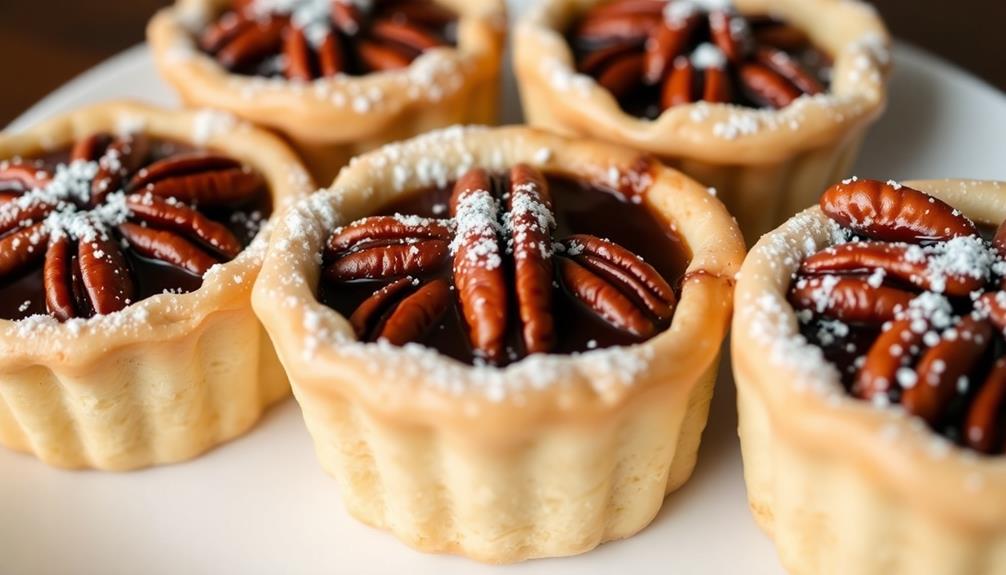
Mini pies are the delightful bite-sized treats that have captivated taste buds for centuries. With their flaky, golden crusts and irresistible fillings, these petite pastries have evolved from their humble European origins to become a beloved staple in homes and gatherings worldwide. Offering endless flavor combinations, from classic fruits to unique chocolate fillings, mini pies provide the perfect way to satisfy your sweet cravings without excess. Plus, they're great for sharing and encourage mindfulness in dessert enjoyment – each mouthwatering morsel an opportunity to savor the flavors. Discover the joy of mini pies and uncover a world of culinary delights.

Key Takeaways

  • Mini pies offer a variety of sweet and savory flavor options in a convenient, individual-sized portion.
  • They originated in the Middle Ages as individual-sized pastries and gained popularity in the 19th century for events and celebrations.
  • The recipe for mini pies typically includes a flaky crust, with customizable fillings ranging from fruits to chocolates and savory ingredients.
  • Baking mini pies involves rolling out the dough, cutting out shapes, filling the crusts, and baking until golden brown.
  • Mini pies encourage mindful dessert consumption and are perfect for sharing during gatherings or celebrations.

History

When did the idea of mini pies first emerge? You might be surprised to learn that mini pies have been around for centuries! The concept of creating smaller, individual-sized pies dates back to the Middle Ages in Europe.

Back then, bakers would make tiny pie crusts called "tarts" or "patties" to serve at special events and celebrations. These mini pies weren't only adorable, but also practical – they were easy to eat and share with others.

As time passed, the popularity of mini pies grew. In the 19th century, they became a staple at tea parties and picnics in both Europe and America.

Ingenious bakers experimented with all sorts of fillings, from sweet fruit to savory meats. Mini pies were the perfect portable treat!

Today, these bite-sized delights continue to delight people of all ages. Whether you enjoy a classic apple pie or something more unique, mini pies are a delicious way to indulge in the timeless joy of baking.

Advertisement

Recipe

Mini Pies

Recipe

Mini pies are a delightful and versatile treat that can be enjoyed as a dessert, a snack, or even as a savory bite. These miniature pastries offer the same satisfaction as a full-sized pie, but in a more manageable and portable format. Whether you're hosting a gathering or simply indulging in a personal treat, mini pies are sure to delight.

The beauty of mini pies lies in their ability to be customized to suit your tastes. From classic fruit fillings to decadent chocolate or savory options, the possibilities are endless. With a few simple ingredients and a bit of creativity, you can create a batch of bite-sized pies that will leave your guests or family members eagerly reaching for more.

Ingredients:

Advertisement
  • 2 cups all-purpose flour
  • 1/2 teaspoon salt
  • 3/4 cup unsalted butter, chilled and cubed
  • 1/4 cup ice water
  • 1 cup desired filling (e.g., fruit, chocolate, savory)

Cooking Instructions:

Preheat your oven to 375°F (190°C). In a large bowl, combine the flour and salt. Cut in the chilled butter until the mixture resembles coarse crumbs. Gradually add the ice water, mixing until the dough just begins to come together.

Divide the dough into two equal parts, shape each into a disk, wrap in plastic, and refrigerate for at least 30 minutes.

On a lightly floured surface, roll out the dough to a thickness of approximately 1/8 inch. Using a round cookie cutter or biscuit cutter, cut out circles of dough, rerolling the scraps as needed. Place the dough circles into a greased mini muffin tin, gently pressing them into the cups.

Fill each cup with your desired filling, being careful not to overfill. Top with another dough circle and crimp the edges to seal.

Bake the mini pies for 20-25 minutes, or until the crust is golden brown. Allow them to cool in the tin for 5 minutes before transferring to a wire rack to cool completely.

Advertisement

Tips:

For a flakier crust, consider using a combination of butter and shortening in the dough. Chilling the dough before rolling and baking is also crucial to ensure the pastry holds its shape.

Experiment with different fillings and flavor combinations to find your personal favorites. Mini pies can be stored in an airtight container for up to 3 days, making them a great make-ahead dessert option.

Cooking Steps

Roll out that dough until it's nice and thin.

Then, grab your favorite cookie cutters and cut out all sorts of fun shapes.

Advertisement

Fill those crusts with your tastiest fillings, crimp the edges tight, and pop them in the oven until they're golden brown.

Step 1. Roll Out the Dough

roll out the dough

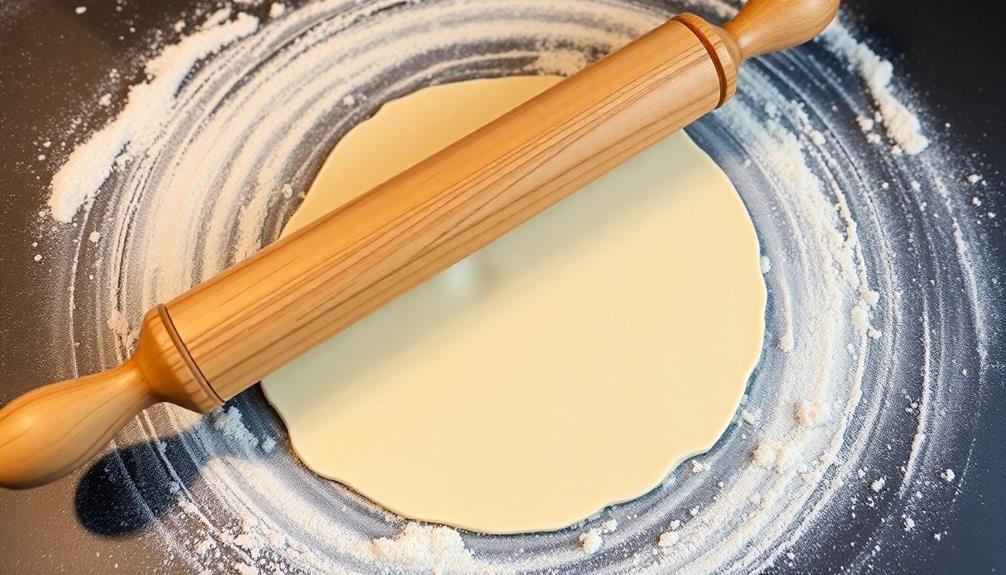
The dough is the foundation of your mini pies, so it's crucial to roll it out properly. Start by lightly flouring your work surface, then place the dough in the center.

Using a rolling pin, gently roll the dough out, starting from the middle and working your way towards the edges. Apply even pressure and rotate the dough frequently to ensure it's evenly thin.

As you roll, keep an eye on the size. You'll want the dough to be about 1/8 inch thick and large enough to fit your mini pie pans. If it starts to stick, lightly dust the surface with more flour.

Once it's the right size, carefully transfer the dough to your pans, pressing it gently into the bottom and sides. Trim any excess dough from the edges.

Now you're ready to fill your mini pies with delicious ingredients! Just remember, taking the time to roll out the dough properly will give your mini pies a perfect, flaky crust.

Advertisement

Step 2. Cut Out the Shapes

cut out the shapes

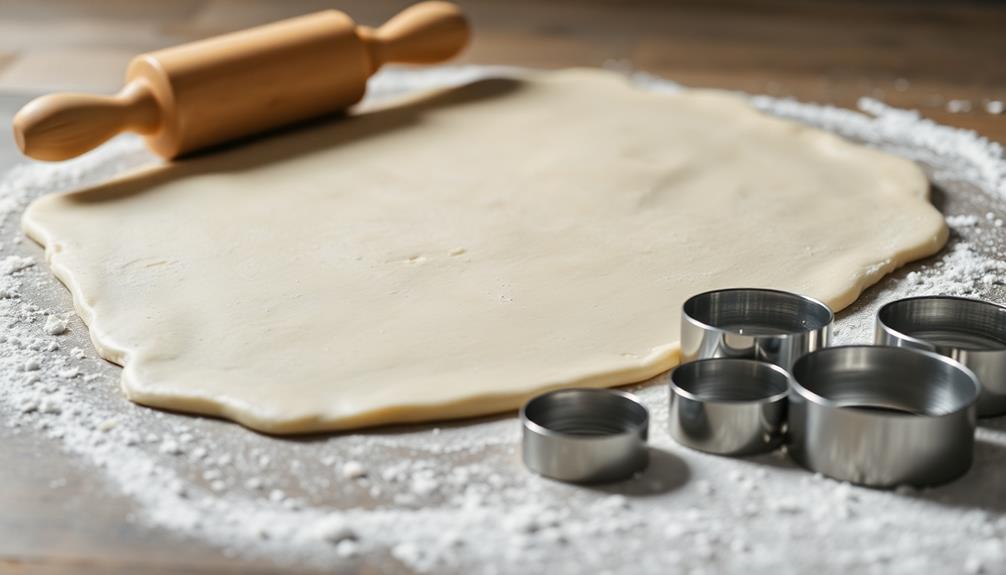
With your dough rolled out, it's time to cut out the shapes for your mini pies. Grab your favorite cookie cutters or a sharp knife and get ready to work. You can make all kinds of fun shapes – circles, hearts, stars, or even mini versions of your favorite animals!

Gently press the cutters into the dough, making sure to leave a little space between each shape. Carefully lift the cut-out pieces and place them onto a baking sheet. You can even re-roll the leftover dough scraps to create more mini pies.

Once all your shapes are cut out, it's time to add the fillings. Use your favorite fruit, nut, or cream cheese spreads to fill the centers. Be sure not to overfill, as the dough needs room to expand during baking.

With your mini pies ready, you're one step closer to enjoying a delicious homemade treat.

Step 3. Fill the Crusts

fill the crusts completely

After cutting out the shapes, it's time to fill the crusts. Grab your little pie tins and start scooping in the tasty fillings. Are you making sweet or savory mini pies? Either way, be generous with the yummy goodness!

For fruit pies, spoon in your favorite berries, apples, or other diced fruit. Don't forget a sprinkle of sugar and a pinch of spice to make it extra special. For savory pies, try hearty fillings like chicken, beef, or veggies. Make sure to season them up with herbs and spices to pack in the flavor.

Once your crusts are full, it's time to top them off. For fruit pies, add a cute lattice crust or a simple top crust. Crimp the edges to seal in all that yummy filling.

Advertisement

Savory pies might get a full top crust or even a decorative puff pastry topping. Don't be afraid to get creative and make each mini pie unique. Soon, your kitchen will be filled with the mouthwatering aroma of freshly baked mini pies!

Step 4. Crimp the Edges Securely

securely crimp the edges

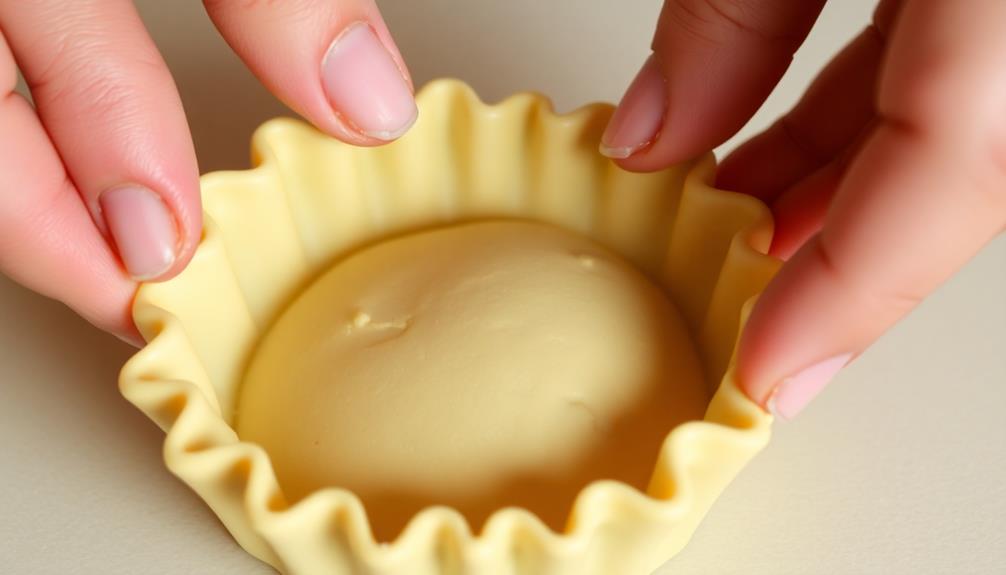
Once the crusts are filled, it's important to crimp the edges securely to seal in all the delicious flavors.

Grab the edges of the dough with your fingertips and gently pinch them together, creating a beautifully scalloped design. Don't be afraid to press firmly – you want to make sure those fillings stay put!

Next, use a fork to firmly press down along the crimped edge. This won't only help the seal, but it'll also add a charming decorative touch.

Be careful not to pierce the dough, though – you don't want any of those tasty ingredients leaking out.

Step 5. Bake Until Golden Brown

bake until golden brown

Preheat your oven to 375°F. Once it's nice and hot, it's time to pop those mini pies in!

Carefully place them on a baking sheet lined with parchment paper. Make sure they're not touching, so they've room to bake evenly.

Advertisement

Now, keep a close eye on them as they bake. You'll know they're done when the crusts turn a beautiful golden brown, about 15-18 minutes. The tops should be puffed up and the filling should be bubbly.

Don't be tempted to open the oven door too often – that can make the pies collapse. Instead, use the oven light to peek in and check on their progress.

When they're perfectly baked, use oven mitts to carefully remove the tray from the oven.

Let the mini pies cool for a few minutes before serving. This allows the filling to set and the crusts to become crisp.

Then, dig in and enjoy your delicious homemade treats!

Advertisement

Final Thoughts

Having explored the world of mini pies, it's clear that these delightful treats offer a world of possibilities. Whether you prefer classic flavors or get adventurous with unique combinations, there's a mini pie out there for every taste bud.

The best part? They're the perfect size for satisfying your sweet cravings without going overboard.

Don't be afraid to get creative in the kitchen. Experiment with different crusts, fillings, and toppings to find your signature mini pie. The beauty of these petite desserts is that they're endlessly customizable.

Plus, they're a fun way to involve the whole family in the baking process.

As you continue your mini pie journey, remember to savor every bite. These little delights are meant to be enjoyed slowly and savored thoroughly.

Advertisement

Frequently Asked Questions

How Long Do Mini Pies Last in the Refrigerator?

Mini pies generally last 3-4 days in the refrigerator. However, it's best to check for signs of spoilage, like an off smell or texture, before consuming. Proper storage in an airtight container can help extend their shelf life.

Can I Freeze Mini Pies for Later Use?

Yes, you can freeze mini pies for later use. Freezing them can extend their shelf life by several months. Be sure to wrap them tightly and label with the date before placing in the freezer.

What Are Some Creative Flavor Combinations for Mini Pies?

You can get creative with mini pie flavors! Try sweet options like apple-cinnamon, pecan, or chocolate-cherry. Or go savory with spinach-feta, caramelized onion, or even mini chicken pot pies. The possibilities are endless for these bite-sized treats.

Can I Use a Store-Bought Pie Crust for Mini Pies?

You can definitely use a store-bought pie crust for your mini pies. It's a quick and easy way to create delicious individual-sized treats. Just make sure to adjust the baking time and keep an eye on them as they cook.

How Can I Ensure the Perfect Flaky Crust for My Mini Pies?

To ensure a perfect flaky crust for your mini pies, you'll want to use a high-quality store-bought pie crust or make your own using cold butter or shortening. Treat the dough gently and allow it to rest before baking for the best results.

Advertisement

Conclusion

You'll love making these mini pies! They're super easy and oh-so-tasty. Just follow the simple steps, and you'll have delightful little pies in no time. The best part? You can customize them with your favorite fillings. Get creative and have fun baking up a batch of these adorable mini treats. Trust us, your family and friends will be impressed by your baking skills!

Continue Reading
Advertisement

Graduations/Birthdays

Sprinkle-Rimmed Drinks

Whimsical and visually captivating, sprinkle-rimmed drinks transport you to a world of playful flavors and enchanting presentations that will leave you craving more.

Published

on

colorful rimmed beverages

You'll be delighted to discover the vibrant world of sprinkle-rimmed drinks! These colorful creations originated in the early 1900s, when creative bartenders began enhancing cocktails with decorative toppings. Today, the trend remains popular for parties and gatherings, with endless possibilities for rimming glasses with an array of sprinkles and candies. Whether you're mixing up a classic margarita or a refreshing mocktail, a sprinkle-rimmed glass adds a playful touch that captivates the senses. The key is balancing the sweetness of the sprinkles with the boldness of your chosen spirit or mixer. Prepare to be enchanted as you explore the delightful flavor and visual appeal of these festive drinks.

Key Takeaways

  • Sprinkle-rimmed drinks originated in the early 20th century as a creative bartender technique to enhance cocktail presentation and add textural interest.
  • Rimming glasses with assorted sprinkles, like nonpareils or crushed candies, provides a festive and visually appealing touch to both alcoholic and non-alcoholic beverages.
  • The balance between the sweetness of the sprinkles and the boldness of the liquor is crucial for achieving a harmonious flavor profile in sprinkle-rimmed drinks.
  • Sprinkle-rimmed drinks are versatile and suitable for a variety of occasions, from casual gatherings to themed parties and celebrations.
  • The creative customization of sprinkle combinations and garnishes allows for unique and personalized drink presentations that can elevate the overall drinking experience.

History

According to historical accounts, the concept of rimming drinks with sprinkles or other decorative toppings can be traced back to the early 20th century. During this time, creative bartenders began experimenting with unique ways to enhance the presentation of their cocktails.

They discovered that adding a colorful, crunchy rim couldn't only make drinks more visually appealing but also add a delightful textural contrast.

The trend quickly caught on, and soon sprinkle-rimmed drinks became a staple at parties and social gatherings. People loved the playful, whimsical touch it added to their beverages.

Over the decades, the practice evolved, with bartenders and home mixologists trying out different types of sprinkles, sugars, and even crushed cookies or candies to rim their drinks.

Today, sprinkle-rimmed drinks remain a popular way to add a touch of fun and flair to any occasion, from casual get-togethers to elegant celebrations.

Advertisement

Recipe

Sprinkle-Rimmed Drinks are a fun and festive way to add a touch of whimsy to any occasion. Whether you're hosting a party or simply treating yourself, these colorful and flavorful drinks are sure to delight.

The rimming of the glass with a variety of sprinkles not only adds a visually appealing element but also provides a delightful textural contrast to the smooth and refreshing drink within. The possibilities are endless when it comes to the sprinkle combinations, allowing you to tailor the drink to your personal taste or the theme of the event.

  • Assorted sprinkles (such as nonpareils, sanding sugar, or crushed candy)
  • Cocktail or mocktail of your choice (e.g., margarita, mojito, lemonade)
  • Lime wedges (optional)

Begin by preparing the sprinkle rim. Pour the desired sprinkles onto a shallow plate or saucer. Wet the rim of the glass with a lime wedge or a small amount of water. Carefully dip the rim of the glass into the sprinkles, gently twisting to ensure even coverage. Set the prepared glass aside.

Next, prepare your cocktail or mocktail according to the recipe. Once the drink is ready, carefully pour it into the sprinkle-rimmed glass. The sprinkles will cling to the sides, creating a festive and eye-catching presentation.

For an extra touch of flair, consider garnishing the drink with a lime wedge or a complementary fruit slice. The sprinkle-rimmed glasses can be made in advance, allowing you to quickly assemble your drinks when guests arrive.

Enjoy your Sprinkle-Rimmed Drinks and let the celebration begin!

Advertisement

Cooking Steps

First, rim the glass with colorful sprinkles to add a fun and festive touch.

Next, pour in your favorite liquor and mix in the remaining drink components.

Step 1. Rim Glass With Colored Sprinkles

rim glass colorful sprinkles

Prepare your glasses by lightly wetting the rim with a damp cloth or paper towel. This will help the sprinkles stick to the edge.

Next, choose your favorite colored sprinkles. Maybe you want to use rainbow sprinkles for a fun, festive look, or opt for subtle metallic sprinkles for a sophisticated touch.

Carefully pour a small amount of sprinkles onto a plate or shallow bowl. Gently dip the wet rim of the glass into the sprinkles, rolling it around to coat the edge evenly.

Tap off any excess sprinkles, then fill your glass with your desired beverage. The colorful, sprinkle-rimmed glass will instantly brighten up your drink and add a playful, decorative element.

Advertisement

Get creative and try different sprinkle colors and patterns to complement the drink inside. This simple technique is a great way to elevate your cocktails, mocktails, or even non-alcoholic beverages for any occasion.

Step 2. Add Liquor

incorporate alcohol into mixture

Now that you've created a whimsical sprinkle-rimmed glass, it's time to add the liquor.

Grab your favorite spirit, whether it's vodka, gin, or rum. Carefully pour it into the prepared glass, being mindful of the sprinkle rim.

The colorful sprinkles will dance and swirl as the liquor hits them, creating a mesmerizing display.

Don't be afraid to experiment with different spirits – each one will interact with the sprinkles in a unique way.

For a refreshing twist, you can even try adding a splash of soda or juice to the mix.

Advertisement

The key is to find the perfect balance between the sweetness of the sprinkles and the boldness of the liquor.

As you sip your creation, enjoy the playful interplay of flavors and textures.

Get ready to delight your senses and impress your guests with these sprinkle-rimmed cocktails.

Step 3. Add Drink Components

incorporate beverage ingredients

Once you've rimmed the glass with the colorful sprinkles, you'll want to start adding the drink components.

Begin by pouring in your favorite liquor. This could be vodka, gin, or even a flavored rum – the choice is yours! Did you know that some studies suggest coffee can enhance cognitive function? Coffee's health benefits can make for an interesting addition to your drink if you choose to incorporate coffee liqueurs.

Next, add a splash of sour mix or lemon juice to balance the sweetness. Don't be afraid to experiment with different juice combinations, like orange or pineapple, to create unique flavor profiles.

Advertisement

Now it's time to sweeten things up. A touch of simple syrup or honey can do the trick, but you can also get creative with flavored syrups, like raspberry or vanilla.

Stir everything together until it's well-combined.

Step 4. Stir in Desired Ingredients

mix in chosen ingredients

How about you stir in your desired ingredients next? This is where you can get creative and customize your sprinkle-rimmed drink to your own taste.

First, add any syrups, juices, or other liquids you'd like. Give it a gentle stir to combine everything.

Next, you can sprinkle in some spices, herbs, or even a bit of zest from a citrus fruit. Maybe a dash of cinnamon or a pinch of ginger would be nice. Don't be afraid to experiment! Just be sure to stir it all together well so the flavors meld.

Finally, you can top it off with a fun garnish, like a slice of fruit or a sprig of mint. This helps bring all the flavors together in a visually appealing way.

Advertisement

Once you've stirred in your desired ingredients, your sprinkle-rimmed drink is ready to enjoy. Sip and savor the unique flavors you've created.

Step 5. Garnish With Edible Flowers

garnish using edible flowers

Why not take your sprinkle-rimmed drink to the next level by garnishing it with edible flowers? These vibrant and whimsical additions can instantly elevate the presentation of your beverage. Carefully select complementary flowers that not only look beautiful, but also offer a subtle, natural flavor to enhance your drink.

Consider using delicate, petite blooms like pansies, violets, or nasturtiums. Their delicate, sweet flavors pair beautifully with many cocktails and mocktails. Arrange the flowers around the rim of the glass, letting them dangle gracefully over the edge. You can even float a few petals directly in the drink for a stunning visual effect.

Edible flowers add a touch of elegance and sophistication to your sprinkle-rimmed creations. Plus, they're a fun way to get creative and make your drinks truly one-of-a-kind.

Final Thoughts

While sprinkle-rimmed drinks may not be for everyone, they can add a delightful and whimsical touch to any gathering. Whether you're hosting a party, celebrating a special occasion, or simply looking to add a bit of fun to your everyday, these playful drinks are sure to bring smiles to your guests' faces.

The vibrant colors and unexpected texture of the sprinkles can transform a simple cocktail or mocktail into a true work of art.

Advertisement

Of course, the key to successful sprinkle-rimmed drinks is finding the right balance. You'll want to choose sprinkles that complement the flavors of your drink, and be careful not to overdo it.

A light dusting around the rim can go a long way in adding visual appeal and a touch of whimsy. So why not give it a try? Embrace your inner child and let your creativity shine through with these delightful, sprinkle-topped creations.

Frequently Asked Questions

What Is the Purpose of the Sprinkle Rim?

The purpose of the sprinkle rim is to add a decorative touch and enhance the flavour of the drink. It catches the eye, creating an enticing visual appeal, while also complementing the drink's overall taste and aroma.

How Long Will the Sprinkle Rim Last on the Drink?

The sprinkle rim won't last too long on your drink. The moisture from the liquid and agitation will cause the sprinkles to dissolve and disperse within a short time, usually less than 10 minutes.

Can I Use Any Type of Sprinkle for the Rim?

You can use a variety of sprinkles for the rim, but some may work better than others. Consider factors like moisture, texture, and adhesion to find the perfect sprinkle for your drink.

Advertisement

How Do I Get the Sprinkles to Stick to the Glass?

To get sprinkles to stick to the glass, you'll need a sticky surface. Moisten the rim with a bit of water, juice, or syrup, then dip it in the sprinkles. The moisture will help them adhere.

Can I Make the Sprinkle Rim in Advance?

You can make the sprinkle rim in advance. Simply apply the sprinkles to a moistened glass rim and allow it to dry completely. Then, when you're ready to serve, the sprinkles will still be firmly in place.

Conclusion

Whoa, you're really gonna love these sprinkle-rimmed drinks! They're a blast to make and even more fun to drink. Grab your favorite colorful sprinkles, rim those glasses, and get ready for a party in your mouth. These drinks are sure to put a smile on your face and bring out the kid in you. So, what are you waiting for? Let's get sprinkling!

Continue Reading

Graduations/Birthdays

Birthday Cake Puppy Chow

Uncover the captivating blend of crunchy Chex, creamy white chocolate, and vibrant sprinkles that make Birthday Cake Puppy Chow an irresistible treat for any celebration.

Published

on

festive puppy chow treats

Get ready to dive into the delightful world of Birthday Cake Puppy Chow! This festive twist on the classic Chex cereal treat combines the crunchy texture of Chex with the rich sweetness of white chocolate and the vibrant colors of rainbow sprinkles. It's the perfect treat for birthdays, parties, or any special occasion. You'll love how the irresistible flavors and textures come together to create a snack that's both visually appealing and utterly delicious. With just a few simple steps, you can whip up a batch and start celebrating in style. Let's explore the details that make this birthday-themed treat so irresistible.

Key Takeaways

  • Birthday Cake Puppy Chow is a sweet and crunchy treat that combines Chex cereal, white chocolate, and colorful sprinkles for a festive twist on traditional puppy chow.
  • The recipe originated in the 1950s and gained popularity as a party food for birthdays and special occasions, appealing to all ages.
  • The combination of the crunchy cereal, rich chocolate, and vibrant sprinkles creates an irresistible snack that is easy to prepare and perfect for sharing.
  • Birthday Cake Puppy Chow can be stored in an airtight container for up to a week, making it a convenient and enjoyable treat for various celebrations.
  • The festive appearance and sweet flavors of Birthday Cake Puppy Chow help create a joyful and celebratory atmosphere, making it an ideal addition to any birthday party or gathering.

History

The origins of Birthday Cake Puppy Chow can be traced back to the 1950s when resourceful home cooks began experimenting with traditional Puppy Chow recipes.

They wanted to create a fun, festive twist on the classic snack mix. By adding colorful sprinkles, vanilla flavoring, and a sweet coating, these innovative bakers transformed the traditional savory Puppy Chow into a delightful treat perfect for celebrations.

As the popularity of this birthday-themed variation grew, recipes were shared and refined, with bakers often using white chocolate or powdered sugar to achieve the desired birthday cake flavor and appearance.

Today, Birthday Cake Puppy Chow has become a beloved party food, brightening up birthdays, sleepovers, and other special occasions.

Its vibrant colors, sweet taste, and crunchy texture make it an irresistible snack that both kids and adults can't get enough of.

Advertisement

Whether homemade or store-bought, this festive twist on a classic favorite is sure to delight anyone with a sweet tooth.

Recipe

Birthday Cake Puppy Chow

Recipe

Puppy chow, also known as muddy buddies, is a classic and delicious snack. This birthday cake version takes the beloved treat and adds a festive twist. Coated in a sweet white chocolate and sprinkled with colorful sprinkles, this puppy chow is the perfect party food or sweet treat.

For those who enjoy a fun and easy dessert, this recipe fits right into that category! Whether you're celebrating a birthday or just looking for a fun and easy snack, this birthday cake puppy chow is sure to be a hit. The combination of crunchy Chex cereal, rich white chocolate, and festive sprinkles creates a flavor and texture that's utterly irresistible.

Advertisement

Ingredients:

  • 9 cups Chex cereal (any variety)
  • 1 cup white chocolate chips
  • 1/4 cup butter
  • 1 cup powdered sugar
  • 1/2 cup rainbow sprinkles

Instructions:

In a large microwave-safe bowl, melt the white chocolate chips and butter together in 30-second intervals, stirring between each, until smooth and fully melted.

Add the Chex cereal to the bowl and gently stir until the cereal is fully coated. Sift the powdered sugar over the coated cereal and fold gently to combine, ensuring all pieces are evenly coated.

Lastly, sprinkle the rainbow sprinkles over the puppy chow and toss gently to distribute.

Tips:

Advertisement

For best results, work in batches when coating the cereal to ensure even coverage.

Store the birthday cake puppy chow in an airtight container at room temperature for up to 1 week. The sprinkles may bleed color slightly over time, but the flavor will remain delicious.

Enjoy this treat as a party snack, gift, or simply as a sweet indulgence.

Cooking Steps

Measure out the Chex cereal into a large bowl.

Melt the butter and marshmallows in the microwave, then stir in the sprinkles.

Advertisement

Pour the melted mixture over the cereal and stir gently to coat each piece evenly.

Step 1. Measure Chex Cereal

measure chex cereal accurately

Carefully measure the crisp, golden Chex cereal, ensuring each piece is evenly distributed. You'll need 9 cups of the delightful, toasted corn squares.

Pour them into a large mixing bowl, ready to be transformed into a delectable birthday treat. Measure precisely to get the right balance – too little and you won't have enough, too much and the coating mightn't cover everything evenly.

Take your time and double-check the amount. With the Chex ready, you're one step closer to creating a crave-worthy birthday cake puppy chow.

The next stage is to blend in the other tasty ingredients that will give this snack its festive flair. Stay focused and enjoy this creative process – the end result will be worth it when you see the joy on everyone's faces as they dive into this homemade delight.

Step 2. Melt Butter and Marshmallows

melt butter and marshmallows

Next, you'll melt the butter and marshmallows together in a saucepan over medium heat. Stir the mixture constantly until it's smooth and fully combined. This should only take a couple of minutes. The butter will melt quickly, and the marshmallows will soften and blend in.

Once the butter and marshmallows are melted, remove the saucepan from the heat. Be careful, as the mixture will be hot.

Advertisement

You'll want to work quickly from this point on. Quickly pour the melted butter and marshmallow mixture over the Chex cereal in a large bowl. Use a spatula to gently fold and coat the cereal evenly. Work carefully to ensure all the pieces are coated.

After the cereal is fully coated, you're ready to move on to the next step of adding the birthday cake-flavored ingredients. This is where the fun really begins!

Step 3. Add Sprinkles to Melted Mixture

add sprinkles to mixture

After coating the Chex cereal in the melted butter and marshmallow mixture, it's time to add the birthday cake-flavored fun.

To ensure that your puppy chow is safe and enjoyable for everyone, be mindful of the ingredients, just like how it's important to offer your pets safe snacks safe snacks for hamsters.

Grab a handful of colorful sprinkles and start sprinkling them generously over the coated cereal. The sprinkles will add a festive touch, making your birthday cake puppy chow look like a true celebration.

Gently stir the sprinkles into the mixture, ensuring they're evenly distributed. You'll see the vibrant colors of the sprinkles pop against the gooey, marshmallow-y cereal. The sprinkles not only add a fun visual element but also provide a burst of sweetness in each bite.

Advertisement

Keep adding sprinkles until the entire batch is coated and the colors are vibrant. The more sprinkles, the better!

Once you're satisfied with the amount, give the mixture one final stir to make sure everything is well combined. Your birthday cake puppy chow is now ready for the next step, and you can't wait to see the delighted faces of your friends and family when they try it.

Step 4. Pour Cereal Mixture

pouring cereal mixture carefully

Once the sprinkles are evenly distributed, pour the coated Chex cereal mixture onto a large baking sheet or into a large bowl. This will allow the cereal pieces to spread out and cool down. You want to make sure they're not piled up on top of each other, so take your time and gently pour the mixture, spreading it out as you go.

Now, you'll want to let the cereal cool completely before moving on to the next step. This usually takes about 15-20 minutes. As it cools, the melted chocolate and peanut butter will harden, creating that classic puppy chow texture.

Keep an eye on it and stir the mixture occasionally to help it cool evenly.

Once the cereal is cooled and hardened, you're ready to enjoy your delicious birthday cake puppy chow! Feel free to sneak a few pieces as a reward for all your hard work. Just don't eat it all before you get to share it with your friends and family!

Advertisement

Step 5. Stir to Coat Cereal Evenly

coat cereal by stirring

With a gentle hand, stir the cereal mixture until every piece is thoroughly coated in the chocolatey-peanut butter goodness.

Don't be too vigorous – you want to ensure the coating spreads evenly without breaking the cereal.

Take your time, moving the spoon in slow, circular motions. As you stir, you'll notice the mixture start to thicken and the color deepen.

Keep going until there's no dry cereal left. You'll know it's ready when the whole batch looks rich and decadent, like a birthday cake batter.

Once it's fully coated, you're almost done! Just a few more steps before you can dive in and enjoy this delightful treat.

Final Thoughts

This Birthday Cake Puppy Chow recipe is a delightful treat that can brighten up any occasion. The final result is a scrumptious and visually appealing snack that's sure to put a smile on everyone's face. The blend of sweet and crunchy textures creates a truly irresistible experience.

Advertisement

For a festive gathering, consider pairing this tasty snack with some stylish home decor solutions like GEEORY Fall Pillow Covers to enhance the atmosphere.

Whether you're celebrating a special birthday or simply looking for a fun and festive snack, this puppy chow is the perfect choice. The vibrant colors and festive sprinkles make it an eye-catching addition to any party or gathering.

It's easy to prepare, and the hands-on process of mixing and coating the cereal can be an enjoyable activity for both kids and adults.

Once you've tried this Birthday Cake Puppy Chow, you'll find yourself craving it again and again. It's a delightful treat that's sure to become a new favorite in your household. Enjoy the sweet, satisfying flavors and the joy of sharing this delicious creation with your loved ones.

Frequently Asked Questions

How Do I Make Birthday Cake Puppy Chow Nut-Free?

To make the recipe nut-free, simply replace the nuts with an equal amount of seeds or a seed-based alternative, like sunflower or pumpkin seeds. This will provide the same crunchy texture without the nut allergens.

Advertisement

What Is the Shelf Life of Birthday Cake Puppy Chow?

The shelf life of homemade snack mixes can vary, but you can typically expect them to last 1-2 weeks when stored in an airtight container at room temperature. Be sure to check for signs of spoilage before enjoying.

Can I Use a Different Type of Cereal for the Recipe?

You can absolutely use a different type of cereal for the recipe. As long as the cereal is dry and crunchy, it should work well. Feel free to experiment with different flavors to suit your taste.

How Do I Adjust the Recipe for a Larger or Smaller Batch?

To adjust the recipe for a larger or smaller batch, you'll need to scale the ingredient amounts up or down proportionately. Start by determining the desired yield, then modify the quantities accordingly to achieve the preferred portion size.

Is Birthday Cake Puppy Chow Suitable for Dogs With Allergies?

While birthday cake puppy chow may contain ingredients that could be unsuitable for dogs with allergies, it's best to check the specific recipe and ingredients to ensure it's safe for your pup. Consult your veterinarian if you have any concerns.

Conclusion

You'll be amazed at how quickly and easily you can whip up this delightful birthday cake puppy chow! The combination of sweet and crunchy textures is simply irresistible. Whether you're baking for a party or just treating yourself, this recipe is sure to put a smile on everyone's face. So, what are you waiting for? Get in the kitchen and start mixing up this tasty birthday treat today!

Advertisement
Continue Reading

Graduations/Birthdays

Unicorn Hot Chocolate

Otherworldly and whimsical, unicorn hot chocolate transports you to a realm of vibrant colors and sweet indulgence, where the possibilities are as limitless as your imagination.

Published

on

magical colorful chocolate beverage

Unicorn hot chocolate is a whimsical treat that'll transport you to a world of vibrant colors and sweet indulgence. Its origins date back to the late 1800s when European confectioners first experimented with natural dyes to create these magical drinks. Today, you can make your own by combining whole milk, heavy cream, and white chocolate chips for the base, then adding vanilla and food coloring to achieve those dreamy blue, pink, and purple hues. Top it off with sweetened whipped cream, rainbow sprinkles, and even edible glitter for a truly enchanting sip. Crafting this one-of-a-kind treat is a delightful journey that celebrates the joy of creativity in the kitchen.

Key Takeaways

  • Unicorn hot chocolate is a whimsical and colorful treat with a history dating back to the late 19th century in Europe.
  • The key ingredients include whole milk, heavy cream, white chocolate chips, and food coloring to create vibrant hues.
  • The preparation involves combining the base ingredients, adding color, incorporating toppings like whipped cream and sprinkles, and serving in a themed mug.
  • Creative presentation techniques, such as using edible glitter and iridescent mugs, can enhance the visual appeal of the drink.
  • Sipping unicorn hot chocolate evokes a sense of nostalgia, celebration, and playfulness, making it an enjoyable experience for special occasions or festive gatherings.

History

The origins of unicorn hot chocolate can be traced back to the late 19th century, when European confectioners began experimenting with food coloring and whimsical flavors.

These early pioneers wanted to create something truly magical, something that would capture the imagination of children and adults alike. They started by infusing their hot chocolate with natural dyes, transforming the rich, creamy beverage into a rainbow of colors.

Soon, the idea of a "unicorn" hot chocolate took hold, as the confectioners added edible glitters, swirls of whipped cream, and even edible flowers to create a truly enchanting experience.

The popularity of this colorful concoction quickly spread, with cafes and bakeries across the continent offering their own unique takes on the unicorn-inspired drink.

Today, unicorn hot chocolate remains a beloved treat, a delightful fusion of nostalgia, whimsy, and the timeless appeal of hot chocolate.

Advertisement

Whether enjoyed on a cozy winter day or as a festive treat, this magical beverage continues to bring joy and wonder to all who sip it.

Recipe

Unicorn Hot Chocolate is a delightful and whimsical treat that will transport you to a world of enchantment. This vibrant and creamy concoction is perfect for those who love to infuse a bit of magic into their daily lives. Whether you're sipping it by the fire on a chilly evening or sharing it with friends, this unicorn-inspired hot chocolate is sure to delight the senses.

The secret to this mesmerizing beverage lies in the careful balance of bold flavors and a touch of playful creativity. With its vibrant hues and sprinkle of edible glitter, Unicorn Hot Chocolate is a visual feast that will have your guests marveling at its sheer beauty.

  • Whole milk
  • Heavy cream
  • White chocolate chips
  • Vanilla extract
  • Food coloring (blue, pink, and purple)
  • Edible glitter (optional)

To create this enchanting Unicorn Hot Chocolate, begin by heating the milk and cream together in a saucepan over medium heat, stirring occasionally until the mixture is steaming hot.

Gently stir in the white chocolate chips and vanilla extract, allowing the chocolate to melt and incorporate into the liquid. Once the mixture is smooth and creamy, divide it evenly into three separate bowls.

In each bowl, stir in a few drops of the desired food coloring (blue, pink, and purple) until the desired shade is achieved.

Advertisement

For the final touch, carefully pour the colored hot chocolate into a serving mug, layering the different hues to create a mesmerizing ombre effect.

Finish with a sprinkle of edible glitter, if desired, and serve immediately. Embrace the whimsical and embrace the magic of Unicorn Hot Chocolate.

Cooking Steps

First, combine the milk, sugar, and cocoa in a saucepan.

Next, add a few drops of your favorite food coloring to transform the hot chocolate into a vibrant, magical hue.

Once it's the perfect color, sprinkle in some rainbow sprinkles for a fun, festive touch.

Advertisement

Top it all off with a dollop of whipped cream and serve it in a unicorn-themed mug for a delightful unicorn-inspired treat.

Step 1. Combine Milk, Sugar, and Cocoa

mix milk sugar cocoa

In a small saucepan, combine the milk, sugar, and cocoa powder. Whisk the ingredients together over medium heat until the mixture is smooth and hot. Be sure to stir constantly to prevent the cocoa from burning or sticking to the bottom of the pan.

Interestingly, many people enjoy pairing sweet treats like hot chocolate with ice cream, especially during the summer months when ice cream consumption peaks in the U.S. ice cream consumption.

As the hot chocolate heats up, you'll start to see small bubbles forming around the edges. That's a good sign! Keep whisking until the sugar has fully dissolved and the whole mixture is steaming. You want it to be hot, but not boiling.

Now, the fun part! Once the hot chocolate is ready, you can start adding in the magical unicorn touches.

Sprinkle in a pinch of edible glitter or a few drops of food coloring to turn your drink into a vibrant, rainbow-hued delight. Top it off with a generous dollop of whipped cream and a sprinkle of colorful sprinkles.

Advertisement

Get creative and make your unicorn hot chocolate as whimsical as can be!

Step 2. Add Food Coloring

incorporate vibrant colorants

Once the hot chocolate is ready, you can add a few drops of food coloring to turn your drink into a vibrant, rainbow-hued delight.

Start with just a drop or two of each color, and then give your mug a gentle stir to blend the colors together. You'll see the hot cocoa transform into a mesmerizing swirl of different hues.

Don't be afraid to get creative with your color combinations! Try mixing red and blue for a purple hue, or yellow and green for a sunny, lime-like shade. The possibilities are endless.

Just remember to add the colors one at a time and stir well in between to achieve your desired effect.

As the food coloring blends with the hot chocolate, you'll notice the drink taking on a whole new look. It's like magic unfolding right before your eyes!

Advertisement

Take a moment to admire your handiwork before taking that first sip of your vibrant, unicorn-inspired hot chocolate.

Step 3. Add Sprinkles

add sprinkles for decoration

Why not add a sprinkle of magic to your unicorn hot chocolate? Sprinkles are the perfect finishing touch, adding a burst of color and a whimsical charm to your dreamy beverage.

Choose from a rainbow of options – vibrant pink, shimmering purple, or perhaps a mix of all the colors of the rainbow. Gently shake the sprinkles over the top of your hot chocolate, allowing them to cascade down and settle on the surface.

As you sip your creation, the sprinkles will melt into the warm, creamy liquid, infusing each sip with a touch of sweetness. The textural contrast between the smooth hot chocolate and the crunchy sprinkles creates a delightful sensory experience.

Get creative and experiment with different sprinkle combinations – maybe even add a few edible glitter flakes for an extra-magical touch. Savor each magical moment as you indulge in your whimsical unicorn hot chocolate masterpiece.

Step 4. Top With Whipped Cream

finish with whipped cream

After adding the sprinkles, top your unicorn hot chocolate with a fluffy cloud of whipped cream.

Grab the can of whipped topping and give it a good shake. Gently press the nozzle, letting the creamy white topping slowly rise above the rim of the mug. Swirl it around in a circular motion, building up a tall, swirly pile.

Advertisement

Don't be shy – pile it high! The more whipped cream, the better. The sweet, airy topping will contrast perfectly with the rich, chocolatey drink below. Plus, it'll make your creation look even more magical and Instagram-worthy.

Once you've reached your desired height, take a step back and admire your masterpiece. The vibrant sprinkles peeking through the fluffy white clouds create a stunning visual.

Now, grab a spoon and dig in! The whipped cream will melt into the hot chocolate, making each sip extra creamy and indulgent. Enjoy every last sweet, frothy bite of your unicorn-inspired treat.

Step 5. Serve in Unicorn-Themed Mug

serve in unicorn mug

For the final touch, serve your unicorn hot chocolate in a fun, unicorn-themed mug. These whimsical mugs often feature vibrant colors, shimmery accents, and a playful horn on top to capture the magical essence of a unicorn.

Sipping your delightful drink from this charming vessel will really bring the unicorn experience to life. You can find unicorn mugs in a variety of styles, from ceramic to insulated travel mugs.

Some designs even have an iridescent finish that sparkles under the light, making them extra special. Choose a mug that speaks to your personal style and complements the colorful hues of your unicorn hot chocolate.

Advertisement

When serving, be sure to add a generous dollop of sweetened whipped cream on top. The creamy topping not only looks beautiful, but it also adds a luxurious texture that pairs perfectly with the rich, velvety chocolate.

Finish it off with a light dusting of edible glitter or rainbow sprinkles for the ultimate unicorn-themed presentation.

Final Thoughts

Crafting the perfect unicorn hot chocolate can be a delightful journey, leaving you with a sense of whimsy and wonder.

As you sip this magical concoction, you'll be transported to a realm of enchantment, where every sip is a celebration of color and imagination.

While the preparation may seem intricate, the joy you'll experience in creating this one-of-a-kind treat is well worth the effort.

Advertisement

From swirling the vibrant hues to topping it with an array of playful garnishes, you'll find yourself immersed in a world of pure delight.

Frequently Asked Questions

Is Unicorn Hot Chocolate Suitable for Vegans or Vegetarians?

You'll need to check the ingredients carefully to determine if a unicorn hot chocolate is suitable for vegans or vegetarians. Some may contain dairy or other non-vegan/vegetarian components, so it's best to review the specifics before consuming it.

How Can I Make Unicorn Hot Chocolate Dairy-Free?

To make your hot chocolate dairy-free, you can use plant-based milk like almond, soy, or coconut milk. You can also add vegan-friendly food coloring or powdered food dyes to achieve that vibrant, unicorn-inspired hue.

Does Unicorn Hot Chocolate Contain Any Artificial Colors or Flavors?

Unicorn hot chocolate may contain artificial colors or flavors to achieve its vibrant and whimsical appearance. However, you can find dairy-free and natural alternatives that use plant-based milks and natural food coloring for a healthier, more wholesome version.

Where Can I Purchase the Ingredients for Unicorn Hot Chocolate?

You can purchase the ingredients for unicorn hot chocolate at specialty or gourmet food stores, or online from retailers that sell baking and specialty ingredients. Look for natural food coloring, edible glitter, and flavored syrups to create the whimsical drink.

Advertisement

How Long Does Unicorn Hot Chocolate Stay Fresh After Preparation?

How long your homemade hot chocolate stays fresh depends on the ingredients you use. Generally, it'll remain tasty for 3-4 days when stored in an airtight container in the refrigerator. Enjoy it while it's at its best!

Conclusion

You'll love whipping up a batch of this vibrant and whimsical unicorn hot chocolate! The bright colors and magical flavor make it a true delight. Enjoy this enchanting treat on a cozy winter day, or serve it at your next party for a fun and festive experience. It's sure to put a smile on everyone's face – so what are you waiting for? Give this recipe a try and let the unicorn magic begin!

Continue Reading
Advertisement

Affiliate Disclaimer
As an affiliate, we may earn a commission from qualifying purchases. We get commissions for purchases made through links on this website from Amazon and other third parties.

Advertisement

Latest

colorful rimmed beverages colorful rimmed beverages
Graduations/Birthdays2 mins ago

Sprinkle-Rimmed Drinks

Whimsical and visually captivating, sprinkle-rimmed drinks transport you to a world of playful flavors and enchanting presentations that will leave...

festive puppy chow treats festive puppy chow treats
Graduations/Birthdays7 mins ago

Birthday Cake Puppy Chow

Uncover the captivating blend of crunchy Chex, creamy white chocolate, and vibrant sprinkles that make Birthday Cake Puppy Chow an...

magical colorful chocolate beverage magical colorful chocolate beverage
Graduations/Birthdays13 mins ago

Unicorn Hot Chocolate

Otherworldly and whimsical, unicorn hot chocolate transports you to a realm of vibrant colors and sweet indulgence, where the possibilities...

colorful skewered fruit delights colorful skewered fruit delights
Graduations/Birthdays19 mins ago

Rainbow Fruit Kebabs

Tantalizing and refreshing, these rainbow fruit kebabs offer a delightful twist on a classic snack, with a vibrant array of...

colorful cheese filled tortillas colorful cheese filled tortillas
Graduations/Birthdays24 mins ago

Confetti Quesadillas

Heighten your taste buds with the vibrant burst of color and flavor in confetti quesadillas, a fusion of Mexican cuisine...

celebratory dessert beverage fusion celebratory dessert beverage fusion
Graduations/Birthdays30 mins ago

Birthday Cake Milkshake

Fulfill your childhood nostalgia with the irresistible Birthday Cake Milkshake, a creamy, indulgent treat that's a celebration in every sip....

colorful cake batter dip colorful cake batter dip
Graduations/Birthdays36 mins ago

Funfetti Dip

Celebrate the vibrant and creamy delight of Funfetti Dip, the ultimate party treat that will captivate your taste buds and...

celebratory sweet snack treat celebratory sweet snack treat
Graduations/Birthdays41 mins ago

Birthday Cake Flavored Popcorn

Outrageous and irresistibly sweet, this birthday cake flavored popcorn promises a flavor explosion that will leave you craving more. Discover...

graduation jewelry and snacks graduation jewelry and snacks
Graduations/Birthdays47 mins ago

Class Ring Onion Rings

Feast on the nostalgic delight of Class Ring Onion Rings, a crispy, golden-brown treat that will transport you back to...

breadsticks resembling pencils breadsticks resembling pencils
Graduations/Birthdays53 mins ago

Pencil-Shaped Breadsticks

Harnessing the rich history and versatility of pencil-shaped breadsticks, explore how to craft these unique and captivating snacks that will...

colorful candy dessert layers colorful candy dessert layers
Graduations/Birthdays59 mins ago

Smarties Candy Parfaits

Observe the vibrant layers of creamy yogurt, pudding, and whipped cream, elevated by the delightful crunch of classic Smarties candies...

noodle shaped letter pasta noodle shaped letter pasta
Graduations/Birthdays1 hour ago

Alphabet Soup

Alphabet soup, a whimsical culinary delight that transports you back to childhood, boasts a rich history and a community-fostering experience...

Advertisement

Trending