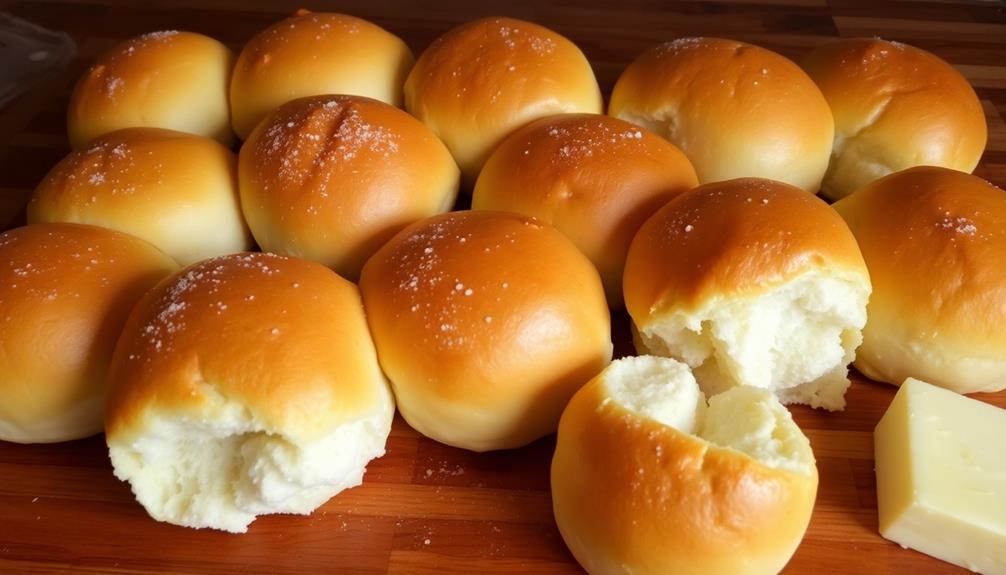
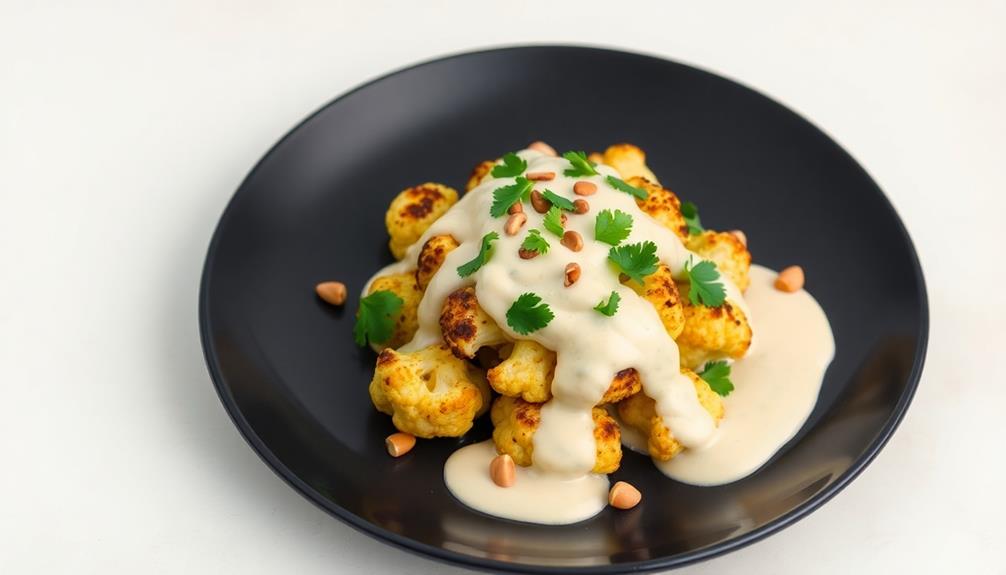
Homemade dinner rolls are a classic delight that'll fill your kitchen with the mouthwatering aroma of freshly baked bread. These soft, fluffy rolls have been a dinnertime staple for generations, and you can easily make your own at home. Just mix up the simple dough, let it rise, then shape and bake until golden brown. Slather them in butter, and you've got a comforting side that'll have everyone reaching for seconds. The tradition of homemade rolls is both satisfying and delicious – and if you'd like to learn more about crafting these tasty treats, you're in the right place.
Key Takeaways
- Homemade dinner rolls offer a unique, fresh-baked taste compared to store-bought options, making them a popular choice for family meals and gatherings.
- The recipe for homemade dinner rolls is customizable, allowing for individual taste preferences and dietary considerations.
- Proper technique and ingredient ratios are crucial for achieving the desired soft, fluffy texture in homemade dinner rolls.
- Homemade baking of dinner rolls can foster a sense of accomplishment, creativity, and cost-effectiveness compared to purchasing gourmet rolls.
- Homemade dinner rolls can be prepared in advance, refrigerated, and baked later, providing convenience and flexibility for hosting meals.
Top picks for "homemade dinner roll"
Open Amazon search results for this keyword.
As an affiliate, we earn on qualifying purchases.
History
Tracing the origins of homemade dinner rolls, you'll find they've been a staple in households for centuries. Way back when, our ancestors would knead the dough by hand, using simple ingredients like flour, yeast, and milk.
They'd let the dough rise, then shape it into fluffy, golden-brown rolls before popping them in the oven. The aroma of fresh-baked bread would waft through the air, making mouths water in anticipation.
Today, the tradition of homemade dinner rolls lives on. While the process may have become a bit easier with modern appliances, the satisfaction of pulling a tray of warm, soft rolls from the oven remains the same.
Whether you're enjoying them alongside a hearty stew or simply with a pat of butter, these comforting treats are a timeless part of the dinner experience.
Recipe
Homemade Dinner Rolls
Recipe
Making homemade dinner rolls from scratch is a rewarding experience that fills your home with the irresistible aroma of freshly baked bread. This recipe produces soft, fluffy rolls that are perfect for any meal, from Sunday supper to holiday feasts.
The key to perfect dinner rolls is in the technique. By following a few simple steps, you can achieve bakery-quality results in your own kitchen. This recipe is versatile and can be easily customized to suit your taste preferences.
Ingredients:
- 3 cups (375g) all-purpose flour
- 1 tablespoon granulated sugar
- 1 teaspoon salt
- 1 package (2 1/4 teaspoons) active dry yeast
- 1 cup (240ml) warm milk
- 4 tablespoons (57g) unsalted butter, melted
Instructions:
In a large mixing bowl, combine the flour, sugar, salt, and yeast. Stir to mix.
Add the warm milk and melted butter, and use a wooden spoon or your hands to knead the dough until it comes together and forms a smooth, elastic ball.
Cover the bowl with a damp towel or plastic wrap and let the dough rise in a warm place for 1 hour, or until doubled in size.
Punch down the dough to release any air bubbles, then divide it into 12 equal pieces.
Shape each piece into a smooth ball and place them in a greased 9×13-inch baking dish or on a parchment-lined baking sheet.
Cover and let the rolls rise for an additional 30 minutes.
Preheat your oven to 400°F (200°C).
Bake the rolls for 18-20 minutes, or until golden brown. Serve warm and enjoy!
Tips: For a softer crust, brush the tops of the rolls with melted butter or an egg wash (1 egg beaten with 1 tablespoon of water) before baking.
To make ahead, prepare the dough, shape the rolls, and refrigerate for up to 24 hours before the second rise and baking. Allow the chilled rolls to come to room temperature before baking.
Cooking Steps
First, you'll need to proof the yeast mixture to make sure it's bubbly and active.
Then, knead the dough for about 5 minutes until it's smooth and elastic.
After that, let the dough rise in a warm place until it's doubled in size.
Once it's risen, punch down the dough to release any air bubbles, and then shape the dough into your favorite dinner roll shapes.
Step 1. Proof the Yeast Mixture
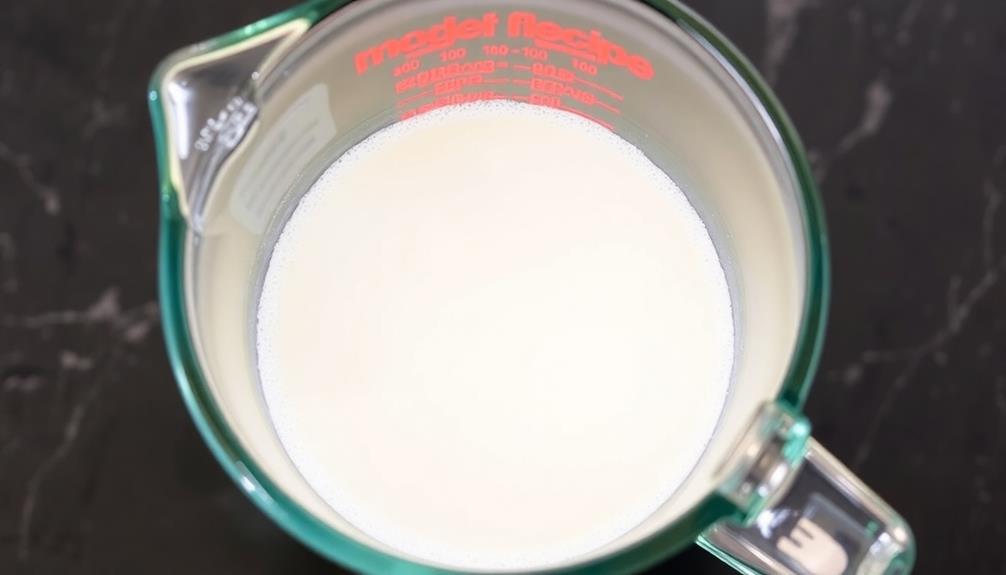
To begin, combine the warm water, yeast, and sugar in a small bowl. Give it a gentle stir and let it sit for a few minutes.
You'll see the mixture start to bubble and foam – that's the yeast coming to life! This is called "proofing" the yeast, and it's an important step in getting your homemade rolls to rise tall and fluffy.
As the yeast proofs, it's releasing tiny gas bubbles that will expand the dough later on. You want to see a nice foamy top, about an inch or two tall.
If the mixture doesn't get nice and bubbly, your yeast might be old or the water too hot, so start over with fresh yeast and make sure the water is warm, not hot.
Once your yeast is happily proofed, you're ready to move on to the next step of making your delicious homemade dinner rolls.
Get excited – this is where the real magic happens!
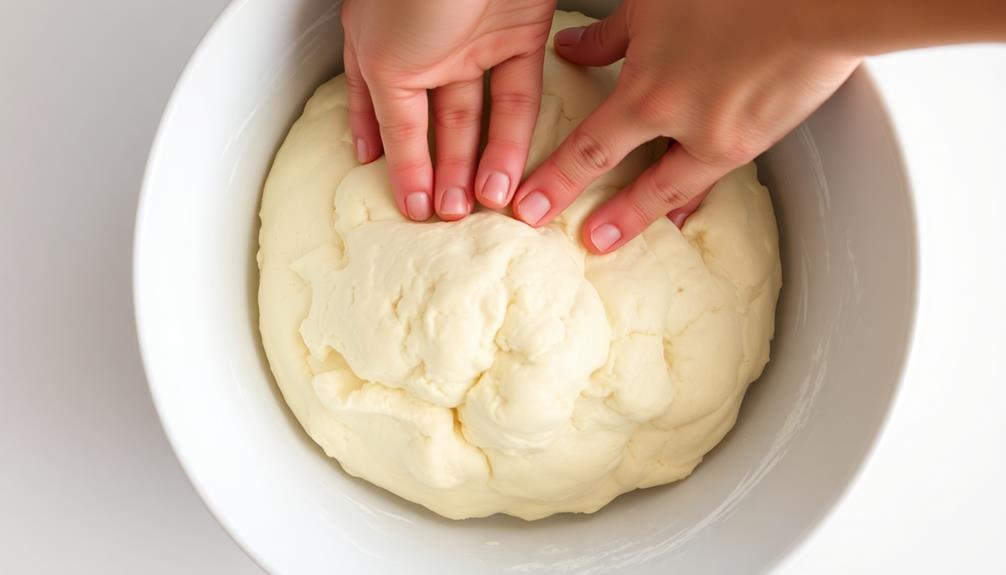
Step 2. Knead the Dough for 5 Minutes
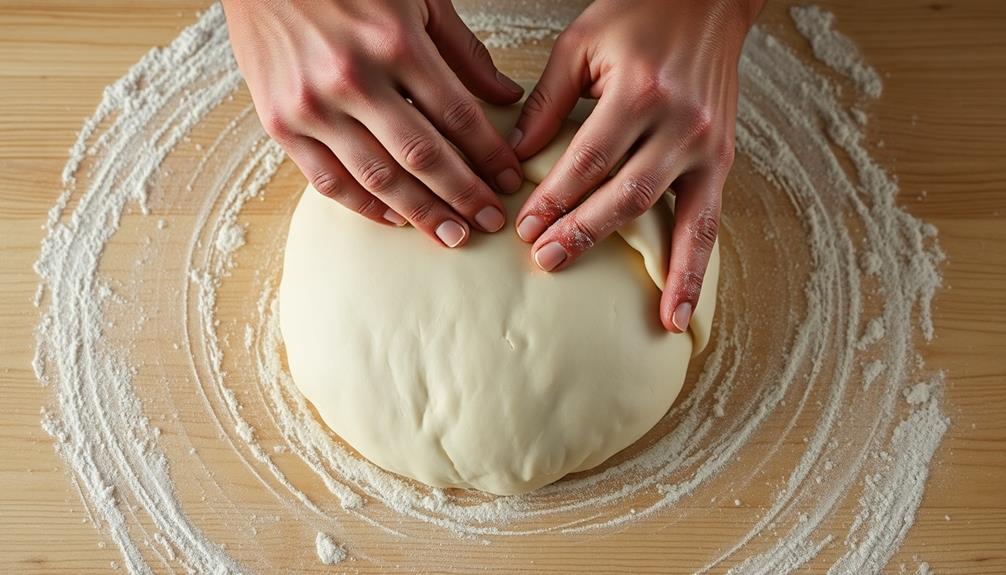
With your yeast nicely proofed, you can now move on to kneading the dough. This is where the magic happens!
Grab your dough and place it on a clean, lightly floured surface. Time to put those hands to work. Start by pressing the dough down with the heel of your hand, then fold it over and press again.
Keep repeating this motion, pushing and folding, for about 5 minutes. You'll feel the dough becoming smoother and more elastic under your touch. As you knead, the gluten strands will develop, giving the rolls their signature chewy texture.
Don't be afraid to get a little vigorous – the more you knead, the better your dough will be. Occasionally, give the dough a quarter turn to ensure even kneading.
Once the 5 minutes are up, your dough should be smooth, supple, and ready for the next step. Nicely done! Your homemade rolls are well on their way.
Step 3. Let the Dough Rise
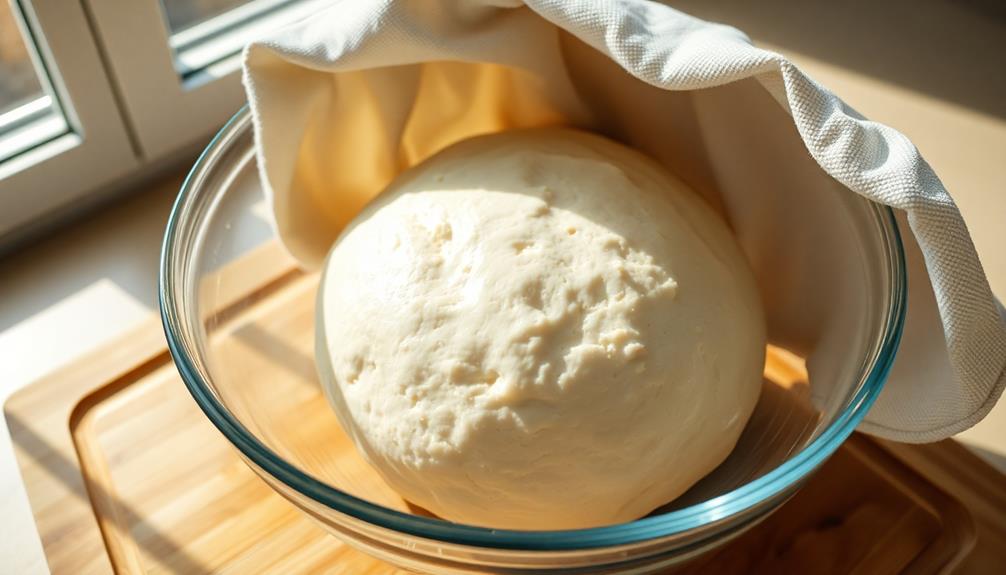
After kneading, it's time to let your dough rise! This is an exciting step, as you'll watch your dough transform and double in size.
First, lightly grease a large bowl with a bit of oil or butter. Gently place your kneaded dough into the bowl, then cover it with a damp towel or plastic wrap.
Find a warm, draft-free spot in your kitchen for the dough to rise. The optimal temperature is around 80-85°F.
As the dough rests, the yeast will do its magic, releasing gases that cause the dough to puff up. This process usually takes 1-2 hours, so be patient!
You'll know the dough is ready when it has doubled in size.
Resist the urge to peek too often, as this can slow down the rising. When the time is up, your fluffy, expanded dough will be ready for the next step.
Get excited, because you're one step closer to enjoying those delicious homemade dinner rolls!
Step 4. Punch Down the Risen Dough
Once your dough has doubled in size, it's time to punch it down. This important step releases all that trapped air, getting the dough ready for the next stage.
Grab your fist and gently press it into the center of the puffy dough. Watch as it deflates with a satisfying whoosh! Keep punching and pushing until the dough is flat and no longer airy.
Next, gather the dough into a ball and place it back in the bowl. Cover it back up and let it rest for about 10 minutes. This brief pause allows the gluten to relax, making the dough easier to work with later on.
While you wait, you can start preheating your oven or preparing the baking sheet. When the time's up, you'll be ready to divide the dough and shape those delicious dinner rolls. Get excited – the best part is coming up next!
Step 5. Shape the Dough Into Rolls
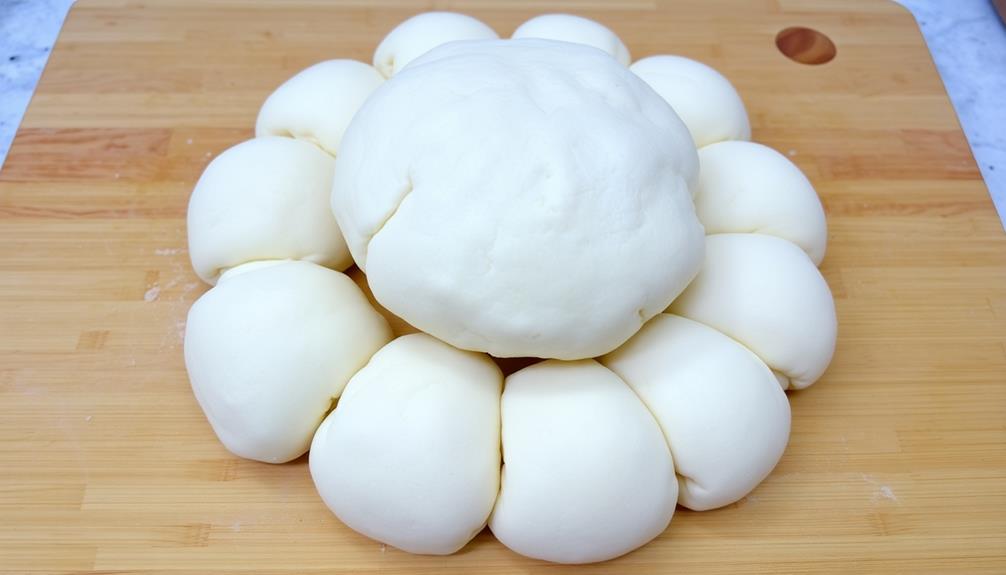
The transformation from a simple ball of dough to perfectly portioned rolls is an art form in itself.
Get ready to channel your inner baker and shape those fluffy, golden-brown clouds of delight. First, divide the dough into equal portions using your hands or a knife.
Gently roll each piece into a smooth, round ball, being careful not to overwork the dough. Place the rolls in a greased baking pan, leaving enough space between them to allow for expansion.
With a gentle touch, you can even give them a little shaping, like pinching the tops or pulling the sides to create that classic dinner roll look.
Now, let them rest and rise one more time before baking. Soon, the tantalizing aroma of freshly baked rolls will fill your kitchen, and you'll be ready to serve up a homemade masterpiece.
Get ready to impress your family and friends with your newfound roll-shaping skills!
Final Thoughts
Your homemade dinner rolls are now ready to enjoy! Isn't it amazing how something so simple can turn out so delicious? You should feel proud of yourself for mastering this classic recipe.
Just imagine the warm, fluffy rolls straight from the oven, the buttery aroma filling your kitchen. Your family is going to be thrilled when you bring these to the table.
And the best part? You made them all by yourself! No more store-bought rolls for you. These homemade beauties are in a league of their own.
So go ahead, slather on some butter and savor every bite. You deserve to indulge in your hard work.
These rolls are the perfect accompaniment to any meal, from a hearty stew to a light salad. Enjoy this newfound baking skill, and don't be surprised if your loved ones start requesting them again and again!
Frequently Asked Questions
Can I Use All-Purpose Flour Instead of Bread Flour?
You can use all-purpose flour instead of bread flour, but the texture may not be as light and airy. The gluten content in bread flour helps create a fluffier, more structured roll. Consider adjusting the recipe if using all-purpose flour.
How Long Do the Rolls Stay Fresh?
The rolls will stay fresh for 2-3 days when stored at room temperature in an airtight container. After that, they may start to get stale or dry out, so it's best to enjoy them within a few days.
Can I Freeze the Dough Before Baking?
You can definitely freeze the dough before baking. This is a great way to make homemade rolls or bread ahead of time. Just thaw the dough in the fridge overnight and bake as usual when you're ready.
Do I Need a Stand Mixer to Make the Dough?
You don't necessarily need a stand mixer to make dough. You can knead the dough by hand, which may take a bit more time and effort, but it's very doable. The end result will be the same delicious homemade dough.
Can I Substitute Honey for the Sugar?
You can substitute honey for sugar in many recipes, but you'll need to adjust the other ingredients. The honey will add sweetness and moisture, so you may need to reduce other liquids slightly. Give it a try and see how it turns out!