Connect with us

Christmas Recipes

Christmas Sangria

Cozy and comforting, Christmas Sangria is a vibrant red beverage that combines the flavors of traditional Spanish Sangria with a jolly blend of…

Published

on

festive holiday fruit drink

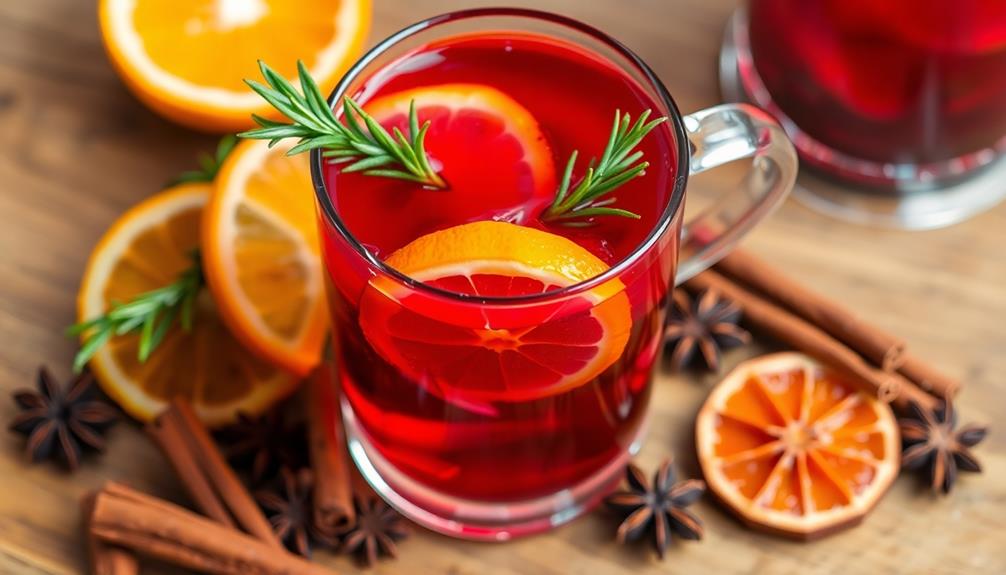
Christmas Sangria brings the festive flavors of traditional Spanish Sangria straight to your holiday celebrations! This vibrant red beverage combines rich red wine with a jolly blend of brandy, triple sec, and spices like cinnamon and star anise. Fresh slices of oranges, apples, and pears add a naturally sweet touch, while tart cranberries balance the flavors. Sip on this cozy, complex drink and let the warm spices and bright citrus transport you to a cheerful holiday gathering. Whether you're hosting a lively party or enjoying a quiet evening, Christmas Sangria is sure to spread holiday cheer. There's even more to discover about this festive cocktail…

Key Takeaways

  • Christmas Sangria is a festive twist on traditional Spanish Sangria, featuring red wine infused with holiday spices and fresh fruits.
  • The recipe includes a base of red wine, brandy, triple sec, and sugar, combined with sliced oranges, apples, pears, and cranberries.
  • Cinnamon sticks and star anise are used as flavor enhancers to create a warm, spicy, and complex taste profile.
  • Christmas Sangria is ideal for cozy gatherings and holiday celebrations, offering a refreshing and shareable beverage option.
  • The vibrant red color, festive garnishes, and balanced flavors make Christmas Sangria a timeless addition to the holiday season.

History

The origins of Christmas Sangria can be traced back to the traditional Spanish punch, Sangria, which has been a beloved beverage in Europe for centuries.

This festive version of the classic drink combines the rich, fruity flavors of Sangria with the cozy, comforting spices of the holiday season.

Imagine sipping on a glass of Christmas Sangria, the vibrant red liquid sparkling in the light, filled with slices of juicy oranges, crisp apples, and fragrant cinnamon sticks.

The aroma of mulled wine and the warm, inviting notes of brandy or red wine make this cocktail the perfect companion for cozy nights by the fireplace or lively holiday parties. The rich spices in the wine intertwine with a hint of citrus, creating a comforting drink that warms the soul. For those seeking a lighter, more festive option, a **pomegranate champagne cocktail recipe** brings a delightful burst of fruity freshness and effervescence to your gatherings. Whether you’re curling up with a good book or toasting with friends, these seasonal sips capture the magic of the holiday season.

Whether you're enjoying a quiet moment alone or gathering with family and friends, Christmas Sangria is sure to fill your heart with the spirit of the season.

Advertisement

Its rich history and festive flavors make it a delightful and timeless addition to any holiday celebration.

Recipe

Christmas Sangria

Sangria is a beloved Spanish beverage that combines red wine, fruit, and a touch of sweetness. As the holidays approach, this festive twist on the classic sangria is the perfect way to celebrate the season. The addition of cinnamon, cranberries, and orange slices creates a delightfully festive flavor profile that will transport you to a cozy winter wonderland.

Whether you're hosting a holiday party or simply looking to enjoy a warm and inviting drink by the fireplace, this Christmas Sangria is sure to delight. Its vibrant colors and aromatic spices make it a visually stunning and incredibly flavorful libation that will have your guests reaching for refills.

  • 1 bottle of red wine
  • 1/2 cup brandy
  • 1/4 cup triple sec
  • 1/4 cup sugar
  • 1 orange, sliced
  • 1 cup fresh cranberries
  • 2 cinnamon sticks
  • 1 apple, sliced
  • 1 pear, sliced

In a large pitcher, combine the red wine, brandy, triple sec, and sugar. Stir until the sugar is fully dissolved.

Add the orange slices, cranberries, cinnamon sticks, apple slices, and pear slices. Stir gently to combine. Refrigerate for at least 2 hours, or up to 24 hours, to allow the flavors to meld.

Advertisement

When ready to serve, give the sangria a gentle stir and pour over ice into glasses. Be sure to include some of the fruit and cinnamon sticks in each serving.

This Christmas Sangria can be enjoyed on its own or paired with your favorite holiday snacks or desserts. Enjoy the festive flavors and the warmth of the season with every sip.

Cooking Steps

Slice up those bright citrus fruits into lovely little rounds.

Next, pour in the rich, red wine and add a touch of sweetener to balance the flavors.

Pop in some ice cubes and finish it off with a sprig of fresh, fragrant rosemary for a festive garnish.

Advertisement

Step 1. Slice Citrus Fruits Into Rounds
slice citrus fruits rounds

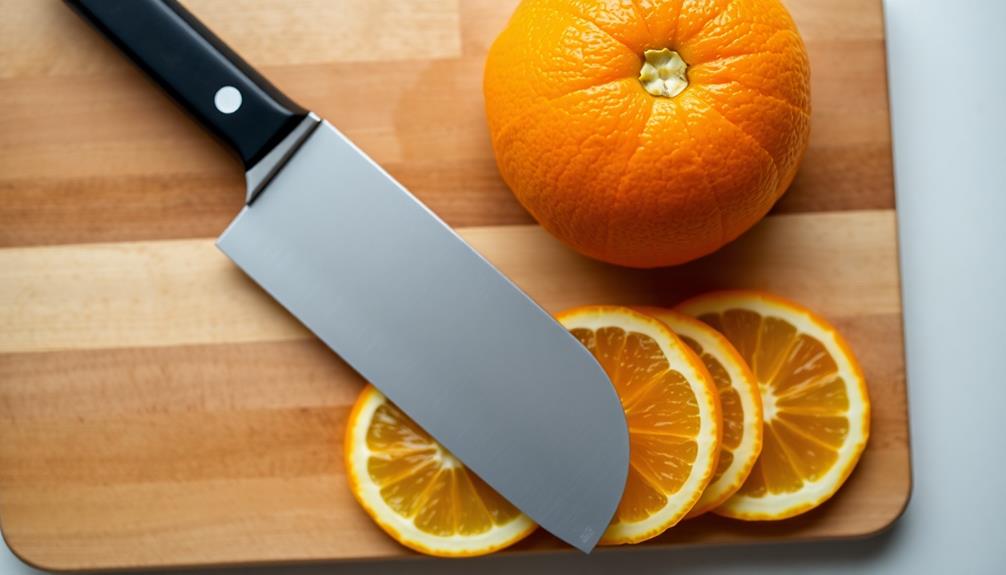
Slicing the citrus fruits into rounds is a straightforward task that'll help you achieve the desired look and flavor for your Christmas Sangria.

Begin by grabbing a sharp knife and a cutting board. Slice the oranges, lemons, and limes into round, even pieces about a quarter-inch thick. As you cut, be careful to keep your fingers safely away from the blade.

The bright, vibrant citrus slices will add a burst of color and a touch of sweetness to your festive drink. Arrange the citrus rounds in a decorative pattern on a plate or platter. This not only makes your Sangria look more appetizing, but it also allows your guests to easily grab a slice or two to add to their glass.

The citrus rounds will infuse the Sangria with their refreshing flavors, so be generous when adding them. With just a few simple slices, you'll have created the perfect garnish to complement your delicious Christmas Sangria.

Step 2. Add Red Wine
incorporate red wine

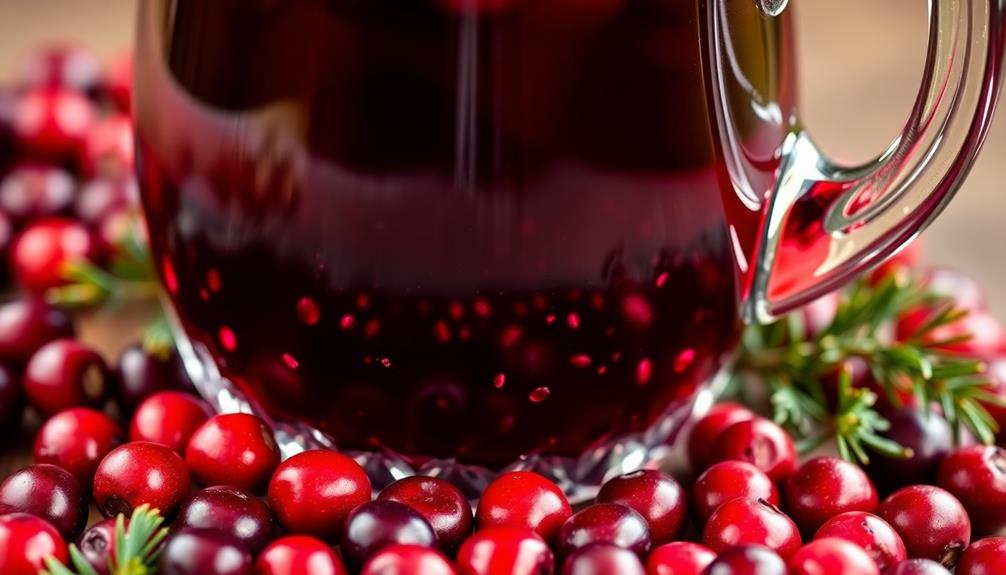
With the citrus slices ready, you can now add the red wine to your Christmas Sangria. This is where the magic really begins! Carefully pour in a full bottle of your favorite red wine, watching as the rich, crimson liquid swirls and mixes with the bright, colorful fruit. The aroma of the wine and the zesty citrus will fill the air, making your mouth water in anticipation.

Now, it's time to give the sangria a good stir. Use a long spoon to gently combine all the ingredients, ensuring the flavors meld together perfectly. As you stir, you'll notice the wine taking on a deeper, richer hue, almost like a glowing ruby.

This is exactly what you want – the more the wine interacts with the fruit, the more complex and delightful the flavors will become.

Advertisement

With the red wine added and the sangria well-mixed, you're one step closer to creating the ultimate holiday drink. Get ready to enjoy the full-bodied, fruity goodness that's Christmas Sangria!

Step 3. Add Sweetener
incorporate sweetener next step

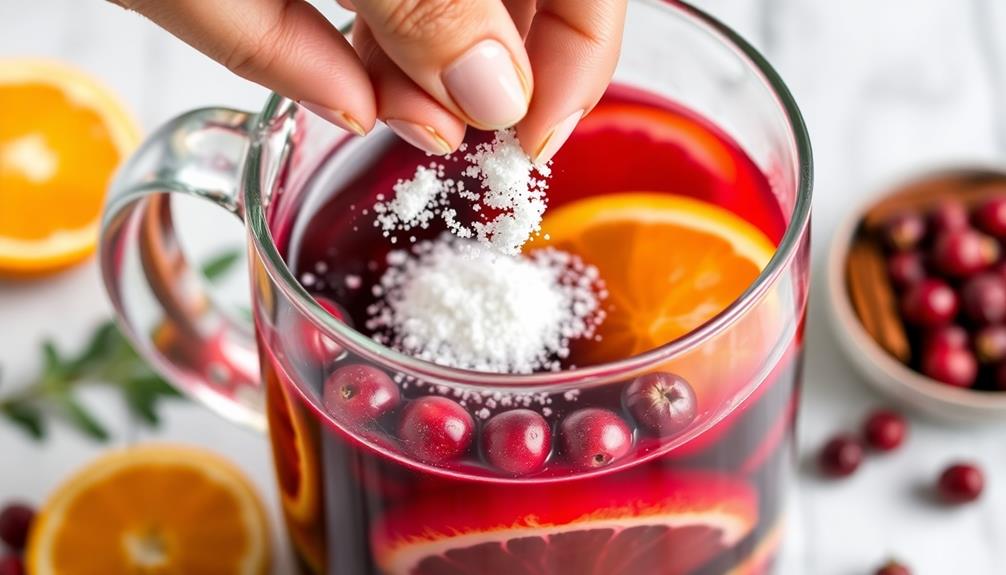
Now that the red wine has been added and the sangria is well-mixed, it's time to sweeten things up. Just a touch of sweetener will do the trick, bringing out the fruity flavors and creating a delightfully festive drink.

You can use honey, agave, or even a bit of sugar to achieve your desired level of sweetness. Start with a small amount, like a tablespoon or two, and give the sangria a good stir.

Taste it, then add more sweetener if you'd like it a little sweeter. Remember, you can always add more, but it's harder to fix a drink that's too sweet.

The sweetener will seamlessly blend with the red wine, giving the sangria a lovely, rich color. As you sip, you'll notice the subtle notes of fruit and just the right amount of sweetness – perfect for enjoying by the fire or sharing with friends and family.

Don't be afraid to play around until you find the perfect balance for your taste buds.

Advertisement

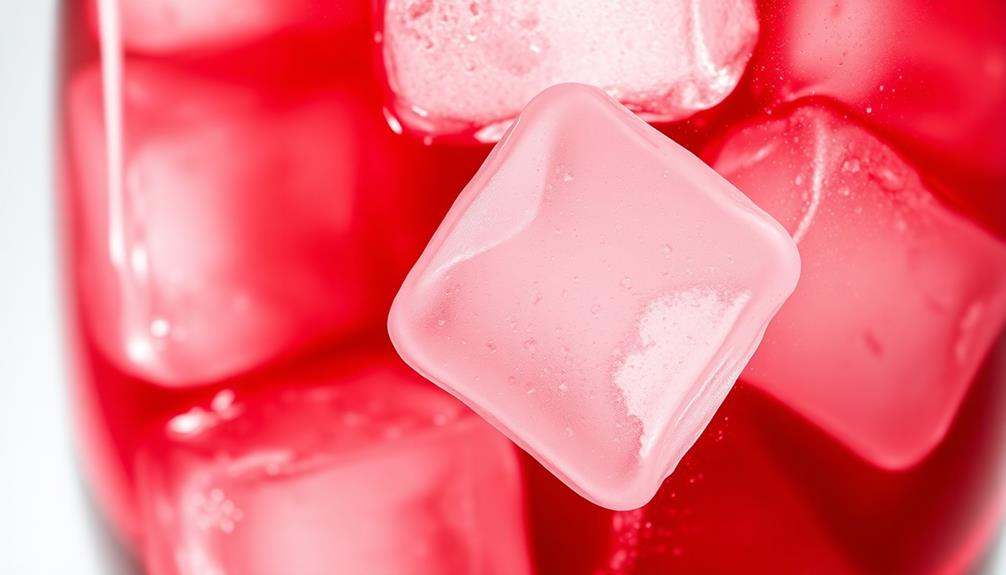
Step 4. Add Ice Cubes

add ice cubes now

Once the sweetener has dissolved into the sangria, it's time to add some ice cubes. This will help chill the festive drink and give it a nice, refreshing touch.

Grab a few handfuls of ice cubes from the freezer and carefully drop them into the pitcher. Watch as the cubes make a satisfying clinking sound and start to slowly melt, cooling down the vibrant red liquid.

As the ice cubes dance around, you can give the pitcher a gentle stir to help them distribute evenly. This will ensure that every sip of your Christmas sangria is perfectly chilled and ready to enjoy.

The combination of the fruity flavors and the icy coldness is truly a treat for your tastebuds. Now, all that's left is to pour the sangria into glasses and get ready to savor the festive delight.

Cheers to the holiday season!

Step 5. Garnish With Fresh Rosemary

garnish with fresh rosemary

To complete your festive Christmas sangria, you'll want to add a fresh garnish of rosemary. This aromatic herb not only looks beautiful, but it also adds a lovely, earthy flavor to your drink.

Carefully pluck a few sprigs of rosemary, making sure to leave a bit of the stem intact. Gently place them on top of the ice cubes, allowing the fragrant leaves to infuse the sangria with their unique aroma.

Advertisement

As your guests take their first sip, they'll be delighted by the combination of the sweet, fruity flavors and the subtle, herbaceous notes of the rosemary.

The vibrant green of the rosemary sprigs will also add a pop of color, making your Christmas sangria even more visually appealing. The gentle brush of the rosemary against their nose and lips will heighten the sensory experience, transporting them to a cozy winter wonderland.

Enjoy the festive and flavorful result of your thoughtful garnish!

Final Thoughts

A few final thoughts on this Christmas Sangria recipe.

You've got the gorgeous ruby-red punch, the festive garnish of fresh rosemary, and all the cozy, jolly flavors of the season. Now, all that's left is to gather your friends and family, pour generous glasses, and sip away the evening.

Advertisement

To complement your gathering, consider portable camping toilets for added convenience if you're celebrating outdoors. This sangria is sure to be the star of your holiday party!

The bright citrus notes and red wine blend together beautifully, creating a delightful balance of sweetness and tartness. Plus, the addition of cinnamon sticks and star anise adds a warm, spicy kick that's perfect for winter.

As you enjoy this merry medley, remember to savor each sip. The complex layers of flavor will have you coming back for more.

Frequently Asked Questions

Can I Use Different Fruits Besides Oranges and Apples?

Absolutely, you can use different fruits besides oranges and apples in your sangria. Get creative with berries, citrus fruits, stone fruits, or tropical fruits – whatever sounds delicious to you! The possibilities are endless.

How Long Does Christmas Sangria Last in the Refrigerator?

Your Christmas Sangria will last 3-5 days in the refrigerator. The fruit and wine will continue to infuse, so the flavor will develop over time. Be sure to store it in an airtight container for best results.

Advertisement

Can I Make Christmas Sangria in Advance?

You can absolutely make your sangria in advance. Just prepare the mixture, cover, and refrigerate for up to 5 days. This will allow the flavors to meld and blend together perfectly before serving.

Do I Have to Use Red Wine for Christmas Sangria?

You don't necessarily have to use red wine for your sangria. While traditional sangria calls for red wine, you can experiment with white or rosé wines to create a unique and festive holiday twist on the classic cocktail.

Is Christmas Sangria Served Warm or Chilled?

Typically, sangria is served chilled, allowing the flavors to mingle and the fruit to infuse the wine. However, you can also serve Christmas sangria warm, creating a cozy and festive beverage perfect for the holiday season.
Advertisement

Christmas Recipes

Christmas Goose: A Traditional Feast

Kindle the holiday spirit with the story of the Christmas goose, a culinary tradition that captures the essence of the festive season.

Published

on

traditional christmas goose feast

Christmas goose has been a beloved centerpiece of holiday feasts for centuries, symbolizing the warmth and abundance of the season. This traditional dish, with its crisp golden-brown skin and succulent, flavorful meat, evokes the comforting flavors and cherished memories that make Christmas such a special time. Preparing a Christmas goose is a true culinary art, requiring care and attention to create the perfect balance of savory flavors. Gather your family around the table to enjoy this festive feast and discover the rich history and time-honored traditions that make this dish a Christmas celebration to remember. There's even more to explore about this beloved holiday classic!

Key Takeaways

  • The Christmas goose is a traditional European dish that has become a symbol of prosperity and abundance during the holiday season.
  • Roasting a whole goose requires careful attention to achieve a crispy skin and succulent meat, often accompanied by savory stuffing and complementary sides.
  • Basting the goose with its own pan drippings throughout the roasting process is essential for enhancing the flavor and creating an evenly browned presentation.
  • Serving the Christmas goose is a cherished holiday tradition that brings families together, fostering a sense of community and creating lasting memories.
  • Dessert options, such as homemade pies or decadent cakes, can provide a fitting conclusion to the festive Christmas goose feast.

History

The tradition of serving Christmas goose traces its origins back to medieval Europe. Back then, geese were abundant and easy to raise, making them a popular choice for holiday feasts. As the seasons changed, families would eagerly await the arrival of the first geese, signaling the start of the Christmas celebrations.

Roasting a goose was no easy task, but the end result was a delicious and tender bird that became a symbol of prosperity and abundance. The golden-brown skin, crispy and flavorful, would fill the air with mouthwatering aromas, drawing everyone to the table.

Over the centuries, the Christmas goose has evolved, but its place at the heart of the holiday feast remains unchanged.

Today, families continue to gather around the table, savoring the rich, juicy meat and the comforting traditions that have been passed down through the generations.

Recipe

Cooking a Christmas goose is a time-honored tradition that can add a touch of elegance and richness to your holiday feast. This succulent bird, with its crisp golden skin and flavorful meat, is a beloved centerpiece for many families.

Advertisement

Preparing a Christmas goose requires a bit of care and attention, but the end result is well worth the effort. The key is to balance the savory flavors of the goose with complementary sides and sauces, creating a harmonious and satisfying dining experience.

Ingredients:

  • 1 (8-10 lb) whole goose
  • 1 onion, diced
  • 2 carrots, peeled and diced
  • 2 celery stalks, diced
  • 4 sprigs of fresh thyme
  • 2 bay leaves
  • Salt and pepper to taste

Instructions:

Preheat your oven to 375°F (190°C). Rinse the goose under cold water and pat it dry with paper towels. Season the cavity with salt and pepper, then stuff it with the onion, carrots, celery, thyme, and bay leaves.

Truss the goose with kitchen string to help it maintain its shape during roasting. Place the goose on a rack in a large roasting pan and roast for approximately 2-2.5 hours, or until the internal temperature reaches 165°F (74°C) in the thickest part of the thigh. Baste the goose regularly with the pan juices to ensure a crisp, golden-brown skin.

When cooking a Christmas goose, be mindful that the bird can be quite rich and fatty. To help balance the flavors, consider serving the goose with tart cranberry sauce, tangy apple chutney, or a light, refreshing salad.

Advertisement

Additionally, it's essential to let the goose rest for at least 15-20 minutes before carving to allow the juices to redistribute, ensuring a juicy and flavorful dining experience.

Cooking Steps

Preheat your oven to 375 degrees Fahrenheit and get ready to create a delicious Christmas goose!

First, rub the goose with seasoned butter to give it a mouthwatering flavor.

Then, stuff the goose with bread cubes for a classic holiday stuffing.

Step 1. Preheat Oven to 375 Degrees Fahrenheit

preheat oven to 375 f

Preheating your oven to 375 degrees Fahrenheit is the crucial first step in this roasting process.

You'll want to make sure your oven is nice and toasty before you pop that magnificent goose inside. This high temperature helps the skin get all nice and crispy, while the meat stays juicy and flavorful.

Advertisement

As the oven warms up, you can start preparing the rest of your ingredients. Gather your seasoning, basting tools, and any other goodies you'd like to add to the pan.

Once that oven beeps, signaling it's reached the perfect temp, you're ready to get cooking! Carefully slide the goose into the oven, being mindful of that hot air.

Close the door quickly to trap all that delicious heat inside. Now, sit back, breathe in those mouthwatering aromas, and get ready for an unforgettable Christmas feast!

Step 2. Rub Goose With Seasoned Butter

rub goose with butter

With the oven preheated, it's time to prepare the goose. First, take the goose and pat it dry with paper towels.

In a small bowl, mix together softened butter, garlic, thyme, salt, and pepper. Gently rub this seasoned butter all over the surface of the goose, making sure to get it into all the nooks and crannies. This will help the skin get crispy and golden brown as it roasts.

Don't forget to rub some of the butter under the skin too – this will keep the meat juicy and flavorful. Once the goose is fully coated, tie the legs together with kitchen string and tuck the wing tips under the body.

Advertisement

Now your beautifully buttered bird is ready for the oven. The delicious aroma of roasting garlic and herbs will soon fill your kitchen, making everyone's mouths water in anticipation.

Get ready for a truly scrumptious Christmas feast!

Step 3. Stuff Goose With Bread Cubes

stuff goose with bread

After rubbing the seasoned butter all over the goose, it's time to stuff the bird with a delicious bread cube mixture.

Grab a large bowl and start tearing up some fresh, crusty bread into bite-sized cubes. Don't worry if the pieces aren't perfect – a little texture is great!

Next, sauté some onions, celery, and herbs in a pan until they're nice and fragrant. Toss the sautéed veggies with the bread cubes, and season the mixture with salt, pepper, and a pinch of poultry seasoning.

Gently stuff this savory stuffing into the cavity of the goose, being careful not to pack it in too tightly. The bread cubes will soak up all the flavorful juices as the goose roasts, creating a mouthwatering, golden-brown centerpiece for your Christmas feast.

Advertisement

Now that the goose is stuffed, you're one step closer to enjoying a truly memorable holiday meal!

Step 4. Roast Goose for 2-3 Hours

roast goose for hours

Now that the goose is stuffed with the flavorful bread cube mixture, it's time to get it in the oven. Preheat your oven to a toasty 350°F (175°C).

Carefully place the prepared goose, breast-side up, in a large roasting pan. You'll want to make sure the pan is big enough to accommodate the bird without it being cramped.

Once the oven is ready, pop that goose right in and let it roast for 2 to 3 hours. As it cooks, the savory scent will start to fill your kitchen, making your mouth water in anticipation.

Every 30 minutes or so, use a basting brush to coat the goose with the delicious juices that collect in the bottom of the pan. This will help the skin turn a beautiful golden brown.

When the timer goes off, use a meat thermometer to check that the internal temperature of the goose has reached at least 165°F (75°C).

Advertisement

If it's good to go, carefully remove the pan from the oven and let the goose rest for 10-15 minutes before carving and serving.

Step 5. Baste Goose With Drippings Periodically

baste goose with drippings

Basting the goose periodically with the drippings in the pan will help create a beautifully browned and crispy skin.

As the goose cooks, juices and fat will collect at the bottom of the roasting pan. Every 30 minutes or so, use a basting brush to scoop up these delicious drippings and generously coat the top and sides of the goose.

This will keep the meat moist and infuse it with even more rich, savory flavor. You'll notice the skin starting to turn a lovely golden-brown as it crisps up.

Be sure to baste the goose well, getting the drippings all over the surface. This will ensure an evenly cooked, picture-perfect bird that will impress your family and friends when you bring it to the table.

The aroma wafting through the kitchen as you baste will have everyone's mouths watering in anticipation!

Advertisement

Final Thoughts

As you prepare to serve your delectable Christmas goose, take a moment to savor the accomplishment. Your hard work and dedication have paid off, and now you can sit back and enjoy the fruits of your labor.

The golden-brown skin, the juicy and tender meat, and the delectable aroma wafting through the air – it's all worth it.

Your guests will be in for a real treat as they dive into the succulent goose, paired with your carefully crafted side dishes. The crispy skin, the flavorful stuffing, and the rich gravy will have them raving about your culinary skills.

And don't forget to save room for dessert – a warm slice of homemade pie or a decadent chocolate cake will be the perfect way to cap off this festive feast.

Enjoy every moment of this special occasion, and cherish the memories you'll create as you gather around the table with your loved ones.

Advertisement

Merry Christmas!

Frequently Asked Questions

How to Properly Store a Christmas Goose Before Cooking?

To properly store a Christmas goose before cooking, keep it refrigerated at 40°F or below. Wrap it tightly in plastic or foil to prevent drying. Thaw in the fridge for 1-2 days before cooking.

Can I Use a Different Type of Goose Instead?

You can definitely use a different type of goose instead of a traditional Christmas goose. Other types of geese, like Toulouse or Muscovy, will work just as well for your holiday feast.

What Are the Best Side Dishes to Serve With Christmas Goose?

When serving Christmas goose, you'll want to choose complementary side dishes. Consider roasted root vegetables, savory stuffing, cranberry sauce, and a light salad to balance the rich, flavorful meat.

How Long Does It Take to Thaw a Frozen Christmas Goose?

Depending on the size of the frozen goose, it can take anywhere from 24 to 72 hours to thaw it safely in the refrigerator. The larger the bird, the longer it'll need to fully defrost.

Advertisement

Is It Possible to Make a Vegetarian Version of Christmas Goose?

You can certainly create a vegetarian version of a Christmas goose. Try using a soy or seitan-based roast that mimics the texture and flavor of a traditional goose. Season it with savory herbs and serve it as the centerpiece of your meatless feast.

Continue Reading

Christmas Recipes

Reindeer Cupcakes

Irresistibly adorable and packed with holiday cheer, these reindeer cupcakes are a festive treat that will have you dreaming of sleigh rides and snowy nights. Learn how to make them.

Published

on

festive reindeer cupcake treats

You'll love making these festive reindeer cupcakes that have been a cherished holiday treat for generations, dating back to ancient Nordic celebrations of the winter solstice. With their chocolatey goodness and whimsical antler decorations, these cupcakes are sure to spread joy at any seasonal gathering. You can easily customize the flavors and frosting, and get creative with candies and pretzel sticks to design your own unique reindeer faces. Whether you're hosting a holiday party or just looking for a cozy afternoon treat, these reindeer cupcakes are sure to delight. And if you'd like to learn more about their history and how to make them, keep reading!

Key Takeaways

  • Reindeer cupcakes are festive holiday treats featuring a chocolate cupcake base with chocolate frosting, candies for facial features, and pretzel sticks for antlers.
  • The origins of reindeer cupcakes can be traced back to ancient Nordic communities, where they were created for winter solstice celebrations.
  • Reindeer cupcakes are easy to make using basic ingredients like cupcake mix, chocolate frosting, and candies, making them suitable for holiday parties or cozy afternoon treats.
  • Creative decoration options, such as tinted frosting, different colored candies, and edible glitter, allow for unique and personalized reindeer cupcake designs.
  • Reindeer cupcakes can enhance the overall holiday spirit and atmosphere, foster connections with family and friends, and create lasting memories through the shared experience of making and enjoying them.

History

According to historical records, reindeer cupcakes have been a beloved holiday treat for centuries. These delightful confections were first enjoyed by ancient Nordic communities, who'd bake them to celebrate the winter solstice and the return of the sun. The reindeer, a majestic creature revered in many northern cultures, was a natural choice to adorn these festive cakes.

Over the years, the recipe for reindeer cupcakes has evolved, with different regions and bakers adding their own unique touches. Some might top the cupcakes with shredded coconut to mimic the reindeer's soft, fluffy fur, while others might use cinnamon candies or chocolate chips to create the distinctive antlers.

The rich, moist sponge and creamy frosting provide the perfect canvas for these whimsical decorations, making each bite a delightful experience.

Whether enjoyed at a cozy holiday gathering or shared with friends and family, reindeer cupcakes continue to spread joy and delight during the most wonderful time of the year.

Recipe

The Reindeer Cupcakes are a delightful and whimsical treat that can be enjoyed by people of all ages.

Advertisement

These cupcakes feature a festive design, with reindeer-inspired decorations that will bring a smile to everyone's face. Whether you're baking them for a holiday party, a family gathering, or just a cozy afternoon indulgence, these cupcakes are sure to delight.

These cupcakes are easy to make and can be customized to fit your personal taste or dietary needs. You can experiment with different flavors of cupcakes and frostings to create your own unique version of these adorable treats.

Ingredients:

  • 1 box of your favorite cupcake mix
  • Ingredients required by the cupcake mix (typically eggs, oil, and water)
  • 1 can of chocolate frosting
  • Red and brown M&Ms or other small candies for the nose and antlers
  • Pretzel sticks for the antlers

Cooking Instructions:

Preheat your oven to the temperature specified on the cupcake mix box. Prepare the cupcake batter according to the instructions on the box.

Divide the batter evenly among the cupcake liners in your baking pan. Bake the cupcakes until a toothpick inserted into the center comes out clean, approximately 18-20 minutes. Allow the cupcakes to cool completely before frosting.

Advertisement

Once the cupcakes are cooled, spread the chocolate frosting evenly over the top of each cupcake. Place two red M&Ms or other small candies near the top of the cupcake to create the reindeer's nose.

Break the pretzel sticks into pieces and arrange them on the top of the cupcake to create the reindeer's antlers.

Tips:

  • For a more festive look, you can tint the frosting with a few drops of green or red food coloring.
  • Try using different colored candies or sprinkles to create unique variations of the reindeer design.
  • Store the cupcakes in an airtight container at room temperature for up to 3 days.

Cooking Steps

Preheat your oven to a toasty 350°F, then mix up the dry ingredients until they're well combined.

Pop the cupcakes in the oven and bake them for 18-20 minutes until they're golden brown.

Step 1. Preheat Oven to 350°F

preheat oven to 350 f

Preheat your oven to 350°F. You'll need to get the oven nice and toasty before you can start baking your delightful reindeer cupcakes. Once it reaches the perfect temperature, you can pop those cupcake tins right in and let the magic happen.

As the oven warms up, you can start gathering your other ingredients. You'll want to have your cake batter all mixed and ready to go. The smell of the batter will have your mouth watering in anticipation!

Advertisement

Once the oven is preheated, you can carefully scoop the batter into the cupcake liners. Be sure to fill them up just the right amount – not too much, not too little.

Now, all you have to do is set the timer and wait patiently. You'll know the cupcakes are done when the tops are golden brown and a toothpick inserted comes out clean. Can you already imagine how amazing they'll taste? Get ready for the most scrumptious reindeer cupcakes ever!

Step 2. Mix Dry Ingredients

combine dry ingredients thoroughly

With the oven preheated, let's start mixing the dry ingredients for your reindeer cupcakes. In a large bowl, whisk together the all-purpose flour, baking powder, and a pinch of salt.

These dry ingredients will give your cupcakes the perfect fluffy texture.

Next, add in the unsweetened cocoa powder. This will give your reindeer cupcakes a rich, chocolatey flavor that everyone will love.

Be sure to sift the cocoa powder first, so there are no pesky lumps.

Advertisement

Now it's time for the brown sugar. Sprinkle it in and use a fork to break up any clumps.

The brown sugar will add a lovely caramel-y sweetness to balance out the chocolate.

Give everything a good stir until the dry ingredients are well combined.

The mixture should look smooth and uniform.

You're doing great – the hard part is over! Now we can move on to the wet ingredients to bring these reindeer cupcakes to life.

Advertisement

Step 3. Bake Cupcakes for 18-20 Minutes

bake cupcakes 18 20 minutes

Having mixed the dry ingredients, you're now ready to bake the reindeer cupcakes. Preheat your oven to 350°F (175°C) and line a 12-cup muffin tin with festive cupcake liners. Scoop the batter evenly into the prepared cups, filling them about three-quarters full.

Carefully place the muffin tin in the preheated oven and set a timer for 18-20 minutes. As the cupcakes bake, your kitchen will fill with the delightful aroma of chocolate and spices. You'll be tempted to peek, but resist the urge! Opening the oven door too often can affect the baking time. Instead, enjoy the tantalizing scent and imagine the light, fluffy texture of the cupcakes when they're done.

When the timer goes off, use oven mitts to gently remove the muffin tin from the oven. The cupcakes should be golden brown and a toothpick inserted into the center should come out clean. Allow them to cool in the tin for a few minutes before transferring them to a wire rack to cool completely.

Step 4. Frost Cupcakes With Buttercream

frost cupcakes with buttercream

Once the cupcakes have cooled completely, it's time to start frosting them with delectable buttercream.

First, gather your butter and powdered sugar. In a large bowl, beat the butter until it's light and fluffy. Gradually add the powdered sugar, a little at a time, mixing well after each addition. Keep mixing until the buttercream is smooth and creamy.

Now it's time to frost your cupcakes! Dip a butter knife or small spatula into the buttercream and swirl it on top of each cupcake. Smooth the frosting with the back of the knife, creating soft, billowy peaks.

Don't be afraid to pile on the buttercream – the more the better!

Advertisement

Once all your cupcakes are frosted, you can get creative. Use a piping bag to pipe rosettes or other designs on top. Or sprinkle on some colorful sprinkles or crushed candy canes.

The possibilities are endless! Your reindeer cupcakes are now ready to delight your friends and family.

Step 5. Decorate With Chocolate Antlers

chocolate antler decoration step

To decorate your reindeer cupcakes, you'll need to create chocolate antlers. First, gather your supplies: chocolate candy melts, a piping bag, and a small, sharp knife.

Melt the candy melts according to the package instructions, then let them cool slightly until they're thick enough to pipe.

Next, snip the tip off the piping bag and carefully pipe the melted chocolate into antler shapes onto a baking sheet lined with parchment paper. Don't worry if they're not perfectly symmetrical – reindeer antlers come in all shapes and sizes!

Once you've piped all the antlers, pop the tray into the fridge to let the chocolate harden, about 10 minutes.

Advertisement

Gently remove the hardened antlers from the parchment paper. Using the knife, carefully trim any uneven edges to make them look their best.

Final Thoughts

As you've whipped up these delightful reindeer cupcakes, you can sit back and admire your handiwork. The chocolate antlers, the fluffy frosting, and the shiny red noses – your creations are simply too cute to eat!

You should feel proud of yourself for bringing these festive treats to life. Not only do they look adorable, but they're sure to delight everyone who tries them.

Imagine the smiles on your family and friends' faces as they bite into the moist, chocolatey cupcake and discover the delightful surprises inside.

These reindeer cupcakes aren't just desserts – they're edible works of art that capture the spirit of the holidays.

Advertisement

Frequently Asked Questions

What Is the Nutritional Value of Reindeer Cupcakes?

The nutritional value of reindeer cupcakes isn't something you'd typically consider. They're likely high in sugar, fat, and calories from the cake and frosting, without much nutritional benefit. It's best to enjoy them in moderation as an occasional treat.

Can Reindeer Cupcakes Be Made Gluten-Free?

Yes, you can make reindeer cupcakes gluten-free. Use gluten-free flour, baking powder, and other common cupcake ingredients. Just be sure to adjust the recipe accordingly to achieve the desired texture and taste.

How Long Can Reindeer Cupcakes Be Stored?

You can typically store homemade cupcakes for 3-4 days at room temperature, or up to a week in the fridge. However, the exact storage time may vary depending on the ingredients and how they're prepared.

Are Reindeer Cupcakes Suitable for Vegetarians?

Are reindeer cupcakes suitable for vegetarians? Well, that depends on the ingredients used. If they're made with non-dairy butter and eggs, they could be a vegetarian-friendly treat. But you'll want to double-check the recipe to be sure.

Can Reindeer Cupcakes Be Used as Party Decorations?

Yes, you can certainly use reindeer cupcakes as party decorations. They make for a whimsical and festive addition to any celebration, adding a touch of holiday cheer to your event.

Advertisement
Continue Reading

Christmas Recipes

Christmas Tree Meringues

Luscious holiday meringues in the shape of festive trees, with a crisp exterior and a melt-in-your-mouth interior, are a must-try for any…

Published

on

festive holiday dessert treats

Christmas tree meringues are a delightful holiday treat! They've been enchanting bakers for generations, with their whimsical shapes, vibrant colors, and irresistible crunch. You'll start by whipping egg whites to stiff, glossy peaks, then fold in sugar for a sweet, fluffy texture. Pipe the meringue into festive tree shapes and bake until crisp. Top with green sanding sugar for a sparkly, festive look. These light and airy treats make perfect edible decorations for your holiday gatherings. And when you're done admiring their beauty, you'll love sinking your teeth into their delightful flavor.

Key Takeaways

  • Classic Christmas dessert with a history dating back to the 18th century, reflecting the evolution of meringue-making techniques across Europe.
  • Made by whipping egg whites into stiff peaks, folding in sugar, and piping into festive tree shapes before baking.
  • Decorative options include colorful swirls, crushed candy canes, and edible glitters, adding to the visual appeal.
  • Best enjoyed fresh but can be stored in an airtight container for up to 3 days, maintaining their crisp exterior and chewy interior.
  • Offer a light, low-calorie treat that is naturally gluten-free, making them a guilt-free indulgence for holiday gatherings.

History

The first recorded recipe for Christmas tree meringues dates back to the 18th century, when meringue-making techniques were rapidly evolving across Europe. Enterprising bakers began experimenting with shaping the delicate, whipped egg whites into festive designs, creating edible Christmas tree ornaments that delighted both the eyes and the taste buds.

These delightful treats, much like the benefits of cilantro for dogs, were enjoyed in moderation, adding to the festive cheer.

As the popularity of meringues grew, so too did the creativity of the cooks who crafted them. Soon, colorful swirls and flecks of crushed candy canes or sprinkles were added, transforming the simple meringue into a true holiday showstopper.

Imagine the delight of children as they gazed upon these whimsical, tree-shaped treats, each one a unique work of edible art.

Today, Christmas tree meringues remain a beloved part of the holiday season, a sweet and shimmering reminder of the joyful traditions that have been passed down through the generations.

Advertisement

With every bite, you can almost hear the laughter and feel the warmth of festive gatherings past.

Recipe

Christmas tree meringues are a delightful and festive treat that can add a touch of whimsy to your holiday celebrations. These light and airy confections aren't only visually stunning but also incredibly easy to prepare.

The key to creating the perfect Christmas tree meringues lies in mastering the art of meringue-making. By whipping egg whites to a stiff peak and carefully folding in sugar, you can achieve a beautifully structured and lightly sweet base for your holiday creations.

  • 4 egg whites, at room temperature
  • 1 cup (200g) granulated sugar
  • Green food coloring (liquid or gel)
  • Decorations (such as sprinkles, silver dragées, or crushed candy canes)

Begin by preheating your oven to 225°F (110°C). Line two baking sheets with parchment paper. In a large, clean bowl, whip the egg whites until they reach stiff peaks. Gradually add the sugar, one tablespoon at a time, while continuing to whip until the meringue is glossy and holds its shape.

Gently fold in a few drops of green food coloring, being careful not to overmix. Spoon the meringue into a piping bag fitted with a large star tip. Pipe the meringue onto the prepared baking sheets, starting from the bottom and working your way up to create a tree shape. Decorate the meringues with your desired toppings.

Bake the Christmas tree meringues for 1 to 1.5 hours, or until they're firm to the touch and can be easily lifted off the parchment paper. Allow them to cool completely on the baking sheets before serving.

Advertisement

These delicate treats are best enjoyed the same day they're made, but they can be stored in an airtight container for up to 3 days.

Cooking Steps

Separate those egg whites from the yolks and whip them up until they're nice and stiff.

Then, gently fold in the granulated sugar, a little at a time.

Now, grab your piping bag and pipe the fluffy meringue onto a baking sheet, ready to bake until they're crisp and delightful!

Step 1. Separate Egg Whites From Yolks

separate egg whites yolks

Separating egg whites from yolks is a crucial step in creating the delicate meringue that will form the base of your Christmas tree meringues. It may seem tricky at first, but with a little practice, you'll be cracking eggs like a pro!

First, you'll need to gently crack the eggs, one at a time, over a clean bowl. Slowly, let the yolk slide into your hand, allowing the white to drip into the bowl below. Be careful not to break the yolk – you don't want any of that golden goodness mixing in with your whites.

Advertisement

Once you've separated all the eggs, you'll have a bowl full of perfectly pure, protein-packed egg whites, ready to be whipped into fluffy, cloud-like meringue. It's an essential step, but don't worry, you've got this!

With a little elbow grease and some holiday cheer, you'll have those meringues piped and baked in no time.

Step 2. Whip Egg Whites Until Stiff

whip egg whites stiffly

With your perfectly separated egg whites ready, it's time to get whipping! Grab your electric mixer and turn it on to high speed. The egg whites will begin to foam up, transforming from a clear, runny liquid into a thick, billowy meringue.

As you whip them, you'll notice the texture changing – the whites will become glossy and stiff, forming beautiful, voluminous peaks. Keep whipping until the meringue holds its shape when you lift the beaters. This usually takes around 5 minutes, but be patient and keep a close eye on it. You want those egg whites whipped to perfection!

Once they're stiff and shiny, you're ready to pipe your Christmas tree meringues. Gently fold in any food coloring or flavorings you'd like, then get creative with piping the meringue into festive tree shapes. With a little practice, you'll be whipping up a batch of fluffy, colorful Christmas tree meringues in no time!

Step 3. Fold in Granulated Sugar Gradually

gradually fold in sugar

Once your egg whites have reached the perfect stiff peaks, it's time to start adding the sugar.

Slowly and steadily, sprinkle in the granulated sugar, a little at a time. Be patient and don't rush this process – you want to fold the sugar in gently, so the air you've whipped into the egg whites doesn't escape.

Advertisement

As you gradually incorporate the sugar, you'll notice the mixture becoming thick and glossy.

Keep folding until all the sugar has disappeared and the meringue is smooth and shiny. Resist the urge to overmix, as that can deflate your precious peaks.

The key is to take your time and fold with a light touch. Imagine you're handling a delicate snowflake – you want to preserve its intricate, delicate structure.

Soon, you'll have a beautifully thick and voluminous meringue, ready to be piped into festive Christmas tree shapes. Get ready for baking magic!

Step 4. Pipe Meringue Onto Baking Sheet

pipe meringue onto sheet

Grab a large piping bag and fit it with a large star tip.

Carefully spoon the fluffy meringue into the bag, making sure to pack it in tightly.

Advertisement

Position the bag over your baking sheet, holding it at a 90-degree angle with the tip just above the surface.

Gently squeeze the bag, applying steady pressure as you pipe the meringue onto the sheet, creating beautiful swirls and peaks that resemble a miniature Christmas tree.

Work your way around the sheet, piping the meringue in a circular pattern to build up the tree shape.

Don't be afraid to get creative, adding extra flourishes and details to make each tree unique.

Once you've filled the sheet, take a moment to admire your handiwork – these delicate, airy meringues are sure to dazzle your friends and family when you serve them up this holiday season!

Advertisement

Step 5. Bake at 200°F Until Crisp

bake until crisp 200 f

Preheat your oven to 200°F. Once it's ready, you'll want to carefully transfer the piped meringue dollops onto your baking sheet.

Be gentle – you don't want to squish those fluffy, cloud-like meringues! Now, slide the tray into the oven and let the magic happen.

As the meringues bake, you'll start to notice them drying out and turning a lovely, crisp white. This process can take around 1-2 hours, so make sure to keep an eye on them.

You'll know they're done when you can lightly touch the meringues without them sticking to your finger.

Once they're perfectly crisp, remove the tray from the oven and let the meringues cool completely.

Aren't they just the cutest little Christmas tree shapes? Now you can admire your handiwork and get ready to dazzle your family and friends with these delightful holiday treats.

Advertisement

Baking has never been so merry and bright!

Final Thoughts

These Christmas tree meringues have been a delightful journey, haven't they? You've followed along step-by-step, creating these whimsical and festive treats.

From whipping the egg whites to the perfect peaks, to piping the meringue into tree shapes, each stage has been both fun and rewarding.

And now, as you admire the crisp, snow-white meringues, you can't help but feel a sense of pride. These aren't just any ordinary cookies – they're edible works of art!

With a dusting of green sanding sugar, they're ready to bring joy to friends and family. The best part? You can enjoy them guilt-free, as meringues are light and airy, melting away on your tongue.

Advertisement

Frequently Asked Questions

How Long Do Christmas Tree Meringues Last?

You can expect your meringues to last 3-5 days when stored properly in an airtight container at room temperature. Their delicate texture may begin to deteriorate after that, so it's best to enjoy them soon after baking.

Can I Use Food Coloring in the Meringue?

You can certainly use food coloring in meringue. The coloring will infuse the meringue with vibrant hues, adding a festive touch. Just be mindful not to overdo it, as too much coloring can affect the delicate texture.

Do I Need to Use a Piping Bag for Shaping?

You don't necessarily need a piping bag to shape the meringue. You can use a spoon or a small scoop to create the desired shapes. However, a piping bag can make the process easier and allow for more intricate designs.

Can I Make the Meringues Ahead of Time?

Certainly! You can make the meringues ahead of time. Just store them in an airtight container at room temperature for up to a week. This allows you to prepare them in advance and enjoy their light, crisp texture when you're ready to serve.

How Should I Store the Finished Meringues?

You can store the finished meringues in an airtight container at room temperature for up to 1 week. Avoid placing them in the refrigerator, as the humidity can cause them to become soft and chewy.

Advertisement
Continue Reading

Affiliate Disclaimer
As an affiliate, we may earn a commission from qualifying purchases. We get commissions for purchases made through links on this website from Amazon and other third parties.

Advertisement

Latest

soft fluffy milk bread soft fluffy milk bread
Baking and Pastry1 hour ago

Milk Bread Recipe by King Arthur: Soft and Fluffy Bread

A delightful milk bread recipe by King Arthur promises soft, fluffy goodness, but wait until you see the secret tips...

ramen s cultural origins explored ramen s cultural origins explored
Asian Cuisine1 hour ago

Is Ramen Korean? The Origins of Your Favorite Noodle Dish

Diving into the remarkable history of ramen, this article explores the dish's deep-rooted connections to Chinese cuisine and its evolution...

vietnamese ginger chicken recipe vietnamese ginger chicken recipe
Vietnamese Cuisine1 hour ago

Gà Kho Gừng: Vietnamese Ginger Chicken You Need to Try

Whet your appetite with the bold, aromatic flavors of Gà Kho Gừng, a captivating Vietnamese ginger chicken dish that's a...

vietnam s steamed rice cake vietnam s steamed rice cake
Vietnamese Cuisine1 hour ago

Vietnam’s Traditional Bánh Đúc: A Steamed Rice Cake Favorite

Flavors of Vietnam's heritage shine in the beloved Bánh Đúc, a steamed rice cake that has captivated the hearts and...

crispy vietnamese banh cam crispy vietnamese banh cam
Vietnamese Cuisine1 hour ago

Sweet and Crispy: Vietnamese Banh Cam Recipe

Flaunting a golden-brown crust and a soft, chewy interior, Vietnamese Banh Cam is a beloved treat that's a must-try for...

perfect tofu kimchi combo perfect tofu kimchi combo
Korean Cuisine2 hours ago

Dubu Kimchi: The Perfect Korean Tofu and Kimchi Combo

Savor the harmonious blend of silky tofu and bold, tangy kimchi in this beloved Korean comfort food dish that's packed...

homemade dressings over bottled homemade dressings over bottled
Homemade Condiments and Sauces6 hours ago

Homemade Salad Dressings: Never Buy Bottled Again

You'll be amazed at the flavor and freshness of homemade salad dressings, and never want to go back to bland,...

whole seeds to spreads whole seeds to spreads
Homemade Condiments and Sauces6 hours ago

Crafting Mustard: From Whole Seeds to Gourmet Spreads

Overcome the mundane with the ancient art of crafting mouthwatering mustard spreads from whole seeds, transforming your cooking into a...

quick pressure cooker recipes quick pressure cooker recipes
One-Pot Wonders7 hours ago

Instant Pot Revolution: Quick and Easy Pressure Cooker Recipes

Pressure cooking has never been easier with the Instant Pot, a game-changing appliance that unlocks a world of quick and...

essential knife maintenance techniques essential knife maintenance techniques
Kitchen Hacks and Tips10 hours ago

Knife Sharpening: Maintaining Your Most Important Tool

Blades that are razor-sharp unlock a world of culinary possibilities, transforming even the simplest tasks into a delightful experience. Discover...

diabetic friendly low glycemic meals diabetic friendly low glycemic meals
Cooking for Special Diets15 hours ago

Cooking for Diabetics: Low Glycemic Index Meals

Unleash the secrets to savory, blood sugar-friendly meals that satisfy your cravings and support your health with our guide to...

delicious african eggplant dishes delicious african eggplant dishes
African Cuisine17 hours ago

African Eggplant Recipes: Creative Ways to Enjoy Eggplant

Plunge into the world of African eggplant recipes that will tantalize your taste buds and inspire your culinary creativity—discover delicious...

Trending