You'll love delving into the world of croquettes! These crispy, golden-brown delights have a rich history dating back to 18th century France. They've evolved over time, with cultural variations like the beloved Spanish croquetas. Today, you'll find croquettes made with all sorts of flavorful fillings, from classic meats to inventive cheeses and veggies. The key to perfect croquettes is getting the creamy interior and crispy exterior just right – it's an art form! Whether you enjoy them as appetizers, sides, or main courses, croquettes make a mouthwatering addition to any meal. Keep reading to uncover more about this beloved global dish.
Key Takeaways
- Croquettes are a versatile dish with a crispy exterior and creamy interior, originating in 18th-century France and popular across various cuisines worldwide.
- The basic recipe for croquettes includes ingredients like mashed potatoes, flour, eggs, and breadcrumbs, with a variety of fillings from meats to cheeses.
- The preparation process involves cooking, mixing, and cooling the filling, followed by rolling the mixture into uniform balls and coating with breadcrumbs before frying.
- Croquettes can be served as appetizers, side dishes, or main courses, and can be paired with dips or sauces that complement the filling.
- Flavor variations of croquettes include traditional fillings like ham, chicken, or seafood, as well as vegetarian options and global-inspired fusion styles.
History
Croquettes have a fascinating history that dates back to the 18th century. Originally created in France, these delightful fried bites were popularized by the renowned chef Auguste Escoffier. He incorporated them into his classic French cuisine, showcasing their versatility and irresistible flavor.
Over the years, croquettes have evolved, with different cultures putting their own spin on the recipe. In Spain, they're known as croquetas, often featuring a creamy béchamel filling. Latin American countries have embraced the dish, infusing it with local ingredients like chicken, ham, or even seafood.
Today, croquettes can be found all over the world, from gourmet restaurants to street food stalls. They've become a beloved comfort food, satisfying cravings with their crispy exterior and savory interior.
Whether you enjoy them as an appetizer or a main course, croquettes are sure to delight your taste buds and transport you to culinary adventures past and present.
Recipe
Croquettes are a classic, versatile dish that can be enjoyed as a savory snack, appetizer, or even a main course. These bite-sized delights are crispy on the outside and creamy on the inside, making them a truly delightful culinary experience.
Whether you prefer them with a classic filling or a unique twist, croquettes are sure to delight your taste buds.
In this recipe, we'll guide you through the process of creating perfectly crisp and flavorful croquettes that are sure to impress your guests or satisfy your cravings.
Ingredients:
- 2 cups cooked and mashed potatoes
- 1 cup all-purpose flour
- 2 eggs, beaten
- 1 cup breadcrumbs
- 1/2 cup grated cheese (such as cheddar or Parmesan)
- 1 tablespoon chopped parsley
- Salt and pepper to taste
- Vegetable oil for frying
Instructions:
In a large bowl, combine the mashed potatoes, flour, and beaten eggs. Mix well until a thick, cohesive mixture forms.
Season with salt and pepper to taste. Gradually add the grated cheese and chopped parsley, mixing until fully incorporated.
Using your hands, form the potato mixture into small, oval-shaped croquettes, approximately 2-3 inches in length. Coat each croquette in breadcrumbs, ensuring an even and complete coverage.
In a large skillet or Dutch oven, heat enough vegetable oil to allow for shallow frying. Once the oil is hot, carefully add the breaded croquettes and fry until golden brown on all sides, about 2-3 minutes per side.
Drain the cooked croquettes on a paper towel-lined plate to remove any excess oil.
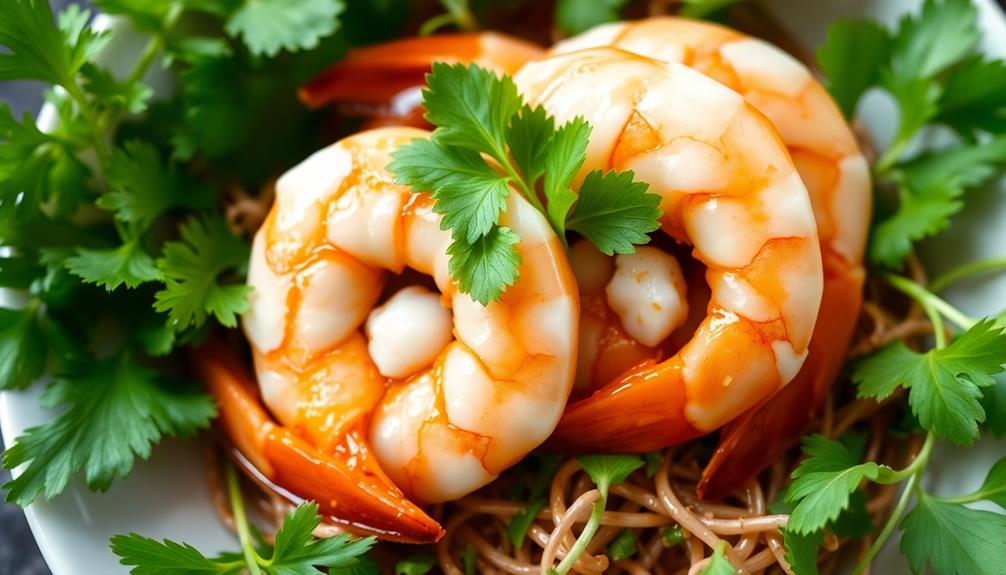
Serve the crispy croquettes warm, accompanied by your favorite dipping sauce or condiments. The creamy interior and crunchy exterior make for a truly delightful dining experience.
Cooking Steps
Melt the butter in a saucepan over medium heat.
Once it's melted, whisk in the flour until it forms a smooth paste.
Gradually pour in the milk, stirring constantly until the mixture thickens into a creamy béchamel sauce.
Chill the mixture in the fridge until firm, then roll it into balls and fry them until golden brown.
Step 1. Melt Butter in Saucepan
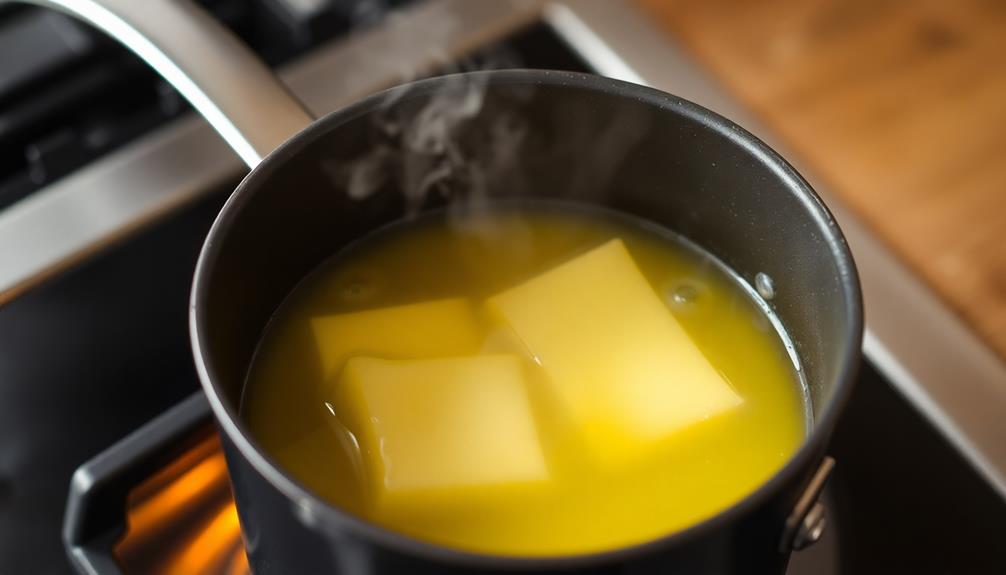
Go ahead and grab a saucepan, then pop the butter inside. Turn the heat to medium and let the butter melt, stirring occasionally. You'll want to keep a close eye on it, making sure the butter doesn't burn. As the butter melts, it will start to bubble and foam up. This is perfectly normal!
Once the butter is fully melted, you can move on to the next step. You'll need to add some flour to the pan, whisking it in quickly to create a smooth roux. Cook this for a minute or two, letting the flour cook out that raw taste.
Now it's time to slowly pour in the milk, continuing to whisk as you go. This will help prevent any lumps from forming. Bring the mixture to a simmer, stirring frequently, until it thickens up nicely.
Season with a pinch of salt and pepper, then you're ready to use this creamy béchamel sauce in your croquetas! If you want to take your croquetas to the next level, consider adding some finely chopped fresh herbs to the béchamel sauce for an extra burst of flavor. Another delicious option is to mix in some grated cheese for a rich and indulgent twist. And if you’re feeling adventurous, try pairing your croquetas with a zesty recipe for marinated anchovies for a truly unforgettable appetizer. The possibilities are endless when it comes to creating delicious and unique culinary creations with béchamel sauce.
Step 2. Add Flour to Butter
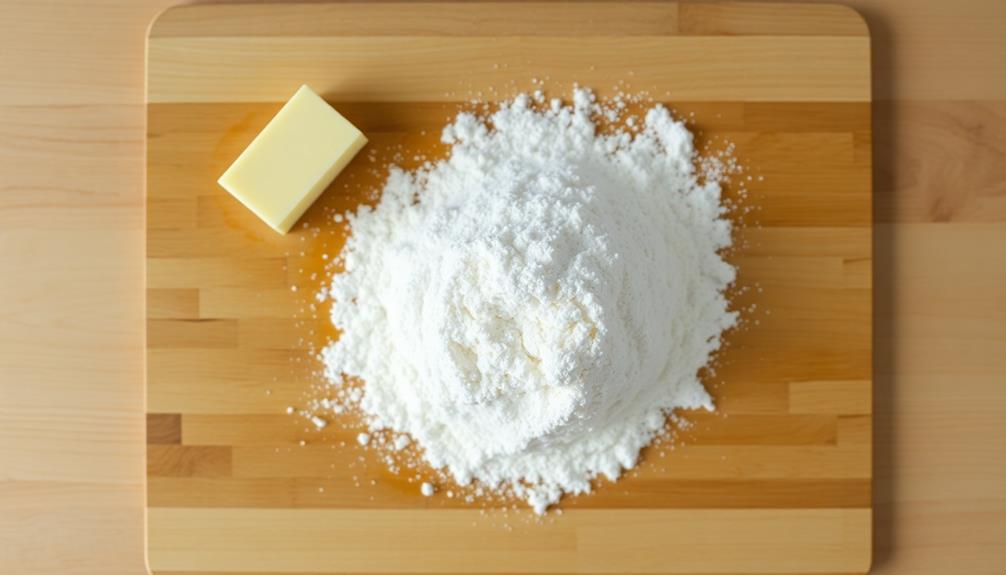
Once the butter is fully melted, you'll want to add some flour to the pan, whisking it in quickly to create a smooth roux. This forms the base of the croquette mixture, helping to thicken and bind the ingredients together.
Start with a 1:1 ratio of butter to flour, adjusting as needed to reach the desired consistency. Using high-quality butter basics can enhance the flavor of your croquettes.
Whisk the flour into the melted butter continuously for about 2-3 minutes, ensuring there are no lumps. The roux should be smooth and glossy, with a light golden color. This process cooks out the raw flour taste, leaving behind a rich, nutty flavor.
Once the roux is ready, you can begin adding the other ingredients to the pan, such as milk or broth, to create the croquette filling. Remember to keep the heat at a medium setting to prevent the roux from burning.
With a little practice, you'll be able to whip up a perfect roux every time, setting the stage for delicious homemade croquettes.
Step 3. Add Milk and Stir
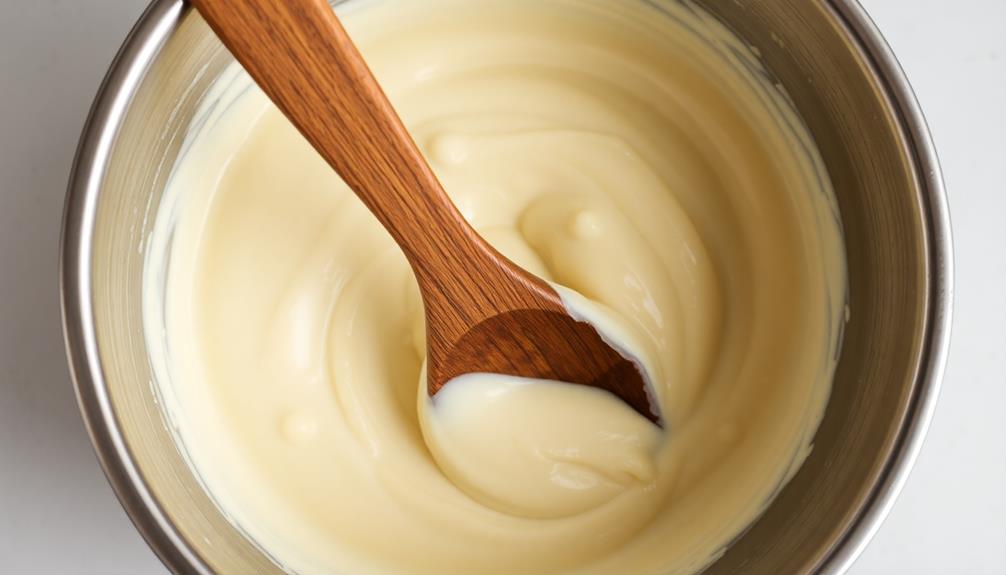
After the roux is ready, you'll want to slowly pour in some milk, whisking continuously to incorporate it. This will create a thick, creamy sauce that's the foundation for your croquettes.
Be sure to whisk vigorously to prevent any lumps from forming. Once the milk is fully combined, you can adjust the seasoning to your liking, adding a pinch of salt and pepper.
The mixture should have a velvety, smooth texture at this point. If it seems too thick, you can thin it out by adding a splash more milk, a little at a time, until you reach the desired consistency.
Now that your bechamel sauce is ready, you can move on to the next step – adding the filling ingredients. This is where you can get creative, incorporating flavors like cheese, ham, or even seafood.
Just be sure to let the mixture cool slightly before assembling your croquettes. With the milk and roux prepared, you're well on your way to crispy, delicious croquettes!
Step 4. Chill Mixture Until Firm
With the creamy béchamel sauce ready, you'll want to let it chill until it firms up. This chilling process is crucial for the croquettes to hold their shape when you start to bread and fry them. Simply transfer the sauce to a shallow baking dish or rimmed plate and pop it in the fridge for 30 minutes to an hour.
As the béchamel cools, it will thicken up nicely. You'll know it's ready when you can scoop up a spoonful and it holds its form instead of slumping back into the dish.
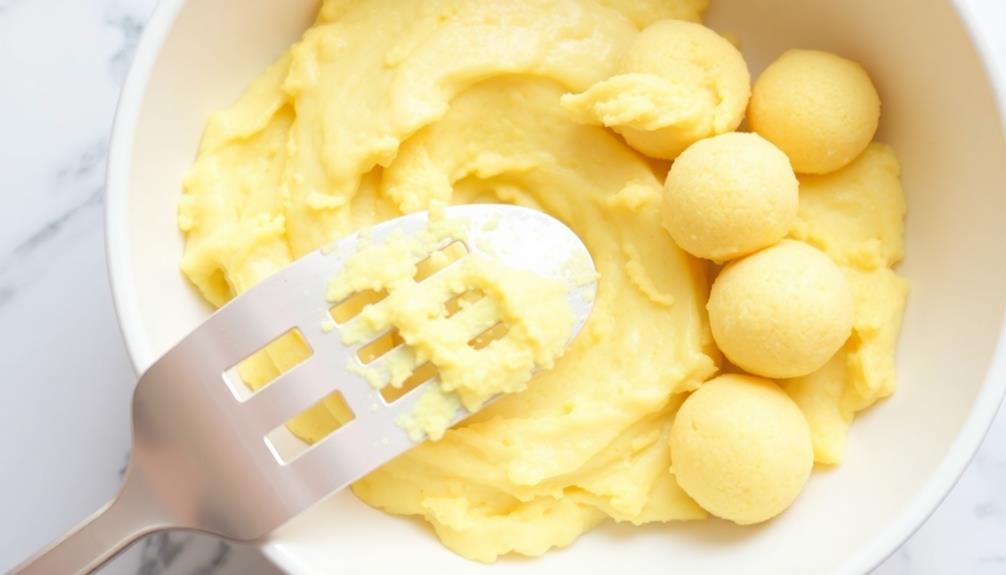
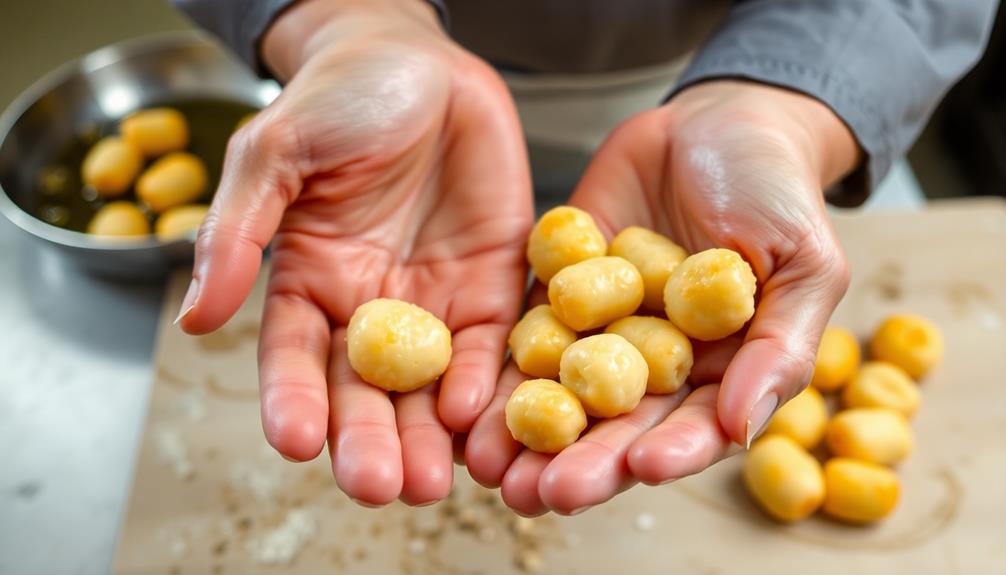
Once chilled, use your hands to form the mixture into compact oval shapes, about 2-3 inches long. Work quickly so the béchamel doesn't warm up too much.
Arrange the formed croquettes on a parchment-lined baking sheet and chill again for 15-20 minutes before breading. This extra time in the fridge helps them firm up even more for perfect frying.
Step 5. Roll Into Balls and Fry
Breading the chilled croquettes is a straightforward process.
First, set up your breading station with three shallow dishes. In the first, place some all-purpose flour. In the second, beat a couple of eggs. In the third, a mixture of breadcrumbs and grated parmesan cheese.
Gently roll each chilled croquette in the flour, coating it evenly on all sides. Next, dip it into the beaten eggs, letting any excess drip off. Finally, roll the croquette in the breadcrumb mixture, pressing lightly to help it adhere.
Once all the croquettes are breaded, heat a generous amount of vegetable oil in a large skillet over medium-high heat.
Carefully lower the breaded croquettes into the hot oil and fry until golden brown, about 2-3 minutes per side. Drain the fried croquettes on a paper towel-lined plate, then serve hot, garnished with a sprinkle of fresh parsley if desired.
Enjoy your crispy, flavorful croquettes!
Final Thoughts
Croquettes are a versatile and delightful dish that have captured the hearts and stomachs of many. As you've learned, the process of creating these crispy, golden-brown morsels isn't only satisfying but also quite simple.
From selecting the right ingredients to rolling the mixture into perfect balls and frying them to perfection, each step is crucial in crafting the ultimate croquette.
While the traditional method is undoubtedly delicious, don't be afraid to experiment with different fillings and flavors to suit your personal taste.
Perhaps you'd like to try a creamy cheese-filled croquette or a savory meat-based one. The possibilities are endless!
Serve them as an appetizer, a side dish, or even as the star of the meal. No matter how you enjoy them, croquettes are sure to bring a smile to your face and a satisfied feeling to your belly.
Frequently Asked Questions
What Is the Best Type of Cheese for Croquetas?
You'll want to use a firm, melty cheese like Manchego or Gruyère for the best croquetas. The cheese should be able to hold its shape while providing a creamy, rich texture to the filling.
Can Croquetas Be Made With Different Types of Meat?
Absolutely, you can make croquetas with different types of meat. While the traditional recipe calls for bechamel and ham, you can experiment with chicken, beef, or even seafood to create delicious variations.
How Long Do Croquetas Keep in the Refrigerator?
How long they'll keep in the fridge depends on the ingredients, but generally, you can store them for 3-5 days. Just be sure to store them in an airtight container to maintain freshness.
Can Croquetas Be Frozen and Reheated?
Yes, croquetas can be frozen and reheated. Simply freeze them in an airtight container or freezer bag, and when you're ready to enjoy them, reheat them in the oven or air fryer until they're hot and crispy.
What Are the Most Common Accompaniments for Croquetas?
You can serve croquetas with a variety of accompaniments to enhance their flavor and experience. The most common options include aioli, spicy ketchup, or a simple salad. These additions can provide a contrasting texture and taste to the crispy fried croquetas.