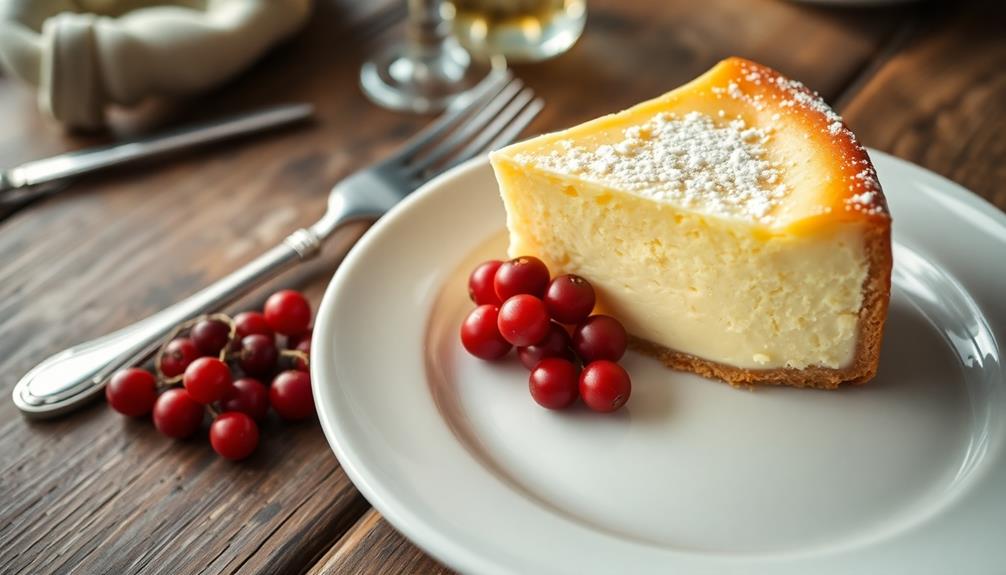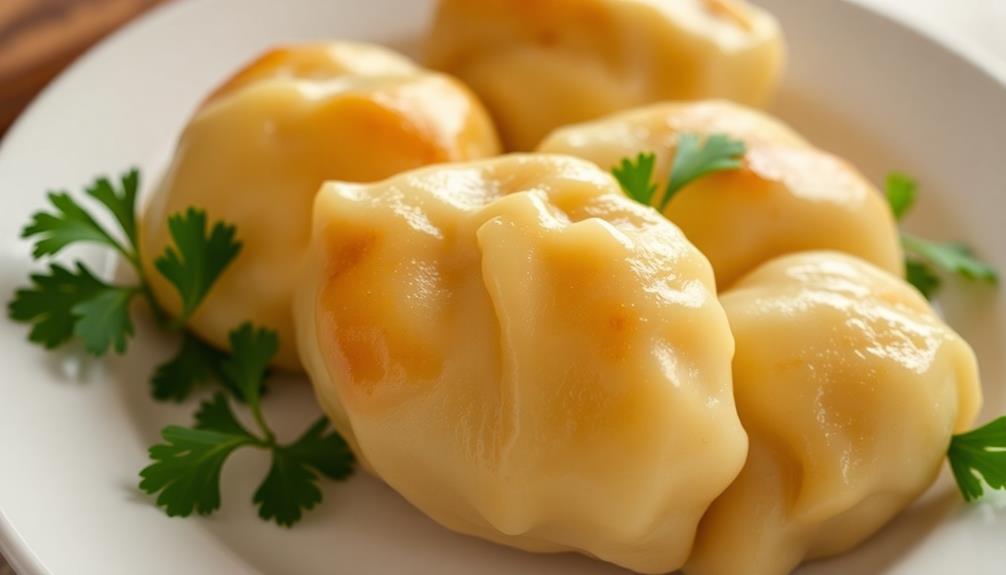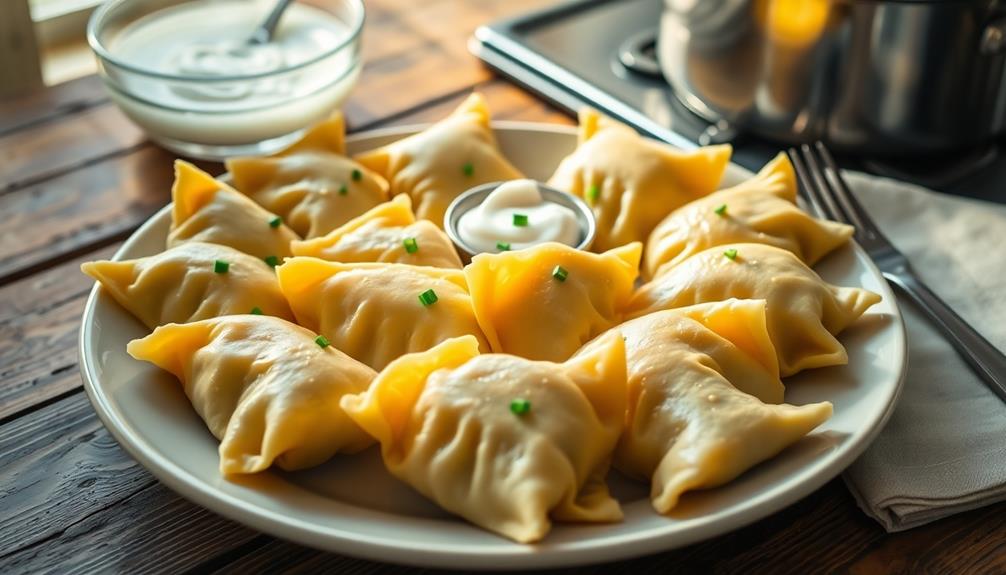
Pierogi are delicious filled dumplings that'll transport your taste buds to Eastern Europe! You'll love these versatile treats, which can be stuffed with savory or sweet fillings. To make them, you'll create a simple dough, roll it out, and cut it into circles. Then, you'll add your favorite filling, fold the dough over, and seal the edges. Boil, fry, or bake your pierogi to perfection, and serve them with sour cream or butter. These comforting dumplings have a rich history and are perfect for family gatherings or cozy nights in. There's so much more to discover about these mouthwatering morsels!
Key Takeaways
- Pierogi are Eastern European dumplings made from dough and filled with various savory or sweet ingredients.
- Classic fillings include mashed potatoes with cheese, sauerkraut with mushrooms, or seasoned ground meat.
- The dough is typically made from flour, warm water, eggs, and salt, then rolled thin and cut into circles.
- Cooking methods include boiling, pan-frying, baking, or steaming, often served with toppings like sour cream.
- Pierogi hold cultural significance in many Eastern European countries and have gained popularity worldwide as comfort food.
Top picks for "pierogi fill dumpling"
Open Amazon search results for this keyword.
As an affiliate, we earn on qualifying purchases.
History
Pierogi have been dishing up comfort and satisfaction for centuries. You'll find these delicious dumplings at the heart of Eastern European cuisine, with roots stretching back to the 13th century. Picture medieval kitchens filled with the aroma of boiling dough and savory fillings!
Traditionally, pierogi were a peasant food, providing a hearty meal that could stretch limited ingredients. You'd see families gathered around the table, folding dough over potato, cheese, or meat fillings.
As time passed, pierogi became a staple in Polish, Ukrainian, and Russian households.
You might be surprised to learn that pierogi have a special place in religious traditions too. During Christmas and Easter, you'd find people preparing special varieties filled with sauerkraut, mushrooms, or sweet fruit.
These little pockets of joy weren't just food; they were a way to bring people together and celebrate.
Today, you can enjoy pierogi all over the world. They've traveled far from their Eastern European origins, becoming a beloved comfort food that reminds us of home, no matter where we're from.
Recipe
Pierogi, a beloved Eastern European dumpling, is a versatile and comforting dish that has gained popularity worldwide. These delectable pockets of dough can be filled with various ingredients, ranging from savory to sweet, making them suitable for any meal or occasion.
In today's volatile economy, similar to investing in gold, pierogi can be a comforting staple that brings warmth to the table, no matter the season. Traditional pierogi are often filled with a mixture of mashed potatoes and cheese, but other popular fillings include sauerkraut, ground meat, or even fruit for dessert variations.
This recipe focuses on the classic potato and cheese filling, which is both satisfying and easy to prepare.
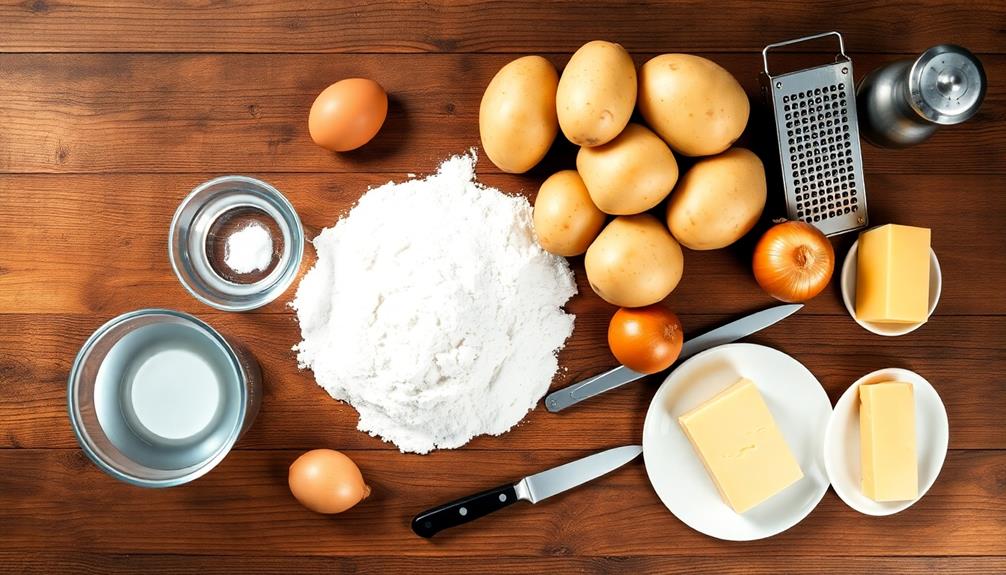
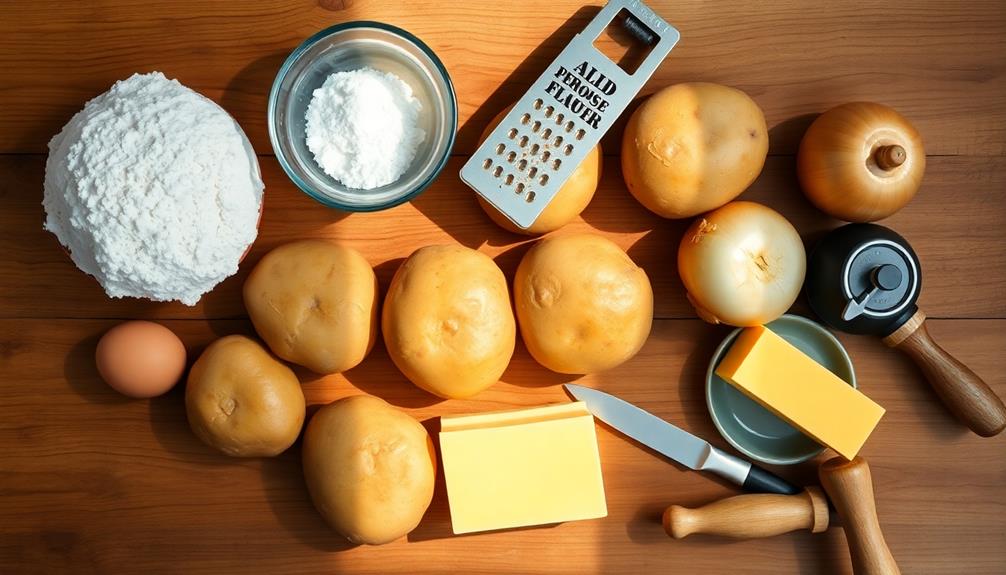
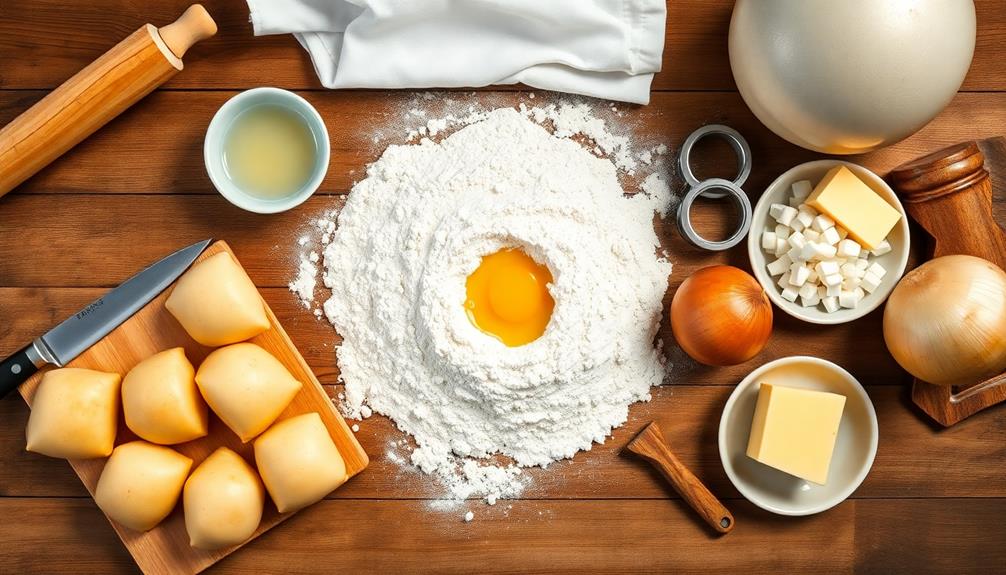
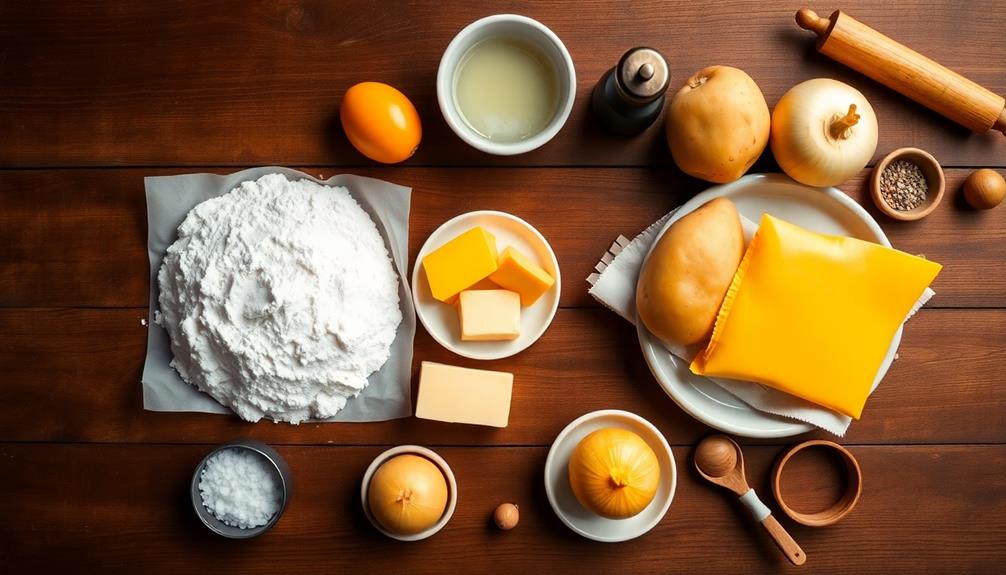
Ingredients:
- 3 cups all-purpose flour
- 1 cup warm water
- 1 egg
- 1/2 teaspoon salt
- 4 large potatoes, peeled and quartered
- 1 cup shredded cheddar cheese
- 1 onion, finely chopped
- 2 tablespoons butter
- Salt and pepper to taste
To prepare the pierogi, start by making the dough. Mix flour, warm water, egg, and salt in a large bowl until a soft dough forms. Knead the dough on a floured surface for about 5 minutes, then cover and let it rest for 30 minutes.
Meanwhile, boil the potatoes until tender, then mash them with cheese, sautéed onions, and seasonings. Roll out the dough thinly and cut into circles. Place a spoonful of filling on each circle, fold in half, and pinch the edges to seal. Boil the pierogi in batches for 3-5 minutes until they float to the surface. Serve with sautéed onions, sour cream, or melted butter.
For best results, avoid overfilling the pierogi to prevent them from bursting during cooking. If not serving immediately, you can freeze the uncooked pierogi on a baking sheet before transferring them to a freezer bag for longer storage.
When ready to eat, simply boil the frozen pierogi without thawing. Experiment with different fillings and toppings to create your own unique variations of this classic dish.
Cooking Steps
You're ready to start making your pierogi!
First, you'll gather and mix your dough ingredients until you've got a smooth, pliable dough.
Once it's ready, roll it out thinly and cut circles from it, then fill each circle with your savory stuffing of choice.
These steps set the stage for creating your delicious, homemade pierogi that'll have everyone asking for seconds!
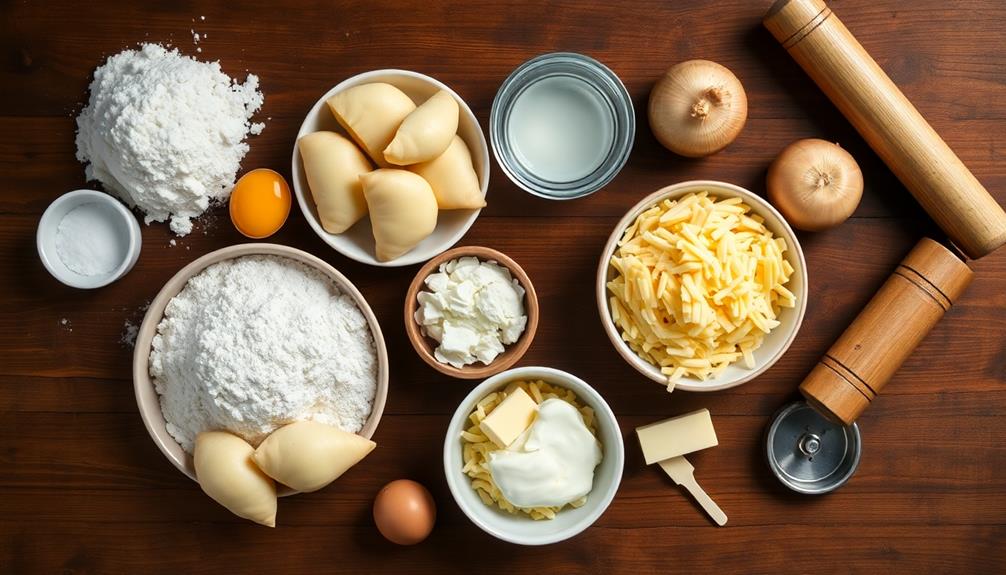
Step 1. Prepare Dough Ingredients
To begin preparing the dough for pierogi, you'll need just a few simple ingredients. Gather all-purpose flour, eggs, warm water, and a pinch of salt. These basic components will come together to create a smooth, pliable dough that's perfect for your delicious dumplings.
Start by measuring out your flour into a large mixing bowl. Create a well in the center of the flour, and crack your eggs into it. The warm water will help bring everything together, so have it ready nearby. Don't forget that pinch of salt – it'll enhance the flavor of your dough!
As you're collecting your ingredients, take a moment to appreciate how these simple items will transform into something amazing. Imagine the soft, pillowy pierogi you'll soon be enjoying!
Step 2. Mix Dough Until Smooth
Now that you've gathered your ingredients, it's time to bring them together. In a large mixing bowl, combine the flour and salt, giving them a quick stir.
Make a well in the center of the dry ingredients and crack the eggs into it. Pour in the water and oil, then roll up your sleeves – it's time to get your hands dirty!
Using your fingers, start mixing the wet and dry ingredients together. As you work, you'll feel the dough coming to life. Don't be afraid to use some muscle; kneading is key to developing the gluten in the flour.
Keep mixing and folding the dough over itself until it becomes smooth and elastic. This might take about 5-7 minutes of steady work.
If the dough feels too sticky, sprinkle in a bit more flour. Too dry? Add a splash of water. You're aiming for a consistency that's pliable but not tacky.
Once your dough is smooth and bounces back when poked, you've nailed it! Cover the bowl with a damp cloth and let it rest for 30 minutes. This break allows the gluten to relax, making the dough easier to roll out later.
Step 3. Roll Out Dough Thinly
After the dough has rested, it's time to transform it into thin sheets. Grab your rolling pin and lightly dust your work surface with flour to prevent sticking. Divide the dough into smaller, manageable portions – this'll make it easier to handle.
Take one portion and begin rolling it out, starting from the center and working your way outward. Apply gentle, even pressure as you roll. You'll want to aim for a thickness of about 1/8 inch, or as thin as you can get it without tearing.
As you roll, rotate the dough occasionally to ensure it's evenly stretched. If the dough starts to stick, sprinkle a bit more flour on your surface or rolling pin. Keep an eye on the shape, trying to maintain a rough circle or oval.
Don't worry if it's not perfect – you'll be cutting it into smaller circles later. Once you've reached the desired thickness, set the rolled dough aside and cover it with a clean kitchen towel to prevent drying.
Repeat this process with the remaining portions until all your dough is beautifully thin and ready for the next step.
Step 4. Cut Circles From Dough
With your dough rolled out thin, it's time to cut out the perfect circles for your pierogies. Grab a round cookie cutter or the rim of a glass that's about 3 to 4 inches in diameter. If you don't have either, don't worry! You can use a knife to trace around a small plate or bowl.
Press the cutter firmly into the dough, giving it a little twist to ensure a clean cut. Repeat this process, spacing your cuts close together to maximize the dough's use. You'll be amazed at how many circles you can get!
As you work, gently remove the cut circles and set them aside on a lightly floured surface.
Don't toss out the scraps! Gather them up and re-roll the dough to cut more circles. You'll want to work quickly to keep the dough from drying out. If it starts to feel tough, let it rest for a few minutes under a damp cloth.
Keep cutting until you've used all your dough. Now you're ready for the fun part – filling your pierogies!
Step 5. Fill With Savory Stuffing
The heart of any pierogi lies in its savory stuffing. Now that you've cut out your dough circles, it's time to fill them with delicious goodness! Grab a spoon and get ready to create mouthwatering pockets of flavor.
Start by placing a small dollop of your chosen filling in the center of each dough circle. You'll want about a tablespoon, but don't overfill – leave room to seal the edges. Popular fillings include mashed potatoes with cheese, sauerkraut with mushrooms, or seasoned ground meat. Feel free to get creative and mix your favorite ingredients!
Gently fold the dough over the filling, creating a half-moon shape. Press the edges together firmly with your fingers, making sure there are no gaps. For an extra-secure seal, you can use a fork to crimp the edges.
As you work, place your filled pierogis on a lightly floured surface to prevent sticking.
Final Thoughts
Why have pierogis captured the hearts and taste buds of so many around the world? It's simple: they're comforting, versatile, and delicious!
These little dough pockets filled with savory goodness have become a beloved dish in many cultures.
You've learned how to make the perfect pierogi dough and fill it with tasty stuffings.
Now, it's time to experiment and make them your own. Try different fillings, from traditional potato and cheese to creative options like spinach and feta.
Don't forget to explore various cooking methods, too. Boil them for a classic approach, or pan-fry them for a crispy twist.
Frequently Asked Questions
Can Pierogi Be Frozen for Later Consumption?
Yes, you can absolutely freeze pierogi for later! It's a great way to save time and have a delicious meal ready when you need it.
After you've made your pierogi, let them cool completely.
Then, arrange them on a baking sheet, not touching, and freeze until solid.
Once frozen, transfer them to a freezer bag. They'll keep for up to 3 months.
When you're ready to eat, just boil them straight from the freezer. It's that easy!
What Are Some Popular Vegetarian Fillings for Pierogi?
You'll love exploring vegetarian pierogi fillings! Some popular options include creamy mashed potatoes with caramelized onions, tangy sauerkraut, or a savory mix of mushrooms and herbs.
You can also try sweet fillings like fruit compotes or farmer's cheese with a touch of vanilla. Don't forget about veggie-packed options like spinach and feta or roasted butternut squash.
Get creative and experiment with your favorite vegetables, cheeses, and seasonings to create your own unique, mouthwatering pierogi fillings!
How Long Do Cooked Pierogi Last in the Refrigerator?
You'll want to eat your cooked pierogi quickly, but don't worry if you can't finish them all at once!
When stored properly in an airtight container, they'll stay fresh in your fridge for 3-5 days. Make sure they're cooled completely before storing.
You'll notice they're still good if they smell normal and look the same as when you put them away. If you're not sure, it's best to toss them out to be safe.
Are There Any Gluten-Free Alternatives for Making Pierogi Dough?
Yes, you've got options for gluten-free pierogi dough!
You can try using a mix of rice flour, potato starch, and tapioca flour.
Another tasty alternative is using mashed potatoes as your base.
Don't forget about almond or coconut flour – they're great choices too!
Each option will give your pierogi a unique texture and flavor.
Remember, you might need to adjust the liquid in your recipe when using these alternatives.
Experiment and find your favorite gluten-free version!
What Are Traditional Polish Side Dishes Served With Pierogi?
When you're enjoying pierogi, you'll find some delicious Polish side dishes to complement them. You can't go wrong with a dollop of sour cream or a sprinkle of crispy bacon bits on top.
Many Poles love to serve caramelized onions alongside their pierogi. You'll also often see sauerkraut, pickled cucumbers, or a fresh garden salad on the plate.
For a heartier meal, try some kielbasa sausage or a warm bowl of borscht (beet soup) to round out your Polish feast.