Connect with us

Nigerian Cuisine

Nigerian Coconut Rice: the Flavorful Side Dish With a Twist

Joyfully explore the vibrant flavors of Nigerian Coconut Rice, a beloved dish that blends creamy coconut milk and aromatic spices for a tropical twist.

Published

on

flavorful nigerian coconut rice

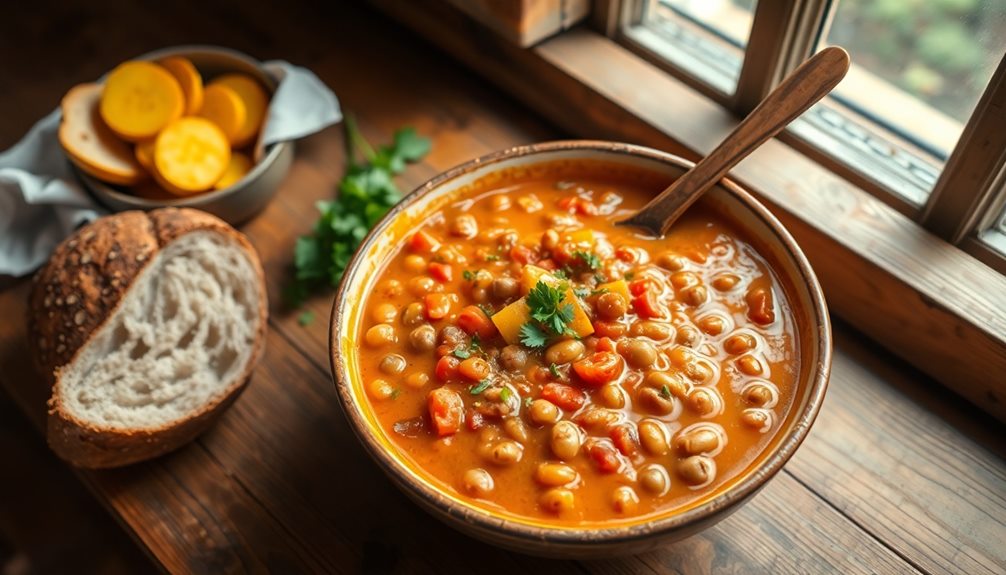
You'll love the vibrant and flavorful taste of Nigerian Coconut Rice, a beloved dish passed down through generations. This creamy side combines long-grain white rice with rich coconut milk, aromatic spices, and fresh ingredients. The result is a tropical twist on a classic that'll delight your senses. You can even boost the nutrition by adding nutritious chia seeds. With its harmonious blend of flavors, Nigerian Coconut Rice is a crowd-pleasing dish perfect for gatherings or as a satisfying meal. Explore the rich culinary heritage of West Africa and discover the magic of this unforgettable dish.

Key Takeaways

  • Nigerian Coconut Rice has a rich history in Nigerian cuisine, passed down through generations and celebrated at special events.
  • The dish combines coconut milk with long-grain white rice, creating a creamy texture and a unique flavor profile.
  • Aromatic ingredients like onions, garlic, and spices like ginger and curry powder enhance the overall taste of the dish.
  • The cooking process involves sautéing the aromatics, simmering the rice in coconut milk, and fluffing it for the perfect texture.
  • Nigerian Coconut Rice offers a delightful and unforgettable dining experience, showcasing the vibrant flavors of West African cuisine.

History

chronicles of past events

Coconut rice has a rich history woven into the culinary tapestry of Nigeria. This beloved dish has been a staple in Nigerian kitchens for generations, passed down through families with pride and care. Its origins can be traced back to the nation's coastal regions, where the abundance of coconut palms provided the key ingredient that gives this rice its distinctive flavor and creamy texture.

Over time, the recipe has evolved, with different regions and communities adding their own unique twists. Some might include aromatic spices like ginger or turmeric, while others might incorporate local vegetables or proteins.

Regardless of the variations, the essence of coconut rice remains the same – a comforting and satisfying side dish that complements a wide range of Nigerian main courses.

Today, coconut rice is enjoyed not just in homes, but also at celebrations and special events, where it often takes center stage as a cherished part of the Nigerian culinary heritage.

Recipe

culinary instructions and ingredients

Nigerian Coconut Rice

Coconut rice is a beloved dish in Nigerian cuisine, known for its aromatic, creamy, and flavorful profile. This delightful recipe combines the richness of coconut milk with the nutty, slightly sweet taste of rice, creating a harmonious blend that tantalizes the taste buds.

For an added nutritional boost, consider incorporating chia seeds into your coconut rice, as they provide essential omega-3 fatty acids and fiber.

Advertisement

The key to achieving the perfect Nigerian coconut rice lies in the careful selection and preparation of the ingredients. Each component plays a vital role in crafting this delectable dish, ensuring a truly authentic and satisfying culinary experience.

Ingredients:

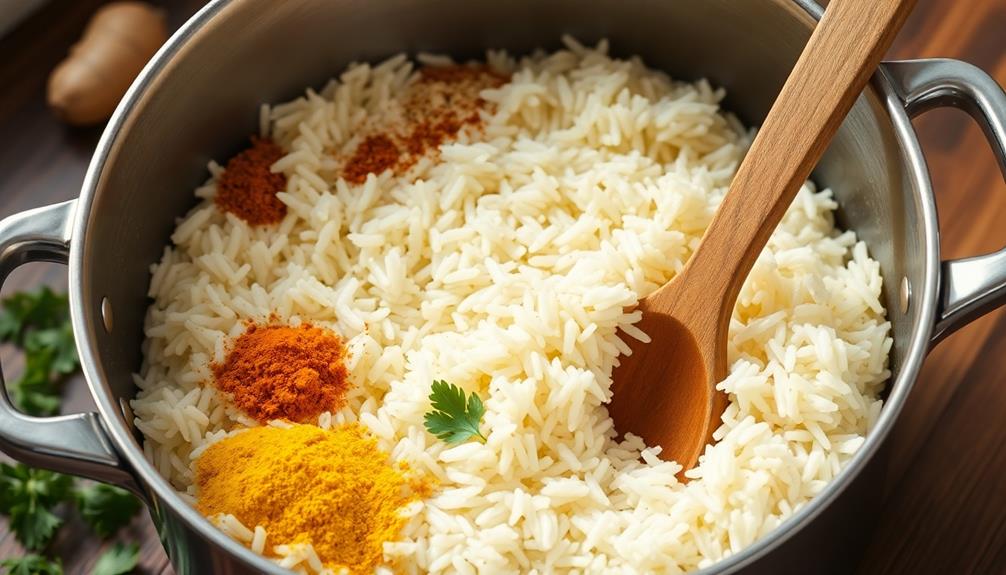
  • 2 cups long-grain white rice
  • 1 cup coconut milk
  • 1 cup water
  • 1 teaspoon salt
  • 1 tablespoon unsalted butter
  • 1 onion, diced
  • 2 cloves garlic, minced
  • 1 teaspoon ground ginger
  • 1 teaspoon curry powder
  • 1/4 cup chopped fresh parsley (optional)

Cooking Instructions:

In a large saucepan, combine the rice, coconut milk, water, and salt. Bring the mixture to a boil over high heat, then reduce the heat to low, cover, and simmer for 20-25 minutes, or until the rice is tender and the liquid is absorbed.

While the rice is cooking, melt the butter in a separate skillet over medium heat. Add the onion and sauté until translucent, about 5 minutes. Stir in the garlic, ground ginger, and curry powder, and cook for an additional 2-3 minutes, or until fragrant.

Once the rice is cooked, fluff it with a fork and gently fold in the sautéed onion mixture. If desired, garnish with chopped fresh parsley before serving.

Advertisement

Tips:

For an even creamier texture, you can add an additional 1/4 cup of coconut milk to the rice mixture.

Additionally, consider toasting the rice briefly in the skillet before cooking to enhance its nutty flavor. Lastly, feel free to experiment with different spices or herbs to personalize the dish to your taste preferences.

Cooking Steps

detailed culinary instructions

First, you'll want to rinse the rice thoroughly before cooking – this helps remove any excess starch.

Next, sauté the onions and garlic in a bit of oil until fragrant.

Then, pour in the coconut milk and let the flavors meld together as you add the rice and seasonings.

Advertisement

Simmer everything gently until the rice is tender and cooked through – the result is a delightfully creamy and coconutty dish!

Step 1. Rinse Rice Thoroughly Before Cooking

rinse rice before cooking

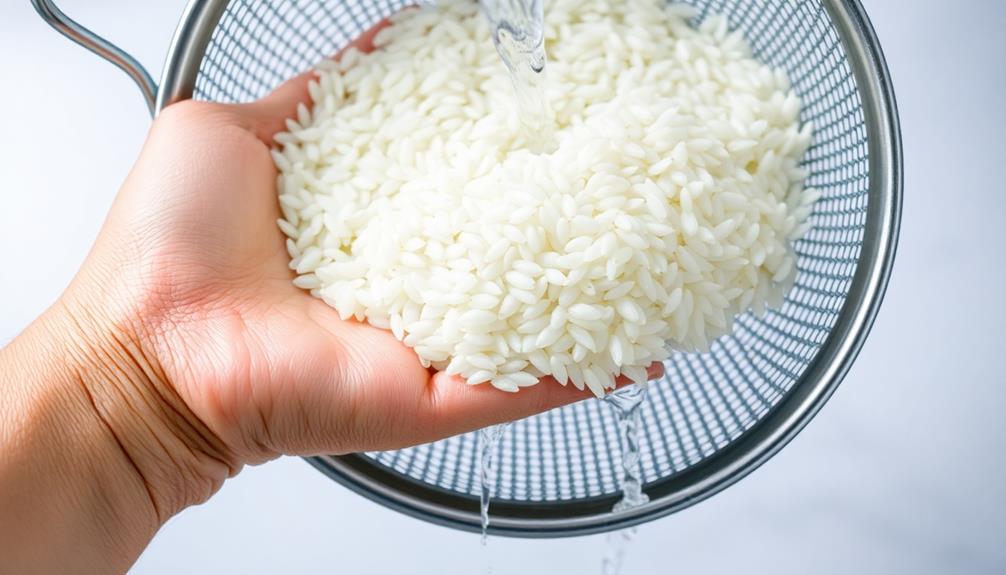
Before cooking the rice, it's important to rinse it thoroughly. You don't want any dirt or debris ending up in your delicious Nigerian coconut rice!

Grab a fine-mesh strainer and place the rice inside. Run cool water over the rice, gently swishing it around to release any impurities. Keep rinsing until the water runs clear – this helps remove excess starch, ensuring your rice won't be sticky or gloppy.

Once the rice is clean, you're ready for the next step! Grab your pot and let's get cooking.

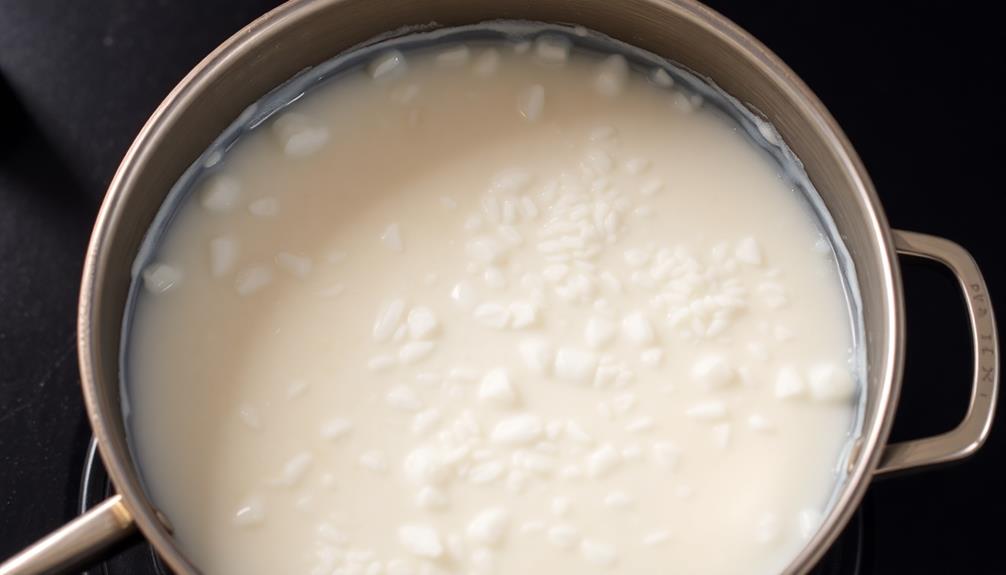
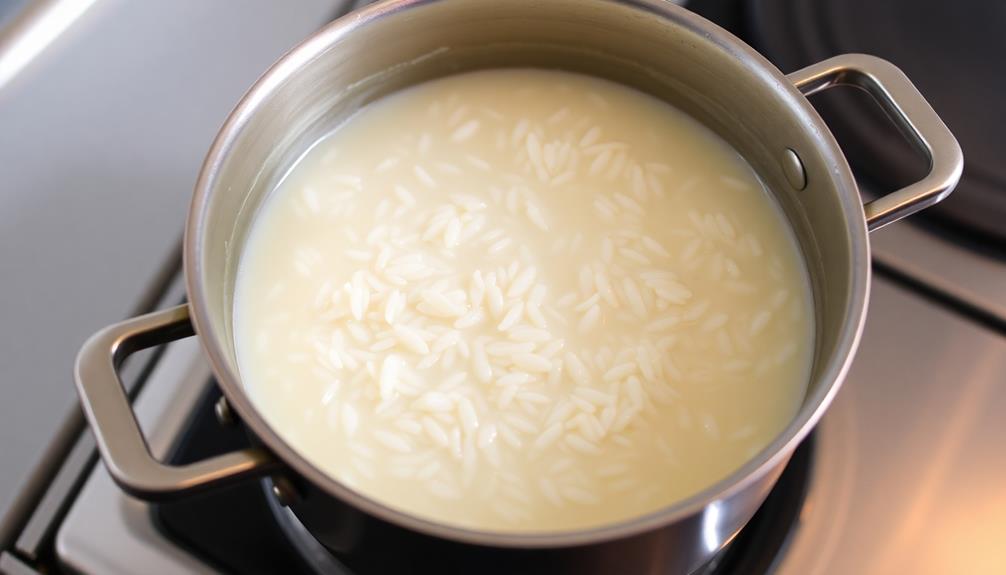
First, add the coconut milk, broth, and seasonings. Bring the mixture to a boil, then reduce the heat and let it simmer.

Now, carefully stir in the rinsed rice. Cover the pot and let the rice cook until it's tender and the liquid is absorbed, about 20 minutes.

Advertisement

Fluff with a fork and serve hot. Enjoy the fragrant, flavorful results of your hard work!

Step 2. Sauté Onions and Garlic

saut onions and garlic

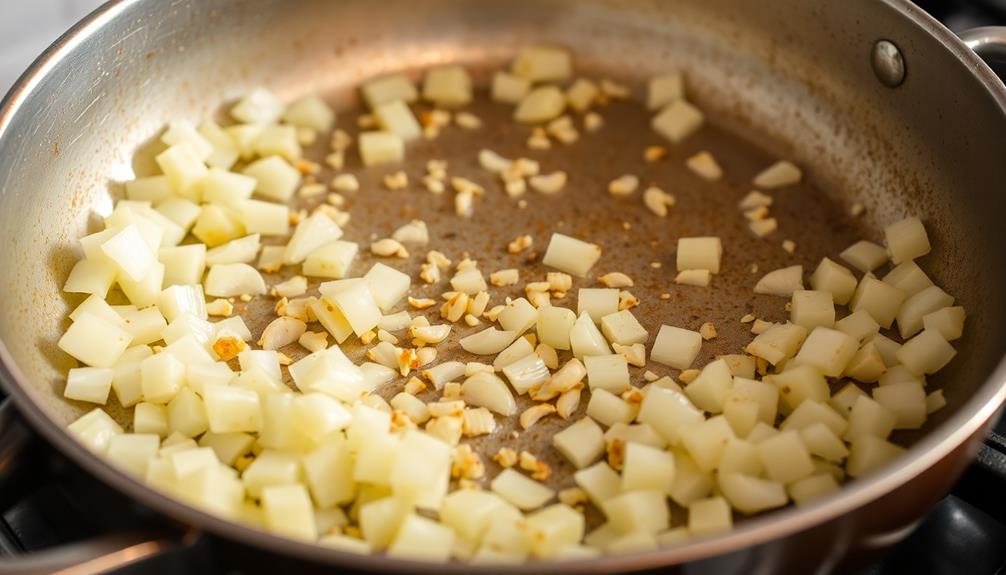
To start, heat a bit of oil in a large skillet over medium heat. Once the oil is shimmering, add the diced onions and minced garlic.

Sauté these aromatics, stirring frequently, until they become fragrant and the onions start to soften, about 3-5 minutes. Adding a touch of compound butter recipes can elevate the flavor even further, enhancing the overall dish.

The onions and garlic will create a delightful aroma that will fill your kitchen. As they cook, they'll become translucent and take on a slightly golden color. This is exactly what you want – the onions and garlic will infuse the rice with incredible flavor.

Be sure to keep a close eye on the skillet, as you don't want the garlic to burn. Burnt garlic can taste bitter, so you'll want to remove the skillet from the heat if the garlic starts to brown too quickly.

Once the onions and garlic are ready, you can move on to the next step in creating your Nigerian Coconut Rice.

Advertisement

Step 3. Add Coconut Milk

incorporate coconut milk now

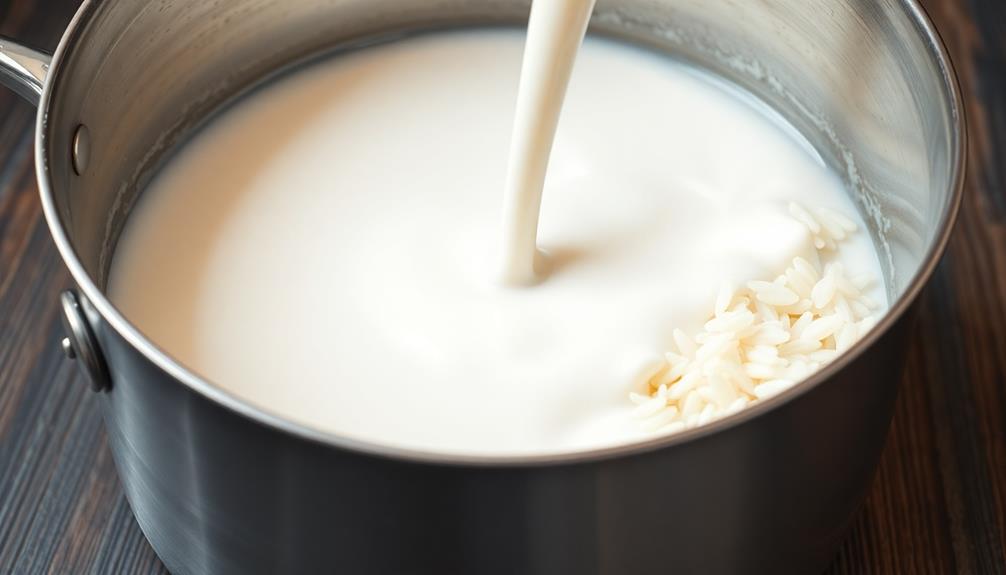
With the aromatic onions and garlic sizzling in the pan, it's time to add the rich and creamy coconut milk. Carefully pour in the coconut milk, watching as it swirls and combines with the fragrant vegetables.

Stir the mixture gently, allowing the coconut milk to infuse the dish with its luscious, tropical flavor.

Now, it's time to season the coconut rice to perfection. Add a pinch of salt, a dash of pepper, and a sprinkle of your favorite herbs.

Stir everything together, ensuring the seasonings are evenly distributed. As the coconut milk simmers, the rice will start to absorb the flavors, creating a harmonious and mouthwatering blend.

Resist the urge to overcook the rice, as you want it to retain a fluffy and light texture.

Keep an eye on the pot, stirring occasionally, until the rice is cooked through and the coconut milk has thickened slightly. This will create the perfect balance of creamy and flavorful coconut rice, sure to delight your family and friends.

Advertisement

Step 4. Add Rice and Seasonings

add rice and seasonings

Once the coconut milk has been added, stir in the uncooked rice. You'll love how the rice soaks up all that delicious coconut flavor!

Sprinkle in some garlic powder, onion powder, and a pinch of salt and pepper. These seasonings will really make the rice pop with taste. Stir everything together until the rice is evenly coated.

Next, bring the mixture to a boil. Once it's boiling, reduce the heat to low, cover the pot, and let the rice simmer for about 20 minutes. Resist the urge to lift the lid – you want to keep all that steam trapped inside to cook the rice perfectly.

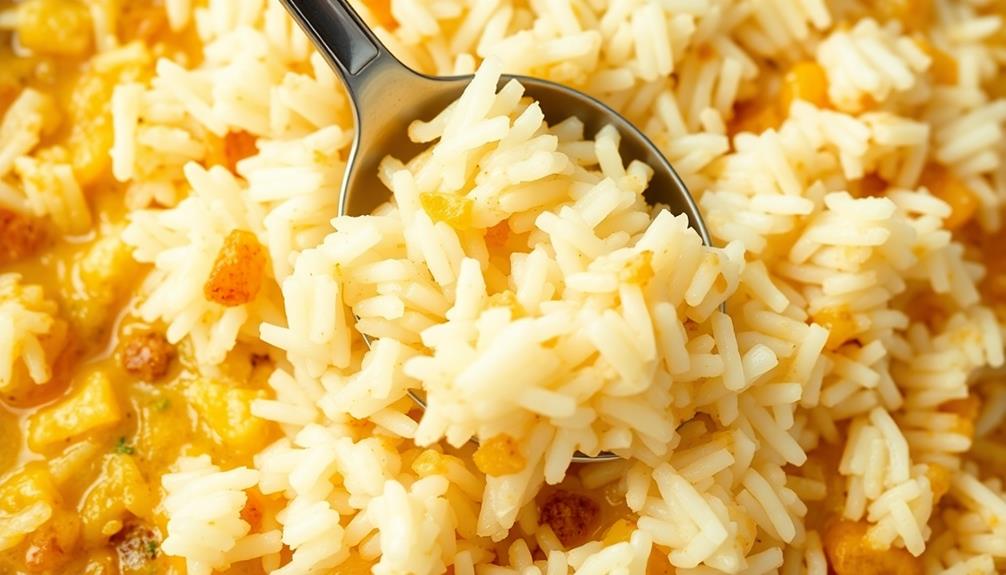
When the time is up, fluff the rice with a fork. Look at that – the grains are tender and infused with coconut goodness!

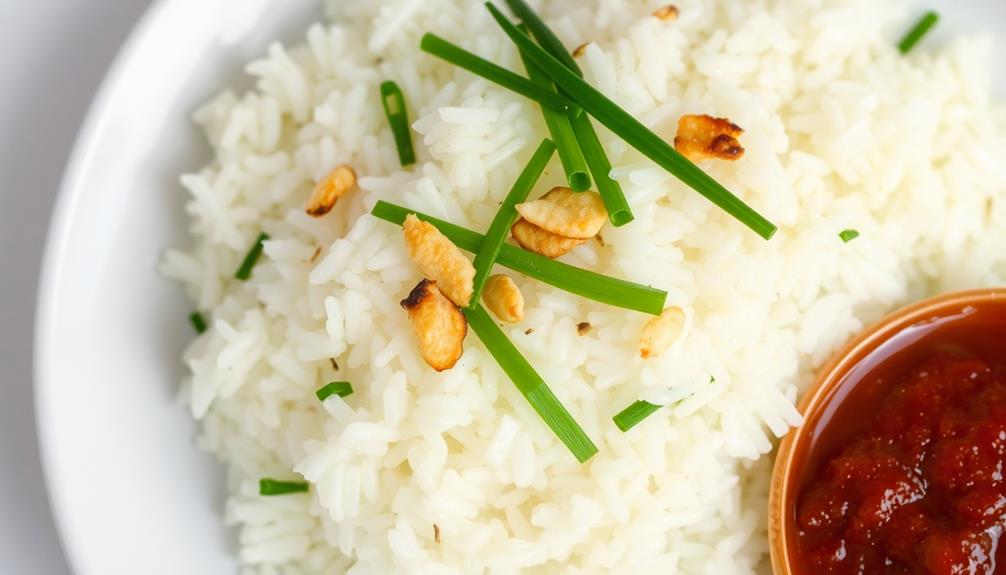
Serve this fragrant coconut rice as a side dish, or enjoy it on its own. Either way, your taste buds are in for a real treat. Get ready for lots of "mmms" and "yums" around the table!

Step 5. Simmer Until Rice Is Tender

simmer rice until tender

Once the rice and seasonings have been added, bring the mixture to a boil.

Reduce the heat to low, then cover the pot with a tight-fitting lid. Simmer the rice, stirring occasionally, until it's tender and the liquid has been absorbed, about 20-25 minutes.

Advertisement

Keep an eye on the pot, as you don't want the rice to overcook and become mushy.

Gently fluff the rice with a fork once it's finished cooking. This helps to separate the grains and gives the dish a nice, fluffy texture.

Now, take a deep whiff – can you smell the fragrant blend of coconut and warm spices?

This is when the flavors really come together, creating a truly delightful side dish.

Serve the coconut rice hot, spooning it into bowls or onto plates, and get ready to enjoy a taste of Nigeria in your own home! Serve the coconut rice hot, spooning it into bowls or onto plates, and get ready to enjoy a taste of Nigeria in your own home! For an even richer dining experience, consider pairing it with a side of fried plantains or a flavorful matoke recipe Ugandan dish to create a delightful fusion of African cuisines. This combination will transport your taste buds on a culinary journey, showcasing the diverse and vibrant flavors of the continent.

Advertisement

Final Thoughts

concluding reflections and insights

Nigerian Coconut Rice offers a delightful culinary experience that celebrates the vibrant flavors of West Africa. With its fragrant blend of coconut, spices, and tender rice, this dish is sure to delight your senses and bring a touch of tropical paradise to your table.

The final step in this recipe is the true star of the show. As the rice simmers, the coconut milk infuses it with a rich, creamy texture and a subtle sweetness that perfectly complements the savory notes. The aroma fills the air, beckoning everyone to gather around and indulge in this authentic Nigerian masterpiece.

Whether you're hosting a family gathering or seeking a unique side dish to elevate your meal, Nigerian Coconut Rice is a crowd-pleaser that will have your guests raving. Serve it alongside grilled meats, stews, or simply enjoy it on its own for a satisfying and unforgettable dining experience.

Frequently Asked Questions

What Makes Nigerian Coconut Rice Unique Compared to Other Coconut Rice Dishes?

What sets Nigerian coconut rice apart is its unique seasoning and cooking method. You'll notice bold flavors from spices like ginger, cumin, and cayenne, giving it a delightfully aromatic and slightly spicy twist compared to more traditional coconut rice dishes.

How Can I Adjust the Level of Coconut Flavor in the Dish?

To adjust the coconut flavor, you can use more or less coconut milk. Add more for a stronger coconut taste, or use less for a more subtle flavor. Experiment to find your perfect balance.

Is Nigerian Coconut Rice Suitable for Vegetarians or Vegans?

Yes, Nigerian coconut rice is suitable for vegetarians and vegans. It's made with coconut milk, rice, and vegetables, without any animal products. You can easily adapt the recipe to suit your dietary needs and preferences.

Advertisement

How Long Does the Dish Keep, and Can It Be Frozen?

The dish can keep for up to 3-4 days in the fridge. It can also be frozen for up to 2-3 months, though the texture may change slightly after thawing.

What Are Some Traditional Accompaniments for Nigerian Coconut Rice?

Traditionally, Nigerian coconut rice is often accompanied by stewed meat, fried plantains, and pepper soup. These hearty and flavorful dishes perfectly complement the rich, creamy, and aromatic nature of the coconut rice.

Advertisement

Nigerian Cuisine

Creamy Coconut Rice Nigerian Style: A Recipe to Try

Unleash your culinary skills with this creamy coconut rice Nigerian style recipe that promises to elevate your meals to new heights. Discover the secret ingredients!

Published

on

nigerian coconut rice recipe

You're going to love making creamy coconut rice Nigerian style! Start by rinsing and soaking 2 cups of rice for 30 minutes. Then, combine the soaked rice with a can of coconut milk, a cup of water, and a teaspoon of salt in a pot. Bring it to a gentle simmer and cover it for about 20 minutes until the rice is tender. Fluff it with a fork, and if you like, stir in extra coconut milk for more creaminess. This delicious dish pairs perfectly with stews, veggies, or even fried plantains. There's so much more to explore about it!

Key Takeaways

  • Creamy coconut rice is made with long-grain rice, coconut milk, water, salt, and vegetable oil for a rich flavor.
  • Rinse and soak jasmine rice to enhance texture and prevent excess starch for fluffy results.
  • Combine soaked rice with coconut milk and optional spices, then simmer until tender for about 20 minutes.
  • Fluff the rice with a fork after cooking, and consider adding extra coconut milk for added creaminess.
  • Serve creamy coconut rice alongside spicy stews, curries, or fried plantains for a delicious and balanced meal.

History

Creamy coconut rice has roots that stretch across various cultures, particularly in Southeast Asia and the Caribbean, where rice is a staple. It's fascinating how this dish combines simple ingredients like rice, coconut milk, and a touch of sweetness to create something so special.

In Southeast Asia, coconut rice often accompanies savory meals, bringing a unique flavor that perfectly balances spices. You can just imagine families gathering around the table, enjoying delicious dishes together!

In the Caribbean, creamy coconut rice often highlights vibrant flavors, like tropical fruits and spices, making it a festive treat at celebrations. It's exciting to think about how this dish has traveled across oceans and adapted to local tastes.

You might notice slight variations depending on the region, but the comforting, creamy texture remains the same.

As you explore this delightful dish, remember that it connects people through shared meals and memories. Whether you're enjoying it at a restaurant or making it at home, creamy coconut rice brings a bit of warmth and joy to your table.

Advertisement

Cooking Steps

To make delicious coconut rice, start by rinsing one cup of jasmine rice under cold water until the water runs clear. This helps remove extra starch, making your rice fluffy.

Next, in a medium pot, combine the rinsed rice, one can of coconut milk, and one cup of water. Add a pinch of salt to enhance the flavor.

Now, put the pot on medium heat and bring the mixture to a gentle boil. Once it's bubbling, reduce the heat to low, cover the pot, and let it simmer for about 15-20 minutes. You'll know it's done when all the liquid is absorbed, and the rice is tender.

While the rice cooks, you can sauté a chopped onion in a little oil until it's soft and fragrant.

When the rice is ready, fluff it with a fork and stir in the sautéed onions. For a burst of flavor, you might want to add a handful of chopped bell peppers or peas.

Advertisement

Step 1. Rinse the Rice Thoroughly

thoroughly rinse the rice

Rinsing your rice thoroughly is an essential step that can make a significant difference in the final texture of your creamy coconut rice. When you rinse the rice, you're washing away excess starch that can make it sticky. Nobody wants clumpy rice, right? You want each grain to stand out and soak up that delicious coconut flavor!

To start, place your rice in a fine-mesh strainer or a bowl. If you use a bowl, fill it with cold water and gently swish the rice around with your hands. You'll see the water become cloudy as the starch washes away. This is a good sign!

Drain that cloudy water and repeat the process a few times until the water runs clear. This usually takes about three to four rinses.

Once the water is clear, you're ready to move on to the next step. Rinsing your rice isn't just a chore; it's a way to ensure your coconut rice turns out perfectly fluffy and creamy.

Step 2. Soak the Rice for 30 Minutes

soak rice for thirty minutes

Soaking the rice for 30 minutes is a crucial step that helps enhance its texture and flavor. When you soak the rice, it absorbs some water, making it softer and fluffier when cooked. This means each grain will be beautiful and tender, just how you want it!

To soak the rice, simply place it in a bowl and cover it with enough water. Make sure the rice is fully submerged. You can give it a little stir to ensure all the grains are wet.

While you wait, this is a great time to gather your other ingredients and get excited about your delicious dish!

Advertisement

After 30 minutes, drain the rice in a colander. You'll notice how it's plumped up a bit, which is exactly what you want.

This soaking step also helps remove excess starch, preventing your rice from getting sticky. Plus, it sets the stage for the next flavors you'll be adding.

Step 3. Add Coconut Milk and Spices

incorporate coconut milk spices

Now that your rice is soaked and ready, it's time to infuse it with the rich flavors of coconut milk and spices. First, grab a medium saucepan and pour in your soaked rice.

Next, it's time to add that creamy coconut milk! You'll want to use about one can, which is usually about 13.5 ounces. This is what makes your rice super creamy and delicious!

Now, add some water to help cook the rice. A good rule of thumb is to use equal parts coconut milk and water.

Then, sprinkle in some spices to make your rice even tastier. A pinch of salt is essential to bring out all those wonderful flavors. You might also like to add a dash of ground ginger or a little bit of turmeric for a warm, earthy taste.

Advertisement

Stir everything gently with a wooden spoon to combine, and watch how the rice starts to come alive with color and aroma! It's like a little party in your pot.

Make sure everything is mixed well before moving on to the next cooking step, where the magic truly happens. Get ready for some tasty coconut rice!

Step 4. Simmer Until Tender

cook until soft

With the mixture of coconut milk, water, and spices ready, bring it to a gentle simmer over medium heat. As you watch the bubbles form, you'll start to smell those delicious flavors coming together. It's like magic!

Stir the rice into the mixture and let it soak up all that creamy goodness.

Once you've added the rice, lower the heat a bit. You want it to cook slowly and evenly. Cover the pot with a lid to trap in the steam, which helps the rice cook perfectly.

You'll need to let it simmer for about 20 minutes, but check it occasionally. If you notice the liquid disappearing too quickly, add a splash more water to keep everything nice and moist.

Advertisement

When the time's up, take off the lid and peek inside. The rice should be tender and fluffy, almost like little clouds! If it still feels a bit hard, give it a few more minutes.

Step 5. Fluff With a Fork

fluff mixture using fork

Have you ever wondered how to achieve that perfect, fluffy texture in your coconut rice? Well, once your rice has simmered until tender, it's time for the fun part—fluffing it with a fork! This step is crucial because it helps separate the grains, giving your rice that light and airy quality that everyone loves.

First, grab a fork and gently poke around in the rice. You don't want to stir too hard; just lift and toss the rice a bit. This way, you'll break up any clumps without mashing the grains.

As you fluff, you'll notice the beautiful coconut aroma filling the air, making your mouth water even more!

Make sure to fluff the rice right after it's done cooking while it's still warm. This helps keep it from getting sticky or gummy. If you'd like, you can also add a little extra coconut milk at this stage for an even creamier texture.

Once you've fluffed it up nicely, serve it hot as a delicious side dish or base for your favorite Nigerian meals. Enjoy every fluffy bite of your creamy coconut rice!

Advertisement

Final Thoughts

Reflecting on this creamy coconut rice recipe, you'll discover how effortlessly it elevates any meal. This dish isn't just about filling your stomach; it brings a delightful taste and aroma that can make even a simple dinner feel special.

Imagine serving it alongside grilled chicken or spicy vegetables. It'll not only make your plate look colorful but will also create a yummy harmony of flavors.

Making this coconut rice is super easy, and you'll feel proud as you watch your family and friends enjoy it. The creaminess from the coconut milk makes every bite feel like a little treat. Plus, it's a fantastic way to introduce new tastes into your kitchen.

Don't forget to experiment! You can add nuts, spices, or even your favorite veggies to make it your own.

The best part? You can whip it up for any occasion, from a casual family dinner to a festive gathering. So, go ahead and give this creamy coconut rice a try! You might just find it becoming a new favorite in your home.

Advertisement

Happy cooking!

Frequently Asked Questions

Can I Use Brown Rice Instead of White Rice?

Yes, you can use brown rice instead of white rice. Just remember, brown rice takes longer to cook and has a nuttier flavor. Adjust your cooking time and liquid accordingly for the best results.

What Dishes Pair Well With Coconut Rice?

Coconut rice pairs beautifully with spicy curries, grilled chicken, or seafood dishes. It also complements stir-fried vegetables and fruity salsas, bringing a creamy texture and subtle sweetness that enhances the overall flavors of your meal.

How Do I Store Leftover Coconut Rice?

To store leftover coconut rice, let it cool to room temperature, then transfer it to an airtight container. Refrigerate for up to four days or freeze for longer storage. Just reheat before enjoying!

Can I Make This Recipe Vegan-Friendly?

Absolutely, you can make this recipe vegan-friendly! Just replace any non-vegan ingredients with plant-based alternatives. Use coconut milk, vegetable broth, and ensure any added seasonings or toppings are also vegan. Enjoy your delicious vegan coconut rice!

Advertisement

What Brand of Coconut Milk Is Recommended?

For coconut milk, you can't go wrong with brands like Thai Kitchen or Aroy-D. They're creamy and flavorful, perfect for your dishes. Just check the label to ensure it fits your dietary preferences!

Continue Reading

Nigerian Cuisine

Ewedu and Gbegiri: Nigerian Soups Perfect Together

Nourish your taste buds with the delightful combination of Ewedu and Gbegiri; discover the secrets to making these perfect Nigerian soups together!

Published

on

nigerian soups pairing perfection

Ewedu and Gbegiri are two amazing Nigerian soups that work perfectly together! Ewedu brings a smooth, velvety texture and a unique flavor, while Gbegiri adds a hearty and creamy touch from mashed beans. When you mix them, you create a delicious combination that warms your heart and brings family and friends together. You'll love how easy they are to prepare. First, you blend Ewedu leaves, then simmer them with meat or fish. Gbegiri is made by mashing cooked beans and adding spices. If you're curious about the steps to enjoy this delightful pairing, stick around to learn more!

Key Takeaways

  • Ewedu and Gbegiri soups showcase Nigeria's rich culinary heritage, combining unique flavors and traditions from various regions.
  • Ewedu is made from jute leaves, while Gbegiri is a nutritious bean soup, creating a complementary texture and taste when served together.
  • The preparation involves blending Ewedu leaves and mashing cooked beans, with added seasonings for depth of flavor in both soups.
  • These soups are often enjoyed with side dishes, fostering connection and storytelling among family and friends during shared meals.
  • Nutrient-packed and comforting, Ewedu and Gbegiri are perfect for any occasion, celebrating the essence of Nigerian cuisine.

History

Exploring the history of Nigerian soups reveals a rich tapestry of cultural influences and regional variations. You might be surprised to learn that these delightful dishes have been enjoyed for centuries! Each region in Nigeria has its own unique flavors and ingredients, shaped by local customs and traditions. For instance, the Yoruba people often use vegetables like ewedu, while the Igbo might prefer oha leaves.

These soups not only nourish the body but also tell stories of the people who make them. They've been passed down through generations, each family adding its special touch. You can imagine a grandmother teaching her grandchildren how to prepare a warm, comforting bowl of soup, sharing secrets and memories along the way.

As you dive into the world of Nigerian soups, you'll notice how they reflect the country's diverse cultures. From the spicy pepper soup to the savory gbegiri, each dish offers a taste of history.

You'll find that these soups are more than just food; they unite friends and families, bringing everyone together over a shared meal. So, get ready to explore these delicious dishes and their fascinating backgrounds!

Cooking Steps

Cooking delicious Nigerian soups involves a series of straightforward yet essential steps that ensure rich flavors and satisfying textures.

Advertisement

First, gather your ingredients! For Ewedu, you'll need fresh Ewedu leaves, water, and spices like locust beans and salt. For Gbegiri, have some cooked beans, stock, and seasonings ready.

Next, wash the Ewedu leaves thoroughly, then blend or pound them until smooth. In a pot, add water and bring it to a boil. Stir in the blended leaves, add locust beans, and season with salt. Let it simmer for about 15-20 minutes, allowing the flavors to blend beautifully.

Meanwhile, for Gbegiri, mash the cooked beans until you get a creamy consistency. In another pot, heat your stock and mix in the mashed beans. Add spices and let it cook for about 10-15 minutes.

Once both soups are ready, serve them together! Pour Gbegiri into a bowl and add Ewedu on top. Enjoy the delightful flavors and textures with your favorite side dish, like pounded yam or rice.

Step 1. Prepare Fresh Ewedu Leaves

prepare fresh ewedu leaves

Fresh ewedu leaves are the star ingredient in a delicious bowl of jute soup, and preparing them properly is essential for the best flavor and texture.

First, gather a bunch of fresh ewedu leaves from your local market or garden. Look for vibrant green leaves without any yellow or brown spots.

Advertisement

Once you have your leaves, rinse them thoroughly under cold running water. This removes dirt and any tiny bugs hiding among the leaves.

After washing, gently shake off excess water and place the leaves on a clean cutting board. Now, it's time to trim! Use a sharp knife to cut off the tough stems and any discolored parts.

Next, stack a few leaves on top of each other and slice them into smaller pieces. You want them to be about one inch wide. This makes it easier to cook and eat later on.

Step 2. Blend Ewedu With Water

blend ewedu and water

To achieve a smooth and flavorful jute soup, you'll want to blend the prepared ewedu leaves with a bit of water.

Start by gathering your ingredients: the fresh ewedu leaves, some clean water, and a blender. If you don't have a blender, a mortar and pestle will work too!

Next, place the ewedu leaves into the blender. Make sure you don't overload it; it's better to blend in batches if you have a lot.

Advertisement

Add just enough water to help the blending process. You want the mixture to be smooth, but not too watery.

Once you've added the water, secure the lid tightly. Turn on the blender and watch the magic happen!

Blend until you have a velvety green puree. If you're using a mortar and pestle, mash the leaves together with some water until you achieve a similar consistency.

After blending, pour the ewedu mixture into a bowl, and admire the vibrant color!

You're now ready to take the next step in creating your delicious jute soup. It's getting exciting, isn't it? Enjoy every moment of cooking!

Advertisement

Step 3. Add Locust Bean Seasoning

incorporate locust bean seasoning

Once you've got your seasoning ready, sprinkle it into the pot with your blended jute leaves.

Stir it in gently, allowing the seasoning to mix well with the soup. As you stir, you'll notice a beautiful aroma filling your kitchen—this is the magic of locust bean!

It's important to let the locust bean simmer for a few minutes. This helps release its full flavor, enhancing the overall taste of your soup.

While you wait, take a moment to enjoy the delightful scents wafting around. It's a sign that you're on your way to a fantastic meal!

Step 4. Simmer With Meat or Fish

simmering with meat fish

Now that your soup is infused with the rich flavors of locust bean, it's time to enhance it further by adding your choice of meat or fish. This step is super exciting because it brings hearty goodness to your dish! You can choose from chicken, beef, goat, or even fish. Each option adds its own special flavor.

First, if you're using meat, cut it into bite-sized pieces. Then, add it to your pot and let it simmer on medium heat. This allows the meat to soak up all those delicious soup flavors.

If you prefer fish, add it a little later, so it doesn't break apart too much.

Advertisement

While everything cooks, make sure to stir occasionally. This helps everything blend together, making your soup even tastier! You'll notice the aroma filling your kitchen, making your tummy rumble in anticipation.

Cook the meat until it's tender, usually about 30-40 minutes, depending on what you chose. If you're using fish, let it simmer for about 10-15 minutes.

Once everything's cooked, you're almost ready for the final touches! Enjoy the delightful journey of flavors as your soup comes together.

Step 5. Adjust Consistency With Water

adjust consistency with water

After your meat or fish has simmered to perfection, you might find the soup needs a little adjustment in consistency.

Don't worry, fixing it's super easy! Just grab a cup of warm water and add it slowly to your pot. As you pour, stir the soup gently. This way, you can see how the texture changes, making sure it's just right for you.

If your soup feels too thick, keep adding water until it reaches the consistency you love. Remember, you want a nice, smooth, and slightly thick soup that'll coat your spoon perfectly.

Advertisement

On the other hand, if it's too watery, don't panic! You can let it simmer for a bit longer to thicken it up.

Taste your soup along the way, too! This will help you figure out if you need to add a pinch of salt or any other spices to amp up the flavor.

Cooking is all about finding what makes you happy. So, enjoy the process of adjusting your soup, and soon you'll have a delicious bowl of Ewedu or Gbegiri ready to serve!

Final Thoughts

As you explore the rich world of Nigerian soups, it's clear that these dishes are more than just meals; they're a vibrant tapestry of culture and tradition.

Ewedu and Gbegiri, in particular, showcase the beauty of Nigerian cuisine. When enjoyed together, they create a delightful mix of flavors and textures that can warm your heart and satisfy your taste buds.

Advertisement

Imagine sitting down with family or friends, sharing stories, and enjoying a hearty bowl of these soups. You can feel the love and history in every spoonful.

Plus, the health benefits of these soups can't be overlooked! Packed with nutrients, they're also comforting and delicious, making them perfect for any occasion.

Frequently Asked Questions

What Are the Health Benefits of Ewedu and Gbegiri?

Ewedu and gbegiri offer numerous health benefits. You'll find they're rich in vitamins, minerals, and fiber, promoting digestion and boosting immunity. They also provide essential nutrients, supporting overall health and well-being in your diet.

Can Ewedu and Gbegiri Be Frozen for Later Use?

Yes, you can freeze both ewedu and gbegiri for later use. Just ensure they're cooled completely before transferring them to airtight containers. When you're ready to eat, simply thaw and reheat thoroughly.

What Side Dishes Pair Well With Ewedu and Gbegiri?

When enjoying your meal, consider pairing it with jollof rice, fried plantains, or pounded yam. These sides complement the flavors beautifully, enhancing your dining experience and making it more satisfying and delicious.

Advertisement

Are There Vegetarian Versions of Gbegiri?

Yes, you can make vegetarian versions of gbegiri using plant-based proteins like tofu or lentils. Just substitute traditional ingredients while maintaining the flavor profile, and you'll have a delicious, meat-free option that everyone can enjoy.

How Can I Adjust the Spice Levels in These Soups?

To adjust the spice levels in your soups, start by adding spices gradually. Taste as you go, and remember you can always add more, but it's tough to tone down heat once it's there.

Continue Reading

Nigerian Cuisine

Egg Sauce Nigerian Style: A Simple Yet Flavorful Side

Bring vibrant flavors to your table with this simple Nigerian Egg Sauce, perfect as a side dish that will leave you craving more!

Published

on

nigerian egg sauce recipe

Egg Sauce is an exciting Nigerian dish that's super easy to make and full of flavor! You start by chopping fresh tomatoes, onions, and bell peppers, then sauté them in oil until soft. Next, you add diced tomatoes and season with salt and pepper for a delicious taste. Pour in beaten eggs gently, stirring to create a creamy mix. Simmer until the eggs are fluffy, and you're ready to enjoy! Serve it as a side with rice or bread at any meal. It's delicious and will surely make your kitchen smell amazing, so stick around to explore more tasty ideas!

Key Takeaways

  • Egg Sauce is an affordable and protein-rich dish, perfect for breakfast, lunch, or dinner.
  • The dish features fresh ingredients like eggs, tomatoes, onions, and bell peppers for vibrant flavor.
  • Cooking Egg Sauce is quick and easy, making it suitable for busy individuals or novice cooks.
  • It pairs well with starchy sides like rice, yam, or bread, enhancing its versatility.
  • Experiment with spices to customize the flavor profile, making it a family favorite.

History

Egg sauce has often been a staple in Nigerian cuisine, celebrated for its simplicity and rich flavor. The history of egg sauce is fascinating and reflects the vibrant culture of Nigeria. You mightn't know that this dish has roots in the traditional cooking of many Nigerian families. It's been passed down through generations, with each family adding their own special touch.

Egg sauce likely became popular because eggs are affordable and easy to cook. They provide a great source of protein, making this dish both nutritious and delicious. You can imagine families gathering around the table, sharing heartwarming stories while enjoying this savory meal together.

Over time, egg sauce has evolved. While many people still make it the traditional way, others have experimented with different ingredients, like tomatoes, onions, and spices. This creativity makes every version unique!

As you learn more about Nigerian cuisine, you'll find that egg sauce remains a favorite for breakfast, lunch, or dinner. It's a dish that brings people together, creating memories filled with laughter and joy.

Cooking Steps

Starting with fresh ingredients will set the foundation for a delicious Nigerian egg sauce. First, gather your ingredients: eggs, tomatoes, onions, bell peppers, and spices.

Advertisement

Chop the tomatoes, onions, and bell peppers into small pieces. This makes everything easier to cook and eat!

Next, heat some oil in a pan over medium heat. Once the oil is hot, add the chopped onions. Stir them until they become soft and fragrant.

Then, toss in the tomatoes and bell peppers. Cook them together for about five minutes, so they blend and create a flavorful sauce.

Now it's time to add your spices! Sprinkle in salt, pepper, and any other spices you like. Stir everything well to combine those tasty flavors.

Crack the eggs into a bowl and whisk them until they're all mixed up. Pour the eggs into the pan with the sauce.

Advertisement

Gently stir everything together until the eggs are cooked but still soft.

Once it's ready, serve your egg sauce warm over rice or with bread. Enjoy this tasty dish, and share it with your family and friends! They're sure to love it just as much as you do!

Step 1. Chop Onions and Peppers

chop onions and peppers

Chopping onions and peppers is a crucial step in creating a flavorful egg sauce. First, grab a cutting board and a sharp knife. You'll want to peel the onions, removing the outer skin until you see the shiny, white layers. Then, chop the onion into small pieces. Be careful! The smell can make your eyes water, but it'll be worth it.

Next, pick your peppers. You can use bell peppers or even spicy ones if you like a kick! Wash them under cold water, then cut them open to remove the seeds. Slice the peppers into small chunks.

The mix of colors from the onions and peppers isn't just pretty; it adds a nice flavor to your dish, too.

Once you've chopped everything, take a moment to enjoy the colorful mix you've created. It's almost like a rainbow on your cutting board!

Advertisement

You're now ready to turn these chopped veggies into something delicious. So, gather them up and get ready to add them to your cooking pot. Your egg sauce is going to be so tasty with these fresh ingredients! Happy cooking!

Step 2. Add Diced Tomatoes

incorporate diced tomatoes

With your colorful mix of chopped onions and peppers ready, it's time to enhance the flavor of your egg sauce by adding diced tomatoes. Grab your can of diced tomatoes or chop up some fresh ones; either works great! Carefully pour them into your sizzling pan, and watch as those juicy red pieces mix with your onions and peppers.

Stir everything together gently for about a minute. You'll notice the vibrant colors blending, creating a beautiful sight in your pan. The tomatoes will start to soften and release their delicious juices, adding a rich taste to your sauce.

This step is super important, as the tomatoes bring a lovely sweetness that balances the savory flavors of the onions and peppers. Don't rush this part! Give the tomatoes a moment to shine, and let their flavors mingle with the other ingredients.

As they cook, you'll see the mixture begin to thicken slightly, making your sauce even more delightful. Take a moment to enjoy the aroma filling your kitchen; it's a sign that something special is on its way! Now you're just a step away from making your egg sauce truly irresistible!

Step 3. Add Seasoning and Stir

seasoning added stir well

Now that your tomatoes have softened and melded beautifully with the onions and peppers, you can season your sauce to elevate its flavor. Start by adding salt to taste; it brings out the natural sweetness of the tomatoes and balances everything nicely.

Next, sprinkle in some ground pepper for a little kick. If you like it spicy, consider adding some chili powder or diced Scotch bonnet peppers—just be careful, as they can pack a punch!

Advertisement

Stir everything together gently, making sure the seasoning mixes evenly throughout the sauce. You'll start to smell the amazing aroma of the spices, and that means you're on the right track!

You can also add a pinch of thyme or curry powder for an extra layer of flavor, but this is totally up to you.

As you stir, watch the sauce transform into something truly delicious. You want it to simmer for a few more minutes so all those flavors blend perfectly.

Keep an eye on the consistency; it should be thick enough to coat a spoon but not too dry. Enjoy this exciting step as your kitchen fills with delightful scents, readying you for the next part of your egg sauce adventure!

Step 4. Add Beaten Eggs Gently

gently incorporate beaten eggs

Once the sauce is simmering to perfection, it's time to incorporate the star ingredient: the beaten eggs. This is where the magic happens!

First, take your bowl of beaten eggs and hold it close. With a gentle hand, slowly pour the eggs into the bubbling sauce. You want to make sure you do this carefully so the eggs mix evenly without scrambling too quickly.

Advertisement

As you pour, use a wooden spoon to stir the sauce lightly. This helps the eggs spread out and blend with all the delicious flavors in the sauce. You'll see how the eggs start to swirl into the mixture, turning it creamy and rich. Isn't that exciting?

Keep stirring just enough to combine everything, but don't worry about making it perfect. The goal is to make sure the eggs get a chance to mingle with the spices and tomatoes.

Let the warmth from the sauce work its magic on the eggs. Trust me, you're going to love how it all comes together! Your kitchen will be filled with a wonderful aroma, making everyone eager for a taste of your delectable egg sauce.

Enjoy this fun cooking moment!

Step 5. Simmer Until Eggs Set

simmer eggs until set

As the egg mixture blends into the sauce, reduce the heat to low and cover the pot. This is where the magic happens!

Let the mixture simmer gently, allowing the eggs to cook through and set. You'll want to keep an eye on it, as the cooking time can vary. It usually takes about 5 to 10 minutes for the eggs to fully set, depending on how many eggs you added to the sauce.

Advertisement

While it simmers, you'll notice the wonderful aroma filling your kitchen. It's hard to resist taking a peek!

When you lift the lid, you should see the eggs looking fluffy and bright, perfectly cooked and ready to enjoy. If you like your eggs a bit firmer, just let them simmer a couple of minutes longer, but be careful not to overcook them.

Once the eggs are set, turn off the heat and let the dish rest for a minute. This will help the flavors blend even more.

Now, you're ready to serve this delicious egg sauce over rice, plantains, or even with some bread. Enjoy every bite of your homemade creation!

Final Thoughts

When it comes to making egg sauce Nigerian style, embracing the simplicity and flavor of this dish can elevate your meals significantly.

Advertisement

You've got this amazing combination of eggs, tomatoes, and spices that packs a punch. It's not just about the taste; it's about how easy it's to whip up. Whether you're in a hurry or looking to impress, this dish fits the bill perfectly!

Imagine serving this delicious sauce over rice, yam, or even bread. Your family and friends will love it, and you'll feel proud knowing you made something so tasty.

Plus, it's a great way to introduce different flavors to your meals. You can mix and match spices to make it your own!

[DIRECTIONS]:

Frequently Asked Questions

Can I Use Alternative Oils for Making Egg Sauce?

You can definitely use alternative oils for making egg sauce. Just choose oils like olive, coconut, or avocado. Each will bring a unique flavor, so experiment to find what you enjoy the most!

Advertisement

What Dishes Pair Well With Nigerian Egg Sauce?

You can pair Nigerian egg sauce with rice, plantains, or steamed vegetables. It also complements bread, yams, and even fried potatoes. Each option enhances the dish's flavor, creating a delightful and satisfying meal.

Is Egg Sauce Suitable for Meal Prep?

Yes, egg sauce is great for meal prep! You can make it ahead, store it in the fridge, and easily reheat it. It stays flavorful, making your busy days a lot simpler and tastier.

How Can I Store Leftover Egg Sauce?

To store leftover egg sauce, let it cool completely, then transfer it to an airtight container. Refrigerate for up to three days or freeze for longer storage. Just reheat before enjoying again!

Can I Add Vegetables to Egg Sauce?

Absolutely, you can add vegetables to your egg sauce! Chopped bell peppers, onions, or spinach enhance the flavor and nutrition. Just sauté them before mixing in your eggs for a delicious twist you'll love.

Advertisement

Continue Reading

Affiliate Disclaimer
As an affiliate, we may earn a commission from qualifying purchases. We get commissions for purchases made through links on this website from Amazon and other third parties.

Advertisement

Vetted

top local car washes top local car washes
Vetted2 months ago

14 Best Car Washes Near You for a Sparkling Clean Ride

I discovered the 14 best car washes near you that promise a sparkling clean ride, and you won't want to...

top mops for 2024 top mops for 2024
Vetted2 months ago

The 15 Best Mops of 2025 – Your Ultimate Guide to a Spotless Home

Find the perfect mop for your cleaning needs in 2025, and discover how these top choices can revolutionize your home...

top women s fragrances 2024 top women s fragrances 2024
Vetted2 months ago

15 Best Perfumes for Women in 2025 – A Fragrance Guide You Can’t Miss

Keen to discover the top 15 perfumes for women in 2025? Uncover unique scents that will elevate your fragrance game!

top local bars guide top local bars guide
Vetted2 months ago

14 Best Bars Near You for an Unforgettable Night Out

Looking for the perfect bar to elevate your night out? Discover the 14 best spots that promise unforgettable experiences!

luxurious beard oil selection luxurious beard oil selection
Vetted2 months ago

15 Best Beard Oils for a Luxurious Grooming Experience in 2025

Shop the 15 best beard oils for a luxurious grooming experience in 2025 and discover which ones will elevate your...

top college laptops 2024 top college laptops 2024
Vetted2 months ago

15 Best College Laptops of 2025: The Ultimate Guide for Students

With our guide to the 15 best college laptops of 2025, discover which powerful models will elevate your academic experience...

waterproof mascaras for tears waterproof mascaras for tears
Vetted2 months ago

15 Best Waterproof Mascaras That Will Survive Any Tear-Jerker

Outstanding waterproof mascaras await to keep your lashes flawless through any emotional moment; discover which ones made the top 15...

top flavorful disposable vapes top flavorful disposable vapes
Vetted2 months ago

15 Best Disposable Vapes of 2025: Top Picks for Flavor and Convenience

Prepare to discover the 15 best disposable vapes of 2025 that blend exceptional flavor and convenience, but which ones truly...

refreshing lunch salad ideas refreshing lunch salad ideas
Vetted2 months ago

15 Best Salads Near You That Will Freshen Up Your Lunch Routine

Transform your lunch with the 15 best salads nearby that will tantalize your taste buds and leave you craving more...

top convertible car seats top convertible car seats
Vetted2 months ago

15 Best Convertible Car Seats of 2025 – Safety and Comfort for Your Little One

Get ready to discover the top 15 convertible car seats of 2025 that blend safety and comfort—find out which models...

delicious fast food breakfast delicious fast food breakfast
Vetted2 months ago

15 Best Fast Food Breakfast Options That Will Make Your Mornings Delicious

Uncover the 15 best fast food breakfast options that will transform your mornings into a delicious experience you won't want...

stylish contacts for vision stylish contacts for vision
Vetted2 months ago

14 Best America’s Contacts for Clear Vision and Style

Browse through the 14 best contact lenses in America for clear vision and style, and discover which one perfectly complements...

Trending