Mexican Cuisine
Flan
Flan, a luscious custard dessert with a golden caramel topping, has captivated taste buds for centuries, and its silky smooth texture will leave you craving more.
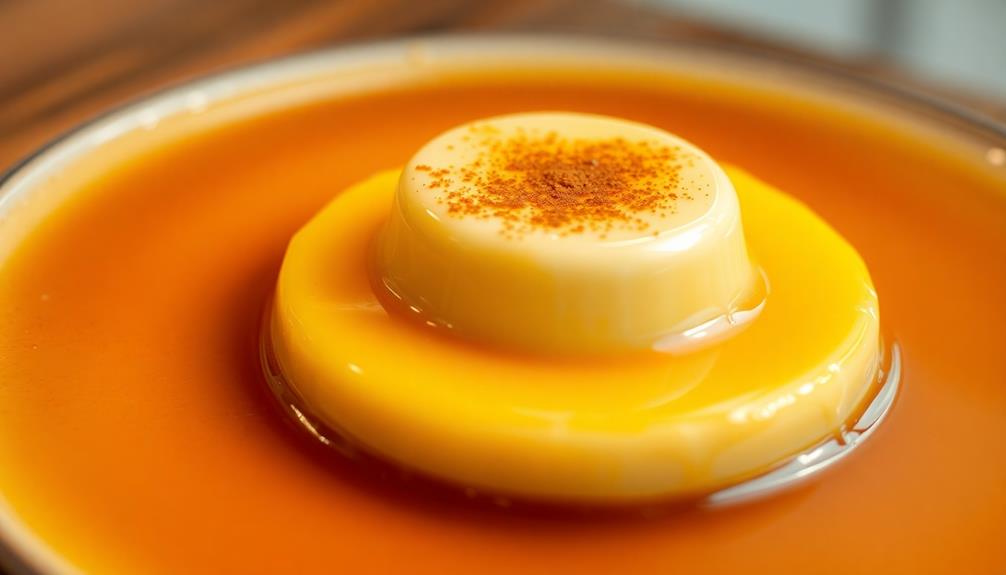
Flan is a delightful custard dessert that's been charming taste buds for centuries. Its creamy texture and golden caramel topping have made it a beloved treat in Spain and Latin America. You'll love sinking your spoon into the silky smooth custard, flavored with vanilla and sweetened condensed milk. Baked to perfection, flan makes a wonderful comfort food for special occasions. You can even try different variations like chocolate or coconut to find your favorite. Serve it chilled for that perfect balance of richness and refreshment. And just wait until you see that beautiful inverted flan revealed on your plate!
Key Takeaways
- Flan is a classic custard-based dessert that originated in ancient Rome and Greece, with Spanish and Latin American influences.
- Flan is characterized by its creamy, velvety texture and a caramel topping, often flavored with vanilla.
- The main ingredients in flan include eggs, sweetened condensed milk, evaporated milk, whole milk, sugar, and vanilla extract.
- Flan is typically baked in a water bath to ensure even cooking and moisture retention, then chilled before serving.
- Flan is a beloved comfort food enjoyed worldwide, often served on special occasions and celebrations.
History
Flan has been a beloved dessert for centuries, with origins dating back to ancient Rome and Greece. Over the centuries, this creamy custard-like treat has evolved, with various cultures putting their own unique spin on the recipe.
In Spain, flan is often flavored with vanilla and served with a soft caramel topping, while in Mexico, it's known for its rich, velvety texture and the addition of sweetened condensed milk.
No matter where you go, flan is a beloved comfort food that brings back fond memories of family gatherings and special occasions.
The smooth, silky custard melts in your mouth, while the caramelized top adds a delightful crunch. Whether you enjoy it plain or with a drizzle of fruit compote, flan is a timeless dessert that continues to delight taste buds around the world.
Recipe
Flan is a delicate custard dessert that originated in Spain and is now enjoyed worldwide. Its smooth, creamy texture and sweet, caramelized topping make it a classic treat. This recipe will guide you through the steps to create a simple yet delectable flan.
The key to a perfect flan lies in the balance of its ingredients. By carefully combining eggs, milk, and sugar, you'll achieve a silky, custard-like consistency that melts in your mouth. The caramelized topping adds a rich, complex flavor that complements the overall sweetness of the dish.
Ingredients:
- 4 large eggs
- 1 (14-ounce) can sweetened condensed milk
- 1 (12-ounce) can evaporated milk
- 1 cup whole milk
- 1 teaspoon vanilla extract
- 1/4 cup granulated sugar
Cooking Instructions:
In a large bowl, whisk together the eggs, sweetened condensed milk, evaporated milk, whole milk, and vanilla extract until well combined.
Pour the mixture into a 9-inch pie dish or a 6-cup flan mold. Sprinkle the granulated sugar evenly over the top.
Place the dish or mold in a larger pan and pour hot water into the larger pan, creating a water bath that comes halfway up the sides of the flan dish.
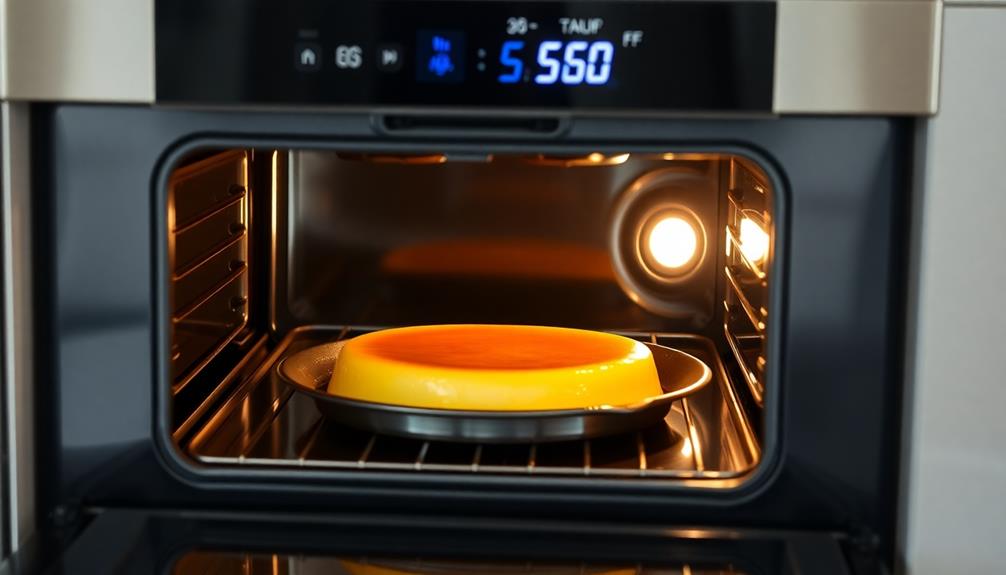
Bake at 350°F for 45-55 minutes, or until the center is almost set. Remove from the oven and let cool completely, then refrigerate for at least 2 hours before serving.
When serving, run a knife around the edge of the flan and invert it onto a plate. The caramelized sugar should have formed a lovely, golden-brown topping.
Slice and enjoy this classic dessert.
Cooking Steps
Alright, let's get cooking!
First, preheat your oven to a toasty 350°F.
In a saucepan, gently heat up the cream until it's nice and warm.
Next, whisk the eggs and sugar together in a bowl until they're all mixed up.
Slowly pour the egg mixture into the cream, stirring as you go.
Step 1. Preheat Oven to 350°F
Preheat your oven to 350°F before starting the recipe. This important step ensures your flan cooks evenly and develops that delightful, golden-brown top.
You can use your oven's preheat function or set the temperature manually. Keep a close eye on the oven as it heats up – you'll know it's ready when the temperature reaches 350°F. The inviting aroma of the oven warming will fill your kitchen, making your mouth water in anticipation.
Once the oven is preheated, you can move on to the next step with confidence, knowing your flan will bake to perfection. Remember, precise oven temperature is key for achieving that signature silky-smooth custard texture and rich caramelized flavor.
With your oven ready, you're one step closer to enjoying a heavenly flan dessert. Get excited, because the fun is just beginning!
Step 2. In a Saucepan, Heat Cream
With your oven preheated and ready to go, let's move on to the next step – heating the cream in a saucepan.
It's time to bring out your trusty saucepan and give it a quick rinse. Once it's dry, place it on the stovetop over medium heat.
Now, pour in the heavy cream and watch as it slowly starts to warm up. You'll want to keep a close eye on it, stirring gently with a wooden spoon to prevent any unwanted scorching or burning.
As the cream begins to steam and bubble around the edges, you'll know it's ready. The aroma will start to fill the air, making your mouth water in anticipation.
Remember to remove the saucepan from the heat just before the cream reaches a full boil. You don't want it to curdle or overcook.
With the cream perfectly heated, you're now one step closer to creating the most delectable flan.
Step 3. Whisk Eggs and Sugar Together
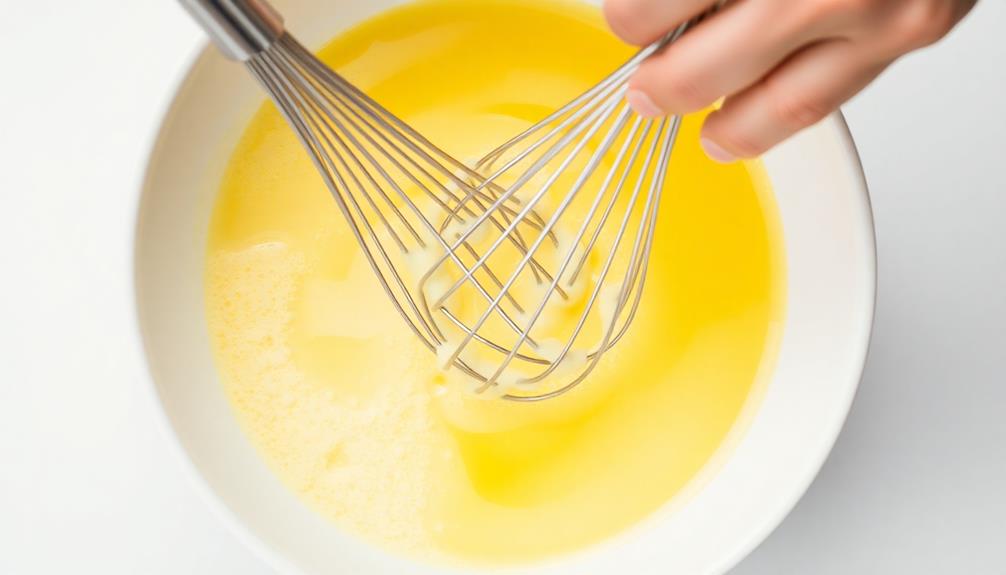
The next crucial step is to whisk the eggs and sugar together. This is where the magic really begins!
You'll want to use a large bowl and a trusty whisk to get the job done. Crack those fresh eggs right in and add a nice helping of sugar.
Now, it's time to start whisking! Go ahead and give it your all – whisk those eggs and sugar until they're nice and light and fluffy.
You'll know you're on the right track when the mixture starts to thicken up and become a lovely, pale yellow color. Keep whisking steadily, making sure to get into all the nooks and crannies.
Whisk, whisk, whisk! The more air you can incorporate, the better. Soon, you'll have a silky smooth, glossy mixture that's ready for the next step.
Isn't it satisfying to see the progress you're making? Great job – you're really cooking now!
Step 4. Slowly Pour Egg Mixture Into Cream
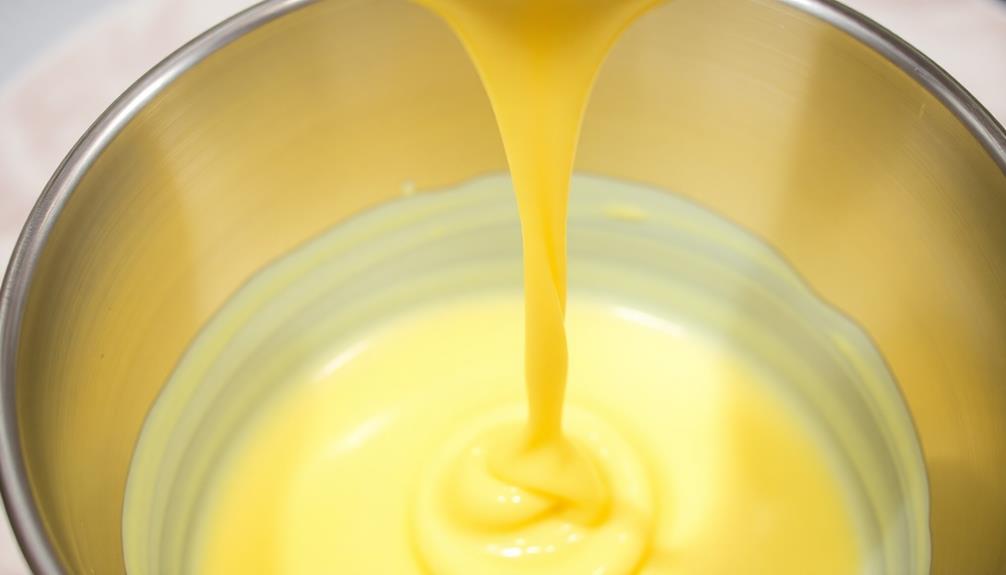
Now that you've whipped the eggs and sugar into a silky smooth, glossy mixture, it's time to slowly incorporate the cream.
Grab your spoon and gently pour the egg mixture into the warm cream, stirring constantly. Go slowly at first, making sure the ingredients blend together seamlessly. You don't want any sudden temperature changes that could cause the eggs to curdle!
Keep pouring and stirring until the flan base is perfectly smooth and creamy. Imagine the cool, velvety texture as it glides across your tongue. Mmm, can you almost taste it? The sweet, rich flavors are about to come together in perfect harmony.
Just a few more stirs and your flan is ready for the next step. Stay focused and patient – the final result will be worth it! Soon you'll have a silky smooth, custard-like masterpiece waiting to be enjoyed.
Step 5. Pour Mixture Into Baking Dish
After your flan base is perfectly smooth and creamy, pour the mixture into a baking dish.
Be careful not to spill a single drop – you want every bit of that delicious custard! Gently lower the dish into the oven, making sure it's level so your flan cooks evenly. As it bakes, the mixture will puff up and develop a lovely golden-brown top.
Resist the temptation to open the oven and peek – you don't want to let all the heat out! Just sit back and let the magic happen. Soon, your kitchen will be filled with the heavenly aroma of freshly baked flan.
When the timer dings, use oven mitts to carefully remove the dish. Allow it to cool completely before refrigerating. This crucial step helps the flan set up into a silky, smooth texture.
Once chilled, run a knife gently around the edges and invert the flan onto a serving plate.
Get ready for ooh's and aah's as you unveil your masterpiece! A dollop of whipped cream or a sprinkle of cinnamon makes the perfect finishing touch.
Final Thoughts
Flan, a delightful custard-based dessert, has captured the hearts and palates of many. As you've followed along with this recipe, you've seen how simple yet rewarding creating this sweet treat can be. The silky smooth texture and the perfect balance of sweetness and richness make flan a true delight.
Now that you've poured the mixture into the baking dish, it's time to let the magic happen in the oven. The anticipation as the flan bakes and fills your kitchen with its enticing aroma is part of the joy.
Once it's done, you'll be thrilled to see the golden-brown custard, glistening with its caramelized top.
When it's time to serve, don't be afraid to get creative. Top it with fresh berries, a drizzle of caramel sauce, or a sprinkle of cinnamon.
Each bite will transport you to a world of culinary bliss. Enjoy the process, savor the flavors, and embrace the deliciousness of homemade flan. Don’t rush through this delightful dessert; take the time to appreciate its smooth texture and rich caramel taste. And if you’re still craving more after finishing your flan, why not pair it with some sizzling and savory fajitas for the ultimate culinary experience? The combination of the creamy flan and the bold flavors of the fajitas will surely leave your taste buds tingling with satisfaction.
Frequently Asked Questions
Is Flan a Type of Custard?
Yes, flan is a type of custard. Custards are baked or cooked egg-based desserts, and flan is a specific type of custard that's typically served chilled with a sweet caramel sauce on top.
Can Flan Be Made Without Eggs?
Yes, you can make flan without eggs. Many recipes use a combination of milk, sugar, and thickeners like cornstarch or gelatin to create a custard-like texture without the need for eggs. The result is a delicious, egg-free dessert.
How Long Does Flan Last in the Fridge?
How long a homemade dessert lasts in the fridge depends on its ingredients. Most custard-based desserts, like flan, will stay fresh for 3-5 days when properly stored in an airtight container in the refrigerator.
Can Flan Be Frozen for Later Use?
Yes, you can freeze flan for later use. When stored properly in an airtight container, frozen flan can last up to 2-3 months in the freezer. Just be sure to thaw it in the refrigerator before serving.
What Are the Common Toppings for Flan?
Common toppings for flan include caramel, whipped cream, fruit compote, chocolate sauce, and toasted coconut. You can get creative and add your favorite flavors to complement the creamy, custard-like texture of the flan.
Alejandro is a vibrant advocate of traditional Mexican cuisine. From spicy tacos and enchiladas to rich moles and tamales, Alejandro’s dishes celebrate the colorful, bold flavors of Mexico. His recipes bring authentic Mexican street food and home-cooked meals to your table, with a focus on using fresh, flavorful ingredients.
Mexican Cuisine
Coronado Cajeta: Mexican Caramel Sauce You’ll Fall in Love With
Graced with a velvety texture and rich, creamy flavor, Coronado Cajeta is a Mexican caramel sauce that will captivate your senses and leave you craving more. Discover why this beloved culinary treasure is a must-try.
Coronado cajeta, a delightful Mexican caramel sauce, will captivate your senses with its velvety texture and rich, creamy flavor. Influenced by Spanish settlers, this beloved culinary treasure originated in the colonial era. The secret lies in the use of goat's milk, which creates a unique creaminess you'll fall in love with. Whether you drizzle it over desserts, dip fresh fruit in it, or enjoy it straight from the jar, cajeta promises a sweet and indulgent experience. The perfect balance of sugar, milk, and spices makes this sauce a must-try for any Mexican cuisine enthusiast. And if you keep reading, you'll discover even more about this captivating caramel delight.
Key Takeaways
- Coronado Cajeta is a rich, velvety Mexican caramel sauce made with the key ingredient of goat's milk, giving it a unique, creamy texture and flavor.
- The cooking process involves simmering and caramelizing the milk and sugar mixture to develop the signature sweet, gooey consistency of cajeta.
- Cajeta is a beloved element of Mexican cuisine, often featured in celebrations and culinary circles for its versatility in enhancing both sweet and savory dishes.
- The sauce appeals to both casual and gourmet cooks, offering a unique flavor profile compared to traditional caramel and providing some nutritional benefits from the goat's milk.
- Achieving the desired consistency of cajeta requires patience and proper caramelization, but the resulting homemade version offers a rich, glossy texture and deep caramel color.
History
Where does the history of Mexican caramel sauce begin? You might be surprised to learn that it dates back centuries! Cajeta, the traditional Mexican caramel sauce, has its roots in the colonial era. Wealthy Spanish settlers brought the recipe from Europe, and over time, it evolved into the unique, delicious treat we know today.
The key ingredient in cajeta is goat's milk, which gives it a rich, creamy texture. As the milk simmers and caramelizes, it develops a deep, complex flavor that's both sweet and slightly tangy. This process was perfected by skilled Mexican cooks, who passed down their techniques from generation to generation.
Today, cajeta remains a beloved part of Mexican cuisine, enjoyed as a topping for ice cream, drizzled over churros, or savored by the spoonful.
Whether you're celebrating a special occasion or simply craving a taste of Mexican culture, this caramel sauce is sure to delight your taste buds and warm your heart.
Recipe
Caramel is a beloved treat around the world, and Mexican caramel sauce is a unique and delightful variation. This rich, creamy sauce is perfect for drizzling over desserts, dipping churros, or even spooning straight from the jar.
Understanding how to budget for ingredients can enhance your cooking experience and ensure you have everything you need for this delicious recipe. The key to this recipe is the use of piloncillo, a type of unrefined Mexican brown sugar that adds a deep, complex flavor to the caramel.
The combination of piloncillo, creamy evaporated milk, and a touch of cinnamon creates a truly special sauce that will transport your taste buds to the heart of Mexico.
- 1 cup piloncillo or dark brown sugar
- 1 cup evaporated milk
- 1/2 cup water
- 1/4 teaspoon ground cinnamon
- 1/4 teaspoon salt
In a medium saucepan, combine the piloncillo, evaporated milk, and water. Bring the mixture to a simmer over medium heat, stirring occasionally, until the piloncillo has dissolved.
Reduce the heat to low and continue to cook, stirring frequently, for 15-20 minutes or until the sauce has thickened to a caramel-like consistency. Stir in the cinnamon and salt.
To achieve the best texture, be patient and allow the sauce to cook slowly, stirring constantly towards the end to prevent burning. The longer the sauce simmers, the richer and more complex the flavor will become. Be sure to taste the sauce periodically and adjust the seasoning as needed to ensure a balanced flavor. This slow-cooked sauce pairs perfectly with a hearty meal, such as a classic chicken fried steak recipe. Once the sauce reaches the desired consistency, it’s ready to be served over your favorite dish to elevate it with delicious, homemade goodness.
Serve the Mexican caramel sauce warm or at room temperature, and enjoy the delightful balance of sweet and spice in every bite. Remember, a well-planned budget can help you enjoy this culinary adventure without financial stress, especially when you consider common financial terms.
Cooking Steps
In a large saucepan, combine the goat's milk and sugar.
Simmer the mixture over medium heat until it thickens, about 15 minutes.
Skim off any impurities that rise to the surface.
Once cooled, transfer the luscious caramel sauce into airtight containers for future use.
Step 1. Combine Goat's Milk and Sugar
To make the caramel sauce, you'll need to combine the goat's milk and sugar. In a large pot, pour in the creamy, rich goat's milk.
Then, sprinkle in the granulated sugar and stir until it's fully dissolved. You'll want to keep a close eye on the pot, gently stirring the mixture as it heats up.
As the temperature rises, the sugar will start to caramelize, turning the mixture a beautiful golden-brown color.
Don't worry if it bubbles and simmers – that's exactly what you want! Just be patient and let the sauce thicken to your desired consistency.
Once it's reached the perfect texture, remove the pot from the heat.
Now, you've got a luscious, velvety Mexican caramel sauce ready to drizzle over ice cream, pancakes, or anything else your heart desires.
Get ready for your taste buds to do a happy dance!
Step 2. Simmer Until Thickened
Gently simmering the milk and sugar mixture is key to developing that signature caramel flavor and velvety texture. Stir the pot occasionally as the liquid bubbles and reduces, keeping a close eye to prevent scorching.
You'll know it's ready when the mixture coats the back of a spoon, and a trail drawn through it remains for a few seconds. This may take 30-45 minutes, so be patient! The longer you simmer, the deeper the caramel notes will become.
Once thickened, remove the pot from heat and allow the cajeta to cool slightly. It will continue to thicken as it cools.
Serve the Mexican-style caramel sauce warm or at room temperature, drizzling it over churros, ice cream, or fresh fruit for a truly decadent treat. You can even use it as a dip for apple slices or pound cake.
However you enjoy it, this homemade cajeta is sure to delight your taste buds and transport you to the vibrant markets of Mexico.
Step 3. Remove Impurities
After your cajeta has thickened to the perfect consistency, you'll want to remove any impurities that may have developed during the simmering process.
Don't worry, this step is a breeze! Gently skim the surface of your cajeta with a spoon, carefully removing any foam or scum that has accumulated. This helps ensure your delicious caramel sauce is silky-smooth and free of unwanted bits.
Next, you'll pass your cajeta through a fine-mesh strainer or cheesecloth. This extra step will catch any stray impurities, leaving you with a beautifully clear and refined sauce.
Once strained, your cajeta is ready to be enjoyed! You can drizzle it over ice cream, pancakes, or even use it as a dip for fresh fruit. The possibilities are endless with this versatile Mexican delight.
Get ready to impress your family and friends with your homemade cajeta masterpiece!
Step 4. Cool Down Mixture
Once your cajeta has been strained, it's time to let the mixture cool down. Don't worry, this part's a breeze!
Carefully pour the hot cajeta into a clean, heat-resistant container. You'll want to use a bowl or pan that's big enough to allow the sauce to spread out and cool evenly.
Now, find a nice, cool spot on your counter or table and set the container there. As the cajeta starts to cool, you might notice it thickening up a bit. That's exactly what you want!
Resist the urge to stir or disturb the mixture – just let it do its thing.
In about 30 minutes, your cajeta should be at a perfect, spreadable consistency. Give it a gentle stir, then transfer it to an airtight container.
Pop it in the fridge to chill completely before serving. Mmm, can you already smell the sweet, caramel-y goodness? Get ready – your tastebuds are in for a real treat!
Step 5. Transfer to Containers
With your cajeta now cooled and thickened to the perfect consistency, it's time to transfer it to airtight containers for storage.
Grab a few clean, dry jars or airtight containers and start scooping that luscious, golden caramel into them. Don't be shy – fill those containers up to the top! You'll want to leave just a tiny bit of space at the top to allow for easy sealing.
Once your containers are filled, take a moment to admire your handiwork. Isn't that cajeta just gorgeous? The rich, glossy texture and deep caramel color are simply mesmerizing.
Now, seal those containers tightly to keep your homemade Mexican caramel sauce fresh and ready to enjoy whenever a craving strikes.
With your cajeta safely tucked away, you can rest easy knowing you have a delicious treat on hand.
Whether you plan to drizzle it over ice cream, use it as a dip for fresh fruit, or simply savor it by the spoonful, this cajeta is sure to become a new family favorite.
Final Thoughts
The Mexican caramel sauce is a delight that can elevate any dessert or dish. Just imagine drizzling it over ice cream, pancakes, or even fresh fruit – the possibilities are endless!
This rich, velvety sauce is sure to impress your family and friends. Once you've mastered the art of making it, you'll find yourself whipping up batch after batch.
It's the perfect way to add a touch of Mexican flair to your culinary creations. From cozy movie nights to festive celebrations, this cajeta will become a staple in your kitchen.
Don't be intimidated by the process – with a little practice, you'll be stirring up this sweet, gooey goodness like a pro.
Drizzle it, dip it, or simply enjoy it by the spoonful. However you choose to indulge, one thing is certain: you're going to fall head over heels for this Mexican caramel sauce.
Frequently Asked Questions
How Long Does Cajeta Last After Being Made?
Homemade cajeta will typically last 2-3 weeks when stored properly in the refrigerator. Its shelf life depends on the ingredients used and how well you seal the container. With proper care, you can enjoy your cajeta for quite some time.
Can Cajeta Be Used in Other Recipes Besides Desserts?
Absolutely! Cajeta can be used in a variety of recipes beyond just desserts. You can use it as a topping for savory dishes, drizzle it over pancakes or waffles, or even use it as a glaze for roasted meats.
Is There a Vegetarian or Vegan Alternative to Traditional Cajeta?
Yes, there are vegan alternatives to traditional cajeta. You can make a plant-based version using ingredients like coconut milk, dates, and spices to achieve a similar rich, caramelized flavor without using dairy.
How Should Cajeta Be Stored to Maintain Its Quality?
To maintain its quality, you should store cajeta in an airtight container in the refrigerator. This will help preserve its texture and flavor, ensuring you can enjoy it for longer.
Can I Use a Different Type of Milk in the Recipe?
You can certainly use a different type of milk in the recipe. Goat's milk, sheep's milk, or even plant-based milk like almond or coconut milk can work, but the flavor and texture may vary from the traditional cajeta made with cow's milk.
Alejandro is a vibrant advocate of traditional Mexican cuisine. From spicy tacos and enchiladas to rich moles and tamales, Alejandro’s dishes celebrate the colorful, bold flavors of Mexico. His recipes bring authentic Mexican street food and home-cooked meals to your table, with a focus on using fresh, flavorful ingredients.
Mexican Cuisine
Mexican Elote: Grilled Corn Delights
Absolutely irresistible, the beloved Mexican street food known as elote captivates the senses with its charred corn, tangy lime, and creamy cotija cheese.
Grilled to perfection and bursting with vibrant Mexican flavors, the beloved street food known as elote captivates your taste buds with its irresistible combination of charred corn, tangy lime, and creamy cotija cheese. Originating from ancient Mesoamerican civilizations, this iconic treat has evolved over centuries, becoming a staple of Mexican culture. Whether you enjoy it fresh off the grill or diced into a colorful salad, elote offers a sensational experience that celebrates the rich heritage of Mexican cuisine. Get ready to indulge in this delightful grilled corn delight that's sure to leave you craving more.
Key Takeaways
- Elote, a traditional Mexican dish of grilled corn, combines charred, juicy kernels with a creamy, tangy sauce and zesty toppings like chili powder and cotija cheese.
- Originating from ancient Mesoamerican civilizations, elote has evolved over time to reflect the vibrant culture and regional variations of Mexican cuisine.
- Preparation of elote involves grilling the corn, coating it in a sauce made of mayonnaise and lime, and garnishing it with a variety of toppings.
- The unique flavor profile of elote, with its balance of savory, tangy, and creamy elements, has contributed to its growing popularity worldwide as a delightful street food.
- Elote represents a celebration of Mexican culinary heritage, often served at festivals and gatherings, and continues to inspire fusion cuisine and culinary creativity globally.
History
Elote, the beloved Mexican street food, has a rich history rooted in the culinary traditions of ancient Mesoamerican civilizations. For centuries, indigenous peoples, such as the Aztecs and the Maya, have been enjoying this delightful grilled corn dish. Back then, they'd roast the corn over open fires, seasoning it with chile, lime, and other flavorful spices.
As Spanish conquistadors arrived in the 16th century, they encountered this tasty treat and quickly became enamored with it. The dish then spread throughout Mexico, evolving and adapting to local tastes and ingredients.
Today, elote is a beloved part of Mexican street food culture, with vendors selling their fragrant, smoky creations from carts and stands all over the country. Whether you're strolling through a bustling market or attending a lively festival, the aroma of freshly grilled elote is sure to delight your senses and transport you to the vibrant heart of Mexican cuisine.
Recipe
Elote, or Mexican street corn, is a beloved street food in Mexico that has gained global popularity in recent years. This grilled corn on the cob is coated in a creamy, tangy, and flavorful sauce, making it a delightful and satisfying dish.
The combination of sweet corn, a savory sauce, and a sprinkle of tangy cheese creates a perfect balance of flavors. Elote is often served as a snack or side dish, but it can also be enjoyed as a main course, especially when paired with other Mexican dishes.
Ingredients:
- 6 ears of fresh corn, husks and silk removed
- 1/2 cup mayonnaise
- 1/2 cup crumbled cotija cheese (or queso fresco)
- 1 lime, cut into wedges
- 1 teaspoon chili powder
- 1/2 teaspoon ground cumin
- 1/4 cup chopped cilantro (optional)
- Salt and pepper to taste
Instructions:
Preheat your grill or grill pan to medium-high heat. Grill the corn, turning occasionally, until charred and tender, about 12-15 minutes.
In a small bowl, mix the mayonnaise, cotija cheese, chili powder, and cumin until well combined. Generously brush the grilled corn with the mayonnaise mixture, making sure to coat all sides.
Sprinkle with chopped cilantro, if desired, and serve immediately with lime wedges on the side.
When cooking this dish, be sure to use fresh, high-quality corn for the best flavor and texture. You can also experiment with different toppings, such as crumbled queso fresco, chopped jalapeños, or a drizzle of Mexican crema, to customize the dish to your taste.
Enjoy the delicious and authentic flavors of Mexican elote!
Cooking Steps
Alright, let's get started on those yummy elote cooking steps!
First, you'll need to husk and clean your corn.
Then, you'll soak the corn in some seasoned water to really amp up the flavor.
Finally, you'll grill that corn over medium heat until it's nice and charred.
Can't wait to slather on that butter and seasonings – it's gonna be delicious with a squeeze of lime!
Step 1. Husk and Clean Corn
Husking and cleaning the corn is the first crucial step in preparing delectable Mexican elote. Gently peel back the green husks, revealing the golden kernels beneath. Be careful not to tear the delicate leaves – you want them intact to use as a handle later.
Once the husks are removed, pick off any stray silk strands clinging to the cob. These can interfere with the smooth, creamy texture you're going for. Run the corn under cool water, gently rubbing to wash away any dirt or debris.
Pat the cobs dry with a clean towel, ensuring they're ready for the next step of seasoning and grilling. With the husks and silk removed, the corn is now prepped and primed to soak up all the zesty flavors of the Mexican elote seasonings.
Get ready for an explosion of tasty delight in every bite!
Step 2. Soak Corn in Seasoned Water
The corn's next stop is a quick soak in a seasoned water bath.
You'll want to fill up a large bowl or container with cool water and add a generous pinch of salt. Give it a good stir to dissolve the salt.
Now, carefully submerge the cleaned corn cobs in the salted water. Let them soak for about 15-20 minutes. This simple step helps the corn absorb some of the seasoning, making the flavor pop even more once it hits the grill.
As the corn soaks, the salt water will gently season the kernels, preparing them for their grand finale.
You can even add a few dashes of chili powder or garlic powder to the water if you want an extra flavor boost. Just be sure not to let the corn soak for too long, or it may become waterlogged.
When the time is up, remove the corn from the water and give it a quick pat dry. Now it's ready to hit the grill and get that delightful char and caramelization going!
Step 3. Grill Corn Over Medium Heat
After the corn has soaked, it's time to fire up the grill! Get ready for some delightful, smoky flavors.
First, make sure your grill is heated to medium heat – you don't want to burn those precious kernels. Gently place the cobs of corn directly onto the grates, making sure to rotate them every few minutes.
As the corn sizzles and caramelizes, you'll start to smell that irresistible, toasted aroma. Keep a close eye, though – you don't want the corn to overcook and become dry.
Once the kernels are tender and slightly charred, it's time to remove them from the heat.
Be careful when handling the hot cobs – use tongs or oven mitts to avoid any painful mishaps.
Now, you're ready to slather on the toppings and enjoy your perfectly grilled Mexican elote! The combination of the sweet, smoky corn and all those delicious seasonings is simply out of this world.
Step 4. Apply Butter and Seasonings
Grab a generous pat of butter and gently spread it all over the hot, freshly grilled corn. The butter will melt instantly, creating a glossy, golden coating that glistens in the sun.
This delicious addition not only enhances the flavor but also provides a rich source of natural fats, which are becoming increasingly popular as consumers shift away from margarine in favor of butter due to its health benefits and global butter consumption trends.
Now, it's time to add the seasonings! Sprinkle on some chili powder – just a pinch will do – and let that zesty flavor sizzle.
Next, a dusting of cotija cheese, a traditional Mexican crumbly delight, adds a salty, tangy kick. Don't forget the lime wedges! Squeeze those bright, citrusy juices all over the buttery, seasoned corn, letting the flavors mingle and dance on your taste buds.
Step 5. Serve With Lime Wedges
Once the corn is beautifully coated in butter and seasoned to perfection, squeeze those vibrant lime wedges all over the top. The tangy citrus notes will dance across your taste buds, complementing the savory flavors of the elote.
Don't be shy – give each cob a generous squeeze, letting the bright green juice drizzle down the golden kernels. The contrast of the warm, buttery corn and the cool, refreshing lime is simply irresistible.
As you take your first bite, the flavors will burst forth, awakening your senses. The lime adds a lovely brightness that cuts through the richness, creating a truly harmonious experience.
Savor each delectable mouthful, relishing the perfect balance of sweet, salty, and tangy. This is a flavor combination that will have you coming back for more, so be sure to have extra lime wedges on hand.
Get ready for an explosion of Mexican flavor in every single bite!
Final Thoughts
Quintessentially, Mexican elote is a delightful street food that captivates the senses. The aroma of freshly grilled corn, the tantalizing flavors of creamy mayonnaise, the zesty kick of lime, and the warmth of melted cotija cheese create a harmonious symphony that leaves a lasting impression.
As you sink your teeth into the tender kernels, you'll be transported to the vibrant streets of Mexico, where the lively energy and cultural richness shine through in every bite. The blend of textures, from the charred exterior to the juicy interior, adds an irresistible complexity that keeps you coming back for more. Every bite is a celebration of the flavors and traditions that have been passed down through generations, making each nibble a tribute to the rich culinary heritage of Mexico. The smoky, savory essence of the corn is a testament to the time-honored techniques and ingredients that define this traditional Mexican dish. With each bite, you can almost hear the sounds of bustling markets and sizzling grills, creating a sensory experience that is truly unforgettable.
Whether enjoyed as a snack or a meal, Mexican elote is a true culinary gem that celebrates the rich heritage and vibrant flavors of Mexico. Indulge in this delightful treat and let the flavors transport you to a world of pure delight.
Frequently Asked Questions
What Is the Best Way to Remove Corn Kernels From the Cob?
To remove corn kernels from the cob, you can stand the cob upright and run a sharp knife down the sides, cutting the kernels off in neat rows. Alternatively, you can use a corn kernel stripper for a quick, easy job.
Can Mexican Elote Be Made With Frozen Corn?
You can certainly make Mexican elote using frozen corn. The key is to thaw the corn thoroughly and pat it dry before sautéing or grilling it to get that charred, flavorful result.
How Long Can Leftover Mexican Elote Be Stored?
Leftover elote can typically be stored in the fridge for 3-4 days. Be sure to store it in an airtight container to keep it fresh. You can also freeze leftover elote for 2-3 months.
What Are Some Alternative Toppings for Mexican Elote?
When it comes to alternative toppings for Mexican elote, you can get creative. Try sprinkling chili powder, lime juice, crumbled cotija cheese, or even a drizzle of crema for a flavorful twist on this classic street food.
Is Mexican Elote Suitable for Vegetarians or Vegans?
Yes, Mexican elote can be suitable for vegetarians and vegans. You can opt for a dairy-free crema or vegan cheese, and skip the traditional toppings like cotija cheese. With the right substitutions, you can enjoy this grilled corn delight!
Alejandro is a vibrant advocate of traditional Mexican cuisine. From spicy tacos and enchiladas to rich moles and tamales, Alejandro’s dishes celebrate the colorful, bold flavors of Mexico. His recipes bring authentic Mexican street food and home-cooked meals to your table, with a focus on using fresh, flavorful ingredients.
Mexican Cuisine
Ceviche is a vibrant seafood dish
Hailing from the vibrant shores of Peru, ceviche captivates with its zesty citrus, tender seafood, and rich history, inviting you to embark on a culinary adventure.
Ceviche is a vibrant seafood dish from Peru that'll transport you right to the sunny shores of the Pacific. You'll love the refreshing blend of citrus, herbs, and tender fish! The origins trace back to the Incan Empire, where they cured raw fish with zesty citrus. Today, ceviche celebrates Peru's incredible culinary diversity – from the northern coast's bright, tangy flavors to the spicy kick of the southern highlands. It's not only delicious, but also healthy, packed with omega-3s and antioxidants. Get ready to embark on a flavorful journey as you discover the rich history and preparation techniques behind this mouthwatering dish.
Key Takeaways
- Ceviche is a Peruvian dish made with fresh raw fish marinated in citrus juices, onions, chili peppers, and cilantro.
- The dish has a rich historical origin, tracing back to pre-Columbian times in the Incan Empire and evolving with the introduction of Spanish ingredients.
- Ceviche is low in calories, rich in omega-3 fatty acids, and packed with vitamins and minerals from the fresh seafood and vegetables.
- Proper preparation techniques, such as precise fish cutting and marination, are crucial for achieving the desired texture and flavor profile of ceviche.
- Ceviche holds significant cultural importance in Peru, where it is celebrated as a national dish and recognized as part of the Intangible Cultural Heritage of Humanity.
History
Ceviche, the renowned Peruvian seafood dish, has a rich and captivating history that spans centuries. Dating back to the Incan Empire, this vibrant dish evolved from the indigenous practice of curing raw fish in citrus juices.
As the Spanish conquistadors arrived in the 16th century, they introduced new ingredients like onions, chili peppers, and cilantro, further enhancing the flavor profile. Over time, ceviche became a beloved staple across Peru, each region developing its own unique twist.
From the zesty citrus notes of the northern coast to the spicy kick of the southern highlands, the diversity of ceviche is a testament to the country's culinary heritage.
Today, this refreshing seafood delight has captured the hearts and palates of food enthusiasts worldwide, showcasing the enduring influence of Peruvian cuisine.
Whether you're savoring it on a sun-drenched beach or in the bustling streets of Lima, ceviche remains a delightful reminder of its rich and storied past.
Recipe
Ceviche is a refreshing seafood dish that originated in Peru. It's made by marinating raw fish or seafood in an acidic citrus-based marinade, typically lime or lemon juice. This process, known as "cooking" by acid, denatures the proteins in the seafood, giving it a firm, cooked-like texture without the use of heat.
The key to a successful ceviche is the freshness of the seafood and the balance of flavors in the marinade. The marinade should be just enough to lightly "cook" the fish, while still allowing the natural taste of the seafood to shine.
- Fresh white fish (such as halibut, sea bass, or tilapia), cut into 1-inch cubes
- Lime juice, enough to cover the fish
- Red onion, thinly sliced
- Tomatoes, diced
- Cilantro, chopped
- Jalapeño or serrano chile, finely chopped (optional)
- Salt and pepper to taste
In a non-reactive bowl, combine the fish, lime juice, onion, tomatoes, cilantro, and chile (if using). Cover and refrigerate for 30 minutes to 1 hour, stirring occasionally, until the fish is opaque and firm.
Serve the ceviche immediately, with tortilla chips or crackers on the side. The acidity of the lime juice will continue to "cook" the fish, so it's best to consume the ceviche shortly after preparing it.
Adjust seasoning with additional salt, pepper, or lime juice as needed.
Cooking Steps
Dice the fish into bite-sized cubes, then let it soak in the tangy citrus juice.
Next, add the crunchy onions and spicy chiles to make it truly pop.
Don't forget the fresh herbs and seasonings – they'll take your ceviche to the next level.
Serve it up immediately on chilled plates for the ultimate refreshing experience.
Step 1. Dice the Fish Into Cubes
Careful preparation is key when dicing the fish into uniform cubes. First, grab a sharp knife and a sturdy cutting board. You'll want to work on a stable surface to prevent any accidents.
Gently place your fish fillet on the board and start slicing it into thin strips, about 1-inch wide. Next, turn the strips and carefully cut them crosswise to create those perfect little cubes. Try to make them all the same size, around 1/2-inch each. This will ensure the fish cooks evenly in the citrus marinade.
Once you've diced the entire fillet, give the cubes a gentle rinse under cold water. Blot them dry with a paper towel before adding them to your citrus mixture. With the fish prepped, you're one step closer to enjoying that bright, refreshing ceviche!
Step 2. Marinate the Fish in Citrus
With the fish prepped, it's time to get the citrus marinade going. In a large bowl, you'll need freshly squeezed juice from some juicy limes, lemons, and oranges. The more citrus, the better! Go ahead and give those fruits a good squeeze until you have about a cup of tangy, vibrant juice.
Now, add a pinch of salt and a sprinkle of black pepper. Give it a good stir to combine. Gently place the diced fish into the citrusy mixture, making sure each piece is fully submerged. Cover the bowl and pop it in the fridge.
Let the fish marinate for 30 minutes to an hour, patiently waiting as the acidic juice "cooks" the seafood to perfection.
As the fish marinates, the citrus will transform the raw cubes into tender, flavorful bites. You'll know it's ready when the fish turns opaque and looks nice and firm.
Time to move on to the next step – adding all the fresh veggies!
Step 3. Add Onions and Chiles
Now that the fish has had a chance to marinate in the citrusy goodness, it's time to add some crisp onions and spicy chiles.
Thinly slice some red or white onion and give it a good rinse to wash away that strong onion bite. Chop up a couple of fresh jalapeños or serranos, leaving the seeds in if you want an extra kick of heat. The onions will add a wonderful crunch and the chiles will bring the fire, creating a perfect balance of flavors.
Gently fold the onions and chiles into the marinated fish. Be sure not to overmix, as you don't want to break up the delicate pieces of fish.
Now, let this delicious mixture sit for another 10-15 minutes, allowing the flavors to meld together. Your ceviche is really starting to come together now! The bright, citrusy tang, the sharp onion crunch, and the spicy chili heat – it's a party in your mouth.
Step 4. Add Herbs and Seasonings
After the onions and chiles have had a chance to marry with the citrusy fish, you'll want to add some fresh herbs and seasonings to really elevate the flavors.
Reach for a handful of fragrant cilantro and gently tear the leaves, releasing their bright, herbal aroma. Sprinkle in a dash of cumin, its earthy, warm spice notes complementing the citrus.
Don't forget the zest of a lime – just a teaspoon or two will add a lovely pop of freshness. A pinch of salt and pepper brings everything together, balancing the acidity and enhancing the natural flavors.
Mix everything together gently, allowing the herbs and spices to mingle with the cured fish, onions, and chiles.
Now your ceviche is truly ready to shine, each bite bursting with vibrant, complex flavors that will have your taste buds dancing with delight.
Step 5. Serve Immediately on Chilled Plates
Once the herbs and seasonings have been gently incorporated, it's time to serve your ceviche.
Grab some chilled plates and arrange the marinated seafood in a pretty, appetizing display. Doesn't it look so fresh and vibrant? The citrusy scent is simply mouthwatering. Can't you just imagine the burst of tangy, savory flavors?
Now, don't wait another minute – dive right in! Grab a fork and take your first delectable bite. The tender, slightly-firm texture of the seafood perfectly contrasts the crisp, cool vegetables.
Each flavorful morsel melts in your mouth, leaving you craving more. Mmm, this is the taste of summertime bliss!
Be sure to savor every last drop of that zesty, aromatic marinade, too. It's an integral part of the ceviche experience.
Serve it up with some crunchy tortilla chips or fresh, crusty bread for the ultimate flavor combination. Trust us, your taste buds are in for a real treat!
Final Thoughts
Ceviche is a versatile and flavorful dish that has captured the hearts of food enthusiasts worldwide.
Whether you're hosting a lively party or enjoying a quiet night in, this refreshing seafood delight is sure to impress. The key is to serve it immediately on chilled plates, allowing the bright, tangy flavors to shine.
As you take that first bite, the burst of citrus, the tender seafood, and the mix of crisp vegetables will dance on your tongue, leaving you craving more.
Ceviche is a true celebration of the ocean's bounty, and each recipe is a unique expression of the chef's creativity.
Frequently Asked Questions
Is Ceviche a Raw Fish Dish?
Yes, ceviche is a raw fish dish. The fish is "cooked" by being marinated in citrus juices, which chemically denatures the proteins, giving the fish a firm, "cooked" texture without the use of heat.
How Long Does Ceviche Need to Marinate?
The length of time needed to marinate depends on the type of seafood used. Generally, it should marinate for 30 minutes to 2 hours, allowing the acidic marinade to "cook" the fish without heat.
Can Ceviche Be Made With Cooked Seafood?
Yes, you can make ceviche with cooked seafood. The acid in the marinade will still "cook" the fish, but the texture won't be as delicate as with raw seafood. It's a great option if you prefer a firmer bite.
Is Ceviche Safe to Eat for Pregnant Women?
Ceviche made with raw seafood may pose a risk for pregnant women due to potential bacteria and parasites. It's best to consult a healthcare provider before consuming raw or undercooked foods during pregnancy to ensure safety.
Can Ceviche Be Frozen for Later Use?
Yes, you can freeze ceviche for later use. The acidic marinade helps preserve the fish, so it'll stay fresh in the freezer for several months. Just be sure to thaw it properly before serving.
Alejandro is a vibrant advocate of traditional Mexican cuisine. From spicy tacos and enchiladas to rich moles and tamales, Alejandro’s dishes celebrate the colorful, bold flavors of Mexico. His recipes bring authentic Mexican street food and home-cooked meals to your table, with a focus on using fresh, flavorful ingredients.
-
Brazilian Cuisine3 months ago
Tacacá
-
Polish Comfort Food3 months ago
Krupnik (Barley Soup)
-
Brazilian Cuisine3 months ago
Caldeirada
-
Brazilian Cuisine3 months ago
Chicken in Brown Sauce
-
Southern Comfort Food3 months ago
Cheese Straws
-
African Cuisine3 months ago
Kedjenou (Ivory Coast)
-
Polish Comfort Food3 months ago
Vegetable Salad
-
American Diner Classics3 months ago
The Maillard Reaction: Understanding the Chemistry of Browning {Food Science and Cooking}