Connect with us

Lebanese Cuisine

Arak (Anise-Flavored Spirit)

Behold the captivating allure of arak, a centuries-old anise-flavored spirit that offers a mesmerizing sensory journey through the vibrant culture of the Mediterranean. Explore the rich history and time-honored tradition that make arak a truly special spirit.

Published

on

anise flavored alcoholic beverage

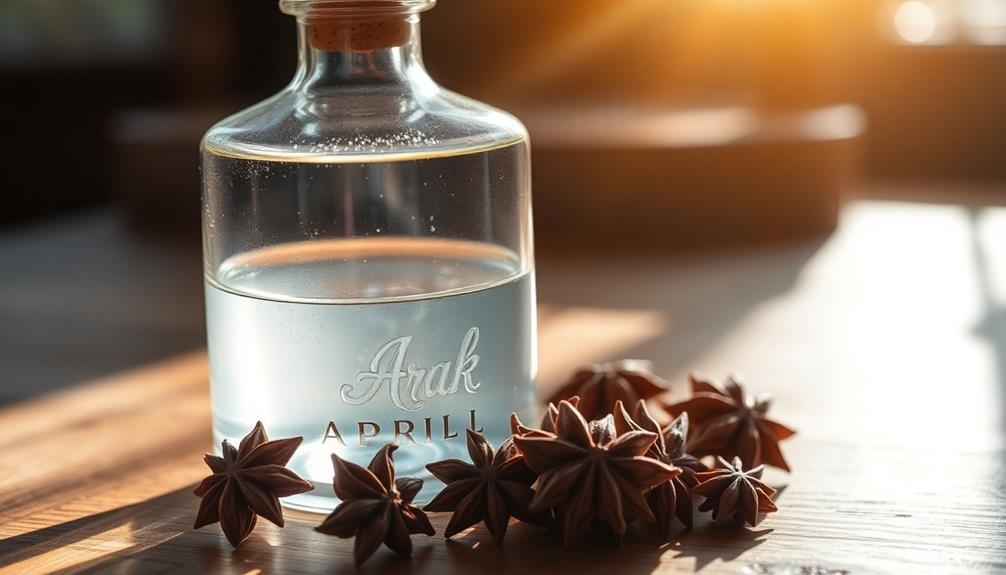
Arak, the captivating anise-flavored spirit, has delighted palates across the Mediterranean for centuries. Originating in ancient Mesopotamia, it's a cherished treasure distilled from grapes and flavored with aromatic anise seeds. The ritual of diluting arak with water creates a beloved tradition, enhancing its complex balance of subtle sweetness and harmonious finish. Whether sipped over ice or enjoyed in cocktails, arak offers a mesmerizing sensory journey that reflects the vibrant culture and timeless traditions of the region. Dive deeper into the rich history, time-honored cooking steps, and captivating flavor profile that make arak a truly special spirit.

Key Takeaways

  • Arak is an anise-flavored spirit that originated in ancient Mesopotamia, with regional variations found throughout the Middle East.
  • Arak is typically made by distilling a base spirit with anise seeds, followed by dilution with water to achieve the desired alcohol content.
  • Arak is regarded as a national treasure in Lebanon, where it is often paired with traditional Middle Eastern cuisine to enhance the dining experience.
  • In Israel, arak symbolizes cultural identity and is enjoyed by diverse populations as a reflection of the country's vibrant culture.
  • The ritual of diluting arak with water creates a beloved tradition that fosters connection and showcases the spirit's complex flavor balance of aromatic anise, subtle sweetness, and a harmonious finish.

History

The origins of arak, the anise-flavored spirit, can be traced back centuries to the Middle East. This beloved drink has a rich history, with roots stretching across the region.

Arak's story began in the ancient land of Mesopotamia, where it was first distilled from grapes and flavored with anise seeds. Over time, the recipe spread throughout the Middle East, each country putting its own unique spin on the beloved beverage.

In Lebanon, arak is considered a national treasure, with families passing down cherished recipes from generation to generation.

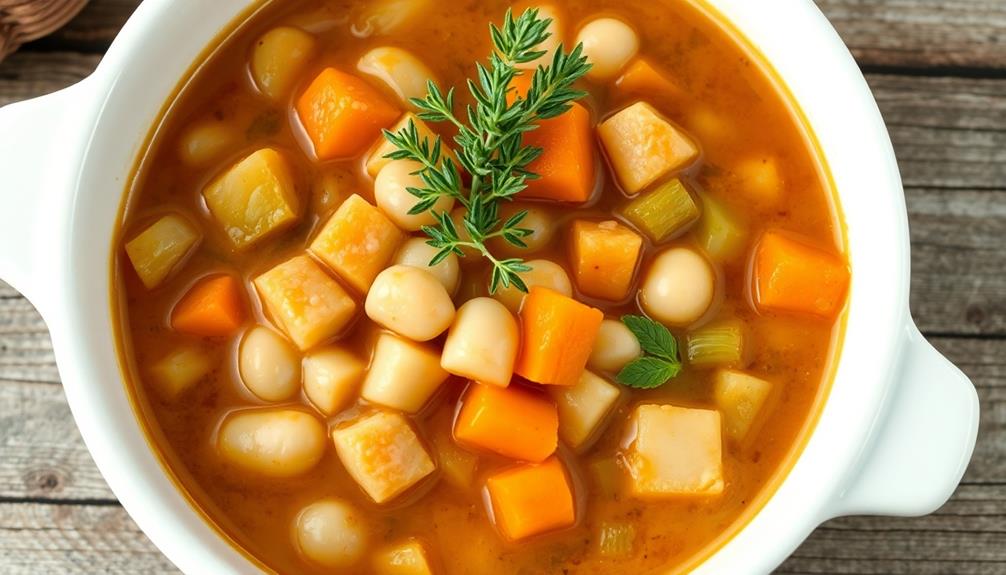
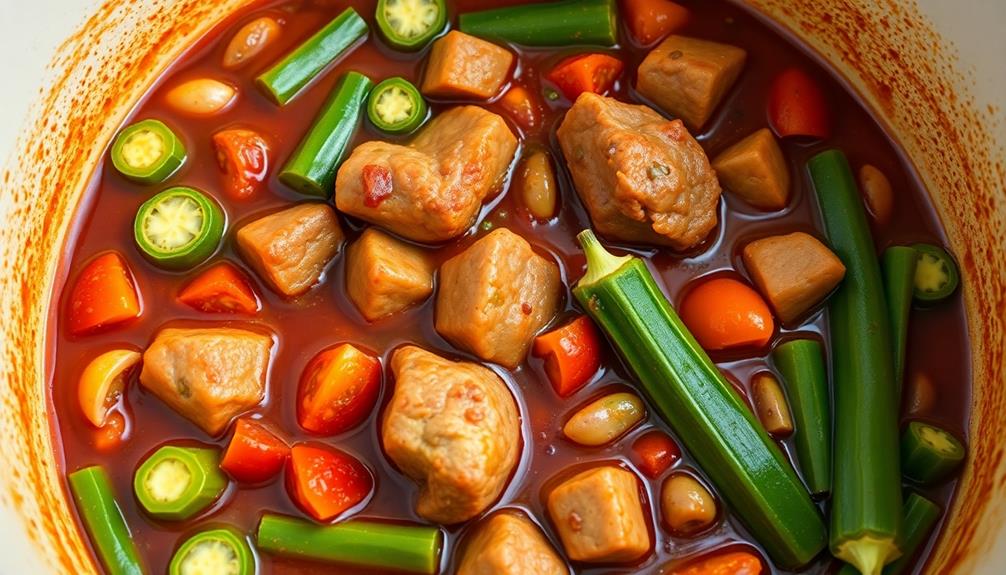
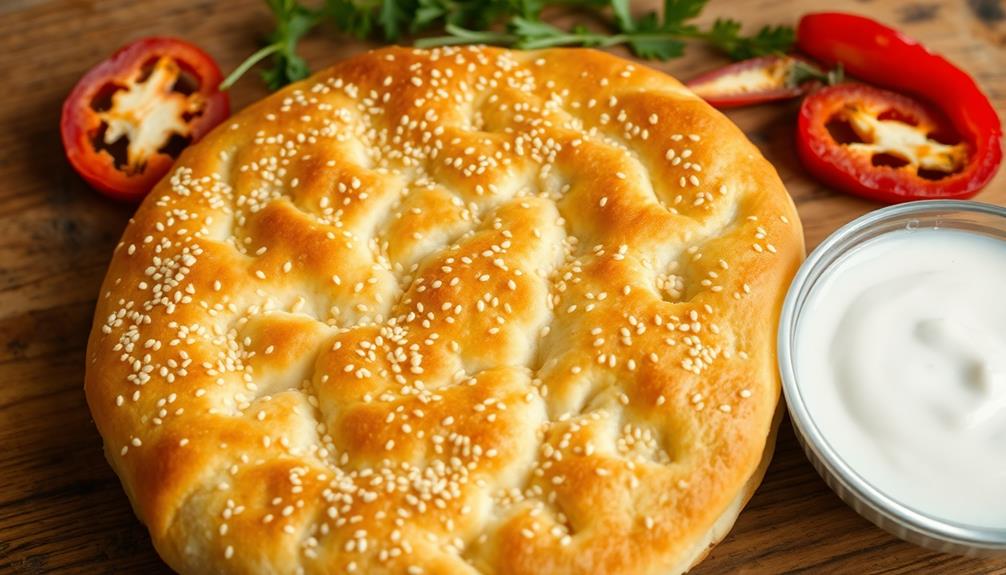
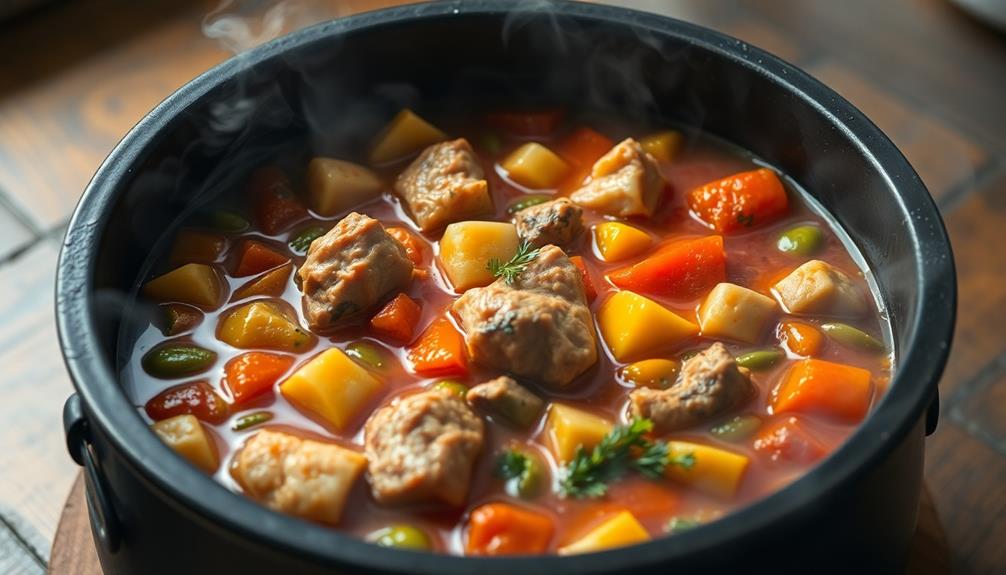
In Syria, it's a beloved accompaniment to traditional Middle Eastern cuisine, adding a touch of licorice-like flavor to the dining experience. The Anise seed is commonly used in many dishes, such as soups, stews, and breads, as well as in hot beverages like tea and coffee. In fact, it is a staple ingredient in the popular traditional Middle Eastern breakfast dish, Shakshuka. Its distinctive flavor adds depth and complexity to the dishes, making it a prized ingredient in Syrian culinary culture.

And in Israel, arak has become a symbol of cultural identity, enjoyed by people from all walks of life.

Advertisement

Today, arak continues to captivate the hearts and palates of those who experience its rich history and distinct taste.

Cooking Steps

To prepare arak, you'll first need to combine the base spirit with water and anise seeds in a still.

This mixture is then slowly heated, allowing the alcohol vapor to rise and be collected. The resulting liquid is the raw arak.

Next, you'll dilute the raw arak with more water to adjust the alcohol content.

This step is crucial, as the final arak should have an alcohol percentage between 40-50%.

Advertisement

Once you've reached the desired strength, it's time to let the arak rest.

During this resting period, the flavors will meld, and the spirit will develop its signature opaque, milky appearance when water is added.

Step 1. Combine Anise Seeds and Alcohol

combine anise seeds alcohol

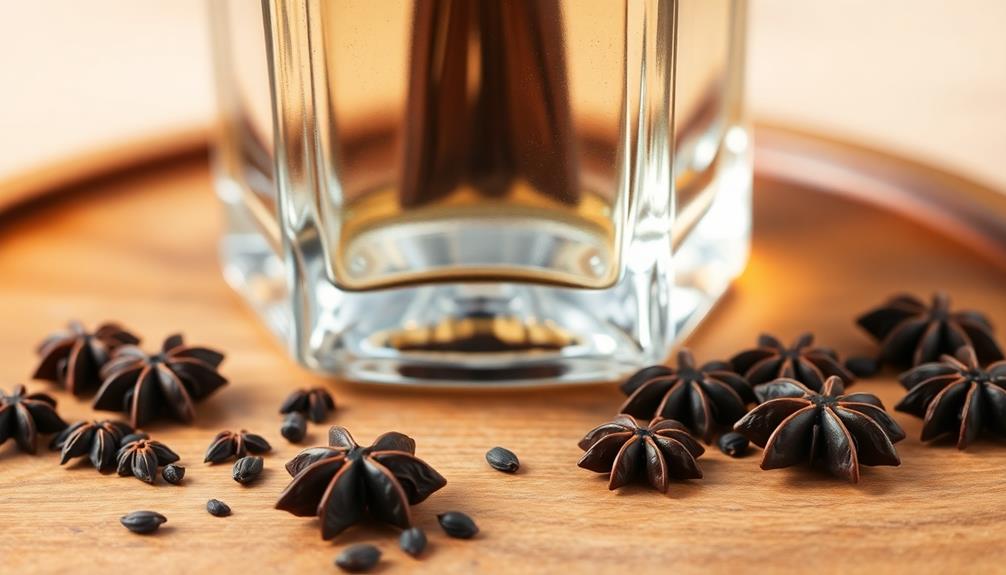
Combining the fragrant anise seeds with the neutral spirit is the first step in crafting the distinctive arak.

First, you'll need to gather your ingredients – high-quality anise seeds and a clear, unflavored alcohol like vodka or grappa. The anise seeds will infuse the spirit with their licorice-like aroma and flavor.

Start by lightly crushing the anise seeds in a mortar and pestle to release their essential oils.

Then, add the crushed seeds to the alcohol in a clean jar or bottle. Seal the container and let the mixture steep for at least a week, shaking it occasionally. The longer it steeps, the more intense the anise flavor will become.

Advertisement

After the infusion period, strain the mixture through a fine-mesh sieve to remove the solids.

You'll be left with a crystal-clear, pale yellow spirit with a captivating anise aroma. This is the base for your homemade arak, ready to be enjoyed straight or used in cocktails.

Step 2. Distill the Mixture

distill the mixture process

With the anise-infused alcohol ready, you'll now need to distill the mixture to produce the clear, high-strength spirit that defines arak.

First, pour the alcohol into a distillation pot or still. It's important to use a pot with a long neck to help separate the alcohol vapor from the other compounds.

Next, apply heat to the pot, causing the alcohol to vaporize and rise up the neck. As the vapors cool, they'll condense back into a liquid, which you'll collect in a separate container.

This distillation process removes impurities and concentrates the alcohol, resulting in a higher-proof spirit. You may need to repeat the distillation a few times to achieve the desired strength.

Advertisement

Keep a close eye on the temperature and collect only the "heart" of the distillate, which is the purest, highest-quality alcohol.

With patience and care, you'll end up with a smooth, flavorful arak that's ready to enjoy.

Step 3. Filter the Distillate

filter the distillate liquid

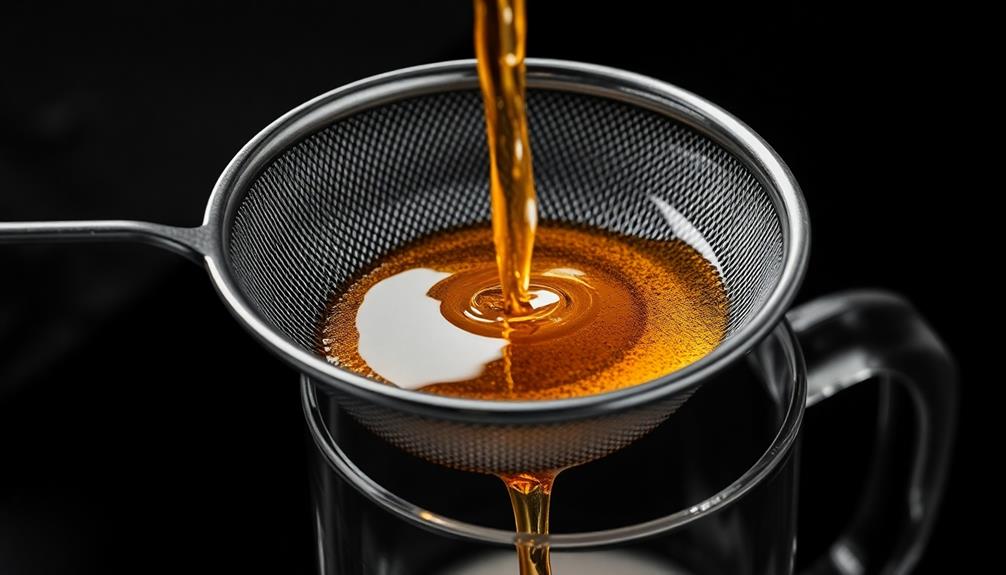
After the distillation process, you'll typically filter the arak distillate to remove any remaining impurities. This filtering step is crucial for creating a smooth, clean-tasting spirit.

You'll use a filter to separate the pure arak from any leftover solids or sediment. The most common method is to pass the distillate through a fine mesh strainer or cheesecloth. This traps any larger particles, leaving you with a clear, refined arak.

Some producers also use a paper filter or even a charcoal filter to further purify the spirit. Once filtered, the arak is ready for bottling and enjoying.

The filtering process helps ensure a consistent, high-quality taste in every sip. It's an important step that shouldn't be overlooked. With the distillate now filtered, you can move on to the final stages of the arak-making process.

Advertisement

Step 4. Dilute Distillate to Desired Strength

dilute distillate to strength

Now that the distillate is filtered, you'll need to dilute it to the desired strength. This is a crucial step in creating the perfect arak.

You'll want to have some water on hand to adjust the alcohol content. Start by pouring the distillate into a clean container. Carefully add a small amount of water, just a few tablespoons at a time, and stir gently.

Keep tasting the mixture until you reach the ideal flavor and alcohol level. The traditional strength for arak is around 40-45% ABV, but you can experiment to find your personal preference.

Be patient and take your time – getting the dilution just right will ensure your arak has a smooth, balanced taste.

Once you've reached the desired strength, you're ready to bottle your homemade arak and enjoy its unique anise-forward flavor. Cheers!

Step 5. Bottle and Age the Spirit

bottle and age spirit

Your homemade arak is now ready to be bottled and aged. Grab some clean, airtight bottles and carefully pour your diluted arak into them. Leave a little space at the top to allow for expansion as the spirit matures.

Once the bottles are filled, seal them tightly. Now, the fun part – aging! Find a cool, dark place like a basement or closet to store your bottles. Over the next several months, the arak will slowly develop its signature flavor profile. The anise notes will become more pronounced, and the overall smoothness will improve.

Advertisement

Be patient, as the best arak is worth the wait! Check on your bottles every so often, giving them a gentle swirl to help the process along.

When you're ready to enjoy your homemade arak, simply pour it over ice or mix it into your favorite cocktails. Cheers to your craftsmanship!

Final Thoughts

As you reflect on the intriguing world of arak, the anise-flavored spirit, consider how its rich history and distinct flavor profile have captivated drinkers across the Mediterranean region. From its origins in the Middle East to its widespread popularity, arak has woven itself into the cultural fabric of numerous countries.

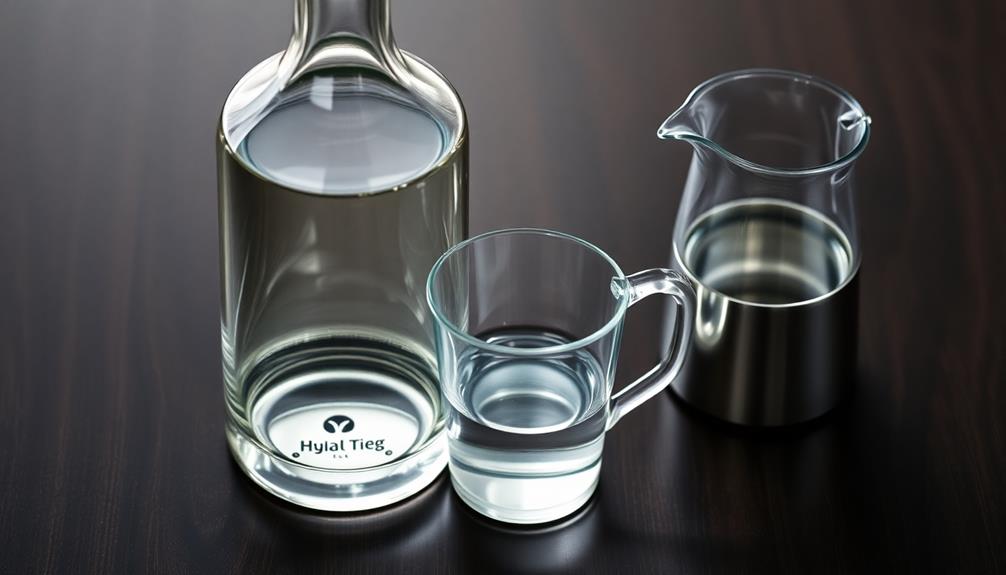
The ritual of diluting arak with water, watching it turn a milky-white color, is a beloved tradition that brings people together.

As you sip this complex spirit, you'll appreciate the delicate balance of flavors – the aromatic anise, the subtle sweetness, and the smooth, harmonious finish.

Advertisement

Arak's versatility allows it to be enjoyed in a variety of settings, from casual gatherings to formal celebrations.

Whether you're exploring arak for the first time or savoring it as a seasoned connoisseur, this unique libation offers a captivating journey for the senses.

Embrace the vibrant culture and timeless traditions that arak represents, and let its allure transport you to the heart of the Mediterranean. Experience the rich history and flavors of arak as you sip on a traditional cocktail made with this iconic spirit, such as the angu À baiana recipe, which infuses arak with the vibrant tastes of Brazil. Allow yourself to be enchanted by the unique blend of aromas and flavors that arak brings, and indulge in a one-of-a-kind journey through the Mediterranean’s most cherished traditions. Whether enjoyed neat or in a beautifully crafted cocktail, arak is sure to captivate your senses and leave a lasting impression.

Frequently Asked Questions

What Are the Main Ingredients Used in Making Arak?

To make this tasty spirit, you'll need some key ingredients. The main ones are grapes, water, and aniseed.

These are carefully combined and distilled to create the distinctive flavor. The aniseed provides the iconic licorice-like taste, while the grapes and water form the base.

Advertisement

With just a few simple steps, you can craft your very own batch of this unique and delightful beverage. It's sure to impress your friends!

How Does Arak Differ From Other Anise-Flavored Spirits?

How does arak differ from other anise-flavored spirits? Well, it's got a unique twist!

Unlike the licorice-like taste of some other anise drinks, arak has a more complex, nuanced flavor. It's distilled from grapes and mixed with anise seeds, giving it a delightful balance of sweetness and spice.

Plus, the traditional method of production gives arak an extra depth you won't find in mass-produced versions.

What Is the Typical Alcohol Content of Arak?

When it comes to arak, you'll be surprised to learn that this anise-flavored spirit packs quite a punch!

Advertisement

Typically, arak has an alcohol content that ranges from 40% to 63% ABV. That's right, it's a strong one!

But don't worry, this rich, full-bodied spirit is meant to be enjoyed in small sips, savored for its unique flavor profile.

Get ready to experience the bold and captivating taste of arak!

How Should Arak Be Served and Consumed?

How should arak be served and consumed? Well, get ready for a real treat!

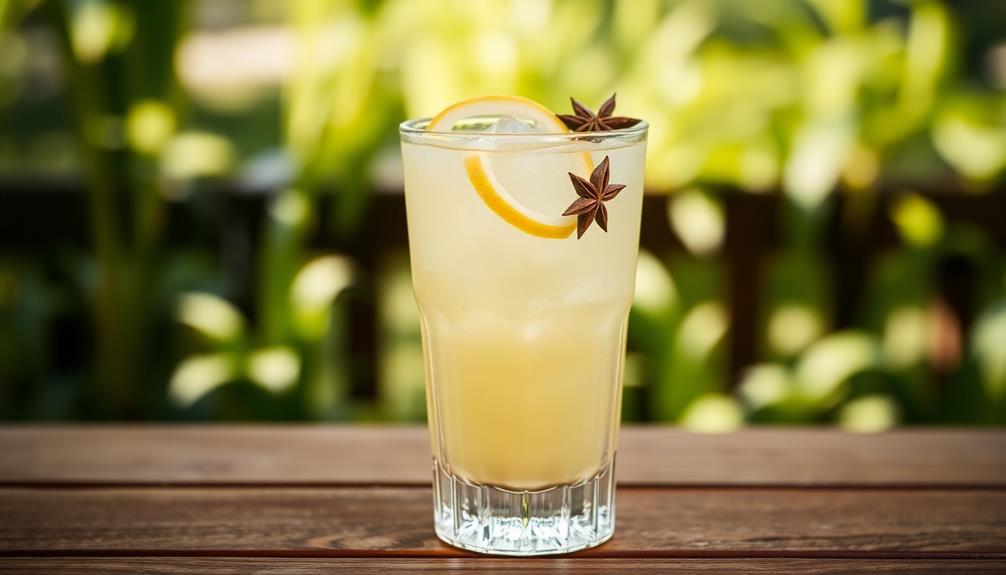
Arak is best enjoyed chilled, either straight or with a splash of cold water. When you add the water, it turns the clear liquid into a milky-white color – it's mesmerizing!

Advertisement

Take small sips and savor the bold, licorice-like flavor. Pair it with traditional Middle Eastern dishes for an authentic experience.

Just take your time and let the flavors dance on your tongue. It's a truly unique and delightful spirit to discover!

Are There Any Health Benefits Associated With Drinking Arak?

While arak doesn't have any major health benefits, enjoying it in moderation can be part of a balanced lifestyle.

The anise flavor provides a unique taste experience, and when served chilled with water, arak can be a refreshing social drink.

Just remember to sip it slowly and stay hydrated, as like any alcoholic beverage, it's important to consume arak responsibly.

Advertisement

Cheers!

Advertisement

Lebanese Cuisine

Bazella W Riz (Peas and Rice)

Latent with history and flavor, Bazella W Riz is a comforting peas and rice dish that transcends cultures and leaves you craving more.

Published

on

peas and rice delight

Bazella W Riz, an age-old blend of peas and rice, is a beloved comfort food that's cherished across many cultures. This hearty dish has a rich history, emerging as a way to stretch limited resources into tasty, nutritious meals. To make it, you'll first soak the peas overnight to soften them up. Then, you'll sauté onions and garlic, add tomatoes, peas, rice, broth, and spices, and let it all simmer until the rice is tender. The result is a fragrant, creamy dish that's sure to warm your soul. And if you keep reading, you'll discover even more about this delightful culinary tradition.

Key Takeaways

  • Bazella W Riz is a traditional dish with a distinct culinary tradition that combines the staple ingredients of peas and rice.
  • The dish emerged as a way to stretch limited resources into nutritious meals, with regional variations in spices, techniques, and serving styles.
  • Proper preparation techniques, such as soaking peas overnight and adding spices, contribute to the dish's creamy texture and enhanced flavor.
  • Simmering the rice and peas in broth allows the flavors to meld together, resulting in a tender and fragrant final dish.
  • Bazella W Riz is cherished as a comfort food and cultural touchstone in many communities, reflecting a unique cultural experience and rich blend of flavors.

History

Although the origins of Bazella W Riz can be traced back centuries, its history as a distinct culinary tradition is relatively recent. The dish's core ingredients – peas and rice – have been staple foods in many cultures for millennia.

However, the specific combination and preparation method that defines Bazella W Riz emerged more recently, likely within the last few centuries. Historians believe the dish developed as a way to stretch limited resources and create a satisfying, nutritious meal.

By pairing the protein-rich peas with the starchy rice, cooks could feed more people with fewer ingredients. Over time, regional variations arose, with different spices, cooking techniques, and serving styles.

Today, Bazella W Riz is cherished as a beloved comfort food and cultural touchstone in many communities. Its enduring popularity speaks to the timeless appeal of simple, wholesome ingredients expertly combined to create a truly delectable dish.

Cooking Steps

To begin the cooking process, gather the necessary ingredients and equipment.

Advertisement

You'll need a large pot, a wooden spoon, and a cutting board. Start by chopping the onions, garlic, and tomatoes into small pieces.

In the pot, sauté the onions and garlic in some olive oil until they're fragrant and tender.

Next, add the tomatoes, peas, and rice to the pot. Pour in the broth and season with salt, pepper, and your favorite herbs.

Bring the mixture to a boil, then reduce the heat and let it simmer for about 20 minutes, or until the rice is cooked through and the peas are tender.

Stir the pot occasionally to prevent sticking.

Advertisement

Once it's done, remove the pot from the heat and let it sit for a few minutes. Fluff the rice with a fork and serve hot, garnished with fresh parsley or green onions if desired.

Enjoy your delicious Bazella w Riz!

Step 1. Soak Peas Overnight Before Cooking

soak peas overnight first

Soaking the peas overnight before cooking is a simple yet essential step that can greatly improve their texture and flavor. When you soak the peas, you're allowing them to absorb water, which softens their tough outer shell and makes them easier to cook through.

This extra time also helps break down the complex starches and sugars within the peas, resulting in a creamier, more tender final dish.

Don't worry, the soaking process is easy! Just place the peas in a large bowl, cover them with water, and let them sit at room temperature overnight.

In the morning, you'll see the peas have plumped up and are ready to be drained and added to your recipe. This simple step ensures your peas will cook evenly and develop a delightful, creamy consistency.

Advertisement

Trust us, the extra time is well worth it for the delicious results!

Step 2. Drain and Rinse Soaked Peas

drain and rinse peas

After letting the peas soak overnight, you'll want to drain and rinse them before cooking. This step is crucial to remove any excess starch and impurities that may have accumulated during the soaking process.

Simply place a colander in your sink and pour the soaked peas into it. Give them a good rinse under cool, running water, gently stirring the peas with your hand to ensure they're all getting a thorough cleaning.

Once they're nice and clean, you can shake the colander to help remove any excess water. This extra step may seem small, but it can make a big difference in the overall texture and flavor of your Bazella w Riz dish.

With the peas prepped and ready to go, you can now move on to the next stage of the recipe – cooking the rice and combining it with the drained and rinsed peas.

Get excited, because you're one step closer to enjoying a delicious, homemade Bazella w Riz!

Advertisement

Step 3. Add Spices to Peas

spice infusion for peas

With the peas drained and rinsed, you're ready to start adding some flavor. First, gather your spices – you'll need cumin, coriander, and a pinch of cayenne pepper. Measure out a teaspoon of each spice and add them to the peas.

Consider enhancing the flavor profile with a touch of essential oils for respiratory health, which can also support your overall well-being while cooking. Give everything a good stir to coat the peas evenly.

The cumin will bring an earthy, warm aroma, while the coriander adds a bright, citrusy note. The cayenne pepper will give the dish a subtle kick of heat. Go easy on the cayenne at first – you can always add more later if you want a spicier flavor.

As you stir the spices into the peas, take a moment to inhale the tantalizing scent. The aroma of the spices will start to fill your kitchen, getting your taste buds excited for the delicious meal to come.

With the spices added, your peas are now ready for the next step – cooking them up with the rice.

Step 4. Add Rice and Peas

incorporate rice and peas

Grabbing the rinsed rice, combine it with the spice-coated peas in a large saucepan. Turn the heat to medium and let the flavors mingle. Stir occasionally as the rice starts to soak up the aromatic spices. Before long, the fragrance will fill the kitchen, making your mouth water.

Now, pour in the broth and bring the mixture to a gentle simmer. Cover the pan and let the rice cook, about 15-20 minutes, until it's tender and the liquid is absorbed. Remember to check it periodically, giving it a stir to prevent sticking.

Advertisement

Once the rice is cooked through, remove the pan from the heat. Fluff the rice and peas with a fork, then season with a pinch of salt and pepper to taste.

This simple, one-pot dish is bursting with delicious Middle Eastern flavors that are sure to satisfy. Serve it warm, and enjoy!

Step 5. Simmer Until Rice Is Tender

simmer rice until tender

Next, gently pour in the broth and bring the mixture to a gentle simmer. You'll want to let it simmer for about 20-25 minutes, or until the rice is nice and tender. Be sure to stir it occasionally to prevent any sticking or burning. The rice should soak up all that delicious broth, making it extra flavorful.

For a truly delightful meal, consider pairing this with the right side dishes or even exploring best vacuums for dust removal to keep your kitchen clean while you cook.

Once the rice is cooked through, you can give it a taste test. If it's still a bit crunchy, just let it simmer for a few more minutes. You'll know it's ready when the grains are soft and fluffy. Don't forget to season with a pinch of salt and pepper to really bring out all the flavors.

Simmering the rice slowly is the key to getting that perfect texture. It may take a bit of patience, but trust us, it's so worth it! Soon, you'll have a pot of fragrant, tender rice ready to serve alongside the peas. Get ready for a mouthwatering dish that's sure to satisfy.

Advertisement

Final Thoughts

Reflecting on the Bazella W Riz journey, you're left with a deeper appreciation for the nuances of this unique cultural experience. The rich blend of flavors, the time-honored techniques, and the sense of community woven into each bite – it all comes together to create a truly memorable dish.

As you savor the last morsel, you can't help but feel a renewed connection to the culinary traditions of this region. The simmering rice, the tender peas, and the harmonious spices have transported you to a different time and place, inviting you to slow down and truly savor the moment. As you sit back and reflect on the meal, you can’t help but think about the rich history of hummus in this region. The creamy blend of chickpeas, tahini, and olive oil has been a staple in the diets of people here for centuries. Understanding the history of hummus adds an extra layer of appreciation for the flavors and traditions of this culture.

Looking ahead, you're excited to share this recipe with friends and family, passing on the legacy of Bazella W Riz. Perhaps you'll even experiment with your own twist, adding a personal flair while still honoring the essence of this beloved dish.

The possibilities are endless, and the joy of discovery is half the fun.

Frequently Asked Questions

What Is the Ideal Ratio of Peas to Rice?

The ideal ratio of peas to rice can vary, but a good rule of thumb is a 1:2 ratio.

Advertisement

This means for every one part peas, you'll want two parts rice. This balance allows the flavors to complement each other perfectly, with the peas providing a pop of sweetness and the rice offering a hearty, filling base.

Feel free to adjust the ratio to suit your personal taste preferences!

Can I Use Frozen Peas Instead of Fresh?

Absolutely! You can definitely use frozen peas instead of fresh ones in your recipe.

Frozen peas are just as nutritious and flavorful as fresh, and they're super convenient too. Plus, they'll save you the time and effort of shelling and prepping fresh peas.

Just toss the frozen peas right in – they'll cook up perfectly and blend beautifully with the rice.

Advertisement

It's an easy swap that'll make your dish even quicker to prepare. Go for it and enjoy your delicious meal!

How Long Can the Cooked Dish Be Stored?

You can definitely store that tasty dish for a few days! The cooked peas and rice will last 3-4 days in the fridge.

Just make sure to pop it in an airtight container. That way, you can enjoy those delicious flavors again and again throughout the week.

And hey, the best part is you can use frozen peas – no need to worry about fresh ones going bad. Isn't that convenient?

Get ready to savor that comforting, homemade meal all over again!

Advertisement

Can I Substitute Other Types of Rice?

Absolutely! You can substitute other types of rice in this dish.

Basmati, jasmine, or long-grain white rice would all work great. Just keep in mind that different rices may have slightly different cooking times, so you might need to adjust the recipe a bit.

But don't worry – it's easy to experiment and find the perfect rice for your taste buds!

Have fun exploring all the delicious possibilities.

Is There a Vegetarian Alternative to the Meat?

Absolutely! There are lots of tasty vegetarian alternatives you can use in place of meat.

Advertisement

One great option is sautéed mushrooms – they've a meaty texture and rich, savory flavor that works perfectly.

You could also try crumbled tofu or tempeh, which are plant-based proteins that can mimic the consistency of ground meat.

Whatever you choose, the key is to season it well and let the flavors shine through.

Get creative and have fun experimenting!

Advertisement

Continue Reading

Lebanese Cuisine

Kawarma (Preserved Meat)

Fascinating preserved meat dish with ancient roots in the Middle East, where people developed ingenious techniques to make it last longer. Discover the art of making kawarma.

Published

on

preserved meat delicacy kawarma

Kawarma is a delectable preserved meat dish with ancient roots in the Middle East. Over centuries, people in this region developed ingenious techniques to preserve meat during times of scarcity. They'd dry and salt the meat, seasoning it with a blend of aromatic spices and herbs. This not only helped the meat last longer, but also infused it with rich, mouthwatering flavors. Today, kawarma remains an integral part of the region's culinary heritage, showcasing the resilience and ingenuity of its people. Crafting this captivating dish involves a multi-step process, from trimming the meat to smoking it to storing it just right. Want to learn more about the art of making kawarma?

Key Takeaways

  • Kawarma is a traditional preserved meat dish with origins in the Middle East, developed to ensure long-term meat storage during times of scarcity.
  • The preparation involves drying, salting, and seasoning the meat with spices and herbs, which enhances the flavor and aids in preservation.
  • Kawarma is an integral part of the Middle Eastern culinary heritage, with regional variations that showcase the resilience and ingenuity of the people.
  • The cooking process includes marinating the meat, searing it in hot oil, and simmering it to achieve a tender, flavorful result.
  • Kawarma is celebrated as a link to the past and a testament to the resourcefulness of Middle Eastern communities in the face of limited resources.

History

Kawarma, a traditional preserved meat dish, has a rich history rooted in the Middle Eastern region. For centuries, people in this area have used ingenious techniques to store meat for long periods, ensuring a reliable food source during times of scarcity.

The process of making kawarma involves meticulously drying and salting the meat, often using spices and herbs to enhance the flavor. This preservation method not only extends the meat's shelf life but also imbues it with a unique, intensely savory taste.

As communities in the Middle East faced environmental challenges and limited access to refrigeration, kawarma became an integral part of their culinary heritage. The dish evolved, with different regions developing their own variations, each reflecting local ingredients and cultural traditions.

Today, kawarma remains a beloved staple, enjoyed not only for its practical benefits but also as a cherished link to the past, celebrating the ingenuity and resilience of the people who perfected this remarkable food preservation technique.

Cooking Steps

Once the meat is prepared, you can begin the cooking process. First, you'll want to gather your ingredients – the marinated meat, some oil, and any spices or herbs you'd like to add.

Advertisement

Heat the oil in a large pan over medium-high heat. When the oil is hot, carefully add the meat. Be cautious, as the hot oil may splatter! Let the meat sear for a few minutes, giving it a nice golden-brown color on all sides.

Next, reduce the heat to low and cover the pan with a lid. This will help the meat cook through without burning the outside. Let it simmer for about an hour, stirring occasionally, until the meat is incredibly tender. The long, slow cooking is what gives kawarma its signature texture and flavor.

Once the meat is cooked through, you can remove the lid and let any excess liquid evaporate. This will help create a thick, rich sauce coating the meat.

And there you have it – perfectly cooked kawarma, ready to enjoy!

Step 1. Trim Meat Into Thin Strips

thinly sliced meat strips

Begin by trimming the meat into thin, even strips, about 1/4 inch thick and 2-3 inches long.

You'll want to use a sharp knife for this task, carefully slicing the meat against the grain. Take your time and focus on creating uniform pieces, as this will help them cook evenly later on.

Advertisement

Once you've got all the meat sliced, it's time to give them a quick rinse under cold water. This helps remove any impurities or excess fat.

After rinsing, pat the strips dry with a clean kitchen towel or paper towels. Ensuring the meat is dry is crucial for the next steps in the preservation process.

With your perfectly portioned meat strips ready, you can now move on to the next phase of making delicious kawarma.

Step 2. Soak Meat in Brine Solution

soaking meat in brine

With the meat strips neatly prepared, you'll now create a brine solution to soak them in. In a large bowl, combine water, salt, and any desired spices. Stir the mixture until the salt fully dissolves, creating a flavorful brine.

Gently place the meat strips into the brine, ensuring they're fully submerged. Cover the bowl and let it rest in the refrigerator for several hours, or even overnight. This brining process infuses the meat with delicious seasoning and helps preserve it.

As the meat soaks, the brine will draw out excess moisture, concentrating the flavors. The salt in the solution also inhibits the growth of harmful bacteria, making the meat safer to consume.

Advertisement

Once the brining is complete, remove the meat strips from the brine and pat them dry with paper towels. They're now ready for the next step in the kawarma preservation process. Get excited, because your homemade kawarma is well on its way!

Step 3. Air Dry Meat Strips

air drying meat strips

After the meat strips have finished brining, it's time to air-dry them. This stage is crucial for creating that classic kawarma texture – chewy, but not too tough.

Grab your meat strips and hang them up in a well-ventilated area, away from direct sunlight. You want a gentle breeze to circulate around them as they dry. It'll take a few hours, so be patient!

Keep an eye on them, making sure they're not getting too dry or crispy. Once they've developed a leathery, slightly shriveled appearance, you're ready for the next step.

Be careful when handling the strips – you don't want to break them. Gently transfer them to a clean surface, ready for the final touches.

Air-drying is a delicate process, but it's worth it to achieve that authentic kawarma flavor and texture. With a little TLC, your meat will be primed for the next phase of preservation.

Advertisement

Step 4. Smoke Meat Strips Over Wood

smoke meat strips wood

Once the air-dried meat strips have acquired the desired leathery texture, it's time to smoke them over wood. This step adds a delightful, smoky flavor that'll have your taste buds dancing.

First, gather some hardwood chips or chunks – oak, hickory, or mesquite work great. Soak the wood in water for at least 30 minutes to create a nice, steady smoke.

Next, set up your smoker or grill for indirect heat. Place the soaked wood over the heat source, then arrange the meat strips on the grates, making sure they don't touch. Close the lid and let the magic happen!

Smoke the meat for 2-4 hours, depending on the thickness of the strips, until they've acquired that irresistible, deep-smoked aroma. Keep an eye on the temperature, ensuring it stays between 200-225°F for best results.

Once the meat is perfectly smoked, remove it from the heat and let it cool slightly. Now, you're ready to enjoy the savory, smoky goodness of your homemade kawarma!

Step 5. Store in Airtight Container

airtight container storage method

To store your homemade kawarma properly, you'll need an airtight container. This will keep your delicious preserved meat fresh and flavorful for weeks.

Simply place the smoked meat strips into the container, making sure there's no air pockets. Seal the lid tightly, locking in that smoky goodness.

Advertisement

Now, where should you store your kawarma? The best spot is in a cool, dry place, like a pantry or cupboard. Avoid the fridge or freezer, as the fluctuating temperatures can dry out the meat.

Your kawarma will stay perfectly preserved at room temperature in its airtight home.

When you're ready to enjoy a tasty piece, just open the container and grab a strip. The kawarma will be bursting with that irresistible blend of spices and smoke.

Store it this way, and your homemade kawarma will stay fresh for up to two months. Easy peasy! Now you can savor the fruits of your labor for weeks to come.

Final Thoughts

Kawarma, the preserved meat delicacy, has undoubtedly captured the hearts and palates of many. As you've learned, the process of creating this unique food is both fascinating and intricate. From the careful selection of meats to the precise curing and drying techniques, every step is crucial in producing the rich, savory flavors and melt-in-your-mouth texture that make kawarma so special. If you’re a fan of kawarma, you may also be interested in learning how to make homemade sujuk. This Middle Eastern sausage is another popular cured meat delicacy that requires skill and patience to create. From grinding the meat and mixing in the perfect blend of spices to the careful process of stuffing and drying, mastering how to make homemade sujuk is a rewarding endeavor for any food enthusiast.

Advertisement

Looking ahead, the future of kawarma is bright. As more people discover this traditional gem, the demand for its authentic, handcrafted version is sure to grow.

Whether you enjoy it as a snack, an ingredient in your favorite dishes, or a centerpiece of a festive spread, kawarma offers a delightful taste of history and culture.

So, the next time you savor a bite of this preserved meat, take a moment to appreciate the skill and dedication that went into its creation.

Kawarma is truly a culinary treasure worth savoring and sharing with loved ones.

Frequently Asked Questions

How Long Can Kawarma Be Stored For?

You'll be amazed at how long kawarma, a type of preserved meat, can be stored!

Advertisement

Properly stored, it can last an incredible 6 to 12 months.

That's right, you can enjoy the delicious flavor of this special meat for up to a year.

Isn't that wild?

With the right storage techniques, kawarma is a fantastic long-lasting option.

Get ready to savor its unique taste for months on end!

Advertisement

What Are the Health Benefits of Eating Kawarma?

Eating kawarma can be a real treat for your body! This preserved meat is packed with all sorts of amazing health benefits.

It's a great source of protein, which helps build and repair your muscles. Plus, it's got lots of vitamins and minerals that keep your bones strong and your immune system healthy.

Can Kawarma Be Used in Other Dishes?

Yes, you can absolutely use kawarma in other dishes! Kawarma's rich, savory flavor makes it a versatile ingredient.

You can chop it up and add it to soups, stews, or rice dishes. Or try frying it up and serving it over a salad for a tasty protein boost.

The possibilities are endless! Kawarma's unique taste and texture can really elevate all kinds of meals.

Advertisement

How Does the Taste of Kawarma Differ From Fresh Meat?

The taste of kawarma differs quite a bit from fresh meat. While fresh meat is juicy and tender, kawarma has a richer, more intense flavor.

It's been preserved and dried, so it has a chewier texture and a deeper, smokier taste. Don't worry – that doesn't mean it's tough or unpleasant.

It's just got a unique character that makes it perfect for adding big flavor to your favorite dishes.

Is Kawarma Only Made in Certain Regions?

Kawarma, a savory preserved meat, isn't just found in one region – it's enjoyed all around the world!

While the preparation may vary, the rich, concentrated flavor sets it apart from fresh meat.

Advertisement

Whether you're in the Middle East, Asia, or even parts of Europe, you'll likely find locals who've perfected their own unique kawarma recipe passed down through generations.

It's a truly global delicacy that brings communities together through its shared love of preserved meats.

Continue Reading

Lebanese Cuisine

Harisseh (Semolina Cake)

With its captivating texture and comforting flavors, Harisseh, a semolina cake with ancient roots in the Middle East, is a cherished symbol of the region’s rich culinary heritage. Discover more about this delightful treat.

Published

on

delicious semolina cake recipe

Harisseh, a semolina cake with ancient roots in the Middle East, will captivate your taste buds. Its unique texture and comforting flavors have delighted people for centuries. First, you'll sift the semolina and flour to create a smooth, fluffy crumb. Then, you'll slowly add melted butter, milk, and sugar, blending them into a batter. Once baked, the cake's mouthwatering aroma will fill the air. Finish with a sprinkle of crushed pistachios for a beautiful presentation and delightful contrast of flavors. With a few simple steps, you'll be enjoying this cherished symbol of the region's rich culinary heritage. And there's more to discover about this delightful treat. For a truly authentic experience, pair your harisseh with a traditional Middle Eastern tea or coffee to complement the sweet pastry dessert. Whether enjoyed on a peaceful afternoon or shared with loved ones, harisseh is sure to become a cherished part of your culinary repertoire. Its timeless appeal and simple yet satisfying ingredients make it a beloved treat worth savoring.

Key Takeaways

  • Harisseh is a cherished semolina-based cake with origins tracing back to ancient culinary traditions of the Middle East, particularly Mesopotamia and the Levant region.
  • The recipe involves sifting semolina and all-purpose flour, incorporating melted butter, milk, and sugar, and baking in a preheated oven for 30-35 minutes.
  • Sifting the flours is crucial for achieving a light and fluffy crumb, while the addition of melted butter and milk contributes to the cake's rich and creamy texture.
  • Garnishing the warm cake with crushed pistachios adds a delightful crunch and nutty flavor, enhancing the overall appeal and taste of the dish.
  • Harisseh is a versatile cake suitable for special occasions or as a comforting snack, representing the rich culinary heritage of the Middle Eastern region.

History

The origins of harisseh, a semolina-based cake, can be traced back to the ancient culinary traditions of the Middle East. Over centuries, this delightful treat has evolved, with each region and culture adding their own unique flair.

Harisseh's roots lie in the kitchens of ancient Mesopotamia, where cooks first experimented with the versatile semolina flour. As the recipe spread throughout the region, it found a special home in the Levant, where it became a beloved part of the local cuisine.

Today, harisseh is enjoyed across the Middle East, from Egypt to Iran, each country and community putting their own spin on the classic recipe. Some add fragrant spices like cinnamon or cardamom, while others incorporate nuts or dried fruit.

No matter the variation, harisseh remains a cherished symbol of the region's rich culinary heritage, a timeless delight that connects generations and cultures.

Cooking Steps

To begin the cooking process, preheat your oven to 350°F (175°C). Grease and flour a 9-inch round cake pan or an 8-inch square baking dish.

Advertisement

Now, in a large bowl, whisk together the semolina, sugar, baking powder, and salt until well combined.

In a separate bowl, beat the eggs, milk, and melted butter until smooth. Slowly pour the wet ingredients into the dry ingredients, mixing until you have a thick, pourable batter.

Pour the batter into the prepared pan, smoothing the top with a spatula.

Bake the harisseh for 35-40 minutes, or until a toothpick inserted in the center comes out clean.

Allow the cake to cool in the pan for 10 minutes before inverting it onto a wire rack to cool completely.

Advertisement

Once cooled, serve the delicious semolina cake and enjoy its delightful texture and flavor.

Step 1. Sift Semolina and All-Purpose Flour

sift semolina and flour

Sifting the semolina and all-purpose flour is a crucial step in preparing the Harisseh. By sifting, you'll remove any lumps or impurities, ensuring a smooth and consistent texture in your cake.

Start by placing a fine-mesh sieve over a large bowl. Gently pour the semolina into the sieve and shake it back and forth, allowing the fine grains to fall through into the bowl below. Repeat this process with the all-purpose flour.

Don't be tempted to skip this step – sifting aerates the flours, which helps create a light and fluffy crumb in the final cake. Plus, it's a satisfying process that only takes a minute.

Once you've sifted both the semolina and flour, give them a quick stir to combine. You're now ready to move on to the next step in crafting your delicious Harisseh.

Sifting may seem small, but it makes a big difference in the quality of your homemade semolina cake.

Advertisement

Step 2. Add Melted Butter

incorporate melted butter

Next, add the melted butter to the sifted flours. You'll want to pour it in slowly, stirring as you go. This helps the butter incorporate evenly throughout the mixture. The butter will add a lovely richness and moisture to your harisseh cake.

Be sure to use real, unsalted butter for the best flavor. Melt it gently over low heat, watching closely so it doesn't burn. Once it's liquid, let it cool slightly before adding it to the dry ingredients.

Stir the butter in with a wooden spoon or sturdy spatula, making sure to scrape the sides and bottom of the bowl. Keep mixing until you have a smooth, well-blended batter. The butter should be fully incorporated, with no visible pockets or streaks remaining.

Now that the butter is in, you're ready for the next step! Grab your mixing bowl and let's keep going.

Step 3. Add Milk and Sugar

add milk and sugar

The addition of milk and sugar is a crucial step in crafting the perfect harisseh cake. This sweet combination brings a lovely creaminess and richness to the semolina base.

First, you'll want to pour in some whole milk, gently stirring it into the melted butter until the mixture is smooth and well-combined. The milk adds a delightful moistness that balances the slightly grainy texture of the semolina.

Next, it's time to sprinkle in the granulated sugar. Start with a quarter cup and give it a good stir, tasting as you go to achieve your desired sweetness level. The sugar will dissolve beautifully, lending a comforting, homey flavor to the cake.

Advertisement

Feel free to add a bit more if you'd like an extra-sweet treat.

With the milk and sugar incorporated, the batter is ready for the next step. Keep stirring to ensure everything is evenly distributed, then prepare to bake your aromatic and delectable harisseh cake.

Step 4. Bake in Preheated Oven

bake in preheated oven

Preheating the oven to the specified temperature is essential for baking the harisseh cake to perfection. Set your oven to 350°F (175°C) and let it heat up completely. This even heat distribution is crucial for the cake to rise evenly and develop a beautiful golden-brown crust.

Once the oven is ready, carefully pour the batter into a greased baking pan. Spread it out evenly, making sure to reach the edges. This will help the cake bake consistently throughout.

Pop the pan into the preheated oven and let the magic happen!

Bake the harisseh for 30-35 minutes, or until a toothpick inserted into the center comes out clean. The aroma wafting through your kitchen will be absolutely mouthwatering.

Advertisement

Keep an eye on the cake, and if the top starts to brown too quickly, simply cover it with a sheet of aluminum foil to prevent overbrowning.

Step 5. Garnish With Crushed Pistachios

garnish with crushed pistachios

Once the harisseh has finished baking to perfection, it's time to add the finishing touch – a sprinkle of crushed pistachios. This simple garnish elevates the cake, bringing a delightful crunch and a pop of vibrant green color.

Gather a handful of shelled pistachios and place them in a small plastic bag. Use a rolling pin or the back of a spoon to gently crush the nuts into small, irregularly shaped pieces. You don't want them too finely ground – just enough to create a lovely texture.

Carefully remove the baked harisseh from the oven and let it cool slightly. While it's still warm, generously sprinkle the crushed pistachios over the top of the cake. The warm semolina will help the nuts stick, creating a beautiful, nutty topping.

Serve the harisseh immediately, allowing your guests to admire the tempting display of golden cake and vibrant green pistachios. The contrasting flavors and textures will delight the senses and have everyone reaching for seconds.

Final Thoughts

Ultimately, you should feel confident in your ability to create this delectable semolina cake, Harisseh. The process may seem daunting at first, but with a little practice, you'll be whipping up these fragrant and indulgent treats in no time.

Advertisement

Remember, the key is to take your time and follow the instructions carefully. Don't be afraid to experiment with different garnishes or flavors to make the dish your own.

Whether you're serving it at a special occasion or enjoying it as a comforting snack, Harisseh is sure to delight your taste buds and impress your friends and family.

Frequently Asked Questions

Can I Substitute Regular Flour for Semolina in This Recipe?

You can certainly try substituting regular flour for semolina in this recipe, but it won't give you quite the same texture.

Semolina has a coarser, grittier texture that adds a unique crumb to baked goods. If you use regular flour, your cake might turn out a bit more fine and delicate.

But hey, why not give it a shot? You might discover a whole new flavor and texture that you love!

Advertisement

How Long Can the Harisseh Cake Be Stored?

You'll be excited to hear that the delicious harisseh cake can be stored for up to a week!

Just keep it in an airtight container at room temperature, and it'll stay fresh and moist. Isn't that great news?

You can enjoy the soft, sweetness of this traditional semolina cake for days.

Just be sure to savor every bite – it's too good to let it go to waste!

Is Harisseh a Traditional Dessert From a Specific Region?

Ooh, you're in for a real treat! Harisseh is a delightful traditional dessert that originated in the Middle East.

Advertisement

It's a semolina-based cake with a mouthwatering, dense texture and a unique flavor profile. Depending on the region, it can be flavored with rose water, orange blossom water, or even spices like cinnamon.

No matter where it's from, this sweet treat is sure to delight your taste buds and transport you to a world of rich, cultural history.

Can I Use a Different Type of Sweetener Instead of Sugar?

Sure, you can absolutely use a different sweetener instead of sugar in your recipe!

Honey, maple syrup, or even agave nectar would work great. The key is to adjust the amount you use, as these alternative sweeteners can be more intense than regular sugar.

Have fun experimenting and find the flavor that suits your taste buds best.

Advertisement

Just be sure to keep a close eye on the texture and consistency as you make the switch.

Happy baking!

What Is the Purpose of the Rose Water in This Recipe?

Rose water adds a lovely, delicate floral flavor to many Middle Eastern desserts. When you use it in your baking, it transports you to a fragrant, exotic world.

The gentle rose scent in your dish creates a sense of warmth and comfort, elevating the overall experience. Plus, the rose water pairs beautifully with the rich, nutty flavors of the semolina in this recipe.

Just a touch goes a long way, so you'll enjoy the subtle yet captivating essence it brings to your dessert.

Advertisement

Continue Reading

Affiliate Disclaimer
As an affiliate, we may earn a commission from qualifying purchases. We get commissions for purchases made through links on this website from Amazon and other third parties.

Advertisement

Vetted

top local car washes top local car washes
Vetted2 months ago

14 Best Car Washes Near You for a Sparkling Clean Ride

I discovered the 14 best car washes near you that promise a sparkling clean ride, and you won't want to...

top mops for 2024 top mops for 2024
Vetted2 months ago

The 15 Best Mops of 2025 – Your Ultimate Guide to a Spotless Home

Find the perfect mop for your cleaning needs in 2025, and discover how these top choices can revolutionize your home...

top women s fragrances 2024 top women s fragrances 2024
Vetted2 months ago

15 Best Perfumes for Women in 2025 – A Fragrance Guide You Can’t Miss

Keen to discover the top 15 perfumes for women in 2025? Uncover unique scents that will elevate your fragrance game!

top local bars guide top local bars guide
Vetted2 months ago

14 Best Bars Near You for an Unforgettable Night Out

Looking for the perfect bar to elevate your night out? Discover the 14 best spots that promise unforgettable experiences!

luxurious beard oil selection luxurious beard oil selection
Vetted2 months ago

15 Best Beard Oils for a Luxurious Grooming Experience in 2025

Shop the 15 best beard oils for a luxurious grooming experience in 2025 and discover which ones will elevate your...

top college laptops 2024 top college laptops 2024
Vetted2 months ago

15 Best College Laptops of 2025: The Ultimate Guide for Students

With our guide to the 15 best college laptops of 2025, discover which powerful models will elevate your academic experience...

waterproof mascaras for tears waterproof mascaras for tears
Vetted2 months ago

15 Best Waterproof Mascaras That Will Survive Any Tear-Jerker

Outstanding waterproof mascaras await to keep your lashes flawless through any emotional moment; discover which ones made the top 15...

top flavorful disposable vapes top flavorful disposable vapes
Vetted2 months ago

15 Best Disposable Vapes of 2025: Top Picks for Flavor and Convenience

Prepare to discover the 15 best disposable vapes of 2025 that blend exceptional flavor and convenience, but which ones truly...

refreshing lunch salad ideas refreshing lunch salad ideas
Vetted2 months ago

15 Best Salads Near You That Will Freshen Up Your Lunch Routine

Transform your lunch with the 15 best salads nearby that will tantalize your taste buds and leave you craving more...

top convertible car seats top convertible car seats
Vetted2 months ago

15 Best Convertible Car Seats of 2025 – Safety and Comfort for Your Little One

Get ready to discover the top 15 convertible car seats of 2025 that blend safety and comfort—find out which models...

delicious fast food breakfast delicious fast food breakfast
Vetted2 months ago

15 Best Fast Food Breakfast Options That Will Make Your Mornings Delicious

Uncover the 15 best fast food breakfast options that will transform your mornings into a delicious experience you won't want...

stylish contacts for vision stylish contacts for vision
Vetted2 months ago

14 Best America’s Contacts for Clear Vision and Style

Browse through the 14 best contact lenses in America for clear vision and style, and discover which one perfectly complements...

Trending