Korean Cuisine
Seaweed Rolls: How to Make These Crispy Korean Favorites
Unleash the flavors of Korea with homemade seaweed rolls, a delectable snack that combines crisp nori, fresh fillings, and easy-to-follow instructions.
Seaweed rolls, also known as gimbap in Korea, are a delicious and healthy snack you'll love! These crispy treats combine the crunch of nori sheets with fresh, flavorful fillings like veggies, protein, and sauces. They're easy to make at home – just soak the seaweed, spread on rice, add your favorite toppings, and roll it up. Seaweed rolls are packed with vitamins, minerals, and fiber, making them a guilt-free snack. Plus, they're super versatile, perfect for parties, picnics, or a quick bite. You'll be rolling up these Korean favorites in no time – let's dive into the full recipe and step-by-step instructions!
Key Takeaways
- Seaweed rolls, known as gimbap in Korea, are a versatile and nutritious snack featuring crisp nori sheets, sushi rice, and diverse fillings.
- To make seaweed rolls, soak nori sheets, spread rice, add fillings, and roll tightly, ensuring a secure wrap for optimal texture and flavor.
- Experiment with a variety of fillings, including fresh vegetables, proteins, and sauces, to create unique and customizable seaweed roll combinations.
- Slice the rolls diagonally with a sharp, wet knife for a clean presentation, and serve immediately with dipping sauces for the best experience.
- Seaweed rolls are a popular social food, suitable for gatherings, parties, and family celebrations, offering a communal dining experience with their crisp texture and savory flavors.
History
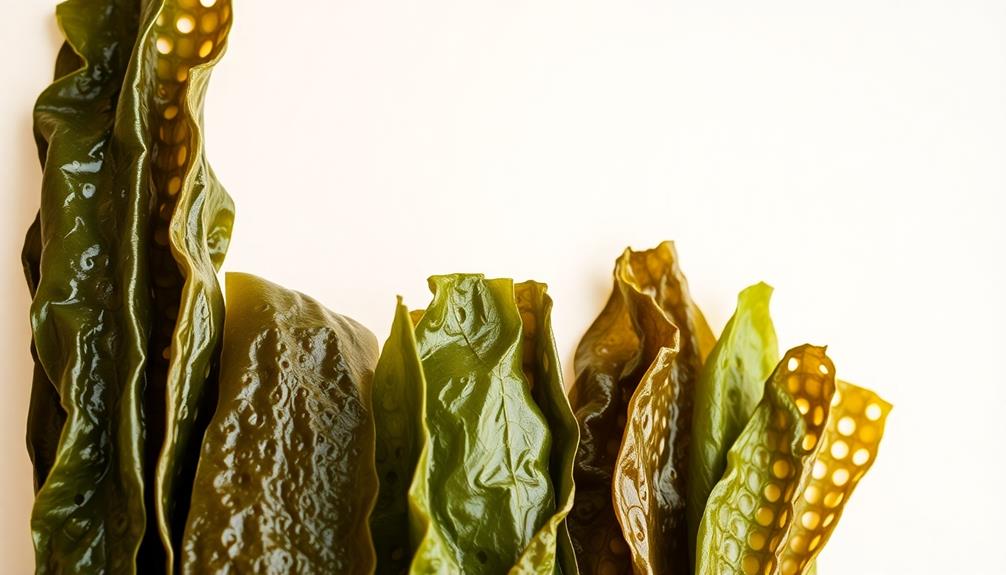
Thought to have originated in ancient China, seaweed rolls have long been a staple in Asian cuisine.
These crunchy, savory treats have a fascinating history that spans centuries and cultures. Traditionally, seaweed rolls were made using simple ingredients like dried seaweed, rice, and vegetables.
Over time, the recipe evolved, with creative chefs adding their own unique twists.
In Korea, seaweed rolls became particularly popular, known as gimbap.
These colorful rolls often feature a variety of fillings, from spicy tuna to pickled radish. They're a beloved snack for families and friends, perfect for picnics, parties, or just a quick, satisfying bite.
Today, seaweed rolls can be found in Asian markets and restaurants around the world, shared and enjoyed by people of all ages.
Whether you're new to the world of seaweed rolls or a seasoned fan, their rich history and delicious flavors are sure to delight your taste buds.
Recipe
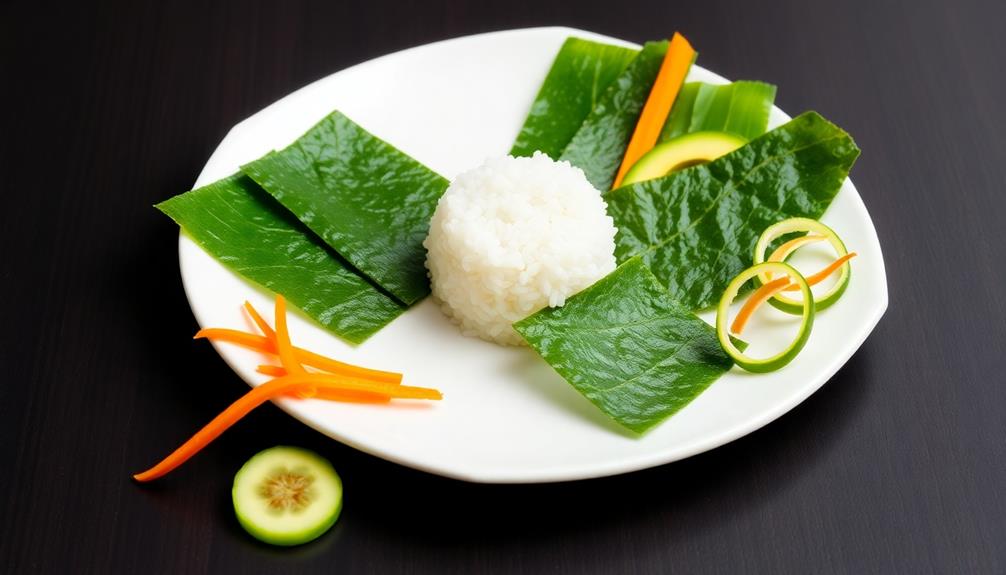
Seaweed rolls are a delightful, nutritious, and versatile dish that can be enjoyed as an appetizer, snack, or even a light meal. The combination of crisp nori sheets, fragrant sushi rice, and fresh, flavorful fillings creates a harmonious blend of textures and tastes.
The process of making seaweed rolls, also known as sushi rolls or maki, may seem daunting at first, but with a little practice, it becomes a rewarding and satisfying culinary experience. The joy of crafting these delicate rolls lies not only in the final product but also in the act of creating something visually appealing and pleasing to the palate.
Ingredients:
- 2 cups sushi rice
- 4 sheets of nori (seaweed sheets)
- 1 avocado, sliced
- 1 cucumber, julienned
- 1 carrot, julienned
- 4 oz cooked crab meat or imitation crab
- Soy sauce, for serving
Cooking Instructions:
Cook the sushi rice according to package instructions. Allow it to cool slightly, then spread it evenly on a baking sheet or large plate.
Place a nori sheet shiny-side down on a bamboo sushi mat. Wet your hands and spread a thin layer of rice over the nori, leaving a 1-inch border at the top. Arrange your desired fillings in a line across the center of the rice.
Using the sushi mat, carefully roll the nori tightly around the fillings, pressing gently to secure the roll. Slice the rolled sushi into 6-8 pieces and serve with soy sauce.
Tips:
For best results, use a sharp knife and wet it before slicing the rolls to prevent the rice from sticking.
Additionally, consider experimenting with different fillings, such as thinly sliced cucumber, avocado, cooked shrimp, or even spicy tuna, to create your own unique seaweed roll variations.
Enjoy your homemade seaweed rolls with family and friends, and savor the flavors of this delightful Japanese-inspired dish.
Cooking Steps
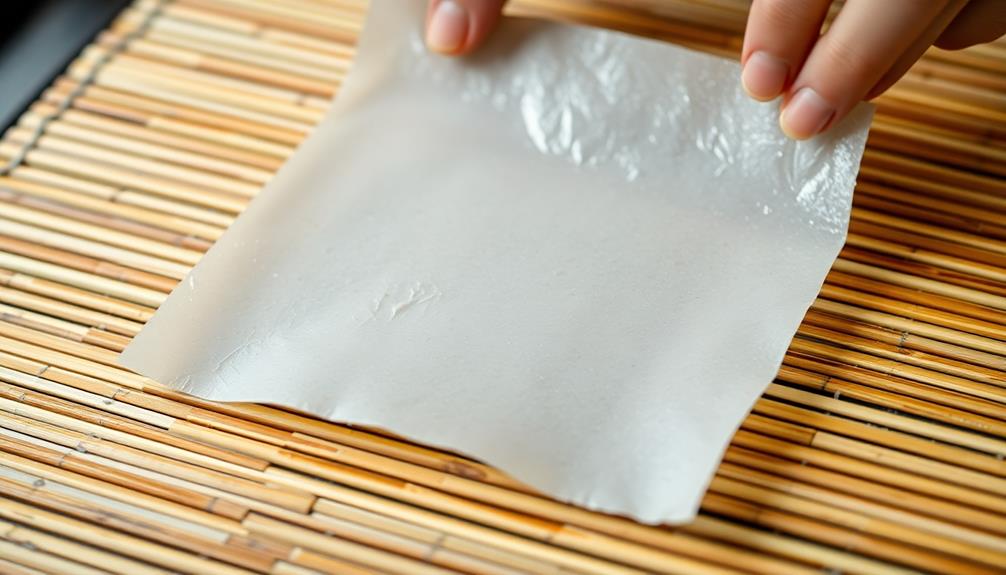
Soak the seaweed sheets in water until pliable, then spread the rice mixture evenly across the surface.
Carefully roll the seaweed sheets tightly, and cut the rolls diagonally for a beautiful presentation.
Serve immediately with your desired dipping sauce and enjoy this delightful, homemade treat!
Step 1. Soak Seaweed Sheets in Water
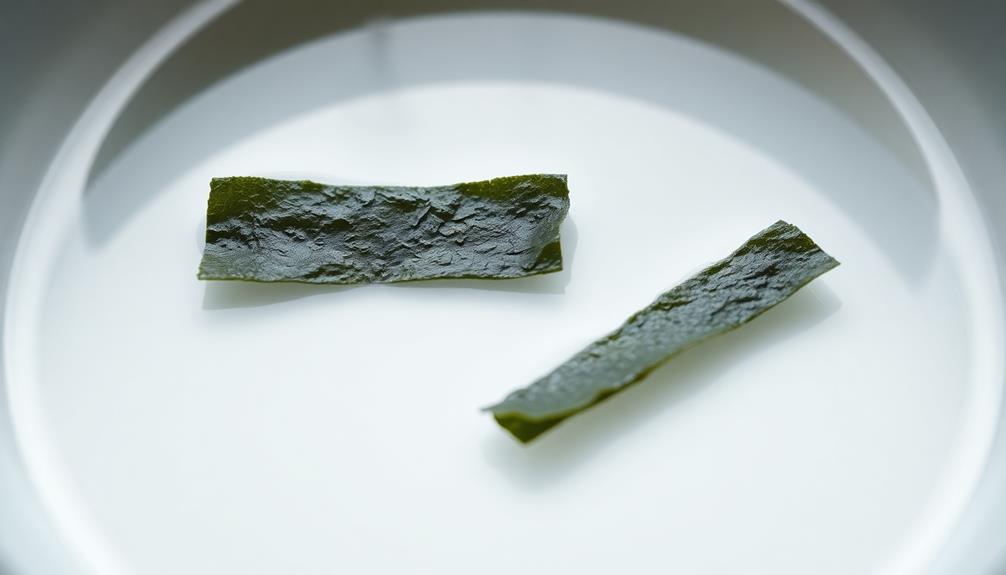
To begin, soak the seaweed sheets in water for a few minutes. This helps them become soft and pliable, making them easier to work with when rolling up your delicious seaweed rolls.
Submerge the sheets completely and let them sit until they've softened, about 3-5 minutes. Gently pat the sheets dry with a clean towel or paper towels. Be careful not to tear them!
Once they're ready, you can start assembling your rolls. Lay a softened sheet flat on your work surface. Add your favorite fillings, like seasoned rice, crunchy veggies, or savory meats.
Carefully roll up the sheet, tucking in the sides as you go. Secure the roll with a toothpick or small piece of nori. Repeat with the remaining sheets and fillings.
Now your seaweed rolls are ready to be enjoyed! Crispy on the outside and bursting with flavor on the inside – a true Korean delight.
Step 2. Spread Rice Mixture Evenly
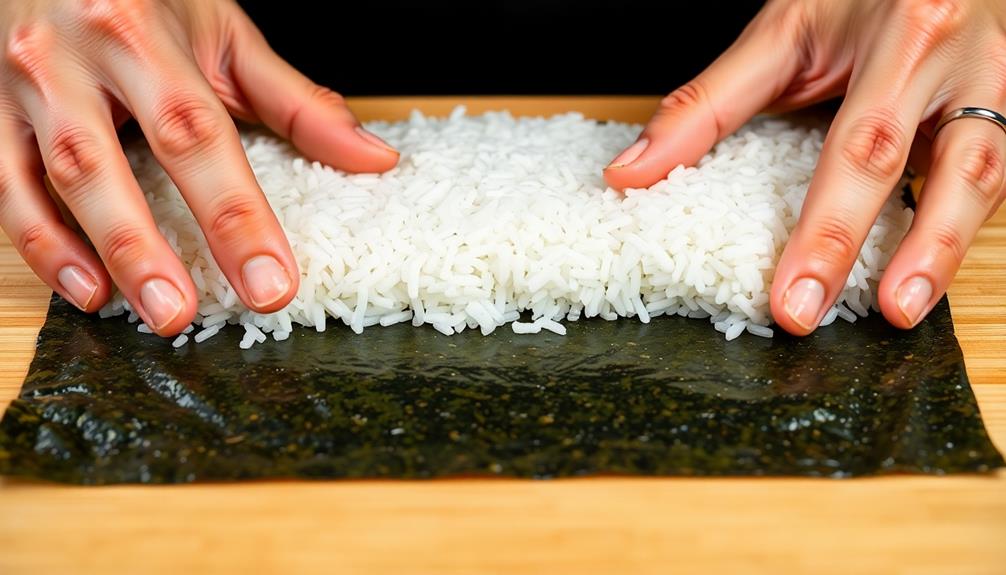
Once the seaweed sheets have softened, it's time to spread the rice mixture evenly across them. You'll want to use a spoon or your hands to gently distribute the rice, making sure it covers the entire surface.
Don't be afraid to get a little messy – this is all part of the fun! Spread the rice in a thin, even layer, leaving a small border around the edges. This will help the rolls hold their shape when you start to roll them up.
Next, you'll need to carefully flip the seaweed sheet over so the rice is facing down. This will allow you to roll the sheet tightly, with the rice on the inside.
Start at one end and gently roll the sheet up, using your fingers to guide the rice as you go. Take your time and be gentle – you don't want the rice to spill out. Once you've reached the other end, give the roll a gentle squeeze to help it hold its shape.
Step 3. Roll Seaweed Sheets Tightly
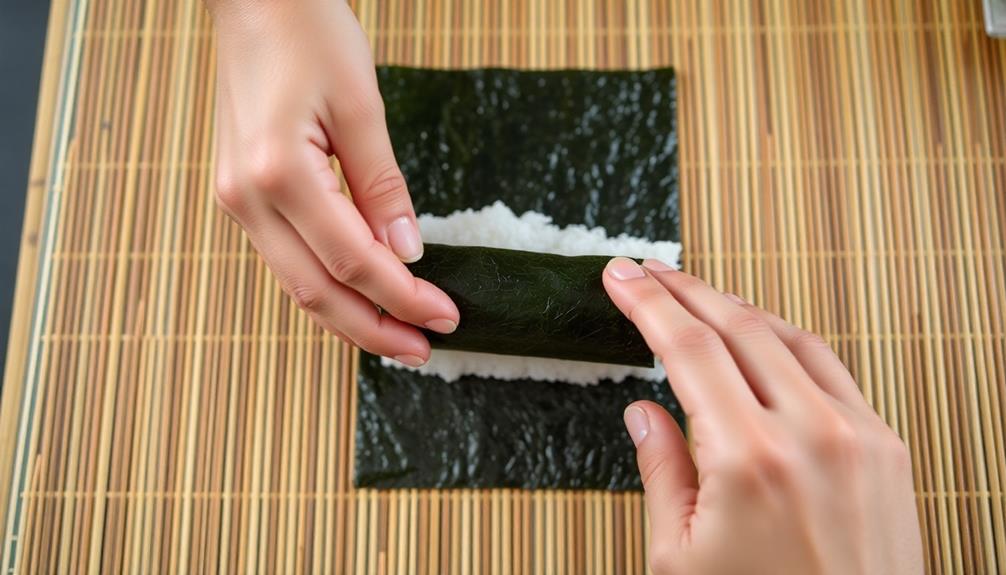
With the rice evenly spread, it's time to roll the seaweed sheets tightly.
Grab a sheet of seaweed and place it on a clean, flat surface. Gently spread a thin layer of the rice mixture over the entire surface, leaving a small border at the top.
Now, starting from the bottom, slowly roll the seaweed sheet up tightly, using your fingers to keep the roll compact. As you roll, be careful not to squeeze too hard, or the seaweed may tear. Keep rolling until you reach the top, creating a neat, cylindrical roll.
Repeat this process with each seaweed sheet, ensuring they're all rolled tightly. This will help the rolls maintain their shape and crunchy texture.
Once you've rolled all the sheets, use a sharp knife to slice each roll into bite-sized pieces, about 1-inch thick. Serve the seaweed rolls immediately, or store them in an airtight container for up to 3 days.
Enjoy these crispy, flavorful Korean delights!
Step 4. Cut Rolls Diagonally
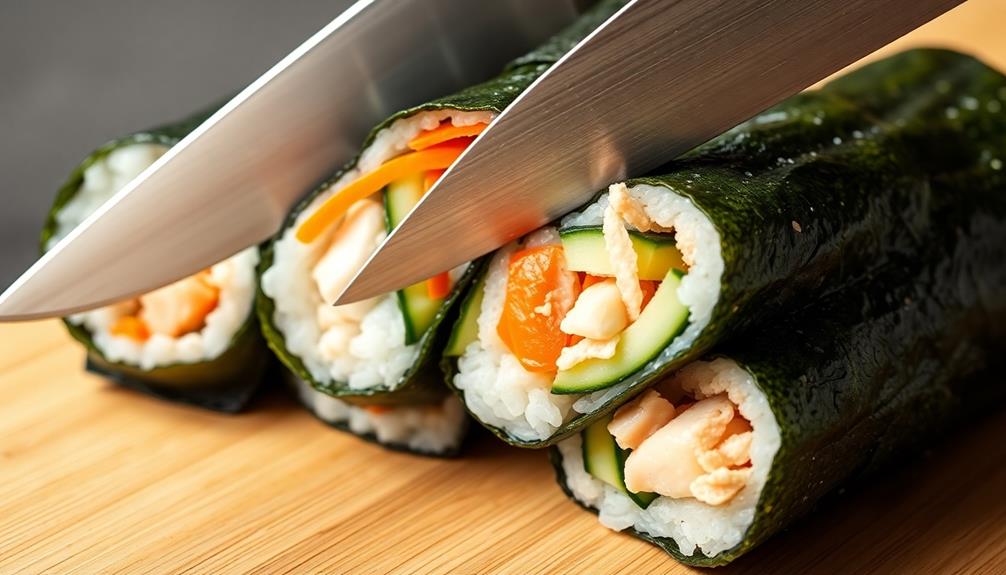
After rolling the seaweed sheets tightly, you'll want to slice each roll diagonally. This will create beautiful, bite-sized pieces that are perfect for sharing with friends and family.
Use a sharp knife to make clean, even cuts, slicing the rolls at a 45-degree angle. You'll end up with a plate of colorful, crescent-shaped seaweed rolls that are just begging to be dipped in your favorite sauces.
The diagonal cut not only makes the rolls look extra fancy, but it also helps them bite-sized and easy to eat. Pop one in your mouth and enjoy the crunchy texture and savory flavor of the seaweed, all wrapped up in a delightful little package.
Your guests are sure to be impressed by your knife skills and the stunning presentation. So, don't be afraid to get a little creative with your cuts – the more diagonal, the better!
Step 5. Serve Immediately With Desired Dipping Sauce
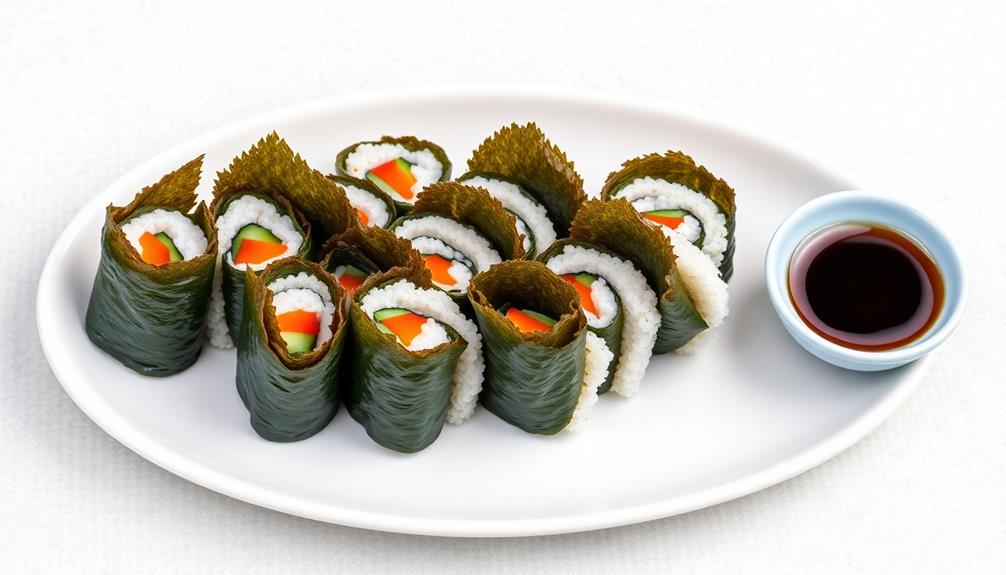
Serve the diagonally-cut seaweed rolls immediately, accompanied by your favorite dipping sauce.
These crispy Korean treats are best enjoyed fresh, with the warm, savory flavors bursting in your mouth. Don't wait – dive right in! Pair them with your favorite dipping sauce or a side of vibrant pickled vegetables for an extra punch of flavor. For those looking to get a bit creative in the kitchen, try incorporating them into a unique kimchi quesadilla fusion recipe that combines bold Korean spices with cheesy, gooey comfort. It’s a perfect way to reinvent these treats while keeping all the delicious excitement intact!
For a classic pairing, try a tangy soy sauce dip.
Simply mix soy sauce, rice vinegar, a touch of sesame oil, and a sprinkle of chopped green onions. The salty-sweet combination will perfectly complement the nori wraps.
Or, for a bolder flavor, whip up a spicy gochujang sauce.
Combine gochujang (Korean chili paste), honey, garlic, and a splash of water to create a thick, flavorful dip. The heat from the gochujang will make your taste buds tingle.
Regardless of your dipping sauce preference, serve the seaweed rolls right away, while they're still warm and crunchy.
Dip, savor, and enjoy these delightful Korean delicacies with family and friends!
Final Thoughts
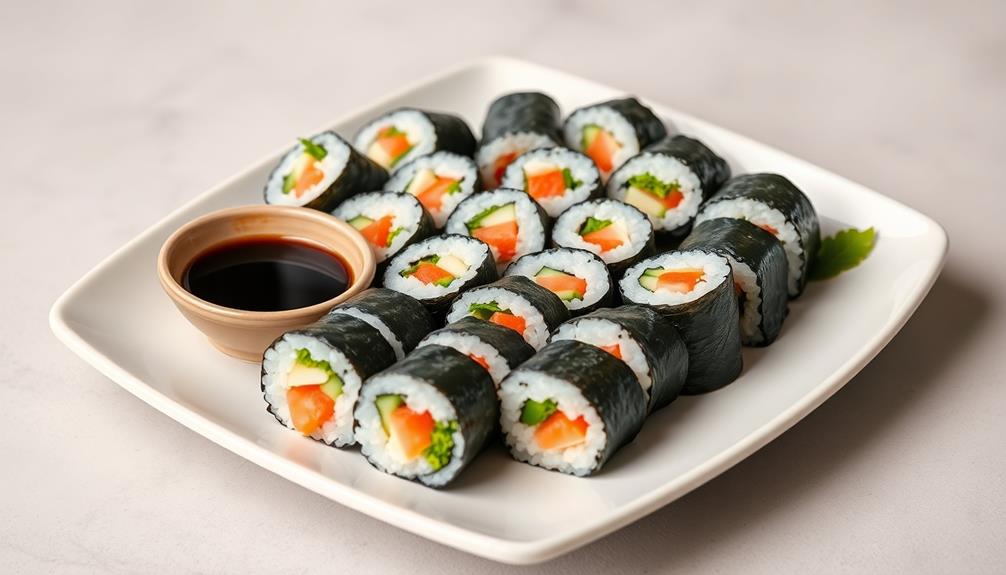
Seaweed rolls make for a delightful and nutritious snack. Not only are they packed with flavor, but they're also a great way to incorporate more wholesome ingredients into your diet.
The crispy texture and savory taste of the seaweed wrapper create a truly satisfying experience.
What's even better? Seaweed rolls are incredibly versatile. You can customize them with your favorite fillings, from fresh vegetables to delicious proteins.
Plus, they're perfect for sharing with friends and family, making them an excellent choice for gatherings and celebrations.
Frequently Asked Questions
How Long Do Seaweed Rolls Last in the Fridge?
Seaweed rolls can last up to a week in the fridge when stored properly in an airtight container. For best quality and crispness, it's best to consume them within 3-4 days of making them.
Can I Use Different Types of Seaweed for This Recipe?
Absolutely, you can use different types of seaweed for this recipe. Feel free to experiment with nori, kombu, or even wakame to create your own unique spin on these crispy Korean favorites.
What Is the Best Way to Store Leftover Seaweed Rolls?
To store leftover seaweed rolls, place them in an airtight container or resealable bag. They'll keep in the fridge for 3-4 days. Just reheat in the oven or air fryer before serving to restore their crispiness.
Can I Freeze Seaweed Rolls for Later Use?
Yes, you can freeze seaweed rolls for later use. Allow them to cool completely, then wrap them individually in plastic wrap or foil. Place the wrapped rolls in an airtight container or freezer bag and freeze for up to 3 months.
How Do I Make the Rolls Extra Crispy?
To make the rolls extra crispy, you should first ensure the seaweed is completely dry before assembling. Next, fry the rolls in hot oil until golden brown, and don't be afraid to let them sizzle for a bit.
Ji-hoon is a skilled chef specializing in traditional and modern Korean cuisine. From savory bulgogi and kimchi to hearty stews and sizzling bibimbap, Ji-hoon’s recipes bring Korea’s bold, spicy, and umami-rich flavors to your kitchen. He focuses on authentic techniques and fresh ingredients that make Korean food so vibrant and flavorful.
Korean Cuisine
Tteokbokki Carbonara: Creamy Korean Spicy Rice Cakes
You won’t believe how delicious Tteokbokki Carbonara is, blending chewy rice cakes with creamy, spicy goodness—discover the secret to this tasty dish!
Tteokbokki Carbonara is an exciting blend of chewy Korean rice cakes and a creamy, spicy sauce that makes your taste buds dance! First, you'll soak your rice cakes until they're nice and tender. Then, mix melted cheddar and cream cheese into the spicy gochujang sauce for that signature kick. Stir in some crispy bacon bits for extra flavor, and don't forget to garnish with fresh green onions! It's a fun dish to make and share with friends or family. If you're curious about the history or want tips on different ingredients, there's plenty more to discover!
Key Takeaways
- Tteokbokki Carbonara combines chewy rice cakes with a creamy, spicy gochujang sauce for a unique twist on traditional Korean street food.
- The dish includes key ingredients like cheddar cheese, cream cheese, garlic, and optional proteins such as bacon for added flavor.
- Soak rice cakes overnight for optimal texture, then boil and sauté with garlic and veggies for a flavorful base.
- Customize spice levels by adjusting gochujang and adding chili oil or gochugaru to suit your taste preferences.
- Garnish with chopped green onions or sesame seeds to enhance presentation and flavor before serving.
History
Since its emergence in the late 20th century, tteokbokki has evolved from a traditional Korean street food into a versatile dish that blends various culinary influences.
Originally, it was a simple meal made with chewy rice cakes, spicy gochujang sauce, and sometimes fish cakes. Street vendors served tteokbokki hot and fresh, making it a favorite snack for people on the go.
As time went on, creative cooks began adding new ingredients and flavors to tteokbokki, helping it grow in popularity. You might find tteokbokki with cheese, eggs, or even vegetables.
This dish has traveled beyond Korea, capturing the hearts (and taste buds) of people around the world.
Now, you can find tteokbokki in various restaurants, food festivals, and even at home. The best part? It's not just a snack anymore; it's a meal!
You might even come across unique versions like tteokbokki carbonara, blending Italian and Korean flavors.
This evolution shows how food can bring cultures together, creating something entirely new and exciting.
Cooking Steps
To whip up a delicious Tteokbokki Carbonara, start by gathering all your ingredients. You'll need chewy rice cakes, spicy gochujang, creamy heavy cream, garlic, and some delicious veggies like green onions. Don't forget your favorite protein, like chicken or tofu!
First, boil a pot of water and add the rice cakes. Cook them for about 5 to 7 minutes until they're soft and chewy.
While that's happening, heat a pan over medium heat and add a splash of oil. Toss in your garlic and veggies, stirring until they're fragrant and tender.
Next, add your cooked rice cakes to the pan. Stir in the gochujang for a spicy kick, then pour in the heavy cream. Mix everything really well, letting it bubble gently. If you want it extra creamy, add more cream!
Finally, season with salt and pepper, and toss in your protein.
Once everything's combined and heated through, sprinkle some chopped green onions on top for a fresh touch. Serve your Tteokbokki Carbonara hot, and enjoy the perfect blend of spicy and creamy flavors! You're gonna love it!
Step 1. Soak Rice Cakes Overnight
Start by soaking the rice cakes overnight to ensure they soften perfectly for your Tteokbokki Carbonara. This step is super important because it helps the rice cakes become chewy and delicious!
Just grab a bowl and fill it with enough water to completely cover the rice cakes. Make sure the rice cakes are fully submerged; this way, they'll soak up all that moisture and get nice and plump.
If you're in a hurry, you can soak them for at least 30 minutes, but overnight is best for that perfect texture.
After soaking, you'll notice they've become softer and easier to work with. When you're ready to cook, drain the water and rinse the rice cakes gently under cool water. This keeps them from sticking together.
Now, they're ready to join your amazing Tteokbokki Carbonara! So, while you're dreaming about all the creamy, spicy goodness to come, take a moment to appreciate how simple soaking these rice cakes can be.
It's a small step that makes a huge difference in your dish. Happy cooking!
Step 2. Add Cheddar Cheese Mixture
Now that you've prepped your rice cakes, it's time to whip up the savory cheddar cheese mixture that'll elevate your Tteokbokki Carbonara. Start by grabbing a medium-sized bowl. Toss in a generous amount of grated cheddar cheese—about one to two cups should do the trick. You can add cream cheese, too, for extra creaminess!
For a nutritious twist, consider incorporating chia seeds for weight loss, which can enhance the dish's fiber content and promote satiety.
Next, pour in some milk, around half a cup, and stir it all together until you get a smooth, cheesy blend. If you want a little zing, sprinkle in some garlic powder or a pinch of pepper. This will make your mixture burst with flavor!
Once it's all mixed, place your bowl in the microwave for about 30 seconds. This will help melt the cheese, making it easier to combine later. After microwaving, give it a good stir again; it should be nice and gooey.
Now, you're ready to combine this cheesy goodness with your rice cakes! This mixture will create a rich and delicious sauce that's sure to delight your taste buds. So, grab your rice cakes and get ready for the next delicious step!
Step 3. Mix in Spicy Sauce
With your cheesy mixture ready, it's time to introduce the spicy sauce that will give your Tteokbokki Carbonara its signature kick. Grab your gochujang, the spicy and sweet Korean red chili paste, and add a few tablespoons to the mixture. This sauce is what makes your dish unique and oh-so-delicious!
Next, pour in some heavy cream to balance the heat from the gochujang. Stir it all together until you see a beautiful, creamy consistency. You want everything to blend perfectly, so take your time and mix well.
If you like things a bit spicier, feel free to add a splash of chili oil or extra gochugaru for more flavor. Remember, you can always adjust the heat to match your preference!
Once you've mixed in the sauce, let it simmer on low heat for a few minutes. This will help all those yummy flavors come together. Keep stirring occasionally to ensure it doesn't stick to the bottom of the pan.
The smell will be amazing, and you'll be so excited for the next step—adding those crispy bacon bits!
Step 4. Stir in Cooked Bacon Bits
As your sauce simmers and fills the kitchen with irresistible aromas, it's the perfect moment to stir in those crispy bacon bits.
Grab your cooked bacon, which should be nicely browned and crunchy. If you haven't cooked it yet, now's a great time to fry it up in a pan until it's golden and delicious. Once you have your bacon ready, crumble it into smaller pieces.
Now, gently add the bacon bits to the bubbling sauce. This step is exciting because the bacon adds a rich, smoky flavor that perfectly complements the creamy sauce.
Use a spatula to mix everything together carefully. You want every piece of tteokbokki to get coated in that luscious sauce, and the bacon to spread out evenly, too.
Keep stirring for a minute or two, allowing the flavors to blend together. You can almost taste the magic happening!
The bacon will mingle with the spicy sauce, creating a mouthwatering combination you won't forget. Once everything is well mixed and heated through, you're just a step away from making this dish even more delightful!
Get ready for the finishing touches that'll make this meal shine.
Step 5. Garnish With Green Onions
To elevate your Tteokbokki Carbonara, sprinkle freshly chopped green onions over the dish just before serving. This simple step adds a burst of color and flavor that makes your meal even more delicious. Green onions, also known as scallions, have a mild taste that complements the creamy sauce and spicy rice cakes perfectly.
Additionally, incorporating fresh ingredients like green onions can enhance your meal's nutritional profile, potentially providing benefits such as improved mood and cognitive function, as seen in the health benefits of coffee coffee's health benefits.
To prepare the green onions, grab a bunch and rinse them under cool water. Pat them dry with a paper towel. Next, using a sharp knife, chop the green onions into small pieces. You can use both the green and white parts, but if you prefer a milder flavor, stick to just the green tops.
Once your Tteokbokki Carbonara is ready, ladle it into bowls or onto plates. Now, take your chopped green onions and sprinkle them generously on top. You'll see the vibrant green color pop against the creamy sauce, making your dish look even more appetizing.
Plus, the fresh taste will give your meal that extra kick! Enjoy every bite, and don't forget to share your creation with friends or family—they'll love it just as much as you do!
Final Thoughts
Tteokbokki Carbonara offers a delightful fusion of flavors that's sure to impress anyone who tries it. Imagine creamy, cheesy goodness mixed with the spicy kick of Korean rice cakes!
It's a fun twist on traditional pasta and a great way to explore new tastes in your kitchen. You can whip this up for family dinners or impress your friends at your next gathering.
As you make this dish, don't forget to enjoy the process. Cooking is all about creating and sharing joy! Plus, you can customize it. Want more spice? Add extra gochujang! Prefer it milder? Just use less. It's your dish, so make it your own.
When you serve Tteokbokki Carbonara, feel free to sprinkle on some green onions or sesame seeds for that extra crunch. Not only do they look great, but they also add more flavor!
Frequently Asked Questions
Can I Use Gluten-Free Rice Cakes for Tteokbokki Carbonara?
Yes, you can use gluten-free rice cakes for your dish. They'll still provide that chewy texture you love. Just check the ingredients to ensure they meet your dietary needs and enjoy your cooking!
What Type of Cheese Works Best in This Recipe?
For this recipe, you'll want to use a creamy cheese like mozzarella or a combination of mozzarella and Parmesan. They melt well and add a delicious richness to your dish, enhancing the overall flavor.
How Can I Adjust the Spice Level?
To adjust the spice level, you can reduce the amount of gochujang or add more cream to dilute it. Alternatively, try mixing in some sugar or honey to balance the heat without losing flavor.
Can Leftovers Be Stored, and How Long Do They Last?
Absolutely, you can store leftovers. Just place them in an airtight container and refrigerate. They'll last about three to four days. If you want to extend their life, consider freezing them for up to three months.
What Side Dishes Pair Well With Tteokbokki Carbonara?
You'll love pairing tteokbokki carbonara with kimchi for a spicy kick, or pickled radishes for a refreshing crunch. Try a simple salad or fried dumplings to complement the creamy texture and enhance your meal experience.
Ji-hoon is a skilled chef specializing in traditional and modern Korean cuisine. From savory bulgogi and kimchi to hearty stews and sizzling bibimbap, Ji-hoon’s recipes bring Korea’s bold, spicy, and umami-rich flavors to your kitchen. He focuses on authentic techniques and fresh ingredients that make Korean food so vibrant and flavorful.
Korean Cuisine
Pickled Radish Wrap: The Perfect Korean Side Dish for BBQ
Bold and tangy, pickled radish wraps elevate your BBQ experience—discover how to create this vibrant side dish that will leave everyone craving more!
Pickled radish wraps are an exciting and tasty Korean side dish that makes your BBQ meal even better! You'll love the crunchy, tangy radishes wrapped in fresh lettuce with grilled meat and a tasty sauce. It's easy to make: just slice radishes thin, mix them with vinegar, sugar, and salt, then let them sit for a day. After that, layer everything in a lettuce leaf, roll it up, and enjoy! These wraps not only add color to your plate but also a burst of flavor. Stick around to uncover more fun facts and tips about this delightful dish!
Key Takeaways
- Pickled radish wraps provide a tangy and refreshing contrast to rich grilled meats, enhancing the overall BBQ experience.
- The vibrant colors and crunchy texture of the wraps add visual appeal and excitement to any BBQ spread.
- Made with fresh ingredients like radishes, lettuce, and sesame seeds, they offer a nutritious and flavorful side dish option.
- These wraps are versatile and can be paired with various grilled items, making them a perfect accompaniment for any BBQ menu.
- The pickling process enhances the radishes' flavor, making them a delightful addition to communal dining and cultural gatherings.
History
The pickled radish wrap has roots that trace back to traditional Asian cuisines, where pickling was a method of preserving vegetables. Imagine long ago, when families wanted to keep their food tasty and fresh! They discovered that pickling radishes added a delicious crunch and tangy flavor. This practice became popular in many Asian countries, especially Korea, where it turned into something special.
As you delve into the history, you'll find that pickled radishes were often served as side dishes. They balanced rich flavors from grilled meats and spicy dishes. People loved the bright color and zesty taste, making meals more exciting.
Over time, these wraps evolved, combining pickled radishes with rice, meat, and other tasty ingredients.
Today, when you enjoy a pickled radish wrap, you're not just tasting a delicious dish; you're connecting with a rich culinary history. You're part of a tradition that's been passed down through generations.
Cooking Steps
Start by gathering your ingredients and tools for this delicious pickled radish wrap. You'll need pickled radish, fresh lettuce leaves, sliced grilled meat, and a tasty sauce, like gochujang. Don't forget your cutting board and a sharp knife!
First, lay out your lettuce leaves on the cutting board. These will be the wrap that holds all the flavors together. Next, take a piece of pickled radish and place it right in the center of the leaf. The bright color of the radish will make your wrap look amazing!
Then, add a slice of your grilled meat on top of the radish. If you love a little kick, drizzle some gochujang sauce over the meat.
Now, it's time to wrap it up! Gently fold the sides of the lettuce over the filling, then roll it from the bottom up, like a burrito.
Once you've wrapped it all up, take a big bite! The crunchy radish, fresh lettuce, and savory meat blend together in a burst of flavor.
Enjoy this fun and tasty side dish at your next BBQ, and watch everyone smile as they dig in!
Step 1. Slice Radishes Thinly
For a perfect pickled radish wrap, slice the radishes thinly to ensure they absorb the flavors of the pickling brine and maintain a pleasant crunch.
Start by choosing fresh, firm radishes. Rinse them under cold water to remove any dirt, and then pat them dry with a clean towel. Grab a sharp knife or a mandoline slicer for precision.
Carefully trim off the tops and bottoms of each radish. Next, hold the radish steady and slice it into thin rounds, about 1/8 inch thick. If you're using a mandoline, be cautious and use the safety guard to protect your fingers. Thin slices are key because they soak up the pickling mixture better, making each bite bursting with flavor.
Once you've sliced all your radishes, take a moment to admire your handiwork. They should look bright and colorful, ready to be transformed into a delicious side dish.
Step 2. Mix With Seasoning Ingredients
The radishes' vibrant colors and fresh crunch deserve a flavorful pickling brine that elevates your wrap. To create this tasty mixture, start by gathering your seasoning ingredients. You'll need rice vinegar for tanginess, sugar for sweetness, and a pinch of salt to balance the flavors.
Mix about half a cup of rice vinegar, a quarter cup of sugar, and a teaspoon of salt in a bowl. Stir it well until the sugar and salt dissolve completely.
Next, add a splash of sesame oil for a nutty aroma, and if you like a little kick, toss in some red pepper flakes. This adds a delightful zing to your pickled radishes!
Now, take your sliced radishes and gently toss them in this flavorful brine. Make sure every slice gets coated in the sweet and sour goodness.
Let the radishes soak for at least 30 minutes. This is when the magic happens! The radishes will soak up all those wonderful flavors, making them a perfect addition to your BBQ wraps.
You'll love how the crunchiness pairs with the seasoning, creating a delicious bite that everyone will enjoy!
Step 3. Pack Radishes in Jar
Once you've let those radishes soak up all that delicious brine, it's time to pack them into a jar. Grab a clean glass jar with a tight lid; this will keep your radishes fresh and tasty.
Start by taking the radishes out of the brine. Gently shake off any extra liquid so they're not too soggy. If you're interested in enhancing the flavors, consider adding a drop or two of essential oils like lemon or peppermint for a refreshing twist, keeping in mind the safety measures regarding their use.
Now, layer the radishes in the jar, standing them up if you can. You want to make sure they fit snugly but not too tight. If you have any leftover brine, pour it over the radishes until they're completely covered. This helps them stay crunchy and flavorful.
Next, you can add some extras if you like! A few slices of garlic or a sprinkle of sesame seeds can add a nice touch.
Once everything's in the jar, make sure the lid is on tight.
Now, feel free to admire your work! You've just packed your radishes, and they're ready for their next adventure. It's exciting to think about how delicious they'll be in your next BBQ dish. Your taste buds will thank you later!
Step 4. Refrigerate for 24 Hours
After packing your radishes in the jar, it's time to let them chill in the refrigerator for 24 hours. This is the most important step in the pickling process! When you allow the radishes to sit, they soak up all those delicious flavors from the vinegar, sugar, and spices. You'll be amazed at how they transform!
Make sure to seal the jar tightly, so no air gets in. This helps the radishes stay crunchy and flavorful. While they're chilling, you can daydream about all the tasty meals you'll enjoy with your pickled radish wraps. Maybe you'll whip up some BBQ or even a tasty rice dish!
After 24 hours, take a peek inside the jar. You should see vibrant, colorful radishes that smell amazing! The waiting might feel a bit tough, but trust us, it's worth it.
You'll be rewarded with perfectly pickled radishes that are tangy, zesty, and just the right crunch. So, go ahead and mark the calendar; your radishes will be ready to rock your next meal! Enjoy this exciting journey of flavors as you prepare to serve your delicious creation.
Step 5. Serve With Sesame Seeds
Now that your pickled radishes have had time to soak up all those incredible flavors, it's time to take your wraps to the next level by adding sesame seeds.
These little seeds aren't just tasty; they add a nice crunch and a delightful nutty flavor that perfectly complements the tangy radishes.
To start, grab a small bowl and pour in some sesame seeds. You can use either white or black seeds, depending on what you like best.
If you want to get fancy, lightly toast the seeds in a dry skillet for a few minutes. This step brings out their flavor even more!
Next, take your pickled radish wraps and sprinkle a generous amount of sesame seeds on top.
Don't be shy—make sure every bite will have that crunchy goodness. You might even want to roll the wraps up a little tighter to keep everything inside.
Final Thoughts
Wrapping up your culinary adventure with pickled radish wraps, you'll likely find that these vibrant bites offer a delightful balance of flavor and texture. They bring a pop of color to your table and a burst of tangy goodness in every bite!
These wraps are more than just food; they're a fun way to enjoy BBQ meals with family and friends. You can easily customize your pickled radish wraps. Whether you fill them with your favorite grilled meats or veggies, the options are endless.
Plus, they add a refreshing crunch that makes any meal feel special. Don't forget to sprinkle on some sesame seeds for an extra nutty flavor!
When you serve these wraps, you're not just sharing a dish; you're sharing a piece of Korean culture. So, next time you fire up the grill, think about including these delicious pickled radish wraps.
They're sure to impress your guests and make your BBQ even more memorable. So grab your radishes, get creative, and enjoy the delightful experience of cooking and sharing this tasty side dish!
Happy cooking!
Frequently Asked Questions
Can I Use Other Vegetables in Place of Radish?
Absolutely! You can use other vegetables like cucumbers, carrots, or bell peppers instead of radish. Just slice them thin, pickle them briefly, and enjoy the fresh crunch and flavor they bring to your dish!
How Long Does Pickled Radish Last in the Fridge?
Pickled radish typically lasts about two to four weeks in the fridge when stored in an airtight container. Just make sure to check for any off smells or changes in texture before using it.
Is Pickled Radish Gluten-Free?
Yes, pickled radish is gluten-free! Most recipes use simple ingredients like radishes, vinegar, salt, and sugar. Always check labels if you're buying pre-made versions, just to ensure there's no hidden gluten in the mix.
What Are the Health Benefits of Pickled Radish?
You'll find pickled radish offers several health benefits. It aids digestion, boosts gut health with probiotics, provides antioxidants, and can help reduce inflammation. Plus, its low-calorie content makes it a great addition to your diet.
Can I Make Pickled Radish in Advance?
Absolutely, you can make pickled radish in advance! Just prepare them a few days ahead, store in the refrigerator, and enjoy their crunch and flavor at your convenience. They'll stay fresh and tasty for weeks!
Ji-hoon is a skilled chef specializing in traditional and modern Korean cuisine. From savory bulgogi and kimchi to hearty stews and sizzling bibimbap, Ji-hoon’s recipes bring Korea’s bold, spicy, and umami-rich flavors to your kitchen. He focuses on authentic techniques and fresh ingredients that make Korean food so vibrant and flavorful.
Korean Cuisine
Fresh and Crunchy: Korean Radish Wraps Perfect for BBQ
Make your BBQ unforgettable with fresh and crunchy Korean radish wraps that tantalize the taste buds—discover how to create this delightful treat!
Korean radish wraps are a fun and crunchy treat perfect for your BBQ! To make them, slice fresh radishes thinly and season them with salt, sugar, and lemon juice for a zesty kick. Layer a lettuce leaf and your choice of marinated meat, tofu, or veggies on each radish slice. Wrap them up tight and serve with a tasty dipping sauce like soy sauce or spicy gochujang. These wraps not only bring great flavor but also make sharing food exciting! Want to add more fun to your BBQ? Keep going, there's even more to discover!
Key Takeaways
- Korean radish wraps are a refreshing and crunchy addition to any BBQ, balancing rich flavors of grilled meats.
- They are customizable, allowing for various fillings like marinated beef, grilled chicken, or tofu, appealing to diverse tastes.
- Fresh radish slices are seasoned for optimal flavor, providing a tangy and sweet bite that enhances the overall dish.
- Serve with a homemade dipping sauce for an extra layer of flavor, encouraging guests to share and enjoy together.
- These wraps promote social interaction, creating a fun and memorable dining experience for guests at your BBQ.
History
Exploring the history of Korean radish wraps, known as "sigeumchi," reveals a rich culinary tradition that dates back centuries. These delicious wraps have their roots in Korean culture, where food isn't just about eating; it's an experience shared with family and friends.
The use of radishes in Korean cuisine dates back to ancient times, when farmers discovered how to grow these crunchy veggies in the fertile soil of Korea.
Sigeumchi became popular because they add a refreshing touch to meals. People love how the cool, crisp radish balances out rich flavors in dishes like grilled meats.
Over the years, families passed down recipes, making slight changes to suit their tastes. You might find that some use different fillings or seasonings, but the main idea stays the same: fresh ingredients wrapped in radish create a delightful bite!
As you dive into the world of sigeumchi, you'll notice how they reflect the heart of Korean cooking—simplicity, freshness, and togetherness.
Ingredients:
- 1 large Korean radish (mu)
- 2 cups cooked and seasoned beef, pork, or tofu
- 1 cup lettuce leaves (such as romaine or butter)
- 1 cup pickled vegetables (such as carrots and cucumbers)
- 1/2 cup sesame oil
- 2 tablespoons gochujang (Korean chili paste)
- 2 tablespoons soy sauce
- 1 tablespoon honey or sugar
- 1 tablespoon sesame seeds
- Fresh herbs (such as perilla or cilantro, for garnish)
Instructions:
Begin by washing and peeling the Korean radish, then cut it into thin, long strips using a mandoline or knife. The strips should be about 1/4 inch thick to ensure they're pliable enough for wrapping.
Prepare your desired fillings by marinating your protein of choice and chopping any vegetables. Arrange your prepared fillings on a serving platter alongside the radish strips.
To make the dipping sauce, mix the sesame oil, gochujang, soy sauce, honey, and sesame seeds in a bowl. Serve everything together, allowing guests to build their own wraps by layering the fillings onto the radish strips, drizzling with sauce, and folding them up.
Extra Tips:
To enhance the flavor of your wraps, try grilling the radish strips lightly for a few minutes before serving; this will add a smoky note that pairs beautifully with the fillings.
Additionally, feel free to experiment with different herbs and pickled vegetables for added texture and taste. If you have leftovers, the radish strips can be stored in the fridge for a couple of days, making them a quick and healthy snack or side dish.
Enjoy your Korean radish wraps at your next BBQ, and watch them become a crowd favorite!
Cooking Steps
To create delicious Korean radish wraps for your BBQ, start by gathering all your ingredients and tools. You'll need fresh Korean radish, your favorite BBQ protein, lettuce leaves, garlic, and some spicy sauce. Having everything ready makes cooking easier!
First, wash and peel the radish. Then, slice it into thin strips, about the size of a finger. These strips are going to be your crunchy wrap!
Next, cook your BBQ protein until it's golden and juicy. You can use chicken, beef, or even tofu.
While it cooks, prepare your lettuce leaves. Gently rinse them, pat them dry, and lay them out on a plate. Once your protein is done, take it off the heat and let it cool for a moment.
Now comes the fun part! Take a piece of lettuce, place a radish strip inside, add some protein, a slice of garlic, and drizzle with spicy sauce. Roll it up like a burrito, and you're ready to enjoy!
Share with your friends and family, and watch their faces light up with delight as they taste these yummy wraps. Enjoy your BBQ!
Step 1. Prepare the Radish Slices
Preparing the radish slices is a crucial step in making delicious Korean radish wraps for BBQ. First, you'll want to choose fresh, firm Korean radishes, which are usually white or pale green. Grab a sharp knife and carefully slice off both ends of the radish.
Then, cut the radish into thin, even slices. Aim for about ¼ inch thick; this way, they'll be sturdy enough to hold your tasty fillings. As you slice, keep an eye on your fingers! It's important to be safe while having fun in the kitchen.
If you find it tricky to slice evenly, you can use a mandoline slicer for more consistency. Just be extra careful with the sharp blade.
Once you've got all your slices ready, arrange them on a clean plate. They should look bright and inviting, ready to be transformed into something amazing. The crunchiness of the radish will add a wonderful texture to your wraps.
Plus, they're low in calories, making your BBQ both delicious and healthy. Now that your radish slices are prepped, you're one step closer to enjoying those yummy wraps!
Step 2. Season the Radish Slices
Seasoning the radish slices is essential for enhancing their flavor and making your wraps truly delightful.
To get started, grab a bowl and add a pinch of salt. The salt will help draw out some moisture from the radishes, making them even crunchier. Sprinkle in a little sugar too! It might sound weird, but sugar balances the saltiness and adds a slight sweetness that's yummy.
Next, squeeze half a lemon into the mixture. The tangy flavor of lemon brightens everything up and makes the radishes taste fresh and zesty.
Mix everything together until the radish slices are evenly coated. You want every slice to soak up that flavor!
Let the seasoned radishes sit for about 10 minutes. This waiting time allows them to soak up all those delicious flavors. While you wait, you can think about all the tasty fillings you'll add to your wraps later.
When the timer dings, you'll see the radishes looking even more inviting. Their vibrant colors and enticing aroma will make you excited to eat.
Trust me; these seasoned radish slices will add a fantastic crunch and flavor to your wraps!
Step 3. Assemble the Wraps
Now that the radish slices have soaked up all that delicious flavor, it's time to assemble your wraps. Grab your beautifully seasoned radish slices and lay them flat on a clean surface. You'll want to create a little assembly line to make this fun and easy.
Next, take a fresh lettuce leaf and place it right on top of the radish slice. This adds a nice crunch and keeps everything together. If you like a little extra zing, sprinkle some chopped green onions or a dash of sesame seeds on top of the lettuce.
Now, fold the sides of the radish slice over the filling, just like wrapping a present. You can use your fingers to tuck everything in snugly. Make sure it's secure so you won't lose any tasty bites while you enjoy your BBQ.
Once you've assembled a few wraps, stack them up on a plate and get ready to impress your friends and family!
These colorful wraps not only look amazing but are also packed with flavor. You'll be so excited to share these with everyone at your next BBQ gathering!
Step 4. Add Protein Filling
To elevate your Korean radish wraps, it's time to add a protein filling that complements the flavors perfectly. You can choose from a variety of proteins like marinated beef, grilled chicken, or even tofu for a vegetarian option.
Start by cooking your chosen protein. If you're using beef or chicken, marinate it in a tasty sauce for at least 30 minutes. This will enhance the flavor and make it more delicious.
Once your protein is cooked, slice it into thin strips. This makes it easier to wrap and enjoy!
Now, take your assembled radish wraps and place a few pieces of the protein in the center. Don't overload it, though! You want to keep each wrap manageable and easy to eat.
Next, you can sprinkle in some fresh veggies like shredded carrots or cucumber for extra crunch. Add a bit of sesame seeds for a nice touch, too.
After you've added your protein and veggies, carefully fold the radish around the filling. Your wraps are now ready to shine at your BBQ! Enjoy the mix of flavors and textures as you take your first bite!
Step 5. Serve With Dipping Sauce
A flavorful dipping sauce can elevate your Korean radish wraps to new heights. You'll want to make a delicious sauce that perfectly complements the crunchy radish and savory filling. One popular choice is a simple soy sauce blend.
Start with a small bowl and mix together two tablespoons of soy sauce, one tablespoon of rice vinegar, and a teaspoon of sesame oil. For an extra kick, add a pinch of red pepper flakes or a dash of chili oil. Including fresh ingredients in your wraps can enhance the nutritional value, as they're rich in antioxidants and vitamins, which can promote overall health high levels of antioxidants.
Once your sauce is ready, it's time to serve! Place the dipping sauce in a small dish alongside your radish wraps. As your friends and family gather around, they'll love grabbing a wrap and dipping it into the sauce. The combination of flavors will make everyone smile!
You can also try other dipping sauces, like a spicy gochujang sauce or a tangy citrus dip. Don't hesitate to experiment and find what you love best!
Final Thoughts
While you might think of BBQ as just another meal, Korean radish wraps elevate the experience by adding a unique twist. Imagine biting into a crunchy, refreshing wrap filled with your favorite BBQ flavors!
It's not just delicious; it's also fun to make and share with friends and family.
These wraps are perfect for any gathering, whether it's a big party or a small get-together. You can customize them however you like, using different meats, veggies, or dipping sauces.
Everyone can create their own tasty combination, making every bite special. Plus, they're a great way to introduce something new to your BBQ spread.
Don't forget to prepare some extra wraps, as they'll disappear quickly! When you serve these Korean radish wraps, you'll surprise everyone with a delightful twist on the classic BBQ meal.
So, gather your ingredients, roll up your sleeves, and get ready to impress your guests. You'll create not just food, but lasting memories filled with laughter and joy.
Enjoy the fresh crunch and the smiles around the table! Happy grilling!
Frequently Asked Questions
What Types of Fillings Work Best With Korean Radish Wraps?
When filling Korean radish wraps, you'll love using marinated meats, fresh vegetables, or spicy tofu. Experiment with different combinations like kimchi and sesame oil for added flavor. Your taste buds will thank you!
Can I Prepare Radish Wraps in Advance for a BBQ?
Yes, you can prepare radish wraps in advance for a BBQ. Just make sure to store them in an airtight container in the fridge. This way, they'll stay fresh and crunchy until you're ready to serve.
Are Korean Radish Wraps Gluten-Free?
Yes, Korean radish wraps are gluten-free! You'll find they use fresh ingredients like radishes, vegetables, and sauces without gluten-containing elements. Just check labels on any pre-made sauces to ensure they meet your dietary needs.
How Do I Store Leftover Radish Wraps?
To store leftover radish wraps, place them in an airtight container in the fridge. They'll stay fresh for up to three days. Just make sure to separate any fillings to maintain their crunchiness.
What Beverages Pair Well With Korean Radish Wraps?
When you're enjoying Korean radish wraps, try pairing them with light beverages like iced green tea, soju, or a crisp lager. These drinks enhance the flavors and keep your palate refreshed while you savor each bite.
Ji-hoon is a skilled chef specializing in traditional and modern Korean cuisine. From savory bulgogi and kimchi to hearty stews and sizzling bibimbap, Ji-hoon’s recipes bring Korea’s bold, spicy, and umami-rich flavors to your kitchen. He focuses on authentic techniques and fresh ingredients that make Korean food so vibrant and flavorful.
-
Brazilian Cuisine3 months ago
Tacacá
-
Brazilian Cuisine3 months ago
Caldeirada
-
Polish Comfort Food3 months ago
Krupnik (Barley Soup)
-
Brazilian Cuisine3 months ago
Chicken in Brown Sauce
-
Southern Comfort Food3 months ago
Cheese Straws
-
Polish Comfort Food3 months ago
Vegetable Salad
-
African Cuisine3 months ago
Kedjenou (Ivory Coast)
-
Ethiopian Cuisine3 months ago
Ye’selata (Ethiopian Salad)