Korean Cuisine
Bulgogi Tacos: Korean-Mexican Street Food
Blending the bold flavors of Korean bulgogi and the vibrant taco, this culinary fusion creates a street food experience that will captivate your taste buds.
Get ready to embark on a flavorful culinary journey as you explore the captivating blend of Korean and Mexican cuisines in the form of mouthwatering bulgogi tacos – a delightful street food sensation that's taking the world by storm! Discover the rich history of bulgogi, a beloved Korean dish fit for royalty, now infused with the zesty flavors of Mexico. Savor the tender, marinated beef, the warmth of soft tortillas, and the vibrant crunch of fresh veggies. Top it off with aromatic herbs and a drizzle of bold sauces for an explosion of taste in every bite. Prepare to be wowed by this unique fusion masterpiece!
Key Takeaways
- Bulgogi, a Korean marinated beef dish, has gained global popularity and inspired fusion creations like bulgogi tacos, blending Korean and Mexican cuisines.
- Key ingredients for bulgogi tacos include thinly sliced marinated beef, soft tortillas, fresh vegetables, and optional additions like sauces, cheese, and garnishes.
- The cooking process involves slicing the beef, marinating it in a flavorful soy-based mixture, grilling the meat, and assembling the tacos with the desired toppings.
- Bulgogi tacos offer a visually appealing presentation with vibrant colors and textures, creating an inviting and satisfying dining experience.
- The popularity of bulgogi tacos reflects the growing appreciation for fusion cuisine, cultural exchange, and the creativity in recipe development that transcends geographical boundaries.
History
Bulgogi, the beloved Korean dish of thinly sliced, marinated beef, has a rich history dating back centuries. This delectable dish was first enjoyed by the Korean royal family and eventually spread to the common people.
Over time, the recipe has evolved, with variations in the marinade and cooking methods.
What's especially exciting is how bulgogi has recently made its way onto the global culinary stage, inspiring creative fusion dishes like bulgogi tacos! These tasty treats combine the savory flavors of bulgogi with the zesty, handheld convenience of tacos.
It's the perfect marriage of Korean and Mexican cuisines, blending cultures and satisfying taste buds everywhere.
As you bite into a bulgogi taco, you'll savor the tender beef, the tangy marinade, and the fresh crunch of the taco shell.
It's a delightful adventure for your senses, transporting you from the streets of Seoul to the vibrant food stalls of Mexico.
Get ready to embark on a flavorful journey with every bite!
Recipe
Bulgogi, the beloved Korean beef dish, takes on a delightful twist when transformed into tacos. This fusion of flavors creates a delightful and unique culinary experience that's sure to impress your taste buds.
The key to achieving the perfect Bulgogi Tacos lies in the balance of sweet, savory, and tangy elements. The tender, marinated beef is the star of the show, complemented by a range of vibrant toppings that add depth and complexity to the dish.
- Flank steak or ribeye, thinly sliced
- Soy sauce
- Brown sugar
- Garlic, minced
- Ginger, grated
- Sesame oil
- Vegetable oil
- Green onions, thinly sliced
- Flour tortillas or corn tortillas
- Shredded cabbage or lettuce
- Carrots, julienned
- Kimchi (optional)
- Sesame seeds (for garnish)
Begin by marinating the thinly sliced beef in a mixture of soy sauce, brown sugar, garlic, ginger, and sesame oil for at least 30 minutes, or up to 24 hours for maximum flavor.
Heat a large skillet or wok over high heat, add a drizzle of vegetable oil, and sauté the marinated beef until it's beautifully caramelized and cooked through. Remove the beef from the heat and toss with the sliced green onions.
To assemble the tacos, warm the tortillas and layer them with the saucy bulgogi, shredded cabbage or lettuce, julienned carrots, and a spoonful of kimchi, if desired.
Sprinkle with sesame seeds for a touch of nutty crunch. Serve immediately and enjoy the harmonious blend of flavors and textures in every bite.
Cooking Steps
First, you'll need to slice the beef into thin, uniform strips so it cooks quickly and evenly.
Next, you'll marinate the beef in a delightful bulgogi sauce, letting the flavors soak in.
Then, you'll grill the marinated beef over high heat, getting those perfect charred edges.
Time to assemble your tacos – layer the grilled beef, then top it all off with some fresh, fragrant cilantro.
Step 1. Slice Beef Into Thin Strips
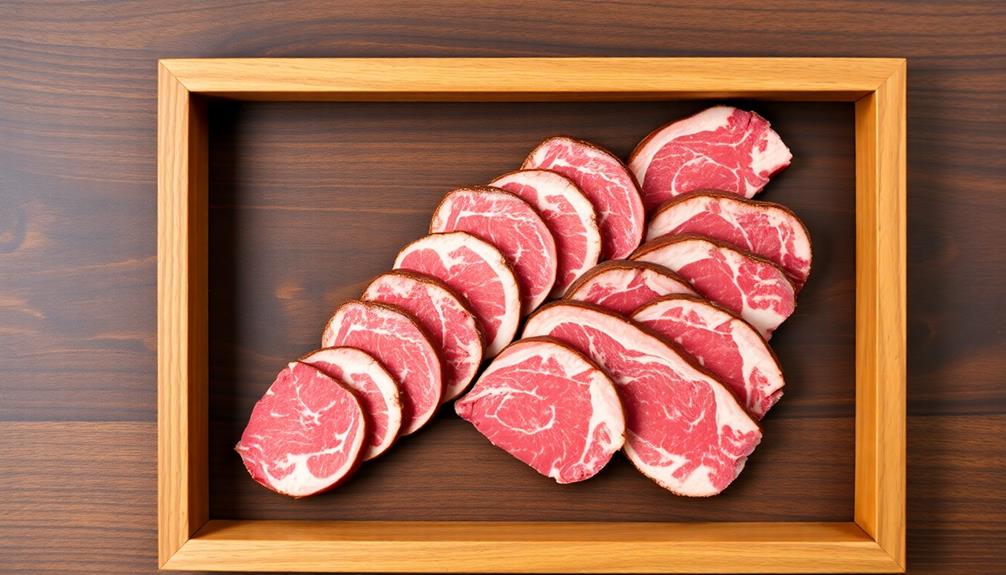
To begin the slicing process, take the beef and, with a sharp knife, carefully slice it into thin, uniform strips. You'll want to slice across the grain of the meat for the most tender texture. Go slowly and pay close attention – you don't want any uneven pieces!
Once you've got a nice pile of thin, evenly-sliced beef, you're ready for the next step.
The key is to slice the beef into strips that are around 1/4-inch thick. This will ensure the meat cooks quickly and becomes wonderfully tender and juicy.
As you slice, try to keep the strips around 2-3 inches long. This size is perfect for packing into the tacos without being too bulky or difficult to eat.
With a little practice, you'll be slicing that beef like a pro in no time! Just remember to take your time and be careful with that sharp knife.
Step 2. Marinate Beef in Bulgogi Sauce
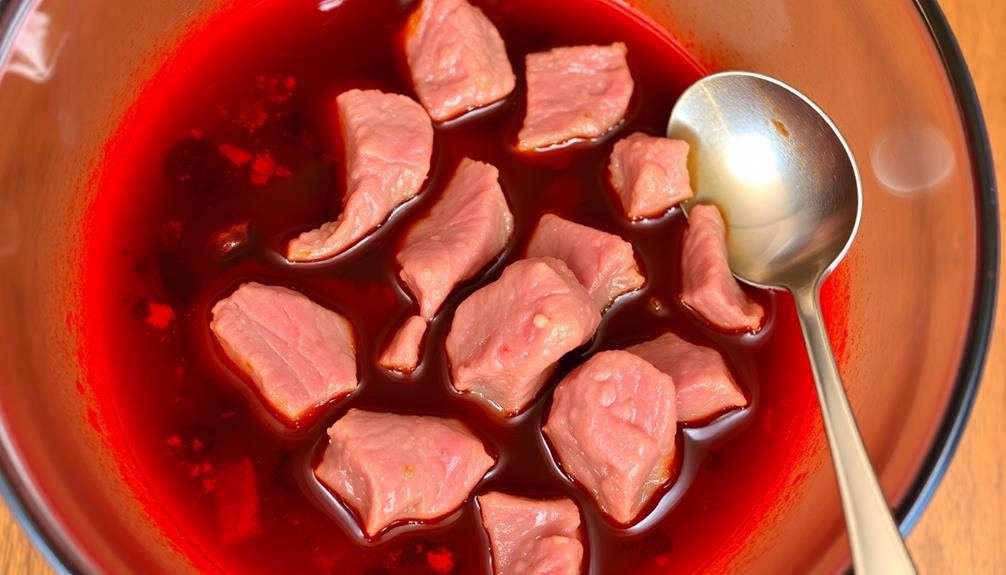
With the beef sliced, you'll want to prepare the bulgogi sauce. This savory, sweet, and slightly spicy marinade will infuse the meat with tons of flavor.
Start by gathering up some soy sauce, brown sugar, garlic, ginger, and a pinch of red pepper flakes. Whisk all these ingredients together in a bowl until the sugar has dissolved.
Now, add your sliced beef strips and toss them around until they're fully coated. Cover the bowl and let the beef marinate in the fridge for at least 30 minutes, or up to a few hours if you have the time. This gives the flavors a chance to really soak in. The longer you marinate, the more flavor-packed your bulgogi will be!
When you're ready to cook, simply heat up a skillet over medium-high heat and add the marinated beef. Sizzle it up until the meat is nicely browned on the edges.
Now your bulgogi is ready to stuff into those warm tortillas!
Step 3. Grill Marinated Beef Over High Heat
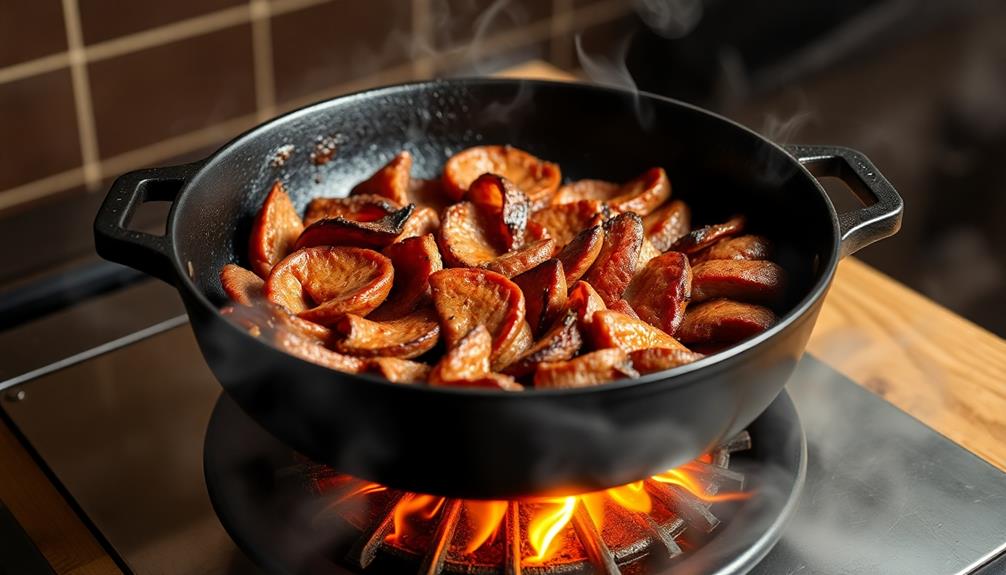
Preheat your grill to high heat. Once it's nice and hot, it's time to get those marinated beef strips sizzling! Carefully place the beef onto the grates, making sure not to overcrowd the grill. You'll want to hear that satisfying sizzle as the meat hits the hot surface.
Flip the beef strips every 2-3 minutes, keeping a close eye to prevent any burning. The high heat will help develop a delicious char and caramelization on the outside, while leaving the inside juicy and tender. Use tongs to handle the beef – no need to poke and prod with a fork, which can release all those tasty juices.
After about 8-10 minutes of grilling, your bulgogi beef should be cooked through. Transfer it to a cutting board and let it rest for a minute or two before slicing into bite-sized pieces.
Now you're ready to assemble those amazing bulgogi tacos! Get ready for an explosion of Korean-Mexican flavor in every bite.
Step 4. Assemble Tacos With Grilled Beef
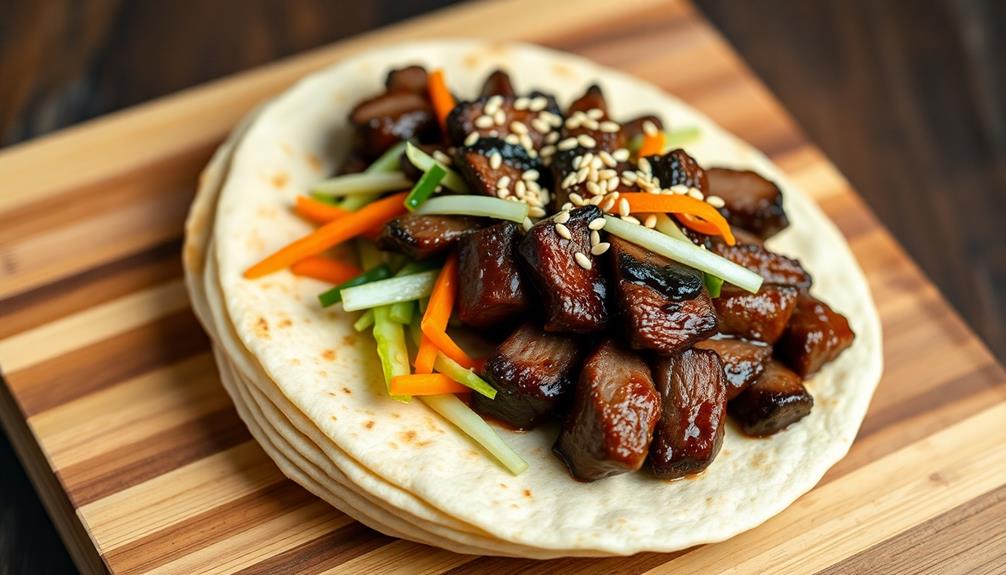
Take your warm, soft taco shells and layer them with the juicy, grilled bulgogi beef.
The savory, slightly sweet flavors of the marinated meat pair perfectly with the light and airy texture of the taco shells.
Sprinkle on some fresh, crisp cabbage for a satisfying crunch, and don't forget the tangy, creamy sour cream to balance out the dish.
Top it all off with a sprinkle of toasted sesame seeds for a nutty finish.
Wrap your hands around the taco and take a big bite, letting the flavors explode in your mouth.
The tender beef, crunchy cabbage, and cool sour cream create a medley of textures that will have you coming back for more.
These bulgogi tacos are a delightful fusion of Korean and Mexican cuisines, perfect for a fun and flavorful meal.
Step 5. Garnish With Fresh Cilantro
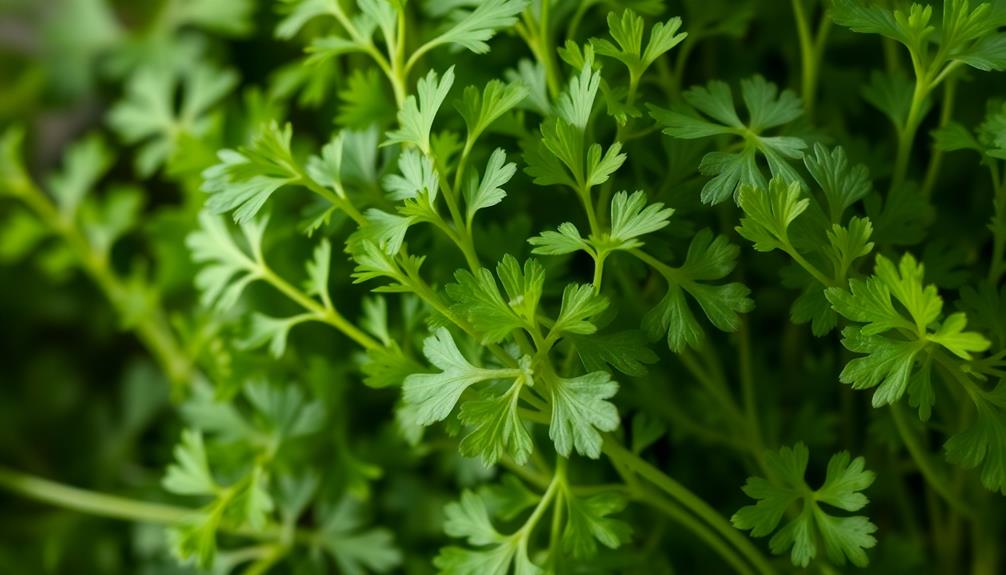
Top the tacos with a sprinkle of fresh cilantro. This fragrant herb will add a bright, zesty flavor that perfectly complements the savory bulgogi beef.
Gently pinch the cilantro leaves between your fingers and scatter them evenly over the assembled tacos. The green flecks will make your creation look extra vibrant and appetizing.
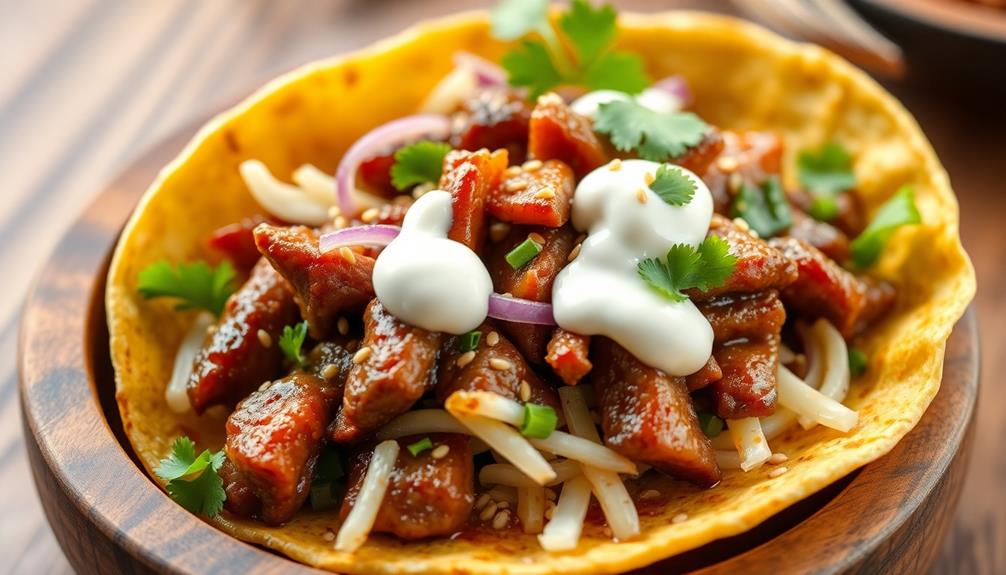
As you take your first bite, you'll get a wonderful mix of textures – the tender, marinated beef, the crisp taco shell, and the soft crunch of the cilantro. The cilantro's distinctive taste will dance on your tongue, cutting through the richness of the meat. It's a match made in taco heaven!
Garnishing with fresh herbs is an easy way to elevate any dish. Cilantro is especially perfect for these bulgogi tacos, adding a refreshing touch that balances the bold Korean flavors.
Go ahead and sprinkle it on generously – the more the merrier when it comes to this zesty green goodness!
Final Thoughts
As you wrap up your culinary adventure with these delectable bulgogi tacos, let's take a moment to reflect on the journey.
Wasn't it just amazing how the savory, tender bulgogi meat blended so perfectly with the crunchy, fresh vegetables and zesty sauce? The flavors danced on your tongue, creating a symphony of deliciousness that truly satisfied your cravings.
Now, as you savor the final bites, you can't help but feel a sense of accomplishment.
You've mastered the art of Korean-Mexican fusion, crafting a dish that's both authentic and innovative. The vibrant colors, the enticing aromas, and the satisfying textures all come together to make these bulgogi tacos a true culinary triumph.
As you lick the last bits of sauce from your fingers, you can't wait to share this recipe with your friends and family, introducing them to the amazing world of Korean-inspired street food.
These bulgogi tacos are sure to become a new favorite, leaving your taste buds craving more of this delightful fusion.
Frequently Asked Questions
What Is the Best Way to Store Leftover Bulgogi?
To store leftover bulgogi, place it in an airtight container and refrigerate it for up to 3-4 days. You can also freeze it for longer storage, but be sure to thaw it before reheating.
Can I Substitute Beef for Pork in This Recipe?
You can certainly substitute pork for beef in this recipe. The pork will have a slightly different flavor, but it will still work well with the traditional Korean seasonings and taco toppings. Feel free to experiment with the protein.
How Do I Reheat the Bulgogi Without Making It Dry?
To reheat the bulgogi without making it dry, you can try steaming it or gently warming it in a skillet with a splash of water or broth. This will help keep the meat moist and flavorful.
Can I Make the Taco Shells From Scratch?
You can absolutely make the taco shells from scratch! It's a simple process that allows you to customize the flavors and textures to your liking. Give it a try for a truly homemade taco experience.
How Long Will the Bulgogi Stay Fresh in the Fridge?
Your homemade bulgogi will stay fresh in the fridge for 3-4 days if you store it properly in an airtight container. Be sure to let it cool completely before refrigerating to prevent bacterial growth.
Alejandro is a vibrant advocate of traditional Mexican cuisine. From spicy tacos and enchiladas to rich moles and tamales, Alejandro’s dishes celebrate the colorful, bold flavors of Mexico. His recipes bring authentic Mexican street food and home-cooked meals to your table, with a focus on using fresh, flavorful ingredients.
Korean Cuisine
Injeolmi: the Chewy Korean Rice Cake With Nutty Flavors
Taste the delightful chewiness of Injeolmi, the nutty Korean rice cake, and uncover the secrets behind this beloved dessert. You won’t want to miss it!
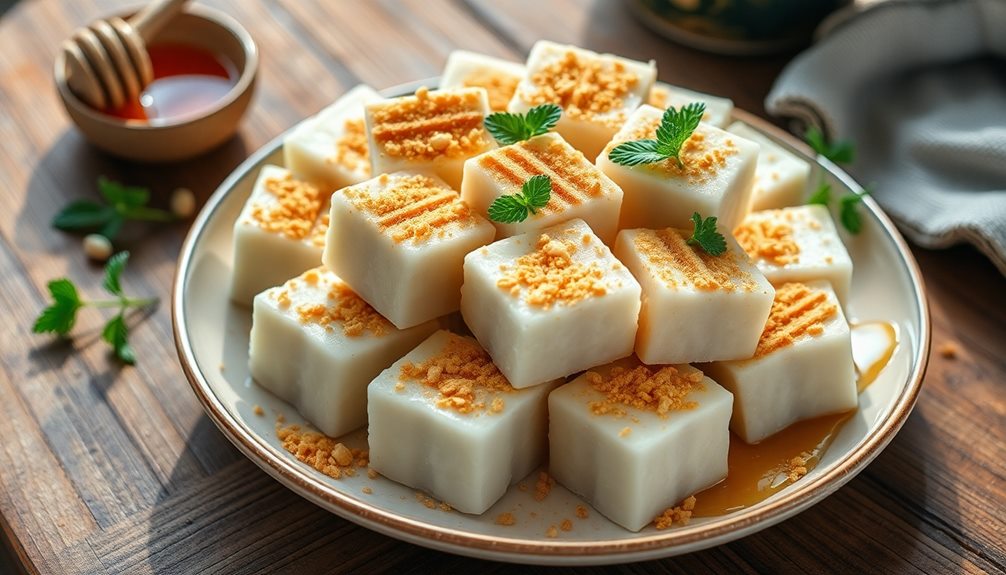
Injeolmi is a tasty Korean rice cake that you're sure to enjoy! It's made from glutinous rice, giving it that delightful chewy texture you can't resist. The nutty flavor comes from being coated in powdered soybean flour, adding a special twist. Traditionally, people enjoy it during celebrations, symbolizing good fortune and togetherness with loved ones. Making Injeolmi can be a fun family activity too, where you can get creative with different toppings and fillings, like sweet red bean paste. It's perfect for sharing during parties and can be paired with tea for an even better treat. Discover more about this unique dessert!
Key Takeaways
- Injeolmi is a traditional Korean rice cake made from glutinous rice, known for its chewy texture and nutty flavor from soybean flour.
- Originating from the Goryeo Dynasty, Injeolmi is associated with good fortune and is commonly served during celebrations and family gatherings.
- The preparation involves soaking, steaming, pounding the rice, filling with red bean paste, and dusting with soybean flour.
- Injeolmi's unique flavor and texture make it an ideal treat for sharing during social occasions, enhancing communal enjoyment.
- It can be enjoyed plain or with various fillings and is often paired with tea for a complete experience.
History
Injeolmi, a traditional Korean rice cake, has a history that spans centuries, with roots tracing back to the Goryeo Dynasty (918-1392). Imagine people back then, enjoying this chewy treat during special celebrations and festivals!
Injeolmi was made from glutinous rice, which is sticky and perfect for creating a delightful texture. Over time, this rice cake became a staple in Korean culture, loved for its nutty flavor and delightful chewiness.
As you explore its history, you'll find that Injeolmi is often associated with good fortune and happiness. Families would make it to celebrate important events, like weddings or the birth of a child. The cake is often coated in powdered soybean flour, giving it that unique taste you might recognize.
Today, Injeolmi is still cherished, not just in Korea but around the world. People enjoy it during holidays and family gatherings, keeping traditions alive.
Whether you've tasted it before or are just learning about it, there's something special about this rice cake that connects generations. So next time you see Injeolmi, remember it's not just a treat; it's a piece of history, bringing joy to many!
Cooking Steps
To make this delicious chewy rice cake, you'll need to start by preparing the ingredients. Gather sweet rice flour, water, and sugar. You'll also want some soybean flour and a pinch of salt for that nutty flavor.
First, mix the sweet rice flour with water in a bowl until it's smooth. Pour this mixture into a steaming dish and steam it for about 20-30 minutes, or until it's cooked through.
While it's steaming, you can prepare the soybean flour by mixing it with sugar and salt in another bowl.
Once the rice cake is ready, let it cool for a bit. Then, you'll want to take it out of the dish and cut it into bite-sized pieces. Roll each piece in the soybean flour mixture, making sure every side is coated. This gives your injeolmi that delightful nutty taste!
Now, it's time to enjoy your chewy rice cake! You can share it with friends or keep it all to yourself—no judgment here!
Just remember, injeolmi is best enjoyed fresh, so dig in while it's still soft and warm. Enjoy your tasty treat!
Step 1. Soak Glutinous Rice Overnight
Before you start making your chewy Korean rice cake, soaking the glutinous rice overnight is crucial for achieving the right texture. This step might seem simple, but it's super important! By soaking the rice, you allow it to absorb water and soften, which helps it become that delightful chewy consistency we all love.
To begin, measure out the glutinous rice you need for your recipe. It's usually about two cups, but feel free to adjust based on how much rice cake you want to make. Rinse the rice under cold water in a fine mesh strainer to remove any excess starch. This helps prevent the rice from becoming too sticky.
Next, place the rinsed rice in a large bowl and cover it with enough water, making sure it's submerged.
Now, let the rice soak for at least six to eight hours, or even overnight. This is the perfect time to dream about the delicious injeolmi you'll be making! When you wake up the next day, you'll find the rice plump and ready for the next steps.
Get excited, because you're one step closer to enjoying this tasty treat!
Step 2. Steam the Soaked Rice
Once the rice has soaked and plumped up, it's time to steam it to achieve that perfect chewy texture. First, grab a steaming basket or a heatproof plate that fits snugly in your pot. You'll want to line it with a clean cheesecloth or a damp paper towel to prevent sticking.
Now, take your soaked rice and spread it evenly in the basket. Don't worry if it looks a bit lumpy; it'll all come together soon!
Next, fill your pot with water, making sure it doesn't touch the rice. Bring the water to a gentle boil, then carefully place your steaming basket over the pot. Cover it with a lid to keep all that steam inside.
Steam the rice for about 30 to 40 minutes. You might want to check it halfway through to see if it looks nice and glossy.
When it's done, turn off the heat and let it sit for a few minutes before removing the basket. This steaming process is crucial, as it creates that chewy and soft texture everyone loves in injeolmi.
You're almost there, so get ready for the next exciting step!
Step 3. Pound the Steamed Rice
As you prepare to pound the steamed rice, make sure you have a sturdy surface and a pestle or a heavy object ready. This is where the fun begins!
First, take the hot, steamed rice and carefully place it on your surface. Remember, it'll be a bit sticky, so don't worry if it clumps together. That's normal!
Now, grasp your pestle tightly and gently start pounding the rice. You want to press down firmly but not too hard—it's all about finding the right rhythm!
As you pound, the rice will start to break down and become softer, turning into a smooth, stretchy dough. This process can be a little workout, so feel free to take breaks if your arms get tired.
Keep an eye on the texture; you want it to be pliable and chewy. If you notice any lumps, don't hesitate to give them an extra pound or two.
Once you've achieved the perfect consistency, you'll be ready for the next step in making your delicious Injeolmi. Enjoy the process, and get excited about the tasty treats ahead!
Step 4. Add Sweet Red Bean Paste
After you've pounded the rice into a smooth, chewy dough, it's time to incorporate the sweet red bean paste. This step is super fun and adds a delicious twist to your injeolmi!
First, take your sweet red bean paste and scoop out a generous amount. You can make it yourself or buy it from the store. Don't worry; either way, it'll taste great!
Next, divide your dough into equal pieces. Flatten one piece in your hand to create a little cup. Now, carefully place a spoonful of that yummy red bean paste right in the center.
Fold the edges of the dough over the paste and pinch them together. This will keep the sweet filling inside, making every bite a delightful surprise!
Repeat this for each piece of dough until you've used all the paste. It's like wrapping little gifts!
Once you're done, gently shape each piece into a round or oval form. This way, your injeolmi will look pretty and inviting.
You're almost there! Get ready for the next step, where you'll dust your chewy treats with a special flour. Yum!
Step 5. Dust With Soybean Flour
To give your injeolmi that perfect finish, you'll want to dust each piece with soybean flour. This step is super important because it adds a delicious nutty flavor and a nice texture that makes your rice cakes even more special. So, let's get started!
First, grab a plate or a shallow bowl and pour in some soybean flour. You can find this flour at Asian grocery stores, or you can make your own by grinding roasted soybeans. It's easy and fun!
Next, take each piece of your injeolmi and gently roll it in the soybean flour. Make sure every side gets coated well. This will create a lovely layer that keeps your rice cakes from sticking together.
After dusting, lay your injeolmi on a clean plate. You'll see how pretty they look, all coated in that golden flour!
Don't forget to taste a piece; it's chewy and nutty, just like you want. Finally, share your delicious injeolmi with family and friends, and watch their faces light up with joy! Enjoy your fantastic creation, and remember, injeolmi is always better when shared!
Final Thoughts
Injeolmi offers a delightful experience that captures the essence of Korean cuisine. This chewy rice cake isn't just a treat; it's a celebration of flavors and textures that makes every bite special.
When you take a piece of Injeolmi, you're tasting a tradition that's been cherished for generations!
Imagine the soft and chewy texture paired with the nutty flavor of soybean flour. It's a combination that dances on your taste buds!
Plus, it's fun to share with friends and family during special occasions or even just a cozy day at home.
Making Injeolmi can be a fun adventure, too. You can get creative with toppings or even try different fillings!
Whether you enjoy it plain or with a twist, each version remains true to its roots while inviting you to explore.
Frequently Asked Questions
Is Injeolmi Gluten-Free?
Yes, injeolmi is gluten-free since it's made from glutinous rice flour, which doesn't contain gluten. Enjoy it without worry if you're avoiding gluten, but always check for cross-contamination with other ingredients.
Can I Use Alternative Flours for Injeolmi?
Yes, you can use alternative flours for injeolmi. Try glutinous rice flour or other gluten-free options like almond or coconut flour. Just keep in mind that the texture and flavor might differ slightly from traditional recipes.
How Long Does Injeolmi Last?
Injeolmi typically lasts about three to five days when stored in an airtight container at room temperature. If you refrigerate it, it can last up to a week, but it may lose some texture.
Where Can I Buy Injeolmi?
You can buy injeolmi at Korean grocery stores, Asian markets, or specialty shops. Online options include retailers like Amazon or dedicated Korean food websites. Check local listings to find the nearest place to satisfy your cravings!
What Are Common Pairings With Injeolmi?
When enjoying injeolmi, you'll love pairing it with sweet red bean paste, honey, or even a sprinkle of powdered soybean flour. These combinations enhance its flavor and create a delightful, textured experience for your taste buds.
Ji-hoon is a skilled chef specializing in traditional and modern Korean cuisine. From savory bulgogi and kimchi to hearty stews and sizzling bibimbap, Ji-hoon’s recipes bring Korea’s bold, spicy, and umami-rich flavors to your kitchen. He focuses on authentic techniques and fresh ingredients that make Korean food so vibrant and flavorful.
Korean Cuisine
Sulung Tang: The Korean Ox Bone Soup for Warmth and Comfort
Warm your soul with Sulung Tang, a traditional Korean ox bone soup, and uncover the secrets behind its rich history and comforting flavors.
Sulung Tang is a delicious Korean ox bone soup that warms your heart and fills your belly! This comforting dish started in the Joseon Dynasty and is made by simmering beef bones for hours, creating a rich and flavorful broth. To make it, you'll soak the bones overnight, then simmer them with garlic, ginger, and other seasonings. It's often served hot, garnished with green onions, and pairs perfectly with rice and kimchi. Families enjoy it together, making it a special and cozy meal. Stick around, and you'll discover more about its history and how to make it yourself!
Key Takeaways
- Sulung Tang is a traditional Korean ox bone soup known for its nourishing qualities, especially during winter months and family gatherings.
- The soup reflects resourcefulness, using all parts of the animal, demonstrating respect for culinary resources in Korean culture.
- Main ingredients include ox bones, beef, garlic, ginger, and seasonings, simmered for hours to create a rich and flavorful broth.
- Nutritionally, Sulung Tang is high in collagen and essential amino acids, promoting joint health and digestive wellness.
- Typically served hot with steamed rice and side dishes, it embodies a communal dining experience, fostering connection among friends and family.
History
Sulung Tang has roots that stretch back centuries in Korean cuisine, often reflecting the resourcefulness of local communities. This delicious soup isn't just food; it's a warm hug on a cold day!
People began making Sulung Tang during the Joseon Dynasty, using ox bones and meat to create a rich, hearty broth. Back then, families would gather around the stove, sharing stories as they waited for the flavors to blend perfectly.
Traditionally, this dish was a way to use every part of the animal, showing respect for the resources they had. Sulung Tang became popular because it was nourishing and helped people feel better, especially during the chilly winter months.
You'll find it served in homes and restaurants alike, and the smell of simmering bones fills the air, inviting you to come closer.
As you enjoy a bowl of Sulung Tang, you're tasting history. Each spoonful connects you to the past, where families worked together to create something special.
Cooking Steps
To create a delicious bowl of Korean ox bone soup, you'll want to start by gathering all your ingredients and tools.
You'll need beef bones, water, garlic, ginger, and some green onions. Don't forget your big pot and a strainer! Once you have everything ready, it's time to get cooking.
First, soak the bones in cold water for about an hour. This helps remove any blood and impurities.
After soaking, rinse the bones well and place them in your pot. Add enough water to cover the bones completely. Bring it to a boil, and then reduce the heat to a simmer.
Next, throw in the garlic and ginger to give your soup a wonderful flavor.
Let it simmer for several hours, usually around six, to really extract the goodness from the bones. After that, strain the broth to remove the solids.
Step 1. Gather Fresh Ox Bones
When you're ready to make delicious Sulung Tang, gathering fresh ox bones is crucial for achieving that rich, hearty flavor.
Start by visiting a local butcher or a farmers' market. Look for bones that are fresh and have a good amount of marrow. The marrow adds a wonderful creaminess to the soup, so don't skip it! You can ask the butcher for specific cuts, like knuckle or neck bones, which work great for this dish.
When you choose your bones, make sure they're not discolored or dried out. You want them to look healthy and vibrant. Fresh bones should have a nice, meaty smell, so take a whiff before buying!
It's also helpful to get a mix of bones, as this will deepen the flavor of your soup.
Once you've gathered your bones, try to pick up around two to three pounds. This should be enough to create a nice, hearty soup for you and your family.
With your fresh ox bones in hand, you'll be one step closer to making a warm and comforting bowl of Sulung Tang that everyone will love!
Now, let's move on to the next exciting step!
Step 2. Soak Bones Overnight in Water
Soaking the bones overnight in water is a crucial step that helps to remove impurities and enhances the soup's flavor. This simple process is key to making your Sulung Tang delicious and comforting.
Start by placing your fresh ox bones in a large bowl or pot. Make sure the bones are completely submerged in water. You can use cold water for this step, as it helps pull out the unwanted bits and dirt.
As the bones soak, you'll notice the water might become a bit cloudy. That's perfectly normal! It means the impurities are being drawn out. Let the bones sit in the water for at least 8 hours, or even overnight if you can. This ensures that they're clean and ready for the next step in your cooking adventure.
Once the soaking time is up, carefully drain the water and rinse the bones under cold running water. This helps wash away any remaining impurities.
Now, you're all set to move on to the next exciting part of making your Sulung Tang. With clean bones, you're one step closer to a warm and hearty meal that's sure to bring comfort to your table!
Step 3. Simmer Bones for Flavor
After rinsing the bones, it's time to bring out their rich flavors by simmering them. Start by placing your cleaned bones in a large pot. Add enough water to cover them completely, then turn up the heat until the water starts to boil.
Once it's boiling, you'll want to reduce the heat to let the bones simmer gently. This slow cooking process is super important because it helps release all those tasty flavors into the water.
Let the bones simmer for at least three to four hours. You might notice some foam or scum rising to the surface. Don't worry; this is normal! Just skim it off with a spoon to keep your broth clear and clean.
As the bones cook, they'll start to give off a wonderful aroma that fills your kitchen with warmth and comfort.
Remember to check the water level occasionally. If it looks low, add a bit more water to keep everything covered.
The longer you let the bones simmer, the richer and deeper the flavor of your sulung tang will be. You're doing great, and soon you'll have a delicious broth ready for the next steps!
Step 4. Strain the Broth Thoroughly
Once your bones have simmered and released their rich flavors, it's time to strain the broth thoroughly. This step is super important because it helps you get a clear and delicious soup!
First, grab a large bowl and a fine mesh strainer or a cheesecloth. You want to make sure all those tasty bits and pieces stay out of your final soup.
Carefully pour your simmered broth through the strainer, letting it catch any leftover bone fragments, fat, or impurities. You might want to use a ladle for this part, as it makes it easier to control the flow.
Watch the steam rise, and enjoy that comforting aroma filling your kitchen!
Once you've strained everything, you can discard the solids left in the strainer. Don't worry; you've captured all the goodness in the liquid.
Now, give the broth a taste. If it's rich and savory, you're on the right track! If it feels a bit bland, don't fret; you'll add more flavor soon.
For now, just relish the fact that you've created a wonderful base for your Sulung Tang, full of warmth and comfort.
Step 5. Add Aromatics and Seasonings
Now that you've got your rich broth ready, it's time to elevate the flavor by adding aromatics and seasonings. Start by finely chopping some garlic and ginger. These two ingredients pack a punch, giving your soup warmth and depth. Toss them into the pot and let them cook for a few minutes until they become fragrant.
Next, add sliced onions and a couple of green onions, chopped into small pieces. The onions add sweetness, while the green onions bring a fresh flavor.
Don't forget to sprinkle in some salt and pepper to taste; they're essential for bringing everything together.
For an extra kick, consider adding a splash of soy sauce or a little sesame oil. These ingredients will deepen the flavor even more.
Stir everything together and let it simmer for about 10 minutes. This allows the aromatics to blend beautifully with the broth.
Final Thoughts
When you savor a bowl of Sulung Tang, you're not just enjoying a meal; you're experiencing a rich tradition that has stood the test of time. This delicious Korean ox bone soup is all about warmth, comfort, and family. Each spoonful tells a story, connecting you to generations who've gathered around the table to share this delightful dish.
The creamy, hearty broth, made from slow-cooked bones, is perfect for warming you up on a chilly day. With every bite, you can taste the love and care that goes into making it.
Whether you're at a bustling restaurant or enjoying it at home with loved ones, Sulung Tang brings everyone together.
As you finish your bowl, think about how special it's to share a meal like this. It's not just about the food; it's about the memories you create.
Frequently Asked Questions
What Are the Health Benefits of Sulung Tang?
You'll find that dishes like sulung tang can boost your immune system, promote joint health, and provide essential nutrients. Its rich collagen content supports skin elasticity, while its warmth comforts your body during colder months.
Can I Use Other Types of Meat in Sulung Tang?
You can definitely use other types of meat in sulung tang. Experiment with beef, pork, or even chicken to create a different flavor profile. Just adjust the cooking time for optimal tenderness and taste.
How Do I Store Leftover Sulung Tang?
To store leftover soup, let it cool completely, then transfer it to an airtight container. Refrigerate for up to three days or freeze for up to three months. Reheat thoroughly before enjoying again.
What Side Dishes Pair Well With Sulung Tang?
When enjoying your meal, consider pairing it with kimchi, pickled radishes, or steamed rice. These side dishes complement the rich flavors and enhance your experience, making your meal even more satisfying and delicious.
Are There Vegetarian Alternatives to Sulung Tang?
Yes, you can create vegetarian alternatives by using vegetable broth, mushrooms, and tofu. Add in hearty vegetables like daikon and carrots for depth, and season with soy sauce or miso for a rich flavor.
Ji-hoon is a skilled chef specializing in traditional and modern Korean cuisine. From savory bulgogi and kimchi to hearty stews and sizzling bibimbap, Ji-hoon’s recipes bring Korea’s bold, spicy, and umami-rich flavors to your kitchen. He focuses on authentic techniques and fresh ingredients that make Korean food so vibrant and flavorful.
Korean Cuisine
Chapagetti Recipe: The Instant Noodle Fusion You’ll Love
How to create a delicious Chapagetti masterpiece in minutes? Discover the secret to customizing this instant noodle fusion that you’ll love!
Chapagetti is a tasty instant noodle dish that mixes delicious noodles with a savory black bean sauce! To make it, you start by boiling water and adding your noodles. After cooking them until they're fluffy, you stir in the seasoning packet for that yummy flavor. You can add colorful veggies and your choice of protein, like chicken or tofu, to make it even better! It's super simple and can be done in just a few minutes. You'll love how quick and fun it is to create your unique Chapagetti masterpiece, and there's even more to discover about personalizing this dish!
Key Takeaways
- Chapagetti is an instant noodle dish inspired by the traditional Korean Jajangmyeon, featuring a savory black bean sauce for rich flavor.
- Cooking involves boiling water, adding noodles, and stirring in the seasoning packet for a quick and easy meal.
- Enhance your Chapagetti by adding stir-fried vegetables and your choice of protein, such as chicken, beef, or tofu.
- The dish is customizable, allowing for personal touches with spices or additional toppings to suit individual tastes.
- Sharing Chapagetti with friends or family creates a fun and memorable cooking experience, celebrating the joy of food together.
History
The allure of Chapagetti, a beloved Korean instant noodle dish, lies in its unique blend of flavors and textures.
But have you ever wondered where it all began? Chapagetti was inspired by a traditional Korean dish called Jajangmyeon, which features noodles topped with a savory black bean sauce. This delicious combination has been a favorite in Korea for many years.
In the 1980s, the Korean food company Nongshim decided to create an instant version of this classic dish. They wanted to make it easy for everyone to enjoy the rich taste of Jajangmyeon without spending hours in the kitchen.
With some clever tweaking, they came up with Chapagetti. It quickly became popular in Korea and beyond, thanks to its convenience and delightful flavor.
Chapagetti stands out because it captures the essence of the original dish while being quick to prepare. You can enjoy it as a snack, a meal, or even as a side dish.
Its rise in popularity has made it a staple in many households, allowing you to experience a taste of Korea right at home.
Cooking Steps
When the noodles are soft, drain the water, but save a little—about half a cup—just in case you want a saucier dish.
Next, return the noodles to the pot. Sprinkle in the seasoning mix and pour in the oil. Mix everything together well until the noodles are evenly coated and look deliciously shiny.
Now, if you want to take your Chapagetti to the next level, you can add some cooked veggies or even a fried egg on top. It makes your meal even yummier!
Serve it up in a bowl, and don't forget to take a moment to admire your creation. Enjoy your tasty Chapagetti and share it with friends or family. They'll be impressed with your cooking skills!
Step 1. Boil Water in a Pot
To kick off your Chapagetti preparation, fill a pot with at least four cups of water and place it on the stove over high heat. It's important to use enough water so that your noodles can cook evenly.
As the water heats up, you can watch it closely. You might see bubbles starting to rise, and that's a good sign!
While you wait, you can gather your other ingredients and get excited about the delicious meal that's coming. Boiling water is a key step in making your Chapagetti, so don't rush it. It usually takes a few minutes, depending on your stove.
You'll know the water is ready when it's bubbling vigorously.
Once you see that rolling boil, you're almost ready to cook the noodles. Just remember, boiling water can be very hot and splashing can happen, so be careful.
Keep an eye on the pot and don't leave it unattended. This is the start of something tasty, and you're doing great!
Soon, you'll be ready for the next step in your Chapagetti adventure. Enjoy the process and get ready for a delicious meal!
Step 2. Add Noodles to Boiling Water
As the water reaches a rolling boil, carefully add the noodles to the pot. Make sure to use a fork or chopsticks to gently separate them if they stick together. You'll hear a satisfying sizzle as the noodles hit the water, and that's a good sign!
Watch them closely, because they'll start softening up pretty quickly. It's important to remember that maintaining good oral hygiene, especially after enjoying meals, is essential for overall health, including reducing the risk of dental issues that could arise from sticky noodle remnants.
Let the noodles cook for about 4 to 5 minutes. During this time, you can stir them occasionally to keep them from clumping. It's like giving them a little dance in the pot!
As they cook, you'll notice them becoming more tender and fluffy. This is when the magic begins!
While you're waiting, you can get excited about the delicious fusion flavors that are coming soon. The smell of boiling noodles is just a hint of all the tasty goodness to come.
When the time's up, use a slotted spoon or a strainer to carefully lift the noodles out of the pot. Make sure to let any excess water drip off.
Now you're all set to move on to the next step, where you'll bring in those incredible seasonings! Enjoy this fun cooking moment!
Step 3. Stir in Seasoning Packet
With the noodles perfectly cooked and ready, it's time to elevate the dish by stirring in the seasoning packet. Grab that little envelope, and let's sprinkle in all that delicious goodness!
Carefully open the packet, being careful not to spill any of the tasty seasoning inside. Did you know that coffee can also enhance your mood during cooking? Coffee's health benefits might just make this culinary experience even more enjoyable!
Now, pour the seasoning over your noodles. As you do this, you'll start to notice the wonderful aroma wafting up, making your mouth water.
Using a fork or chopsticks, gently toss the noodles. You want to make sure every noodle gets coated in that rich, savory flavor.
Keep stirring until all the seasoning blends in nicely, turning your noodles into a gorgeous mix of colors and flavors. Don't rush—take your time! A good stir ensures that every bite will be just as tasty as the last.
As you mix, you might even see some steam rising from the pot, which is always a good sign. This is the moment when your Chapagetti starts to transform into something truly special.
Get ready, because the best part of this cooking adventure is just around the corner!
Step 4. Add Vegetables to Noodles
Now that your noodles are perfectly seasoned, it's time to toss in some vibrant vegetables for added flavor and nutrition. Adding veggies not only makes your dish colorful but also boosts its healthiness. You can choose from a variety of options like carrots, bell peppers, or even spinach—whatever you love!
Start by chopping your vegetables into bite-sized pieces. This way, they'll cook evenly and mix well with your noodles.
Heat up a little oil in a pan over medium heat. Once it's hot, throw in your veggies and stir-fry them for about three to five minutes. You want them to be tender but still crisp—nobody likes mushy veggies!
After your veggies are ready, carefully add your seasoned noodles to the pan. Give everything a good mix, making sure those delicious flavors blend together. If you want to kick it up a notch, you can even sprinkle in a pinch of salt or some chili flakes for extra zing.
Once everything's well combined, it's time to serve! You'll be amazed at how much more delicious your Chapagetti becomes with these fresh, colorful veggies. Enjoy your tasty creation!
Step 5. Add Protein of Choice
After adding those vibrant vegetables, it's time to boost your Chapagetti with some protein. You can choose from a variety of delicious options! If you're a fan of meat, consider adding sliced chicken, beef, or pork. Just cook your protein in a skillet until it's nice and golden brown, then toss it in with your noodles and veggies.
Additionally, similar to how early socialization is important for puppies, ensuring a well-rounded meal with protein can enhance your overall nutrition.
Not into meat? No worries! Tofu is a fantastic choice. You can cut it into cubes, give it a quick sauté, and mix it in for a tasty, healthy twist. If you want something even quicker, try canned tuna or shrimp. Just drain the can or thaw the shrimp, and they're ready to go!
Remember to season your protein while cooking. A sprinkle of salt, pepper, or even some soy sauce can really enhance the flavor. Once you've added your protein, give everything a good stir to combine those yummy flavors.
Let it cook for a few more minutes, so everything warms up nicely.
And there you have it—a protein-packed Chapagetti that's sure to satisfy your hunger and delight your taste buds! Enjoy your delicious creation!
Final Thoughts
Creating Chapagetti at home can be a delightful culinary adventure. With its unique blend of flavors and textures, this dish is sure to become a favorite in your kitchen. You can mix it up by adding your favorite proteins, veggies, or even a splash of spice to make it your own.
The best part is, it's super easy and quick to whip up, making it perfect for busy days or when you simply want a comforting meal.
As you gather your ingredients and start cooking, let your imagination run wild! You can experiment with different toppings, sauces, and sides. Maybe you'll discover a new combination that you absolutely love.
Don't be afraid to invite friends or family to join you in this fun cooking experience. Sharing a delicious meal makes it even more special.
In the end, Chapagetti isn't just a dish; it's a chance to create memories in the kitchen. So, grab your noodles and start this tasty journey.
You'll be amazed at how something so simple can bring so much joy. Happy cooking, and enjoy every bite of your Chapagetti masterpiece!
Frequently Asked Questions
What Is Chapagetti Made Of?
Chapagetti's made of chewy noodles, a savory black bean sauce, and various seasonings. You'll often find dehydrated vegetables included, enhancing the flavor and texture, making it a deliciously satisfying meal for any occasion.
Can I Make Chapagetti Vegan?
Yes, you can make chapagetti vegan! Just swap out any non-vegan ingredients, like meat or eggs, and use vegetable broth instead of chicken broth. Enjoy your delicious, plant-based twist on this popular noodle dish!
How Long Does Chapagetti Last in the Pantry?
Chapagetti typically lasts about 6 to 12 months in your pantry when stored properly. Just make sure it's in a cool, dry place, and check for any signs of damage before using it.
Where Can I Buy Chapagetti?
You can buy Chapagetti at most grocery stores, Asian markets, or online retailers like Amazon. Check the international or noodle aisle for the best selection. It's usually easy to find, so happy shopping!
Are There Any Nutritional Facts for Chapagetti?
You'll find that Chapagetti typically contains around 350 calories per serving, with about 10 grams of protein and 15 grams of fat. Check the packaging for specific nutritional facts, as they may vary slightly.
Ji-hoon is a skilled chef specializing in traditional and modern Korean cuisine. From savory bulgogi and kimchi to hearty stews and sizzling bibimbap, Ji-hoon’s recipes bring Korea’s bold, spicy, and umami-rich flavors to your kitchen. He focuses on authentic techniques and fresh ingredients that make Korean food so vibrant and flavorful.
-
Southern Comfort Food1 month ago
Cheese Straws
-
Brazilian Cuisine1 month ago
Caldeirada
-
Southern Comfort Food1 month ago
Creamed Corn
-
Brazilian Cuisine1 month ago
Chicken in Brown Sauce
-
Brazilian Cuisine1 month ago
Tacacá
-
Southern Comfort Food1 month ago
Squash Casserole
-
Southern Comfort Food1 month ago
Chocolate Gravy
-
African Cuisine1 month ago
Poulet DG (Cameroon)