Italian Cuisine
Ossobuco Alla Milanese
Nourish your senses with the tender veal shanks and rich tomato-based sauce of the classic Ossobuco alla Milanese, a timeless Italian dish that’ll leave you craving more.
Ossobuco alla Milanese is a delightful Italian dish that'll transport you to the heart of Milan! You'll savor the tender veal shanks, slowly braised in a rich tomato-based sauce, then garnished with the vibrant gremolata of lemon zest, parsley, and garlic. This classic recipe dates back centuries, showcasing the culinary pride of the Lombardy region. The long, slow cooking process breaks down the meat, yielding a melt-in-your-mouth texture. Serve it over creamy polenta or fluffy risotto for an authentic taste of Italy. Get ready to enjoy this timeless dish that's sure to delight your senses!
Key Takeaways
- Ossobuco alla Milanese is a classic Italian dish featuring tender veal shanks braised in a tomato-based sauce, originating from the Lombardy region.
- The long cooking process breaks down the connective tissue, yielding incredibly tender meat that is traditionally served with gremolata, a mixture of lemon zest, parsley, and garlic.
- Ossobuco is considered an integral part of Italian culinary heritage and is often enjoyed with risotto alla Milanese, showcasing the gastronomic pride of Milan.
- The dish's name "ossobuco" translates to "hollow bone," referring to the veal shanks used as the primary protein source.
- Ossobuco alla Milanese is a symbol of communal dining, fostering connection through shared meals and representing the rich flavors and traditions of Italian cuisine.
History
Originating in the Lombardy region of Italy, ossobuco alla Milanese has a rich history that has stood the test of time. This beloved dish dates back to the 18th century, when Milanese chefs first crafted the savory, slow-cooked veal shanks.
Traditionally, the meat was simmered with vegetables, white wine, and aromatic herbs, creating a mouthwatering blend of flavors.
Over the centuries, ossobuco alla Milanese has become an integral part of Italian culinary heritage. Families would gather to enjoy this heartwarming meal, often accompanied by risotto alla Milanese, another regional specialty. Ossobuco alla Milanese originated in Lombardy, Italy, and has been passed down through generations, with each family adding its own unique twist to the dish. Similarly, risotto alla Milanese has a rich risotto history and origins, dating back to the 16th century, when saffron was first introduced to Italy. This creamy and aromatic rice dish has also become a beloved staple in Italian cuisine, often served alongside ossobuco alla Milanese to create a truly comforting and satisfying meal.
The dish's popularity has transcended borders, and it's now savored by food enthusiasts around the world.
Today, ossobuco alla Milanese remains a cherished symbol of Milan's gastronomic pride. Whether served in cozy trattorias or elegant restaurants, this timeless dish continues to bring joy and comfort to those who savor its rich, tender goodness.
Recipe
Ossobuco alla Milanese is a classic Italian dish that originated in Milan, Italy. It features tender veal shanks slowly braised in a flavorful tomato-based sauce, often garnished with gremolata, a zesty mixture of lemon zest, parsley, and garlic.
The dish's name, "ossobuco," translates to "hollow bone," referring to the cross-cut veal shanks that are the star of the show. The long, slow cooking process breaks down the connective tissue, resulting in meat that falls off the bone effortlessly.
Ingredients:
- 4 veal shanks, about 1-inch thick
- 1/4 cup all-purpose flour
- 3 tablespoons olive oil
- 1 large onion, diced
- 2 carrots, peeled and diced
- 2 celery stalks, diced
- 3 garlic cloves, minced
- 1 cup dry white wine
- 1 (14.5 oz) can crushed tomatoes
- 2 cups beef or chicken stock
- 1 bay leaf
- 2 sprigs fresh thyme
- Salt and freshly ground black pepper, to taste
Cooking Instructions:
In a large Dutch oven or heavy-bottomed pot, heat the olive oil over medium-high heat. Dredge the veal shanks in the flour, shaking off any excess. Brown the shanks on all sides, about 3-4 minutes per side, until they develop a nice golden-brown crust. Remove the shanks from the pot and set aside.
Reduce the heat to medium, and add the onion, carrots, and celery to the pot. Cook for about 5-7 minutes, stirring occasionally, until the vegetables are softened. Add the garlic and cook for an additional minute, until fragrant.
Pour in the white wine and use a wooden spoon to scrape up any browned bits from the bottom of the pot. Allow the wine to simmer for 2-3 minutes.
Return the veal shanks to the pot, and add the crushed tomatoes, stock, bay leaf, and thyme. Season with salt and pepper. Bring the mixture to a boil, then reduce the heat to low, cover, and simmer for 1.5-2 hours, or until the veal is very tender and falling off the bone.
Tips:
For the best flavor, use fresh, high-quality ingredients. Browning the veal shanks is an important step that adds depth of flavor to the dish.
Be patient during the long simmering process, as it's crucial for tenderizing the meat. Serve the ossobuco with the reduced braising liquid, and top with a generous amount of gremolata for a bright, zesty finish.
Cooking Steps
Season the veal shanks with salt and pepper.
Brown the shanks in a hot pan to get a nice sear.
Then, braise the shanks in the oven until they're fork-tender and the meat is falling off the bone.
Step 1. Season the Veal Shanks
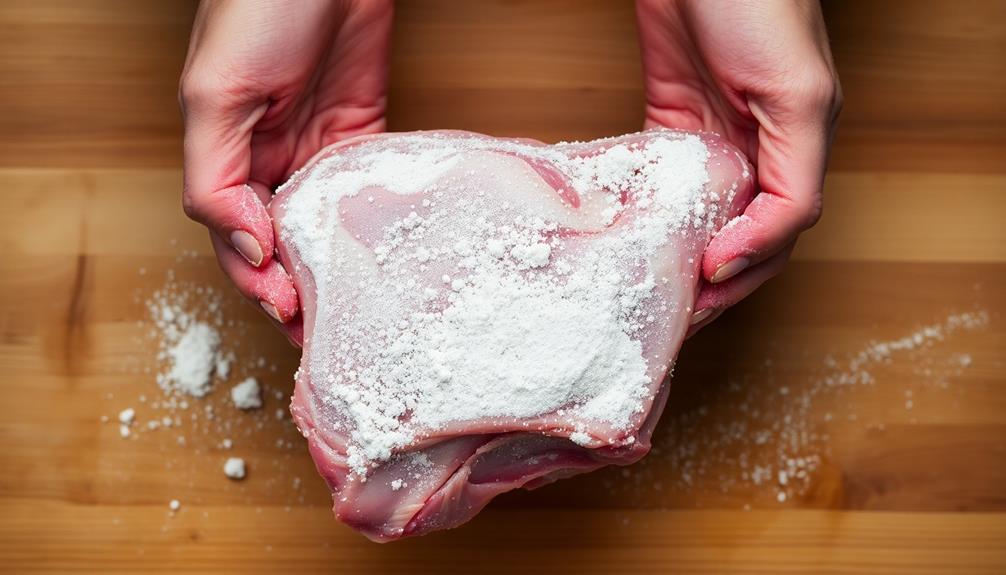
Tender veal shanks form the foundation of this classic Milanese dish. First, you'll want to generously season the shanks with salt and pepper. Don't be shy – the more seasoning, the better! Sprinkle the salt and freshly ground black pepper all over the meat, making sure to coat every inch. This will help the flavors really shine through as the shanks cook.
Next, use your hands to gently rub the seasoning into the meat, getting it deep into the crevices. This helps the flavors permeate the veal, resulting in a mouthwatering dish.
You can even add a pinch of dried herbs, like rosemary or thyme, for an extra aromatic touch. Just remember, a little goes a long way!
Once the shanks are perfectly seasoned, you're ready to move on to the next step in creating this delectable Ossobuco alla Milanese.
Step 2. Brown the Veal Shanks
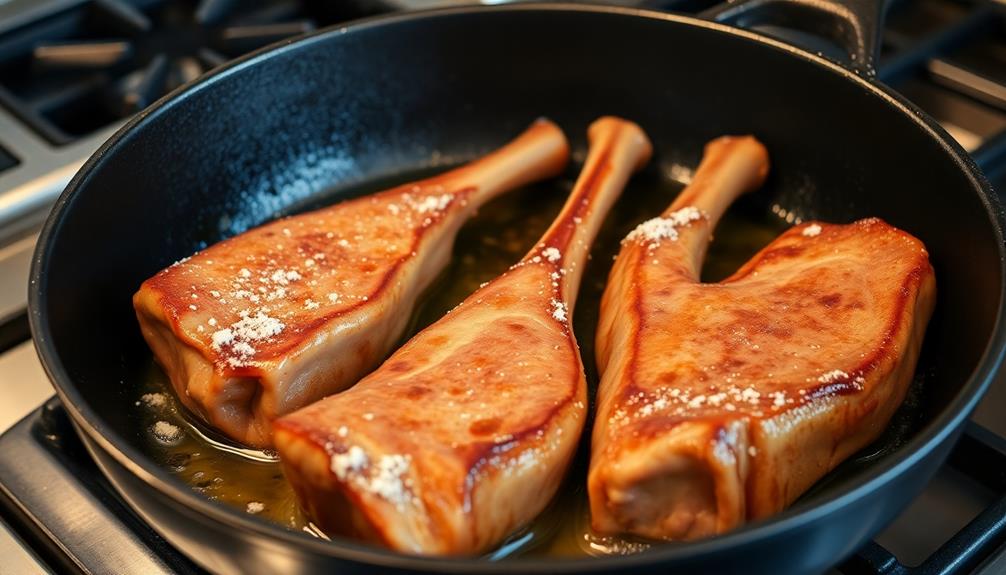
Next, you'll want to sear the seasoned veal shanks in a large, heavy-bottomed pan or Dutch oven over medium-high heat.
The key is to get a nice, golden-brown crust on the meat, which will add tons of flavor to the final dish.
Carefully place the shanks in the hot pan, making sure not to overcrowd them.
You'll want to let them sizzle and brown for about 3-4 minutes per side, turning them gently with tongs to ensure even browning.
The aroma as the meat cooks will fill your kitchen and have your mouth watering in no time!
Once the shanks are beautifully browned, remove them from the pan and set them aside.
You'll use the flavorful browned bits left in the pan to start building your ossobuco sauce.
Get ready for the next step – adding the aromatic vegetables!
Step 3. Braise the Veal Shanks
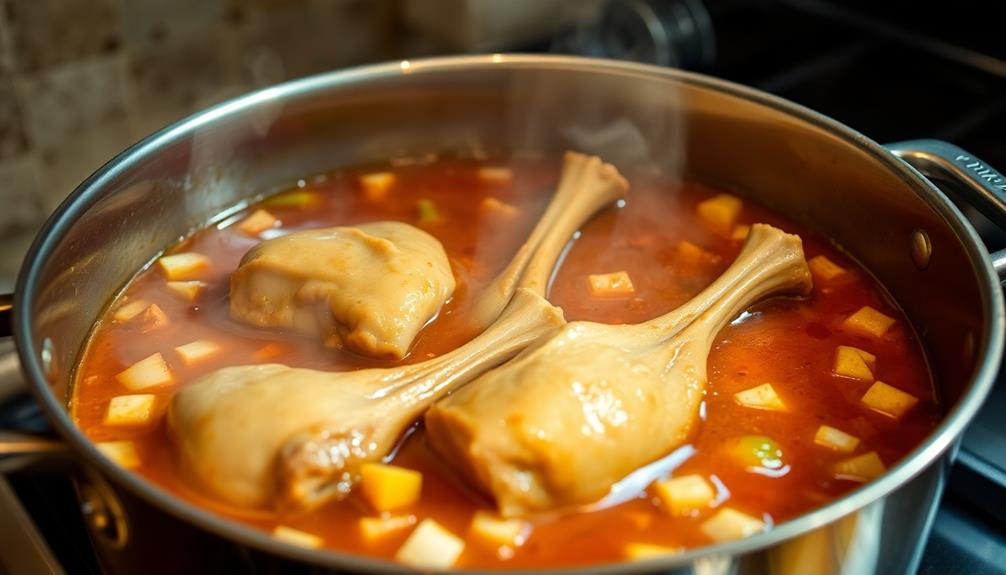
With the veal shanks beautifully browned, it's time to braise them to tender perfection.
Grab a large Dutch oven or heavy-bottomed pot and add a few tablespoons of olive oil. Gently place the shanks into the hot oil and let them sizzle for a minute or two, turning them to get an even sear on all sides.
Next, add the aromatic vegetables – onions, carrots, and celery – and sauté until they start to soften.
Sprinkle in a bit of flour to create a roux, then pour in the white wine and scrape up any browned bits from the bottom of the pot.
Let the wine simmer until it's reduced by half.
Step 4. Add Vegetables and Stock
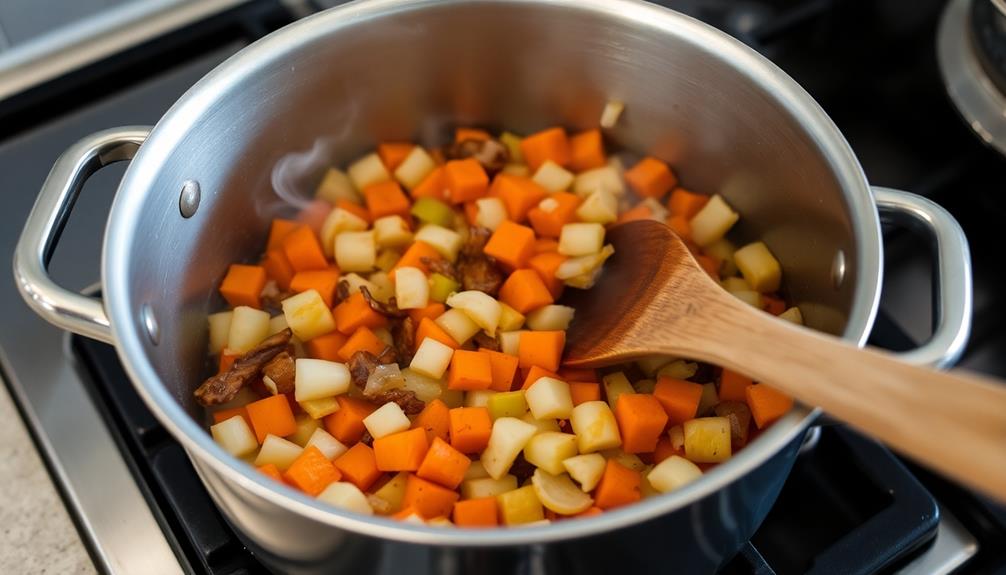
Now that the veal shanks are beautifully browned, it's time to add the aromatic vegetables and stock to the braising liquid.
First, toss in the chopped onions, carrots, and celery. These veggies will add incredible flavor as they soak up all the tasty bits from the pan.
Next, pour in the warm beef stock, making sure to scrape up any browned bits on the bottom of the pot. This will create a rich, flavorful braising liquid that will transform the veal shanks into tender, fall-off-the-bone perfection.
Bring the mixture to a gentle simmer, then cover the pot with a tight-fitting lid.
Let the ossobuco braise for about 1 1/2 to 2 hours, or until the meat is incredibly tender.
Every so often, check on the dish and baste the veal shanks with the delicious braising liquid. The aroma wafting through your kitchen will have your mouth watering in anticipation!
Step 5. Reduce Heat, Simmer Until Tender
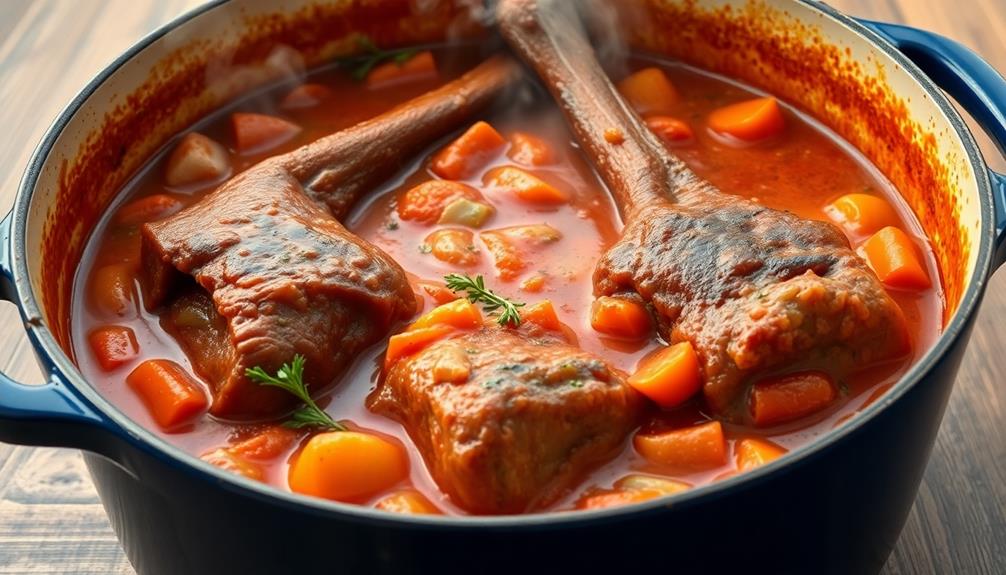
Once the veggies and stock have been added, reduce the heat to a gentle simmer. This will allow the flavors to meld together beautifully.
As the ossobuco simmers, the meat will become meltingly tender, falling off the bone with ease. Keep a watchful eye, stirring occasionally to prevent sticking. The aroma filling your kitchen will have your mouth watering in anticipation!
After 45 minutes to an hour, the ossobuco should be fork-tender. The sauce will have thickened, coating the meat in a rich, savory glaze.
Don't be tempted to rush – low and slow is the key to achieving that signature Milanese texture. When the meat is fall-off-the-bone perfect, it's time to serve.
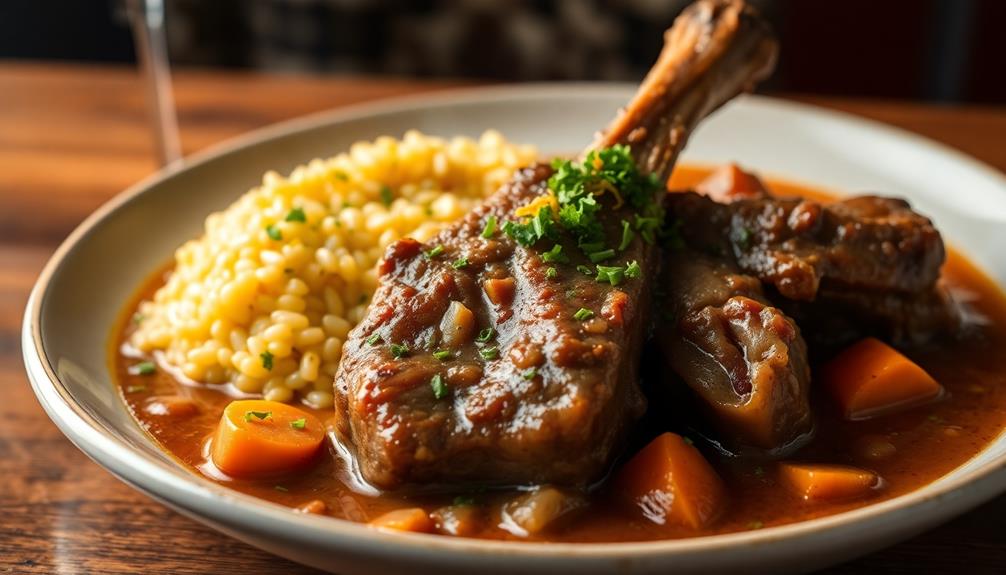
Ladle the ossobuco over creamy polenta or buttery mashed potatoes, and prepare to be transported to the heart of Milan with every bite. Buon appetito!
Final Thoughts
Ultimately, ossobuco alla Milanese is a dish that showcases the rich flavors and tender texture of veal shanks. When you take that first bite, you'll be transported to the bustling streets of Milan with each mouthful. The slow-simmered meat practically falls off the bone, melting in your mouth.
And the gremolata – that vibrant blend of garlic, parsley, and lemon zest – adds a bright, aromatic note that ties the whole dish together.
What really makes this dish special is how the ingredients come together in perfect harmony. The veal, the broth, the wine – they all mingle and meld, creating a symphony of flavors that will have your taste buds singing.
Plus, it's a great dish to enjoy with family and friends, sharing stories and laughter over a hearty, comforting meal.
Frequently Asked Questions
How Can I Make Ossobuco Alla Milanese Vegetarian?
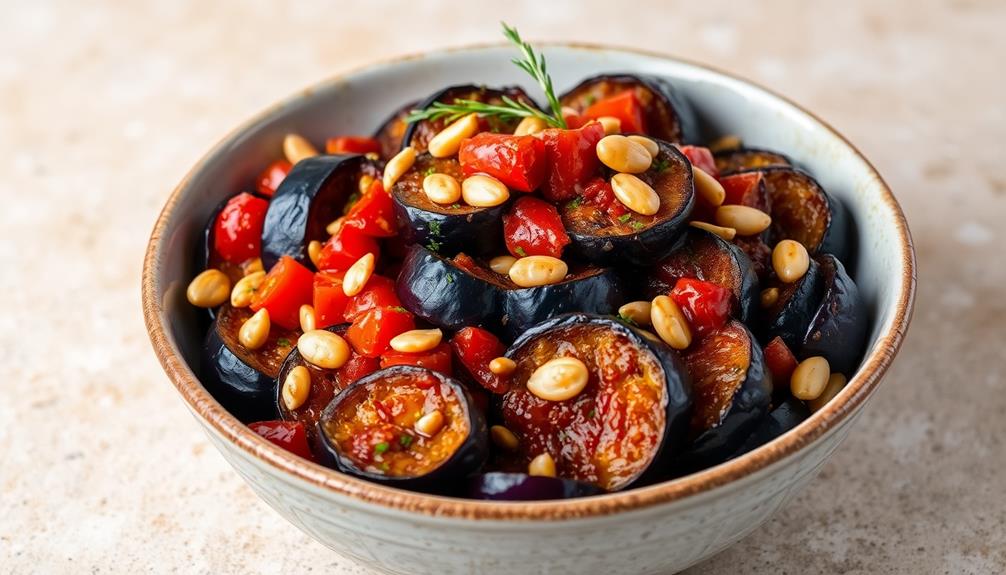
To make a vegetarian version, you can substitute the veal shanks with hearty vegetables like mushrooms, eggplant, or zucchini. Braise them in a flavorful tomato-based sauce, and finish with gremolata for the classic Milanese touch.
What Wine Pairs Best With This Dish?
When pairing wine with this dish, you'll want a bold, full-bodied red that can stand up to the rich, savory flavors. Consider a Barolo, Chianti, or Sangiovese – the tannins and acidity will complement the dish beautifully.
Can I Use a Slow Cooker to Make Ossobuco?
You can absolutely use a slow cooker to make ossobuco. The slow, gentle cooking method helps break down the tough meat and infuses it with rich, flavorful sauce. Just be sure to sear the meat beforehand for best results.
How Long Can Leftover Ossobuco Be Stored?
Leftover ossobuco can be stored in the refrigerator for 3-4 days or in the freezer for 2-3 months. Make sure to store it in an airtight container to maintain freshness and prevent freezer burn.
Is There a Gluten-Free Version of This Recipe?
There is indeed a gluten-free version of this recipe. You can substitute the breadcrumbs with gluten-free alternatives like almond flour or ground nuts to create a delicious and safe meal for those with gluten sensitivities.
Luca is our resident expert in Italian cuisine, with a deep love for fresh ingredients, classic pasta dishes, and rustic pizzas. He brings the heart of Italy to Cook if Ya, sharing recipes that highlight the simplicity and elegance of traditional Italian cooking, always paired perfectly with local wines.
Italian Cuisine
Whipped Lardo: The Italian Spread That’s Rich and Savory
Just when you thought Italian cuisine couldn’t get any more delectable, discover the incredible richness and savory flavors of whipped lardo, a traditional Tuscan specialty.
Whipped lardo is an incredible Italian spread that'll wow your taste buds with its rich, savory flavors. For centuries, folks in Tuscany have been curing pork fat with herbs and spices, then whipping it into a decadent, creamy treat. It's a wonderful way to minimize food waste by using every part of the pig. Though lardo has regional variations, the end result is always divine – perfect for topping bread, veggies, and pasta. If you continue exploring this tasty Italian specialty, you'll discover even more ways to elevate your cooking and impress your guests.
Key Takeaways
- Whipped lardo is an Italian specialty made by curing and rendering pork fat, then whipping it to achieve a creamy, spreadable texture.
- The traditional curing process with salt, herbs, and spices infuses the lardo with a rich, savory flavor profile.
- Whipped lardo can be used as a topping for bread, vegetables, and pasta dishes, adding a burst of umami to various culinary creations.
- The rendering and whipping process creates a light, airy texture, making it an ideal spread or dip for appetizers and snacks.
- Whipped lardo is a versatile ingredient that showcases the culinary ingenuity of Italian cuisine, minimizing food waste and elevating simple dishes.
History
Where did lardo, the rich and flavorful Italian cured pork fat, come from?
Lardo has a long and storied history in Italian cuisine, tracing its roots back centuries. In the Tuscan region of Italy, lardo was traditionally made by curing pork fat with a mix of herbs and spices, then aging it to develop its signature creamy texture and savory flavor.
This centuries-old process was a way for Italian families to make the most of every part of the pig, ensuring no food went to waste. Lardo was often used as a cooking fat, adding depth and richness to dishes.
Over time, it became a beloved specialty, with different regions developing their own unique recipes and traditions around this versatile ingredient.
Today, lardo is still prized in Italy and around the world for its incredible taste and texture. Whether spread on crusty bread or used in cooking, this historic Italian delicacy continues to delight and inspire food lovers everywhere.
Cooking Steps
To make the whipped lardo, begin by gathering your ingredients. You'll need a block of high-quality lardo, which is an Italian cured pork fat.
Grab a food processor or blender to whip the lardo into a smooth, creamy consistency.
Next, start by dicing the lardo into small pieces. This will help it blend more easily. Toss the lardo cubes into your food processor and turn it on. Let it run for a few minutes, scraping down the sides as needed, until the lardo transforms into a light, fluffy spread.
Once it's whipped to perfection, transfer the lardo to a bowl or jar. You can season it with a pinch of salt and a sprinkle of black pepper, if you'd like.
The whipped lardo is now ready to enjoy as a decadent topping for crusty bread, roasted vegetables, or even a simple pasta dish. Just be sure to savor every rich and savory bite!
Step 1. Cure Lardo With Salt and Herbs
After trimming the lardo block, it's time to cure it with salt and herbs. You'll need to rub the entire surface with a generous amount of coarse sea salt. Don't be shy – make sure to evenly coat every nook and cranny.
Next, sprinkle on a blend of dried herbs like rosemary, thyme, and oregano. The salt and herbs will work together to draw out moisture and infuse the lardo with mouthwatering flavor.
Once the lardo is thoroughly seasoned, place it in a container with a tight-fitting lid. Refrigerate it for at least 2 weeks, flipping it over every few days. This curing process allows the salt and herbs to penetrate deep into the fat, transforming the texture and taste.
After 2 weeks, rinse off the excess salt and herbs, then pat the lardo dry. It's now ready to be thinly sliced and savored on crusty bread, roasted vegetables, or anything else your heart desires. Get ready for an explosion of rich, savory delight!
Step 2. Slow Render Lardo in Oven
Once the lardo has finished curing, it's time to render the fat in the oven. This slow cooking process will transform the solid blocks of cured pork fat into a smooth, spreadable delight.
Preheat your oven to a low 275°F (135°C). Carefully place the lardo pieces onto a rimmed baking sheet, making sure they don't touch. Slide the tray into the oven and let the lardo work its magic for 2 to 3 hours, or until the fat has fully melted and rendered down.
As the lardo cooks, your kitchen will fill with the most tantalizing aroma. Be patient – the slow and steady heat will coax out all the rich, savory flavors.
When the lardo is silky and liquid, remove the tray from the oven. Use a slotted spoon to transfer the rendered fat into a clean bowl, leaving behind any browned bits or impurities.
Let the lardo cool slightly before whipping it into a fluffy, spreadable consistency. Now you're ready to enjoy this decadent Italian specialty!
Step 3. Whip Rendered Lardo Until Smooth
With the lardo rendered, it's time to whip it into a smooth, spreadable consistency. Grab your stand mixer or a handheld electric beater and get ready to work some magic.
Start by placing the warm, rendered lardo into the mixing bowl. Turn on the machine and let it go to town, whipping the lardo until it transforms into a light and fluffy spread.
As the lardo whips, you'll notice it starting to lighten in color and become silkier in texture. Keep mixing for several minutes, stopping to scrape down the sides of the bowl as needed, until the lardo is completely smooth and creamy.
This process helps incorporate air into the lardo, making it lighter and more spreadable.
Once you've achieved the perfect whipped texture, your lardo is ready to be enjoyed. Spread it generously on crusty bread, use it as a savory topping for roasted veggies, or simply enjoy it on its own as a decadent treat.
Step 4. Chill Whipped Lardo Until Set
To ensure the whipped lardo holds its light and airy texture, chill it in the refrigerator until it's set, about 1 to 2 hours.
As the whipped lardo cools, the fat will solidify, creating a smooth, spreadable consistency. This step is crucial, as it allows the lardo to maintain its fluffy, cloud-like texture.
Similar to the efficiency of geothermal heat pumps, which rely on stable temperatures for optimal performance, the cooling process for whipped lardo is essential for achieving the perfect consistency.
Once the lardo is chilled and set, it's ready to be enjoyed!
Spread it onto crusty bread, crackers, or use it as a topping for roasted vegetables or meats. The cool, creamy lardo will melt deliciously on your tongue, offering a rich, savory flavor that's truly irresistible.
Step 5. Serve Whipped Lardo on Crusty Bread
After chilling the whipped lardo until it's set, you're ready to start serving it. Grab some crusty, rustic bread and get ready for a flavor explosion!
Tear or slice the bread into bite-sized pieces, creating the perfect vessel for the creamy, rich lardo. The contrast between the crunchy bread and the smooth, savory lardo is simply divine.
Gently spoon or spread the chilled lardo onto each piece of bread, making sure to cover the surface evenly. The cool, whipped texture will melt on your tongue, releasing the pure, porky goodness. You can even add a sprinkle of freshly cracked black pepper or a drizzle of high-quality olive oil to elevate the flavors. For an extra savory kick, consider topping the lardo with thin slices of Vietnamese beef jerky. The combination of the rich, creamy lardo and the umami-packed beef jerky creates a flavor explosion in every bite. The crispy texture of the jerky also adds a delightful contrast to the smooth lardo, making it a truly indulgent and satisfying snack.
Serve the lardo-topped bread as an appetizer or a snack, and watch as your guests can't resist going back for more. The combination of the crusty bread and the indulgent lardo is sure to leave them craving for another bite.
Final Thoughts
Whipped lardo, the unsung hero of Italian cuisine, deserves a spot in every discerning palate's repertoire.
This rich, savory spread may not be the most glamorous ingredient, but it packs a flavor punch that'll have you coming back for more. Once you've tried it, you'll wonder how you ever lived without it.
Spread it generously on crusty bread, and you've got a snack fit for the gods.
Or try it as a topping for roasted veggies, grilled meats, or even pasta. The possibilities are endless!
The creamy, buttery texture and salty, umami-packed flavor will elevate any dish.
Frequently Asked Questions
Is Whipped Lardo Safe to Consume During Pregnancy?
While whipped lardo can provide a rich, savory taste, it's best to consult your healthcare provider during pregnancy. They can advise if consuming this pork-based spread is safe for you and your baby's well-being.
Can Whipped Lardo Be Used as a Substitute for Butter in Baking?
Yes, you can use whipped lardo as a substitute for butter in baking. It'll add a rich, savory flavor to your baked goods. Just be sure to adjust the amount, as lardo is typically more flavorful than butter.
How Long Can Whipped Lardo Be Stored in the Refrigerator?
You can store whipped lardo in the refrigerator for up to 2 weeks. Keep it tightly covered to prevent it from drying out or absorbing other flavors. Enjoy the rich, savory spread within that timeframe for the best quality.
Are There Any Health Benefits Associated With Consuming Whipped Lardo?
While whipped lardo is high in saturated fat, it may offer some potential health benefits. Lardo contains anti-inflammatory properties and may support heart health when consumed in moderation as part of a balanced diet.
Can Whipped Lardo Be Found in Regular Grocery Stores or Specialty Shops?
You'll typically find whipped lardo in specialty food shops or Italian markets, not in regular grocery stores. It's a unique, rich spread that may be challenging to source outside of specific culinary retailers or specialty purveyors.
Nadia brings the warmth and depth of Lebanese cuisine to Cook if Ya. From classic mezze spreads like hummus and tabbouleh to rich, flavorful mains like shawarma and kibbeh, her recipes offer a delicious journey through the flavors of Lebanon, emphasizing fresh herbs, spices, and aromatic ingredients.
Italian Cuisine
Squid Ink Sauce: The Bold and Unique Ingredient for Your Dishes
Unlock the culinary world’s best-kept secret with squid ink sauce, a bold and versatile ingredient that elevates any dish to new heights.
Squid ink sauce is a bold and unique ingredient that can transform your dishes! For centuries, people in the Mediterranean region have used squid ink to add a striking black hue and briny flavor to their cooking. Today, it's popular worldwide for its visual appeal and ability to enhance the taste of pasta, seafood, and even desserts. Not only is it delicious, but squid ink is also packed with nutrients like vitamins, minerals, and antioxidants, making it a healthy choice. Get ready to impress your friends and family with this captivating ingredient – there are so many creative ways to use it in your kitchen.
Key Takeaways
- Squid ink sauce offers a unique, briny flavor profile that adds depth and visual appeal to various dishes, particularly in Mediterranean and Asian cuisines.
- Nutrient-rich with antioxidants and essential minerals, squid ink sauce is a healthy addition to meals, with low caloric content.
- Versatile in culinary applications, squid ink sauce can be used in pasta dishes, seafood pairings, risottos, soups, and even creative desserts.
- Careful handling is required to maintain the flavor integrity of squid ink, which pairs well with ingredients like olive oil, garlic, lemon, and herbs.
- Popular recipes featuring squid ink sauce include risottos, paella, pizzas, and pastas, showcasing its versatility and bold, captivating culinary presence.
History
Squid ink has been used in culinary traditions for centuries, with origins tracing back to the Mediterranean region. Back then, the Italians and Greeks discovered the bold, briny flavor of this unique ingredient and began incorporating it into their dishes. Squid ink adds a striking black hue to sauces, pastas, and risottos, creating a visually stunning presentation.
Over time, the use of squid ink expanded beyond the Mediterranean, making its way into cuisines around the world. In Spain, it's a key component of the famous dish, squid in its own ink. The Japanese also embraced squid ink, using it to color and flavor sushi, tempura, and other seafood specialties.
Today, squid ink remains a beloved ingredient for adventurous home cooks and renowned chefs alike. Its bold, briny taste pairs beautifully with a variety of foods, from delicate fish to hearty meats.
Whether you're new to squid ink or a seasoned pro, it's sure to add a unique and memorable flair to your culinary creations.
Cooking Steps
To prepare the squid ink sauce, begin by gathering all the necessary ingredients and tools.
In a medium-sized saucepan, heat some olive oil over medium heat. Add minced garlic and sauté until fragrant, about 1 minute. Carefully pour in the squid ink, which will turn the mixture a dramatic black color.
Stir in chicken or vegetable broth, and let the sauce simmer for 10-15 minutes, stirring occasionally, until it thickens slightly.
Season the sauce with salt, pepper, and a squeeze of lemon juice to balance the flavors. If the sauce seems too thick, add a bit more broth. For an extra creamy texture, stir in a pat of butter or a splash of cream at the end.
The squid ink sauce is now ready to serve! Toss it with your favorite pasta, spoon it over grilled seafood, or use it as a dipping sauce for fresh bread.
Get creative and let the bold, briny flavor of the squid ink shine.
Step 1. Sauté Aromatics in Olive Oil
Next, you'll sauté the aromatic ingredients in olive oil. Start by heating a large pan over medium heat and adding a generous drizzle of olive oil.
Once the oil is shimmering, toss in the minced garlic and finely chopped onion. Let them sizzle and soften, stirring occasionally, for about 3-5 minutes. The kitchen will soon fill with the heavenly aroma of the sautéing aromatics. Proper preparation in the kitchen can enhance your overall cooking experience, much like how understanding toilet maintenance can improve your home environment.
Next, add the chopped celery and carrots to the pan. Continue sautéing for another 2-3 minutes, until the vegetables are tender and fragrant.
Be sure to stir the mixture frequently to prevent any burning or sticking. The key is to gently cook the aromatics, allowing their flavors to meld and intensify.
Once the vegetables are perfectly softened, you’re ready to move on to the next step in creating your flavorful squid ink sauce. First, add a generous amount of squid ink to the softened vegetables, stirring well to evenly distribute the flavor. Then, let the sauce simmer for 15-20 minutes to allow the flavors to meld together. For a unique twist, consider serving this flavorful squid ink sauce over a crispy banh bot chien recipe for a delicious and unexpected combination of flavors and textures. The contrast of the rich and savory squid ink sauce with the crispy and chewy banh bot chien will surely impress your guests.
Step 2. Add Squid Ink
A tablespoon or two of squid ink is all you'll need to lend a striking black color and briny, oceanic flavor to the sauce.
Simply stir it into the sautéed aromatics and watch as the sauce transforms into a dramatic, midnight-black hue. The squid ink will impart a subtle, savory taste that evokes the depths of the sea.
Don't be shy – the more ink you add, the bolder the flavor will become.
Be mindful, though, as a little squid ink goes a long way. Start with a small amount, then taste and adjust as needed. The ink can be quite potent, so you don't want to overpower the other flavors in the dish.
Stir it in gradually until you achieve the perfect balance of blackness and bold, oceanic essence.
Once the squid ink is incorporated, let the sauce simmer for a few minutes, allowing the flavors to meld together seamlessly.
Then, you're ready to serve your uniquely delicious, jet-black creation.
Step 3. Add Wine and Simmer
After adding the squid ink, pour in a splash of white wine to the simmering sauce. The wine will help mellow out the bold, briny flavor of the ink, creating a more balanced and harmonious taste.
As the wine simmers, it'll gradually reduce, concentrating its fruity notes and acidity. This will help cut through the richness of the sauce, making it more lively and vibrant on your palate.
Stir the mixture gently, allowing the wine to incorporate fully. Let the sauce simmer for about 10 minutes, until it thickens to your desired consistency.
The low and slow cooking process will marry all the flavors together, transforming the squid ink into a luxuriously silky sauce. Keep a close eye, stirring occasionally to prevent sticking or burning.
Once it's reached the perfect texture, your squid ink sauce is ready to be drizzled over pasta, seafood, or any other dish that could use a pop of bold, savory flavor.
Step 4. Add Cream and Seasonings
To finish the squid ink sauce, stir in a splash of heavy cream. This will give the sauce a luxurious, velvety texture that coats the noodles or seafood perfectly.
Don't be afraid to add a bit more if you want an even richer consistency. Incorporating soothing aromas while cooking can enhance your overall culinary experience, much like how aromatherapy can promote relaxation.
Next, it's time to season the sauce. Start by sprinkling in a pinch of salt and a dash of freshly ground black pepper.
Taste the sauce and adjust the seasonings as needed. You can also add a touch of lemon juice or zest to brighten up the flavors.
If you want to amp up the savory umami notes, stir in a teaspoon of Parmesan cheese or a splash of Worcestershire sauce.
And if you like a little heat, a sprinkle of red pepper flakes or a squirt of sriracha will do the trick.
Once the seasonings are just right, your squid ink sauce is ready to serve.
Drizzle it over your favorite pasta, rice, or sautéed seafood for a truly unique and delicious meal.
Step 5. Serve Immediately Over Pasta
With the sauce ready, you can now serve it immediately over your desired pasta.
Whether you've chosen spaghetti, penne, or any other shape, the rich and flavorful squid ink sauce will elevate your dish to new heights.
Simply plate the hot, freshly cooked pasta and spoon the squid ink sauce generously over the top. The deep, inky black color of the sauce will create a stunning visual contrast with the pasta, making for a truly eye-catching presentation.
Don't be afraid to be generous with the sauce – you want each bite to be coated in its bold, briny essence.
As you twirl the pasta around your fork, the sauce will cling to the noodles, ensuring every mouthful is bursting with the unique umami flavors of the squid ink.
Serve immediately while the pasta is hot, and enjoy the remarkable combination of textures and tastes that this remarkable sauce provides.
Final Thoughts
Ultimately, squid ink sauce is a captivating culinary experience that merits your attention. This bold and unique ingredient can transform any dish, adding a striking black color and a delightful briny flavor that will tantalize your taste buds.
Whether you're tossing it with pasta, drizzling it over seafood, or using it as a dip, squid ink sauce is a versatile addition to your culinary repertoire.
Embracing the alluring mysteries of the deep sea, squid ink sauce introduces an element of adventure to your meals. It's a chance to elevate your home cooking and impress your friends and family with your culinary prowess.
Don't be intimidated by its dramatic appearance – squid ink sauce is surprisingly easy to incorporate into your favorite recipes.
Frequently Asked Questions
Where Can I Purchase High-Quality Squid Ink?
You can find high-quality squid ink at specialty seafood markets, online retailers, or directly from squid purveyors. Look for fresh, sustainable sources to ensure you're getting the best quality for your culinary creations.
How Long Does Homemade Squid Ink Sauce Last?
Homemade squid ink sauce can last up to a week when stored properly in the refrigerator. It's best to keep it in an airtight container and use it within 5-7 days for the freshest flavor.
Can I Substitute Other Types of Ink for Squid Ink?
You can substitute other types of ink for squid ink, but the flavor and color won't be the same. Squid ink has a distinctive briny, umami taste that's difficult to replicate with other inks. It's best to stick with the real thing.
What Is the Nutritional Value of Squid Ink?
Squid ink is a nutritious ingredient, containing vitamins, minerals, and antioxidants. It's packed with protein, iron, and omega-3 fatty acids. While it won't replace other inks, it adds a unique flavor and visual appeal to your dishes.
Can I Use Squid Ink in Baked Goods?
Yes, you can use squid ink in baked goods. It adds a striking black color and a briny, umami flavor to breads, crackers, and even desserts. Just be mindful of the strong taste and use it sparingly.
Nadia brings the warmth and depth of Lebanese cuisine to Cook if Ya. From classic mezze spreads like hummus and tabbouleh to rich, flavorful mains like shawarma and kibbeh, her recipes offer a delicious journey through the flavors of Lebanon, emphasizing fresh herbs, spices, and aromatic ingredients.
Italian Cuisine
Zabaglione
Forget the calories, this indulgent Italian custard, Zabaglione, is a decadent delight that will transport you to la dolce vita with just one spoonful.
Zabaglione is the stuff dreams are made of – a rich and creamy Italian dessert that's been delighting people for centuries! It's got egg yolks, sugar, and Marsala wine, which come together to create a silky, indulgent treat. You can enjoy it warm or chilled, and it pairs perfectly with biscotti, berries, or even pastries. Zabaglione is a true taste of la dolce vita, capturing the essence of Italian culture and bringing families together. If you're curious to learn more about this cherished dessert, you'll find a wealth of history, recipes, and serving suggestions in the comprehensive overview.
Key Takeaways
- Zabaglione is a traditional Italian dessert made with egg yolks, sugar, and Marsala wine or other fortified wines, known for its rich, creamy texture.
- The recipe for zabaglione dates back to the 14th century and is an integral part of Italian culture, often served at weddings and holidays.
- Zabaglione is a rich source of protein from the egg yolks, but also contains sugar and alcohol from the wine, making it a treat to be enjoyed in moderation.
- The preparation method for zabaglione involves whisking the ingredients over a double boiler to achieve a light, airy consistency.
- Zabaglione can be served on its own, or used as a filling or topping in various desserts, and can be paired with fresh fruits, biscotti, or sponge cake.
History
Zabaglione, a classic Italian dessert, has a rich and indulgent history. This frothy, custard-like treat has been delighting taste buds for centuries! Originating in Italy, the first recorded recipe dates back to the 14th century, though its roots likely stretch even further.
Over the years, zabaglione has become a beloved part of Italian culture. It's often served at special occasions, like weddings and holidays, adding a touch of elegance and decadence.
The key ingredients – egg yolks, sugar, and Marsala wine – create a luxurious, velvety texture that melts in your mouth.
Whether enjoyed on its own or paired with fresh fruit, zabaglione is a true delight. Its history reflects the Italian passion for food, family, and living life to the fullest.
Recipe
Zabaglione is a rich and creamy Italian dessert that's often enjoyed as a light and airy treat. It's a versatile dish that can be served on its own or paired with fresh fruit, sponge cake, or other desserts.
The key to a successful zabaglione is to whip the egg yolks and sugar until they're light and fluffy, and then gently fold in the Marsala wine or other fortified wine. This creates a delicate and silky texture that melts in your mouth.
Ingredients:
- 6 large egg yolks
- 1/2 cup granulated sugar
- 1/2 cup Marsala wine or other fortified wine
- 1/4 cup heavy cream (optional)
Instructions: In a large, heatproof bowl, whisk together the egg yolks and sugar until the mixture is light and fluffy, about 3-5 minutes.
Place the bowl over a saucepan of simmering water, making sure the bowl doesn't touch the water. Whisk the mixture continuously for 5-8 minutes, or until it has thickened and doubled in volume.
Remove the bowl from the heat and immediately fold in the Marsala wine. Serve the zabaglione warm, or chill it in the refrigerator for at least 2 hours before serving.
For an even richer and creamier texture, you can fold in a 1/4 cup of heavy cream after the zabaglione has cooled. This will create a luscious and indulgent dessert.
Zabaglione is best enjoyed immediately, but can be stored in the refrigerator for up to 2 days.
Cooking Steps
Whisk the egg yolks and sugar until they're light and frothy.
Then, slowly pour in the wine and continue whisking over a double boiler until the mixture thickens.
Serve this delightful zabaglione immediately, in chilled glasses, for a truly special treat.
Step 1. Whisk Egg Yolks and Sugar
To begin the process, whisk the egg yolks and sugar together in a heatproof bowl until the mixture becomes thick and creamy. This takes just a few minutes, so be patient and keep whisking with vigor! The goal is to aerate the mixture, creating a light and fluffy texture.
Next, gently pour in the Marsala wine or sherry, whisking continuously to fully incorporate it. Don't be afraid to put some muscle into it – the more air you can work into the eggs, the better!
Once the liquid is blended in, you're ready for the next step. Place the bowl over a simmering pot of water, making sure the bottom doesn't touch the water.
Continue whisking the zabaglione steadily until it thickens to a custard-like consistency. This should take around 5-8 minutes. Keep an eye on it, as you don't want the eggs to curdle.
Once it's reached the perfect texture, remove from heat and serve immediately while warm and frothy.
Step 2. Add Wine
Next, gently pour in the Marsala wine or sherry, whisking continuously to fully incorporate it. The wine will give the zabaglione a delightful, rich flavor.
As you whisk, you'll notice the mixture start to thicken and become frothy. This is a crucial step, as the wine is what transforms the simple egg yolk and sugar into the signature zabaglione consistency.
Keep whisking vigorously, making sure to reach all the edges of the bowl. The wine should blend seamlessly into the egg mixture, creating a smooth, silky texture.
Don't be afraid to put some muscle into it – the more air you incorporate, the lighter and fluffier your zabaglione will be.
Once the wine is fully incorporated, your zabaglione is well on its way to perfection.
Pause for a moment to admire the gorgeous golden hue and irresistible aroma – you're one step closer to enjoying this delightful Italian dessert.
Step 3. Cook Over Double Boiler
With the wine now beautifully blended into the egg mixture, it's time to start cooking the zabaglione over a double boiler. This special cooking method helps to gently heat the ingredients without overcooking them.
First, fill the bottom pan of the double boiler with about an inch of water. Bring it to a gentle simmer over medium heat. Then, place the top pan containing the egg-wine mixture directly over the simmering water. Be sure the bottom of the top pan doesn't touch the water.
Now, start whisking the mixture continuously. As it heats, it will gradually thicken and become light and frothy. This takes about 5-8 minutes of constant whisking. Keep a close eye and don't let the mixture boil or it will curdle.
Once the zabaglione has reached the desired thick, creamy consistency, remove it from the heat. It's now ready to serve warm in dessert cups or use in other recipes. Enjoy this delightful, velvety Italian treat!
Step 4. Whisk Until Light and Frothy
Continuous whisking is key to transforming the egg-wine mixture into the desired light, airy zabaglione. Don't let your arm get tired! Keep that whisk moving in quick, circular motions for several minutes.
You'll notice the mixture start to thicken and become light and frothy as you whisk. That's exactly what you want.
Patience is crucial here – don't stop whisking too soon, or your zabaglione won't have that lovely, pillowy texture. Whisk until the mixture is pale and has tripled in volume.
You should see ribbons forming as you lift the whisk. This means the eggs have been thoroughly aerated, trapping tiny air bubbles that will make your zabaglione light and fluffy.
Once you've reached that perfect, light and frothy consistency, your zabaglione is ready to serve. Spoon it into dessert bowls and enjoy its sweet, creamy deliciousness.
This classic Italian treat is sure to delight everyone at the table.
Step 5. Serve Immediately, in Chilled Glasses
Once the zabaglione has reached the desired light, frothy texture, waste no time and quickly transfer it to chilled glasses or bowls.
You'll want to serve this luscious, golden-hued treat immediately, as its delicate, airy quality is best savored when fresh.
Carefully pour or spoon the zabaglione into your prepared vessels, filling them about three-quarters full. The cool temperature of the glasses will help to set the custard and prevent it from deflating too quickly.
For an extra special touch, consider garnishing the zabaglione with a sprinkle of cinnamon, a drizzle of sweet dessert wine, or a few fresh berries.
These simple additions can elevate the dish, making it truly shine as the star of any meal or celebration.
Serve the zabaglione right away, encouraging your family and guests to indulge in this decadent, cloud-like delight.
Its fleeting nature is part of the charm, so be sure to savor every spoonful while it's at its peak.
Final Thoughts
Zabaglione, the delicate and indulgent Italian custard, has undoubtedly left an indelible mark on the culinary world. It is often enjoyed on its own, but it also pairs beautifully with fresh fruit or Italian sweet bread. The luxurious texture and rich flavor of zabaglione make it a popular choice for elegant desserts, and it has become a staple in many Italian households. Whether served as a simple, yet decadent, ending to a meal or used as a filling for pastries, this classic custard continues to delight taste buds around the globe.
Whether you've savored it in a chilled glass or incorporated it into decadent desserts, this versatile treat has a way of capturing the hearts and taste buds of all who experience it.
As you bid farewell to this delightful exploration, remember that the true essence of zabaglione lies in its ability to bring people together.
Imagine serving this silky custard at your next family gathering or dinner party – the oohs and aahs of your guests as they indulge in its rich, velvety goodness will be music to your ears.
And who knows, you might even inspire someone to embark on their own zabaglione journey, passing down this cherished tradition to future generations.
Frequently Asked Questions
What Is the Difference Between Zabaglione and Sabayon?
Zabaglione and sabayon are the same thing – it's a light, frothy Italian custard made from egg yolks, sugar, and wine. The only difference is that "zabaglione" is the Italian term, while "sabayon" is the French version.
Can I Make Zabaglione Without Egg Yolks?
Can you make zabaglione without egg yolks? Well, no, that wouldn't be zabaglione. The key ingredient in zabaglione is egg yolks, which give it a rich, creamy texture. Without the yolks, it just wouldn't be the same.
How Long Can I Store Homemade Zabaglione?
How long can you store homemade zabaglione? The delicate custard-like dessert is best enjoyed fresh, but it can be refrigerated for up to 3 days. However, the texture and flavor may diminish over time.
Can I Use Zabaglione as a Filling for Pastries?
You can certainly use zabaglione as a filling for pastries. Its creamy, custard-like texture makes it an excellent choice for tarts, éclairs, or even layered cakes. Just be sure to chill it well before using.
Is Zabaglione Gluten-Free?
Yes, zabaglione is gluten-free. It's a light, frothy Italian custard made with just egg yolks, sugar, and Marsala wine or other fortified wine. Since it doesn't contain any wheat flour, zabaglione is a perfect gluten-free option for fillings and desserts.
Luca is our resident expert in Italian cuisine, with a deep love for fresh ingredients, classic pasta dishes, and rustic pizzas. He brings the heart of Italy to Cook if Ya, sharing recipes that highlight the simplicity and elegance of traditional Italian cooking, always paired perfectly with local wines.
-
Brazilian Cuisine3 months ago
Tacacá
-
Polish Comfort Food3 months ago
Krupnik (Barley Soup)
-
Brazilian Cuisine3 months ago
Caldeirada
-
Brazilian Cuisine3 months ago
Chicken in Brown Sauce
-
Southern Comfort Food3 months ago
Cheese Straws
-
African Cuisine3 months ago
Kedjenou (Ivory Coast)
-
Polish Comfort Food3 months ago
Vegetable Salad
-
American Diner Classics3 months ago
The Maillard Reaction: Understanding the Chemistry of Browning {Food Science and Cooking}