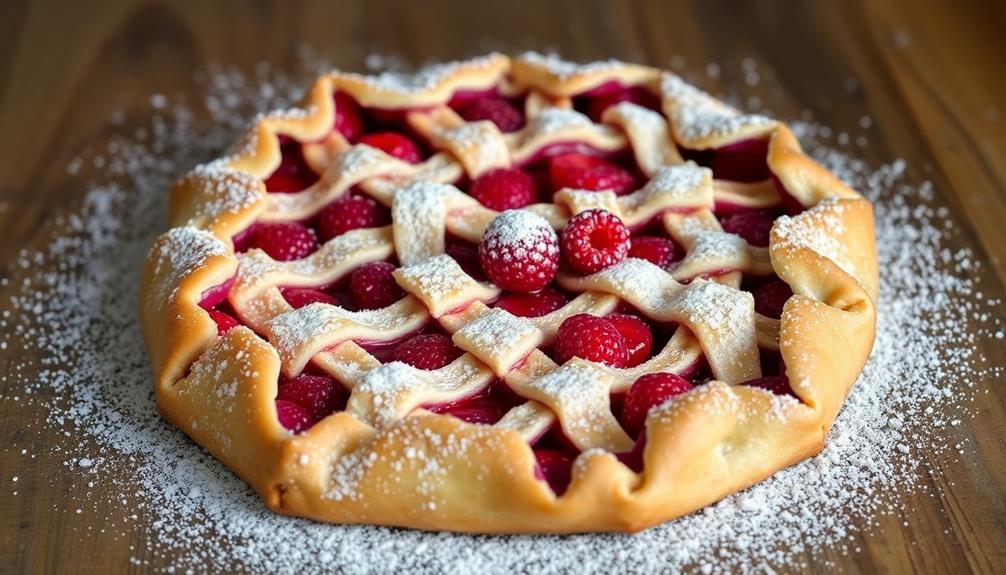

Crostata's buttery, flaky crust and delightful fillings make it a beloved Italian treat. You'll find it bursting with fresh fruits, nut spreads, or savory ingredients – whatever suits your taste! Bakers have been crafting this rustic pastry for generations, celebrating the seasons and traditions of Italy. Serve it warm, dusted with powdered sugar, for a charming end to any meal. Whether you're hosting a gathering or enjoying a quiet moment, crostata's versatility and homemade goodness are sure to delight. Intrigued? Let's dive deeper into the history and recipe of this cherished Italian delight.
Key Takeaways
- Crostata is a rustic Italian pastry with a buttery crust and versatile fillings, including fresh fruits, nut spreads, or savory ingredients.
- It originated in rural Italy and has regional variations, with southern versions featuring citrus fruits and northern ones highlighting berries.
- The cooking process involves rolling out the dough, adding the desired filling, crimping and shaping the dough edges, and baking until golden brown.
- Crostata is often served warm, dusted with powdered sugar, and enjoyed as a delightful ending to meals or a standalone treat.
- This versatile pastry can be adapted for various occasions, dietary preferences, and seasonal fruits, offering a range of sweet to tangy flavors.
Top picks for "crostata"
Open Amazon search results for this keyword.
As an affiliate, we earn on qualifying purchases.
History
The humble crostata has a long and storied history, tracing its roots back to the rural regions of Italy. This beloved pastry, with its flaky crust and sweet fruit filling, has been delighting taste buds for centuries.
Initially, the crostata was a simple affair, made by farmers and homemakers using whatever seasonal fruits were available. Over time, the recipe evolved, with each region developing its own unique twist. In the south, you might find a crostata filled with tangy citrus, while the north boasts versions bursting with juicy berries.
Today, the crostata remains a cherished part of Italian culinary tradition. Whether served at a family gathering or enjoyed as a leisurely afternoon treat, this timeless pastry continues to bring joy and comfort to those who savor its flavors.
Its enduring popularity is a testament to the power of simple, honest ingredients crafted with care.
Recipe
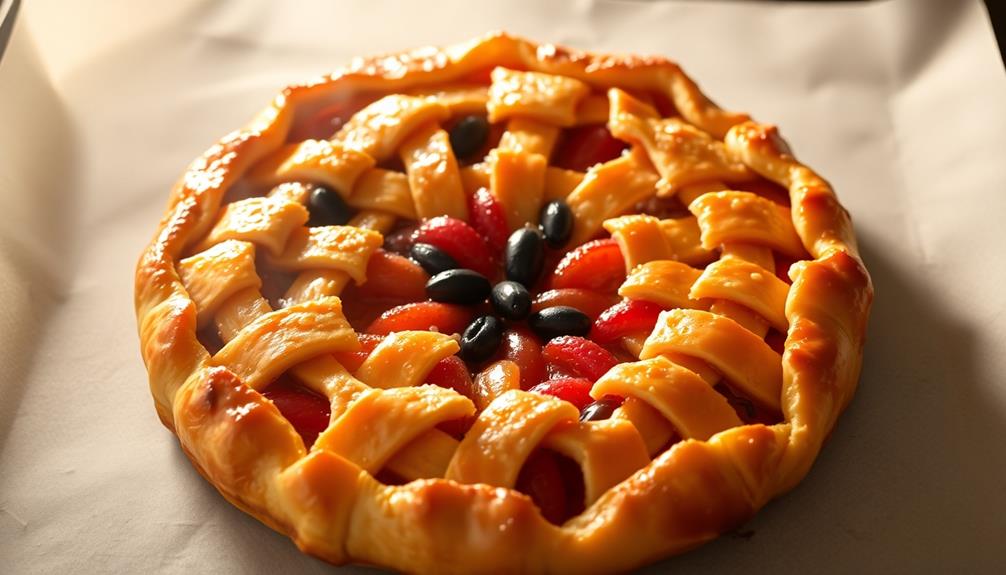
Crostata is a classic Italian pastry that can be filled with a variety of sweet or savory ingredients. This rustic tart is a delightful dessert that showcases the flavors of the filling while the flaky crust provides a perfect complement. Classic tomato bruschetta is a popular savory filling for crostata, featuring ripe tomatoes, fresh basil, and garlic. The combination of the juicy tomatoes and fragrant herbs pairs wonderfully with the buttery, flaky crust of the crostata. Whether enjoyed as a sweet or savory treat, crostata is a versatile pastry that brings traditional Italian flavors to any table.
The crust for a crostata is typically made with a simple, buttery dough that's easy to work with and bakes up to a golden brown. The filling can range from fresh fruit like berries or stone fruits to nutty spreads or even savory ingredients like cheese and vegetables.
Ingredients:
- 2 cups (250g) all-purpose flour
- 1/2 cup (115g) unsalted butter, chilled and cubed
- 1/4 cup (50g) granulated sugar
- 1 teaspoon salt
- 1 egg, beaten
- 2-3 tablespoons ice water
For the Filling:
- 2 cups (250g) fresh fruit, such as berries or stone fruits, washed and sliced
- 1/4 cup (50g) granulated sugar
- 2 tablespoons cornstarch
- 1 teaspoon lemon zest (optional)
Instructions:
In a food processor, pulse the flour, butter, sugar, and salt until the mixture resembles coarse crumbs. Add the beaten egg and 2 tablespoons of ice water, and pulse until the dough just begins to come together. If the dough is too dry, add the remaining 1 tablespoon of ice water and pulse again.
Shape the dough into a disc, wrap in plastic wrap, and refrigerate for at least 30 minutes.
Preheat the oven to 375°F (190°C). On a lightly floured surface, roll the dough out to a 12-inch circle, about 1/4-inch thick. Carefully transfer the dough to a 9-inch tart pan with a removable bottom. Press the dough into the sides of the pan and trim any excess. Chill the dough-lined tart pan for 15 minutes.
In a bowl, mix the fruit, sugar, cornstarch, and lemon zest (if using) until well combined. Spoon the filling into the prepared tart shell. Bake for 30-35 minutes, or until the crust is golden brown and the filling is bubbling. Allow the crostata to cool completely before slicing and serving.
When making a crostata, the key is to work the dough as little as possible to prevent it from becoming tough. Additionally, chilling the dough before rolling and baking helps to ensure a flaky, tender crust. Experiment with different fillings to find your favorite combination of flavors.
Cooking Steps
Roll out that dough and get ready to bake!
Next, add your favorite filling – the possibilities are endless.
Finally, crimp and shape the edges, then pop it in the oven until it's golden brown.
Don't forget to sprinkle on some powdered sugar for the finishing touch.
Step 1. Roll Out the Dough

Having gathered your ingredients, begin by lightly flouring your work surface. This is where the magic of crostata-making begins!
Grab your rolling pin and get ready to transform that dough into a thin, even layer. Gently roll the dough, starting from the center and working your way outward. Apply light, even pressure to ensure it doesn't stick to the surface.
As the dough starts to take shape, rotate it occasionally to maintain a round, uniform appearance. Don't be afraid to add a sprinkle of flour if needed to prevent sticking. Keep rolling until the dough is about 1/8-inch thick, large enough to fit your tart pan.
Carefully transfer the rolled dough to your pan, gently pressing it into the sides and bottom. Trim any excess dough from the edges, creating a clean, polished look.
Congratulations! You've successfully rolled out the dough for your delectable crostata. Now, let's move on to the next step in this culinary adventure.
Step 2. Add Desired Filling

With the dough beautifully rolled out, it's time to add your desired filling. This is where you can let your creativity shine! You can choose from a variety of sweet or savory options, depending on your mood and preference.
For a classic crostata, you might go with a juicy fruit filling, like fresh berries or sliced apples. Simply arrange the fruit in the center of the dough, leaving a nice border around the edge.
If you're feeling adventurous, try a unique filling, such as nutty hazelnut spread or even a savory pesto.
Once you've added your filling, it's time to fold the dough over the edges, creating a rustic, free-form shape. This gives the crostata its signature look and allows the filling to peek through.
Don't worry about perfection – the more organic and imperfect, the better!
Now your crostata is ready for the oven. Get ready for the mouthwatering aroma to fill your kitchen as it bakes to golden, flaky perfection.
Step 3. Crimp and Shape Dough Edges

Next, you'll want to carefully crimp and shape the edges of the dough. Using your fingers, gently pinch and roll the dough to create a beautiful, fluted edge all the way around. This not only makes your crostata look extra special, but it also helps to contain the filling as it bakes.
Be gentle and take your time. Slowly work your way around the entire circle, creating a uniform edge. If any parts of the dough tear or crack, simply press them back together. You want a lovely, scalloped border that will bake up golden and crisp.
Once you're satisfied with the edge, use a fork to lightly prick the bottom of the dough. This will help prevent any air bubbles from forming as it bakes.
And voila! Your crostata is now ready to be filled and baked to perfection. Get ready for the delicious aroma to fill your kitchen!
Step 4. Bake Until Golden Brown
Once you've carefully crimped and shaped the edges, it's time to bake your crostata until it's golden brown. Preheat your oven to a toasty 375°F (190°C).
Gently slide the prepared crostata onto a baking sheet lined with parchment paper. This will help prevent sticking and ensure even browning.
As the crostata bakes, your kitchen will fill with the mouthwatering aroma of buttery pastry and fragrant fruit. Keep a close eye on it, checking every 10-12 minutes.
You'll know it's ready when the crust is a beautiful golden hue and the fruit filling is bubbling happily.
Once the crostata is baked to perfection, carefully remove it from the oven. Let it cool for a few minutes before slicing and serving.
Enjoy the flaky, crisp crust and the warm, gooey fruit center – it's a delightful treat that's sure to impress your family and friends. Bon appétit!
Step 5. Garnish With Powdered Sugar
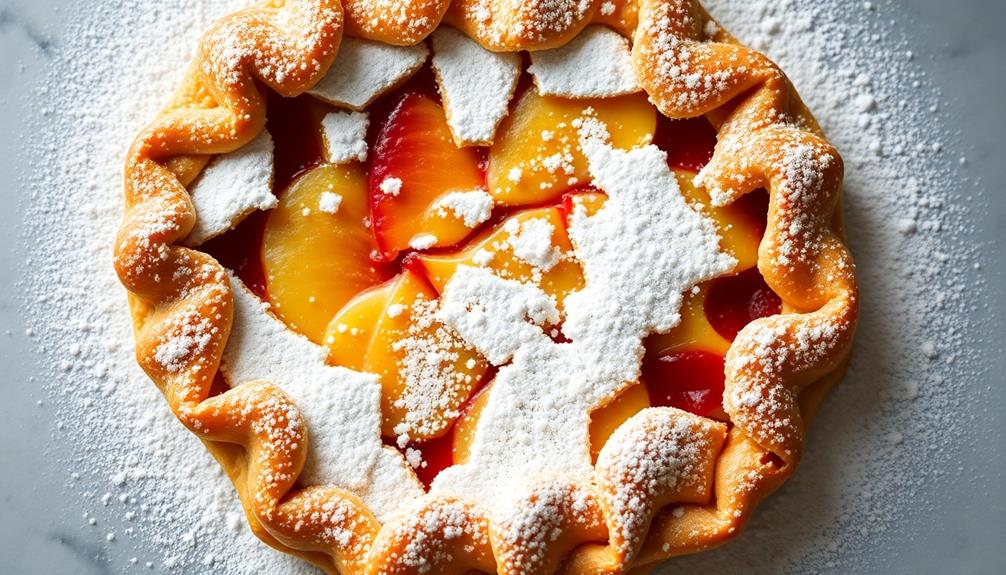
After allowing the crostata to cool for a few minutes, dust the top generously with powdered sugar. This final touch adds a lovely, snowy dusting that contrasts beautifully with the golden-brown crust.
Gently shake the powdered sugar over the tart using a fine-mesh sieve or small strainer, making sure to cover the entire surface. The sweet, fluffy sugar will melt slightly, creating a delightful texture and flavor.
For an extra festive look, you can add a light coating of powdered sugar around the edges of the crostata as well. Carefully run your fingers along the sides, letting the sugar fall and cling to the flaky crust. This will give the dessert a truly eye-catching presentation.
Serve the crostata immediately while it's still warm, allowing the powdered sugar to create a lovely, wintry appearance. The combination of the buttery pastry and the sweet, snowy topping is sure to delight your family and friends. Enjoy this classic Italian treat!
Final Thoughts
Crostata is a delightful Italian tart that offers a delicious and satisfying end to any meal. Once you've dusted the top with a light layer of powdered sugar, your crostata is ready to shine.
The combination of the buttery crust and the sweet, jammy filling creates a heavenly treat that's sure to delight your taste buds.
Whether you're serving it at a family gathering or enjoying it as a sweet snack, the crostata is a versatile dessert that can be dressed up or down. You can experiment with different fillings, from classic fruit preserves to more unique flavors like chocolate or lemon. The possibilities are endless!
As you savor each bite, you'll be transported to the charming cafes of Italy, where the crostata is a beloved and time-honored tradition.
Frequently Asked Questions
How Long Does a Crostata Last After Baking?
After baking, your crostata can last for several days when stored properly. It generally keeps well for up to 3-4 days at room temperature, or you can refrigerate it to extend its shelf life.
Can I Use Store-Bought Pie Crust for a Crostata?
Yes, you can use store-bought pie crust for your crostata. It's a convenient option that'll save you time on the preparation. Just be sure to follow the instructions on the package for the best results.
What Is the Difference Between a Crostata and a Tart?
You may be wondering, what's the difference between a crostata and a tart? Well, a tart typically has a thinner, crispier crust, while a crostata often features a more rustic, thicker pastry base.
Can I Freeze a Baked Crostata?
You can certainly freeze a baked crostata. Once it's cooled completely, wrap it tightly in plastic wrap or aluminum foil, and place it in the freezer. It'll keep for up to 3 months, and you can thaw it at room temperature before serving.
Is a Crostata Considered a Dessert or a Pastry?
A crostata is considered both a dessert and a pastry. It's a type of open-faced tart that can be sweet or savory, making it versatile enough to be enjoyed as a sweet treat or an appetizer.