International Cuisine
Fried Shrimp Burger: A Crispy and Juicy Delight
Crunchy and succulent, the fried shrimp burger is a mouthwatering treat that will leave you craving more with every delicious bite. Discover how to make it!
A fried shrimp burger is a tasty delight that brings together crispy, golden-brown coating and juicy shrimp. You'll love the crunchy texture from panko breadcrumbs and the flavorful zing from spices like garlic and paprika. It's super easy to customize with your favorite toppings, like fresh lettuce, juicy tomatoes, and creamy tartar sauce. Ideal for beach days or backyard barbecues, this burger is perfect for sharing with family and friends. Plus, you can experiment with side dishes like sweet potato fries or coleslaw for a complete meal. There's so much to explore in this fun dish!
Key Takeaways
- The fried shrimp burger features crispy, golden-brown patties made from fresh shrimp and seasoned breadcrumbs, offering a delightful crunch.
- It originated from coastal cuisine and is popular in the United States, especially along the Gulf Coast.
- Customizable toppings like lettuce, tomato, and tartar sauce enhance freshness and flavor in each burger.
- Nutritionally, each burger contains approximately 400-500 calories and is high in protein, thanks to the shrimp.
- The dish can be served with various sides and dipping sauces, making it versatile for meals or gatherings.
History
The fried shrimp burger has its roots in coastal cuisine, where fresh seafood takes center stage. People living near oceans and rivers have enjoyed shrimp for centuries, often preparing it in tasty ways. As time went on, folks began to dream up new dishes, and the shrimp burger was born! Imagine mixing delicious shrimp with spices, breading it up, and frying it to a golden crisp. Doesn't that sound yummy?
In the United States, the fried shrimp burger gained popularity, especially in areas known for their seafood, like the Gulf Coast. These areas celebrate their ocean treasures, and you can find shrimp burgers at many beachside shacks and restaurants. They've become a favorite meal for families enjoying a day by the sea.
Plus, making a shrimp burger is a fun and creative experience. You can add your favorite toppings, like tangy sauces or crunchy slaw, making each burger unique.
Whether you're enjoying it at the beach or in your backyard, the fried shrimp burger brings a taste of the ocean right to your plate. So, grab a bite and enjoy the flavors of coastal cooking!
Cooking Steps
To create a delicious fried shrimp burger, start by gathering all your ingredients and tools, ensuring you have everything at hand for a smooth cooking process. You'll need fresh shrimp, breadcrumbs, an egg, flour, and your favorite seasonings. Don't forget the burger buns and toppings like lettuce, tomato, and sauce!
First, peel and devein the shrimp, then chop them into small pieces. In a bowl, mix the shrimp with the egg and your chosen seasonings. Next, add flour and breadcrumbs, and stir until everything's combined.
Now, heat some oil in a pan over medium heat. While that's warming up, form the shrimp mixture into patties. Once the oil's hot, carefully place the patties in the pan. Fry them for about 3-4 minutes on each side, or until they're golden brown and crispy.
When they're done, let the patties rest on a paper towel to absorb excess oil.
Step 1. Prepare Shrimp Mixture
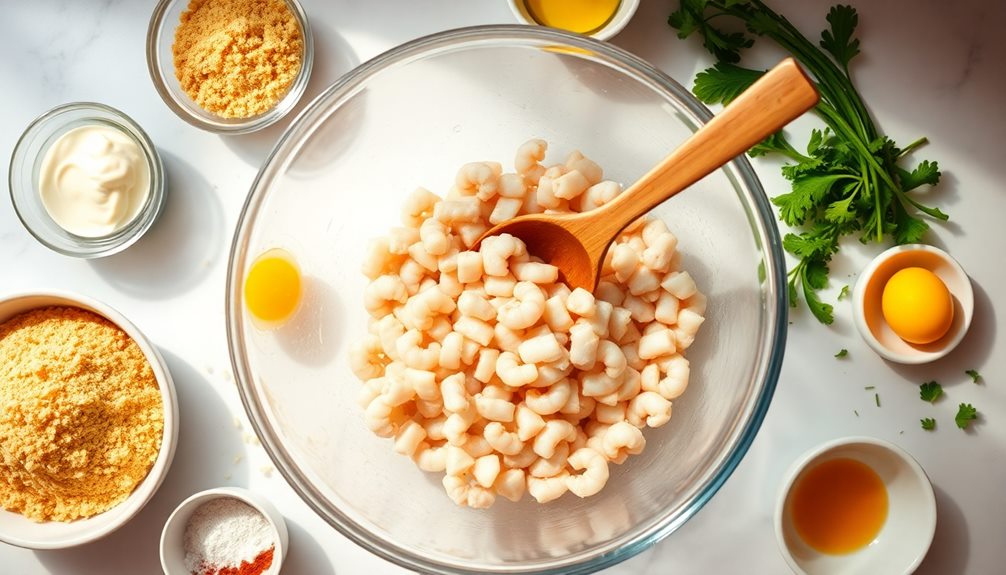
Getting started on the shrimp mixture is crucial for a delicious fried shrimp burger. First, you'll need to gather all your ingredients. You'll want fresh shrimp, breadcrumbs, and some tasty spices like garlic powder, paprika, and salt. Don't forget a bit of chopped green onion for that yummy flavor!
Next, peel and devein your shrimp. This part can be a little messy, but that's okay! Rinse them under cold water, then pat them dry with a paper towel. Once they're ready, chop the shrimp into small pieces. You want them to be bite-sized, so they'll mix well.
Now, grab a big bowl and toss in the chopped shrimp. Add your breadcrumbs and spices, mixing everything together with your hands or a spoon. It's like playing with your food, but trust me, it's going to be worth it!
If you want, you can add an egg to help hold everything together, making the mixture even more delicious.
Step 2. Form Shrimp Patties
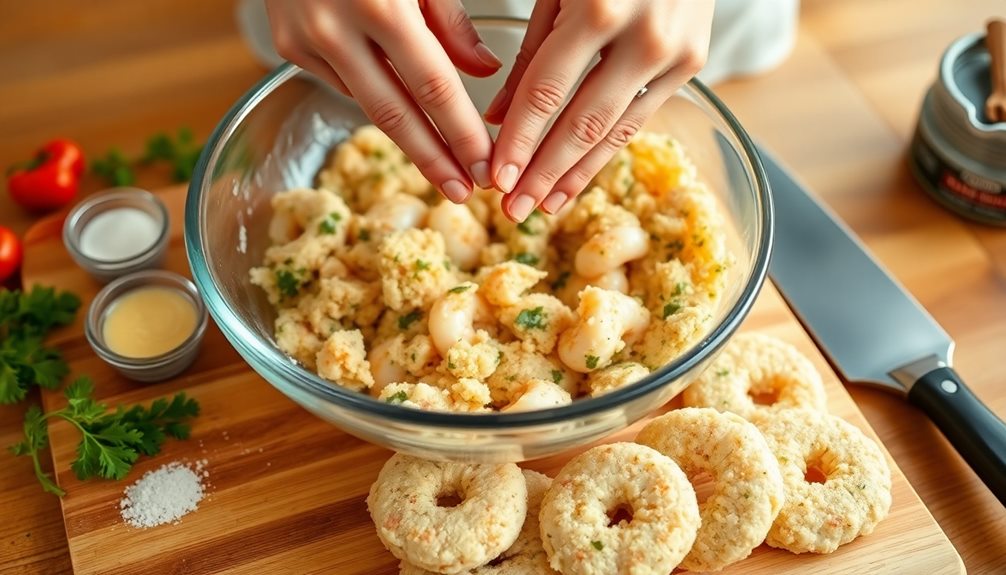
After mixing your shrimp, it's time to form the patties. Grab a handful of the shrimp mixture; about the size of a golf ball should do. With your hands, gently shape it into a flat, round patty. Don't worry if it doesn't look perfect! Each patty will be unique, just like you. Aim for a thickness of about one inch, which helps them cook evenly.
As you form the patties, make sure they're not too thick or too thin. If they're too thick, they mightn't cook all the way through, and if they're too thin, they could fall apart. Keep the patties on a plate or a clean surface as you shape them. You can even make a little indentation in the center of each patty; this helps them cook evenly and stay nice and juicy.
Once you've formed all the patties, take a moment to admire your handiwork! You're just a few steps away from enjoying a delicious fried shrimp burger.
Step 3. Coat Patties in Breadcrumbs
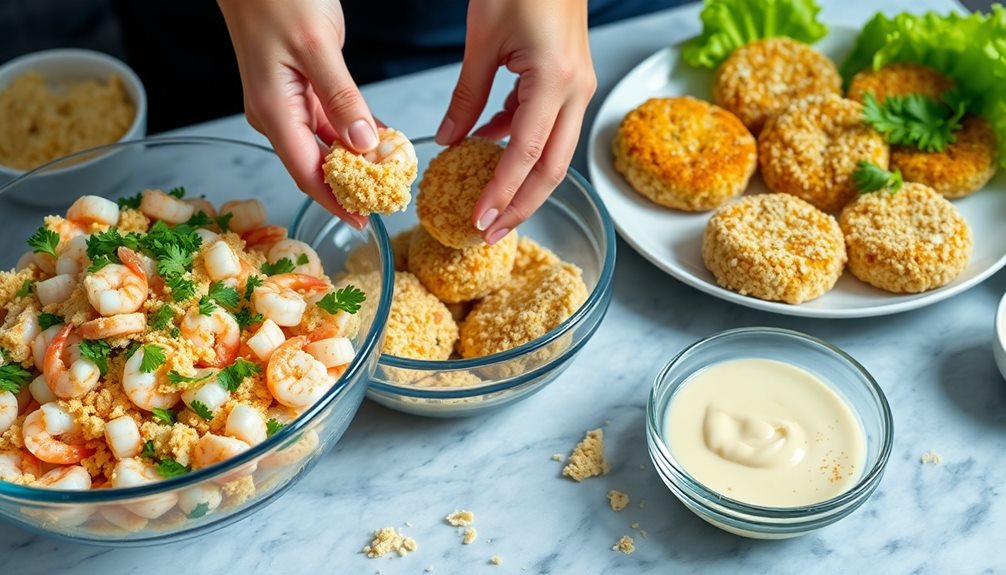
Coating your shrimp patties in breadcrumbs is the key to achieving that perfect crispy texture. First, gather your ingredients: some plain or seasoned breadcrumbs, and a shallow dish. You'll want to have your shrimp patties ready to go.
Now, it's time to get your hands a little messy in the best way! Take each shrimp patty and gently press it into the breadcrumbs. Make sure to coat both sides evenly. You want to cover every bit of that delicious shrimp mixture.
If you like a thicker coating, feel free to dip your patty in a beaten egg before breading it. This extra step can make your burger even crunchier!
Once you've coated all your patties, let them rest for about 10 minutes. This helps the breadcrumbs stick better and gives you an even crispier bite.
If you're feeling adventurous, you can mix in some spices or grated cheese with your breadcrumbs for added flavor. Just imagine that tasty crunch waiting for you!
With your shrimp patties all set, you're one step closer to enjoying a fantastic meal. Get ready for the next exciting part of cooking!
Step 4. Fry Patties Until Golden Brown
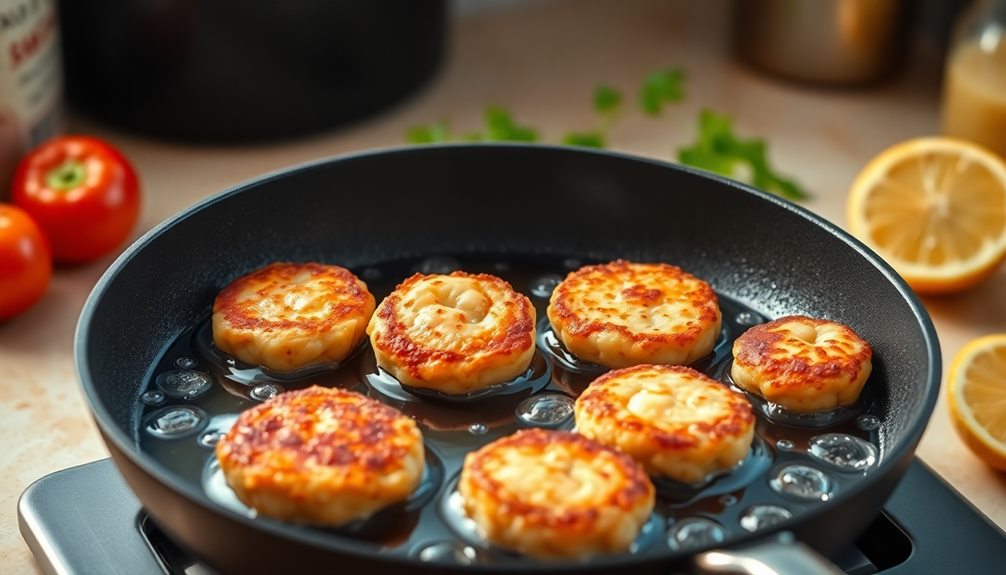
Once your shrimp patties are perfectly coated in breadcrumbs, it's time to fry them until they're golden brown and irresistibly crispy.
First, grab a large frying pan and pour in enough oil to cover the bottom, about half an inch deep. Heat the oil over medium heat until it shimmers like a sparkling lake.
Carefully place your shrimp patties in the hot oil, making sure not to overcrowd the pan. This will help them cook evenly and get that beautiful crust you're after.
Let them fry for about 3 to 4 minutes on one side. You'll know they're ready to flip when they turn a lovely golden color.
Once they're golden on the bottom, gently flip them over and fry the other side for another 3 to 4 minutes. Keep an eye on them; you want them crispy, but not burnt!
When both sides are perfectly golden, it's time to take them out. The aroma will make your mouth water, and you'll be so excited to taste them. Just wait a little longer; the next step is just around the corner!
Step 5. Drain on Paper Towels
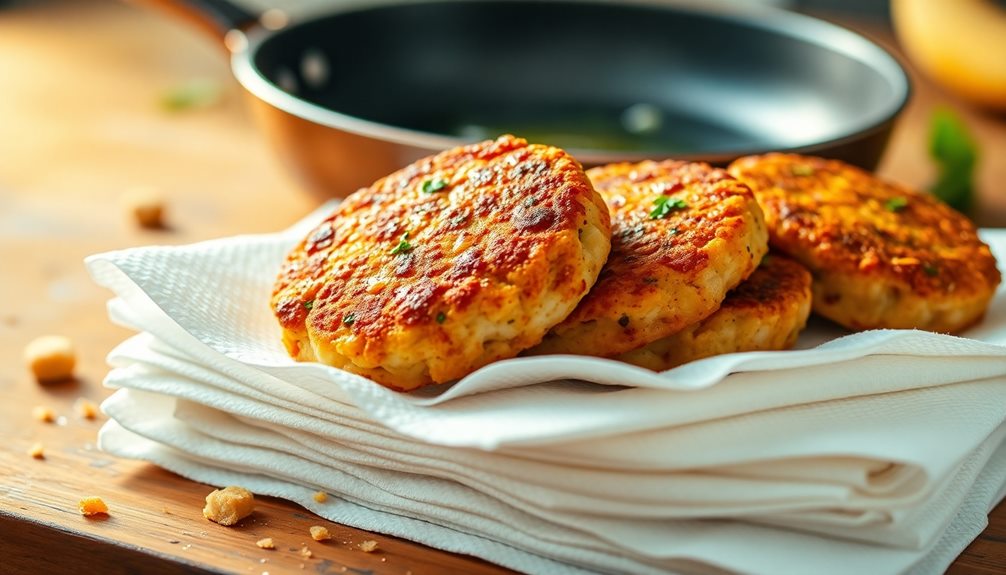
As soon as your shrimp patties are golden and crispy, it's time to get them out of the oil. Carefully lift each patty using a slotted spoon, letting the excess oil drip off. You want to keep that delicious crunch without it becoming soggy.
Now, grab a plate and lay down some paper towels. This will help soak up any leftover oil, keeping your shrimp burgers light and tasty.
Place the patties on the paper towels in a single layer. You might hear a little sizzling sound as the oil meets the towels, and that's totally normal! If you've made a lot of patties, consider using a second layer of towels or a new plate to avoid overcrowding.
Let them drain for about 2-3 minutes. This little wait is worth it, trust me!
While they're draining, you can set up your burger station with buns, toppings, and sauces. Your kitchen will smell amazing, and your friends and family will be super excited to dig in.
Once your patties are ready, you're one step closer to enjoying your scrumptious fried shrimp burger! Enjoy every crispy, juicy bite!
Final Thoughts
When you take that first bite of a fried shrimp burger, you're in for a delightful experience that combines crunch and flavor in a way that's hard to resist. The crispy coating gives way to juicy shrimp, creating a satisfying texture that's simply delicious.
You might find yourself smiling as you taste the blend of spices and seasonings that make this burger special.
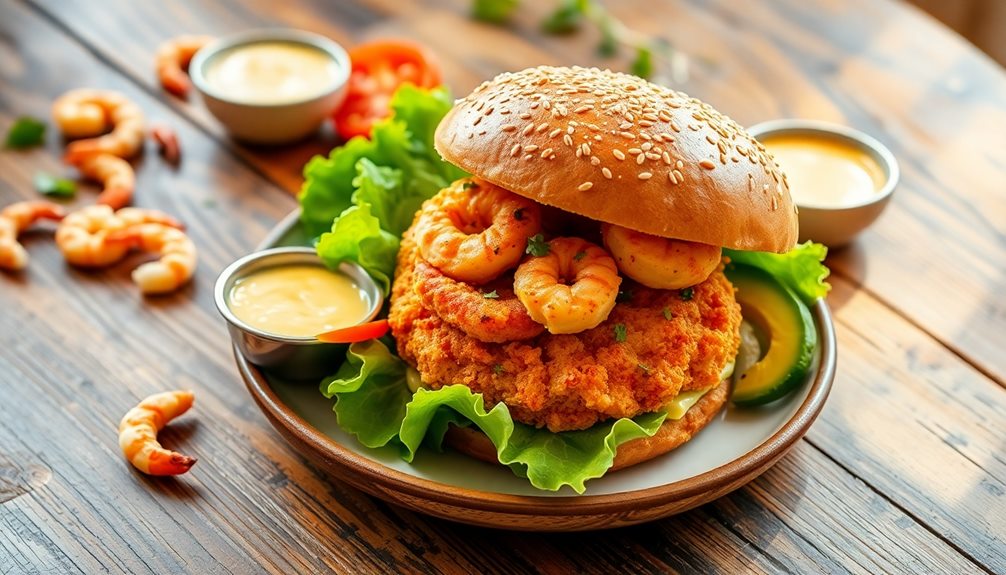
Making a fried shrimp burger at home isn't just fun; it's a chance to impress your family and friends with your cooking skills. You can experiment with different toppings, like fresh lettuce, zesty sauces, or even a slice of avocado.
Each burger can become a unique creation that reflects your taste!
Frequently Asked Questions
Can I Use Frozen Shrimp for the Burger?
Yes, you can use frozen shrimp for your burger. Just make sure to thaw them properly before cooking. This'll help achieve that juicy texture and flavor you're aiming for. Enjoy your cooking!
What Toppings Pair Well With a Fried Shrimp Burger?
When it comes to toppings, you can't go wrong with coleslaw for crunch, spicy mayo for kick, or sliced avocado for creaminess. A squeeze of lime adds brightness, making each bite burst with flavor!
How Do I Store Leftover Fried Shrimp Burgers?
To store leftover fried shrimp burgers, wrap them tightly in plastic wrap or foil. Place them in an airtight container, then refrigerate for up to three days. Reheat in the oven for best results.
Are There Gluten-Free Options for the Bun?
Yes, there are gluten-free options for buns! You can use lettuce wraps, gluten-free bread, or specially made gluten-free buns available at many grocery stores. Just be sure to check the labels for any hidden gluten.
Can I Make a Shrimp Burger Without Frying?
Yes, you can absolutely make a shrimp burger without frying! Try baking or grilling the shrimp patties instead. This way, you'll enjoy a healthier option while still savoring delicious flavors and textures. Enjoy your cooking!
International Cuisine
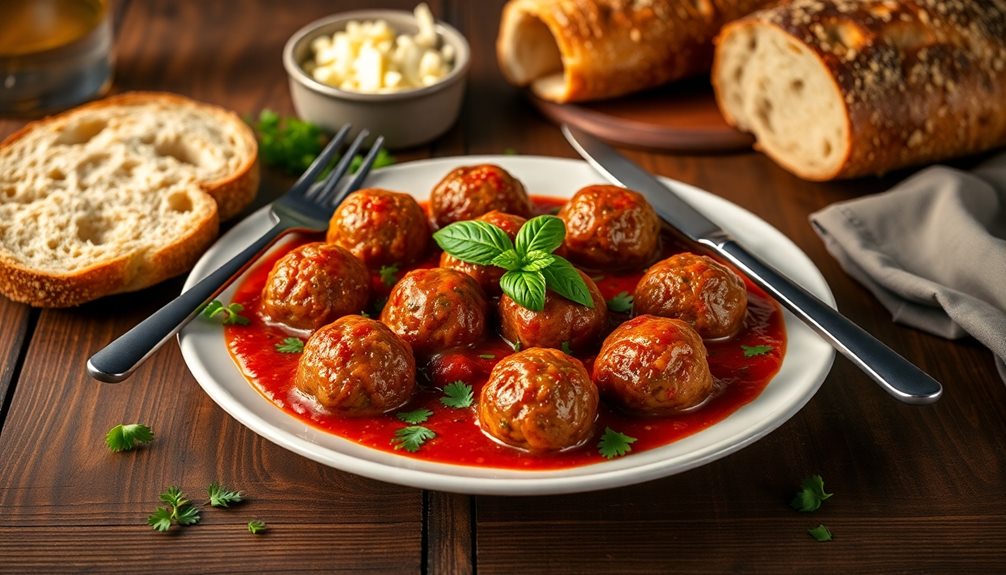
The Meatball Shop Recipe: How to Make Perfect Meatballs
Learn the secrets to crafting perfect meatballs just like The Meatball Shop, and discover how to elevate your dish to a whole new level!
You can make delicious meatballs, just like at The Meatball Shop, with easy steps! Start by gathering quality ground meat, breadcrumbs, eggs, and fresh herbs. Mix these ingredients in a big bowl, using your hands for the perfect blend. Roll the mixture into golf ball-sized meatballs and chill them for about 30 minutes. Preheat your oven to 400°F and bake the meatballs for 20-25 minutes, turning them halfway for that golden color. Make sure they reach 165°F inside. Serve them with your favorite sauce over pasta or as tasty appetizers. Stick around to learn even more tips for great meatballs!
Key Takeaways
- Use high-quality ground meat, breadcrumbs, fresh herbs, eggs, and spices to create a flavorful meatball mixture.
- Mix ingredients gently with clean hands to maintain tenderness and avoid overmixing.
- Chill shaped meatballs for at least 30 minutes to enhance texture and flavor before cooking.
- Bake at 400°F (200°C) for 20-25 minutes, ensuring internal temperature reaches 165°F (74°C) for safe consumption.
- Serve meatballs with various sauces, over pasta, or as appetizers garnished with fresh herbs for a delightful presentation.
History
Tracing back to ancient times, meatballs have a rich and varied history that reflects the culinary practices of different cultures. You might be surprised to learn that people have been making meatballs for thousands of years! In ancient Rome, they mixed ground meat with spices and grains, creating tasty bites similar to what you enjoy today.
As you travel through history, you'll find that every culture has its own special twist on meatballs. In Italy, for example, they use ingredients like breadcrumbs, cheese, and herbs, resulting in deliciously flavorful morsels.
Meanwhile, in Sweden, you've got the famous Swedish meatballs, often served with creamy sauce and lingonberry jam, making them unique and beloved.
You can see how meatballs have adapted and evolved over the years, bringing different flavors to tables everywhere. They've gone from simple meals for ancient families to gourmet dishes in fancy restaurants.
No matter where you are, there's a good chance you've tasted or seen these delightful bites. So, next time you enjoy a meatball, think about the history behind those scrumptious flavors and the people who've made them special throughout the ages!
Cooking Steps
When you're ready to cook your meatballs, the key is to follow a few straightforward steps that ensure they're juicy and flavorful.
First, preheat your oven to 400°F (200°C). This will get everything nice and hot! Line a baking sheet with parchment paper, so the meatballs don't stick.
Next, grab your meatball mixture and shape it into small balls—about the size of a golf ball works well. Place them on the baking sheet, leaving some space between each one. You want them to cook evenly!
Once your oven is hot, pop the meatballs in and bake for about 20 to 25 minutes. You'll know they're done when they're golden brown and cooked through.
While they bake, you can prepare your favorite sauce. Maybe marinara or something zesty!
When the meatballs are ready, take them out of the oven and let them rest for a few minutes. This helps them stay juicy.
Finally, serve your meatballs with sauce, pasta, or on a sub. Enjoy your delicious creation!
Step 1. Gather Ingredients and Tools
Before diving into the world of meatball-making, you'll want to have everything ready at hand. Gathering your ingredients and tools is key to making the perfect meatballs.
Start with the basics: ground meat, like beef, pork, or turkey, and don’t forget about breadcrumbs, eggs, and your favorite seasonings. Fresh herbs like parsley or basil can add a delicious touch! If you’re feeling adventurous, consider adding some smoked meats to your ground meat mixture for an extra burst of flavor. Options like smoked bacon or sausage can take your dish to the next level! Just be sure to adjust your seasoning to account for the smokiness of the added meats. Smoking meats can add depth and complexity to any ground meat dish.
Next, grab your measuring cups and spoons. You'll need these to ensure you get the right amounts, which is super important for flavor.
A large mixing bowl is essential for combining everything. You might also want a baking sheet or a skillet handy for cooking your meatballs.
Don't forget about your trusty kitchen tools! A pair of kitchen shears can help chop herbs, while a spoon makes stirring easier.
If you have a meat thermometer, that's a bonus! It'll help you check if your meatballs are cooked perfectly.
Step 2. Mix Meat and Seasonings Thoroughly
Get ready to dive into the mixing process, as combining the meat and seasonings thoroughly is crucial for flavor. Grab a large bowl and add your ground meat, whether it's beef, pork, turkey, or a mix.
Now, it's time to sprinkle in those delicious seasonings you gathered earlier, like salt, pepper, garlic powder, and herbs.
Using your clean hands, gently mix the meat and seasonings together. Make sure you're distributing the seasonings evenly throughout the meat. If you notice that some parts are clumpy, don't worry! Just keep mixing until everything looks well combined.
You might want to try not to overmix, as that can make your meatballs tough instead of tender. Just mix until everything is nicely blended. It can be a bit messy, but that's part of the fun!
Once you're finished, you'll have a flavorful mixture ready for shaping. Trust me, this step is super important because it sets the stage for those tasty meatballs to come. Enjoy the process, and get excited about the delicious meal you're creating!
Step 3. Shape Into Uniform Balls
Shaping your meat mixture into uniform balls is key to ensuring they cook evenly. When you've got your delicious meat mixture ready, it's time to roll! Start by washing your hands and grabbing a scoop of the mixture—about the size of a golf ball. You want each meatball to be roughly the same size so they all cook at the same rate.
Now, gently roll the mixture between your palms, using a light touch. You don't want to squish them too hard; just enough to form a nice, round ball. If the mixture sticks to your hands, you can lightly wet your palms with water or oil. This little trick makes it easier!
Once you've shaped all your meatballs, place them on a baking sheet lined with parchment paper. Make sure to leave some space between each ball so they can breathe and brown nicely.
You'll find that uniformity not only helps with cooking but also makes your meatballs look super appetizing! Keep going until you've shaped all your mixture, and soon you'll be ready for the next tasty step in your meatball adventure!
Step 4. Chill Before Cooking
Chilling your meatballs for at least 30 minutes before cooking can make a big difference in their texture and flavor. When you pop them in the fridge, the ingredients have time to mingle and bond, making the meatballs firmer and easier to handle. This means they're less likely to fall apart while cooking!
To chill your meatballs, simply place them on a tray or plate, making sure they're not touching each other. Cover them with plastic wrap or a clean kitchen towel to keep them fresh. If you're feeling adventurous, you can even pop them in the freezer for about 15 minutes for a quicker chill! The goal is to firm them up just enough that they hold their shape when they hit the heat.
While you wait, you can prepare your sauce or side dishes. Getting everything ready ahead of time makes your cooking experience a breeze!
Plus, the anticipation of those delicious meatballs will make the wait even more exciting. Remember, a little patience goes a long way in creating the perfect meatballs for your meal! So, chill out and enjoy the process!
Step 5. Bake Until Golden Brown
After letting your meatballs chill, it's time to cook them to perfection. Preheat your oven to 400°F (200°C). This will help your meatballs get that delightful golden brown color we all love.
Line a baking sheet with parchment paper, which makes for easy cleanup later.
Now, carefully place your chilled meatballs onto the baking sheet, giving them some space. Don't crowd them! This allows hot air to circulate around each meatball, helping them cook evenly.
Once they're all lined up, pop them into the oven.
Set a timer for about 20 to 25 minutes. You'll want to check halfway through and give them a little turn to ensure they brown all over.
When the timer goes off, take a peek! If they're golden brown and sizzling, they're ready.
If you've got a meat thermometer, check that the center is at least 165°F (74°C) to make sure they're cooked through.
Once they're done, let them rest for a few minutes. This helps keep them juicy and delicious.
Now, you're ready to enjoy those perfect meatballs!
Final Thoughts
Have you ever wondered what truly makes a meatball unforgettable? It's all about the love, care, and a few special tips that you can easily master.
When you gather your ingredients, think about how each one adds flavor and texture. Choosing the right meat, mixing it with fresh herbs, and adding just the right amount of seasoning can make all the difference.
Don't forget to get your hands a little messy! Mixing the ingredients by hand helps you feel the textures and create the perfect consistency.
As you shape each meatball, imagine the smiles they'll bring when you serve them to family and friends.
And let's not overlook cooking! Baking until golden brown gives them that delicious finish.
Try serving your meatballs with your favorite sauce or on a bed of pasta.
Frequently Asked Questions
Can I Use Ground Turkey Instead of Beef?
Yes, you can definitely use ground turkey instead of beef! It'll give your dish a lighter flavor and healthier profile. Just make sure to adjust seasonings and cooking time for the best results. Enjoy cooking!
What Herbs Pair Well With Meatballs?
When making meatballs, consider using herbs like basil, oregano, and parsley. They bring out flavors beautifully. You might also try thyme or rosemary for a unique twist. Experimenting with different combinations can enhance your dish!
How Do I Store Leftover Meatballs?
To store leftover meatballs, let them cool completely, then place them in an airtight container. You can refrigerate them for up to four days or freeze them for up to three months. Enjoy your leftovers!
Can I Freeze Meatballs After Cooking?
Yes, you can freeze cooked meatballs! Just let them cool, then place them in an airtight container or freezer bag. They'll stay fresh for up to three months, making meal prep super easy for you!
What Sauces Complement Meatballs Best?
When pairing sauces with meatballs, you can't go wrong with marinara, barbecue, or creamy mushroom sauce. Each adds a unique flavor profile, elevating your dish and making every bite delightful and satisfying. Enjoy experimenting!
International Cuisine
Cream Shrimp: A Rich and Flavorful Seafood Delight
One bite of cream shrimp reveals a rich and flavorful experience that will leave you craving more—discover how to create this seafood delight!
Cream shrimp is a delicious seafood dish that you'll love! It combines tender shrimp with a creamy sauce, making each bite rich and bursting with flavor. You start by sautéing shrimp with garlic until it's pink and then add creamy goodness along with your favorite seasonings. A gentle simmer thickens the sauce, creating a delightful blend. When it's ready, you can serve it with fresh herbs and maybe some lemon juice for extra brightness. This dish isn't just tasty; it's perfect for sharing and brings everyone together. Stick around, and you'll discover more about this scrumptious meal!
Key Takeaways
- Cream shrimp is a delicious seafood dish featuring shrimp cooked in a rich, creamy sauce, often enhanced with garlic and spices.
- It offers nutritional benefits, being low in calories and high in omega-3 fatty acids, making it a heart-healthy choice.
- The dish has a rich history, originating in coastal regions and evolving through various cultures to become a global favorite.
- Cooking involves sautéing shrimp, adding cream and seasonings, and simmering to achieve a thick, flavorful sauce.
- Presentation is key; garnishing with fresh herbs and serving with rice or bread enhances both flavor and visual appeal.
History
When you think about cream shrimp, it's fascinating to consider its rich history. This delicious dish has roots that stretch back to coastal regions where fresh seafood was abundant. People have enjoyed shrimp for thousands of years, but it was the creamy sauces that made this dish really special. Imagine early cooks experimenting with butter, cream, and spices to create something extraordinary!
Over time, cream shrimp became popular in various cultures. In many countries, families gathered around the table to savor this delightful meal. The combination of tender shrimp and smooth, rich cream warmed hearts and filled bellies.
As recipes traveled through different lands, each culture added its unique twist, making it a beloved dish worldwide.
Today, cream shrimp is often served at special occasions or enjoyed as a comforting meal at home. Its history is a reminder of how food brings people together, connecting generations through shared experiences.
Cooking Steps
Begin by gathering all your ingredients and equipment to ensure a smooth cooking process. You'll need fresh shrimp, cream, garlic, butter, and some spices like salt and pepper. Don't forget a frying pan and a spatula!
First, melt some butter in your frying pan over medium heat. Once it's bubbly, toss in minced garlic and sauté it until it's fragrant—this should only take about a minute.
Next, add the shrimp to the pan. Cook them for about two to three minutes on each side, until they turn pink and curl up.
Now, it's time to create the creamy sauce! Pour in the cream and stir well. Season it with salt and pepper to taste.
Let everything simmer for a few minutes until the sauce thickens a bit. This is the moment when your kitchen will smell amazing!
Step 1. Prepare Fresh Shrimp Ingredients
To prepare fresh shrimp, start by gathering your ingredients and tools. You'll need 1 pound of fresh shrimp, peeled and deveined, a tablespoon of olive oil, and a pinch of salt. Don't forget a cutting board, a sharp knife, and a mixing bowl!
First, wash your shrimp under cold water. This helps remove any leftover bits. Next, dry them with a clean kitchen towel or paper towels. It's important to make sure they're dry so they cook perfectly later on. If you prefer, you can leave the tails on for a fun touch, or peel them entirely if you like.
Now, let's season! Place the shrimp in the mixing bowl and drizzle with olive oil, adding a pinch of salt. Toss them gently to coat, ensuring each shrimp gets some oil and salt. This step makes your shrimp tasty and helps them cook evenly.
Once you've prepped everything, it's time to get cooking! You've done an amazing job so far, and your shrimp are ready for the next steps. Get excited because you're just a few moments away from a delicious seafood dish!
Step 2. Sauté Shrimp With Garlic
Now that your shrimp are prepped and seasoned, it's time to sauté them with garlic for a burst of flavor. First, grab a large skillet and heat up some olive oil over medium heat.
While the oil warms, finely chop a few cloves of garlic. You want that yummy aroma to fill your kitchen! If you're a coffee lover, consider pairing this dish with a delightful espresso to enhance the meal experience, as caffeine content in espresso can provide a nice boost.
Once the oil is shimmering, toss in the garlic. Be careful not to let it burn; you want it to turn golden and fragrant. This should take about 30 seconds.
Next, add your seasoned shrimp to the pan. Hear that sizzle? That's music to your ears! Cook the shrimp for about 2-3 minutes on each side until they turn pink and opaque.
Remember to give them a gentle stir occasionally to ensure even cooking. If you like a bit of heat, you can sprinkle in some red pepper flakes for an extra kick.
Once your shrimp are perfectly cooked, remove them from the heat. You've just created a delicious garlic shrimp dish that'll impress everyone! Enjoy the delightful smell and get ready for the next tasty step in your creamy shrimp adventure!
Step 3. Add Cream and Seasonings
Once your shrimp are perfectly sautéed, it's time to stir in the cream and seasonings to elevate the dish. Grab a measuring cup and pour in about one cup of heavy cream. This creamy goodness is what makes your shrimp so delightful! As you mix it in, you'll notice how the color changes and everything starts to look rich and inviting.
Next, it's time to add some seasonings. Sprinkle in a pinch of salt and pepper for flavor. If you like a little kick, consider adding a dash of paprika or red pepper flakes. You can also toss in some fresh herbs like parsley or basil for a pop of color and freshness.
Stir everything together gently, making sure the shrimp are well coated in that luscious cream.
Don't forget to taste! If it needs a little more seasoning, add it now. This is your chance to make it just how you like it. As you mix, let the creamy sauce begin to work its magic.
You're so close to enjoying a bowl of creamy shrimp delight that's bursting with flavor!
Step 4. Simmer Until Sauce Thickens
With the cream and seasonings well incorporated, let the mixture simmer over medium heat. This step is super important because it's when all those delicious flavors blend together!
As it simmers, you'll notice the sauce starting to thicken, which is exactly what you want. Stir it gently every few minutes to prevent anything from sticking to the bottom of the pan.
Keep an eye on it! You don't want the sauce to boil too hard. If it bubbles too much, turn the heat down a bit. You're looking for a gentle simmer, just like a cozy bubble bath for your creamy sauce!
After about 10 to 15 minutes, you should see the sauce getting thicker and creamier. It'll cling beautifully to the shrimp, making each bite extra tasty.
When it's reached your desired thickness, it's time to turn off the heat. The aroma will fill your kitchen, and you'll be so excited to taste this rich delight.
Just remember, patience is key! Enjoy the process, and soon you'll have a delicious sauce that's perfect for your shrimp. Get ready for the next step because your creamy seafood dish is almost complete!
Step 5. Serve With Fresh Herbs
A generous sprinkle of fresh herbs can elevate your cream shrimp dish to new heights. Fresh herbs not only add a pop of color but also bring amazing flavors that make your dish shine. You can choose herbs like parsley, chives, or basil, which all work wonderfully with the creamy sauce.
To start, chop your chosen herbs finely. Aim for about two tablespoons, but feel free to adjust based on your taste. Once your cream shrimp is cooked and ready to serve, sprinkle the herbs right on top. This little touch makes your dish look extra special and appetizing!
If you want to enhance the flavors even more, consider adding a squeeze of fresh lemon juice. It brightens up the creaminess and complements the shrimp perfectly.
Lastly, don't forget to serve your cream shrimp with some crusty bread or over a bed of fluffy rice. This way, everyone can enjoy every last drop of that delicious sauce.
Now you're ready to impress your family and friends with a delightful meal that's bursting with flavor and freshness! Enjoy every bite!
Final Thoughts
Wrapping up our exploration of cream shrimp, it's clear that this dish offers a delightful blend of flavors and textures that can elevate any meal. Its rich, savory profile pairs beautifully with a variety of side dishes, making it a versatile option for both casual dinners and special occasions. For an extra indulgent touch, consider serving it alongside a butter cream bread recipe, which complements the creaminess of the shrimp while adding a hint of sweetness. Together, they create a harmonious dining experience that’s sure to impress.
Whether you're cooking for family or hosting friends, cream shrimp is sure to impress. The creamy sauce, mixed with tender shrimp, creates a taste that feels both luxurious and comforting.
You can easily customize this dish to fit your taste. Imagine adding fresh herbs or a squeeze of lemon juice to brighten the flavors!
Pair it with rice or pasta, and you've got a meal that's not just delicious but also looks beautiful on the plate.
Don't forget about the joy of sharing food with loved ones. Cooking cream shrimp can turn an ordinary evening into a special occasion.
Plus, it's a great way to introduce others to the wonders of seafood.
Frequently Asked Questions
What Types of Shrimp Are Best for Cream Shrimp Recipes?
For cream shrimp recipes, you'll want to use large, succulent shrimp like Gulf, Tiger, or Jumbo shrimp. Their size and texture hold up well in creamy sauces, enhancing the dish's overall flavor and richness.
Can Cream Shrimp Be Frozen for Later Use?
Yes, you can freeze cream shrimp for later use. Just make sure to store it in an airtight container. When you're ready to enjoy it, thaw gently to maintain the texture and flavor.
How Can I Make Cream Shrimp Healthier?
To make cream shrimp healthier, you can use low-fat dairy, substitute whole ingredients with lighter options, incorporate more vegetables, and control portion sizes. These changes enhance nutrition without sacrificing flavor, keeping your dish delicious and satisfying.
What Wine Pairs Well With Cream Shrimp Dishes?
When pairing wine with cream shrimp dishes, you'll want a crisp white like Sauvignon Blanc or a buttery Chardonnay. These options complement the richness without overpowering the delicate flavors, enhancing your dining experience beautifully.
Are There Vegetarian Alternatives to Cream Shrimp?
You can try using mushrooms or tofu as a base, adding a creamy sauce made from cashews or coconut milk. These alternatives create a delicious, satisfying dish that mimics the richness of cream shrimp.
-
Brazilian Cuisine3 months ago
Tacacá
-
Brazilian Cuisine3 months ago
Caldeirada
-
Polish Comfort Food3 months ago
Krupnik (Barley Soup)
-
Brazilian Cuisine3 months ago
Chicken in Brown Sauce
-
Southern Comfort Food3 months ago
Cheese Straws
-
Polish Comfort Food3 months ago
Vegetable Salad
-
African Cuisine3 months ago
Kedjenou (Ivory Coast)
-
American Diner Classics3 months ago
The Maillard Reaction: Understanding the Chemistry of Browning {Food Science and Cooking}