Connect with us

Food Science and Cooking

Protein Denaturation: The Science Behind Cooking Eggs and Meat

Approaching the science of protein denaturation unlocks the secrets to expertly cooking eggs and meats, transforming textures and flavors to delight the senses.

Published

on

cooking proteins transforms textures

Mastering the science of protein denaturation is the key to cooking perfect eggs and tender meats. As you heat proteins, their molecular structures break down, resulting in the mouthwatering textures and flavors we love. By controlling temperatures, you can achieve the ideal doneness – from fluffy scrambled eggs to juicy, seared chicken. Monitoring internal temperatures and utilizing different cooking techniques unlock a world of culinary possibilities. Once you understand the principles behind protein transformation, you'll elevate your cooking skills and delight your senses. There's much more to explore when it comes to the fascinating interplay between food science and the culinary arts.

Key Takeaways

  • Protein denaturation, the structural change in proteins due to factors like heat and acids, is a crucial concept in cooking that enhances texture and flavor.
  • Controlled temperature application and techniques can mirror the efficiency of heat pumps to optimize cooking results and achieve desirable protein transformations.
  • Monitoring internal temperature is essential for proper protein denaturation, ensuring the desired textures and flavors, such as tender chicken and fluffy eggs.
  • Experimentation with various cooking methods, like searing, poaching, and baking, utilizes the principles of protein denaturation to yield diverse culinary results.
  • Mastery of cooking techniques, alongside knowledge of protein behavior, enriches the overall culinary experience by enhancing flavor profiles and nourishing both body and soul.

History

Although the concept of protein denaturation has been known for centuries, it wasn't until the 19th century that scientists truly began to understand the underlying mechanisms. In the 1820s, French chemist Pierre-Jean Robiquet discovered that proteins could be denatured by heat, acids, and other agents.

Later, in the 1840s, German chemist Justus von Liebig further explored the effects of heat on protein structure.

The dawn of the 20th century ushered in a golden age of protein research. Biochemists like Emil Fischer and Frederick Sanger delved deep into the complexities of protein folding and structure.

Their groundbreaking work laid the foundation for our modern understanding of how temperature, pH, and other factors can disrupt the delicate balance that gives proteins their native form.

Today, this knowledge underpins the science of cooking, allowing chefs to harness the power of denaturation to transform the texture and flavor of everything from eggs to meat.

Advertisement

Recipe

Cooking isn't just about assembling ingredients, but also about understanding the science behind the transformation of those ingredients. When it comes to cooking proteins, the process of denaturation plays a crucial role in determining the final texture and flavor of the dish.

This transformation is similar to how heat pumps utilize renewable energy sources for heating, creating a versatile and efficient outcome. By incorporating controlled temperatures and monitoring techniques, we can achieve optimal results in our cooking, much like energy-efficient models can reduce electricity costs in heat pumps.

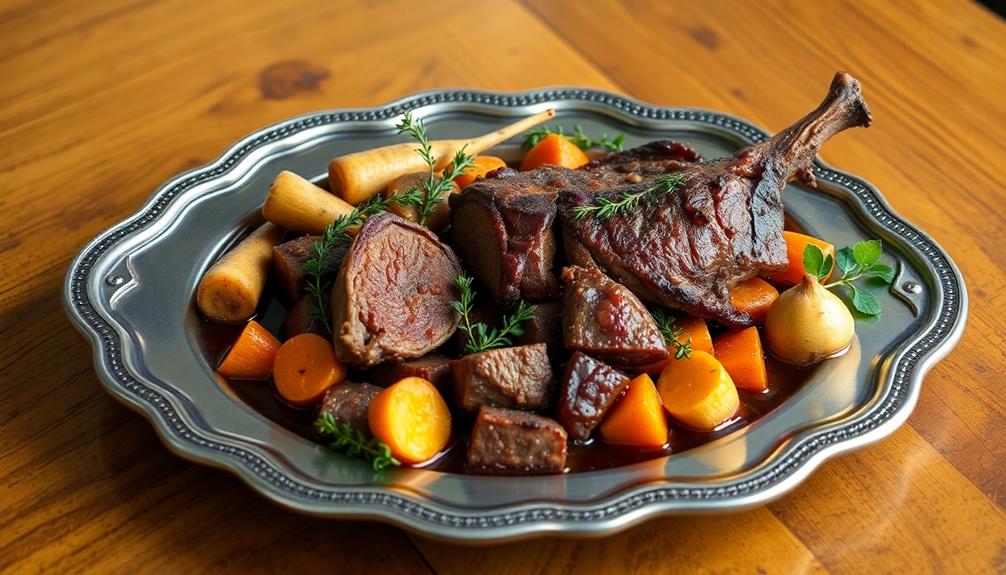
In this recipe, we’ll explore how the controlled denaturation of proteins can create a delightful and tender meal. By carefully monitoring the cooking temperature and time, we can unlock the full potential of the proteins and deliver a dish that’s both visually appealing and delightfully satisfying. Understanding food colloids in cuisine is essential for achieving the perfect texture and mouthfeel in our dish. By controlling the denaturation of proteins, we can create a tender and juicy meal that will leave our guests wanting more. This knowledge of food colloids allows us to elevate our cooking to a new level and impress even the most discerning of palates.

Ingredients:

  • 1 lb (450 g) boneless, skinless chicken breasts
  • 2 tablespoons (30 ml) olive oil
  • 1 teaspoon (5 ml) salt
  • 1/2 teaspoon (2.5 ml) black pepper
  • 1 cup (240 ml) low-sodium chicken broth
  • 2 cloves garlic, minced
  • 1 tablespoon (15 ml) fresh thyme leaves

Cooking Instructions:

Preheat your oven to 375°F (190°C). In a large, oven-safe skillet or baking dish, heat the olive oil over medium-high heat. Season the chicken breasts with salt and pepper, then sear them in the hot oil for 2-3 minutes per side, or until a golden-brown crust forms.

Advertisement

Transfer the seared chicken to the oven and roast for 20-25 minutes, or until the internal temperature reaches 165°F (74°C). Remove the chicken from the oven and let it rest for 5 minutes before slicing.

Tips:

To ensure optimal protein denaturation, it's essential to monitor the internal temperature of the chicken. The sudden rise in temperature during the searing process denatures the proteins on the surface, creating a flavorful crust.

The continued cooking in the oven then denatures the proteins throughout the meat, resulting in a juicy and tender texture. Be mindful not to overcook the chicken, as that can lead to a dry and rubbery outcome. Enjoy your perfectly cooked, protein-rich meal!

Cooking Steps

Crack the eggs into a bowl and whisk them with a fork.

Advertisement

Apply heat to the eggs, stirring continuously to incorporate the ingredients fully.

Serve the cooked eggs immediately for best results.

Step 1. Crack Eggs Into a Bowl

crack eggs into bowl

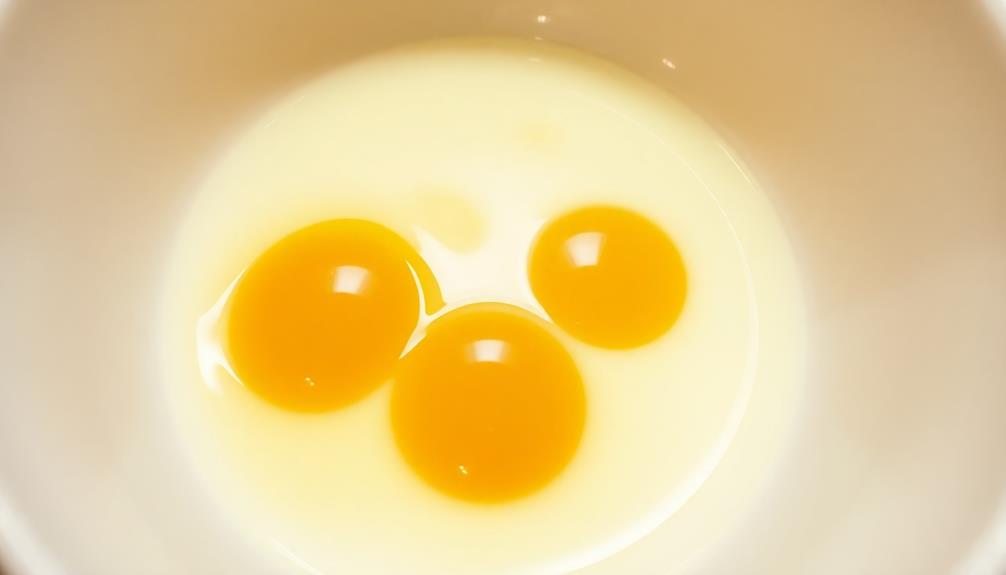
Go ahead and crack those eggs straight into a clean bowl.

Be careful not to let any eggshells fall in, as they can impart an unpleasant gritty texture to your dish.

Use the edge of the bowl to cleanly separate the yolks from the whites, allowing the whites to drop into the bowl while the yolks remain in the shell halves.

Discard the empty shells.

Advertisement

Once all the eggs are cracked, use a fork or whisk to gently beat the eggs together until they're well-combined and uniform in color.

Avoid over-beating, as this can cause the eggs to become aerated and result in a lighter, fluffier texture than you may desire.

The goal is to blend the yolks and whites without incorporating too much air.

With the eggs prepped, you're now ready to move on to the next step in cooking perfect eggs, whether you're planning to scramble, fry, or use them in another recipe.

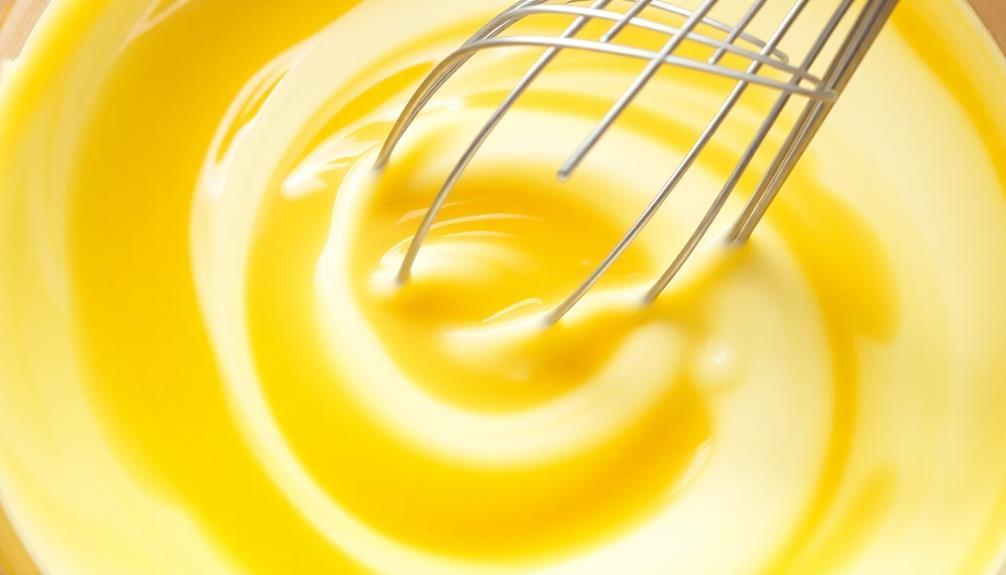
Step 2. Whisk Eggs With a Fork

whisk eggs using fork

Whisking the eggs with a fork is the next crucial step. Grab a fork and start beating the eggs in a circular motion, ensuring all the yolks and whites are thoroughly combined. This action introduces air into the mixture, which is essential for achieving a light and fluffy texture.

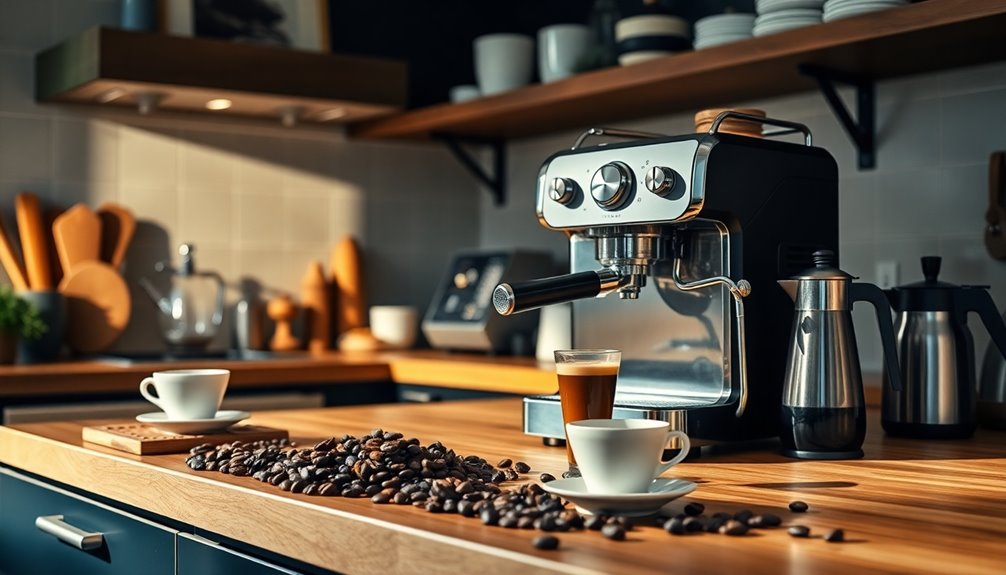
Additionally, incorporating ingredients like cold brew coffee can enhance flavor while providing a refreshing boost. Don't overwork the eggs, as that can result in a dense, rubbery texture. Instead, whisk just until the mixture is homogeneous and you no longer see distinct yolks or whites.

Advertisement

Be gentle, but don't be afraid to put some elbow grease into it. The faster you whisk, the more air you'll incorporate, leading to a fluffier final product.

Once the eggs are properly whisked, you're ready to move on to the next step in the cooking process, whether you're making scrambled eggs, omelets, or any other egg-based dish.

Step 3. Add Heat

apply heat in cooking

With the eggs properly whisked, you can now start cooking them. As you add heat, the proteins in the eggs will begin to denature, or unravel, from their natural shape. This denaturation is crucial for the eggs to solidify and transform into the fluffy, cooked breakfast you desire.

Gently pour the whisked eggs into a preheated pan, using a spatula to push and fold the eggs as they cook. The heat causes the protein bonds to break apart and reform into a new, more stable structure. This process traps air bubbles, giving the eggs their light and airy texture.

Keep an eye on the eggs, stirring occasionally, until they reach your preferred level of doneness. The denaturation will continue as the internal temperature rises, so be mindful not to overcook and end up with rubbery, dry eggs.

With a bit of practice, you'll master the art of cooking perfect, protein-packed eggs every time.

Advertisement

Step 4. Stir Eggs to Incorporate Fully

incorporate eggs by stirring

As the eggs hit the hot pan, gently stir and fold them with a spatula. This constant motion prevents the eggs from overcooking and ensures they cook evenly.

Ice cream, despite its indulgent nature, also requires careful preparation to achieve the perfect texture and flavor; similar to cooking eggs, the balance of ingredients is crucial.

Stir slowly and deliberately, allowing the uncooked portions to flow into the hot areas of the pan. Don't scramble the eggs vigorously, as this can result in a dry, crumbly texture. Instead, use a gentle folding motion to incorporate the runny parts with the more solid sections.

Continually stir and fold the eggs until they reach your desired doneness, whether that's soft and creamy or firmer and drier. Pay close attention to the texture, adjusting the heat and your stirring technique as needed.

Remember, the eggs will continue to cook even after you've removed them from the heat, so be sure to stop the cooking process when they're slightly undercooked.

With a little practice, you'll master the art of perfectly cooked, velvety smooth eggs every time.

Advertisement

Step 5. Serve Eggs Immediately After Cooking

serve eggs right away

Once you've mastered the art of gently stirring and folding the eggs, it's time to serve them immediately. Eggs are best enjoyed when they're hot and fluffy, so don't let them sit around on the stove or in the pan. The proteins in the eggs will continue to denature and firm up, resulting in a drier, chewier texture.

As soon as the eggs reach your desired doneness, remove the pan from the heat. Carefully transfer the eggs to a warm plate or serving dish. The residual heat in the pan will continue to cook the eggs, so it's important to get them off the heat source right away.

Serve the eggs immediately, while they're still warm and creamy. The longer you wait, the more the proteins will continue to denature and the eggs will become overcooked.

Enjoy your perfectly cooked, soft and tender eggs while they're at their best!

Final Thoughts

Ultimately, the process of protein denaturation during cooking is a fascinating interplay between heat, time, and the complex structures of various proteins.

By understanding how these factors influence the transformation of proteins, you can unlock the secrets to perfectly cooked eggs, meat, and other protein-rich foods.

Advertisement

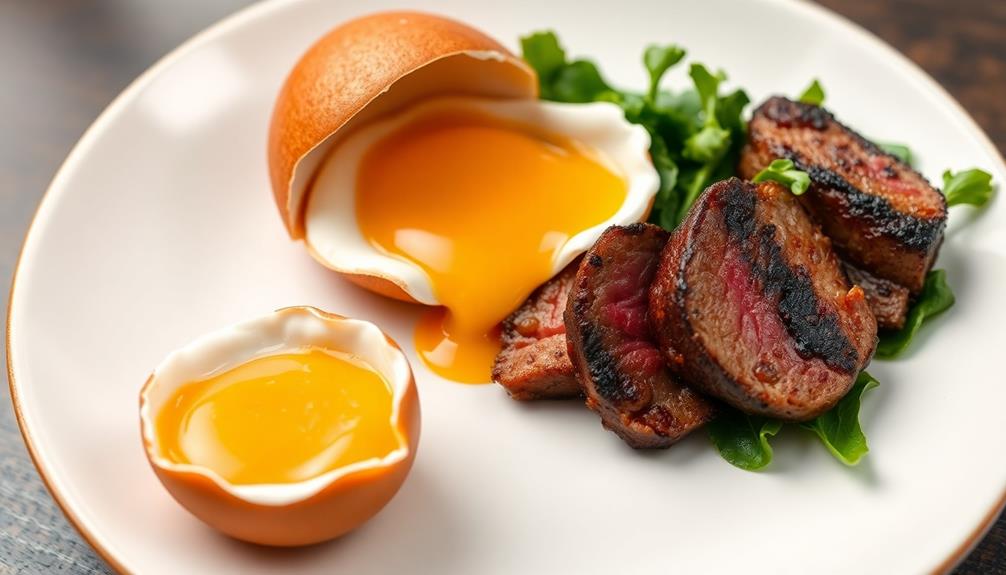
Whether you're searing a steak, poaching an egg, or baking a casserole, the principles of protein denaturation are at work, dictating the texture, flavor, and appearance of the final dish.

By applying this knowledge, you can experiment with cooking techniques, adjust temperatures and times, and create culinary masterpieces that delight the senses.

Remember, the journey of protein denaturation isn't just about the science – it's about the art of transforming simple ingredients into extraordinary dishes that nourish the body and soul.

Embrace the power of this process, and let your culinary creativity soar.

Frequently Asked Questions

What Is the Difference Between Denaturation and Coagulation?

Denaturation refers to the loss of a protein's native structure, while coagulation is the process where proteins come together to form a semi-solid or solid matrix. Denaturation precedes coagulation, but they're distinct processes that yield different results.

Advertisement

How Does Protein Denaturation Affect the Texture of Cooked Food?

Protein denaturation changes the texture of cooked food by unfolding the protein molecules, altering their interactions, and resulting in a firmer, chewier, or creamier texture depending on the specific protein and cooking method used.

Can Protein Denaturation Be Reversed After Cooking?

Can protein denaturation be reversed after cooking? No, once proteins have been denatured through the application of heat, they can't be restored to their original state. The structural changes are permanent, so the cooked food's texture can't be reversed.

How Does Ph Affect Protein Denaturation During Cooking?

pH significantly affects protein denaturation during cooking. Acidic or basic environments can cause proteins to unfold and their shape to change, altering the food's texture and flavor. This process is generally irreversible once cooked.

What Are Some Common Misconceptions About Protein Denaturation in Cooking?

A common misconception is that denaturation always ruins proteins. In fact, it's what makes eggs and meat palatable – controlled denaturation through cooking enhances their flavor and texture. Understanding this process can help you become a better cook.

Advertisement

Advertisement

Food Science and Cooking

Spice Challenge: How Many Scoville Units Is Buldak Ramen?

Unleash your tastebuds with the fiery Buldak ramen, packing up to 8,000 Scoville heat units – a true test of spice tolerance.

Published

on

buldak ramen scoville units

You won't believe it, but that fiery Korean noodle dish – Buldak ramen – packs a real punch! With up to 4,400 Scoville heat units, it's a true spice challenge for the brave. It all starts with those instant ramen noodles, then you add the gochujang, gochugaru, brown sugar, and soy sauce for an explosion of savory, spicy, and sweet flavors. The heat can range from 3,000 to 8,000 Scoville units, so get ready to sweat, tear up, and laugh – it's all part of the fun! If you're up for an adventure, the Buldak ramen challenge awaits.

Key Takeaways

  • Buldak ramen measures approximately 4,400 Scoville Heat Units (SHU), with a range from 3,000 to 8,000 units on the Scoville scale.
  • The Scoville scale is used to quantify the spiciness in food, where higher SHU indicates greater heat and spice level.
  • The intense heat and bold flavors of Buldak ramen make it a popular choice for spice enthusiasts participating in spice challenges.
  • Participants often report feelings of thrill and excitement during the Buldak ramen challenge, as well as a sense of accomplishment upon completion.
  • The enjoyment of Buldak ramen can lead to a memorable experience, reinforcing the idea that spice can enhance food enjoyment for those with a high spice tolerance.

History

historical events and developments

The Buldak ramen, with its fiery reputation, has captured the attention of spice enthusiasts worldwide. This delectable dish has a storied history that dates back to the bustling streets of South Korea.

Buldak, which translates to "fire chicken," was first created in the early 2000s by a group of adventurous chefs who sought to push the boundaries of traditional Korean cuisine.

The original Buldak recipe featured a blend of scorching hot chili peppers, including the notorious Habanero and Carolina Reaper, which can measure up to 2.2 million Scoville units!

Over the years, the dish has evolved, with various iterations and spice levels to cater to different palates. Today, the Buldak ramen has become a global phenomenon, with fans eagerly seeking out the latest and spiciest versions to conquer.

Whether you're a seasoned spice enthusiast or just looking for a thrilling culinary adventure, the Buldak ramen's captivating history is sure to pique your interest and get your taste buds tingling with anticipation.

Advertisement

Recipe

cooking instructions and ingredients

Buldak ramen, a spicy Korean noodle dish, is known for its intense heat and bold flavors. This recipe captures the essence of Buldak, using a blend of fiery chili peppers and a variety of spices to create a truly unique and unforgettable culinary experience.

The key to this dish lies in the careful balance of the Scoville units, the measurement of a pepper's heat. Buldak ramen is typically made with a combination of gochujang (Korean chili paste), gochugaru (Korean chili flakes), and other spices, resulting in a Scoville rating that can range from 3,000 to 8,000 units, making it a true test of one's spice tolerance.

Ingredients:

  • 2 packages of instant ramen noodles
  • 1/4 cup gochujang (Korean chili paste)
  • 2 tablespoons gochugaru (Korean chili flakes)
  • 2 tablespoons brown sugar
  • 2 tablespoons soy sauce
  • 1 tablespoon toasted sesame oil
  • 2 cloves garlic, minced
  • 1 teaspoon grated ginger
  • 1/2 teaspoon ground black pepper
  • 2 cups water
  • 2 hard-boiled eggs, halved (optional)
  • Scallions, thinly sliced (optional)

Instructions:

In a large saucepan, combine the gochujang, gochugaru, brown sugar, soy sauce, sesame oil, garlic, ginger, and black pepper. Whisk the ingredients together until well-blended.

Add the water and bring the mixture to a boil. Reduce the heat and let the sauce simmer for 5 minutes, stirring occasionally, to allow the flavors to meld.

Add the ramen noodles to the sauce and cook according to the package instructions, usually 2-3 minutes. Once the noodles are cooked, remove the pan from the heat.

Advertisement

Divide the Buldak ramen into bowls and top with the hard-boiled egg halves and sliced scallions, if desired.

It's important to remember that the Scoville heat of this dish can vary depending on the individual's spice tolerance. Start with a smaller portion and gradually increase the amount of chili paste and flakes to find your desired level of heat.

Enjoy this Buldak ramen challenge, but be prepared for a fiery and unforgettable culinary adventure.

Cooking Steps

step by step cooking instructions

Bring the water to a boil, then stir in the bold Buldak powder.

Next, add the noodles and let them simmer for 3 minutes.

Step 1. Bring Water to a Boil

boil water first step

Fill a medium-sized pot with water and place it on the stovetop over high heat.

You'll want to bring the water to a rolling boil – this shouldn't take too long, just wait patiently and keep an eye on it.

Advertisement

Once the water is bubbling furiously, it's time to add the Buldak Ramen noodles and seasoning packet.

Carefully pour in the noodles, being cautious of the hot steam.

Now sprinkle in the spicy seasoning – get ready for an exciting flavor explosion!

Stir everything together, ensuring the noodles are fully submerged.

Let the ramen simmer for 3-4 minutes, allowing the noodles to soften and the flavors to meld.

Advertisement

Mmm, can you smell that delicious aroma filling the kitchen?

Your Buldak Ramen is almost ready to enjoy.

Just a little longer, and you'll be digging into this fiery, flavorful dish.

Stay tuned for the next steps!

Step 2. Add Buldak Powder

add buldak powder now

Once the water is boiling, carefully pour in the noodles, being mindful of the hot steam.

Now it's time to add the Buldak powder – the spicy secret ingredient that will take your ramen adventure to the next level! Tear open the seasoning packet and sprinkle it evenly over the noodles. Herbal teas, such as turmeric tea, can be a great way to soothe your stomach after indulging in spicy dishes.

Advertisement

Get ready for a fiery explosion of flavor! The Buldak powder is packed with a potent blend of chili peppers, measuring a whopping 3,200-8,000 Scoville heat units. That's seriously spicy stuff, so start with a small amount and add more to taste.

Stir the powder into the boiling water until it's fully dissolved, creating a rich, spicy broth.

Keep a glass of milk nearby, just in case the heat becomes too much to handle. The creamy dairy can help soothe the burning sensation.

Embrace the challenge and see if you can handle the heat! Are you ready to take on the Buldak Ramen Spice Challenge?

Step 3. Add Noodles

incorporate noodles into recipe

Add the noodles to the boiling water, being mindful of the steam. Carefully lower the noodle block into the pot, taking care not to splash the hot liquid.

Gently stir the noodles, breaking them apart as they soften. Allow the noodles to cook for the recommended time, usually 3-5 minutes, until they reach the perfect texture.

Advertisement

Once the noodles are cooked, drain them in a colander, ensuring you retain the flavorful broth. Rinse the noodles briefly with cool water to stop the cooking process. This will help them maintain their springy bite.

Now, add the cooked noodles back to the pot with the reserved broth. Stir in the Buldak powder, ensuring the noodles are evenly coated.

The vibrant red hue and irresistible aroma will have your senses tingling in anticipation. Get ready to experience the fiery, tongue-tingling sensation of the Buldak Ramen challenge!

Step 4. Let Noodles Simmer for 3 Minutes

simmer noodles for three minutes

After draining the noodles, return them to the pot with the reserved broth.

Bring the mixture to a gentle simmer and let it cook for 3 minutes. This allows the noodles to fully absorb the bold, spicy flavors of the Buldak broth.

As the noodles simmer, you'll notice the broth thickening slightly.

Advertisement

Stir the mixture occasionally to ensure even cooking. The noodles should become tender yet still have a satisfying bite to them.

When the 3 minutes are up, your Buldak ramen is ready to serve!

Carefully ladle the piping hot noodles and broth into your favorite bowl.

The vibrant red hue and enticing aroma will have your taste buds tingling with anticipation.

Get ready to embark on a flavor adventure that's sure to leave a lasting impression!

Advertisement

Step 5. Drain the Noodles and Serve

drain noodles serve immediately

With the noodles simmered to perfection, it's time to drain and serve your Buldak ramen.

Carefully grab the pot and pour the steaming noodles through a colander, letting the broth drain away. Give the noodles a gentle shake to remove any excess liquid.

Now, transfer the drained noodles to your serving bowl.

Scoop out a generous portion of the deliciously spicy Buldak sauce and drizzle it over the top. Stir the sauce into the noodles, ensuring every bite is coated in that mouth-watering, fiery flavor.

For the final touch, add any desired toppings.

Sliced green onions, a sprinkle of sesame seeds, or a dollop of cool, creamy sour cream can all help balance the heat.

Advertisement

Once everything is perfectly arranged, it's time to dig in and enjoy your Buldak ramen challenge!

Final Thoughts

concluding reflections and insights

The Buldak Ramen challenge was indeed a fiery experience that tested the limits of your spice tolerance. Wow, those Scoville units really pack a punch! You've gotta hand it to the folks who can handle that level of heat. But even if your taste buds were singed, you can't help but feel a sense of pride for giving it your all.

Looking back, the journey was as thrilling as it was intense. From the moment you cracked open that steaming hot bowl, you knew you were in for an adventure. The bold flavors danced on your tongue, igniting a fire that had you reaching for the nearest glass of milk. But you powered through, determined to conquer the challenge and emerge victorious.

Now, as you sit back and reflect, you can't help but smile at the memories. Who knew a simple bowl of noodles could be so much fun? The Buldak Ramen experience has left an indelible mark, reminding you that sometimes the spiciest adventures are the most rewarding.

Frequently Asked Questions

What Is the Average Scoville Rating of Buldak Ramen?

The average Scoville rating of Buldak Ramen is around 3,000-8,000 Scoville heat units. This makes it a fairly spicy instant ramen, though the exact heat level can vary depending on the specific batch or brand.

How Do the Scoville Units of Buldak Ramen Compare to Other Spicy Foods?

The Scoville units of Buldak Ramen are quite high, ranging from 3,000 to 8,000 SHU. This places it among the spicier foods, surpassing milder peppers like jalapeños but falling short of the blazing heat of habaneros or ghost peppers.

Advertisement

What Are the Health Effects of Consuming Buldak Ramen?

Consuming Buldak ramen can have several health effects. It's high in sodium and may cause digestive issues like heartburn, bloating, and diarrhea. The spice can also irritate your throat and mouth. Be mindful of your portion sizes and hydration levels when enjoying this fiery dish.

Is Buldak Ramen Available in All Countries?

Buldak ramen's availability can vary by country. While it's popular in some regions, it may not be widely distributed globally. The spice level and specific ingredients can also differ depending on the local market.

How Long Does the Spiciness of Buldak Ramen Last?

The spiciness of Buldak ramen can linger for quite some time. It's an intense heat that won't fade quickly, so you'll feel the burn for a while after finishing the fiery noodles.

Continue Reading

Food Science and Cooking

The Surprising Health Benefits of Ginger Chews

Harness the remarkable power of ginger chews, a delightful and nourishing snack that offers a wide range of surprising health benefits.

Published

on

ginger chews promote health benefits

You'll be amazed by the incredible health benefits packed into every bite of ginger chews! These tasty treats have a long history rooted in traditional medicine, prized for aiding digestion, reducing inflammation, and supporting the immune system. Studies even suggest ginger may help alleviate symptoms associated with breast cancer. Beyond their spicy-sweet flavor, ginger chews are recognized for their ability to soothe upset stomachs, boost immunity, and promote overall well-being. Discover the full range of surprising benefits that make ginger chews a delightful and nourishing snack you'll want to incorporate into your daily routine.

Key Takeaways

Key points:

  • Ginger chews are effective in alleviating nausea, aiding digestion, and reducing inflammation due to ginger's well-documented medicinal properties.
  • Ginger chews may help boost the immune system and provide antioxidant protection, contributing to overall health and wellness.
  • Consuming ginger chews regularly can potentially alleviate muscle pain and soreness, making them a valuable addition to an active lifestyle.
  • Homemade ginger chews offer a preservative-free alternative to store-bought options, allowing for customization and control over the ingredients.
  • Ginger chews are a convenient, portable, and versatile snack that can be easily incorporated into daily routines for maximum health benefits.

History

understanding past events contextually

Though the origins of ginger chews can be traced back thousands of years, their popularity has surged in recent decades as people have discovered their diverse health benefits.

For centuries, ginger root has been used in traditional medicine across Asia and the Middle East. Ancient Chinese and Ayurvedic texts often praised ginger's ability to ease digestive issues, reduce inflammation, and boost the immune system.

Additionally, some studies suggest that ginger may have properties that can contribute to overall wellness, particularly in relation to symptoms of breast cancer.

As global trade expanded, ginger found its way to Europe and the Americas, where enterprising confectioners began crafting the chewy, aromatic treats we know and love today.

Advertisement

Now, ginger chews are a beloved snack around the world, offering a tasty and convenient way to experience ginger's many wonders.

Whether you enjoy them for their invigorating flavor or their impressive health properties, there's no denying the timeless appeal of this ginger-infused delight.

Recipe

cooking instructions and ingredients

Ginger chews are a delightful and healthful snack that can be easily made at home. These chewy candies harness the power of ginger, a potent spice known for its numerous health benefits, including aiding digestion and reducing inflammation. The process of making ginger chews is straightforward and offers a satisfying homemade alternative to store-bought varieties, which may contain preservatives or artificial ingredients.

The key to achieving the perfect ginger chew lies in the balance of sweet and spicy flavors. By carefully crafting the recipe, you can create a treat that tantalizes the taste buds while providing a natural boost of wellness. Dangers of raisins for dogs can be a reminder of the importance of using safe ingredients in homemade snacks.

Ingredients:

  • 1 cup granulated sugar
  • 1/2 cup light corn syrup
  • 1/4 cup water
  • 2 tablespoons freshly grated ginger
  • 1/4 teaspoon ground ginger
  • 1/4 teaspoon baking soda
  • 1/4 teaspoon salt

Instructions:

In a medium saucepan, combine the sugar, corn syrup, and water. Bring the mixture to a boil over medium-high heat, stirring constantly. Once boiling, continue cooking without stirring until the temperature reaches 250°F on a candy thermometer.

Advertisement

Remove the pan from the heat and stir in the freshly grated ginger, ground ginger, baking soda, and salt. The mixture will foam and expand. Pour the hot mixture onto a lightly greased baking sheet and let it cool completely, about 1 hour.

Once cooled, use a greased knife or scissors to cut the ginger chew into bite-sized pieces.

To achieve the perfect texture, be mindful of the temperature when cooking the sugar mixture. Allowing the mixture to reach the correct hard-crack stage is essential for creating the delightfully chewy consistency. Additionally, be cautious when handling the hot candy, as it can cause burns.

Enjoy your homemade ginger chews as a satisfying and healthful snack.

Cooking Steps

step by step cooking instructions

Combine the ginger, sugar, and water in a saucepan.

Simmer the mixture until it thickens, about 15-20 minutes.

Advertisement

Pour the thickened mixture onto a baking sheet and allow it to cool completely before cutting it into chewy, delightful ginger chews.

Step 1. Combine Ginger, Sugar, and Water

mix ginger sugar water

To make the ginger chews, you'll first need to combine the ginger, sugar, and water. In a medium saucepan, add 1 cup of freshly grated ginger, 1 cup of white sugar, and 1 cup of water. Bring the mixture to a boil over medium-high heat, stirring constantly to dissolve the sugar.

Once the mixture is boiling, reduce the heat to medium-low and let it simmer for about 20 minutes. You'll know it's ready when the liquid has thickened and the ginger has softened. Be sure to stir the mixture every few minutes to prevent burning.

After simmering, remove the pan from the heat and let the ginger mixture cool slightly. Then, pour it onto a clean, lightly greased baking sheet or parchment paper.

Use a spatula to spread the mixture into an even layer, about 1/4-inch thick. Allow the ginger chews to cool completely before cutting them into bite-sized pieces.

Step 2. Simmer Mixture Until Thickened

simmer until thickened mixture

Once the mixture reaches a boil, you'll want to reduce the heat to medium-low and let it simmer for about 20 minutes. This allows the flavors to meld together and the mixture to thicken up nicely.

Be sure to stir it occasionally, so nothing sticks to the bottom of the pan. Herbal ingredients like ginger are known for their health benefits, which include anti-inflammatory properties and nausea relief.

Advertisement

As the mixture simmers, you'll notice it start to transform. The liquid will become syrupy, and the ginger flavor will intensify.

Keep a close eye on it, so it doesn't reduce too much. You want it to have a nice, thick consistency that's perfect for making chewy ginger candies.

Once the 20 minutes are up and the mixture has thickened, it's time to remove it from the heat.

Let it cool slightly before pouring it onto a clean, lightly oiled surface. Get ready to have some fun as you start to shape and roll the ginger chews!

Step 3. Pour Mixture Onto Baking Sheet

pour mixture onto sheet

After the mixture has cooled slightly, pour it out onto a lightly oiled baking sheet or surface.

Use a spatula to spread the mixture evenly, making sure it's about 1/4 inch thick. This will help the ginger chews hold their shape as they cool and harden.

Advertisement

Now, place the baking sheet in the fridge or freezer. This rapid cooling will set the ginger chews, making them perfect for cutting and wrapping.

Once the mixture has hardened, about 30 minutes, use a sharp knife to cut it into bite-sized pieces.

Carefully transfer the ginger chews to an airtight container or bag. This will keep them fresh and chewy.

Feel free to get creative – you can roll the chews in sugar, coat them in chocolate, or even add a sprinkle of cinnamon for extra flavor.

Enjoy your homemade ginger chews as a tasty and healthy treat!

Advertisement

Step 4. Allow Mixture to Cool

cool the mixture down

Now that you've finished cooking the ginger mixture, it's important to let it cool before moving on to the next step. This is a crucial part of the process, as it allows the chews to set and become firmer in texture.

Carefully transfer the hot mixture onto a baking sheet or parchment paper-lined surface. Spread it out evenly to help it cool more quickly.

You'll want to resist the temptation to dive right in – let the chews sit for about 15-20 minutes, until they're no longer piping hot.

As the mixture cools, you'll notice it start to harden and take on a chew-like consistency. This is exactly what you're going for!

Be patient and let the ginger chews do their thing. Once they've reached a comfortable temperature, you can move on to the next step of the recipe. Get ready to enjoy the delicious, ginger-y goodness!

Step 5. Cut Chews Into Pieces

cut chews into pieces

With the ginger mixture cooled and hardened, it's time to cut the chews into individual pieces.

Grab a sharp knife and place the firm, golden slab onto a clean, sturdy cutting board. Using a gentle, sawing motion, slice the chew into evenly sized rectangles. Be careful not to let the knife slip – you want those chews to come out neat and tidy!

Advertisement

Once you've cut the entire batch, you can admire your handiwork.

These petite ginger chews are perfect for popping into your mouth, sharing with friends, or even gifting in cute little boxes. The vibrant, golden color and enticing ginger aroma are sure to delight all your senses.

Now, gather up those delightful ginger bites and get ready to enjoy the delicious, spicy-sweet flavor. Your taste buds are in for a real treat!

Final Thoughts

reflective conclusion insights

Ginger chews provide a convenient and delicious way to experience the many health benefits of ginger. Whether you're looking to soothe an upset stomach, boost your immune system, or simply enjoy a tasty treat, these chewy delights have got you covered.

What's not to love? Ginger chews pack a flavorful punch, with a spicy-sweet taste that's sure to tantalize your taste buds.

Plus, they're easy to incorporate into your daily routine, making it simple to enjoy the advantages of ginger anytime, anywhere.

Advertisement

Don't just take our word for it – try them for yourself and see how these remarkable little chews can brighten your day and support your overall well-being.

From their impressive health benefits to their irresistible flavor, ginger chews are a true crowd-pleaser that deserve a spot in every pantry.

Embrace the power of ginger and indulge in the goodness of these fantastic chews today!

Frequently Asked Questions

How Long Do Ginger Chews Last Before They Spoil?

You can generally expect ginger chews to last 6-12 months before they spoil, but their shelf life may vary depending on storage conditions. Proper storage in an airtight container in a cool, dry place will help them stay fresh longer.

Do Ginger Chews Have Any Side Effects?

Ginger chews are generally safe, but some people may experience mild side effects like heartburn, gas, or stomach discomfort. It's best to start with a small amount and see how your body responds.

Advertisement

Can Ginger Chews Be Made Vegan or Gluten-Free?

Yes, ginger chews can be made vegan and gluten-free. Many brands offer plant-based and wheat-free versions, catering to dietary preferences. You can easily find ginger chews that fit your lifestyle and dietary needs.

What Is the Proper Way to Store Ginger Chews?

To properly store ginger chews, keep them in an airtight container at room temperature. Avoid exposure to moisture, heat, and direct sunlight to maintain their texture and flavor. Proper storage will ensure your ginger chews stay fresh for longer.

Are There Any Contraindications With Ginger Chews and Medications?

Ginger chews may interact with certain medications, like blood thinners and diabetes medications. It's best to consult your healthcare provider before consuming ginger chews, especially if you're taking any prescription or over-the-counter medications.

Continue Reading

Food Science and Cooking

How Many Ginger Chews Can You Eat in a Day? The Safe Limit

Learn the safe limit for ginger chews and discover how to enjoy their benefits without overdoing it—what’s the perfect balance?

Published

on

daily ginger chews limit

You can safely enjoy one or two ginger chews each day! They can be delicious and helpful for your tummy, but it's important to listen to your body. If you eat more than a few, you might feel a tummy ache or worse, especially if you have certain health issues. It's always best to start with a low amount and see how you feel. Remember, moderation is key for a fun and happy experience with ginger chews. Curious about more ways to enjoy ginger or its benefits? There's plenty more to discover!

Key Takeaways

  • Start with one or two ginger chews per day to assess personal tolerance.
  • Gradually increase intake while monitoring for any adverse reactions.
  • Daily consumption should generally not exceed a few pieces for most individuals.
  • Health conditions, like diabetes, may require caution due to sugar content.
  • Consult a healthcare provider if unsure about safe limits based on personal health.

History

Ginger chews have a rich history that dates back centuries. They're not just a tasty treat; they've been enjoyed by many cultures around the world! You might be surprised to learn that ginger itself has been used for thousands of years, especially in Asia. People loved it for its unique flavor and its ability to help with tummy troubles.

In the past, ginger was often mixed with sugar and other spices to create chewy candies. These treats became popular because they were easy to carry and perfect for sharing. Imagine people on long journeys, munching on ginger chews to stay refreshed and energized!

As time went on, ginger chews found their way into markets and homes, becoming a favorite for many. They're not just delicious; they also bring back memories of family gatherings and celebrations.

You might even find that they're a part of traditional remedies in some cultures, helping to soothe sore throats or settle upset stomachs.

Recipe for Homemade Ginger Chews

Ginger chews are a delightful treat that combines the spicy warmth of ginger with a chewy texture, making them a perfect snack for any time of the day. Not only do they satisfy your sweet tooth, but they also offer potential health benefits, including easing nausea and aiding digestion.

Advertisement

Making ginger chews at home is a simple process that allows you to control the ingredients and sweetness to your preference. To create these delicious treats, you'll need fresh ginger, sugar, and a few other pantry staples. The process involves cooking the ginger until it becomes tender, then combining it with sugar to form a chewy candy.

Once you master the technique, you can experiment with additional flavors such as lemon or honey to personalize your ginger chews even further.

Ingredients:

  • 1 cup fresh ginger, peeled and sliced thinly
  • 2 cups water
  • 2 cups granulated sugar
  • 1/4 cup corn syrup
  • 1/4 teaspoon salt
  • 1/2 teaspoon ground ginger (optional)
  • Cornstarch or powdered sugar for dusting

Cooking Instructions:

In a medium saucepan, combine the sliced ginger and water, bringing it to a boil over medium heat. Reduce the heat and let it simmer for about 30 minutes, or until the ginger is tender.

Drain the ginger, reserving about 1/2 cup of the cooking liquid. Return the ginger to the saucepan, add the reserved liquid, sugar, corn syrup, and salt. Cook over medium heat, stirring constantly until the mixture thickens and reaches a temperature of around 250°F on a candy thermometer. This usually takes about 20-30 minutes.

Once done, pour the mixture onto a greased baking sheet and let it cool for a few minutes before cutting it into squares or your desired shape.

Extra Tips:

When making ginger chews, keep a close eye on the cooking process, as the mixture can quickly go from perfect to burnt. To ensure even cooking, stir regularly and monitor the temperature closely.

Advertisement

If you prefer a softer chew, remove the mixture from the heat just before it reaches 250°F. Additionally, dusting the cooled pieces with cornstarch or powdered sugar will help prevent them from sticking together.

Store your ginger chews in an airtight container at room temperature for optimal freshness.

Cooking Steps

Wondering how to make your own ginger chews at home? It's easier than you think! First, gather your ingredients: fresh ginger, sugar, water, and a little bit of lemon juice.

Start by peeling and chopping the ginger into small pieces. Then, place the ginger in a pot with water and bring it to a boil. Let it simmer for about 30 minutes. This helps release all that spicy ginger flavor!

Next, strain the ginger pieces out and keep the liquid. Add sugar to the ginger liquid and stir it until it dissolves.

Advertisement

Now, you want to cook this mixture on medium heat. Keep an eye on it! You'll want to stir frequently until it thickens and reaches a candy-like consistency. This can take around 15-20 minutes.

Once it's thick enough, pour it onto a greased baking sheet. Let it cool completely before cutting it into small squares.

You can even dust the pieces with a little sugar to keep them from sticking together. Enjoy your homemade ginger chews! They're perfect for a tasty snack or to share with friends!

Step 1. Measure Ginger Root Accurately

accurately measure ginger root

When you're ready to measure ginger root accurately, it's crucial to have the right tools on hand for precision. Start with a clean cutting board and a sharp knife. You'll also need a measuring spoon or a scale, depending on how much ginger you need.

First, grab a fresh piece of ginger root. Look for one that's firm and smooth—this means it's fresh! If you're using a scale, peel the ginger and cut off a small piece. Weigh it to get the exact amount you need.

If you're using measuring spoons, you can scoop out the minced ginger after peeling and chopping it finely.

Advertisement

Remember, one tablespoon of fresh ginger is about 15 grams, so adjust your measurements based on your recipe. If you're using dried ginger instead, a teaspoon is usually enough since it's more potent.

Always double-check your measurements, especially if you're making something special! By measuring ginger root accurately, you'll ensure your dishes taste just right.

Plus, it's a fun way to get familiar with cooking! Get ready to enjoy the zingy flavor of ginger in your meals!

Step 2. Chop Ginger Into Small Pieces

chop ginger into pieces

Chopping ginger into small pieces is a simple yet essential step that enhances its flavor in your dishes.

First, start by peeling the ginger root. You can use a spoon to scrape off the skin easily.

Once it's peeled, you'll want to grab a sharp knife and a cutting board.

Advertisement

Now, cut the ginger into thin slices. Make sure your fingers are tucked in, so you don't accidentally cut yourself.

After you've sliced it, stack a few slices and slice them again into thin strips.

Finally, chop those strips into small cubes. The smaller the pieces, the more flavor they'll release when cooked.

You might wonder why this matters.

Well, when ginger is chopped finely, it blends better into your recipes, making everything taste delicious!

Advertisement

You can add it to stir-fries, soups, or even smoothies for a zesty kick.

Step 3. Simmer Ginger in Water

simmer ginger in water

Simmering ginger in water is a straightforward process that unlocks its aromatic qualities and health benefits. Ginger is known for its anti-inflammatory properties and can aid digestion, making it a perfect addition to your wellness routine.

First, grab a pot and fill it with about four cups of water. Next, add your chopped ginger pieces. If you want a stronger flavor, you can use more ginger! Turn the heat to medium-high and let the water come to a gentle boil.

Once it's boiling, reduce the heat to low and let it simmer for about 10 to 15 minutes. This is where the magic happens! The ginger will release its spicy, warm aroma, filling your kitchen with a delightful scent. You can take a moment to breathe in that lovely fragrance; it's part of the fun!

For an added boost, consider that ginger may also help improve cognitive function aiding cognitive benefits.

While it simmers, you can prepare your favorite mug or tea cup. After the simmering time, you'll have a fragrant ginger infusion ready for sipping. Feel free to add a little honey or lemon to enhance the flavor.

Advertisement

This warm ginger drink isn't only yummy but also great for digestion and soothing sore throats. So, enjoy your homemade ginger tea and all the cozy vibes it brings!

Step 4. Strain Mixture Through Cheesecloth

strain mixture using cheesecloth

Once your ginger has finished simmering and the aroma has filled your kitchen, it's time to strain the mixture through cheesecloth. This step is super important because it helps you separate the delicious ginger-infused liquid from the chunky bits, leaving you with a smooth base for your ginger chews.

First, grab a clean piece of cheesecloth. You can find this at most grocery stores or even online. Place it over a bowl or pot, making sure it's big enough to catch all the liquid.

Carefully pour the simmered ginger mixture into the cheesecloth. You'll see the liquid flow through, while the ginger pieces stay behind. This is where the magic happens!

Once you've poured everything, gather the corners of the cheesecloth and gently squeeze it. Be careful not to burn yourself, but you want to get every last drop of that flavorful liquid.

If you have a little extra time, let it sit for a few minutes to drain fully. After that, you'll be ready to move on to making your ginger chews even tastier. Enjoy the process, and savor that lovely ginger scent!

Advertisement

Step 5. Add Sweetener to Taste

adjust sweetness to preference

Now that you have your ginger-infused liquid ready, it's time to add sweetener to taste. This is where the fun begins! Sweetening your ginger mixture can make it taste just right for you.

You can use honey, sugar, or even maple syrup—whatever you like best. Start with a small amount, maybe one or two teaspoons, and stir it in well.

Then, take a sip and see how it tastes. If you want it sweeter, add more! It's all about what makes your taste buds happy. Just remember, you can always add more sweetener, but you can't take it out once it's in.

If you're feeling adventurous, why not try adding a splash of lemon juice or a sprinkle of cinnamon? These little extras can make your ginger drink even more delicious!

Once you've got the sweetness just right, you're ready to enjoy your creation. Pour it into a fun glass, grab a friend, and share the joy of your tasty ginger drink.

It's a great treat to sip on, especially when you want something warm and comforting. Enjoy!

Advertisement

Final Thoughts

Ultimately, knowing how many ginger chews you can eat in a day comes down to understanding your own body and health needs.

Ginger chews are delicious and can help with tummy troubles, but it's important not to overdo it. For most people, enjoying a few ginger chews each day is perfectly fine.

But if you have certain health conditions, like diabetes or stomach issues, you may want to be more careful.

Listen to your body! If you start to feel any discomfort, it might be a sign to cut back.

Frequently Asked Questions

Are Ginger Chews Safe for Children?

Ginger chews can be safe for children in moderation. They may help with digestion and nausea, but it's best to consult a pediatrician first. Always watch for allergies or sensitivities before introducing new snacks.

Advertisement

Can Ginger Chews Cause Digestive Issues?

Yes, ginger chews can cause digestive issues for some people. You might experience stomach upset, bloating, or diarrhea if you consume too many. It's best to enjoy them in moderation and pay attention to your body's reactions.

How Should Ginger Chews Be Stored?

You should store ginger chews in a cool, dry place, away from direct sunlight. Keeping them in an airtight container helps maintain freshness and prevents them from becoming hard or losing flavor over time.

Are There Any Allergens in Ginger Chews?

Ginger chews can contain allergens, depending on the brand. Always check the ingredient list for common allergens like soy, nuts, or gluten. If you're unsure, consult with your doctor before trying them. Stay safe!

Can Ginger Chews Interact With Medications?

Yes, ginger chews can interact with certain medications. If you're on blood thinners or diabetes medication, it's best to consult your doctor before enjoying ginger chews to avoid any potential complications or side effects.

Advertisement

Continue Reading

Affiliate Disclaimer
As an affiliate, we may earn a commission from qualifying purchases. We get commissions for purchases made through links on this website from Amazon and other third parties.

Advertisement

Vetted

top local car washes top local car washes
Vetted2 months ago

14 Best Car Washes Near You for a Sparkling Clean Ride

I discovered the 14 best car washes near you that promise a sparkling clean ride, and you won't want to...

top mops for 2024 top mops for 2024
Vetted2 months ago

The 15 Best Mops of 2025 – Your Ultimate Guide to a Spotless Home

Find the perfect mop for your cleaning needs in 2025, and discover how these top choices can revolutionize your home...

top women s fragrances 2024 top women s fragrances 2024
Vetted2 months ago

15 Best Perfumes for Women in 2025 – A Fragrance Guide You Can’t Miss

Keen to discover the top 15 perfumes for women in 2025? Uncover unique scents that will elevate your fragrance game!

top local bars guide top local bars guide
Vetted2 months ago

14 Best Bars Near You for an Unforgettable Night Out

Looking for the perfect bar to elevate your night out? Discover the 14 best spots that promise unforgettable experiences!

luxurious beard oil selection luxurious beard oil selection
Vetted2 months ago

15 Best Beard Oils for a Luxurious Grooming Experience in 2025

Shop the 15 best beard oils for a luxurious grooming experience in 2025 and discover which ones will elevate your...

top college laptops 2024 top college laptops 2024
Vetted2 months ago

15 Best College Laptops of 2025: The Ultimate Guide for Students

With our guide to the 15 best college laptops of 2025, discover which powerful models will elevate your academic experience...

waterproof mascaras for tears waterproof mascaras for tears
Vetted2 months ago

15 Best Waterproof Mascaras That Will Survive Any Tear-Jerker

Outstanding waterproof mascaras await to keep your lashes flawless through any emotional moment; discover which ones made the top 15...

top flavorful disposable vapes top flavorful disposable vapes
Vetted2 months ago

15 Best Disposable Vapes of 2025: Top Picks for Flavor and Convenience

Prepare to discover the 15 best disposable vapes of 2025 that blend exceptional flavor and convenience, but which ones truly...

refreshing lunch salad ideas refreshing lunch salad ideas
Vetted2 months ago

15 Best Salads Near You That Will Freshen Up Your Lunch Routine

Transform your lunch with the 15 best salads nearby that will tantalize your taste buds and leave you craving more...

top convertible car seats top convertible car seats
Vetted2 months ago

15 Best Convertible Car Seats of 2025 – Safety and Comfort for Your Little One

Get ready to discover the top 15 convertible car seats of 2025 that blend safety and comfort—find out which models...

delicious fast food breakfast delicious fast food breakfast
Vetted2 months ago

15 Best Fast Food Breakfast Options That Will Make Your Mornings Delicious

Uncover the 15 best fast food breakfast options that will transform your mornings into a delicious experience you won't want...

stylish contacts for vision stylish contacts for vision
Vetted2 months ago

14 Best America’s Contacts for Clear Vision and Style

Browse through the 14 best contact lenses in America for clear vision and style, and discover which one perfectly complements...

Trending