Oh, you've got to try this sweet science of caramelization! For centuries, folks have been transforming plain old sugar into a golden-brown delight that's perfect for drizzling over desserts or adding a rich, nutty flavor to all sorts of dishes. It's all about carefully heating the sugar until it melts and turns that gorgeous color, then quickly removing it from the heat to stop the cooking. With a little practice, you'll be creating caramel magic in your kitchen. And if you want to dive deeper into this culinary wonder, just keep reading!
Key Takeaways
- Caramelization is a chemical reaction that transforms sugar into a golden-brown liquid with a complex, nutty flavor profile essential for various recipes.
- The caramelization process involves carefully monitoring the temperature and stirring to prevent burning, resulting in a range of culinary possibilities.
- Caramelized sugar can be used in both sweet and savory dishes, enhancing flavors and adding richness to the final product.
- Mastering caramelization is a crucial technique for creating iconic desserts like crème brûlée, which relies on the controlled application of caramelized sugar.
- Embracing the culinary exploration of caramelization encourages creativity and innovation in the kitchen, leading to the discovery of new techniques and unique flavor combinations.
Top picks for "caramelization sweet science"
Open Amazon search results for this keyword.
As an affiliate, we earn on qualifying purchases.
History
Caramelization has a long and storied history, dating back to ancient civilizations. The Egyptians, Greeks, and Romans all discovered the sweet, golden goodness that came from heating up sugar. They used it to make delicious treats and glaze their foods.
Over time, people in other parts of the world, like China and the Middle East, started experimenting with caramelization too.
In the 1800s, caramelization became even more popular as new cooking techniques were invented. Bakers learned how to perfectly brown sugar to create the most mouth-watering cakes and pastries.
Chefs discovered that caramelizing onions or other vegetables could add a lovely, complex flavor to their dishes. Candy makers perfected the art of making smooth, rich caramel candies.
Today, caramelization is used in all kinds of cooking, from savory to sweet. It's a delicious way to add depth and warmth to any recipe!
Recipe
Caramelizing sugar is a culinary technique that transforms the simple sweetness of sugar into a complex, nutty, and deeply flavorful ingredient. When sugar is heated, its molecules undergo a series of chemical reactions that create hundreds of new flavor compounds, resulting in the coveted golden-brown hue and enticing aroma of caramel.
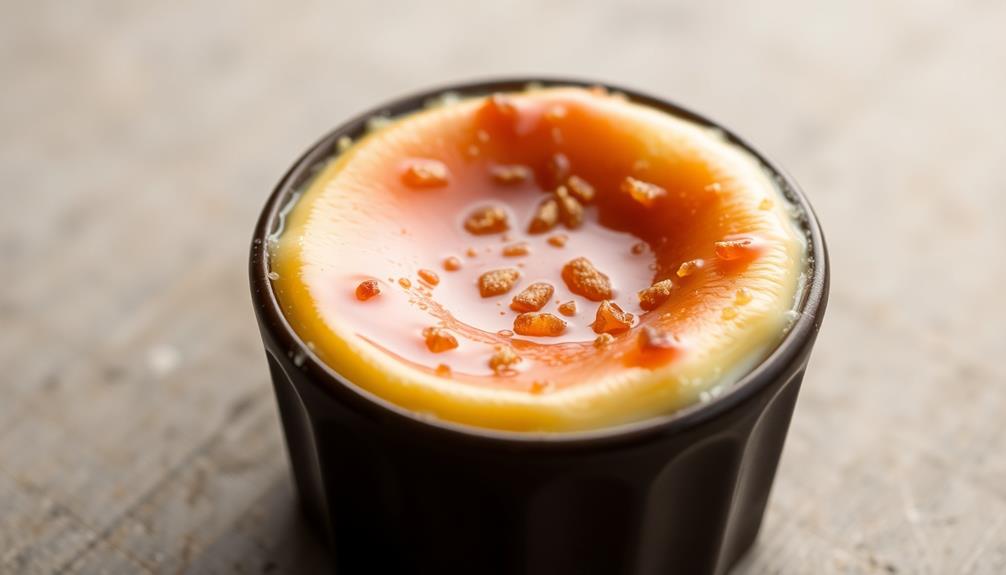
This recipe showcases the versatility of caramelized sugar by incorporating it into a classic crème brûlée. The rich, creamy custard base is topped with a layer of caramelized sugar, creating a delightful contrast of textures and flavors in every bite.
Ingredients:
- 2 cups heavy cream
- 6 large egg yolks
- 1/2 cup white sugar, plus 1/4 cup for caramelizing
Instructions:
In a medium saucepan, heat the heavy cream over medium heat, stirring occasionally, until it begins to simmer. Remove from heat.
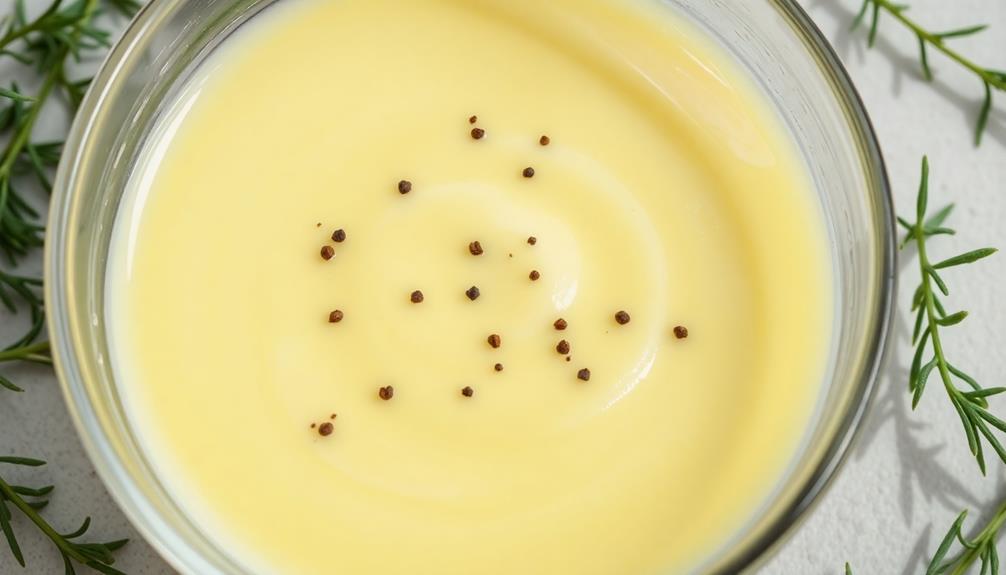
In a separate bowl, whisk the egg yolks and 1/2 cup of sugar until the mixture is pale and thick. Slowly pour the hot cream into the egg yolk mixture, whisking constantly to prevent curdling.
Return the mixture to the saucepan and cook over medium heat, stirring constantly, until thickened slightly, about 5-7 minutes. Strain the custard through a fine-mesh sieve and divide it evenly among 6 ramekins.
Preheat the oven to 325°F (165°C). Place the ramekins in a baking dish and pour enough hot water into the dish to come halfway up the sides of the ramekins.
Bake for 30-35 minutes, or until the custard is set but still slightly jiggly in the center. Remove the ramekins from the water bath and let cool completely, then refrigerate for at least 2 hours or up to 3 days.
Just before serving, sprinkle the remaining 1/4 cup of sugar evenly over the chilled custards. Using a kitchen torch, caramelize the sugar by holding the flame about 2 inches from the surface and moving it around until the sugar is melted and golden brown. Serve immediately.
Tips:
For best results, use a high-quality heavy cream with a high fat content, as this will result in a richer, creamier custard.
Additionally, be sure to chill the custards thoroughly before caramelizing the sugar topping, as this will help the sugar melt and caramelize evenly.
Cooking Steps
Heat the sugar over medium heat, stirring it occasionally as it melts into a golden-brown liquid.
Watch carefully for color changes, and once it's reached your desired shade, quickly remove the caramelized bits from the heat.
Step 1. Heat the Sugar
Once the sugar has been prepared, the real magic begins. It's time to start heating that sweet stuff! Grab your pan and turn on the heat.
You'll want to keep a close eye on the sugar as it starts to melt. Watch closely as the crystals turn into a golden, bubbly liquid. Can you smell that delicious aroma? That's the sugar caramelizing, and it's about to get even better.
As the temperature rises, the sugar will deepen in color, going from golden to amber and finally to a rich, dark brown. Stir gently to help the sugar cook evenly.
Be careful, though – the liquid sugar gets incredibly hot, so take it slow and steady. Once it reaches the perfect shade, quickly remove the pan from the heat. The caramelization process is complete, and you're one step closer to creating something truly sweet and special!
Step 2. Stir the Melting Sugar Occasionally

As the sugar melts, it's important to stir it occasionally. This helps the sugar melt evenly and prevents it from burning. Use a wooden spoon or heatproof spatula to gently stir the sugar, making sure to scrape the sides and bottom of the pan.
The sugar will start to turn a light golden color as it melts. Keep an eye on it, as the caramelization process happens quickly!
Stirring the melting sugar also allows you to check the temperature. Use a candy thermometer to monitor the sugar's progress. When it reaches 320-350°F, the sugar has caramelized and is ready to use in your recipe.
Be careful, though – the hot sugar can cause nasty burns if it splashes on your skin.
Stirring the melting sugar is an important step in the caramelization process. By keeping an eye on it and giving it a gentle stir, you'll end up with rich, flavorful caramel perfect for all sorts of sweet treats.
Just remember to take it slow and stay safe around that hot sugar!
Step 3. Watch for Color Changes

As the sugar melts, you'll want to keep a close eye on the color changes. At first, the sugar will simply melt into a clear, colorless liquid.
But as the temperature rises, you'll start to see the sugar take on a beautiful golden hue. This is the beginning of caramelization, the magical process that turns plain old sugar into a rich, complex flavor.
Soon, the golden color will deepen, transforming into a rich, amber tone. This is where the real magic happens! The sugar molecules are breaking down and rearranging, creating hundreds of new flavor compounds.
The aroma will become absolutely heavenly, filling the air with the sweet, nutty scent of caramel.
Keep stirring the sugar gently, watching as the color continues to darken. You're looking for a deep, mahogany brown – the perfect point for many caramel-based recipes.
But be careful not to let it go too far, or the sugar will burn and turn bitter. Stay vigilant, and enjoy the show!
Step 4. Remove the Caramelized Bits
After you've reached that perfect mahogany brown, it's time to quickly remove the pan from the heat. The caramelization process happens fast, and those bits can easily go from golden to bitter if you're not careful.
While you're enjoying the aroma of your caramelized sugar, you might also consider the soothing effects of essential oils like peppermint oil for a refreshing lift in your kitchen.
Grab your trusty spatula and gently scoop out the lovely, caramelized sugar cubes or pieces. Mmm, can you smell that rich, toasted aroma? It's like magic!
Be mindful not to scrape too hard, or you might end up with some unwanted burnt bits in your final dish.
Carefully transfer the caramelized sugar to a plate or bowl, and admire your handiwork. These sweet, crispy morsels are perfect for topping ice cream, yogurt, or even your morning oatmeal.
Or, you can use them to add a delightful crunch to your favorite dessert recipes. The possibilities are endless when you master the art of caramelization!
Step 5. Add Ice Water

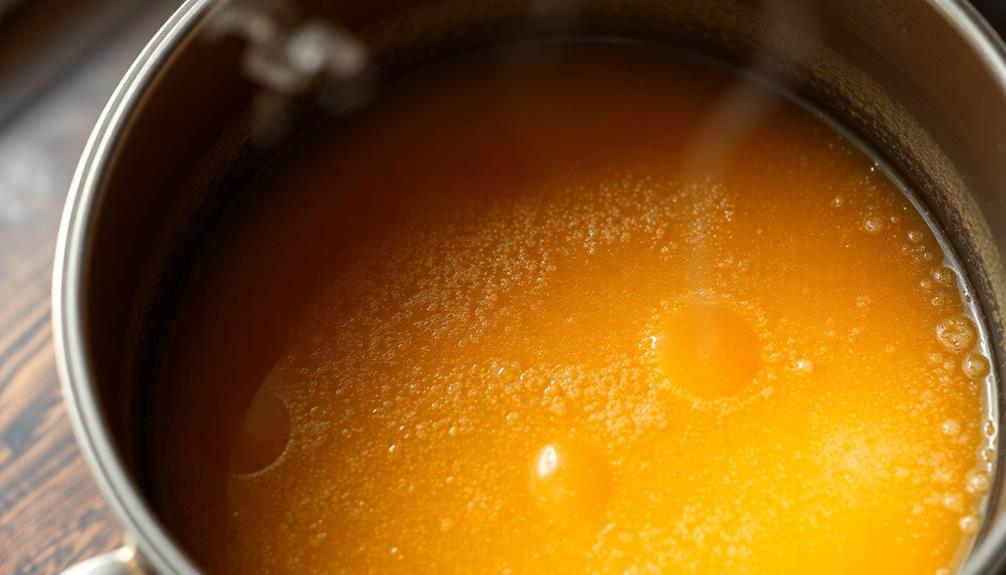
Having removed the caramelized sugar from the heat, you'll want to quickly add some ice water to the pan. This sudden temperature change will stop the cooking process and prevent the sugar from burning or becoming bitter.
Watch as the hot pan sizzles and steams when the cold water hits it! The contrast between the scorching-hot sugar and the icy water is really quite dramatic.
As the sugar dissolves, you can use a spoon to gently stir and scrape up any hardened bits stuck to the bottom of the pan. The water will turn a lovely golden-brown color, capturing the essence of the caramelized sugar.
Be careful, as the mixture may still be very hot! Once the sugar has fully dissolved, you can pour the resulting syrup into a clean container to use in your recipe.
This sweet, rich liquid is perfect for drizzling over desserts, adding to drinks, or using as a glaze. The quick addition of ice water ensures your caramelized sugar turns out perfectly every time.
Final Thoughts
Caramelization is truly a remarkable phenomenon that, for the devoted cook, unlocks a world of culinary possibilities. Mastering the art of caramelizing sugar can transform even the most humble ingredients into something truly extraordinary.
Whether you're creating a decadent crème brûlée, a gooey caramel sauce, or a perfectly golden-brown pastry, the rich, complex flavors of caramelized sugar are sure to delight.
As you continue on your culinary journey, remember to embrace the process of experimentation and discovery. Don't be afraid to try new techniques, to push the boundaries of what's possible in the kitchen.
With a little patience and a lot of passion, you can unlock the secrets of caramelization and create dishes that will leave your friends and family in awe.
Frequently Asked Questions
How Long Does Caramelization Take for Different Sugar Types?
How long caramelization takes depends on the type of sugar you're using. Granulated sugar caramelizes faster than brown sugar, while honey and maple syrup need more time to reach that delicious, golden-brown stage.
Can Caramelization Be Controlled for Specific Flavors and Colors?
Yes, you can control caramelization to achieve specific flavors and colors. By adjusting factors like temperature, time, and the type of sugar, you can fine-tune the caramelization process to create your desired culinary outcomes.
What Are the Health Benefits and Risks of Caramelized Sugar?
Caramelized sugar can provide a pleasant, deep flavor, but it also carries health risks. While it may add complexity to your dish, consuming too much can lead to weight gain and increased risk of chronic conditions. Moderation is key when enjoying caramelized sugar.
Can Caramelization Be Used in Baking, Candy-Making, or Other Dishes?
Absolutely! You can use caramelization in baking, candy-making, and other dishes. It adds a rich, complex flavor and appealing color to cakes, cookies, sauces, and more. Caramelization is a versatile technique that can enhance a variety of sweet and savory recipes.
How Can I Troubleshoot Issues With Caramelization in My Cooking?
If you're having trouble with caramelization, try adjusting the temperature, cooking time, or sugar content. Pay close attention to the color changes, and don't be afraid to experiment to find the perfect balance.