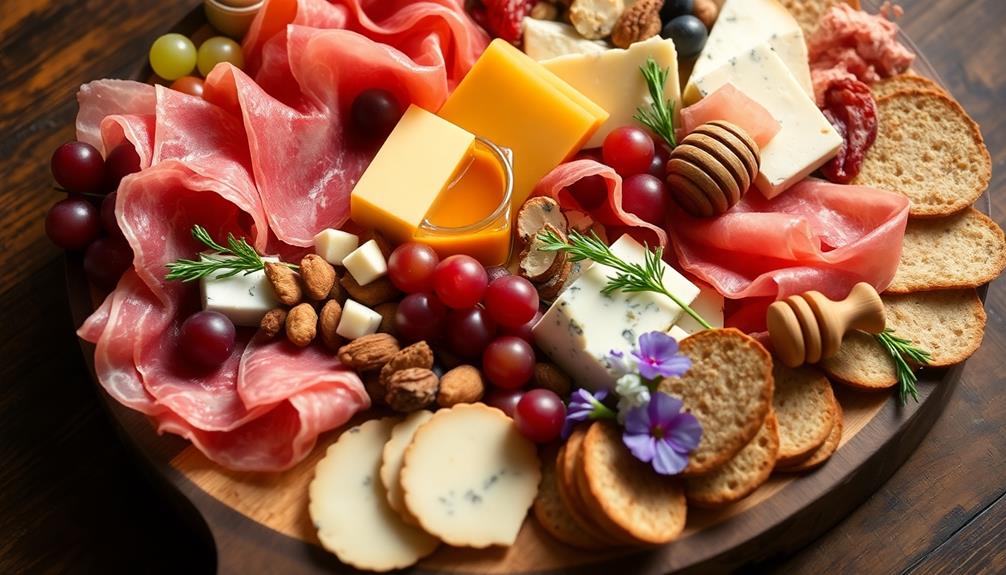

Creating a locally-sourced charcuterie board is a delightful way to showcase your region's flavors. Start by selecting a variety of cured meats from local butchers or farmers markets. Add an assortment of local cheeses, ranging from soft to hard textures. Include seasonal fruits, nuts, and olives for contrast. Don't forget to add locally-made spreads like honey or jam. Arrange your items artfully on a board, mixing colors and textures for visual appeal. Provide small utensils for easy serving. Remember to let cheeses come to room temperature before serving for the best flavor. This tasty spread offers a perfect opportunity to support local producers and explore unique regional tastes.
Key Takeaways
- Source meats, cheeses, and fruits from local farmers' markets or specialty shops for freshness and regional flavor.
- Include a variety of locally cured meats, such as prosciutto, salami, and chorizo, for diverse tastes and textures.
- Select an assortment of local cheeses, including soft, hard, and crumbly options, to complement the meats.
- Incorporate seasonal fruits and vegetables from nearby farms to add color and balance to the board.
- Use locally sourced honey, jams, or spreads as accompaniments to enhance the regional theme of the charcuterie board.
Top picks for "locally sourc charcuterie"
As an affiliate, we earn on qualifying purchases.
History
Although the modern charcuterie board has gained popularity in recent years, its origins can be traced back to 15th century France. You might be surprised to learn that the word "charcuterie" comes from the French words "chair" (flesh) and "cuit" (cooked).
Back then, charcuterie referred to shops that sold cooked pork products. The presentation of these items on a board not only showcases the variety but also contributes to a warm and inviting atmosphere, akin to transformative decor ideas.
As time went on, these shops started offering a wider variety of cured meats and accompaniments. You'd find not just pork, but also beef, poultry, and game. The idea of presenting these items on a board evolved naturally as a way to showcase the shop's offerings.
In the 19th century, charcuterie became more refined. You'd see elaborate displays in French delicatessens, featuring artfully arranged meats, cheeses, and garnishes.
This tradition spread across Europe and eventually made its way to other parts of the world.
Today, you can create your own charcuterie board at home, carrying on this centuries-old tradition. It's a great way to entertain guests or enjoy a variety of flavors in one sitting.
Recipe
A charcuterie board isn't so much a recipe as it's an assembly of carefully chosen ingredients. This culinary art form originated in France and has since become a popular appetizer or light meal option around the world. The beauty of a charcuterie board lies in its versatility and customization, allowing you to cater to various tastes and dietary preferences.
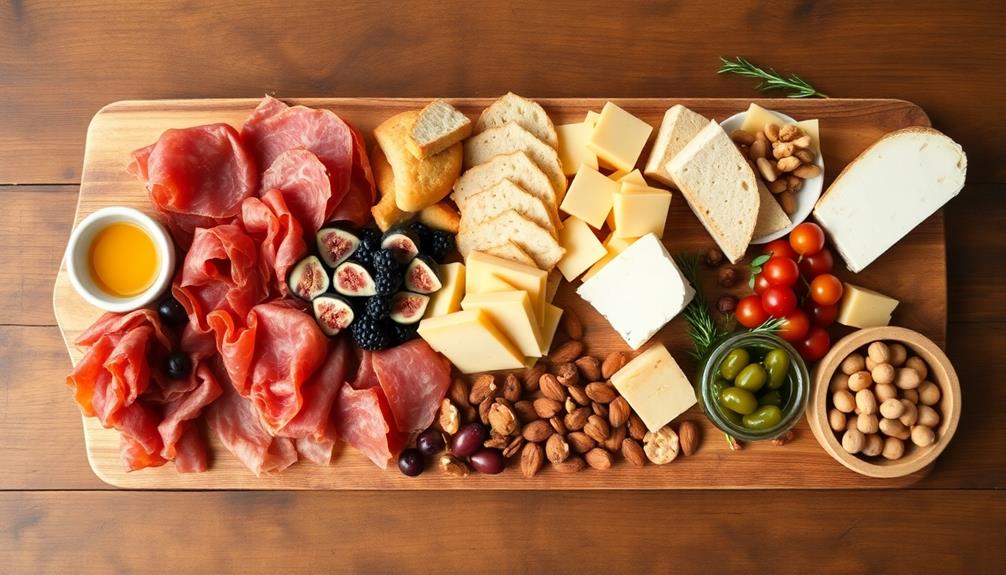
Creating the perfect charcuterie board is about balancing flavors, textures, and visual appeal. While there's no strict formula, a well-curated board typically includes a variety of cured meats, cheeses, fruits, nuts, spreads, and accompaniments. The key is to offer a diverse selection that encourages guests to explore different taste combinations. To add a unique touch to your charcuterie board, consider incorporating some traditional Mexican discada cooking. This style of cooking involves grilling a variety of meats and vegetables on a large, round, flat griddle or disc. The result is flavorful, juicy meats that can add a delicious twist to your board. Consider including some discada-style chorizo, carne asada, and grilled nopales for a memorable and unexpected addition to your spread.
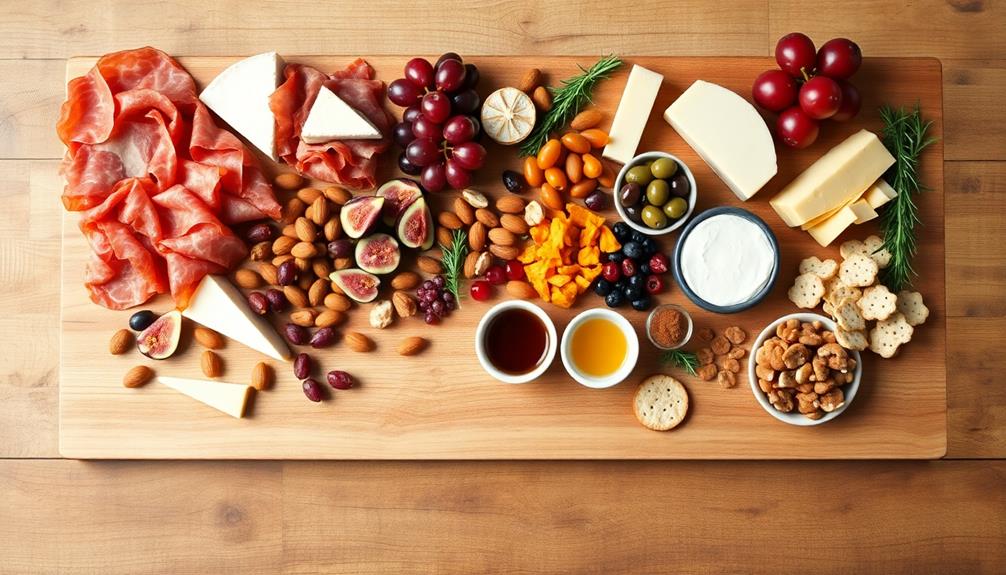
- Assorted cured meats (prosciutto, salami, chorizo)
- Various cheeses (brie, cheddar, goat cheese)
- Fresh fruits (grapes, figs, berries)
- Dried fruits (apricots, cranberries)
- Nuts (almonds, walnuts)
- Olives
- Cornichons or small pickles
- Honey
- Fig jam or other fruit preserves
- Mustard
- Crackers or sliced baguette
- Fresh herbs for garnish
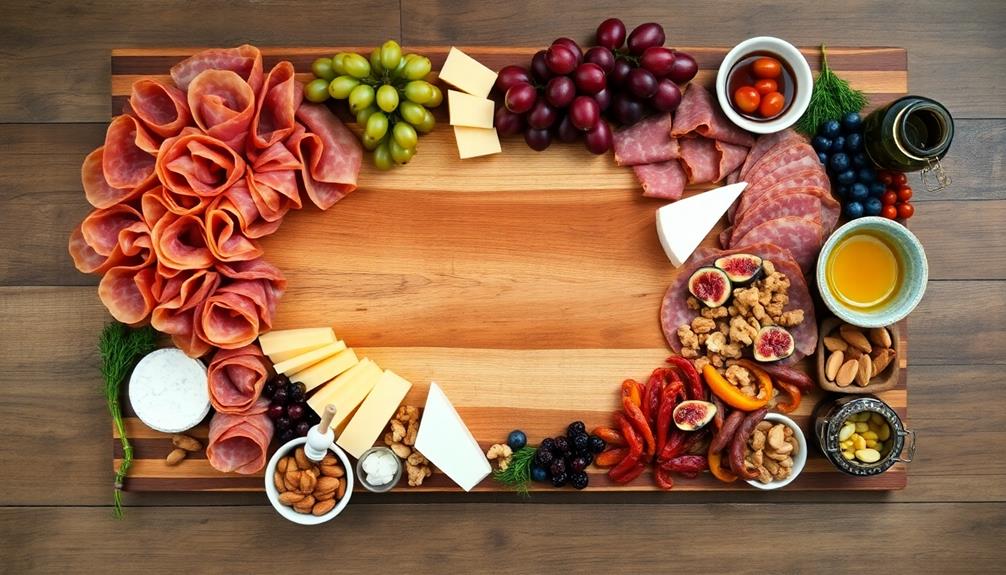
To assemble your charcuterie board, start by placing small bowls or ramekins for spreads and olives on your board. Arrange the cheeses next, spacing them out across the board. Fold or roll the cured meats and place them near the cheeses. Fill in the gaps with clusters of fruits, nuts, and crackers. Add sprigs of fresh herbs for a pop of color and aroma. Remember to provide serving utensils for each cheese and spread.
For the best experience, remove cheeses from the refrigerator about 30 minutes before serving to allow them to come to room temperature. This enhances their flavors and textures.
When selecting ingredients, aim for a mix of mild and bold flavors, as well as different textures (creamy, crunchy, chewy). Don't overcrowd the board; leaving some empty space makes the presentation more visually appealing and allows room for guests to easily access items.
Cooking Steps
To create your perfect charcuterie board, you'll want to start by selecting fresh, local meats and curing them with spices from your area.
Next, arrange these flavorful meats on your board, adding local cheeses and fruits to complement the flavors.
Step 1. Select Fresh Local Meats
Selecting fresh local meats is crucial for creating an outstanding charcuterie board. You'll want to visit your local butcher or farmers market to find the best options. Look for a variety of cured meats like prosciutto, salami, and chorizo. These meats should have a rich color and smell fresh, not sour or off-putting.
When you're at the market, don't be shy about asking questions. The sellers can tell you about the meat's origin, curing process, and flavor profile. This information will help you choose meats that complement each other on your board. Try to pick at least three different types of meat for variety.
Remember to consider texture too. Mix thinly sliced meats with thicker cuts or whole sausages. This will add visual interest to your board and give your guests different eating experiences.
As you select your meats, think about how they'll pair with cheeses and other items you plan to include. A good rule of thumb is to aim for about 2 ounces of meat per person. This ensures everyone gets a taste without overwhelming the other elements on your charcuterie board.
Step 2. Cure Meats With Local Spices
While selecting fresh local meats is key, taking your charcuterie board to the next level involves curing your own meats with local spices. Start by choosing a cut of pork or beef that's well-marbled.
Mix salt, sugar, and your favorite local spices like rosemary, thyme, or juniper berries. Rub this mixture all over the meat, making sure to cover every inch. Place the meat in a sealed plastic bag and refrigerate it for about a week, turning it daily to distribute the cure evenly.
After curing, rinse the meat thoroughly and pat it dry. Now, it's time to add more flavor. Roll the meat in crushed peppercorns or other whole spices.
Wrap it tightly in cheesecloth and hang it in a cool, dry place for several weeks. Keep an eye on it, checking for any unusual smells or mold growth.
Once it's firm to the touch, your homemade cured meat is ready. Slice it thinly and arrange it on your charcuterie board. You'll love the unique flavors that come from using local spices in your curing process.
Step 3. Arrange Meats on Board
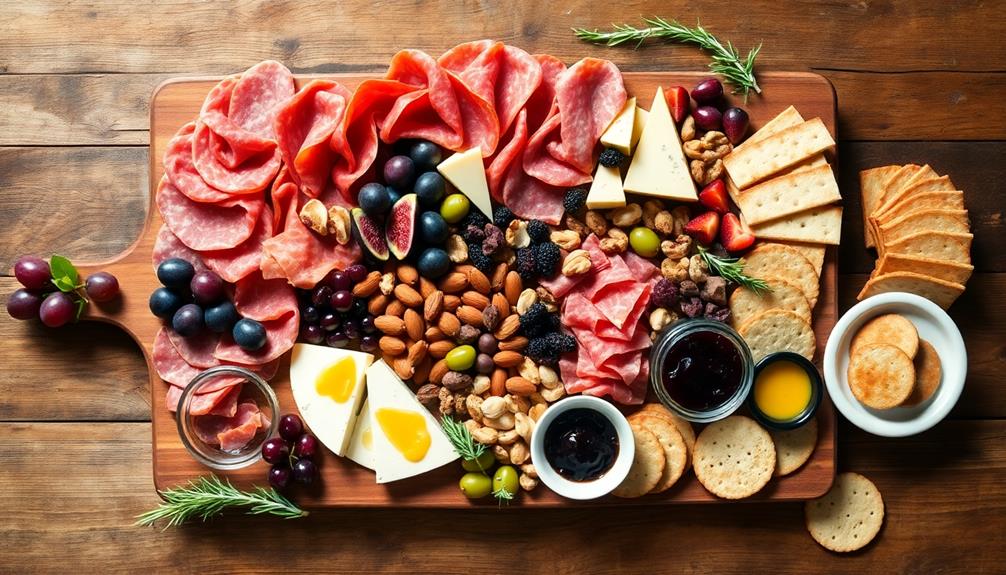
Arranging meats on your charcuterie board is an art form that requires attention to detail and a keen eye for presentation. Start by placing larger meat slices, like prosciutto or salami, in small piles or fans around the board. Fold or roll thinner slices to create attractive shapes and add visual interest.
Next, add smaller cured meats like chorizo or pepperoni in clusters or lines between the larger meats. Make sure to spread the meats evenly across the board, leaving space for other items like cheese and crackers.
Try to mix up colors and textures to create an appealing display. For example, place dark salami next to lighter-colored prosciutto. Don't overcrowd the board; leave some empty spaces to make it easier for guests to pick up the meats.
Remember to keep strong-flavored meats separate from milder ones to prevent flavor mixing. If you're using soft meats like pâté, place them in small dishes on the board.
Lastly, add some fresh herbs or edible flowers for a pop of color and freshness. Your beautifully arranged meats will be the star of your charcuterie board!
Step 4. Add Local Cheeses and Fruits
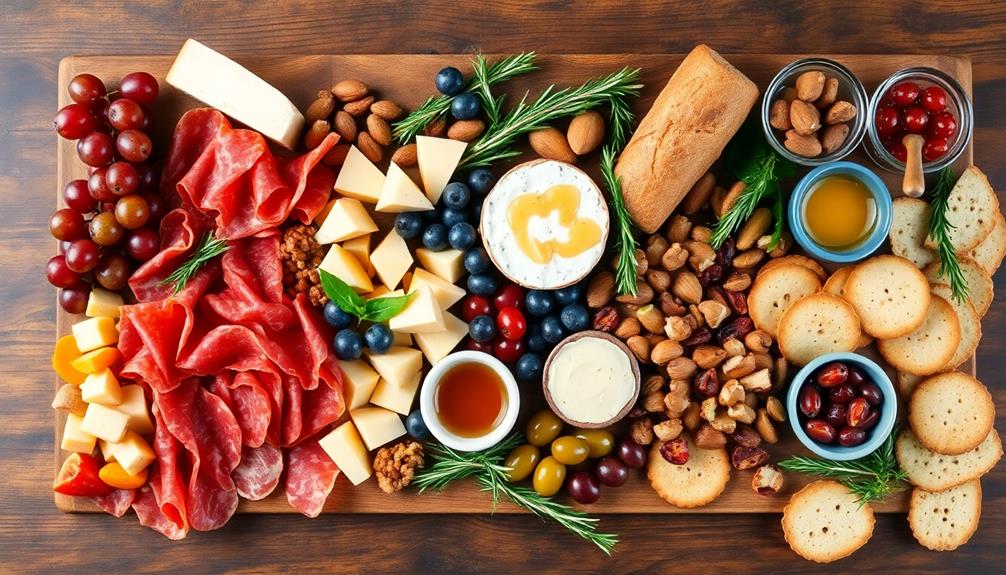
Local cheeses and fruits are the perfect complement to your carefully arranged meats. Start by selecting a variety of local cheeses, aiming for different textures and flavors. You'll want to include a soft cheese like brie, a hard cheese like cheddar, and perhaps a crumbly cheese like blue cheese.
For inspiration on enhancing your home atmosphere, consider using GEEORY Fall Pillow Covers to create a cozy environment for your gathering. Cut the harder cheeses into small cubes or triangles, and leave softer cheeses whole with a cheese knife nearby.
Next, add fresh, seasonal fruits to your board. Grapes are a classic choice and can be left in small clusters. Slice apples or pears thinly, and don't forget to add some berries for color and sweetness. If you're feeling adventurous, include some dried fruits like apricots or figs.
Arrange the cheeses and fruits around your meats, creating an appealing visual balance. Make sure to leave some space between items so guests can easily pick up what they want.
It's a good idea to place small bowls on the board for olives or nuts, adding more variety to your spread. Remember, the goal is to create a beautiful, tasty arrangement that showcases your local ingredients.
Step 5. Garnish With Edible Flowers
To elevate your charcuterie board's visual appeal, garnish it with edible flowers. Choose flowers that are safe to eat and complement your board's flavors. Some popular options include nasturtiums, pansies, and violets.
Before you start, make sure to rinse the flowers gently in cool water and pat them dry with a paper towel.
Scatter a few flowers around the board, placing them strategically to add pops of color. You can use whole flowers or just the petals, depending on the size and look you want. Try tucking some between cheese wedges or nestling them next to fruit slices. For a fun touch, float a few petals in small dishes of honey or olive oil.
Remember that less is more when it comes to edible flowers. You don't want to overwhelm the other items on your board. If you're unsure about which flowers to use, stick to herbs with blossoms like chive flowers or basil blooms. These not only look pretty but also add a subtle flavor that pairs well with cheeses and meats.
Final Thoughts
Creating a charcuterie board can be a delightful culinary adventure. As you've learned, there's so much more to it than just placing meats and cheeses on a board.
You've discovered how to choose the right ingredients, arrange them beautifully, and add special touches like edible flowers. By approaching this process with an abundance mindset, you can transform the experience into one of creativity and joy, enhancing your connection to the moment.
Remember, the key to a great charcuterie board is balance. Mix flavors, textures, and colors to create an eye-catching and tasty spread.
Don't forget to include a variety of accompaniments like nuts, fruits, and spreads to complement your main items. For example, a cheese platter can be enhanced with a selection of figs, honey, and assorted crackers. Additionally, a charcuterie board can be elevated with the addition of whole grain mustard, pickles, and olives. You could also pair your main dishes with homemade nettle and potato soup for a comforting and delicious meal.
When you're ready to serve, make sure everything is at the right temperature. Cold meats and cheeses won't taste their best, so let them sit out for a bit before guests arrive.
Keep your board looking fresh by replenishing items as needed throughout your event.
Most importantly, have fun with it! Charcuterie boards are meant to be enjoyed, so don't stress too much about perfection.
Your guests will appreciate the effort and creativity you've put into crafting a unique and delicious experience for them to share.
Frequently Asked Questions
How Long Can a Charcuterie Board Sit Out at Room Temperature?
You shouldn't leave your charcuterie board out for more than 2 hours at room temperature. After that, bacteria can multiply rapidly. If it's hot (over 90°F), reduce the time to 1 hour. Always prioritize food safety.
What Types of Cheese Pair Best With Cured Meats?
You'll want to pair cured meats with aged cheeses like Parmigiano-Reggiano or sharp cheddar. For softer options, try Brie or Camembert. Don't forget blue cheeses; they're excellent with salty cured meats. Mix textures for variety.
Are There Vegetarian or Vegan Options for Charcuterie Boards?
You can create delicious vegetarian or vegan charcuterie boards. Try using marinated vegetables, nuts, olives, hummus, and plant-based cheeses. Include fruits, jams, and crackers for variety. It's easy to adapt traditional boards to suit dietary preferences.
How Far in Advance Can I Prepare a Charcuterie Board?
You can prepare most charcuterie board elements a day in advance. Assemble cheeses, meats, and fruits 2-3 hours before serving. Add crackers and bread last minute to maintain crispness. Don't forget to cover and refrigerate pre-assembled items.
What's the Ideal Ratio of Meats to Cheeses on a Charcuterie Board?
You'll want to aim for a balanced ratio of meats to cheeses on your charcuterie board. A good rule of thumb is 1:1, but you can adjust based on your preferences. Don't forget to include accompaniments like fruits and nuts.