Farm-to-Table Cooking
Dragon Fruit: How to Use This Colorful Cactus
Featuring a vibrant hue and delectable tropical taste, dragon fruit is a versatile cactus fruit that can elevate any dish with its captivating allure.
Dragon fruit's vibrant colors, unique shape, and delectable tropical flavor make it a captivating ingredient to incorporate into your meals. Originating from Central and South America, this versatile cactus fruit has gained popularity worldwide for its impressive nutritional profile and ability to elevate the presentation of any dish. You can dice it into a refreshing salad, blend it into a nourishing smoothie, or grill it to add a subtle smoky note – dragon fruit's versatility encourages culinary exploration and creative flavor combinations. Intrigued? Let's dive deeper into how to make the most of this colorful cactus.
Key Takeaways
- Dragon fruit is a nutrient-dense fruit that can be enjoyed raw, in smoothies, salads, desserts, and savory dishes, offering a unique tropical flavor.
- The fruit's vibrant colors and versatility make it a great ingredient for creative culinary exploration and presentation.
- When selecting dragon fruit, look for a bright, evenly colored skin and a slight give when gently pressed.
- To prepare, peel the fruit, slice off the ends, and dice the white flesh into cubes, sprinkled with lime juice.
- Dragon fruit pairs well with citrus, tropical fruits, spices, creamy ingredients, and savory elements, allowing for a range of flavor combinations.
History
The dragon fruit, also known as pitaya, has a rich and fascinating history that can be traced back to its native habitats in Central and South America. This vibrant, exotic fruit was first cultivated by the Mesoamerican civilizations, including the Aztecs and the Maya, who prized it for its unique appearance and delectable flavor.
Over time, the cultivation of dragon fruit spread throughout the region, and it eventually made its way to other parts of the world, including Asia and Australia. Today, dragon fruit is enjoyed globally, with major producers in countries like Vietnam, Thailand, and Nicaragua.
The dragon fruit's rise in popularity can be attributed to its versatility in the kitchen, as well as its potential health benefits. Rich in antioxidants, vitamins, and minerals, this cactus fruit has become a sought-after ingredient in a wide range of dishes, from smoothies and salads to desserts and cocktails.
Recipe
Dragon Fruit Smoothie
Dragon fruit, also known as pitaya, is a vibrant and flavorful tropical fruit that can be enjoyed in a variety of ways. One delightful option is to incorporate it into a refreshing and nutrient-dense smoothie. This recipe showcases the natural sweetness of dragon fruit, blending it with other wholesome ingredients to create a delicious and healthful beverage.
The bright pink hue of the dragon fruit not only makes for an eye-catching smoothie, but also indicates its rich content of antioxidants and vitamins. Combined with the creamy texture of yogurt and the refreshing tang of citrus, this smoothie is a perfect way to start your day or enjoy as a midday pick-me-up.
Ingredients:
- 1 cup fresh or frozen dragon fruit, cubed
- 1 cup plain Greek yogurt
- 1/2 cup milk or non-dairy milk of your choice
- 1 tablespoon honey or maple syrup (optional)
- 1/2 lime, juiced
- Ice cubes (as desired)
Instructions:
In a high-speed blender, combine the dragon fruit, yogurt, milk, honey or maple syrup (if using), and lime juice. Blend until smooth and creamy.
Add ice cubes and blend again until the desired consistency is achieved. Serve immediately and enjoy the vibrant, refreshing flavors of this dragon fruit smoothie.
For an extra boost of nutrition, consider adding a handful of spinach or kale to the smoothie. You can also experiment with different fruits, such as mango or pineapple, to create unique flavor combinations.
Enjoy this dragon fruit smoothie as a healthy and delicious way to start your day or as a refreshing treat any time.
Cooking Steps
Choose a ripe, vibrant dragon fruit with a blemish-free skin.
Peel the fruit and slice it into rounds, then dice the rounds into cubes.
Sprinkle the cubes with lime juice and add a colorful garnish to enhance the dish's presentation.
Step 1. Choose Ripe, Vibrant Dragon Fruit
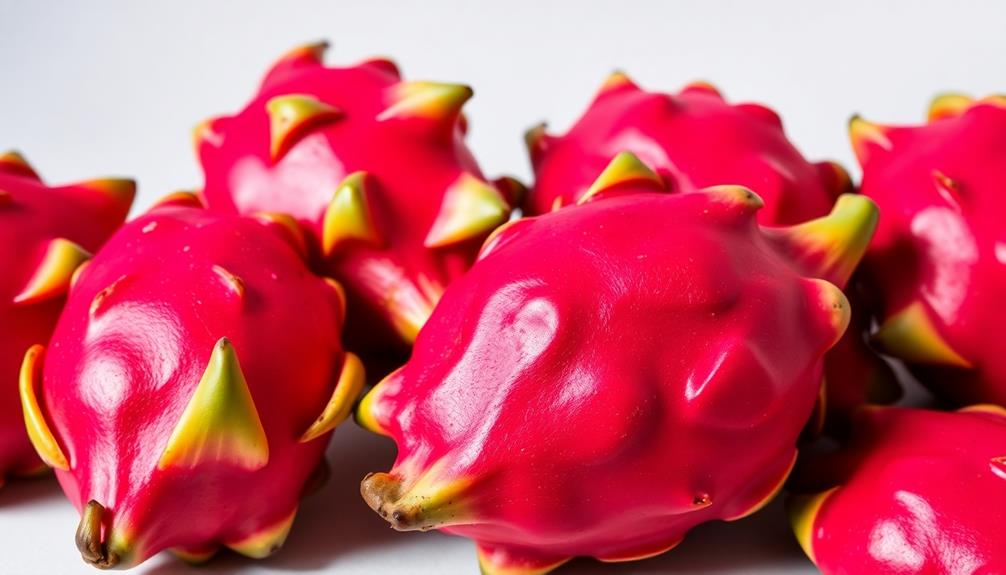
Ripeness and vibrancy are paramount when selecting dragon fruit. Look for fruit with a bright, vibrant color – whether it's red, pink, or yellow. Avoid any that appear dull or wrinkled, as those will likely be overripe and mushy. Gently press the fruit; it should have a slight give, but not be too soft. If it's rock-hard, it's not yet ripe.
The stem end should be green and fresh-looking. Steer clear of dragon fruit with brown or dried-out stems, as they're past their prime. When you give the fruit a gentle squeeze, it should have a slight give, but still feel firm. If it's overly soft, it's overripe and won't have the best texture or flavor.
Look for dragon fruit that's heavy for its size, which indicates it's juicy and well-hydrated. Aim to choose fruit that's bright, plump, and free of blemishes or bruises.
With some careful selection, you'll end up with the ripest, most vibrant dragon fruit.
Step 2. Peel Fruit and Slice Into Rounds
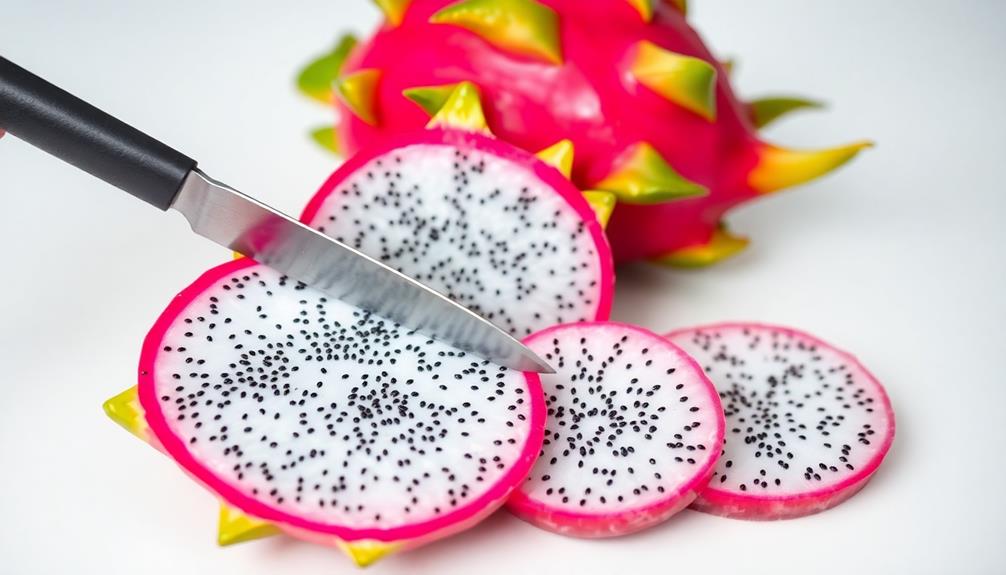
Once you've selected the perfect dragon fruit, it's time to prepare it. Start by giving the fruit a good rinse under cool running water.
Use a sharp knife to slice off both ends of the fruit, exposing the white interior. Next, stand the fruit up on one of the cut ends and carefully run the knife down the sides, removing the bright pink skin in strips. Discard the skin and admire the beautiful white flesh dotted with tiny black seeds.
Slice the peeled dragon fruit into rounds, about 1/2 inch thick. You can arrange the slices on a plate or platter, or use them as a topping for yogurt, salads, or even cocktails.
The juicy, mildly sweet flesh pairs well with a variety of flavors. Try drizzling the slices with a bit of honey or lime juice for a simple yet refreshing treat. Enjoy the vibrant color and unique texture of this tropical fruit.
Step 3. Dice Dragon Fruit Into Cubes
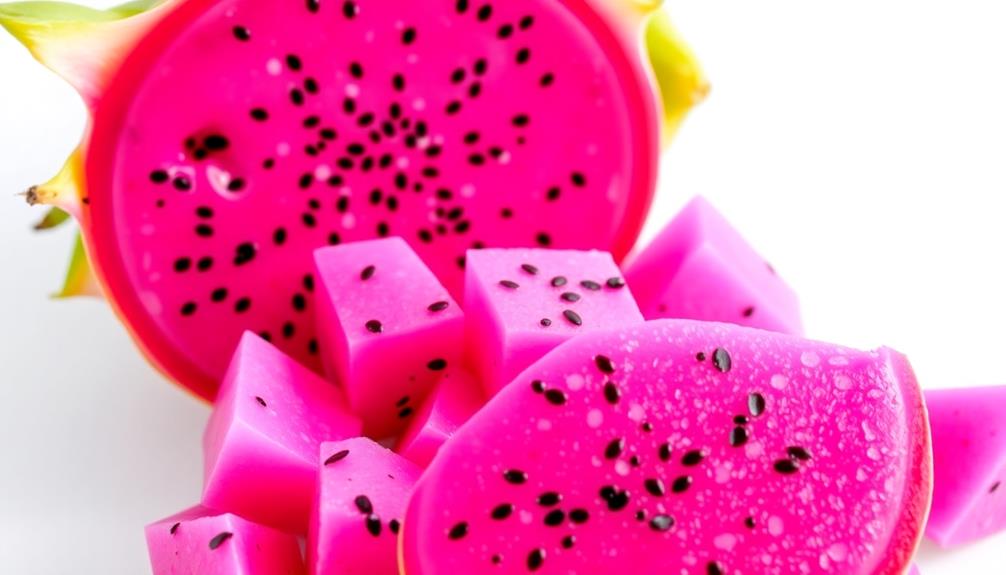
Slice the peeled dragon fruit lengthwise into thin planks. Then, stack the planks and cut them crosswise into 1/2-inch cubes. You'll end up with vibrant pink or white cubes, depending on the variety of dragon fruit you're using.
These cubes make a beautiful addition to fruit salads, yogurt parfaits, and even savory dishes like stir-fries.
The firm, crunchy texture of diced dragon fruit pairs nicely with softer fruits like mango, pineapple, or kiwi. Try mixing the cubes with a splash of lime juice, a sprinkle of chili powder, and a drizzle of honey for a refreshing salsa-like topping.
Or fold them into whipped cream for a pretty, pink-hued dessert.
The sky's the limit when it comes to using diced dragon fruit. Toss it into smoothies, scatter it over oatmeal, or simply enjoy the cubes on their own as a healthy, hydrating snack.
No matter how you use them, these boldly-colored dragon fruit cubes are sure to add a fun, tropical twist to your culinary creations.
Step 4. Sprinkle With Lime Juice
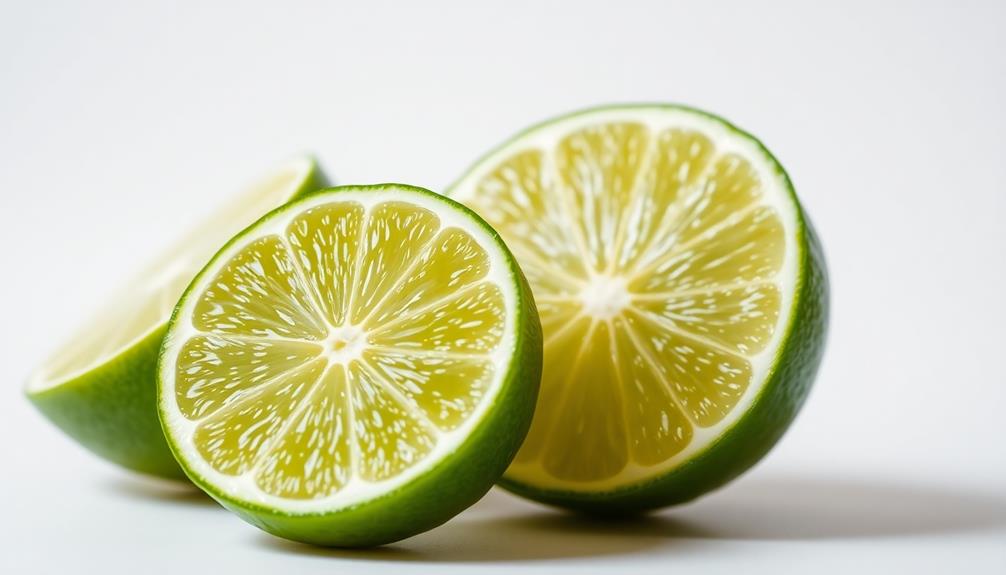
After dicing the dragon fruit, sprinkle the vibrant cubes with a squeeze of fresh lime juice. This simple step adds a bright, tangy note that complements the sweet, subtly floral flavor of the dragon fruit. The acid in the lime juice also helps prevent the fruit from browning too quickly, preserving its vivid colors.
When choosing a lime, look for ones that feel heavy for their size and have a bright, glossy skin. Roll the lime on the counter before cutting to help release more of its juices. Squeeze the lime directly over the diced dragon fruit, aiming to coat all the cubes evenly. Use just enough lime juice to lightly dress the fruit – you don't want to overwhelm its delicate taste.
Gently toss the lime-kissed dragon fruit to ensure the juice is distributed throughout. At this point, the dragon fruit is ready to be used in a variety of dishes, from refreshing salads to tropical desserts.
The combination of sweet, tart, and vibrant flavors makes it a versatile ingredient.
Step 5. Add a Colorful Garnish
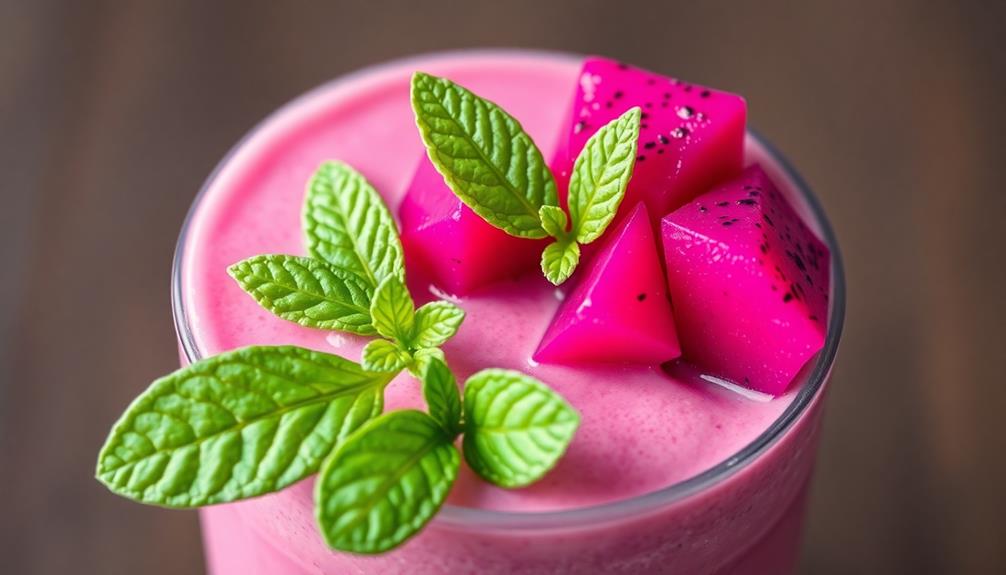
To add a vibrant, colorful garnish, consider thinly slicing another dragon fruit and arranging the translucent pink or white discs around the edge of your serving dish. You can also use the dragon fruit's green leafy top as a garnish, carefully plucking a few sprigs and tucking them between the fruit slices. For an added touch of elegance, try sprinkling some fresh mint leaves over the dragon fruit slices for a burst of green and a refreshing flavor. If you’re looking for a savory twist, consider pairing the dragon fruit with a charred okra recipe for a colorful and flavorful dish that is sure to impress your guests. The vibrant colors and unique textures of the dragon fruit, combined with the charred okra, create a stunning visual presentation and a delightful culinary experience.
For an even more eye-catching presentation, try cutting the dragon fruit into small cubes or triangles and scattering them over the top of your dish. The contrast of the bright pink or white fruit against the darker colors of the rest of the ingredients will make your creation pop.
Don't be afraid to get creative with your garnishes. Sprinkle on some toasted coconut flakes, drizzle with honey or agave, or add a few fresh mint leaves. These simple touches will elevate your dragon fruit dish and make it truly spectacular.
Final Thoughts
Dragon fruit's versatility continues to captivate culinary enthusiasts. From vibrant garnishes to decadent desserts, this unique cactus fruit offers endless possibilities for innovative cuisine.
As you continue to explore the wonders of dragon fruit, remember to embrace its natural beauty and let it shine. Don't be afraid to experiment with different flavor combinations and preparation methods – the results may surprise and delight you.
Ultimately, dragon fruit is a celebration of the unexpected. Its striking appearance and subtle sweetness invite you to step outside your comfort zone and discover new culinary adventures.
Whether you're whipping up a refreshing smoothie or crafting an elegant plated dessert, this versatile ingredient is sure to add a touch of magic to your culinary creations.
Frequently Asked Questions
What Are the Health Benefits of Dragon Fruit?
Dragon fruit is packed with vitamins, minerals, and antioxidants that can boost your immune system, aid digestion, and reduce inflammation. Plus, it's low in calories and high in fiber, making it a great addition to a healthy diet.
How Do I Store Dragon Fruit Properly?
To store dragon fruit properly, keep it at room temperature and out of direct sunlight. Once ripe, it can be refrigerated for up to 5 days. Avoid placing it near other fruits as it can cause them to ripen faster.
Can Dragon Fruit Be Consumed by Those With Diabetes?
Yes, dragon fruit can be consumed by those with diabetes. It's low in calories and carbs, making it a diabetes-friendly fruit. Just be mindful of portion sizes and incorporate it into your overall healthy eating plan.
Is the Skin of Dragon Fruit Edible?
Yes, the skin of dragon fruit is edible. It's crunchy and has a mild flavor that complements the sweet flesh. Just be sure to wash it thoroughly before eating.
How Can I Tell if a Dragon Fruit Is Ripe?
To tell if a dragon fruit is ripe, look for one that's slightly soft when gently squeezed. The skin should be vibrant in color, and the stem end should be slightly withered. Ripe dragon fruits are ready to enjoy!
Ethan’s passion for farm-to-table cooking comes through in every dish he creates. He focuses on fresh, organic, and locally sourced ingredients, crafting seasonal recipes that celebrate the natural flavors of the earth. Based in California, Ethan’s modern approach to cooking is all about sustainability and simplicity.
Farm-to-Table Cooking
Smoking Meats at Home: A Beginner’s Guide
Unlock the secrets to mouthwatering smoked meats at home with this beginner’s guide that promises extraordinary culinary creations beyond your wildest dreams.
Yearning to indulge in rich, smoky barbecue flavors at home? You're in luck – smoking meats is a delectable hobby that's easier than it may seem! This handy beginner's guide will walk you through the essentials, from selecting the perfect wood chips to monitoring temperatures for mouthwatering results. You'll discover how to transform ordinary cuts of meat into extraordinary culinary creations that'll have your friends and family raving. With a little patience and attention to detail, you'll be whipping up finger-licking good smoked meats in no time. Just wait until you experience the aroma wafting through your kitchen – your taste buds are in for a real treat!
Key Takeaways
- Understand the history and cultural significance of smoking meats, which has been a preservation method for centuries and a tradition in the American South.
- Familiarize with the essential equipment, ingredients, and techniques required for successful home smoking, including temperature control, smoke levels, and proper preparation.
- Learn the crucial steps for smoking meats, such as choosing the right wood, preparing the smoking chamber, applying rubs or marinades, and monitoring the temperature.
- Discover tips and techniques to perfect the art of smoking, including using a meat thermometer, avoiding frequent lid lifting, and experimenting with different wood chip flavors.
- Emphasize the importance of food safety, proper handling, and presentation to ensure a memorable and enjoyable dining experience when serving smoked meats.
History
Smoking meat has been a time-honored tradition for centuries. Early humans discovered that preserving meat over a smoky fire kept it fresh and tasty for much longer. As civilizations grew, people perfected the art of smoking, using different wood chips and techniques to create unique flavors.
In the American South, smoking meats became a beloved part of the culture. Families would gather around the smoker, swapping stories and enjoying the mouthwatering aromas. Pit masters honed their skills, passing down their secrets from generation to generation.
Barbecue contests and festivals emerged, celebrating the rich history and diversity of smoked meats.
Today, the art of smoking continues to captivate home cooks and professional chefs alike. Whether you're perfecting your brisket or experimenting with new recipes, the joy of smoking meats connects you to a centuries-old tradition of delicious discovery.
Recipe
Smoking meats at home can be a rewarding and delicious way to prepare a variety of proteins. The process of slow-cooking meats over low heat and wood smoke infuses the meat with a rich, complex flavor that simply can't be replicated any other way.
Whether you're looking to create classic barbecue fare or more unique smoked specialties, mastering the art of home smoking is a valuable culinary skill.
The key to successful home smoking lies in controlling the temperature and smoke levels throughout the cooking process. This requires patience and attention to detail, but the end results are well worth the effort.
With the right equipment and techniques, you can produce mouthwatering smoked meats that will impress your guests and satisfy your cravings.
Ingredients:
- 3-4 lbs pork shoulder or beef brisket
- 1/4 cup kosher salt
- 2 tbsp brown sugar
- 1 tbsp smoked paprika
- 1 tsp garlic powder
- 1 tsp onion powder
- 1 tsp black pepper
- 2-3 cups wood chips (such as hickory, oak, or mesquite)
Cooking Instructions:
Combine the salt, brown sugar, paprika, garlic powder, onion powder, and black pepper in a small bowl. Rub the seasoning mixture evenly over the entire surface of the meat. After seasoning the meat, cover and refrigerate it for at least 4 hours, or overnight if possible. This will allow the flavors to infuse into the meat and create a more flavorful dish. If you’re looking for a delicious way to use this seasoned meat, consider using it in a Vietnamese pâté recipe for a unique and tasty dish.
Cover and refrigerate for at least 2 hours, or up to 24 hours. Soak the wood chips in water for at least 30 minutes.
Set up your smoker or grill for indirect heat, maintaining a temperature between 225°F and 250°F. Add the soaked wood chips to the heat source.
Place the meat on the grate, close the lid, and smoke for 6-8 hours, or until the meat reaches an internal temperature of 195°F. Allow the meat to rest for 30 minutes before slicing or pulling.
Tips:
For best results, use a meat thermometer to monitor the internal temperature of the meat throughout the smoking process.
Avoid lifting the lid or peeking too frequently, as this can release valuable smoke and heat.
Experiment with different wood chip flavors to find your perfect combination.
Serve the smoked meat with your favorite barbecue sauces, pickles, and sides for a truly mouthwatering feast.
Cooking Steps
Start by choosing the right wood for the job – hickory, oak, or apple all make great smoky flavors.
Next, prepare your smoking chamber by getting the temperature just right.
Then, add a tasty rub or marinade to really make those meats shine.
Remember to keep a close eye on the temperature as you smoke, and you'll be enjoying your delicious smoked creations in no time!
Step 1. Choose the Right Wood
When selecting the right wood for smoking meats, you'll want to consider the flavors and aromas each type imparts.
Hickory is a classic choice, offering a robust, smoky taste that pairs perfectly with pork and beef. Mesquite, on the other hand, has a bold, almost spicy flavor that works great with red meats.
For a milder, sweeter smoke, try fruitwoods like apple or cherry. These lend a delicate, almost floral essence that complements poultry and seafood beautifully.
Oak is a versatile option, imparting a medium-bodied smoke that's suitable for a variety of meats. Maple provides a subtle, slightly sweet flavor that's delicious with ham and bacon.
Experiment with different wood types to discover your personal favorites and find the perfect match for the dish you're smoking.
With the right wood, you'll be well on your way to creating mouthwatering, restaurant-quality smoked meats right at home.
Step 2. Prepare Smoking Chamber
With the right wood chosen, it's time to prepare your smoking chamber. First, you'll want to make sure your smoker is clean and ready to go. Give it a good wipe-down, and check that all the parts are in working order.
Next, you'll need to set up the smoking chamber. If you're using a charcoal smoker, arrange the coals in a way that allows for even heat distribution. For an electric or gas smoker, simply plug it in and turn it on.
Then, add your wood chips or chunks to the designated area. Remember, the type of wood you choose can greatly impact the flavor of your meat.
Once everything is ready, it's time to add your meat. Arrange the cuts in a way that allows for good air circulation, so the smoke can evenly penetrate the meat.
Now, sit back, relax, and let the smoker do its magic. Before you know it, you'll have mouthwatering, perfectly smoked meats to enjoy!
Step 3. Add Rub/Marinade
Before placing the meat in the smoker, take a moment to apply a well-thought-out rub or marinade. This extra step can take your smoked meats to the next level!
Rubs are a blend of spices and seasonings that you'll massage right into the surface of the meat. Marinades, on the other hand, are liquid mixtures that you'll let the meat soak in for a while. Both options infuse the meat with tons of delicious flavor.
When choosing a rub, consider your favorite flavors – maybe a savory blend of garlic, onion, and black pepper, or a sweet and smoky combo with brown sugar and paprika.
For marinades, you can get creative with ingredients like citrus juices, soy sauce, herbs, and even beer or wine. Just be sure to let the meat marinate for at least 30 minutes, or up to 24 hours for maximum flavor.
With a flavorful rub or marinade, your smoked meats will be finger-licking good!
Step 4. Monitor Smoking Temperature
Maintaining the proper smoking temperature is paramount to achieving mouthwatering, well-cooked meats. You'll want to keep a close eye on the temperature, making sure it stays within the ideal range for the type of meat you're smoking. An inexpensive meat thermometer is a must-have tool to monitor the internal temperature of your meat and the ambient temperature in your smoker.
As you smoke, aim for a consistent temperature between 225°F and 250°F. This "low and slow" approach ensures your meat cooks evenly and develops that signature smoky flavor.
If the temperature starts to dip, add more charcoal or wood chips to maintain the heat. And if it climbs too high, adjust the vents or open the lid to lower the temperature.
With a little practice, you'll get the hang of keeping that temperature just right. Soon, you'll be serving up tender, juicy smoked meats that'll have everyone coming back for seconds!
Step 5. Enjoy the Smoked Meat Creation
Once your meat has reached the desired internal temperature, it's time to remove it from the smoker and let it rest. This important step allows the juices to redistribute throughout the meat, making every bite absolutely delicious.
While it's resting, you can start preparing the table, getting out your favorite condiments, and gathering your family and friends. They'll be so excited to try your homemade smoked creation!
When the meat is ready, slice or pull it apart, whatever suits the cut you used. Don't forget to baste it with any flavorful juices that have accumulated.
Then, pile it high on a platter and watch your loved ones' faces light up. The smoky aroma will have their mouths watering, and they'll dive in eagerly.
Savor every bite, and don't be shy about going back for seconds! This is the moment you've been waiting for – enjoy the fruits of your labor and bask in the compliments.
Final Thoughts
Smoking meats at home can be a rewarding and delightful experience, but it's essential to keep a few final thoughts in mind.
First and foremost, always prioritize food safety. Maintain proper temperatures, clean your equipment thoroughly, and follow all the necessary steps to prevent foodborne illnesses. Remember, the joy of smoked meats comes not just from the mouthwatering flavors, but also from sharing them safely with your loved ones.
As you continue on your smoking journey, don't be afraid to experiment and find your own unique style.
Try different wood chips, marinades, and seasonings to discover the flavors that truly captivate your taste buds. The beauty of smoking at home is the freedom to customize your creations exactly the way you like them.
Lastly, approach each smoking session with patience and attention to detail.
The art of smoking meats takes time and practice, but the payoff is well worth it. Savor the process, enjoy the aromas, and take pride in the delicious results. Happy smoking!
Frequently Asked Questions
What Is the Best Type of Wood for Smoking Meat?
The best type of wood for smoking meat depends on your personal preference. Hickory and oak are classic choices, offering a rich, smoky flavor, while fruit woods like apple or cherry lend a sweeter aroma. Experiment to find your favorite.
How Long Can Smoked Meat Be Stored?
Properly smoked meat can be stored for up to 4 weeks in the refrigerator or up to 3 months in the freezer. However, storage time depends on factors like the type of meat, smoking method, and how it's packaged.
Can I Use a Regular Grill for Smoking Meat?
Yes, you can use a regular grill for smoking meat. Just set up the grill for indirect heat, add a smoker box or foil packet filled with wood chips, and adjust the vents to maintain low temperatures for slow smoking.
How Do I Clean My Smoker After Use?
After using your smoker, let it cool completely. Remove the grates and ashes, wipe down the interior, and scrub the grates with hot, soapy water. Dry thoroughly before your next use to maintain your smoker's performance.
What Safety Precautions Should I Take When Smoking Meat?
When smoking meat, always wear protective gloves and eyewear to avoid burns. Maintain proper ventilation to prevent smoke inhalation, and never leave your smoker unattended. Properly dispose of ash and hot coals to minimize fire hazards.
Alejandro is a vibrant advocate of traditional Mexican cuisine. From spicy tacos and enchiladas to rich moles and tamales, Alejandro’s dishes celebrate the colorful, bold flavors of Mexico. His recipes bring authentic Mexican street food and home-cooked meals to your table, with a focus on using fresh, flavorful ingredients.
Farm-to-Table Cooking
Mastering the Art of Sous Vide
Overcome the challenge of cooking with precision and explore the world of sous vide, a culinary technique that unlocks a new level of flavor and texture.
Mastering the art of sous vide is an exciting journey that'll have you cooking up juicy, flavorful dishes like a professional chef. This low-temperature technique dates back to the 1970s, and it's revolutionized cooking for both home cooks and culinary experts. With precise temperature control, you'll seal food in airtight bags and submerge it in a water bath to achieve perfectly cooked results every time. Whether you're tackling tender chicken breasts or decadent desserts, sous vide unlocks a world of culinary possibilities. And the best part? There's so much more to discover about this incredible cooking method.
Key Takeaways
- Understand the history and evolution of sous vide cooking, which originated in the 1970s and has become a global culinary sensation.
- Grasp the basics of sous vide cooking, including sealing food in airtight bags, controlling water temperature, and achieving perfectly cooked, tender, and flavorful dishes.
- Follow essential tips for successful sous vide cooking, such as using reliable equipment, appropriate food-grade bags, and proper cooking time monitoring.
- Recognize the mastery and precision in sous vide cooking, which allows for consistent results, exact temperature control, and enhanced texture and flavor.
- Embrace the opportunities for experimentation and creativity in sous vide cooking, while also enjoying the relaxation and satisfaction of the cooking process.
History
Tracing the origins of sous vide, you'll find its roots stretching back to the 1970s, when chefs and scientists began exploring the potential of low-temperature, long-duration cooking.
They discovered that by sealing food in airtight bags and immersing it in precisely controlled water baths, they could achieve remarkably tender and flavorful results. These early pioneers were onto something special!
As the years passed, the sous vide technique continued to evolve, with advancements in equipment and a growing understanding of the science behind it.
Chefs from around the world embraced this innovative cooking method, using it to create dishes that were simply out of this world. Juicy steaks, perfectly cooked vegetables, and even delicate desserts – the possibilities were endless! Some chefs even took it a step further, experimenting with fusion cuisine and creating unique dishes that blend different culinary traditions. One such creation was the Vietnamese tacos, which combined the flavors of traditional Vietnamese cuisine with the familiar format of a Mexican taco. This new approach to cooking opened up a world of new flavors and culinary experiences for food lovers everywhere.
Today, sous vide has become a culinary sensation, with home cooks and professional chefs alike marveling at its ability to unlock the true potential of ingredients.
It's a fascinating journey through time, and one that's sure to inspire your own culinary adventures.
Recipe
Sous vide is a method of cooking that involves sealing food in an airtight plastic bag and submerging it in a water bath held at a precise, constant temperature. This technique allows for precise temperature control, resulting in perfectly cooked, tender, and flavorful dishes every time.
In this recipe, we'll demonstrate how to create a delicious sous vide dish that showcases the versatility of this cooking method. By following these steps, you'll be able to impart a depth of flavor and achieve a level of doneness that's simply unattainable with traditional cooking methods.
Ingredients:
- 4 boneless, skinless chicken breasts
- 2 tablespoons olive oil
- 1 teaspoon salt
- 1/2 teaspoon black pepper
- 2 cloves garlic, minced
- 1 sprig fresh thyme
Cooking Instructions:
Preheat a water bath to 165°F (74°C). Season the chicken breasts with salt, pepper, and garlic. Place the chicken in a resealable plastic bag, seal, and submerge in the water bath. Cook for 1 hour and 15 minutes, or until the chicken reaches an internal temperature of 165°F (74°C).
Tips:
When cooking sous vide, it's important to use a high-quality, food-grade plastic bag that's BPA-free and designed for this purpose. Avoid using regular plastic bags, as they may not provide an airtight seal and can potentially leach harmful chemicals into the food.
Additionally, be sure to fully submerge the sealed bag in the water bath to ensure even cooking throughout the dish.
Cooking Steps
Alright, let's get started!
First, you'll want to preheat your water bath to the perfect temperature.
Then, seal your food up nice and tight in a vacuum-tight pouch.
Next, gently lower that sealed pouch into the warm water bath and let it cook for the specified amount of time.
Step 1. Preheat Water Bath to Desired Temperature
Once you've gathered your ingredients and equipment, the next step is to preheat your water bath to the desired temperature. This is a crucial part of the sous vide process, as maintaining the correct temperature is key to achieving perfectly cooked results.
First, fill your sous vide container or pot with water, making sure to leave enough room for the food you'll be cooking.
Then, use your sous vide device to set the water bath to the precise temperature required for your recipe. This could be anywhere from 120°F for a rare steak to 185°F for a custard.
As the water heats up, you can start preparing your food. Just remember to wait until the water bath has fully preheated before adding your ingredients.
This ensures the temperature remains stable throughout the cooking process. Once the water is at the right temperature, you're ready to lower your sealed food pouch into the bath and let the magic of sous vide work its wonders!
Step 2. Seal Food in Vacuum-Tight Pouch
With the water bath preheated to the perfect temperature, you can now focus on sealing your food in a vacuum-tight pouch.
This step is crucial for ensuring your ingredients cook evenly and retain all their delicious flavors. Carefully place your food items into a sturdy, high-quality vacuum bag. Gently smooth out any air pockets, then slowly lower the open end of the bag into a vacuum sealer.
Watch as the machine sucks out every last bit of air, creating a tight, secure seal. This airtight environment will prevent any water or steam from entering the pouch during the cooking process.
Once sealed, your food is ready to be submerged in the water bath. The vacuum-tight pouch will protect your ingredients, locking in all the juices and nutrients.
Get ready for a mouthwatering meal that's cooked to perfection!
Step 3. Immerse Sealed Pouch in Water Bath
Gently lower the vacuum-sealed pouch into the preheated water bath. Make sure it's completely submerged, with no air pockets.
The water temperature should be precisely set to the optimal cooking temperature for your dish – this ensures your ingredients cook evenly and retain their delicious flavors. As the pouch sinks, you'll see tiny bubbles start to rise, signaling that the cooking process has begun.
Let the pouch sit undisturbed, gently circulating the water to maintain an even temperature.
Depending on the recipe, your food may need to cook for anywhere from 30 minutes to several hours. Be patient and let the magic of sous vide work its wonders! The slow, steady heat will transform even the toughest cuts of meat into melt-in-your-mouth perfection.
Keep an eye on the time, and when your dish is ready, carefully remove the pouch from the water bath. Get ready to unveil a culinary masterpiece!
Step 4. Cook for Specified Duration
Although the cooking time may vary depending on the specific dish, it's crucial to follow the recipe's recommended duration.
Once your sealed pouch is submerged in the water bath, simply sit back and let the magic happen! The controlled temperature of the water will gently and evenly cook your food to perfection.
You'll be amazed at how tender and juicy your meats turn out, with all the delicious flavors locked in.
And the best part? You don't have to constantly monitor the pot or worry about overcooking. Just set a timer and let the sous vide do its thing.
When the timer goes off, carefully remove the pouch from the water. Be cautious – it'll be hot!
Then, simply open up the pouch and get ready to enjoy a restaurant-quality meal in the comfort of your own home.
Get ready to impress your family and friends with your newfound sous vide skills!
Step 5. Remove Pouch From Water Bath
Once the timer goes off, carefully remove the pouch from the water bath.
Make sure to use tongs or a slotted spoon to gently lift the pouch out of the hot water. The pouch will be very hot, so be extra cautious! Slowly and steadily, lift the pouch and transfer it to a clean work surface.
Now, take a moment to admire the perfectly cooked food inside. The meat or vegetables should look mouth-wateringly tender and juicy.
Gently open the pouch, allowing the delicious aromas to fill the air. At this stage, you're one step closer to enjoying your delectable sous vide creation.
Next, you'll need to finish the dish by searing, grilling, or adding any final touches.
But first, take a deep breath and savor the anticipation. You've mastered an important step in the sous vide process.
Pat yourself on the back – you're well on your way to becoming a sous vide superstar!
Final Thoughts
Mastering the sous vide technique requires a blend of precision and patience.
You've come so far, learning how to set up the perfect water bath and carefully seal your food in pouches. Now, it's time to take a step back and reflect on your journey. Think about how much you've learned and how much more confident you feel in the kitchen.
Sous vide cooking may have seemed intimidating at first, but with each successful dish, you've proven that you can master this technique.
As you continue to experiment and explore the world of sous vide, remember to have fun. Don't be afraid to get creative and try new flavor combinations.
The beauty of this method is that it allows you to cook food to perfection every time. So, relax, take a deep breath, and savor the delicious results of your hard work.
Who knows, you might even become the neighborhood sous vide expert!
Frequently Asked Questions
What Is the Ideal Water Temperature for Sous Vide Cooking?
The ideal water temperature for sous vide cooking typically ranges from 130°F to 185°F, depending on the dish you're preparing. This precise temperature control ensures your food is cooked to perfection every time.
How Do I Seal Food in a Vacuum Bag for Sous Vide?
To seal food in a vacuum bag for sous vide, you'll need a vacuum sealer. Place the food in the bag, align the edges, and use the sealer to remove all the air, creating an airtight seal. This prevents water from entering the bag during cooking.
Can I Reuse Sous Vide Bags Multiple Times?
You can reuse sous vide bags multiple times, but it's essential to clean and dry them thoroughly after each use. However, avoid reusing bags that have held raw proteins to prevent cross-contamination.
How Long Can I Store Cooked Sous Vide Food in the Fridge?
You can typically store cooked sous vide food in the fridge for 3-4 days. Make sure to refrigerate the food in an airtight container and consume it within this timeframe for optimal quality and safety.
Is Sous Vide Cooking Safe for Pregnant Women or Children?
Sous vide cooking can be safe for pregnant women and children, but you should consult with your healthcare provider first. The precise cooking times and temperatures are crucial to ensure the food is cooked thoroughly and safely.
Alejandro is a vibrant advocate of traditional Mexican cuisine. From spicy tacos and enchiladas to rich moles and tamales, Alejandro’s dishes celebrate the colorful, bold flavors of Mexico. His recipes bring authentic Mexican street food and home-cooked meals to your table, with a focus on using fresh, flavorful ingredients.
Farm-to-Table Cooking
Turkish Simit: Sesame-Crusted Bread Rings
Grab a taste of Turkish tradition with simit, the beloved sesame-crusted bread rings that have captivated the hearts and stomachs of locals and visitors alike for centuries.
Step right up and experience the tantalizing aromas of Turkish simit – sesame-crusted bread rings that have captivated the hearts and stomachs of locals and visitors alike for centuries! Originating in the bustling streets of 16th century Constantinople, these iconic treats are a cherished part of Turkish culture, symbolizing community and hospitality. Bite into the golden-brown, sesame-studded exterior to reveal a soft, pillowy interior – a perfect companion for breakfast or a midday snack. Whether you're exploring the vibrant markets of Istanbul or baking them at home, simit offers a delightful taste of tradition that'll leave you craving more.
Key Takeaways
Key points:
- Simit is a circular, sesame-crusted bread that originated in the 16th century Ottoman capital Constantinople and has become a beloved street food in Turkey.
- Simit's unique texture and flavor come from specific ingredients, such as bread flour, salt, yeast, and egg, as well as traditional baking methods, including wood-fired ovens.
- The simit-making process involves carefully kneading the dough, shaping the rings, briefly boiling them, and then baking them to create a crunchy exterior and soft interior.
- Enjoying simit is a quintessential part of the Turkish street food experience, with vendors offering the aroma-filled treats to hungry passersby, creating a lively atmosphere.
- Simit holds cultural significance in Turkey, representing communal eating, hospitality, and shared experiences, and has gained international appeal as a unique and delicious Turkish bread.
History
The origins of the Turkish simit can be traced back to the 16th century, when it emerged as a popular street food in the Ottoman capital of Constantinople.
Back then, vendors would push carts through the bustling city streets, selling these delightful sesame-crusted bread rings to hungry passersby. Simit quickly became a beloved staple, satisfying the cravings of both the wealthy nobility and the hardworking commoners.
Over the centuries, the recipe and preparation methods have been refined, but the classic simit flavor endures.
Today, you can still find vendors hawking these tasty treats on the streets of modern-day Istanbul, just as they've for hundreds of years.
Whether you're on your way to work or exploring the city's vibrant neighborhoods, a freshly baked simit makes for a truly authentic Turkish experience.
Its crispy exterior and fluffy interior are sure to delight your senses and leave you craving more of this beloved national treasure.
Recipe
Simit is a popular circular bread that originates from Turkey. It's a staple snack and breakfast item enjoyed throughout the country. The unique texture and flavor of simit come from the combination of ingredients and the baking process.
Simit is traditionally baked in a wood-fired oven, which gives it a distinct crunch and slightly smoky aroma. However, it can also be prepared at home using a conventional oven, making it accessible to home cooks.
Ingredients:
- 3 cups (375g) bread flour
- 1 teaspoon (5g) salt
- 1 teaspoon (5g) instant yeast
- 1 cup (240ml) warm water
- 1 egg, beaten
- Sesame seeds
Cooking Instructions:
In a large mixing bowl, combine the bread flour, salt, and instant yeast. Gradually add the warm water and knead the mixture until it forms a smooth, elastic dough.
Cover the bowl and let the dough rise for about an hour, or until it has doubled in size. Punch down the dough to release any air bubbles, then divide it into 8 equal pieces.
Roll each piece into a long, thin rope, then shape it into a circular ring. Place the simit rings on a parchment-lined baking sheet, cover, and let them rest for 15 minutes.
Brush the simit rings with the beaten egg, then generously sprinkle them with sesame seeds. Bake the simit in a preheated oven at 400°F (200°C) for 15-20 minutes, or until golden brown.
When baking simit at home, it's important to achieve the characteristic crispy crust and chewy interior.
Experimentation with baking time and temperature may be necessary to find the perfect balance for your oven. Additionally, you can try brushing the simit with a diluted sugar solution before baking to enhance the shine and crunch.
Cooking Steps
Divide the dough into small, equal pieces and roll each one into a long rope.
Then, form a ring with the rope and seal the ends together.
Next, dip the simit in simmering water to give it a shiny, chewy crust.
Step 1. Divide Dough Into Small Pieces
After the dough has finished proofing, divide it into small, equal pieces.
You'll want to do this carefully, using your hands to gently pull and shape the dough. It's important to make sure each piece is the same size, so your simit will bake up evenly.
Pinch off a chunk of dough about the size of a golf ball. Roll it between your palms to form a smooth, round ball.
Repeat this process, working your way around the dough until you've divided it into 12-16 equal portions.
Arrange the dough balls on a lightly floured surface, keeping them spaced apart so they don't stick together as they rest.
Let the dough pieces sit for 10-15 minutes before shaping them into rings. This resting period will make the dough easier to work with.
Now you're ready to begin shaping your Turkish simit!
Step 2. Roll Each Piece Into a Rope
Now that you've let the dough pieces rest, you can begin shaping them into those classic simit rings. Gently roll each piece into a long, thin rope using the palms of your hands.
Don't worry if it's not perfectly smooth – the imperfections will add to the rustic charm of your simit. As you roll, apply a gentle back-and-forth motion, applying just enough pressure to create that wonderful, snake-like texture.
Once you've got your rope, it's time to form the signature simit ring. Wrap the rope around your hand, overlapping the ends slightly to create a circle. Pinch the overlapping ends to seal the ring, then gently transfer it to your work surface.
Keep going until you've shaped all the dough pieces into those beautiful, golden simit rings. It may take a little practice, but you'll get the hang of it in no time. Just remember to have fun and let your creativity shine through!
Step 3. Form Ring and Seal
With your dough ropes ready, it's time to form the classic simit ring. Gently take one rope and loop it into a circular shape, connecting the two ends. Pinch and press the seam firmly to seal the ring.
Repeat this process with the remaining ropes, creating as many simit rings as you'd like. The dough should hold its circular shape nicely, ready for the next step.
As you work, notice the soft, pliable texture of the dough. It's almost like sculpting with clay! Gently manipulate each ring, smoothing out any bumps or uneven spots.
The goal is to create a perfectly round, evenly thick simit. With a little care and attention, you'll have a tray of beautiful, professional-looking bread rings.
Now that your simit are formed, it's time to add the signature sesame seed coating. Get ready for the delightful aroma and satisfying crunch that's about to happen!
Step 4. Dip Simit in Simmering Water
To cook the simit, start by bringing a large pot of water to a gentle simmer. Once the water is hot, carefully lower the formed simit rings into the simmering water.
Let them soak for about 30 seconds, turning them occasionally with a slotted spoon. This quick dip in the water will help the simit develop that lovely shiny, golden-brown crust when baked.
Gently remove the simit rings from the water, letting any excess drip off. Place them on a baking sheet lined with parchment paper.
The simmering water bath is an important step that sets the simit apart from other bread rings. It helps the dough puff up and the sesame seeds to stick beautifully to the exterior.
Now your simit is ready for the final baking stage, where they’ll transform into those iconic, crunchy-on-the-outside, soft-on-the-inside Turkish delights! Next, carefully place the simit onto a baking sheet and put them into a preheated oven. Watch as the dough turns a golden brown, and the sesame seeds on the outside begin to toast and release their nutty aroma. Once they’re done baking, you’ll have a delicious, authentic treat that pairs perfectly with a cup of Turkish tea or alongside crispy Vietnamese spring rolls. The contrast of textures and flavors will surely make for a delightful culinary experience.
Step 5. Brush With Egg Wash
After removing the simit from the simmering water, you'll want to brush them with an egg wash. This gives the simit a lovely golden sheen and helps the sesame seeds stick even better.
You'll need to crack a couple of eggs into a shallow bowl, then use a pastry brush to gently sweep the egg wash all over the surface of each simit. Be sure to get the egg wash into all the nooks and crannies!
The egg wash will give the simit a beautiful shine when they come out of the oven. As the simit bakes, the egg will set and the sesame seeds will toast to a delightful crunch.
Your kitchen will be filled with the warm, nutty aroma of the toasted sesame. Once the simit are golden brown, you'll know they're ready to enjoy.
Grab one while it's still hot – the fluffy interior and crisp outer shell make for an incredible texture in every bite.
Final Thoughts
Simit, the beloved Turkish bread, has undoubtedly captured the hearts and palates of many across the globe. With its golden-brown, sesame-studded exterior and soft, chewy interior, it's no wonder this delightful treat has become a beloved staple.
Whether you're enjoying a freshly baked simit for breakfast, as a snack, or alongside a steaming cup of Turkish tea, the experience is truly unforgettable.
The process of making simit may seem complex, but the end result is well worth the effort. From the careful kneading of the dough to the artful shaping and the final topping of sesame seeds, each step is essential in creating the perfect simit.
The aroma that fills the air as the bread bakes is enough to make your mouth water in anticipation.
As you savor each bite, you'll be transported to the bustling streets of Istanbul, where simit vendors are a ubiquitous sight, offering their wares to the hungry passersby.
Simit, truly, is a delightful taste of Turkish culture that deserves a place in your culinary adventures.
Frequently Asked Questions
What Is the Nutritional Value of Turkish Simit?
You'll find that this savory bread is a good source of carbohydrates and fiber, though it's also relatively high in fat and calories due to the sesame seed coating. The exact nutritional profile can vary, so it's best to check the label.
Where Can I Purchase Simit Outside of Turkey?
You can purchase simit outside of Turkey in some Middle Eastern grocery stores or specialty bakeries. Many international supermarkets may also carry it, especially in areas with large Turkish or Mediterranean populations.
How Long Does Simit Typically Stay Fresh?
Simit typically stays fresh for 1-2 days at room temperature. It's best to enjoy it on the day it's made, as the sesame coating and soft interior won't last much longer. You'll want to store it properly to keep it from drying out.
Can Simit Be Frozen for Later Consumption?
You can freeze simit for later consumption, but it won't maintain its signature crispy texture. The dough may become dense and the sesame coating can lose its crunch after thawing. It's best enjoyed fresh for the optimal experience.
Are There Any Gluten-Free or Vegan Simit Variations?
While traditional simit contains gluten from the wheat flour, you can find gluten-free and vegan versions made with alternative flours and ingredients. These variations allow those with dietary restrictions to enjoy the unique flavor and texture of simit.
Alejandro is a vibrant advocate of traditional Mexican cuisine. From spicy tacos and enchiladas to rich moles and tamales, Alejandro’s dishes celebrate the colorful, bold flavors of Mexico. His recipes bring authentic Mexican street food and home-cooked meals to your table, with a focus on using fresh, flavorful ingredients.
-
Brazilian Cuisine3 months ago
Tacacá
-
Brazilian Cuisine3 months ago
Caldeirada
-
Polish Comfort Food3 months ago
Krupnik (Barley Soup)
-
Brazilian Cuisine3 months ago
Chicken in Brown Sauce
-
Southern Comfort Food3 months ago
Cheese Straws
-
Polish Comfort Food3 months ago
Vegetable Salad
-
African Cuisine3 months ago
Kedjenou (Ivory Coast)
-
Ethiopian Cuisine3 months ago
Ye’selata (Ethiopian Salad)