Connect with us

Ethiopian Cuisine

Ye’selata (Ethiopian Salad)

Discover the vibrant and flavorful world of Ye’selata, an Ethiopian salad that celebrates the diverse culinary traditions of the Horn of Africa, and learn how to recreate its unique appeal.

Published

on

ethiopian salad preparation recipe

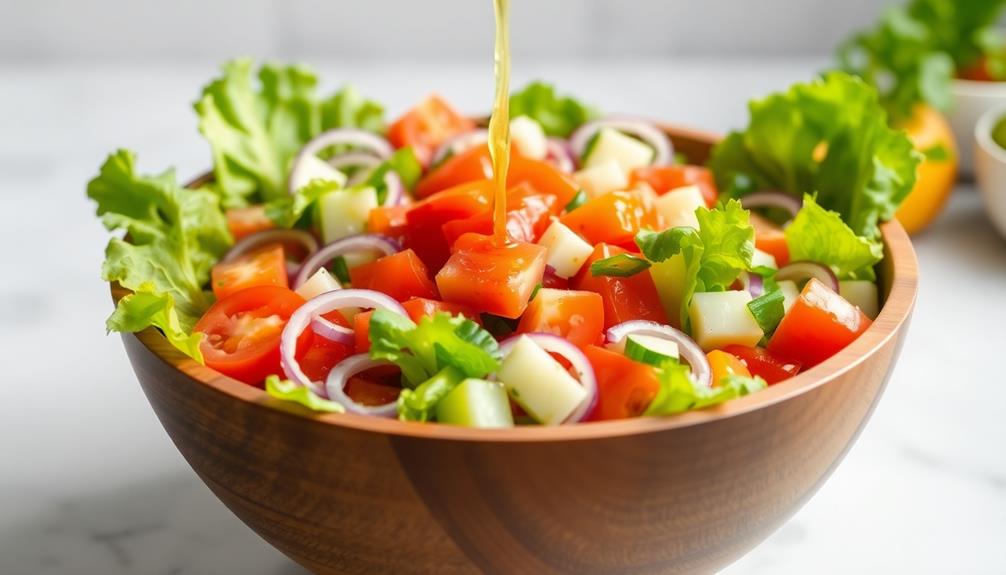
Ye'selata is an incredible Ethiopian salad that reflects the rich culture and diverse culinary traditions of the Horn of Africa. You'll often find it prepared communally during special gatherings, highlighting its social significance. This vibrant dish combines fresh vegetables like crisp romaine, juicy tomatoes, and crunchy onions, dressed in a tangy dressing that creates a burst of flavors in every bite. It's a versatile salad you can enjoy as a side, light main course, or snack. The secret to its success lies in balancing textures and flavors – and if you keep reading, you'll discover more about the preparation and serving suggestions that make this salad truly remarkable.

Key Takeaways

  • Ye'selata is a vibrant Ethiopian salad combining fresh vegetables, herbs, and a tangy dressing, reflecting the diverse culinary traditions of the Horn of Africa.
  • The dish is often prepared communally during special occasions, highlighting its social aspect and serving as a versatile side, light main course, or snack.
  • The success of Ye'selata lies in balancing textures and flavors, particularly with crisp lettuce, juicy tomatoes, and crunchy onions, using seasonal ingredients.
  • Presentation and serving suggestions, such as topping with toasted walnuts and crumbled feta, can enhance the dish's appeal and enjoyment.
  • Understanding the economic implications of ingredient sourcing can inform culinary choices and preparation, allowing for better decision-making in the kitchen.

History

The origins of the Ethiopian salad can be traced back to the diverse culinary traditions of the Horn of Africa region. From the fertile lands of the highlands to the coastal areas, the ingredients that make up this vibrant dish have been a part of local diets for centuries.

Ye'selata, as it's known in Amharic, the official language of Ethiopia, is a reflection of the country's rich cultural heritage. The combination of fresh vegetables, flavorful spices, and tangy citrus notes creates a harmonious balance that has delighted generations of Ethiopians.

As families gather for special occasions, the preparation of this salad becomes a communal affair, with each member contributing their own touch to the final result.

The versatility of Ye'selata is another reason for its enduring popularity. It can be served as a side dish, a light main course, or even a refreshing snack, making it a beloved staple in Ethiopian cuisine.

Recipe

Ethiopian salad is a vibrant and flavorful dish that combines a variety of fresh vegetables, herbs, and a tangy dressing. The salad is a staple in Ethiopian cuisine and is often served as a side dish or a light main course. Incorporating seasonal ingredients can enhance the flavors even further, making it a perfect addition to any farm-to-table meal.

Advertisement

The key to a delicious Ethiopian salad is the perfect balance of textures and flavors. The crisp lettuce, juicy tomatoes, and crunchy onions are complemented by the earthy spices and the tangy dressing, creating a harmonious blend of tastes.

Ingredients:

  • 1 head of romaine lettuce, chopped
  • 2 large tomatoes, diced
  • 1 red onion, thinly sliced
  • 1 cucumber, diced
  • 1 bell pepper, diced
  • 1/2 cup fresh parsley, chopped
  • 1/2 cup fresh cilantro, chopped
  • 1 teaspoon ground cumin
  • 1 teaspoon paprika
  • 1/4 cup lemon juice
  • 2 tablespoons olive oil
  • Salt and black pepper to taste

Instructions:

In a large salad bowl, combine the chopped romaine lettuce, diced tomatoes, sliced red onion, diced cucumber, diced bell pepper, chopped parsley, and chopped cilantro.

In a small bowl, whisk together the ground cumin, paprika, lemon juice, and olive oil. Pour the dressing over the salad and toss gently to coat. Season with salt and black pepper to taste.

When preparing this Ethiopian salad, it's important to use fresh, high-quality ingredients for the best flavor. You can also adjust the spice level by adding more or less paprika, and the acidity by adjusting the amount of lemon juice.

Advertisement

Additionally, you can experiment with other vegetables, such as shredded carrots or sliced radishes, to add more texture and flavor to the dish. For those looking to elevate their dining experience, consider pairing this salad with a fermented vegetable plate for added complexity and gut health benefits.

Cooking Steps

Rinse and chop your ingredients to prep them for the salad.

Toss the chopped veggies with a splash of lemon juice to keep them fresh.

Step 1. Rinse and Chop Ingredients

rinse chop prepare ingredients

Begin by gathering all the ingredients you'll need for this refreshing Ethiopian salad.

Start by rinsing the lettuce leaves under cool, running water to remove any dirt or debris. Pat them dry with paper towels and tear them into bite-sized pieces, placing them in a large mixing bowl.

Next, rinse the tomatoes and slice them into quarters. Add the tomato pieces to the bowl.

Advertisement

Peel and chop the onion into small, even pieces, then add them to the mix.

Wash the cucumber, slice it lengthwise, and then into half-moons, adding them to the salad.

Finally, rinse the parsley, pat it dry, and finely chop the leaves. Sprinkle the parsley over the salad.

With all the ingredients prepped, you're ready to move on to the next step in creating this refreshing Ethiopian treat.

Step 2. Toss Ingredients With Lemon Juice

tossing ingredients with lemon

With the ingredients prepped, it's time to give the salad a refreshing zing. In a large mixing bowl, combine the chopped tomatoes, cucumbers, onions, and greens. Drizzle the lemon juice over the top, using about 2-3 tablespoons. You want just enough to coat the veggies and provide a tangy kick.

Using clean hands or a large spoon, gently toss the salad to evenly distribute the lemon juice. Be careful not to over-mix, as you don't want to bruise the delicate greens. The goal is to lightly dress the salad, allowing the natural flavors to shine through.

Advertisement

Once the salad is well-coated, give it a final taste and adjust the lemon juice as needed. You can add a pinch of salt and pepper at this stage too, if desired.

Now the salad is ready to serve! Spoon it into bowls or plates and enjoy the refreshing, zesty flavors of this authentic Ethiopian dish.

Step 3. Add the Dressing

incorporate the dressing

Drizzling the lemon dressing over the salad brings the ingredients together, awakening their vibrant flavors.

Take the reserved lemon juice and whisk it with the olive oil, honey, and a pinch of salt and pepper until emulsified. Slowly pour this tangy, sweet dressing over the tossed salad, using just enough to lightly coat the greens and vegetables. Gently fold the dressing into the salad, ensuring every bite gets a hint of the zesty, flavorful topping.

The key is to dress the salad right before serving, allowing the flavors to meld. You don't want the greens to become soggy, so start with a small amount of dressing and add more as needed.

The vibrant hues of the vegetables and herbs will pop against the light, citrusy coating, making this Ethiopian-inspired salad a feast for the senses. Serve immediately for maximum freshness and enjoyment.

Advertisement

Step 4. Let Salad Chill for 15 Minutes

chill salad for fifteen minutes

After dressing the salad, allow it to chill for about 15 minutes. This resting period lets the flavors meld and the ingredients marinate.

During this time, the vegetables will soften slightly, and the dressing will be absorbed, creating a more cohesive and flavorful salad.

While you wait, gather your serving bowl and utensils. This way, you'll be ready to transfer the salad once the 15 minutes are up. Chilling the salad also helps to chill the entire dish, so it's refreshing and crisp when served.

Once the time is up, give the salad one final toss to ensure everything is evenly coated in the dressing.

Then, transfer it to your serving bowl and enjoy! The cool, tangy flavors of this Ethiopian-inspired salad are sure to delight your taste buds.

Step 5. Serve Chilled and Enjoy

chill serve enjoy delight

Once the salad has had its 15-minute chill, it's ready to serve. Proper nutrition, like the fresh ingredients in this salad, is essential for brain development and emotional well-being; nutrition's role in development can't be overlooked.

Carefully transfer the chilled salad into a serving bowl. You'll want to use a slotted spoon to ensure the tomatoes and other vegetables don't get too soggy from the dressing.

Advertisement

Now, give the salad a gentle toss to evenly distribute the flavors. Invite your guests to serve themselves, spooning the vibrant, flavorful salad onto their plates. Encourage them to top their portions with the toasted walnuts and crumbled feta for a delightful crunch and creamy tanginess.

This Ethiopian-inspired salad is best enjoyed chilled, so make sure everyone digs in right away. The combination of crisp lettuce, juicy tomatoes, and aromatic herbs is simply divine.

Your family and friends are sure to love this refreshing, healthy dish. Don't be surprised if they come back for seconds!

Final Thoughts

Though you may have tried many salad recipes, the Ethiopian salad is truly a unique and delightful experience. Its vibrant colors, complex flavors, and nutritious ingredients make it a standout option. The blend of spices, tangy dressing, and fresh vegetables create a burst of taste in every bite.

Additionally, understanding the economic implications of various ingredients can enhance your culinary experience, especially when considering how mercantile goods impact market stability the economic implications. Don't be intimidated by the unfamiliar ingredients – they're easy to find and come together seamlessly.

Advertisement

The best part? This salad is endlessly customizable. Feel free to experiment with your favorite veggies, adjust the spice level, or add a protein for a heartier meal.

And don't forget to serve it chilled for the ultimate refreshing experience. Whether you're hosting a gathering or enjoying a solo lunch, the Ethiopian salad is sure to impress and delight.

Frequently Asked Questions

Is Ye'selata a Traditional or Modern Ethiopian Dish?

You're asking whether this dish is a traditional or modern Ethiopian offering. Based on the context provided, ye'selata appears to be a traditional Ethiopian salad, as it's specifically named as an "Ethiopian Salad."

What Is the Nutritional Value of Ye'selata?

The nutritional value of this salad depends on the ingredients used, but it's generally a healthy option. It's rich in vitamins, minerals, and fiber, making it a great addition to your diet.

Can Ye'selata Be Served as a Main Dish or a Side?

You can serve this dish as either a main course or a side. It's versatile enough to work in either capacity, depending on your preferences and the other items you're serving. The choice is yours!

Advertisement

How Long Does Ye'selata Typically Take to Prepare?

Preparing this dish typically takes around 20-30 minutes. You'll need to chop and mix the ingredients, which can be a bit time-consuming, but the overall process is fairly simple and straightforward.

Are There Any Variations or Regional Differences in Ye'selata Recipes?

There can be regional variations in salad recipes, with different ingredients or preparation methods. Some areas may use unique local produce or spices, tailoring the dish to local tastes. The specific recipe can vary across different regions.

Continue Reading
Advertisement

Ethiopian Cuisine

Spris (Layered Fruit Juice)

A captivating layered fruit juice, Spris blends vibrant colors and refreshing flavors to elevate any festive gathering, as it offers a unique taste experience.

Published

on

layered fruit juice delight

Spris, a captivating layered fruit juice, blends vibrant colors and refreshing flavors to elevate any festive gathering. You'll be wowed by its stunning visual appeal, as the intricate layering of juices creates a unique taste experience. Spris features a delightful balance of sweet and tart notes, with each sip offering a tropical journey. The icy cubes add a delightful textural contrast, while the customizable fruit combinations make it perfect for all palates. Serve Spris as a centerpiece or complement to your meals, and get ready to impress your guests with its remarkable presentation and unforgettable taste. Let's dive deeper into the history and preparation of this remarkable beverage.

Key Takeaways

  • Spris is a vibrant, layered fruit juice known for its balanced sweet and tart flavors, offering a refreshing and visually appealing drinking experience.
  • The intricate layering process with different fruit juices, such as orange, pineapple, cranberry, and grapefruit, creates distinct flavor profiles and a stunning presentation.
  • Spris is versatile, suitable for various occasions, from casual gatherings to formal events, as a refreshing drink or a dessert alternative.
  • The layering techniques involve pouring the denser juice first and then carefully adding lighter juices to maintain the distinct layers and visual appeal.
  • Serving chilled spris over ice cubes enhances the refreshing qualities and contrasting textures, creating a sensory experience reminiscent of a tropical oasis.

History

When did the concept of layered fruit juice, known as Spris, first emerge?

Spris, the delightful layered fruit juice, has a fascinating history that dates back to the early 20th century. It all started in the vibrant streets of Europe, where local vendors began experimenting with different fruit juices, creating visually stunning and flavorful concoctions.

The key to Spris lies in its intricate layering process. By carefully pouring various fruit juices into a glass, the mixologists were able to achieve stunning color gradients and distinct flavor profiles in each sip. This innovative approach quickly captured the hearts and taste buds of locals and visitors alike, transforming Spris into a beloved beverage across the continent.

As the popularity of Spris grew, it became a staple at festivals, celebrations, and casual gatherings, adding a touch of vibrancy and excitement to any occasion.

Today, the legacy of Spris lives on, with people around the world embracing this delightful and visually captivating fruit juice.

Advertisement

Recipe

Spris, or layered fruit juice, is a refreshing and visually appealing treat that can be enjoyed on a warm day. This chilled beverage features vibrant layers of different fruit juices, creating a beautiful gradient effect.

The key to a successful Spris is carefully pouring each juice layer to avoid mixing. The order of the layers and the choice of fruits can be tailored to personal preferences, making this a versatile and customizable recipe.

Ingredients:

  • 1 cup orange juice
  • 1 cup pineapple juice
  • 1 cup cranberry juice
  • 1 cup grapefruit juice
  • Ice cubes

Cooking Instructions:

Pour the orange juice into the bottom of a tall glass. Slowly pour the pineapple juice over the back of a spoon, allowing it to gently float on top of the orange juice.

Repeat this process with the cranberry and grapefruit juices, pouring them over the back of the spoon to create distinct layers. Add ice cubes to the glass to chill the Spris before serving.

Advertisement

When preparing Spris, it's important to use chilled juices and pour them slowly and carefully to maintain the layered effect.

Experiment with different fruit juice combinations to create your own unique variations of this refreshing and visually appealing drink.

Cooking Steps

Prepare the fruit juices separately, carefully layering each flavor to create a vibrant, visually stunning Spris.

Refrigerate the layered creation until it's fully set, then garnish with fresh fruit slices for a delightful touch.

Serve the chilled Spris with icy cubes to enjoy the refreshing, fruity delight.

Advertisement

Step 1. Prepare Fruit Juices Separately

separate juice preparation method

First, select the juices you wish to use for your Spris creation. Typically, a mix of citrus, berry, and tropical fruit juices works well. Measure each juice accurately, as the layered effect depends on their relative densities.

Begin with the densest juice, such as pomegranate or grape, pouring it carefully into a clear glass or serving vessel.

Next, add the middle-density juices, such as orange or cranberry, pouring them gently down the side of the glass to create distinct layers.

Finish with the lightest juices, like pineapple or mango, again pouring them slowly down the side to maintain the layered appearance.

Between each juice addition, use a spoon to gently push the previous layer down, helping the new layer settle on top. This technique takes some practice, but the result is a beautifully layered, visually striking Spris.

Once all the juices are added, chill the drink before serving to enhance the vibrant colors and flavors.

Advertisement

Step 2. Layer the Juices

layering the juices

To layer the juices, begin by carefully pouring the densest juice, such as pomegranate or grape, into a clear glass or serving vessel.

It's worth noting that juices like cranberry are rich in antioxidants, which can add health benefits to your spris, but be mindful of potential gastrointestinal issues if consumed in excess antioxidant benefits.

Slowly and gently pour the next lightest juice, like orange or pineapple, over the back of a spoon to create a distinct layer on top of the first. Continue this process, adding layers of different fruit juices, from the densest to the lightest.

Be patient and pour each juice slowly to prevent the layers from blending together. You can use a variety of colors, like ruby red, sunny yellow, and deep purple, to create a beautiful, visually appealing display.

Once all the layers are in place, you can garnish the top with a slice of fruit or a sprig of mint for a stunning presentation.

Enjoy your layered fruit juice masterpiece, or "spris," as a refreshing and healthy treat. The vibrant colors and unique texture make it a delightful and impressive beverage to serve at parties or gatherings.

Advertisement

Step 3. Refrigerate Until Set

chill mixture until firm

Once the layered juices are poured, refrigerate the spris until they're set, which typically takes around 30 minutes. This step is crucial to ensure the layers stay distinct and the spris hold their shape.

As the spris chill, the fruit juices will start to thicken and solidify. You'll know they're ready when the layers are firm to the touch and no longer appear liquid. This process helps the spris maintain their beautiful, vibrant colors and prevents the flavors from blending together.

Be patient during this step, as it's important not to rush the chilling process. Resist the temptation to peek or move the spris before they're fully set, as this could disrupt the layers.

Once the 30 minutes are up, give the spris a gentle shake to check if they're ready. If they still seem a bit wobbly, let them chill for a few more minutes until they've reached the desired consistency.

Step 4. Garnish With Fresh Fruit Slices

garnish with fruit slices

Once the spris have set, it's time to add the finishing touch. Garnishing your layered fruit juice creations with fresh fruit slices is the perfect way to elevate their presentation and make them even more irresistible.

Start by selecting a variety of colorful, ripe fruits that complement the flavors in your spris. Thin slices of citrus, such as orange or grapefruit, can add a bright, tangy accent. Kiwi, strawberry, or mango slices bring a vibrant pop of color.

Arrange the fruit slices in a decorative pattern on top of each spris, letting them drape elegantly over the edges.

Advertisement

For an extra special touch, consider adding a sprig of fresh mint or a light dusting of powdered sugar. These simple garnishes will make your spris look and taste like they came straight from a gourmet café.

Take your time arranging the fruit, and remember that the more creative and visually appealing your garnishes are, the more your guests will be delighted when they dig in.

Step 5. Serve Chilled Spris With Icy Cubes

serve chilled spritz cocktails

For the ultimate refreshment, serve your chilled spris over icy cubes. The cool, crisp sensation will instantly revive your senses, making this layered fruit juice an irresistible treat.

Begin by filling your glasses or serving vessels with a generous amount of ice cubes. To enhance the flavor profile, consider incorporating fresh herbs like mint for an extra layer of freshness, as seen in exotic fruit blend inspirations.

Slowly pour the chilled spris over the ice, allowing the layers to gradually reveal their vibrant colors and flavors. As the ice melts, the fruit juices will mingle, creating a symphony of refreshing tastes.

Encourage your guests to stir the spris gently with a spoon, ensuring each sip includes a blend of the distinct fruit layers. The icy cubes not only chill the drink but also add a satisfying crunch, providing a delightful textural contrast.

Advertisement

Serve the spris immediately, as the ice will continue to melt, diluting the flavors over time. Enjoy the perfect balance of sweet and tart, with the icy cubes enhancing the overall experience.

Final Thoughts

Spris, the layered fruit juice, leaves a lasting impression. Its vibrant colors and refreshing flavors make it the perfect accompaniment to any festive occasion.

Whether you're hosting a lively backyard gathering or a cozy indoor celebration, the chilled Spris is sure to delight your guests.

The icy cubes add a delightful crunch, complementing the smooth, velvety layers of fruit-infused delight. As you sip, the flavors dance on your tongue, transporting you to a tropical oasis.

The versatility of Spris is truly remarkable – it can be the star of the show or a refreshing sidekick, seamlessly blending with your desired menu.

Advertisement

Elevate your next event with the captivating presentation of Spris. Its visually stunning appearance and thirst-quenching properties make it the perfect choice for any celebration.

Embrace the joyful experience of this layered fruit juice and create lasting memories with every sip.

Frequently Asked Questions

How Long Does Spris Last After Opening?

Once you open it, the product's shelf life is limited. You'll want to consume it within a few days for the best quality and flavor. Refer to the expiration date on the packaging for guidance on how long it'll stay fresh after opening.

Can Spris Be Frozen for Later Use?

You can definitely freeze the product for later use. Freezing helps extend its shelf life, though the texture and flavor may change slightly once thawed. Just be sure to store it in an airtight container.

What Is the Nutritional Value of Spris?

The nutritional value of a layered fruit juice depends on the specific fruits used, but it typically contains a good amount of vitamins, minerals, and antioxidants. Enjoy it as part of a balanced diet!

Advertisement

Can Spris Be Made With Different Fruit Juices?

Yes, you can make spris using different fruit juices. The versatile layered drink allows you to get creative and experiment with various fruit flavors to suit your taste preferences.

Is Spris Suitable for Vegans or Vegetarians?

Yes, Spris is suitable for vegans and vegetarians as it's made with fruit juices and doesn't contain any animal-derived ingredients. You can enjoy this refreshing beverage without worrying about its compatibility with your plant-based lifestyle.

Continue Reading

Ethiopian Cuisine

Buna (Coffee)

The captivating history of Ethiopia’s beloved coffee, buna, is a story of discovery, cultural significance, and a global phenomenon that continues to enchant, as the rich heritage…

Published

on

rich ethiopian coffee tradition

Buna, the beloved coffee of Ethiopia, has a captivating history. Originating in the highlands, it was discovered by a curious goatherd who noticed energetic goats near coffee berries. Buna soon became integral to Ethiopian culture, spreading to the Arabian Peninsula where it was refined into a beverage. Today, it's one of the world's most widely consumed drinks. The coffee ceremony is a cherished tradition, fostering community and connection through nuanced preparation methods that honor the rich heritage. Every step, from grinding the beans to the precise pouring, holds deep cultural significance. Delve deeper into the enchanting world of buna and uncover its captivating traditions.

Key Takeaways

  1. Buna, or Ethiopian coffee, has its origins traced to the highlands of Ethiopia, where it became integral to the country's cultural heritage.
  2. The traditional Ethiopian coffee ceremony is a multi-step ritual that reflects the community, craftsmanship, and cultural significance of the beverage beyond just its consumption.
  3. Brewing buna involves a specific method of coarsely grinding coffee beans, adding hot water, and carefully straining the mixture to produce a smooth, refined cup.
  4. Sharing the experience of brewing and drinking buna fosters social interaction, strengthens communal bonds, and creates lasting memories among Ethiopians.
  5. Preserving the unique traditions and preparation methods of buna is crucial in order to maintain the rich cultural heritage associated with this iconic Ethiopian drink.

History

The origins of buna, the beloved coffee, can be traced back centuries to the highlands of Ethiopia.

Legend has it that a young goatherd named Kaldi discovered the energizing effects of coffee beans after observing his goats dancing excitedly near a bush with bright red berries.

Word of this miraculous discovery soon spread, and the cultivation and consumption of coffee became an integral part of Ethiopian culture.

As the popularity of coffee grew, it gradually made its way to the Arabian Peninsula, where it was carefully cultivated and transformed into a refined beverage.

From there, the love for coffee spread across the world, with European traders and colonists introducing it to new continents and cultures.

Advertisement

Today, coffee is one of the most widely consumed beverages globally, with countless varieties and preparation methods to delight the senses.

Recipe

Buna, or coffee, is a beloved beverage enjoyed worldwide. Originating from the coffee bean, it has a rich history and cultural significance, particularly in the regions where it's grown.

The process of brewing the perfect cup of coffee can be both an art and a science, requiring a delicate balance of ingredients and preparation methods. In fact, the nuances of different brewing methods, such as the contrast between lungo and espresso, can greatly affect the overall flavor and experience of coffee.

In this recipe, we'll explore the traditional way of preparing buna, a time-honored ritual that has been passed down through generations in various coffee-producing countries.

Ingredients:

Advertisement
  • Fresh, whole coffee beans
  • Water
  • Spices (such as cardamom, cinnamon, or cloves)
  • Optional: Honey or sugar

To prepare the perfect cup of buna:

Grind the coffee beans to a fine powder using a mortar and pestle or a spice grinder. Bring fresh, cold water to a boil in a traditional coffee pot or cezve.

Once the water is boiling, add the ground coffee and any desired spices. Reduce the heat and allow the mixture to simmer for 5-7 minutes, stirring occasionally.

Remove the pot from the heat and let the coffee grounds settle, about 2-3 minutes. Carefully pour the brew into small cups, ensuring to leave the sediment behind.

For an authentic buna experience, serve the coffee hot, accompanied by a small amount of honey or sugar, if desired.

The aroma and flavor of the freshly brewed buna will transport you to the heart of the coffee-growing regions, where this ritual has been cherished for centuries.

Advertisement

Cooking Steps

To brew a perfect cup of buna, start by coarsely grinding your coffee beans.

Bring some hot water to a boil, then pour it over the grounds and stir the mixture thoroughly.

Let the coffee brew undisturbed for a few minutes before straining it through a fine mesh to enjoy its rich, flavorful goodness.

Step 1. Grind Coffee Beans Coarsely

coarsely grind coffee beans

Grinding coffee beans coarsely is a crucial step in crafting a robust, flavorful cup of buna. Using a burr or blade grinder, pulse the whole beans several times until they achieve a consistency similar to coarse sea salt.

Avoid over-grinding, as this can result in a bitter, over-extracted brew. Aim for a grind size that's coarse enough to allow water to flow through the grounds at an optimal rate, extracting the full depth of flavors.

Too fine of a grind can lead to a muddy, over-extracted cup, while too coarse may result in a thin, under-extracted beverage. Experiment with different grind settings to find the sweet spot that suits your personal taste preferences and brewing method.

Advertisement

Regularly cleaning your grinder ensures consistent, quality grounds for each batch of buna. With the right coarse grind, you're well on your way to crafting a delightful Ethiopian coffee experience.

Step 2. Add Hot Water

pour in boiling water

With the coarsely ground coffee beans ready, it's time to add the hot water.

Bring a kettle of water to a boil, then carefully pour the steaming liquid over the grounds. The water should be around 195-205°F (91-96°C) for the best extraction. Stir the mixture gently to ensure all the coffee is saturated.

Let the coffee steep for about 4 minutes, allowing the flavors to fully develop. During this time, the grounds will sink to the bottom of the pot.

Once the time is up, slowly pour the coffee through a filter, separating the rich, aromatic liquid from the spent grounds. Be sure to pour the coffee into your favorite mug or cup, ready to enjoy the fruits of your labor.

The perfect cup of buna is now ready to savor!

Advertisement

Step 3. Stir Mixture Thoroughly

thoroughly stir the mixture

After pouring the hot water over the grounds, gently stir the mixture to ensure all the coffee is fully saturated. Use a clean spoon or stirrer to gently move the grounds around, making sure no dry pockets remain. Stir in a circular motion, working from the outside of the container toward the center. This will help evenly distribute the water and create a smooth, consistent brew.

Stirring the buna (coffee) mixture thoroughly is an important step, as it helps release the full flavor and aroma of the grounds. The agitation also helps the water penetrate the porous coffee particles, extracting all the delicious compounds.

Continue stirring for about 30 seconds to a minute, until the liquid appears uniform in color and consistency.

After stirring, let the buna (coffee) brew for the recommended time, typically 4-5 minutes. This final steep will ensure a robust, flavorful cup of coffee. Enjoy your freshly brewed buna (coffee)!

Step 4. Let Coffee Brew Undisturbed

brew coffee without interruption

Once you've thoroughly stirred the buna (coffee) mixture, it's time to let it brew undisturbed. This is a crucial step in the process, as it allows the flavors to fully develop and the coffee to reach its optimal strength.

Gently set the pot or carafe aside, ensuring it's on a level surface. Avoid any unnecessary movement or disturbance during this stage. The coffee needs time to steep, extracting all the delightful aromas and rich flavors from the grounds.

Let the buna brew for approximately 4-5 minutes, depending on your personal preference. Resist the temptation to peek or stir the mixture, as this can disrupt the brewing process.

Advertisement

Keep a close eye on the time, and when the timer goes off, your buna will be ready to serve. Pouring the coffee too soon can result in a weaker, less flavorful drink.

Step 5. Strain Coffee Through Fine Mesh

strain coffee using mesh

Grab a fine mesh strainer and position it over your serving vessel. Slowly pour the freshly brewed coffee through the strainer, allowing the liquid to drip down into the cup or carafe below. The fine mesh will catch any coffee grounds or sediment, ensuring a smooth, clean cup of coffee.

Take your time with this process, pouring slowly and steadily to get the most out of your brew. Be sure to tilt the pot or press gently on the grounds in the strainer to extract every last drop of that delicious coffee.

Once the liquid has finished dripping, remove the strainer and admire your perfectly strained cup of buna.

This simple step of straining the coffee through a fine mesh adds an extra level of refinement to your brew. Enjoy the rich, smooth flavor of your expertly prepared coffee, savoring each sip.

Final Thoughts

The journey through the fascinating world of buna, or Ethiopian coffee, has been an enlightening one. As you've discovered, the art of preparing and enjoying this cherished beverage is steeped in rich tradition and cultural significance.

Advertisement

From selecting the finest beans to meticulously roasting and brewing them, each step has its own unique charm.

Now, as you savor that final sip, let the flavors linger and the aroma envelop you. Reflect on the care and attention that went into creating this cup of buna.

Remember the smiles and laughter shared during the ritual, the sense of community and connection fostered by this shared experience.

Carry this appreciation for the traditions and nuances of Ethiopian coffee with you, and share the joy of buna with others whenever you can.

For in the end, it's not just about the coffee itself, but the rich tapestry of culture and tradition that it represents.

Advertisement

Frequently Asked Questions

What Is the Difference Between Buna and Regular Coffee?

You may not notice much difference between regular coffee and buna, as both are brewed from roasted coffee beans. However, buna often has a unique flavor profile, stemming from its Ethiopian origins and traditional preparation methods.

How Does the Buna Brewing Process Differ From Other Coffee Brewing Methods?

You'll notice the buna brewing process differs from other methods, as it involves roasting the beans over an open fire and using a clay pot to steep the grounds, resulting in a richer, more intense flavor profile.

Is Buna Coffee More Expensive Than Regular Coffee?

Is buna coffee more expensive than regular coffee? Generally, yes. Buna, a traditional Ethiopian coffee brewing method, often involves more labor-intensive processes, which can make the final product more costly than typical commercial coffee preparations.

Can Buna Coffee Be Purchased in Regular Grocery Stores?

Yes, you can typically find buna coffee in regular grocery stores, though the selection may be more limited compared to specialty coffee shops or online retailers. Prices can vary but are often higher than standard coffee options.

What Are the Health Benefits of Drinking Buna Coffee?

Drinking coffee can provide several health benefits. It's a good source of antioxidants, which can help reduce inflammation and protect against chronic diseases. Plus, it may boost your energy levels and improve cognitive function. Give it a try and see how it makes you feel!

Advertisement
Continue Reading

Ethiopian Cuisine

Tella (Traditional Beer)

Yearning to uncover the centuries-old secrets of Tella, Ethiopia’s traditional beer that connects the past to the present and reflects the resilience of local traditions.

Published

on

traditional ethiopian beer tella

Tella is Ethiopia's centuries-old traditional beer, a cultural treasure that connects the past to the present. This flavorful brew is crafted using local grains like barley, sorghum or millet, along with water, yeast, and optional sugar and spices. The brewing process requires patience, with the soaked grains boiled, strained, and cooled before adding yeast to start fermentation. Tella's unique character varies by region, reflecting the ingenuity and resilience of local traditions. More than just a beverage, Tella symbolizes the identity and values of Ethiopian communities, often shared during social gatherings and celebrations. Intrigued? There's more to discover about this captivating cultural treasure.

Key Takeaways

  • Tella is a centuries-old traditional beer that is integral to the cultural heritage and identity of Ethiopia.
  • The brewing process involves soaking, boiling, and fermenting local grains like barley, sorghum, or millet.
  • Tella is often consumed during social gatherings, celebrations, and religious ceremonies, strengthening community bonds.
  • The unique regional variations and artisanal production methods showcase the craftsmanship and cultural significance of Tella.
  • Tella contains beneficial nutrients and may offer probiotic benefits, making it a healthier alternative to commercial beers.

History

Tella, the traditional beer of Ethiopia, traces its origins back centuries, woven into the very fabric of the country's cultural heritage. This beloved beverage has been a cherished part of social gatherings, celebrations, and religious ceremonies for generations.

The process of brewing tella is a time-honored tradition, passed down through the ages, with each family or community having their own unique recipes and techniques.

The ingredients for tella typically include barley, gesho (a type of buckthorn), and water, though the exact proportions and methods can vary. The fermentation process can take several days, creating a satisfyingly complex and flavorful brew.

Tella is often served in clay pots or traditional cups, adding to the authentic experience.

Today, tella remains an integral part of Ethiopian culture, a tangible link to the nation's rich history and traditions.

Advertisement

Whether enjoyed during a festive celebration or as a daily social ritual, this traditional beer continues to bring people together and celebrate the enduring spirit of Ethiopia.

Recipe

Tella, also known as Traditional Beer, is a popular beverage in parts of Africa. It's a fermented drink made from various grains, including sorghum, millet, or barley. The brewing process involves a unique combination of techniques and ingredients that have been passed down through generations.

The recipe for Tella can vary depending on the region and personal preferences, but the core method remains consistent. Crafting this traditional beer requires patience, attention to detail, and a deep understanding of the fermentation process.

  • Sorghum or millet flour
  • Water
  • Yeast
  • Sugar (optional)
  • Spices (such as ginger, cinnamon, or cloves)

To prepare Tella, begin by mixing the sorghum or millet flour with water in a large pot. Bring the mixture to a boil, stirring constantly to prevent burning. Once the mixture has thickened, remove it from heat and allow it to cool.

Add the yeast and, if desired, a small amount of sugar. Cover the pot and let the mixture ferment for several days, stirring occasionally, until the desired level of fermentation is achieved.

When the Tella is ready, you may wish to strain it to remove any sediment or debris. The final product can be served chilled or at room temperature, and it can be enjoyed on its own or paired with traditional African dishes.

Advertisement

Keep in mind that the flavor and alcohol content of Tella can vary depending on the length of fermentation and the specific ingredients used.

Cooking Steps

To get started, you'll need to soak the grains in water overnight.

Then, bring the soaked grains to a boil and let them simmer.

After that, strain the boiled grains to collect the filtered mixture.

Step 1. Soak Grains Overnight in Water

overnight grain soaking process

Soaking the grains overnight in water is a crucial step in the tella-making process. This allows the grains to soften and swell, preparing them for the next stages of the fermentation.

Start by rinsing the grains, such as sorghum, barley, or wheat, in clean water. Then, place them in a large container and cover them completely with fresh water. Let the grains soak for at least 8 hours, or overnight, ensuring they've ample time to absorb the moisture.

Advertisement

After the soaking period, drain the excess water, leaving just the plump, hydrated grains. This step is essential for achieving the desired texture and flavor in your tella.

The softened grains will be easier to grind, extract the sugars, and ferment, resulting in a smooth, rich traditional beer. Remember to keep the soaked grains covered and in a cool, dark place until you're ready to move on to the next step in the tella-making process.

Step 2. Boil the Soaked Grains

boil soaked grains thoroughly

Next, you'll want to boil the soaked grains to begin the cooking process. In a large pot, combine the soaked grains and enough fresh water to cover them by about an inch.

Bring the mixture to a rolling boil over high heat, then reduce the heat to low and let it simmer for 30-45 minutes, stirring occasionally. This will soften the grains and begin the process of breaking down the starches.

Keep an eye on the pot and add more water if the mixture starts to look too dry. You'll know the grains are ready when they're soft and easily mashable.

Once they've reached the desired texture, remove the pot from the heat and let the contents cool slightly before moving on to the next step. This gentle boiling helps prepare the grains for the fermentation that will create the signature flavors of your traditional tella beer.

Advertisement

Step 3. Strain the Boiled Grains

strain boiled grains step

After the grains have been gently boiled, you'll need to strain them. Grab a large, clean colander or strainer and place it over a bowl or pot. Slowly pour the hot, boiled grains into the strainer, allowing the liquid to drain off. Be careful – the grains will be very hot!

Gently press down on the grains with a spoon to help release more of the liquid. You want to extract as much of the flavorful liquid as possible, while leaving the spent grains behind.

Once the grains have been fully strained, discard them or set them aside for another use, such as animal feed.

The strained liquid is now the wort, the foundation of your tella. Transfer the wort to a clean pot or container.

At this point, you can proceed to the next step of the tella brewing process – cooling the wort. With the grains strained, you're one step closer to enjoying a refreshing, traditional tella!

Step 4. Cool the Filtered Mixture

cool the filtered mixture

With the grains strained, the next step is to cool the wort. This is an important process, as the temperature of the liquid must be lowered before the yeast can be added.

First, place the filtered mixture into a large container or pot. Gently stir the liquid to help it cool more quickly. You can also set the container in a sink or tub filled with cold water, which will accelerate the cooling process.

Advertisement

Keep a close eye on the temperature, aiming for around 70-80°F (21-27°C). Once the wort has reached the desired temperature, it's time to add the yeast. This will kickstart the fermentation, transforming the sugars into alcohol and carbon dioxide.

Be sure to cover the container to prevent any unwanted particles from getting in. With the wort cooled and the yeast added, the tella is well on its way to becoming a delicious traditional beer.

Step 5. Add Yeast to Mixture

incorporate yeast into mixture

To kickstart the fermentation process, add the prepared yeast to the cooled wort. This living organism will convert the sugars in the mixture into alcohol and carbon dioxide, bringing your tella to life.

Sprinkle the yeast evenly over the surface of the liquid, then use a clean utensil to gently stir it in. Be careful not to over-agitate the mixture, as this can damage the delicate yeast cells.

Once the yeast is incorporated, cover the vessel and let it sit in a warm, dark place. The yeast will begin multiplying, consuming the sugars and producing the desired alcohol content.

Over the next few days, you'll notice bubbles forming and the mixture becoming more bubbly as fermentation takes hold. This is an exciting stage, as you're one step closer to enjoying your homemade tella!

Advertisement

Keep a close eye on the process, making any necessary adjustments to ensure a successful fermentation.

Final Thoughts

Tella, the traditional beer, holds a unique place in the cultural tapestry of many communities. As you've now added the yeast and allowed the mixture to ferment, it's time to consider the final thoughts.

The end result, a rich and flavorful libation, is well worth the effort. Savor the fruity notes and the satisfying fizz as you share this special drink with friends and family.

Remember, tella is more than just a beverage – it's a living link to the past, a tradition that connects generations. Each sip carries the weight of history, the stories of those who've come before. As you raise your glass, take a moment to appreciate the craftsmanship and the care that went into its creation.

Whether enjoyed during a festive celebration or as a leisurely accompaniment to a meal, tella is a testament to the ingenuity and resilience of your community.

Advertisement

Embrace this time-honored tradition, and let it inspire you to celebrate the enduring spirit of your cultural heritage.

Frequently Asked Questions

How Long Can Tella Be Stored Before It Spoils?

You should consume homemade fermented beverages within a few days to a week, as they don't preserve well and can spoil quickly without proper storage. Proper refrigeration may extend their shelf life slightly, but they're best enjoyed fresh.

What Are the Health Benefits of Drinking Tella?

Drinking a moderate amount of traditional fermented beverages can provide beneficial probiotic effects, aiding digestion and boosting your immune system. However, excessive consumption may lead to health issues, so it's important to enjoy these drinks in moderation as part of a balanced lifestyle.

Can Tella Be Made at Home With Modern Equipment?

You can make tella at home using modern equipment like a fermentation tank, grain mill, and temperature control. With the right ingredients and process, you can brew this traditional beer right in your own kitchen.

Is Tella Safe for Pregnant Women to Consume?

It's best to avoid drinking any alcoholic beverages during pregnancy, as they can potentially harm the developing fetus. Speak with your healthcare provider to determine the safest choices for you and your baby's wellbeing.

Advertisement

How Does the Taste of Tella Compare to Other Traditional Beers?

You'll find that the taste of tella, a traditional beer, differs from other regional brews. It has a distinctive, earthy flavor that's often described as richer and more robust compared to more mainstream beer varieties.

Continue Reading
Advertisement

Affiliate Disclaimer
As an affiliate, we may earn a commission from qualifying purchases. We get commissions for purchases made through links on this website from Amazon and other third parties.

Advertisement

Latest

tangy citrus dessert squares tangy citrus dessert squares
Graduations/Birthdays4 mins ago

Lemon Bars

Unlock the secrets to making the perfect lemon bars, a classic American dessert that combines a buttery crust with a...

delicious chocolate dessert squares delicious chocolate dessert squares
Graduations/Birthdays9 mins ago

Brownies

Joyful and decadent, the story of brownies dates back to a historic culinary mishap, unveiling a rich legacy of chocolate-infused...

delicious homemade chocolate treats delicious homemade chocolate treats
Graduations/Birthdays15 mins ago

Chocolate Chip Cookies

Homemade chocolate chip cookies with their buttery, crispy edges and soft, chewy centers have captivated taste buds for generations, but...

celebratory dessert for gatherings celebratory dessert for gatherings
Graduations/Birthdays21 mins ago

Sheet Cake

Discover the delectable world of sheet cake, a versatile and crowd-pleasing dessert that has captured the hearts of celebrations for...

delicious baked sweet treats delicious baked sweet treats
Graduations/Birthdays26 mins ago

Cupcakes

Baking cupcakes is a delightful endeavor that unveils a world of endless possibilities, from classic flavors to imaginative creations.

creamy egg salad delight creamy egg salad delight
Graduations/Birthdays32 mins ago

Egg Salad Sandwiches

Unlock the secrets to crafting the perfect egg salad sandwich, a timeless classic that delights the senses and satisfies the...

fresh mozzarella tomato basil fresh mozzarella tomato basil
Graduations/Birthdays37 mins ago

Caprese Sandwiches

Indulge in the irresistible blend of creamy mozzarella, juicy tomatoes, and fragrant basil that makes the Caprese sandwich a beloved...

turkey avocado wrap recipe turkey avocado wrap recipe
Graduations/Birthdays42 mins ago

Turkey and Avocado Wraps

Craving a quick, nutritious, and delicious lunch that satisfies your taste buds? Discover the irresistible combination of Turkey and Avocado...

stuffed flatbread delights stuffed flatbread delights
Graduations/Birthdays47 mins ago

Pita Pockets

Juicy fillings, crisp veggies, and savory grilled meats come together in these versatile pita pockets that are easy to prepare...

bacon lettuce tomato delight bacon lettuce tomato delight
Graduations/Birthdays52 mins ago

BLT Sandwiches

A timeless classic, the BLT sandwich captivates with its harmonious blend of crisp bacon, fresh lettuce, and juicy tomatoes, leaving...

artisanal melted cheese delight artisanal melted cheese delight
Graduations/Birthdays58 mins ago

Gourmet Grilled Cheese

Mouth-watering gourmet grilled cheese sandwiches with artisanal breads and premium cheeses that transform this lunchtime classic into an indulgent culinary...

delicious italian sub sandwiches delicious italian sub sandwiches
Graduations/Birthdays1 hour ago

Italian Sub Sandwiches

Perennially popular for their blend of savory Italian cured meats, creamy cheeses, and crisp veggies, Italian sub sandwiches are a...

Advertisement

Trending