Cooking for Special Diets
Ketogenic Cooking: High-Fat, Low-Carb Recipes for Weight Loss
Gain a culinary edge with Ketogenic Cooking’s high-fat, low-carb recipes that not only help you shed unwanted pounds but also boost your metabolic health.
The ketogenic diet's high-fat, low-carb recipes can help you shed unwanted pounds and boost your metabolic health. By emphasizing quality ingredients like boneless chicken, Parmesan, and aromatic herbs, you'll enjoy flavorful meals that keep you feeling energized and satisfied. The key is mastering cooking techniques like searing and baking to bring out the best in these nutrient-dense ingredients. As you explore this sustainable way of eating, you'll discover a world of culinary creativity and open up new possibilities for your health and wellness journey.
Key Takeaways
- Ketogenic cooking emphasizes high-fat, low-carb macronutrient ratios to induce ketosis and promote weight loss.
- Common keto-friendly ingredients include boneless, skinless chicken thighs, Parmesan cheese, olive oil, garlic, and herbs.
- Preparation techniques like searing and baking are preferred to enhance flavor and achieve desired doneness.
- Sustainability in the ketogenic diet is crucial, including recipe experimentation, nutrient balance, and health monitoring.
- Embracing culinary creativity, open-mindedness, and regular practice can make ketogenic cooking an enjoyable and sustainable lifestyle.
History
The ketogenic diet has an intriguing history, tracing its roots back to ancient medical practices. In the early 20th century, physicians discovered its potential to treat epilepsy, a condition that was challenging to manage at the time. The diet works by putting the body into a metabolic state called ketosis, where fat becomes the primary fuel source instead of carbohydrates.
Over the decades, the ketogenic diet has evolved, with researchers exploring its applications beyond epilepsy. It's now recognized for its ability to promote weight loss, improve insulin sensitivity, and even potentially benefit certain neurological conditions.
The rise of the modern ketogenic movement can be attributed to a growing understanding of the diet's mechanisms and the increasing popularity of low-carb, high-fat eating plans.
Today, the ketogenic diet continues to captivate health enthusiasts and medical professionals alike, with a wealth of resources available to help individuals transition to this lifestyle.
As the research continues, the full potential of this ancient approach to nutrition may yet be unveiled. Understanding the paleo diet cooking basics is essential to fully harnessing the benefits of this nutritional approach. By focusing on whole foods such as lean meats, fish, fruits, vegetables, nuts, and seeds, adherents can tap into the power of this diet to optimize their health and well-being. With ongoing research and exploration, the paleo diet cooking basics may become even more refined, offering even greater insights into this time-honored approach to nutrition.
Recipe
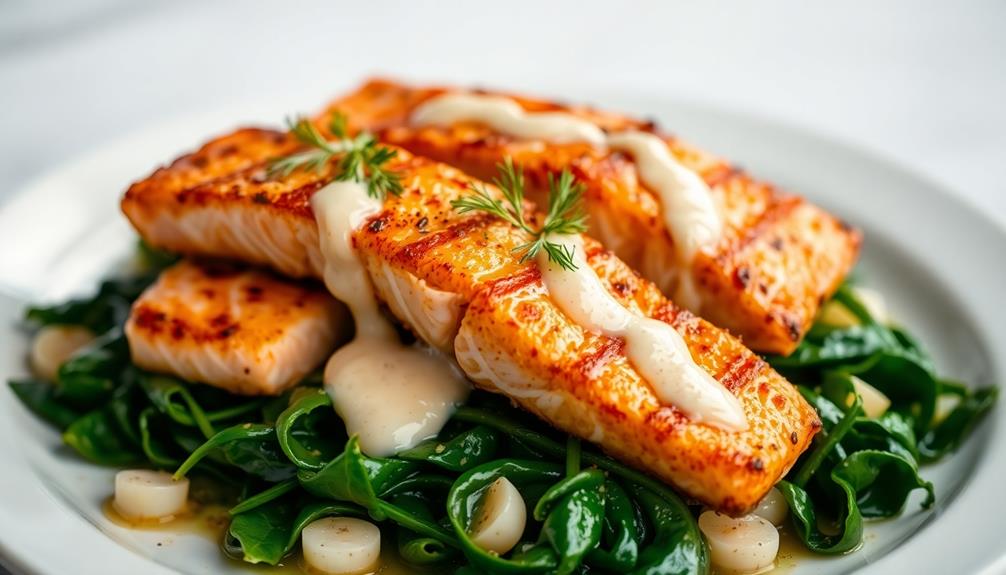
Ketogenic diets have gained popularity for their ability to promote weight loss and improve metabolic health. As a ketogenic diet relies on high-fat, low-carb macronutrient ratios, it's important to have a repertoire of delicious and nutritious recipes that align with these dietary principles. This ketogenic recipe showcases a simple yet flavorful dish that's sure to satisfy your cravings while keeping you in ketosis.
The key to success on a ketogenic diet is to focus on wholesome, high-fat ingredients that are low in carbohydrates. This recipe exemplifies this approach by highlighting the use of nutrient-dense foods that are keto-friendly.
- Boneless, skinless chicken thighs
- Olive oil
- Garlic cloves
- Dried oregano
- Salt and black pepper
- Grated Parmesan cheese
- Chopped fresh parsley
Preheat your oven to 400°F (200°C). In a large, oven-safe skillet, heat the olive oil over medium-high heat. Add the garlic and sauté until fragrant, about 1 minute.
Season the chicken thighs with the dried oregano, salt, and black pepper, then place them in the skillet. Sear the chicken for 2-3 minutes per side, or until a golden-brown crust forms. Transfer the skillet to the preheated oven and bake for 20-25 minutes, or until the chicken is cooked through and the internal temperature reaches 165°F (75°C).
Sprinkle the grated Parmesan cheese over the chicken during the last 5 minutes of baking. Remove the dish from the oven, garnish with chopped fresh parsley, and serve immediately.
For best results, use high-quality, pasture-raised chicken thighs and grated Parmesan cheese. The combination of the savory chicken, crispy Parmesan crust, and fragrant herbs creates a delightful keto-friendly meal that's sure to satisfy your taste buds and keep you on track with your low-carb lifestyle.
Cooking Steps
First, gather all your ingredients.
Next, preheat your oven to 350 degrees Fahrenheit.
Then, mix all the wet ingredients and add the chopped vegetables before pouring the mixture into a baking dish.
Step 1. Gather All Ingredients
Before you begin cooking, it's crucial to have all the necessary ingredients on hand. Take some time to review the recipe and make sure you've gathered everything you'll need. This will ensure a smooth cooking process and prevent any last-minute scrambling.
To support your meal planning, consider keeping a printable list of low carb foods handy to streamline your grocery shopping.
Start by checking your pantry and fridge for the staple items like oils, seasonings, and any other base ingredients. Then, focus on the specific ingredients listed in the recipe. Measure out the exact amounts required to avoid over or under-seasoning your dish.
Be mindful of any special dietary requirements or substitutions the recipe calls for. For instance, if you're following a strict ketogenic diet, you'll need to swap out high-carb ingredients with low-carb alternatives. Double-check the labels and macros to stay on track.
Once you've collected all the necessary components, arrange them within easy reach on your workspace. This will keep you organized and allow you to work efficiently throughout the cooking process.
Step 2. Preheat Oven to 350 Degrees Fahrenheit
With your ingredients all set, it's time to start cooking. Preheat your oven to 350 degrees Fahrenheit. This temperature is ideal for many keto-friendly recipes, as it allows the food to cook thoroughly without burning.
As the oven heats up, take a moment to ensure you have all your necessary baking dishes and utensils ready to go. This will make the cooking process smoother and more efficient.
Once the oven has reached the desired temperature, you can begin placing your dishes inside. Remember to use oven mitts to protect your hands from the heat.
Maintaining the correct oven temperature is crucial for achieving the perfect texture and doneness in your keto dishes. Keep a close eye on the oven and adjust the temperature as needed to ensure your food cooks evenly.
With the oven preheated and your ingredients prepared, you're now ready to start assembling and baking your delicious ketogenic creations.
Step 3. Mix All Wet Ingredients
To begin the cooking process, gather all the wet ingredients called for in the recipe and mix them together thoroughly in a large bowl. This typically includes ingredients like eggs, heavy cream, melted butter, or coconut oil. Use a whisk or a hand mixer to ensure the wet ingredients are fully combined.
Mixing the wet ingredients first allows you to create an emulsion, which will help bind the recipe together and create a smooth, uniform texture.
Once the wet ingredients are mixed, you can move on to adding the dry ingredients. This step is crucial in keto cooking, as you'll need to carefully measure and balance the low-carb flours, sweeteners, and other dry components to maintain the ketogenic macronutrient profile.
Paying close attention to the ratios of wet and dry ingredients will help you achieve the desired consistency and flavor profile for your ketogenic dish.
Step 4. Add Chopped Vegetables
Once you have the wet ingredients thoroughly combined, it's time to add the chopped vegetables.
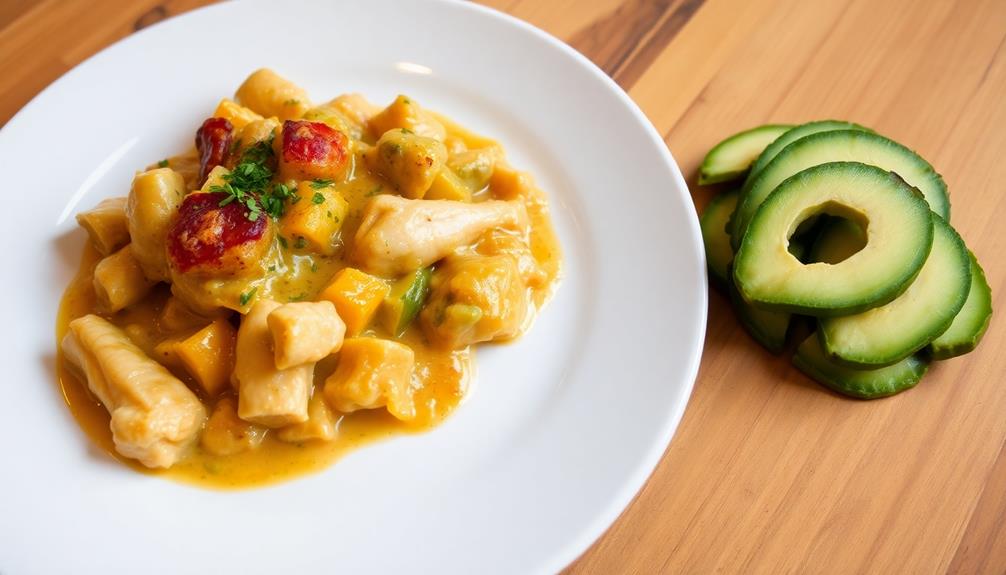
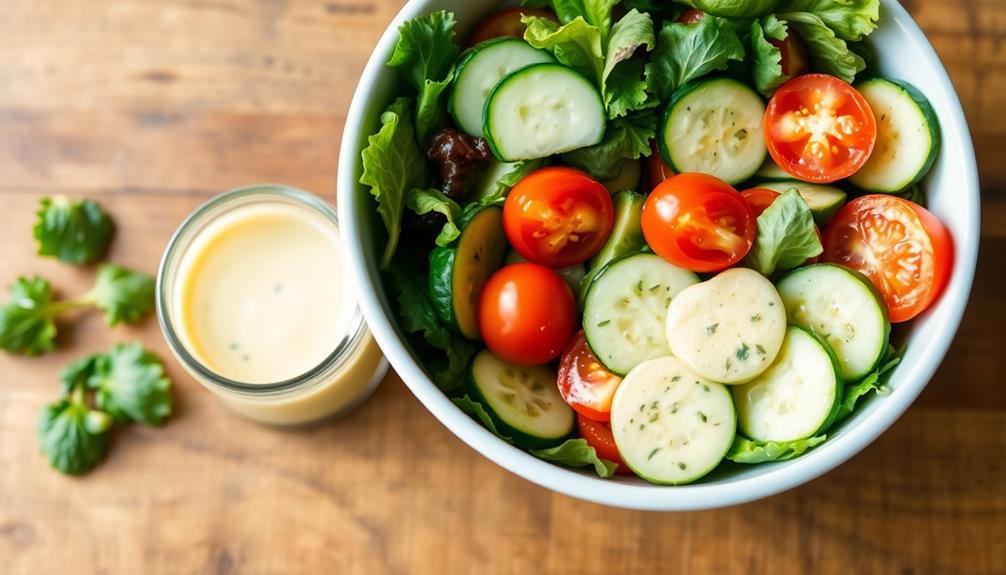
Begin by gathering your choice of keto-friendly veggies, such as broccoli, cauliflower, zucchini, or spinach. Incorporating these low-carb vegetables not only enhances the flavor but also helps to add fiber to your meals, which is essential for gut health on a ketogenic diet.
Chop them into bite-sized pieces, ensuring they're evenly sized for uniform cooking. Gently fold the chopped vegetables into the wet mixture, taking care not to overmix and preserve their texture. The veggies will add a delightful crunch and boost the fiber content, while contributing to the overall nutrient profile of your ketogenic dish.
As you incorporate the vegetables, pay attention to the recipe's cooking time. Some vegetables may require slightly longer cooking times than others, so adjust the heat and duration accordingly.
This step helps ensure all the ingredients are cooked through and tender, without any raw or undercooked spots. Once the vegetables are fully incorporated, you're ready to move on to the next stage of your ketogenic cooking adventure.
Step 5. Pour Into Baking Dish
The baking dish is the next step in your ketogenic cooking journey. Grab a baking dish that's large enough to accommodate all the ingredients you've prepared.
Lightly grease the dish with a high-fat, keto-friendly oil like olive oil or avocado oil. This will prevent the food from sticking and ensure easy clean-up later.
Carefully pour the chopped vegetables into the prepared baking dish, spreading them out evenly. If you're adding any proteins, like chicken or beef, place them on top of the veggies.
Make sure everything is in a single layer for even cooking. Finally, pour any remaining sauces or seasonings over the top, ensuring all the ingredients are well-coated.
With the baking dish ready, you can now transfer it to the preheated oven and let the magic happen.
Keep an eye on the dish as it cooks, and adjust the temperature or cooking time as needed to achieve your desired doneness. Soon, you'll have a delicious, keto-friendly meal ready to enjoy.
Final Thoughts
As you wrap up your ketogenic cooking journey, remember the importance of sustainability. Adopting a ketogenic lifestyle is a significant commitment, and it's essential to find recipes and techniques that work for you in the long run.
Don't be afraid to experiment and find ways to make your favorite dishes more keto-friendly.
Remember, the key to success is balance. While the ketogenic diet emphasizes high-fat, low-carb foods, it's still important to include a variety of nutrient-dense ingredients to ensure you're meeting your body's needs.
Pay attention to your energy levels, digestive health, and overall well-being, and make adjustments as necessary.
Ultimately, the best ketogenic recipes are the ones that you enjoy and can sustain. Keep an open mind, embrace creativity, and have fun with your culinary adventures.
With the right mindset and a bit of practice, you can unlock the benefits of ketogenic cooking and achieve your health and wellness goals.
Frequently Asked Questions
Is the Ketogenic Diet Safe for People With Diabetes?
The ketogenic diet can be safe for people with diabetes, but you should consult your healthcare provider first. They can help you manage your blood sugar levels and adjust your medications to ensure the diet is appropriate for your individual needs.
Can I Still Drink Alcohol on the Ketogenic Diet?
You can drink alcohol on the ketogenic diet, but it's important to do so in moderation. Alcohol can affect ketosis, so you'll want to choose low-carb options and monitor your blood sugar levels carefully.
How Do I Know if I'm in Ketosis?
You can tell if you're in ketosis by monitoring your ketone levels, which you can do through urine, blood, or breath testing. Look for signs like increased energy, reduced appetite, and weight loss.
Can the Ketogenic Diet Help With Certain Medical Conditions?
The ketogenic diet can help manage certain medical conditions like epilepsy, type 2 diabetes, and Alzheimer's disease. It may also benefit those with cardiovascular disease, PCOS, and certain types of cancer, though more research is needed.
What Are the Potential Side Effects of the Ketogenic Diet?
The ketogenic diet may cause side effects like fatigue, headaches, constipation, and kidney stones. You should consult your doctor before starting this diet, as it can also affect certain medical conditions.
Cooking for Special Diets
Cooking for Food Allergies: Safe and Delicious Alternatives
Prepare delectable dishes that cater to various food allergies, unlocking a world of culinary exploration and satisfying meals that please every palate.
Cooking for food allergies can be an exciting challenge! Rather than seeing dietary restrictions as limiting, you can discover delicious and nourishing alternatives. From ancient civilizations to modern science, understanding food allergies opens up a world of creative cooking. With careful preparation and techniques like sautéing veggies and using a food processor, you can craft satisfying meals free of common allergens. Artfully plating the final dish and experimenting with flavors makes mealtime truly special. By staying informed and engaged, you'll unlock a whole new appreciation for the joy of cooking for diverse dietary needs. There's more to discover when it comes to allergy-friendly cuisine.
Key Takeaways
- Understand the underlying causes and symptoms of food allergies to identify safe and nourishing ingredient substitutions for allergy-friendly cooking.
- Develop recipes using nutrient-dense, allergy-friendly ingredients like fresh vegetables, lentils, and spices to create satisfying and versatile meals.
- Employ careful preparation techniques, such as thorough cleaning and ingredient separation, to prevent cross-contamination and ensure food safety.
- Experiment with cooking methods and flavor profiles to craft delectable allergy-friendly dishes that cater to diverse dietary needs.
- Stay informed on the latest research in food allergies and engage with the allergy-friendly cooking community to continuously enhance your culinary skills.
History
Food allergies have a long and complex history, tracing back to ancient civilizations. In those early days, people didn't fully understand what caused these reactions. They thought it might be curses, bad spirits, or something in the food itself.
Over time, scientists started to uncover the real reasons behind food allergies. They learned that the immune system plays a big role. When someone with a food allergy eats that food, their body goes into overdrive, trying to fight it off. This can cause all sorts of symptoms, from rashes to trouble breathing.
Nowadays, we know a lot more about food allergies. Doctors can test for them and help people figure out which foods to avoid.
And cooks have gotten really good at making delicious, allergy-friendly meals. They use special ingredients and techniques to make sure everyone can enjoy the food, no matter their allergies.
It's an exciting time, with so many tasty options for people with food allergies!
Recipe
Navigating the culinary world with food allergies can be a daunting task, but with the right recipes, you can create delicious and safe meals. This recipe for a gluten-free, dairy-free, and nut-free dish is a perfect example of how to cater to various dietary restrictions without compromising on flavor.
Incorporating nutrient-dense ingredients can help ensure that you're meeting your nutritional needs while avoiding allergens. This dish is a versatile and hearty meal that can be enjoyed for lunch or dinner. The combination of fresh vegetables, protein-packed lentils, and aromatic spices creates a satisfying and nutritious dish that's sure to please even the most discerning palate.
Ingredients:
- 1 cup dried brown lentils, rinsed
- 2 cups vegetable broth
- 1 tablespoon olive oil
- 1 onion, diced
- 2 cloves garlic, minced
- 1 red bell pepper, diced
- 1 cup diced zucchini
- 1 teaspoon cumin
- 1 teaspoon paprika
- 1/2 teaspoon dried oregano
- 1/4 teaspoon cayenne pepper (optional, for a spicy kick)
- Salt and black pepper to taste
- Chopped fresh parsley for garnish (optional)
Instructions:
In a medium saucepan, combine the lentils and vegetable broth. Bring the mixture to a boil, then reduce the heat and simmer for 20-25 minutes, or until the lentils are tender and the liquid is absorbed. Set aside.
In a large skillet, heat the olive oil over medium heat. Add the onion and garlic, and sauté for 2-3 minutes, or until fragrant and translucent.
Add the bell pepper and zucchini, and continue cooking for an additional 5-7 minutes, or until the vegetables are tender. Stir in the cooked lentils, cumin, paprika, oregano, and cayenne pepper (if using).
Season with salt and black pepper to taste. Cook for an additional 2-3 minutes, or until the flavors are well combined.
Tips:
To make this dish even more filling, you can serve it over a bed of steamed quinoa or rice. Additionally, you can customize the vegetables to your liking, using a variety of seasonal produce.
For a boost of protein, you can also add a can of drained and rinsed chickpeas or kidney beans. Remember to always read labels carefully to ensure that all ingredients are suitable for your specific dietary needs.
Cooking Steps
First, gather all the necessary ingredients.
Next, chop the vegetables into bite-size pieces.
Then, sauté the vegetables in oil or butter, add your protein and seasonings, and serve the dish immediately on a warm plate.
Step 1. Gather All Necessary Ingredients
The first step in preparing a meal for those with food allergies is to gather all the necessary ingredients. This may seem obvious, but it's crucial to ensure you have everything you need before you start cooking. Checking your pantry and fridge to make sure you have all the allergy-friendly items on your recipe list can help you avoid surprises.
Additionally, consider incorporating calming beverages like herbal tea, which can complement your meal and provide health benefits. Don't forget to read the labels carefully, as some ingredients may contain hidden allergens.
Once you've gathered your ingredients, arrange them on your countertop or workspace. This will help you stay organized and keep track of what you've added to the dish.
If you're working with multiple allergens, it's a good idea to keep the ingredients separated to avoid cross-contamination. Remember to wash your hands and clean your work area thoroughly before you begin cooking.
Step 2. Chop All Vegetables Into Bite-Size Pieces
Next, chop all the vegetables into bite-size pieces. This is an important step to ensure even cooking and make it easier for your guests to enjoy the meal.
Using a sharp knife, carefully slice the carrots, bell peppers, and zucchini into small, uniform cubes. For the onions, peel off the outer layers and chop them into small pieces. Remember to handle the knife with care and keep your fingers curled under to avoid any accidents.
If you have a food processor, you can use it to quickly and evenly chop the veggies. Just be sure not to over-process them, as you want them to maintain a nice texture. Incorporating fresh herbs like cilantro can also enhance the flavor and provide health benefits for dogs in moderation.
Once everything is chopped, give the vegetables a gentle toss to mix them together. This will help the flavors meld and create a visually appealing dish.
With the vegetables all prepped, you're one step closer to a delicious, allergy-friendly meal.
Step 3. Sauté Vegetables in Oil or Butter
Frequently, sauté the chopped vegetables in a small amount of high-quality oil or butter over medium heat. This method helps to soften and caramelize the vegetables, bringing out their natural flavors.
Be sure to stir the vegetables occasionally to ensure even cooking. If you're using butter, keep a close eye to prevent it from burning. The key is to cook the vegetables until they're tender but still have a slight bite. This usually takes around 5-7 minutes, depending on the size of the pieces.
For extra flavor, try adding a pinch of salt, pepper, or your favorite herbs and spices. Sautéing is a great way to prepare vegetables for a variety of dishes, from stir-fries to omelets.
Experiment with different oil and vegetable combinations to find your favorite flavors. Remember to always adjust the heat and cooking time to suit your personal preferences.
Step 4. Add Protein and Seasonings
After sautéing your vegetables to perfection, it's time to add protein and seasonings to create a well-rounded and flavorful dish. Choosing the right protein can make all the difference. Consider lean options like chicken, turkey, or tofu to keep your meal allergy-friendly.
Simply add your protein of choice and let it cook through, stirring occasionally.
Next, it's time to season your dish. Experiment with a variety of herbs and spices to find the flavors you enjoy. Garlic, onion, and a pinch of salt and pepper are classic starts.
For a little extra zing, try a squeeze of lemon or a sprinkle of paprika. Remember, the key is to build layers of flavor, so don't be afraid to get creative with your seasoning combinations.
As the aromas fill your kitchen, you'll know you're on your way to a delicious, allergy-safe meal.
Step 5. Serve Immediately on Warm Plate
Dish up the prepared meal immediately onto a warmed plate for a professional presentation. This simple step makes all the difference! The hot dish will look and taste its best when served right away. Plus, it shows your guests you've taken the time to create a meal tailored just for them.
After all your hard work, you'll want to showcase the final product. Transferring the food to a heated plate helps it maintain the perfect temperature. This prevents the flavors from getting dull or the textures from becoming soggy. Your carefully crafted dish deserves to be savored at its peak!
When plating, arrange the components artfully. Drizzle sauces, sprinkle garnishes, and place items with intention. This elevates the presentation, making the meal feel more special. Your guests will appreciate the thoughtful touches.
Serve promptly for maximum enjoyment and to ensure those food allergies are properly avoided. With a warm plate and a beautiful display, you're ready to impress!
Final Thoughts
Cooking for those with food allergies can be a rewarding yet challenging endeavor. You've learned how to identify hidden ingredients, use safe substitutions, and serve food that's both allergy-friendly and delicious.
Remember, with a little creativity and resourcefulness, you can prepare meals that cater to everyone's needs. This can include exploring a variety of cuisines, trying new ingredients, or tailoring dishes to meet specific dietary preferences. For those managing high blood pressure, incorporating dash diet recipes for hypertension can be a delicious and effective way to promote heart health. By making simple swaps and focusing on fresh, nutrient-rich foods, you can create meals that are both satisfying and beneficial for your well-being.
Don't be discouraged if a recipe doesn't turn out exactly as planned. Embrace the process of experimentation and enjoy the journey of discovering new flavors. You might even find that your allergy-friendly dishes become family favorites.
As you continue your culinary adventures, stay informed about the latest research and trends in food allergies. This will help you adapt recipes and stay ahead of the curve.
Most importantly, have fun in the kitchen! Cooking for those with food allergies is an opportunity to showcase your skills and spread joy through nourishing meals.
Frequently Asked Questions
How Do I Identify Food Allergens in Recipes?
To identify food allergens in recipes, carefully read through the ingredient list and look for common allergens like nuts, dairy, eggs, wheat, soy, and seafood. Pay close attention to how ingredients are listed to spot potential allergens.
What Are the Best Substitutes for Common Allergens?
When substituting for common allergens, consider using alternatives like nut-free butters, dairy-free milk, and gluten-free flours. Experiment with recipes to find tasty replacements that work for your dietary needs.
How Can I Prevent Cross-Contamination in the Kitchen?
To prevent cross-contamination in the kitchen, use separate cutting boards, utensils, and cookware for different ingredients. Wash your hands and surfaces thoroughly between preparing different dishes. Thoroughly clean the kitchen before cooking for someone with food allergies.
Are There Any Tips for Dining Out With Food Allergies?
When dining out with food allergies, check the menu carefully, ask detailed questions about ingredients, and inform your server of your dietary needs. Bring your own condiments and be prepared to request modifications to menu items.
How Can I Make Recipes More Allergy-Friendly for Guests?
You can make recipes more allergy-friendly by substituting common allergens with safe alternatives, using fresh, whole-food ingredients, and clearly labeling dishes to avoid cross-contamination. Get creative with flavors and textures to satisfy everyone's dietary needs.
Cooking for Special Diets
Anti-Inflammatory Diet: Foods to Combat Chronic Inflammation
Jumpstart your journey to better health with the anti-inflammatory diet, a flavorful approach that harnesses the power of whole foods to fight chronic inflammation.
Looking to combat chronic inflammation and boost your overall health? The anti-inflammatory diet might be just what you need! This approach emphasizes delicious whole foods packed with nutrients that can help reduce inflammation. From omega-3 rich fish and antioxidant-filled fruits and veggies to soothing spices like turmeric, this diet offers a bounty of flavorful options. By incorporating these anti-inflammatory ingredients into your meals, you can not only manage various health conditions but also improve your digestion and mental clarity. Curious to learn more about the cooking steps and lifestyle changes involved? Keep reading to explore the ins and outs of this transformative dietary approach.
Key Takeaways
- An anti-inflammatory diet focuses on whole, nutrient-dense foods rich in omega-3 fatty acids, antioxidants, and phytochemicals to reduce chronic inflammation.
- Common anti-inflammatory ingredients include fish, flaxseeds, fruits, vegetables, olive oil, and spices like turmeric and ginger.
- Adopting an anti-inflammatory diet can enhance overall health, support immune function, and lower the risk of chronic diseases.
- Meal preparation for an anti-inflammatory diet emphasizes fresh produce, lean proteins, and mindful cooking techniques to preserve nutrient content.
- Committing to an anti-inflammatory lifestyle requires patience, as the benefits often manifest gradually with consistent dietary changes.
History
The anti-inflammatory diet has its roots in ancient medicinal practices, with references to its principles found in traditional systems of healing across the globe. For centuries, people have recognized the power of certain foods to reduce inflammation in the body.
In ancient China, practitioners of traditional Chinese medicine used herbs and dietary changes to address inflammatory conditions. Similarly, Ayurvedic medicine from India has long emphasized the importance of a balanced, whole-foods-based diet to promote overall health and well-being.
As modern science has advanced, researchers have begun to uncover the mechanisms behind the anti-inflammatory properties of various foods. Studies have shown that compounds like omega-3 fatty acids, antioxidants, and phytochemicals can help to calm inflammation at the cellular level.
This growing body of evidence has led to the popularization of the anti-inflammatory diet in recent decades, as people seek natural ways to manage chronic inflammatory conditions and support their overall health.
Recipe
Eating an anti-inflammatory diet can help reduce chronic inflammation and improve overall health. Incorporating anti-inflammatory spices like turmeric and ginger not only enhances flavor but also provides significant health benefits; studies show Turmeric's potent effects can help reduce markers of inflammation.
This recipe for a delicious and nutritious anti-inflammatory meal is easy to prepare and packed with beneficial ingredients. The combination of fresh vegetables, lean protein, and anti-inflammatory spices creates a flavorful and satisfying dish that can be enjoyed any time of day.
This recipe is a great option for those looking to incorporate more anti-inflammatory foods into their diet. Packed with nutrient-dense ingredients like turmeric, ginger, and leafy greens, it not only helps reduce inflammation but also adds vibrant flavors to your meals. For those with special dietary needs, you can easily adapt this recipe by exploring cooking tips for food allergies to ensure it’s safe and enjoyable for everyone. Whether you’re meal-prepping or cooking for the family, this dish is both nourishing and versatile.
- 4 boneless, skinless chicken breasts
- 2 cups mixed greens (such as spinach, kale, and arugula)
- 1 cup sliced bell peppers
- 1 cup diced cucumbers
- 1/4 cup sliced red onion
- 2 tablespoons olive oil
- 1 tablespoon balsamic vinegar
- 1 teaspoon ground turmeric
- 1/2 teaspoon ground ginger
- Salt and pepper to taste
Preheat the oven to 375°F. Season the chicken breasts with the turmeric, ginger, salt, and pepper. Place the chicken on a baking sheet and bake for 25-30 minutes, or until the internal temperature reaches 165°F.
While the chicken is cooking, prepare the salad by combining the mixed greens, bell peppers, cucumbers, and red onion in a large bowl. Whisk together the olive oil and balsamic vinegar, then drizzle over the salad and toss to coat.
Once the chicken is cooked, slice it and add it to the salad. Serve immediately.
To enhance the anti-inflammatory properties of this dish, consider adding additional anti-inflammatory ingredients such as avocado, walnuts, or a sprinkle of ground cinnamon. Enjoy this flavorful and nourishing meal as part of a balanced anti-inflammatory diet.
Cooking Steps
First, gather your ingredients and chop them up.
Next, sauté the veggies in a bit of olive oil until they're nice and tender.
Then, add your spices and seasonings to give it all that delicious flavor.
Now, stir in the rice and let it simmer until it's perfectly cooked.
Step 1. Prepare and Chop the Ingredients
To prepare the ingredients for your anti-inflammatory diet, begin by carefully chopping up the fresh vegetables and herbs.
You'll want to wash them thoroughly and pat them dry before cutting. Dice the onions, mince the garlic, and chop the leafy greens like spinach or kale into bite-sized pieces.
Remember to use a sharp knife to ensure clean, even cuts. For the fruits, such as berries or citrus, gently rinse and slice or dice them as needed.
Don't forget to zest the lemon or orange if the recipe calls for it. As you prepare each ingredient, place them in separate bowls so they're ready to go when you start cooking.
This step might take a little extra time, but it'll make the actual cooking process much smoother and quicker. Plus, having all your ingredients prepped and within reach will help you stay organized and focused while you cook.
Step 2. Sauté Vegetables in Olive Oil
Next, heat a large skillet or sauté pan over medium heat and add a tablespoon or two of high-quality extra virgin olive oil.
Once the oil is hot, carefully add the chopped vegetables to the pan. Be sure to spread them out in an even layer so they can sauté properly.
As the veggies cook, use a spatula to stir and flip them occasionally. This helps them brown evenly and absorb the delicious olive oil flavor.
Sauté the vegetables for about 5-7 minutes, or until they're tender and starting to caramelize around the edges.
Now, you can add any additional seasonings you'd like, such as garlic, herbs, or a pinch of salt and pepper.
Gently toss the veggies to coat them in the spices. Continue sautéing for another minute or two, until everything is fragrant and well-combined.
Once the vegetables are cooked to your liking, remove the pan from the heat.
You're now ready to build your anti-inflammatory meal by adding the sautéed veggies to your dish.
Step 3. Add Spices and Seasonings
Now that the vegetables have been sautéed, it's time to add any desired spices and seasonings. This is where you can really bring out the flavors and make the dish your own.
Reach for your favorite dried herbs like oregano, basil, or thyme. A sprinkle of garlic powder, onion powder, or paprika can also add delicious depth.
Don't be afraid to get a little adventurous – try a dash of cumin, chili powder, or curry powder for some warmth and complexity. Freshly ground black pepper is a must to finish it off.
Stir everything together and let the aromas fill your kitchen. The key is to start with a small amount of each spice and adjust to your taste. That way, you can find the perfect blend that tantalizes your taste buds.
Have fun experimenting and find the flavors that make this dish sing!
Step 4. Add Rice and Simmer
Once the vegetables are seasoned, go ahead and add the rice. You'll want to use a long-grain white rice or brown rice for the best texture. Gently pour the rice into the pot, making sure to evenly distribute it throughout the vegetables. Give everything a good stir to combine the flavors.
Now, it's time to add the liquid. Pour in some broth or stock, enough to just cover the rice and veggies. Bring the mixture to a gentle simmer, then reduce the heat to low, cover the pot, and let it cook for about 20 minutes. Resist the urge to lift the lid and peek – you want to keep all that delicious steam trapped inside!
After 20 minutes, the rice should be tender and the vegetables will be nicely cooked through. Fluff the rice with a fork and serve hot. The combination of the aromatic spices, fresh vegetables, and hearty rice makes for a satisfying and nourishing anti-inflammatory meal.
Step 5. Garnish With Fresh Herbs
To finish off your anti-inflammatory dish, you'll want to add a few fresh herbs as a garnish. These vibrant green leaves not only look beautiful, but they'll also infuse your meal with an extra burst of flavor. Try sprinkling some chopped parsley, basil, or cilantro over the top. The fresh, herbal notes will complement the other ingredients perfectly.
Additionally, many of these herbs possess their own anti-inflammatory properties, enhancing the health benefits of your meal.
Don't be afraid to get creative with your herb choices. Maybe you'll want to try something a little different, like rosemary or thyme. Just make sure to chop the herbs finely so they're evenly distributed.
You can even try tearing the leaves with your fingers for a more rustic look.
The herbs will add a lovely pop of color and a refreshing finish to your anti-inflammatory dish. Plus, many herbs are packed with their own anti-inflammatory properties, making them a wonderful addition to your healthy meal.
Final Thoughts
The anti-inflammatory diet's true power lies in its ability to transform your overall health and well-being. By choosing nutrient-rich, whole foods, you'll nourish your body and reduce inflammation.
This approach isn't a quick fix; it's a lifestyle change that takes time and commitment. But the rewards are immense. As you incorporate more anti-inflammatory ingredients into your meals, you may notice increased energy, improved digestion, and even a boost in your mood.
Don't be discouraged if change doesn't happen overnight. Stick with it, and you'll start to see the benefits. Savor the delicious flavors, and enjoy the process of preparing wholesome, healing meals.
Frequently Asked Questions
How Can I Modify This Diet for a Vegetarian Lifestyle?
To modify this diet for a vegetarian lifestyle, focus on incorporating more plant-based anti-inflammatory foods like leafy greens, berries, nuts, seeds, and whole grains. You can also include plant-based protein sources and healthy fats to support your dietary needs.
What Are the Potential Side Effects of an Anti-Inflammatory Diet?
While an anti-inflammatory diet can be beneficial, you may experience side effects like gastrointestinal discomfort, changes in bowel habits, and potential nutrient deficiencies if you don't properly plan your meals. Always consult a healthcare professional before making significant dietary changes.
Can I Combine This Diet With Other Dietary Restrictions?
You can certainly combine an anti-inflammatory diet with other dietary restrictions, but it's essential to consult a healthcare professional to ensure the combined approach meets your nutritional needs and doesn't interfere with any existing medical conditions or treatments.
How Long Should I Follow an Anti-Inflammatory Diet for Optimal Results?
You should follow an anti-inflammatory diet for at least 4-6 weeks to see optimal results. The duration can vary depending on your health condition and individual response, but consistent adherence is key for reducing inflammation effectively.
Are There Any Supplements That Can Complement This Dietary Approach?
Supplements like omega-3 fatty acids, turmeric, and ginger can complement an anti-inflammatory diet by providing additional anti-inflammatory benefits. However, it's best to consult your healthcare provider before starting any new supplement regimen.
Cooking for Special Diets
DASH Diet Recipes: Cooking to Lower Blood Pressure
Your ultimate guide to delectable, blood-pressure-lowering meals with the DASH diet – discover the secret to nourishing your body and pleasing your palate.
The DASH diet recipes are your secret weapon for lowering blood pressure through delectable, nutritious meals. This eating plan emphasizes fresh, whole-food ingredients like fruits, veggies, and lean proteins. Sauté your vegetables in olive oil, add a touch of tomato paste, then simmer until tender. Finish with a sprinkle of fragrant fresh herbs like parsley or basil – they'll uplift the flavors and provide extra health benefits. With the DASH diet, you can enjoy creative, satisfying dishes that nourish your body and please your palate. And there's more to discover about the benefits of this smart approach to cooking for special diets.
Key Takeaways
- DASH diet recipes feature fresh, whole-food ingredients rich in nutrients, fiber, and antioxidants to promote heart health and lower blood pressure.
- Sautéing vegetables in olive oil and adding tomato paste enhances flavors and achieves tenderness, creating a savory base for DASH diet recipes.
- Incorporating fresh herbs like parsley, basil, or oregano at the end of cooking adds color, aroma, and complex flavor profiles to DASH diet dishes.
- The DASH diet encourages creativity and experimentation with various ingredient combinations to develop healthy and satisfying recipes.
- Following the DASH diet has been proven effective in lowering blood pressure and improving overall health, making it a suitable dietary choice for those with special health needs.
History
The DASH (Dietary Approaches to Stop Hypertension) diet was developed in the early 1990s by a team of researchers at the National Institutes of Health. They wanted to find a way to help people lower their blood pressure without relying on medication.
Through their studies, they discovered that eating certain foods, like fruits, vegetables, and whole grains, could make a big difference.
The DASH diet quickly became popular because it's easy to follow and doesn't require any special or expensive ingredients. It focuses on eating plenty of nutrient-rich foods and limiting sodium, fat, and sugar.
Over the years, the DASH diet has been shown to not only lower blood pressure but also improve heart health and reduce the risk of other chronic conditions, like diabetes and certain types of cancer.
Today, the DASH diet is one of the most recommended eating plans for people looking to improve their overall well-being.
With its delicious and healthy recipes, it's a great way to nourish your body and mind.
Recipe
The DASH (Dietary Approaches to Stop Hypertension) diet is a healthy eating plan designed to help lower blood pressure and improve overall cardiovascular health. This recipe for a delicious and nutritious dish is perfect for those following the DASH diet.
This dish is a flavorful and satisfying meal that can be enjoyed as a main course or a side. It features a variety of fresh, whole-food ingredients that are packed with essential nutrients, fiber, and antioxidants.
The combination of lean protein, complex carbohydrates, and healthy fats will help to keep you feeling full and satisfied.
Ingredients:
- 1 cup quinoa, rinsed
- 2 cups low-sodium vegetable broth
- 1 cup diced tomatoes
- 1 cup diced cucumber
- 1/2 cup chopped red onion
- 1/4 cup chopped fresh parsley
- 2 tablespoons lemon juice
- 1 tablespoon olive oil
- 1/2 teaspoon ground cumin
- 1/4 teaspoon salt
- 1/4 teaspoon black pepper
Cooking Instructions:
In a medium saucepan, combine the quinoa and vegetable broth. Bring to a boil, then reduce heat to low, cover, and simmer for 15-20 minutes, or until the quinoa is tender and the liquid is absorbed.
Remove from heat and fluff with a fork. Allow to cool slightly.
In a large bowl, combine the cooked quinoa, diced tomatoes, diced cucumber, chopped red onion, and chopped parsley. Drizzle with lemon juice and olive oil, and season with cumin, salt, and black pepper. Toss gently to coat.
Extra Tips:
This dish can be served warm or chilled, making it a great option for a quick and easy lunch or a light dinner.
For added protein, you can top it with grilled chicken or shrimp. The quinoa can also be replaced with other whole grains, such as brown rice or farro, to change up the texture and flavor.
Cooking Steps
Start by rinsing and chopping your veggies.
Next, sauté them in a bit of olive oil until they're tender.
Then, stir in some tomato paste and let it all simmer until the vegetables are cooked through.
Don't forget to sprinkle on some fresh herbs at the end for extra flavor!
Step 1. Rinse and Chop Vegetables
Begin by thoroughly rinsing all the vegetables you'll be using. This helps remove any dirt or debris that may be on them.
Once they're rinsed, place them on a clean cutting board. Grab your sharpest knife and carefully chop the vegetables into the sizes needed for your recipe.
Go slowly and pay close attention to ensure you don't cut yourself. If you're dicing an onion, for example, cut it in half first, then thinly slice each half before chopping across the slices. This creates uniform, bite-size pieces.
For leafy greens like spinach or kale, stack the leaves, roll them up, then slice through to create thin ribbons.
As you chop, try to keep the pieces similar in size so they cook evenly. Consistent cutting also makes for a more attractive final dish.
When you're done, you'll have all your veggies prepped and ready to cook! Just add them to your pot or pan and continue with the recipe.
Step 2. Sauté Veggies in Olive Oil
After chopping your veggies, it's time to sauté them in olive oil. This simple cooking technique brings out the natural flavors and adds a delicious, golden-brown color to your veggies.
Start by heating a large skillet over medium heat and add a tablespoon or two of olive oil. Once the oil is hot, carefully add your chopped veggies. Spread them out in a single layer so they've plenty of room to cook.
Let the veggies sauté for 5-7 minutes, stirring occasionally, until they're tender and slightly crispy. Be sure to keep an eye on them, as you don't want them to burn. Adjust the heat as needed to achieve the perfect sauté.
Once your veggies are done, you can season them with a pinch of salt, pepper, or your favorite herbs and spices.
Serve them as a side dish or incorporate them into your favorite DASH-friendly recipes. Sautéing is a quick and easy way to enjoy the fresh, crunchy texture of your vegetables.
Step 3. Add Tomato Paste
With the sautéed vegetables ready, the next step is to incorporate tomato paste. Tomato paste is a concentrated form of tomatoes that adds a rich, savory flavor to your dish.
The addition of tomato paste can also enhance your emotional well-being, as engaging in the cooking process can serve as a calming practice, similar to the ritual of brewing tea.
Grab a spoonful of tomato paste and stir it into the sautéed veggies. As you mix it in, you'll notice the mixture start to thicken and take on a deeper, reddish-brown hue. The tomato paste will help to bind all the flavors together, creating a harmonious blend.
Keep stirring until the tomato paste is fully incorporated. This step enhances the overall taste and texture of the dish, preparing it for the next addition.
The combination of sautéed vegetables and tomato paste lays the foundation for a delicious and satisfying DASH-friendly meal. Continue following the recipe, adding the remaining ingredients to bring this healthy dish to life.
Step 4. Simmer Until Vegetables Are Tender
Now that the tomato paste has been stirred in, it's time to let the flavors meld. Reduce the heat to medium-low and let the mixture simmer. This gentle heat will allow the vegetables to become tender and the flavors to blend together beautifully.
As the vegetables cook, consider enjoying a cup of herbal tea to enhance relaxation and complement your meal.
Stirring occasionally, let the mixture simmer for about 15-20 minutes. You'll know the vegetables are done when they're easily pierced with a fork. The carrots and celery should be soft, and the onions should be translucent. Keep an eye on the pot, adding a splash of broth or water if the mixture starts to look dry.
As the vegetables simmer, the aroma will fill your kitchen, making your mouth water in anticipation. The rich, savory flavors will meld together, creating a delightful and satisfying base for your DASH-friendly meal.
Patience is key here, as the slow simmering process allows the ingredients to truly come together.
Step 5. Sprinkle With Fresh Herbs
Once the vegetables have simmered and reached the desired tenderness, it's time to introduce the bright, fresh flavors of herbs. Adding fresh herbs can't only enhance the taste but also provide nutritional benefits, like those found in celery juice and pregnancy, which are rich in vitamins beneficial for overall health.
Sprinkle a generous amount of your favorite fresh herbs over the top of the dish. Chopped parsley, basil, or oregano work beautifully, adding a pop of color and an aromatic boost. You can use just one herb or combine a few for a more complex flavor profile.
Gently stir the herbs into the vegetables, taking care not to mash or bruise them. This gentle incorporation allows the herbs' flavors to infuse the entire dish. The fresh herbs will instantly uplift the flavors, complementing the simmered vegetables perfectly.
Their fragrance will fill your kitchen, making your senses come alive. Enjoy the contrast of the tender vegetables and the vibrant, herbal notes. This simple step transforms the dish, elevating it from ordinary to extraordinary.
Final Thoughts
The DASH diet is a versatile and effective approach to healthy eating that can benefit individuals of all ages and dietary preferences.
By focusing on nutrient-dense foods like fruits, vegetables, whole grains, and lean proteins, the DASH diet provides a delicious and satisfying way to lower blood pressure and improve overall health.
As you've seen, the recipes in this article showcase the incredible flexibility of the DASH diet.
Whether you're looking for a hearty main dish, a flavorful side, or a sweet treat, there are endless options to explore.
Don't be afraid to get creative and try new combinations of ingredients – the DASH diet encourages experimentation and a love of good food. You might discover unexpected flavor pairings that not only excite your taste buds but also provide numerous health benefits. Incorporating items from the antiinflammatory diet foods list can further enhance your meals by including nutrient-rich options like leafy greens, colorful fruits, and omega-3-rich fish. By combining these foods with DASH diet principles, you can create satisfying dishes that support overall wellness and help reduce inflammation.
Frequently Asked Questions
What Is the Sodium Content in DASH Diet Recipes?
The sodium content in DASH diet recipes is generally low, as the focus is on including whole, unprocessed foods and limiting high-sodium ingredients. You'll find these recipes emphasize fresh produce, lean proteins, and low-sodium seasonings to help manage your blood pressure.
Can DASH Diet Recipes Be Modified for Vegetarians/Vegans?
Yes, you can easily modify DASH diet recipes to make them vegetarian or vegan-friendly. Swap out animal-based proteins with plant-based options, adjust seasonings, and focus on incorporating plenty of fruits, vegetables, whole grains, and legumes.
How Long Do DASH Diet Recipes Take to Prepare?
DASH diet recipes typically take 30-60 minutes to prepare. They emphasize whole, unprocessed ingredients which require some chopping and cooking, but most can be made in under an hour with a bit of planning and preparation.
Are DASH Diet Recipes Suitable for People With Diabetes?
Yes, DASH diet recipes are suitable for people with diabetes. The DASH diet emphasizes whole, nutrient-dense foods that are low in sodium and high in fiber, which can help manage blood sugar levels effectively.
Can DASH Diet Recipes Be Frozen for Later Use?
You can definitely freeze DASH diet recipes for later use. The key is to choose recipes that freeze well and follow proper food storage techniques to maintain quality and safety. This makes meal prep a breeze.
-
Brazilian Cuisine3 months ago
Tacacá
-
Brazilian Cuisine3 months ago
Caldeirada
-
Polish Comfort Food3 months ago
Krupnik (Barley Soup)
-
Brazilian Cuisine3 months ago
Chicken in Brown Sauce
-
Southern Comfort Food3 months ago
Cheese Straws
-
African Cuisine3 months ago
Kedjenou (Ivory Coast)
-
Polish Comfort Food3 months ago
Vegetable Salad
-
American Diner Classics3 months ago
The Maillard Reaction: Understanding the Chemistry of Browning {Food Science and Cooking}