Cooking for Special Diets
Intermittent Fasting and Keto: Combining Dietary Strategies
Leveraging the power of intermittent fasting and the keto diet can unlock a synergistic approach to supercharge your health and fitness goals.
Combining intermittent fasting and the keto diet can supercharge your health and fitness goals. By cycling between eating and fasting periods, you'll enter ketosis faster, boosting fat-burning. Fuel up on nutrient-dense keto-friendly foods like avocados, coconut oil, and leafy greens during eating windows for sustained energy. Coconut milk is a versatile ingredient that adds creaminess without the carbs. Remember, everyone responds differently, so work closely with your healthcare provider and tune in to your body's signals. Ready to dive deeper into this dynamic dietary duo?
Key Takeaways
- Combining intermittent fasting and the keto diet can facilitate entry into ketosis, enhancing fat burning and supporting weight loss.
- Intermittent fasting during keto provides sustained energy levels and improves overall health through nutrient-dense meals.
- Keto-friendly recipes focus on healthy fats, low-carb vegetables, and protein sources, suitable for meals during eating windows or snacks during fasting.
- Coconut milk can be used as a dairy-free, low-carb alternative in keto recipes, adding creaminess and healthy fats.
- Consulting healthcare professionals and monitoring individual responses is recommended when implementing a combined intermittent fasting and keto approach.
History
Intermittent fasting and the keto diet have a long and intertwined history, dating back centuries. Ancient cultures, like the Greeks and Romans, often practiced intermittent fasting for religious or spiritual reasons.
Meanwhile, the origins of the keto diet can be traced to the high-fat, low-carb diets used to treat epilepsy in the 1920s. Over time, both approaches evolved, with intermittent fasting gaining popularity as a weight loss strategy and the keto diet becoming a mainstream dietary trend.
Today, these two practices are frequently combined, as they can complement each other well. Intermittent fasting can help the body enter a state of ketosis, the metabolic process that the keto diet aims to achieve.
This synergy has made the "intermittent fasting and keto" approach an increasingly common and effective way for people to improve their health, boost their energy, and reach their fitness goals.
Recipe
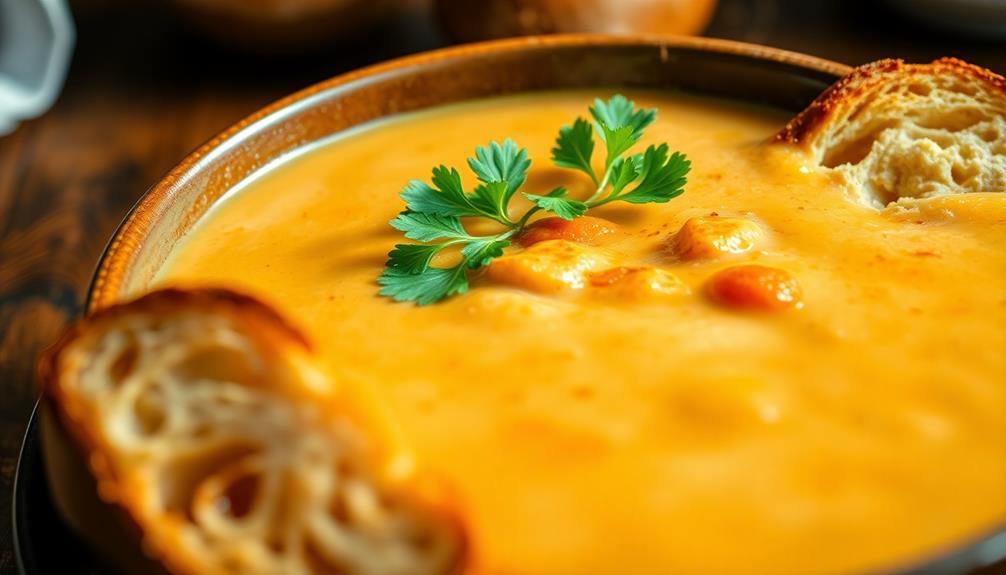
Intermittent fasting and the ketogenic diet can be a powerful combination for achieving your health and fitness goals. This recipe for a delicious keto-friendly dish is perfect for those following an intermittent fasting lifestyle.
Incorporating healthy fats and nutrient-dense ingredients, this recipe will nourish your body while keeping you in a state of ketosis. Whether you're looking for a satisfying meal during your eating window or a tasty snack to enjoy during your fast, this dish is sure to hit the spot. For those transitioning to a ketogenic diet, this recipe offers a delicious way to stay on track and meet your nutritional needs. By using ingredients that are high in healthy fats and low in carbohydrates, this dish supports the body’s metabolic shift towards using fat as its primary source of energy. So, whether you’re a seasoned keto eater or just starting out, this recipe is a great addition to your meal rotation. If you’re in the process of transitioning to ketosis, this recipe’s balance of healthy fats and nutrient-dense ingredients can help support your body’s adaptation to this metabolic state. By fueling your body with the right combination of nutrients, you can make the transition to ketosis smoother and more sustainable. With a focus on whole, natural foods, this recipe is a delicious way to nourish your body while making the shift towards a ketogenic lifestyle.
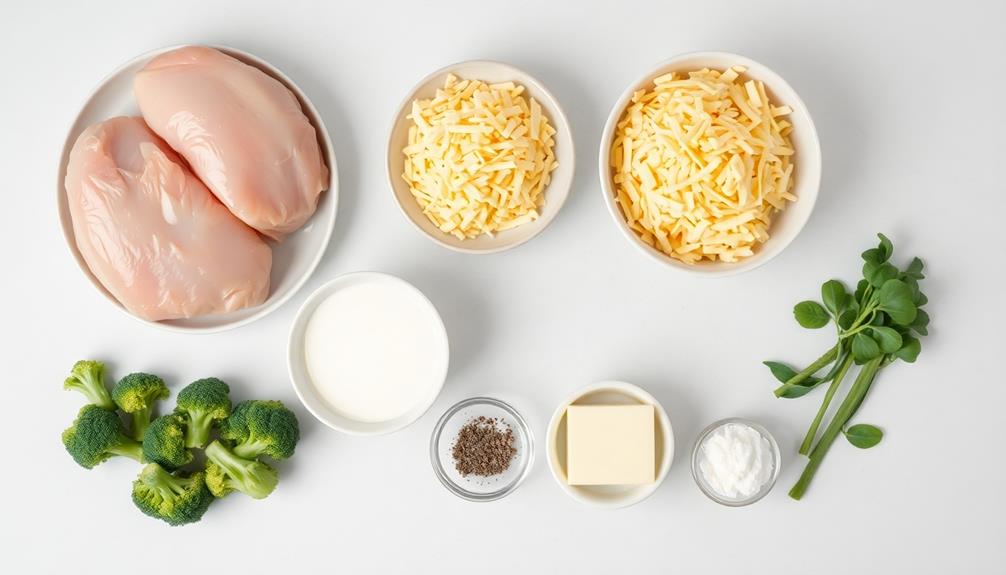
- 1 lb boneless, skinless chicken thighs
- 2 cups broccoli florets
- 1/2 cup shredded cheddar cheese
- 1/4 cup heavy cream
- 2 tablespoons butter
- 1 teaspoon garlic powder
- 1/2 teaspoon salt
- 1/4 teaspoon black pepper
Preheat your oven to 375°F (190°C). In a large, oven-safe skillet, melt the butter over medium heat. Add the chicken thighs and sear them on both sides until golden brown, about 3-4 minutes per side.
Transfer the skillet to the preheated oven and bake the chicken for 20-25 minutes, or until it reaches an internal temperature of 165°F (75°C).
Remove the skillet from the oven and add the broccoli florets. Pour the heavy cream over the top, and sprinkle the garlic powder, salt, and black pepper.
Top the dish with the shredded cheddar cheese. Return the skillet to the oven and bake for an additional 10-15 minutes, or until the broccoli is tender and the cheese is melted and bubbly.
Cooking Steps
First, gather the required ingredients for this recipe.
Next, heat the coconut oil in a pan and sauté the vegetables until they're nice and tender.
Step 1. Gather Required Ingredients
To begin, you'll need to gather a few key ingredients for your intermittent fasting and keto meal. First, you'll want to stock up on healthy fats like avocado, olive oil, and coconut oil. These will be the foundation of your dishes, providing sustained energy and nourishment.
Incorporating essential oils can also enhance your cooking experience; for example, unlock aromatic cleaning power can create a more pleasant kitchen environment.
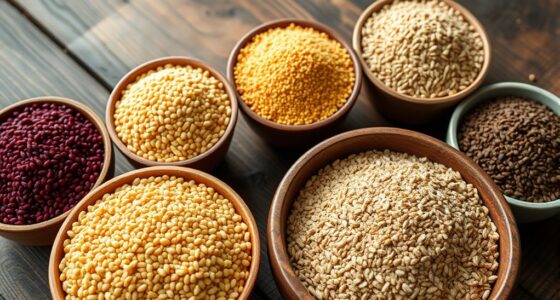
You'll also need some low-carb vegetables, such as leafy greens, broccoli, and cauliflower. These will add essential vitamins, minerals, and fiber to your meals.
Don't forget some protein sources, like chicken, fish, eggs, or tofu. These will help keep you feeling full and satisfied.
Finally, you may want to have some keto-friendly snacks on hand, like nuts, seeds, or low-carb berries.
With these ingredients, you'll be well on your way to crafting delicious and nutritious intermittent fasting and keto-friendly meals.
Remember to adjust portion sizes and experiment to find what works best for your individual needs and preferences.
Step 2. Add Coconut Oil
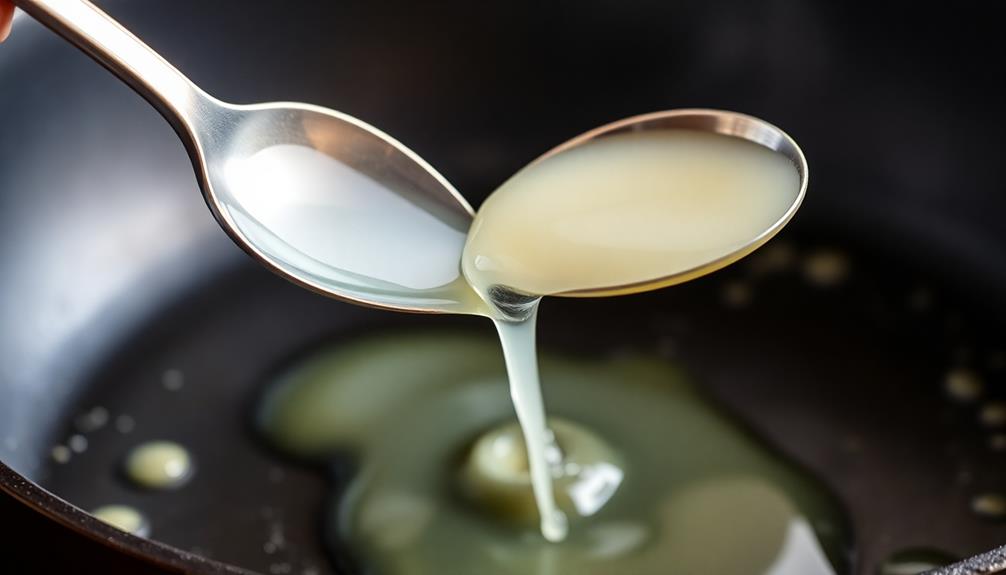
Next, add 1-2 tablespoons of coconut oil to your cooking pan or skillet. Coconut oil is a fantastic choice when following the keto diet, as it's high in healthy fats that can help keep you feeling full and satisfied.
Additionally, incorporating coconut oil into your meals can provide a quick source of energy due to its medium-chain triglycerides (MCTs) content, which can support ketone production and enhance fat burning for those on a keto diet high in healthy fats.
When the oil is heated, it'll melt into a liquid, making it easy to coat your pan. This step helps prevent sticking and ensures your keto-friendly ingredients cook evenly.
As the oil heats up, you'll notice a subtle, nutty aroma fill the air. Coconut oil has a relatively high smoke point, meaning you can cook at higher temperatures without it burning. This makes it perfect for sautéing, frying, or roasting your low-carb veggies and proteins.
Just be mindful not to overheat it, as that can cause the oil to break down and lose some of its beneficial properties.
Once the oil is shimmering, you're ready to add your other keto ingredients and start cooking! The coconut oil will help everything brown beautifully and lock in those delicious flavors.
Step 3. Saute Vegetables in Coconut Oil
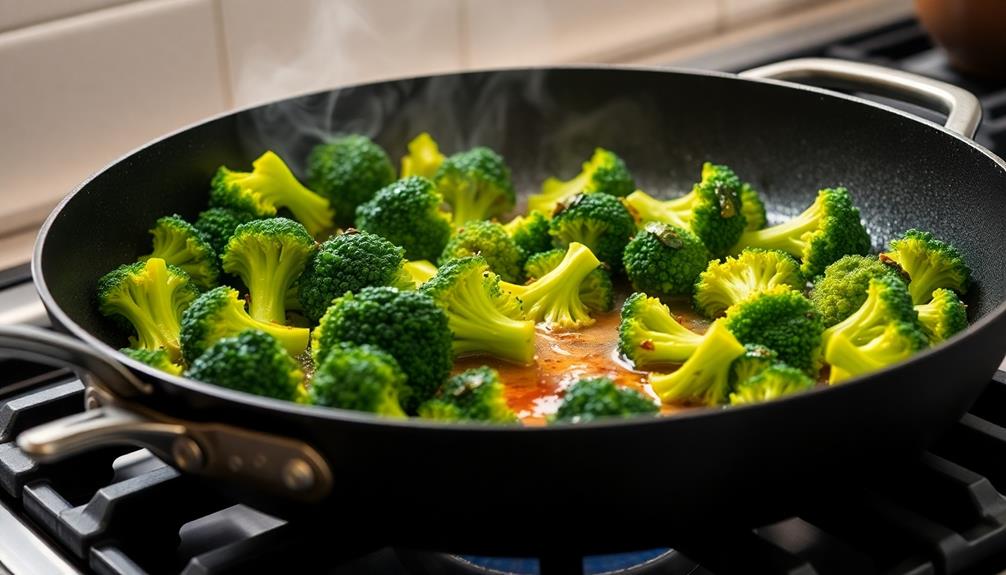
With the coconut oil now heated and ready, it's time to add your low-carb vegetables. Chop up a variety of veggies like zucchini, bell peppers, and onions. Toss them into the pan and let them sizzle.
The coconut oil will infuse the vegetables with a subtle sweetness and crisp them up perfectly. Not only does coconut oil enhance flavor, but it also offers a nutrient boost that can complement your nutrient-dense vegetarian options.
Stir the veggies occasionally to ensure they cook evenly. You'll want them to be tender but still have a bit of bite. Once they've reached your desired texture, remove the pan from the heat.
The coconut oil will give the vegetables a lovely sheen and a nutrient boost. Pair these sautéed veggies with grilled protein for a complete keto-friendly meal. You can also add them to salads or serve them as a tasty side dish.
The options are endless! Get creative and enjoy the delicious, healthy flavor of coconut oil-sautéed vegetables.
Step 4. Add Spices
After the vegetables have sizzled in the coconut oil, it's time to add some spices. This is where you can really add a punch of flavor to your dish.
Start by sprinkling in a teaspoon of cumin and a half-teaspoon of chili powder. The cumin will give the vegetables an earthy, aromatic taste, while the chili powder will provide a nice heat.
Next, add a quarter-teaspoon of garlic powder and a pinch of salt and pepper. The garlic powder will amp up the savory notes, and the salt and pepper will help balance the flavors. Be sure to stir the spices in thoroughly so they coat the vegetables evenly.
If you want to get extra fancy, you can also add a dash of smoked paprika or a sprinkle of dried oregano. These additional spices will give your dish a depth of flavor that will have your taste buds dancing.
Just remember, a little goes a long way when it comes to spices, so start with small amounts and adjust to your liking.
Step 5. Add Coconut Milk
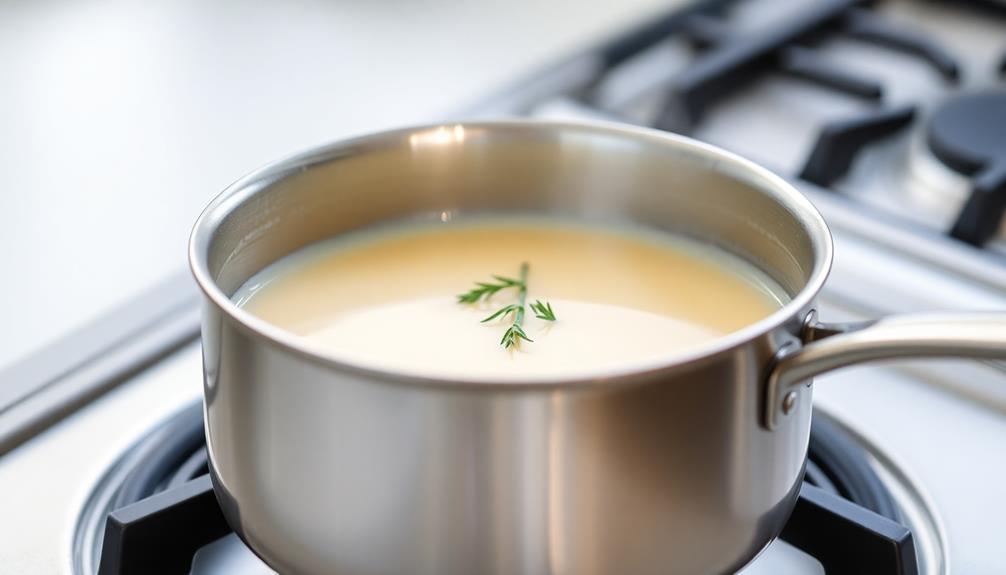
Now, pour in the coconut milk. This creamy addition will infuse your dish with a rich, tropical flavor. Coconut milk is a great way to add healthy fats to your keto-friendly meal. It's packed with medium-chain triglycerides (MCTs), which can help boost ketone production and support weight loss efforts.
When cooking with coconut milk, be sure to give it a good stir to incorporate it evenly throughout the dish. You can use coconut milk to create sauces, soups, curries, and more. It pairs especially well with spices like turmeric, ginger, and chili peppers.
Start with a small amount of coconut milk and add more to reach your desired consistency. A little goes a long way, so you don't want to overdo it.
Coconut milk can also be used to replace dairy in many recipes, making it a versatile ingredient for your keto kitchen. Enjoy the creamy, coconut goodness!
Final Thoughts
As you've explored the potential benefits of intermittent fasting and the keto diet, it's important to remember that any dietary changes should be approached with caution and in consultation with a healthcare professional.
While these strategies can be powerful tools for weight management and overall health, they aren't one-size-fits-all solutions.
It's crucial to listen to your body and make adjustments as needed.
Some people may thrive on intermittent fasting and keto, while others may find these approaches challenging or even detrimental to their well-being.
Pay attention to how you feel, monitor your energy levels, and be willing to tweak your approach to find what works best for you.
Frequently Asked Questions
How Do I Know if Intermittent Fasting Is Right for Me?
You'll know if intermittent fasting is right for you if it aligns with your lifestyle, goals, and health needs. Consider your eating habits, schedule, and any underlying conditions to determine if this approach could benefit you.
Can I Drink Coffee During My Fasting Period?
Sure, you can drink black coffee during your fasting period. Just be mindful that some additions like milk, sugar, or creamers may break your fast. Keep it simple and stick to plain, unsweetened coffee to stay in a fasted state.
What Are the Potential Side Effects of Combining Keto and Fasting?
When you combine keto and fasting, you may experience side effects like fatigue, headaches, irritability, and difficulty concentrating. It's important to monitor your body's response and adjust your approach accordingly to minimize any potential negative impacts.
How Long Should I Fast for Optimal Benefits?
You should start with shorter fasts, like 12-16 hours, and gradually increase the duration to 18-24 hours as your body adapts. This allows your body to reap the benefits of fasting without experiencing negative side effects.
Can I Exercise During My Fasting Periods?
Yes, you can exercise during your fasting periods. In fact, exercising while fasting can provide additional benefits, such as improved fat-burning and increased growth hormone production. Just be sure to listen to your body and adjust your workout intensity as needed.
Cooking for Special Diets
Cooking for Food Allergies: Safe and Delicious Alternatives
Prepare delectable dishes that cater to various food allergies, unlocking a world of culinary exploration and satisfying meals that please every palate.
Cooking for food allergies can be an exciting challenge! Rather than seeing dietary restrictions as limiting, you can discover delicious and nourishing alternatives. From ancient civilizations to modern science, understanding food allergies opens up a world of creative cooking. With careful preparation and techniques like sautéing veggies and using a food processor, you can craft satisfying meals free of common allergens. Artfully plating the final dish and experimenting with flavors makes mealtime truly special. By staying informed and engaged, you'll unlock a whole new appreciation for the joy of cooking for diverse dietary needs. There's more to discover when it comes to allergy-friendly cuisine.
Key Takeaways
- Understand the underlying causes and symptoms of food allergies to identify safe and nourishing ingredient substitutions for allergy-friendly cooking.
- Develop recipes using nutrient-dense, allergy-friendly ingredients like fresh vegetables, lentils, and spices to create satisfying and versatile meals.
- Employ careful preparation techniques, such as thorough cleaning and ingredient separation, to prevent cross-contamination and ensure food safety.
- Experiment with cooking methods and flavor profiles to craft delectable allergy-friendly dishes that cater to diverse dietary needs.
- Stay informed on the latest research in food allergies and engage with the allergy-friendly cooking community to continuously enhance your culinary skills.
History
Food allergies have a long and complex history, tracing back to ancient civilizations. In those early days, people didn't fully understand what caused these reactions. They thought it might be curses, bad spirits, or something in the food itself.
Over time, scientists started to uncover the real reasons behind food allergies. They learned that the immune system plays a big role. When someone with a food allergy eats that food, their body goes into overdrive, trying to fight it off. This can cause all sorts of symptoms, from rashes to trouble breathing.
Nowadays, we know a lot more about food allergies. Doctors can test for them and help people figure out which foods to avoid.
And cooks have gotten really good at making delicious, allergy-friendly meals. They use special ingredients and techniques to make sure everyone can enjoy the food, no matter their allergies.
It's an exciting time, with so many tasty options for people with food allergies!
Recipe
Navigating the culinary world with food allergies can be a daunting task, but with the right recipes, you can create delicious and safe meals. This recipe for a gluten-free, dairy-free, and nut-free dish is a perfect example of how to cater to various dietary restrictions without compromising on flavor.
Incorporating nutrient-dense ingredients can help ensure that you're meeting your nutritional needs while avoiding allergens. This dish is a versatile and hearty meal that can be enjoyed for lunch or dinner. The combination of fresh vegetables, protein-packed lentils, and aromatic spices creates a satisfying and nutritious dish that's sure to please even the most discerning palate.
Ingredients:
- 1 cup dried brown lentils, rinsed
- 2 cups vegetable broth
- 1 tablespoon olive oil
- 1 onion, diced
- 2 cloves garlic, minced
- 1 red bell pepper, diced
- 1 cup diced zucchini
- 1 teaspoon cumin
- 1 teaspoon paprika
- 1/2 teaspoon dried oregano
- 1/4 teaspoon cayenne pepper (optional, for a spicy kick)
- Salt and black pepper to taste
- Chopped fresh parsley for garnish (optional)
Instructions:
In a medium saucepan, combine the lentils and vegetable broth. Bring the mixture to a boil, then reduce the heat and simmer for 20-25 minutes, or until the lentils are tender and the liquid is absorbed. Set aside.
In a large skillet, heat the olive oil over medium heat. Add the onion and garlic, and sauté for 2-3 minutes, or until fragrant and translucent.
Add the bell pepper and zucchini, and continue cooking for an additional 5-7 minutes, or until the vegetables are tender. Stir in the cooked lentils, cumin, paprika, oregano, and cayenne pepper (if using).
Season with salt and black pepper to taste. Cook for an additional 2-3 minutes, or until the flavors are well combined.
Tips:
To make this dish even more filling, you can serve it over a bed of steamed quinoa or rice. Additionally, you can customize the vegetables to your liking, using a variety of seasonal produce.
For a boost of protein, you can also add a can of drained and rinsed chickpeas or kidney beans. Remember to always read labels carefully to ensure that all ingredients are suitable for your specific dietary needs.
Cooking Steps
First, gather all the necessary ingredients.
Next, chop the vegetables into bite-size pieces.
Then, sauté the vegetables in oil or butter, add your protein and seasonings, and serve the dish immediately on a warm plate.
Step 1. Gather All Necessary Ingredients
The first step in preparing a meal for those with food allergies is to gather all the necessary ingredients. This may seem obvious, but it's crucial to ensure you have everything you need before you start cooking. Checking your pantry and fridge to make sure you have all the allergy-friendly items on your recipe list can help you avoid surprises.
Additionally, consider incorporating calming beverages like herbal tea, which can complement your meal and provide health benefits. Don't forget to read the labels carefully, as some ingredients may contain hidden allergens.
Once you've gathered your ingredients, arrange them on your countertop or workspace. This will help you stay organized and keep track of what you've added to the dish.
If you're working with multiple allergens, it's a good idea to keep the ingredients separated to avoid cross-contamination. Remember to wash your hands and clean your work area thoroughly before you begin cooking.
Step 2. Chop All Vegetables Into Bite-Size Pieces
Next, chop all the vegetables into bite-size pieces. This is an important step to ensure even cooking and make it easier for your guests to enjoy the meal.
Using a sharp knife, carefully slice the carrots, bell peppers, and zucchini into small, uniform cubes. For the onions, peel off the outer layers and chop them into small pieces. Remember to handle the knife with care and keep your fingers curled under to avoid any accidents.
If you have a food processor, you can use it to quickly and evenly chop the veggies. Just be sure not to over-process them, as you want them to maintain a nice texture. Incorporating fresh herbs like cilantro can also enhance the flavor and provide health benefits for dogs in moderation.
Once everything is chopped, give the vegetables a gentle toss to mix them together. This will help the flavors meld and create a visually appealing dish.
With the vegetables all prepped, you're one step closer to a delicious, allergy-friendly meal.
Step 3. Sauté Vegetables in Oil or Butter
Frequently, sauté the chopped vegetables in a small amount of high-quality oil or butter over medium heat. This method helps to soften and caramelize the vegetables, bringing out their natural flavors.
Be sure to stir the vegetables occasionally to ensure even cooking. If you're using butter, keep a close eye to prevent it from burning. The key is to cook the vegetables until they're tender but still have a slight bite. This usually takes around 5-7 minutes, depending on the size of the pieces.
For extra flavor, try adding a pinch of salt, pepper, or your favorite herbs and spices. Sautéing is a great way to prepare vegetables for a variety of dishes, from stir-fries to omelets.
Experiment with different oil and vegetable combinations to find your favorite flavors. Remember to always adjust the heat and cooking time to suit your personal preferences.
Step 4. Add Protein and Seasonings
After sautéing your vegetables to perfection, it's time to add protein and seasonings to create a well-rounded and flavorful dish. Choosing the right protein can make all the difference. Consider lean options like chicken, turkey, or tofu to keep your meal allergy-friendly.
Simply add your protein of choice and let it cook through, stirring occasionally.
Next, it's time to season your dish. Experiment with a variety of herbs and spices to find the flavors you enjoy. Garlic, onion, and a pinch of salt and pepper are classic starts.
For a little extra zing, try a squeeze of lemon or a sprinkle of paprika. Remember, the key is to build layers of flavor, so don't be afraid to get creative with your seasoning combinations.
As the aromas fill your kitchen, you'll know you're on your way to a delicious, allergy-safe meal.
Step 5. Serve Immediately on Warm Plate
Dish up the prepared meal immediately onto a warmed plate for a professional presentation. This simple step makes all the difference! The hot dish will look and taste its best when served right away. Plus, it shows your guests you've taken the time to create a meal tailored just for them.
After all your hard work, you'll want to showcase the final product. Transferring the food to a heated plate helps it maintain the perfect temperature. This prevents the flavors from getting dull or the textures from becoming soggy. Your carefully crafted dish deserves to be savored at its peak!
When plating, arrange the components artfully. Drizzle sauces, sprinkle garnishes, and place items with intention. This elevates the presentation, making the meal feel more special. Your guests will appreciate the thoughtful touches.
Serve promptly for maximum enjoyment and to ensure those food allergies are properly avoided. With a warm plate and a beautiful display, you're ready to impress!
Final Thoughts
Cooking for those with food allergies can be a rewarding yet challenging endeavor. You've learned how to identify hidden ingredients, use safe substitutions, and serve food that's both allergy-friendly and delicious.
Remember, with a little creativity and resourcefulness, you can prepare meals that cater to everyone's needs. This can include exploring a variety of cuisines, trying new ingredients, or tailoring dishes to meet specific dietary preferences. For those managing high blood pressure, incorporating dash diet recipes for hypertension can be a delicious and effective way to promote heart health. By making simple swaps and focusing on fresh, nutrient-rich foods, you can create meals that are both satisfying and beneficial for your well-being.
Don't be discouraged if a recipe doesn't turn out exactly as planned. Embrace the process of experimentation and enjoy the journey of discovering new flavors. You might even find that your allergy-friendly dishes become family favorites.
As you continue your culinary adventures, stay informed about the latest research and trends in food allergies. This will help you adapt recipes and stay ahead of the curve.
Most importantly, have fun in the kitchen! Cooking for those with food allergies is an opportunity to showcase your skills and spread joy through nourishing meals.
Frequently Asked Questions
How Do I Identify Food Allergens in Recipes?
To identify food allergens in recipes, carefully read through the ingredient list and look for common allergens like nuts, dairy, eggs, wheat, soy, and seafood. Pay close attention to how ingredients are listed to spot potential allergens.
What Are the Best Substitutes for Common Allergens?
When substituting for common allergens, consider using alternatives like nut-free butters, dairy-free milk, and gluten-free flours. Experiment with recipes to find tasty replacements that work for your dietary needs.
How Can I Prevent Cross-Contamination in the Kitchen?
To prevent cross-contamination in the kitchen, use separate cutting boards, utensils, and cookware for different ingredients. Wash your hands and surfaces thoroughly between preparing different dishes. Thoroughly clean the kitchen before cooking for someone with food allergies.
Are There Any Tips for Dining Out With Food Allergies?
When dining out with food allergies, check the menu carefully, ask detailed questions about ingredients, and inform your server of your dietary needs. Bring your own condiments and be prepared to request modifications to menu items.
How Can I Make Recipes More Allergy-Friendly for Guests?
You can make recipes more allergy-friendly by substituting common allergens with safe alternatives, using fresh, whole-food ingredients, and clearly labeling dishes to avoid cross-contamination. Get creative with flavors and textures to satisfy everyone's dietary needs.
Cooking for Special Diets
Anti-Inflammatory Diet: Foods to Combat Chronic Inflammation
Jumpstart your journey to better health with the anti-inflammatory diet, a flavorful approach that harnesses the power of whole foods to fight chronic inflammation.
Looking to combat chronic inflammation and boost your overall health? The anti-inflammatory diet might be just what you need! This approach emphasizes delicious whole foods packed with nutrients that can help reduce inflammation. From omega-3 rich fish and antioxidant-filled fruits and veggies to soothing spices like turmeric, this diet offers a bounty of flavorful options. By incorporating these anti-inflammatory ingredients into your meals, you can not only manage various health conditions but also improve your digestion and mental clarity. Curious to learn more about the cooking steps and lifestyle changes involved? Keep reading to explore the ins and outs of this transformative dietary approach.
Key Takeaways
- An anti-inflammatory diet focuses on whole, nutrient-dense foods rich in omega-3 fatty acids, antioxidants, and phytochemicals to reduce chronic inflammation.
- Common anti-inflammatory ingredients include fish, flaxseeds, fruits, vegetables, olive oil, and spices like turmeric and ginger.
- Adopting an anti-inflammatory diet can enhance overall health, support immune function, and lower the risk of chronic diseases.
- Meal preparation for an anti-inflammatory diet emphasizes fresh produce, lean proteins, and mindful cooking techniques to preserve nutrient content.
- Committing to an anti-inflammatory lifestyle requires patience, as the benefits often manifest gradually with consistent dietary changes.
History
The anti-inflammatory diet has its roots in ancient medicinal practices, with references to its principles found in traditional systems of healing across the globe. For centuries, people have recognized the power of certain foods to reduce inflammation in the body.
In ancient China, practitioners of traditional Chinese medicine used herbs and dietary changes to address inflammatory conditions. Similarly, Ayurvedic medicine from India has long emphasized the importance of a balanced, whole-foods-based diet to promote overall health and well-being.
As modern science has advanced, researchers have begun to uncover the mechanisms behind the anti-inflammatory properties of various foods. Studies have shown that compounds like omega-3 fatty acids, antioxidants, and phytochemicals can help to calm inflammation at the cellular level.
This growing body of evidence has led to the popularization of the anti-inflammatory diet in recent decades, as people seek natural ways to manage chronic inflammatory conditions and support their overall health.
Recipe
Eating an anti-inflammatory diet can help reduce chronic inflammation and improve overall health. Incorporating anti-inflammatory spices like turmeric and ginger not only enhances flavor but also provides significant health benefits; studies show Turmeric's potent effects can help reduce markers of inflammation.
This recipe for a delicious and nutritious anti-inflammatory meal is easy to prepare and packed with beneficial ingredients. The combination of fresh vegetables, lean protein, and anti-inflammatory spices creates a flavorful and satisfying dish that can be enjoyed any time of day.
This recipe is a great option for those looking to incorporate more anti-inflammatory foods into their diet. Packed with nutrient-dense ingredients like turmeric, ginger, and leafy greens, it not only helps reduce inflammation but also adds vibrant flavors to your meals. For those with special dietary needs, you can easily adapt this recipe by exploring cooking tips for food allergies to ensure it’s safe and enjoyable for everyone. Whether you’re meal-prepping or cooking for the family, this dish is both nourishing and versatile.
- 4 boneless, skinless chicken breasts
- 2 cups mixed greens (such as spinach, kale, and arugula)
- 1 cup sliced bell peppers
- 1 cup diced cucumbers
- 1/4 cup sliced red onion
- 2 tablespoons olive oil
- 1 tablespoon balsamic vinegar
- 1 teaspoon ground turmeric
- 1/2 teaspoon ground ginger
- Salt and pepper to taste
Preheat the oven to 375°F. Season the chicken breasts with the turmeric, ginger, salt, and pepper. Place the chicken on a baking sheet and bake for 25-30 minutes, or until the internal temperature reaches 165°F.
While the chicken is cooking, prepare the salad by combining the mixed greens, bell peppers, cucumbers, and red onion in a large bowl. Whisk together the olive oil and balsamic vinegar, then drizzle over the salad and toss to coat.
Once the chicken is cooked, slice it and add it to the salad. Serve immediately.
To enhance the anti-inflammatory properties of this dish, consider adding additional anti-inflammatory ingredients such as avocado, walnuts, or a sprinkle of ground cinnamon. Enjoy this flavorful and nourishing meal as part of a balanced anti-inflammatory diet.
Cooking Steps
First, gather your ingredients and chop them up.
Next, sauté the veggies in a bit of olive oil until they're nice and tender.
Then, add your spices and seasonings to give it all that delicious flavor.
Now, stir in the rice and let it simmer until it's perfectly cooked.
Step 1. Prepare and Chop the Ingredients
To prepare the ingredients for your anti-inflammatory diet, begin by carefully chopping up the fresh vegetables and herbs.
You'll want to wash them thoroughly and pat them dry before cutting. Dice the onions, mince the garlic, and chop the leafy greens like spinach or kale into bite-sized pieces.
Remember to use a sharp knife to ensure clean, even cuts. For the fruits, such as berries or citrus, gently rinse and slice or dice them as needed.
Don't forget to zest the lemon or orange if the recipe calls for it. As you prepare each ingredient, place them in separate bowls so they're ready to go when you start cooking.
This step might take a little extra time, but it'll make the actual cooking process much smoother and quicker. Plus, having all your ingredients prepped and within reach will help you stay organized and focused while you cook.
Step 2. Sauté Vegetables in Olive Oil
Next, heat a large skillet or sauté pan over medium heat and add a tablespoon or two of high-quality extra virgin olive oil.
Once the oil is hot, carefully add the chopped vegetables to the pan. Be sure to spread them out in an even layer so they can sauté properly.
As the veggies cook, use a spatula to stir and flip them occasionally. This helps them brown evenly and absorb the delicious olive oil flavor.
Sauté the vegetables for about 5-7 minutes, or until they're tender and starting to caramelize around the edges.
Now, you can add any additional seasonings you'd like, such as garlic, herbs, or a pinch of salt and pepper.
Gently toss the veggies to coat them in the spices. Continue sautéing for another minute or two, until everything is fragrant and well-combined.
Once the vegetables are cooked to your liking, remove the pan from the heat.
You're now ready to build your anti-inflammatory meal by adding the sautéed veggies to your dish.
Step 3. Add Spices and Seasonings
Now that the vegetables have been sautéed, it's time to add any desired spices and seasonings. This is where you can really bring out the flavors and make the dish your own.
Reach for your favorite dried herbs like oregano, basil, or thyme. A sprinkle of garlic powder, onion powder, or paprika can also add delicious depth.
Don't be afraid to get a little adventurous – try a dash of cumin, chili powder, or curry powder for some warmth and complexity. Freshly ground black pepper is a must to finish it off.
Stir everything together and let the aromas fill your kitchen. The key is to start with a small amount of each spice and adjust to your taste. That way, you can find the perfect blend that tantalizes your taste buds.
Have fun experimenting and find the flavors that make this dish sing!
Step 4. Add Rice and Simmer
Once the vegetables are seasoned, go ahead and add the rice. You'll want to use a long-grain white rice or brown rice for the best texture. Gently pour the rice into the pot, making sure to evenly distribute it throughout the vegetables. Give everything a good stir to combine the flavors.
Now, it's time to add the liquid. Pour in some broth or stock, enough to just cover the rice and veggies. Bring the mixture to a gentle simmer, then reduce the heat to low, cover the pot, and let it cook for about 20 minutes. Resist the urge to lift the lid and peek – you want to keep all that delicious steam trapped inside!
After 20 minutes, the rice should be tender and the vegetables will be nicely cooked through. Fluff the rice with a fork and serve hot. The combination of the aromatic spices, fresh vegetables, and hearty rice makes for a satisfying and nourishing anti-inflammatory meal.
Step 5. Garnish With Fresh Herbs
To finish off your anti-inflammatory dish, you'll want to add a few fresh herbs as a garnish. These vibrant green leaves not only look beautiful, but they'll also infuse your meal with an extra burst of flavor. Try sprinkling some chopped parsley, basil, or cilantro over the top. The fresh, herbal notes will complement the other ingredients perfectly.
Additionally, many of these herbs possess their own anti-inflammatory properties, enhancing the health benefits of your meal.
Don't be afraid to get creative with your herb choices. Maybe you'll want to try something a little different, like rosemary or thyme. Just make sure to chop the herbs finely so they're evenly distributed.
You can even try tearing the leaves with your fingers for a more rustic look.
The herbs will add a lovely pop of color and a refreshing finish to your anti-inflammatory dish. Plus, many herbs are packed with their own anti-inflammatory properties, making them a wonderful addition to your healthy meal.
Final Thoughts
The anti-inflammatory diet's true power lies in its ability to transform your overall health and well-being. By choosing nutrient-rich, whole foods, you'll nourish your body and reduce inflammation.
This approach isn't a quick fix; it's a lifestyle change that takes time and commitment. But the rewards are immense. As you incorporate more anti-inflammatory ingredients into your meals, you may notice increased energy, improved digestion, and even a boost in your mood.
Don't be discouraged if change doesn't happen overnight. Stick with it, and you'll start to see the benefits. Savor the delicious flavors, and enjoy the process of preparing wholesome, healing meals.
Frequently Asked Questions
How Can I Modify This Diet for a Vegetarian Lifestyle?
To modify this diet for a vegetarian lifestyle, focus on incorporating more plant-based anti-inflammatory foods like leafy greens, berries, nuts, seeds, and whole grains. You can also include plant-based protein sources and healthy fats to support your dietary needs.
What Are the Potential Side Effects of an Anti-Inflammatory Diet?
While an anti-inflammatory diet can be beneficial, you may experience side effects like gastrointestinal discomfort, changes in bowel habits, and potential nutrient deficiencies if you don't properly plan your meals. Always consult a healthcare professional before making significant dietary changes.
Can I Combine This Diet With Other Dietary Restrictions?
You can certainly combine an anti-inflammatory diet with other dietary restrictions, but it's essential to consult a healthcare professional to ensure the combined approach meets your nutritional needs and doesn't interfere with any existing medical conditions or treatments.
How Long Should I Follow an Anti-Inflammatory Diet for Optimal Results?
You should follow an anti-inflammatory diet for at least 4-6 weeks to see optimal results. The duration can vary depending on your health condition and individual response, but consistent adherence is key for reducing inflammation effectively.
Are There Any Supplements That Can Complement This Dietary Approach?
Supplements like omega-3 fatty acids, turmeric, and ginger can complement an anti-inflammatory diet by providing additional anti-inflammatory benefits. However, it's best to consult your healthcare provider before starting any new supplement regimen.
Cooking for Special Diets
DASH Diet Recipes: Cooking to Lower Blood Pressure
Your ultimate guide to delectable, blood-pressure-lowering meals with the DASH diet – discover the secret to nourishing your body and pleasing your palate.
The DASH diet recipes are your secret weapon for lowering blood pressure through delectable, nutritious meals. This eating plan emphasizes fresh, whole-food ingredients like fruits, veggies, and lean proteins. Sauté your vegetables in olive oil, add a touch of tomato paste, then simmer until tender. Finish with a sprinkle of fragrant fresh herbs like parsley or basil – they'll uplift the flavors and provide extra health benefits. With the DASH diet, you can enjoy creative, satisfying dishes that nourish your body and please your palate. And there's more to discover about the benefits of this smart approach to cooking for special diets.
Key Takeaways
- DASH diet recipes feature fresh, whole-food ingredients rich in nutrients, fiber, and antioxidants to promote heart health and lower blood pressure.
- Sautéing vegetables in olive oil and adding tomato paste enhances flavors and achieves tenderness, creating a savory base for DASH diet recipes.
- Incorporating fresh herbs like parsley, basil, or oregano at the end of cooking adds color, aroma, and complex flavor profiles to DASH diet dishes.
- The DASH diet encourages creativity and experimentation with various ingredient combinations to develop healthy and satisfying recipes.
- Following the DASH diet has been proven effective in lowering blood pressure and improving overall health, making it a suitable dietary choice for those with special health needs.
History
The DASH (Dietary Approaches to Stop Hypertension) diet was developed in the early 1990s by a team of researchers at the National Institutes of Health. They wanted to find a way to help people lower their blood pressure without relying on medication.
Through their studies, they discovered that eating certain foods, like fruits, vegetables, and whole grains, could make a big difference.
The DASH diet quickly became popular because it's easy to follow and doesn't require any special or expensive ingredients. It focuses on eating plenty of nutrient-rich foods and limiting sodium, fat, and sugar.
Over the years, the DASH diet has been shown to not only lower blood pressure but also improve heart health and reduce the risk of other chronic conditions, like diabetes and certain types of cancer.
Today, the DASH diet is one of the most recommended eating plans for people looking to improve their overall well-being.
With its delicious and healthy recipes, it's a great way to nourish your body and mind.
Recipe
The DASH (Dietary Approaches to Stop Hypertension) diet is a healthy eating plan designed to help lower blood pressure and improve overall cardiovascular health. This recipe for a delicious and nutritious dish is perfect for those following the DASH diet.
This dish is a flavorful and satisfying meal that can be enjoyed as a main course or a side. It features a variety of fresh, whole-food ingredients that are packed with essential nutrients, fiber, and antioxidants.
The combination of lean protein, complex carbohydrates, and healthy fats will help to keep you feeling full and satisfied.
Ingredients:
- 1 cup quinoa, rinsed
- 2 cups low-sodium vegetable broth
- 1 cup diced tomatoes
- 1 cup diced cucumber
- 1/2 cup chopped red onion
- 1/4 cup chopped fresh parsley
- 2 tablespoons lemon juice
- 1 tablespoon olive oil
- 1/2 teaspoon ground cumin
- 1/4 teaspoon salt
- 1/4 teaspoon black pepper
Cooking Instructions:
In a medium saucepan, combine the quinoa and vegetable broth. Bring to a boil, then reduce heat to low, cover, and simmer for 15-20 minutes, or until the quinoa is tender and the liquid is absorbed.
Remove from heat and fluff with a fork. Allow to cool slightly.
In a large bowl, combine the cooked quinoa, diced tomatoes, diced cucumber, chopped red onion, and chopped parsley. Drizzle with lemon juice and olive oil, and season with cumin, salt, and black pepper. Toss gently to coat.
Extra Tips:
This dish can be served warm or chilled, making it a great option for a quick and easy lunch or a light dinner.
For added protein, you can top it with grilled chicken or shrimp. The quinoa can also be replaced with other whole grains, such as brown rice or farro, to change up the texture and flavor.
Cooking Steps
Start by rinsing and chopping your veggies.
Next, sauté them in a bit of olive oil until they're tender.
Then, stir in some tomato paste and let it all simmer until the vegetables are cooked through.
Don't forget to sprinkle on some fresh herbs at the end for extra flavor!
Step 1. Rinse and Chop Vegetables
Begin by thoroughly rinsing all the vegetables you'll be using. This helps remove any dirt or debris that may be on them.
Once they're rinsed, place them on a clean cutting board. Grab your sharpest knife and carefully chop the vegetables into the sizes needed for your recipe.
Go slowly and pay close attention to ensure you don't cut yourself. If you're dicing an onion, for example, cut it in half first, then thinly slice each half before chopping across the slices. This creates uniform, bite-size pieces.
For leafy greens like spinach or kale, stack the leaves, roll them up, then slice through to create thin ribbons.
As you chop, try to keep the pieces similar in size so they cook evenly. Consistent cutting also makes for a more attractive final dish.
When you're done, you'll have all your veggies prepped and ready to cook! Just add them to your pot or pan and continue with the recipe.
Step 2. Sauté Veggies in Olive Oil
After chopping your veggies, it's time to sauté them in olive oil. This simple cooking technique brings out the natural flavors and adds a delicious, golden-brown color to your veggies.
Start by heating a large skillet over medium heat and add a tablespoon or two of olive oil. Once the oil is hot, carefully add your chopped veggies. Spread them out in a single layer so they've plenty of room to cook.
Let the veggies sauté for 5-7 minutes, stirring occasionally, until they're tender and slightly crispy. Be sure to keep an eye on them, as you don't want them to burn. Adjust the heat as needed to achieve the perfect sauté.
Once your veggies are done, you can season them with a pinch of salt, pepper, or your favorite herbs and spices.
Serve them as a side dish or incorporate them into your favorite DASH-friendly recipes. Sautéing is a quick and easy way to enjoy the fresh, crunchy texture of your vegetables.
Step 3. Add Tomato Paste
With the sautéed vegetables ready, the next step is to incorporate tomato paste. Tomato paste is a concentrated form of tomatoes that adds a rich, savory flavor to your dish.
The addition of tomato paste can also enhance your emotional well-being, as engaging in the cooking process can serve as a calming practice, similar to the ritual of brewing tea.
Grab a spoonful of tomato paste and stir it into the sautéed veggies. As you mix it in, you'll notice the mixture start to thicken and take on a deeper, reddish-brown hue. The tomato paste will help to bind all the flavors together, creating a harmonious blend.
Keep stirring until the tomato paste is fully incorporated. This step enhances the overall taste and texture of the dish, preparing it for the next addition.
The combination of sautéed vegetables and tomato paste lays the foundation for a delicious and satisfying DASH-friendly meal. Continue following the recipe, adding the remaining ingredients to bring this healthy dish to life.
Step 4. Simmer Until Vegetables Are Tender
Now that the tomato paste has been stirred in, it's time to let the flavors meld. Reduce the heat to medium-low and let the mixture simmer. This gentle heat will allow the vegetables to become tender and the flavors to blend together beautifully.
As the vegetables cook, consider enjoying a cup of herbal tea to enhance relaxation and complement your meal.
Stirring occasionally, let the mixture simmer for about 15-20 minutes. You'll know the vegetables are done when they're easily pierced with a fork. The carrots and celery should be soft, and the onions should be translucent. Keep an eye on the pot, adding a splash of broth or water if the mixture starts to look dry.
As the vegetables simmer, the aroma will fill your kitchen, making your mouth water in anticipation. The rich, savory flavors will meld together, creating a delightful and satisfying base for your DASH-friendly meal.
Patience is key here, as the slow simmering process allows the ingredients to truly come together.
Step 5. Sprinkle With Fresh Herbs
Once the vegetables have simmered and reached the desired tenderness, it's time to introduce the bright, fresh flavors of herbs. Adding fresh herbs can't only enhance the taste but also provide nutritional benefits, like those found in celery juice and pregnancy, which are rich in vitamins beneficial for overall health.
Sprinkle a generous amount of your favorite fresh herbs over the top of the dish. Chopped parsley, basil, or oregano work beautifully, adding a pop of color and an aromatic boost. You can use just one herb or combine a few for a more complex flavor profile.
Gently stir the herbs into the vegetables, taking care not to mash or bruise them. This gentle incorporation allows the herbs' flavors to infuse the entire dish. The fresh herbs will instantly uplift the flavors, complementing the simmered vegetables perfectly.
Their fragrance will fill your kitchen, making your senses come alive. Enjoy the contrast of the tender vegetables and the vibrant, herbal notes. This simple step transforms the dish, elevating it from ordinary to extraordinary.
Final Thoughts
The DASH diet is a versatile and effective approach to healthy eating that can benefit individuals of all ages and dietary preferences.
By focusing on nutrient-dense foods like fruits, vegetables, whole grains, and lean proteins, the DASH diet provides a delicious and satisfying way to lower blood pressure and improve overall health.
As you've seen, the recipes in this article showcase the incredible flexibility of the DASH diet.
Whether you're looking for a hearty main dish, a flavorful side, or a sweet treat, there are endless options to explore.
Don't be afraid to get creative and try new combinations of ingredients – the DASH diet encourages experimentation and a love of good food. You might discover unexpected flavor pairings that not only excite your taste buds but also provide numerous health benefits. Incorporating items from the antiinflammatory diet foods list can further enhance your meals by including nutrient-rich options like leafy greens, colorful fruits, and omega-3-rich fish. By combining these foods with DASH diet principles, you can create satisfying dishes that support overall wellness and help reduce inflammation.
Frequently Asked Questions
What Is the Sodium Content in DASH Diet Recipes?
The sodium content in DASH diet recipes is generally low, as the focus is on including whole, unprocessed foods and limiting high-sodium ingredients. You'll find these recipes emphasize fresh produce, lean proteins, and low-sodium seasonings to help manage your blood pressure.
Can DASH Diet Recipes Be Modified for Vegetarians/Vegans?
Yes, you can easily modify DASH diet recipes to make them vegetarian or vegan-friendly. Swap out animal-based proteins with plant-based options, adjust seasonings, and focus on incorporating plenty of fruits, vegetables, whole grains, and legumes.
How Long Do DASH Diet Recipes Take to Prepare?
DASH diet recipes typically take 30-60 minutes to prepare. They emphasize whole, unprocessed ingredients which require some chopping and cooking, but most can be made in under an hour with a bit of planning and preparation.
Are DASH Diet Recipes Suitable for People With Diabetes?
Yes, DASH diet recipes are suitable for people with diabetes. The DASH diet emphasizes whole, nutrient-dense foods that are low in sodium and high in fiber, which can help manage blood sugar levels effectively.
Can DASH Diet Recipes Be Frozen for Later Use?
You can definitely freeze DASH diet recipes for later use. The key is to choose recipes that freeze well and follow proper food storage techniques to maintain quality and safety. This makes meal prep a breeze.
-
Brazilian Cuisine3 months ago
Tacacá
-
Polish Comfort Food3 months ago
Krupnik (Barley Soup)
-
Brazilian Cuisine3 months ago
Caldeirada
-
Brazilian Cuisine3 months ago
Chicken in Brown Sauce
-
Southern Comfort Food3 months ago
Cheese Straws
-
African Cuisine3 months ago
Kedjenou (Ivory Coast)
-
Polish Comfort Food3 months ago
Vegetable Salad
-
American Diner Classics3 months ago
The Maillard Reaction: Understanding the Chemistry of Browning {Food Science and Cooking}