Crafting dairy-free pizza at home is easier than you might think! You'll be amazed by the flavor and texture of these tasty pies. Start with a homemade dough, then top it with plant-based cheeses, fresh veggies, and savory proteins. Bake at high heat for a crispy crust, and you've got a delicious dairy-free pizza the whole family will enjoy. Don't be afraid to get creative with unique toppings – there's so much room for experimentation. And if you want to learn more about the history, cooking techniques, and social aspects of dairy-free pizza, keep reading.
Key Takeaways
- Dairy-free pizzas are made with a combination of plant-based ingredients like nuts, soy, and coconut to create creamy cheese alternatives.
- The cooking process involves preparing the dough, topping with desired veggies and proteins, and baking in a preheated oven for 12-15 minutes.
- Experimenting with various toppings, sauces, and crust options can enhance the flavor and texture of dairy-free pizzas.
- Crafting dairy-free pizzas at home encourages creativity, skill development, and social enjoyment within the community.
- Dairy-free pizza caters to diverse dietary preferences and is suitable for those with lactose intolerance or reducing dairy intake.
History
Dairy-free pizza has roots dating back to the early 20th century, when innovative chefs began experimenting with alternative cheese substitutes.
Faced with the growing demand for more inclusive dietary options, these culinary pioneers set out to create delicious pizzas that could be enjoyed by those avoiding dairy.
Through trial and error, they discovered that ingredients like nuts, soy, and coconut could be transformed into creamy, melty "cheeses" that could top their pizzas.
As plant-based eating gained popularity, dairy-free pizza evolved, with more advanced dairy alternatives and creative topping combinations emerging.
Today, the dairy-free pizza movement has gone mainstream, with specialty shops, frozen options, and even DIY recipes catering to those seeking a cheese-free slice.
Whether you're lactose intolerant, vegan, or simply curious, the history of dairy-free pizza offers a fascinating glimpse into the innovative spirit of chefs who refused to let dietary restrictions stand in the way of delicious, shareable pies.
Recipe
Making a delicious dairy-free pizza at home is a satisfying and healthier alternative to traditional pizza. This recipe uses a combination of plant-based ingredients to create a flavorful and satisfying meal that everyone can enjoy.
The key to a successful dairy-free pizza is finding the right balance of flavors and textures. By using high-quality, fresh ingredients and experimenting with different toppings, you can create a pizza that's just as delicious as the original.
Ingredients:
- 1 pre-made or homemade pizza crust
- 1 cup of your favorite dairy-free cheese (such as cashew-based or soy-based cheese)
- 1 cup of your favorite pizza sauce
- 1 cup of sliced vegetables (such as bell peppers, onions, mushrooms, etc.)
- 1/2 cup of your favorite plant-based protein (such as sliced tofu, tempeh, or vegan sausage)
Cooking Instructions:
Preheat your oven to 425°F (220°C). Spread the pizza sauce evenly over the crust, leaving a small border around the edges.
Sprinkle the dairy-free cheese over the sauce, followed by the sliced vegetables and plant-based protein. Bake the pizza for 15-20 minutes, or until the crust is golden brown and the cheese is melted and bubbly.
When making a dairy-free pizza, it's important to experiment with different toppings and cheese alternatives to find the perfect combination that suits your taste preferences.
Additionally, be sure to use a high-quality pizza crust or make your own to ensure a delicious and satisfying base for your toppings.
Cooking Steps
First, you'll need to prepare the dough according to the recipe instructions.
Once the dough is ready, top it with your desired toppings.
Then, simply bake the pizza in a preheated oven until it's golden and crispy.
Step 1. Prepare the Dough
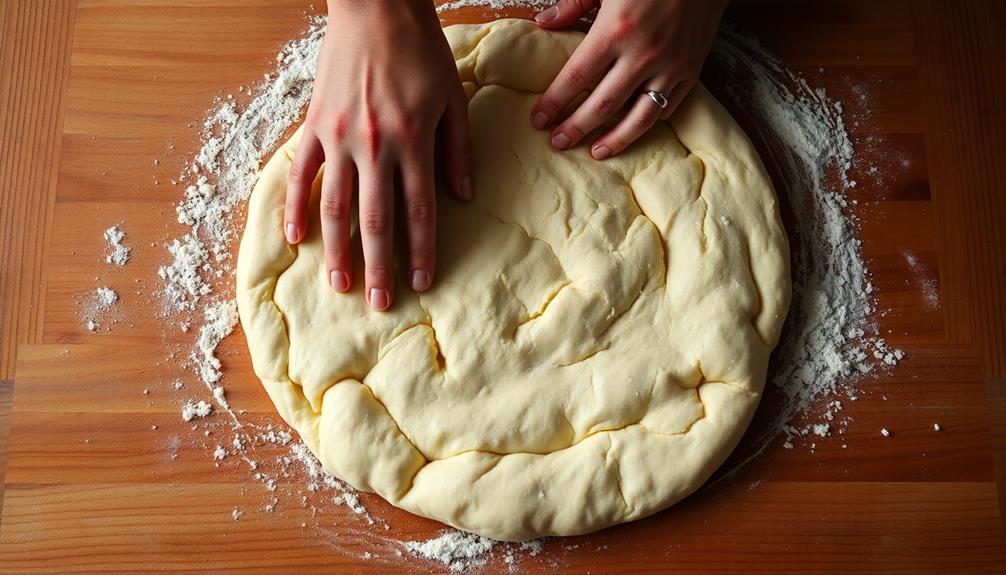
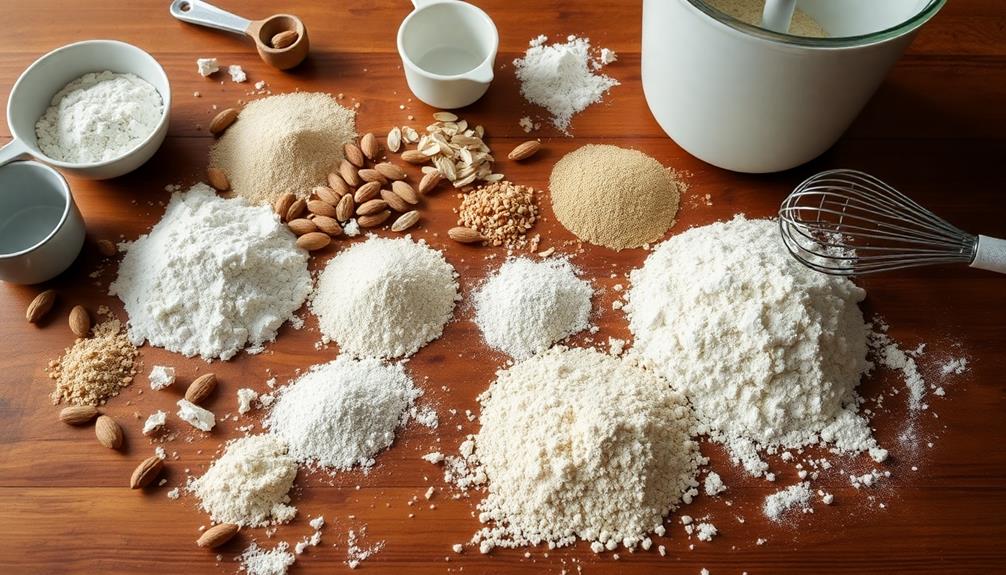
Begin by gathering your ingredients for the dough. You'll need all-purpose flour, yeast, warm water, olive oil, and a pinch of salt.
In a large bowl, combine the flour and yeast, then slowly add the warm water and olive oil, mixing until a shaggy dough forms.
Turn the dough out onto a lightly floured surface and knead it for about 5 minutes, until it becomes smooth and elastic.
Place the dough in a lightly oiled bowl, cover it with a damp towel, and let it rise for 60-90 minutes, or until it's doubled in size.
Once the dough has risen, punch it down to release any air bubbles.
Divide the dough in half and use your hands to shape each half into a round disk, about 12 inches wide.
You're now ready to top your dairy-free pizza and bake it to perfection!
Step 2. Top With Desired Toppings
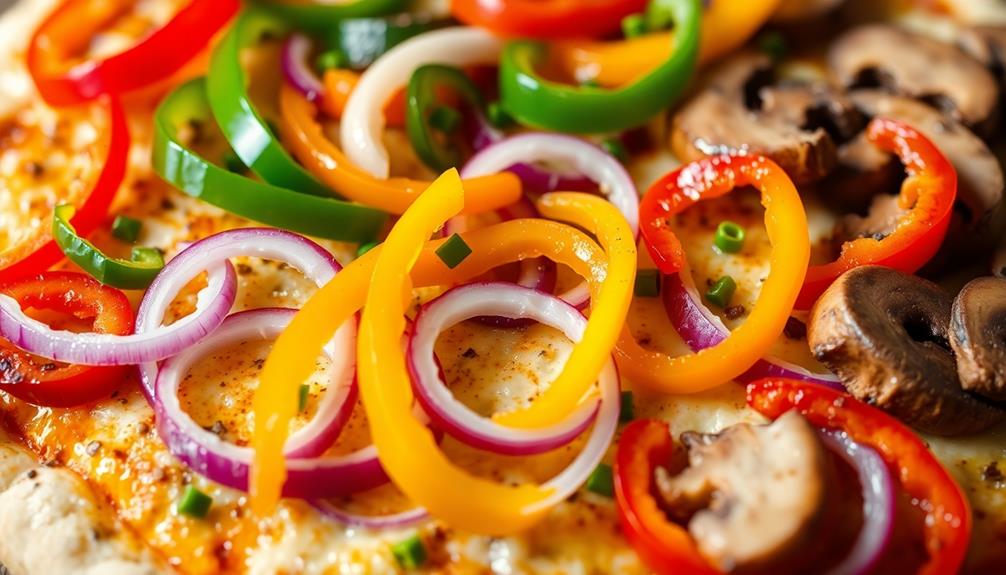
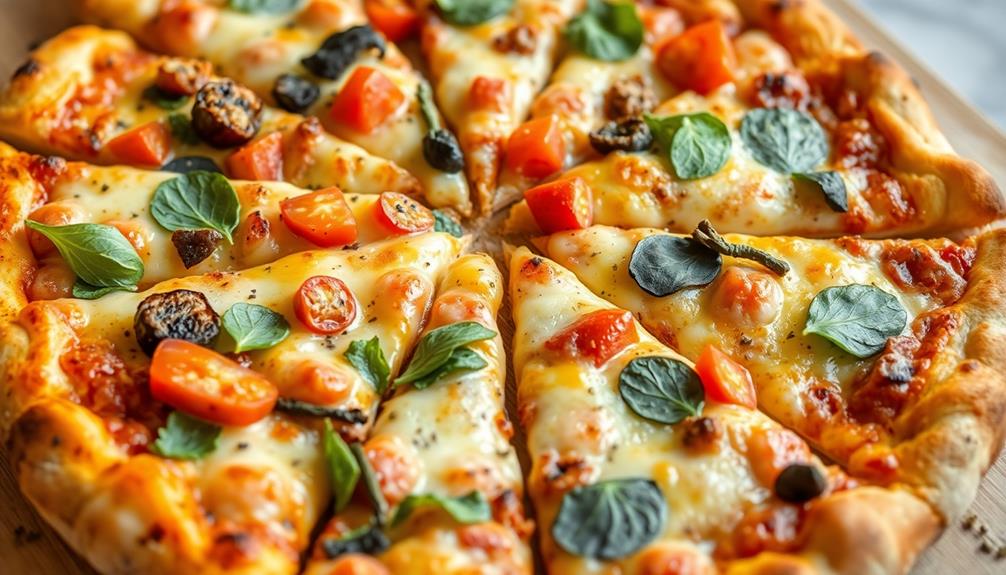
After shaping the dough, you can start topping your dairy-free pizza. The options are endless! Feel free to get creative with your favorite veggie toppings.
Try sliced mushrooms, bell peppers, onions, and olives for a classic combo. Aromatherapy can enhance your cooking experience by creating a calming atmosphere, which can help you focus on the flavors you want to create aromatherapy benefits.
Or, if you're in the mood for something more adventurous, top it with grilled eggplant, roasted artichokes, or sun-dried tomatoes. Don't forget to add a sprinkle of dried herbs like oregano, basil, or thyme to boost the flavor.
For a heartier pizza, you can also add plant-based protein toppings like sautéed tofu, crumbled tempeh, or even vegan sausage. Just make sure to cook any raw toppings before adding them to the pizza.
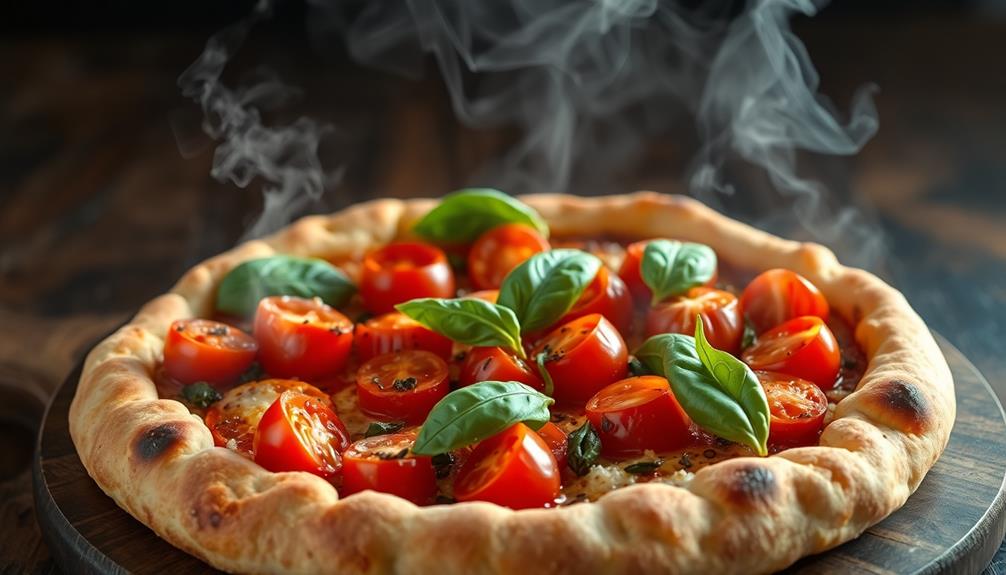
Step 3. Bake in Preheated Oven
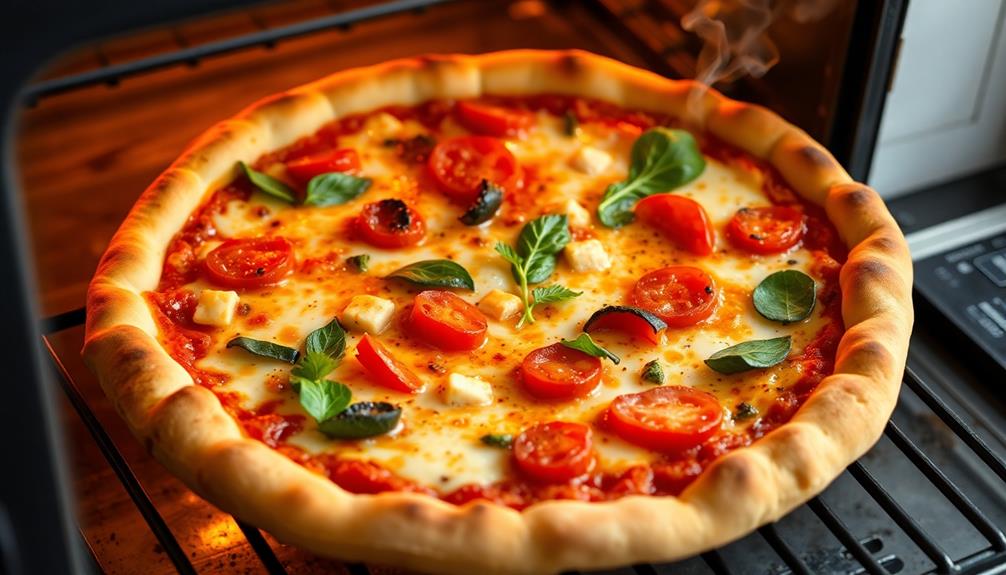
Once the pizza dough is properly shaped, it's time to bake your dairy-free masterpiece. Preheat your oven to a scorching 450°F (230°C). This high temperature will help create a crispy, golden-brown crust.
Carefully transfer the topped pizza onto a baking sheet or pizza stone. If you're using a stone, make sure to preheat it along with the oven for at least 30 minutes. This will ensure even cooking and a perfectly crisp base.
Slide the pizza into the preheated oven and bake for 12-15 minutes, or until the crust is nicely browned and the toppings are sizzling. Keep a close eye on it, as dairy-free pizzas tend to bake faster than their cheese-laden counterparts.
The aroma wafting through your kitchen will be irresistible! Once the pizza is done, remove it from the oven and let it cool for a couple of minutes before slicing and serving. Enjoy your delicious, dairy-free creation!
Step 4. Allow to Cool Slightly
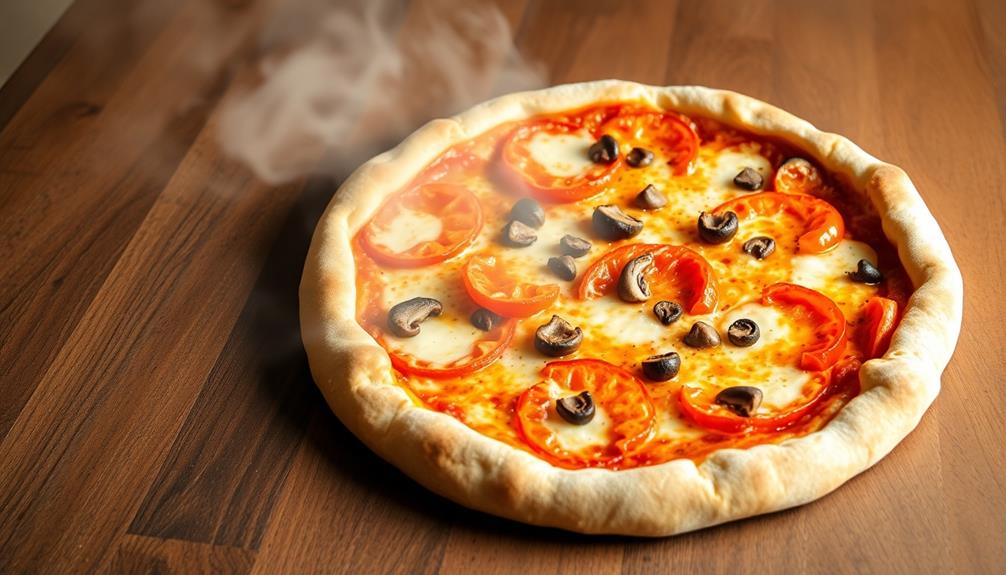
Once the dairy-free pizza is out of the oven, let it cool for a couple of minutes before slicing and serving. This allows the crust to set and the toppings to firm up slightly.
It'll make the pizza easier to handle and prevent any messy spills. You don't want to rush this step – give it enough time to cool down a bit, but not so long that it gets cold. Depending on your oven and the size of the pizza, 2-3 minutes should do the trick.
Keep an eye on it and use a spatula to gently slide the pizza onto a cutting board once it's ready. Slice it up and enjoy your delicious dairy-free creation!
The slight cooling period ensures the perfect texture and temperature for the ultimate pizza experience. With a little patience, you'll have a piping hot, perfectly baked dairy-free pizza ready to savor.
Step 5. Slice and Serve Immediately
Once the pizza has cooled slightly, you can now slice and serve it immediately. This is the moment you've been waiting for!
Grab a sharp knife and carefully slice through the crisp, golden crust, revealing the vibrant, dairy-free toppings beneath. As you cut, the aroma of the fresh herbs and aromatic vegetables will waft through the air, tantalizing your senses.
Be sure to slice the pizza into even, generous portions so that everyone can enjoy a satisfying slice. Arrange the slices on a platter or plate, and get ready to delight your guests or family with this delicious, dairy-free creation.
The key is to serve the pizza as soon as it's sliced, while the crust is still warm and the toppings are at their peak freshness. So, don't wait – dive in and savor every bite of your homemade, dairy-free pizza masterpiece!
Final Thoughts
With dairy-free pizza becoming increasingly popular, it's clear that more and more people are embracing the benefits of this delicious and versatile option.
Whether you're lactose intolerant, following a plant-based diet, or simply looking to reduce your dairy intake, crafting a dairy-free pizza at home is a fantastic way to enjoy all the flavors of classic pizza without compromising on taste or texture.
As you continue exploring the world of dairy-free pizza, remember to experiment with different toppings, sauces, and crusts to find the perfect combination that suits your taste buds.
Don't be afraid to get creative and try new things – the beauty of dairy-free pizza is that the possibilities are endless!
With a little practice and some kitchen know-how, you'll be whipping up delectable dairy-free pies that will have your family and friends asking for seconds.
Frequently Asked Questions
Can I Use Plant-Based Milk in the Dough?
You certainly can use plant-based milk in your pizza dough. It'll add moisture and richness without the dairy. Just be sure to adjust the recipe accordingly, as plant-based milks can have different properties than cow's milk.
Do I Need to Pre-Bake the Crust Before Topping?
You don't necessarily need to pre-bake the crust before topping it. Many recipes suggest adding toppings directly to the unbaked dough. However, pre-baking can help create a crispier crust, especially if you're using a softer or wetter dough.
How Can I Achieve a Crispy Dairy-Free Cheese Alternative?
To achieve a crispy dairy-free cheese alternative, try using a blend of nuts, seeds, and seasonings. Press the mixture firmly onto the crust, then bake until golden and crunchy. Experimentation is key to finding your perfect dairy-free cheese substitute.
What Are Some Healthy Topping Options for Dairy-Free Pizza?
You can top your dairy-free pizza with a variety of healthy options, such as roasted vegetables, grilled chicken, pesto, and caramelized onions. Get creative and experiment with different flavor combinations to make your pizza truly delicious.
How Long Does a Dairy-Free Pizza Stay Fresh?
Dairy-free pizzas typically stay fresh for 2-3 days when stored properly in the refrigerator. However, their shelf life can vary depending on the specific toppings and crust used. To maximize freshness, you should consume your dairy-free pizza within a few days of baking.