Connect with us

Chinese Cuisine

Tangyuan (Glutinous Rice Balls)

Kneading glutinous rice flour, stuffing with delectable fillings, and boiling until they float, tangyuan are cherished Chinese treats that symbolize unity and togetherness.

Published

on

sweet glutinous rice dumplings

Tangyuan, the chewy glutinous rice balls, have delighted Chinese families for centuries! These festive treats originated during the Tang Dynasty to honor the winter solstice. Today, they're enjoyed year-round, symbolizing unity and togetherness. To make them, you'll knead together glutinous rice flour and warm water, then stuff the dough with tasty fillings like red bean paste. Boil the filled balls until they float, then serve them warm in broth or drizzled with a sweet syrup. Customize them with toppings like sesame seeds for extra flavor and flair. Making tangyuan is a fun family activity – so get ready to roll up your sleeves and create these cherished Chinese delights!

Key Takeaways

  • Tangyuan is a traditional Chinese dessert made from glutinous rice flour, with origins dating back to the Tang Dynasty.
  • They are typically enjoyed during the Lantern Festival, representing unity and togetherness in Chinese culture.
  • The dough is shaped into balls, with various fillings like red bean paste, and then boiled until they float to the surface.
  • Tangyuan can be served in warm broth, drizzled with syrup, or garnished with toasted sesame seeds for added flavor and texture.
  • Crafting tangyuan can be a fun family activity that promotes bonding and the passing down of culinary traditions.

History

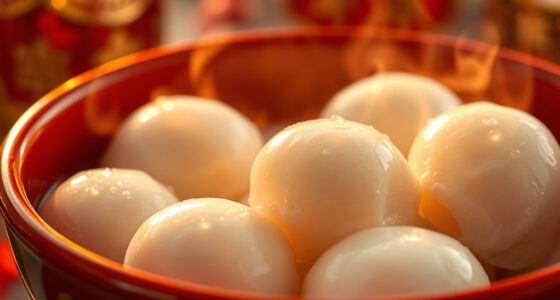
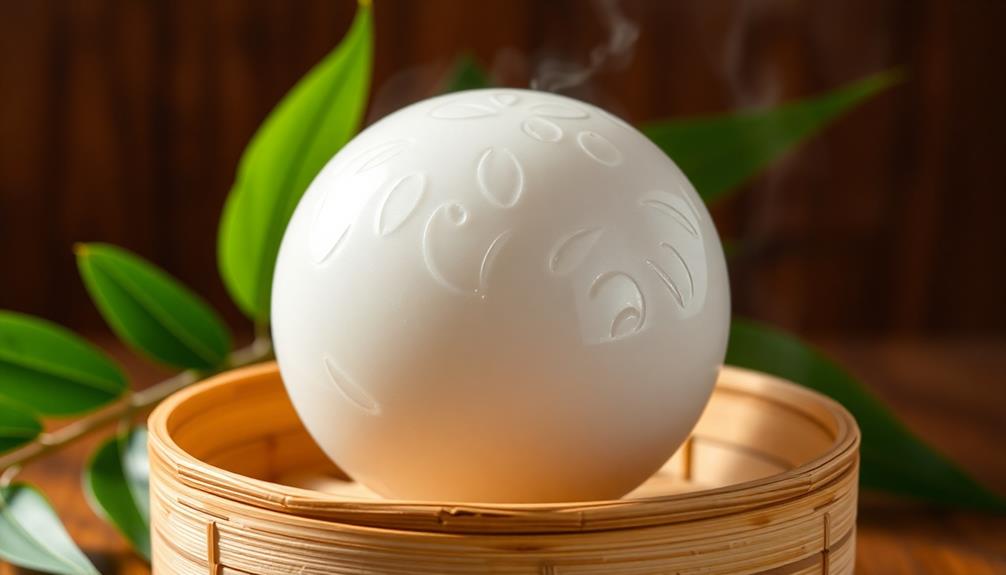
Tangyuan, a beloved Chinese delicacy, has a rich history dating back centuries. These chewy, round glutinous rice balls are a traditional food enjoyed during the Lantern Festival, a joyous celebration that marks the end of the Lunar New Year. The name "tangyuan" literally means "round balls in soup," and this tasty treat has been a beloved part of Chinese culture for generations.

The origins of tangyuan can be traced back to the Tang Dynasty, when these delightful dumplings were first created and served to honor the winter solstice.

Over the centuries, the recipe and preparation methods have evolved, with different regions developing their own unique variations.

Today, tangyuan come in a wide array of flavors, from classic sweet fillings to savory options, making them a versatile and beloved part of Chinese cuisine.

Recipe

Tangyuan, also known as glutinous rice balls, are a traditional Chinese dessert enjoyed for their soft, chewy texture and sweet flavors. These delightful treats are often served during special occasions, such as the Lantern Festival, to symbolize togetherness and unity.

Advertisement

The process of making tangyuan may seem daunting, but with a few simple steps, you can create these delectable morsels in the comfort of your own kitchen. Whether you prefer a classic sweet filling or a more adventurous flavor, this recipe will guide you through the process to achieve the perfect tangyuan.

Ingredients:

  • 1 cup (120g) glutinous rice flour
  • 1/4 cup (60ml) warm water
  • Filling of your choice (e.g., sweetened red bean paste, black sesame paste, or chopped peanuts)

Cooking Instructions:

In a large mixing bowl, combine the glutinous rice flour and warm water. Knead the mixture until a smooth, pliable dough forms.

Cover the dough with a damp cloth and let it rest for 30 minutes. Divide the dough into small, equal-sized balls, about 1 inch (2.5 cm) in diameter. Using your thumb, create an indent in the center of each ball and fill it with your desired filling.

Gently pinch the dough around the filling to seal it completely. Bring a large pot of water to a boil, and carefully drop the filled tangyuan into the boiling water. Cook for 5-7 minutes, or until the tangyuan float to the surface.

Advertisement

When cooking tangyuan, it's important to use freshly made glutinous rice flour for the best texture. Additionally, be gentle when handling the dough to prevent the filling from leaking.

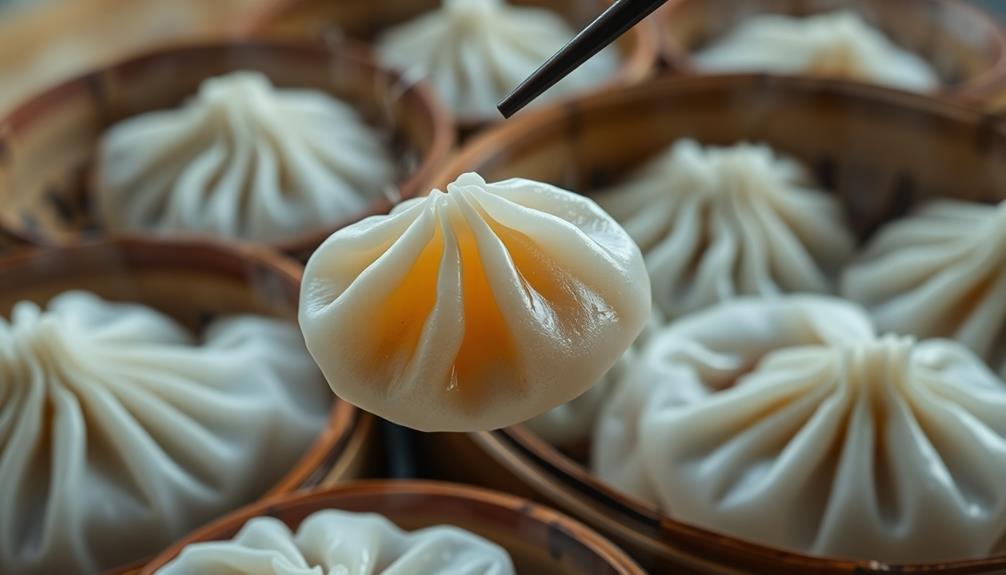
Serve the cooked tangyuan warm, either with a sweet broth or drizzled with a syrup of your choice, such as honey or brown sugar.

Cooking Steps

Alright, let's get started on those tangyuan!

First, you'll need to knead the dough until it's smooth and easy to work with.

Next, fill the dough with your favorite filling.

Advertisement

Then, simply pop those little balls into some boiling water and let 'em cook until they float to the top.

Don't forget to give them a good drain before serving, and you can even sprinkle on some sesame seeds for a tasty finishing touch!

Step 1. Knead Dough Until Smooth and Pliable

knead dough until smooth

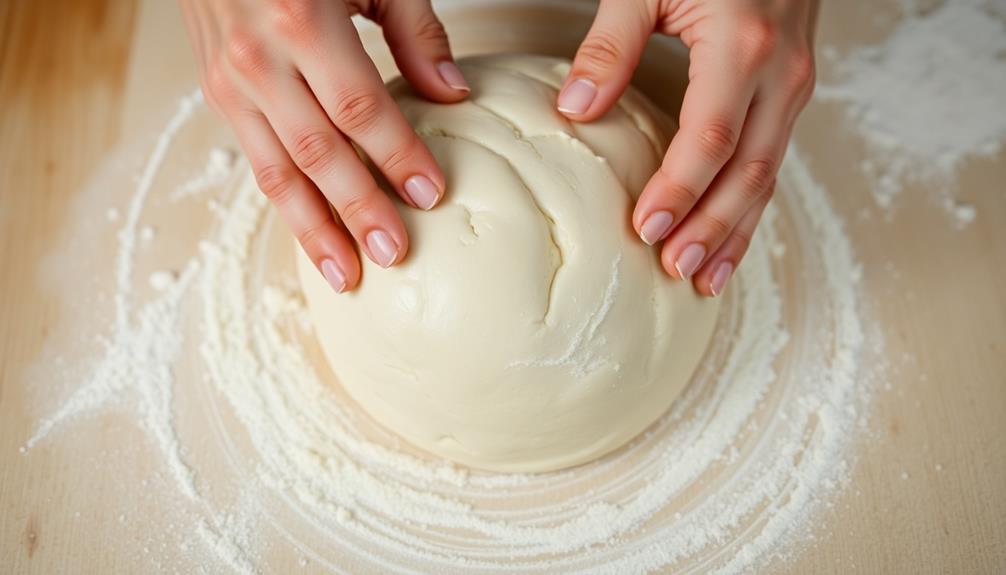
How do you go about kneading the dough until it's smooth and pliable? First, make sure your work surface is clean and lightly dusted with flour.

Then, take a big ol' lump of that glutinous rice dough and start pressing and folding it over itself. Use the heels of your hands to really work it, pushing and squeezing until the dough becomes silky smooth.

Don't be shy – put some muscle into it! As you knead, the dough will gradually transform from lumpy and sticky to soft and supple.

You'll know it's ready when you can easily shape it into a ball without it cracking or falling apart. Once it reaches this perfect, pliable state, you're one step closer to making those delightful little tangyuan!

Advertisement

Just remember to keep kneading with confidence, and don't be afraid to get your hands a little messy. It's all part of the fun.

Step 2. Fill Dough With Desired Filling

fill dough with filling

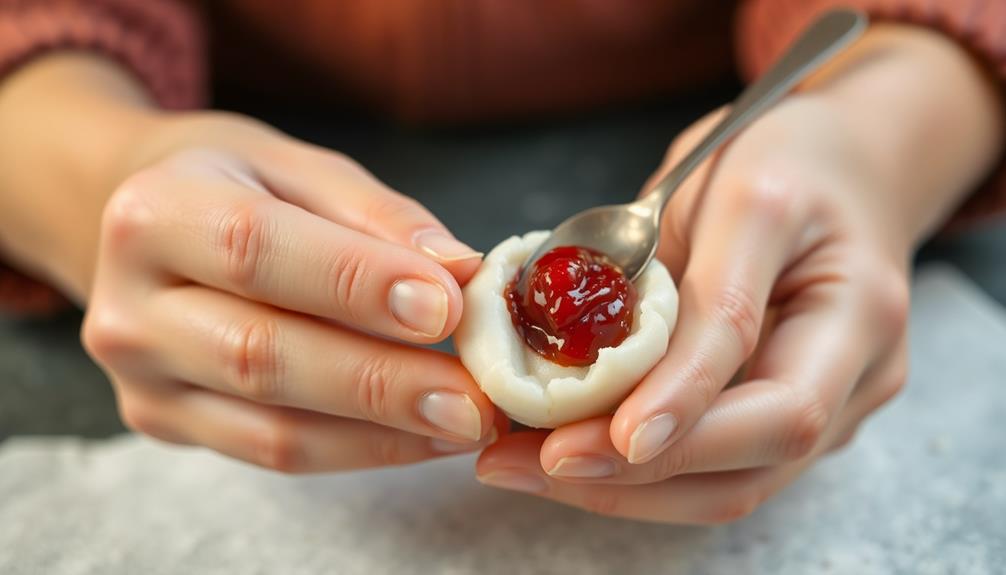
Once you've kneaded the dough to a smooth, supple texture, it's time to start filling your tangyuan.

Grab a small piece of the dough and roll it into a ball about the size of a ping-pong ball. Use your thumb to make an indentation in the center, creating a little cup.

Now, spoon a teaspoon or so of your favorite filling into the dough cup. Maybe you'll choose a sweet red bean paste or a savory pork and vegetable mixture.

Gently pinch the dough around the filling, sealing it inside. Roll the filled dough ball between your palms to smooth it out, being careful not to crack the surface.

Repeat this process until you've used up all your dough. Aren't these little dumplings fun to make?

Advertisement

The possibilities for fillings are endless, so get creative and fill them with your preferred flavors. Just wait until you take that first delightful bite!

Step 3. Cook in Boiling Water

boil water for cooking

With the tangyuan dumplings filled, you'll need to cook them in boiling water. First, bring a large pot of water to a rolling boil.

Once the water is at a full boil, gently drop the filled tangyuan into the pot. They'll sink to the bottom at first, but don't worry – they'll start floating back up to the surface as they cook. Let them simmer for 5-8 minutes, until they're completely cooked through.

The tangyuan are done when they're floating on top and their exteriors look glossy and translucent.

Use a slotted spoon to carefully transfer the cooked tangyuan to a serving bowl. Be gentle, as the dumplings can be delicate.

You can serve the tangyuan warm in the broth, or drain them and serve them plain. They're delicious either way! The sweet, chewy texture of the glutinous rice balls pairs perfectly with the savory or sweet fillings.

Advertisement

Enjoy your homemade tangyuan!

Step 4. Drain Cooked Tangyuan From Water

drain cooked tangyuan water

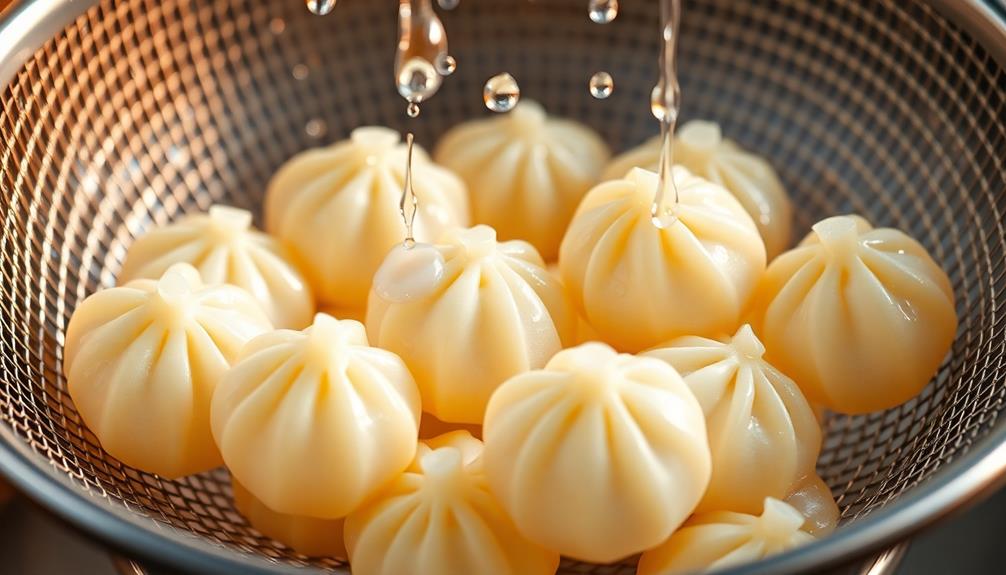
When the tangyuan have finished simmering for 5-8 minutes and are floating on top of the water, you'll want to carefully remove them from the pot.

Using a slotted spoon or strainer, gently scoop out the cooked tangyuan and transfer them to a serving bowl or plate. Be extra cautious, as the little rice balls will be hot!

Once they're out of the water, you can give them a quick rinse under cold running water. This will stop the cooking process and help the tangyuan retain their soft, delicate texture.

Gently shake or pat them dry with a paper towel, then they're ready to serve!

Tangyuan are delightful when enjoyed warm, so try to work quickly to get them from the pot to the table.

Advertisement

You can top them with a drizzle of sweet syrup, sprinkle on some toasted sesame seeds, or simply savor them plain.

No matter how you serve them, these chewy, flavorful rice balls are sure to be a hit!

Step 5. Garnish With Sesame Seeds, if Desired

garnish with sesame seeds

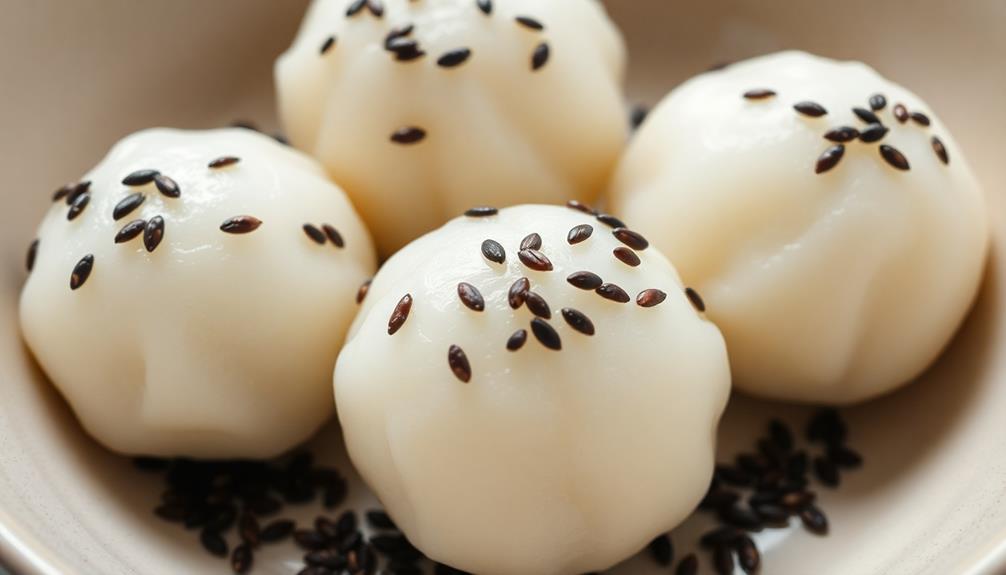
If desired, you can garnish the drained and cooled tangyuan with a sprinkling of toasted sesame seeds. The nutty, crunchy texture of the sesame seeds provides a delightful contrast to the soft, chewy glutinous rice balls.

Simply pour a small amount of sesame seeds into your palm and gently sprinkle them over the tangyuan. The seeds will lightly adhere to the surface, adding a visually appealing and tasty finishing touch.

For maximum flavor, you can toast the sesame seeds in a dry skillet over medium heat, stirring frequently, until they're lightly golden and fragrant. This extra step brings out the natural oils and enhances the nutty aroma.

Be careful not to let them burn, as that can create a bitter taste. Once toasted, the sesame seeds are ready to elevate your tangyuan to the next level of deliciousness.

Advertisement

Feel free to add as much or as little as you like, depending on your personal preference.

Final Thoughts

Ultimately, tangyuan are a comforting and delightful treat that can elevate any occasion. The soft, chewy texture and sweet, earthy flavors make them a beloved dessert, while their festive appearance adds a touch of whimsy to any gathering.

Whether you're celebrating a special event or simply craving a cozy, indulgent snack, these glutinous rice balls are sure to hit the spot.

What makes tangyuan so special is their versatility. You can serve them warm or chilled, dress them up with toppings like sesame seeds, or even experiment with different fillings.

And let's not forget the fun of making them yourself, getting your hands a little messy as you shape the dough into perfect little spheres. It's a delightful activity that the whole family can enjoy.

Advertisement

Frequently Asked Questions

What Is the Significance of Tangyuan During Chinese Festivals?

During Chinese festivals, tangyuan holds deep cultural significance. It symbolizes reunion, completeness, and a yearning for harmony. This cherished tradition brings families together, fostering a sense of belonging and celebrating the joyous occasions that define Chinese heritage.

How Long Can Tangyuan Be Stored After Cooking?

Cooked tangyuan can be stored for up to 3 days in the refrigerator. However, they'll lose their soft, chewy texture the longer they're kept. For best results, enjoy your tangyuan fresh on the day they're made.

Can Tangyuan Be Frozen and Reheated?

You can absolutely freeze and reheat cooked tangyuan. Just let them cool completely, then pop them in the freezer. When you're ready to enjoy, reheat in the microwave or boiling water until heated through. Easy peasy!

Are There Any Health Benefits Associated With Tangyuan?

There are some potential health benefits to eating tangyuan. They're made with glutinous rice flour, which contains complex carbohydrates that can provide sustained energy. Additionally, the fillings often include nutritious ingredients like red bean or sesame paste.

Where Can I Purchase Pre-Made Tangyuan in My Local Area?

You can find pre-made tangyuan at Asian grocery stores or specialty markets in your local area. Many Chinese supermarkets and international food shops will carry this popular glutinous rice dessert in the frozen section.

Advertisement
Continue Reading
Advertisement

Chinese Cuisine

Yunnan Cross-Bridge Rice Noodles

Nestled in the heart of Yunnan, China, Yunnan cross-bridge rice noodles offer a mouthwatering journey through the province’s rich culinary heritage, leaving you craving for more.

Published

on

yunnan rice noodle dish

Yunnan cross-bridge rice noodles are a mouthwatering dish hailing from the vibrant province of Yunnan, China. Tracing their roots to the late Qing dynasty, these noodles were accidentally created by Yunnanese scholars crossing the Long Bridge over the Yangtze River. Today, this UNESCO-recognized culinary treasure features a unique cooking method – you'll assemble the ingredients, then pour in hot, flavorful broth to create an unforgettable dining experience. Get ready to dive into tender rice noodles, fresh veggies, and succulent proteins, all expertly blended for a true taste of Yunnan's rich heritage.

Key Takeaways

  • Yunnan Cross-Bridge Rice Noodles have their origins in the late Qing dynasty of Yunnan province, created by Yunnanese scholars crossing the Long Bridge over the Yangtze River.
  • This noodle dish is recognized as a UNESCO intangible cultural heritage, representing the rich heritage and culinary traditions of Yunnan province.
  • The unique cooking method involves assembling ingredients and pouring hot broth over them, creating a multi-textural dining experience with robust flavors.
  • Yunnan Cross-Bridge Rice Noodles are traditionally served at family gatherings and celebrations, reflecting the dish's cultural significance and symbolism of hospitality.
  • The dish features a flavorful broth, chewy rice noodles, fresh vegetables, and various proteins, offering a balanced and customizable nutritional profile.

History

The origins of Yunnan cross-bridge rice noodles can be traced back to the late Qing dynasty, when Yunnan province's diverse culinary traditions began to take shape.

This unique dish was created by a group of diligent Yunnanese scholars who'd often carry their lunch with them as they crossed the Long Bridge over the Yangtze River. One day, as they were eating, the noodles fell into the hot soup below – and a tasty new dish was born!

The scholars quickly realized that submerging the noodles in the hot broth was actually the key to the dish's delectable flavor. The heat softened the rice noodles while infusing them with the rich, aromatic broth.

Over time, cross-bridge noodles became a beloved specialty in Yunnan, known for their springy texture and mouthwatering savory notes.

Today, this centuries-old recipe is still prepared with care, using fresh regional ingredients that celebrate Yunnan's vibrant culinary heritage.

Advertisement

Recipe

Yunnan cross-bridge rice noodles, also known as "Crossing the Bridge" noodles, is a popular dish originating from the Yunnan province in China. This dish is renowned for its flavorful broth and chewy rice noodles. The unique cooking method involves carefully assembling the ingredients and pouring hot broth over them, creating a visually stunning and delicious meal.

The dish is typically served family-style, with the broth and noodles presented separately, allowing each diner to customize their bowl to their liking. The process of "crossing the bridge" refers to the tradition of the chef bringing the hot broth to the table, creating a sense of anticipation and theater.

Ingredients:

  • 8 oz rice noodles
  • 4 cups chicken or vegetable broth
  • 1 lb boneless, skinless chicken thighs, thinly sliced
  • 2 eggs, beaten
  • 1 cup thinly sliced cabbage
  • 1 cup bean sprouts
  • 1/2 cup thinly sliced green onions
  • 2 cloves garlic, minced
  • 1 tbsp soy sauce
  • 1 tsp sesame oil
  • 1/2 tsp white pepper

Cooking Instructions:

In a large pot, bring the broth to a boil. Reduce heat to low and keep the broth at a gentle simmer.

Arrange the chicken, eggs, cabbage, bean sprouts, and green onions on a serving platter. Serve the hot broth, noodles, and garnishes separately, allowing each diner to customize their bowl.

Advertisement

When cooking this dish, it's important to slice the ingredients thinly to ensure quick cooking and easy assembly. Additionally, make sure the broth is piping hot when served, as the contrast between the hot broth and the fresh, cool ingredients is a key part of the experience.

Enjoy your Yunnan cross-bridge rice noodles!

Cooking Steps

Soak those rice noodles in water until they're nice and soft.

Once the broth's bubbling away, you can start arranging everything – the noodles, the broth, and all the tasty toppings.

Don't forget to add your favorite fixings, then serve it up piping hot for the best slurping experience!

Advertisement

Step 1. Soak Rice Noodles in Water

soak rice noodles thoroughly

Grab a large bowl and fill it with lukewarm water. This is where you'll soak your rice noodles to get them nice and soft.

Make sure the water covers the noodles completely, as they'll expand as they soak. Give the noodles about 20-30 minutes to soak, stirring them occasionally to ensure even softening. You'll know they're ready when they've become pliable and easy to bend without breaking.

Once the noodles have soaked, drain them in a colander. Rinse them under cool running water to remove any excess starch.

This step helps prevent the noodles from sticking together later on. Gently squeeze out any excess water, being careful not to damage the delicate noodles.

Now they're all set to be added to your hot broth or stir-fried dishes! Get ready to enjoy the chewy, slurpable goodness of your Yunnan cross-bridge rice noodles.

Step 2. Bring Broth to a Boil

bring broth to boil

Next, bring a large pot of broth to a rolling boil. This'll be the key to unlocking the mouthwatering flavors of your Yunnan cross-bridge rice noodles.

Make sure to use a generous amount of broth – you want enough to fully submerge the noodles. As the broth heats up, you'll start to see those lively bubbles burst on the surface. That's your cue that it's ready!

Advertisement

Don't be afraid to crank up the heat to get it going. Once it's at a full boil, you can reduce the heat slightly to maintain that steady simmer.

Now, grab your soaked rice noodles and gently add them to the hot broth. Stir them around to make sure they're fully submerged and separated.

Let the noodles cook for just a minute or two until they're tender and pliable. You want them to have a nice bite, not be mushy.

With the broth boiling and the noodles ready, you're one step closer to slurping up a delicious bowl of Yunnan goodness!

Step 3. Arrange Noodles, Broth, and Toppings

arrange noodles broth toppings

With the broth at a rolling boil and the noodles ready, it's time to assemble your Yunnan cross-bridge rice noodle dish.

First, grab a large bowl and carefully pour in some of the steaming hot broth.

Advertisement

Now, use your chopsticks to gently lower the freshly cooked noodles into the broth. Arrange them neatly, making sure they're fully submerged.

Next, it's time for the fun part – adding your favorite toppings! You can load up your bowl with slices of tender beef, juicy chicken, or crisp veggies like baby bok choy.

Don't forget to sprinkle on some chopped scallions and cilantro for extra flavor and color.

Finally, give everything a gentle stir to combine the ingredients.

Your Yunnan cross-bridge rice noodle masterpiece is now ready to enjoy! The hot, fragrant broth, chewy noodles, and tasty toppings make for a truly delightful and satisfying meal.

Advertisement

Step 4. Add Desired Toppings

add toppings as desired

With the noodles and broth ready, you can now start adding your desired toppings. The fun part is choosing all the tasty treats to top off your bowl!

First, you'll want to add some fresh, crunchy vegetables like thinly sliced cabbage, carrot, and green onion. These add great texture and flavor.

Next, consider adding a protein like roasted chicken, beef, or even soft-boiled eggs for extra heartiness.

Don't forget the herbs – fresh cilantro, mint, and Thai basil will really make the dish pop with their aromatic flavors.

For a bit of crunch, try topping it off with crispy wonton strips or peanuts.

Finally, a drizzle of chili oil or sriracha will give it a delightful kick of heat.

Advertisement

Get creative and customize your bowl exactly how you like it! With all these amazing toppings, your Yunnan Cross-Bridge Rice Noodles are about to be taken to the next level of deliciousness.

Step 5. Serve Immediately, While Hot

serve hot immediately enjoy

Once the noodles and toppings are ready, serve the dish immediately while it's hot. The steaming broth, tender noodles, and aromatic toppings are at their best when enjoyed right away.

Don't let the food cool down – dive in and savor every delicious bite!

Transfer the noodles and toppings to a big bowl, then ladle the hot broth over the top. The noodles will soak up the flavorful liquid, creating a comforting and satisfying meal.

Make sure to include all your favorite toppings for the ultimate Cross-Bridge Rice Noodle experience.

As you take that first slurpy spoonful, you'll be transported to the bustling markets of Yunnan. The combination of textures and flavors is simply irresistible.

Advertisement

Final Thoughts

As you've explored the depths of Yunnan's renowned cross-bridge rice noodles, it's clear that this culinary delight offers a unique and captivating dining experience.

From the artful preparation to the robust flavors, every bite transports you to the heart of this vibrant region. What truly sets these noodles apart is the dedication and passion of the chefs who've perfected the craft over generations.

As you reflect on your journey through this culinary adventure, take a moment to savor the memories.

Picture the steaming bowls, the aromatic broth, and the interplay of textures that make each mouthful a delightful discovery.

This is more than just a meal – it's a cultural experience that celebrates the rich heritage of Yunnan and the enduring power of food to bring people together.

Advertisement

Frequently Asked Questions

Can the Noodles Be Made With Different Types of Rice?

You can certainly use different types of rice to make rice noodles. The choice of rice variety will affect the texture and flavor, so experiment to find the one that suits your preferences best.

How Long Do the Noodles Typically Last After Being Cooked?

How long do the cooked noodles typically last? Well, it depends on the type of noodles, but generally, they'll stay fresh for 3-5 days when stored properly in the fridge. Just be sure to keep 'em covered to prevent drying out.

Are There Any Dietary Restrictions Associated With This Dish?

Regarding dietary restrictions, the dish may not be suitable for individuals with gluten or nut allergies. It's always best to inquire about the specific ingredients used to ensure it aligns with your dietary needs.

Can the Toppings Be Customized to Individual Preferences?

You can customize the toppings to your individual preferences. The dish is highly versatile, allowing you to tailor the ingredients to your liking and dietary needs. You have the freedom to create a personalized version of this dish.

Are There Any Health Benefits to Consuming Yunnan Cross-Bridge Rice Noodles?

When you consume rice noodles, you can enjoy some health benefits. They're typically low in fat and calories, and provide complex carbs that can fuel your body. Plus, they're gluten-free, making them a great option for those with dietary restrictions.

Advertisement
Continue Reading

Chinese Cuisine

Red-Braised Pork Belly

A succulent Hunan classic, red-braised pork belly is a melt-in-your-mouth delight that has captivated generations, with its rich soy and brown sugar flavors. Discover the secrets behind this…

Published

on

savory chinese pork dish

Red-braised pork belly is a scrumptious Chinese dish from Hunan Province that's been passed down for generations. You'll start by searing the pork to get a mouthwatering crust, then simmer it in a rich soy and brown sugar sauce with fragrant spices like star anise and cinnamon. The long, slow cooking makes the pork belly melt-in-your-mouth tender. Garnish it with fresh green onions for a pop of color and crunch. Serve this comforting dish with steamed rice, and you'll see why it's considered a true culinary treasure. Want to learn more about the storied history and cooking techniques behind this irresistible dish?

Key Takeaways

  • Red-Braised Pork Belly is a traditional Chinese dish originating from Hunan province, known for its savory, sweet, and aromatic flavors.
  • The recipe features tender pork belly simmered in a rich sauce with key ingredients like soy sauce, rice wine, and brown sugar.
  • Cooking techniques such as blanching, searing, and long braising are essential for achieving the desired tenderness and flavor complexity.
  • The harmonious balance of flavors and textures, including the tender pork and the crunchy green onion garnish, creates an irresistible culinary experience.
  • Patience and skill development are crucial in preparing this dish, as it can be improved by allowing the flavors to meld over time.

History

The origins of red-braised pork belly can be traced back to the Hunan province of China, where this savory and aromatic dish has been a beloved regional delicacy for centuries.

The heart of this classic recipe lies in the slow-cooking process, which allows the pork's natural flavors to mingle with the rich, caramelized sauce. As the pork simmers away, the fat renders down, creating a melt-in-your-mouth texture that's simply irresistible.

Over time, the dish has become a beloved part of Chinese culinary heritage, with families passing down their cherished techniques and secret ingredients from generation to generation.

Whether enjoyed as a family meal or a special occasion feast, red-braised pork belly remains a beloved staple that continues to delight taste buds across China and beyond.

Its captivating combination of savory, sweet, and aromatic notes makes it a true culinary treasure, steeped in the rich traditions of Chinese cuisine.

Advertisement

Recipe

Red-Braised Pork Belly is a classic Chinese dish that features tender, flavorful pork belly slowly simmered in a rich, savory sauce. The long braising time allows the pork to become meltingly tender, while the aromatic spices and soy sauce infuse the meat with deep, complex flavors.

The key to the perfect red-braised pork belly is patience. The dish requires a bit of time and attention, but the results are well worth it. The pork belly is first seared to create a golden-brown crust, then simmered in a mixture of soy sauce, rice wine, and spices until the meat is fall-apart tender.

  • 2 lbs pork belly, cut into 1-inch cubes
  • 3 cloves garlic, minced
  • 1 inch ginger, peeled and sliced
  • 1/2 cup soy sauce
  • 1/4 cup rice wine or Shaoxing wine
  • 2 tablespoons brown sugar
  • 2 star anise
  • 2 cinnamon sticks
  • 4 cups chicken or beef stock

In a large Dutch oven or heavy-bottomed pot, sear the pork belly over medium-high heat until golden brown on all sides, about 5-7 minutes. Remove the pork from the pot and set aside.

Reduce the heat to medium, add the garlic and ginger to the pot, and cook for 1-2 minutes until fragrant. Pour in the soy sauce, rice wine, brown sugar, star anise, and cinnamon sticks, and stir to combine.

Add the seared pork belly and stock, and bring the mixture to a boil. Reduce the heat to low, cover the pot, and simmer for 2-3 hours, or until the pork is tender and the sauce has thickened. Adjust the seasoning to taste, and serve the red-braised pork belly with steamed rice, a side of vegetables, and your favorite condiments.

For the best results, be patient and let the pork braise for as long as possible. The longer it cooks, the more tender and flavorful the pork will become.

Advertisement

Additionally, you can prepare the dish a day in advance and let the flavors meld together overnight before reheating and serving.

Cooking Steps

Slice that pork belly into chunky pieces, then blanch them in boiling water to get rid of any impurities.

Next, you'll caramelize the pork in a skillet to lock in the flavor.

Step 1. Slice Pork Belly Into Chunks

slice pork belly chunks

Before you can begin cooking the pork belly, you'll need to slice it into bite-sized chunks. First, grab a sharp knife and a sturdy cutting board.

Carefully place the pork belly on the board, then use the knife to cut the meat into 1-inch pieces. Don't worry if they're not perfectly uniform – the irregular shapes will add to the rustic charm of the dish.

As you work, try to keep the pieces evenly sized so they cook at the same rate. Once you've sliced the entire pork belly, you can give the chunks a quick rinse under cold water to remove any stray bits of fat or skin.

Advertisement

Dry them off with some paper towels, and you're ready to move on to the next step! Cooking the pork belly low and slow is the key to achieving that melt-in-your-mouth texture, so take your time and enjoy the process.

Your patience will definitely pay off in the end.

Step 2. Blanch Pork Belly in Boiling Water

blanch pork belly boiling

The first step in the cooking process is to blanch the pork belly chunks in boiling water. This important step helps to remove any impurities or excess fat from the meat, giving you a cleaner, more refined flavor in the final dish.

Simply fill a large pot with water and bring it to a rolling boil over high heat. Once the water is bubbling vigorously, carefully add the sliced pork belly pieces. Let them soak for about 2 to 3 minutes, then use a slotted spoon to scoop them out and transfer them to a clean bowl or plate.

Don't worry if the pork looks a bit pale and bland at this stage – the real magic will happen during the next steps of the cooking process. With the pork belly now prepped and ready, you can move on to the next exciting phase of this delicious recipe!

Step 3. Caramelize Pork Belly in Skillet

caramelize pork belly skillet

With the pork belly now prepped and ready, grab a large, heavy-bottomed skillet and place it over medium-high heat.

Once the skillet is nice and hot, add a generous drizzle of oil and let it heat up for a minute or two.

Advertisement

Now, carefully add the blanched pork belly slices to the pan, making sure they don't overlap.

You'll want to let them sizzle and brown for about 2-3 minutes per side, turning them occasionally with tongs.

As the pork sears, you'll start to see the edges turn golden and crispy – that's exactly what you're going for!

Keep an eye on them, adjusting the heat as needed to prevent burning.

Once both sides are beautifully caramelized, transfer the pork to a plate and set it aside.

Advertisement

Don't worry, we're not done yet – there are still a few steps to go before this delicious pork belly is ready to enjoy!

Step 4. Simmer Pork in Aromatic Liquid

pork simmered in aromatics

Next, add the caramelized pork belly slices to a Dutch oven or large, heavy-bottomed pot.

Pour in enough water or broth to just cover the pork. Toss in some fragrant ingredients like star anise, cinnamon sticks, cloves, and ginger slices. The pungent aroma will make your mouth water!

To complement your meal, consider serving it with a soothing cup of herbal tea, as many varieties can aid in digestion and enhance your dining experience, such as herbal teas with digestion benefits.

Bring the liquid to a boil, then reduce the heat to a gentle simmer. Let the pork slowly braise for about an hour, or until it's meltingly tender. The longer you simmer it, the more the flavors will blend together.

Be patient – it's well worth the wait! Occasionally, skim any foam or fat that rises to the surface. This will keep your dish nice and clean.

Advertisement

When the pork is super soft, you're ready for the next step. Get ready to experience the deep, rich flavors of this classic Chinese dish!

Step 5. Garnish With Green Onions

garnish dish with onions

Finely slice some green onions to garnish the tender, red-braised pork belly. You'll want those vibrant, green slices to create a colorful contrast against the rich, caramelized meat. Sprinkle them generously over the top – the fresh, oniony flavor will perfectly complement the savory-sweet pork.

Don't be shy with the green onions! The more, the merrier. They'll add a lovely crunch and brightness to each bite. Plus, the pop of green makes the dish look extra appetizing. Imagine how nice those slender green onion pieces will look, nestled among the shiny, reddish-brown pork cubes.

Once you've added the green onions, your red-braised pork belly is ready to serve. Scoop it up and enjoy the delightful interplay of flavors and textures. The tender pork, the aromatic cooking liquid, and the crisp green onions – it's a harmony of yum that's sure to delight your taste buds.

Final Thoughts

Ultimately, the essence of this red-braised pork belly dish lies in its harmonious balance of flavors and textures. The tender, melt-in-your-mouth pork, combined with the rich, caramelized sauce, creates a truly irresistible experience.

The vibrant green onions you sprinkled on top not only add a pop of color but also a delightful crunch, complementing the dish perfectly.

Advertisement

As you savor the final bites, you can't help but feel a sense of accomplishment. This recipe has allowed you to explore the depths of Chinese cuisine and expand your culinary horizons.

The techniques you've learned, from searing the pork to expertly reducing the sauce, will undoubtedly serve you well in future culinary adventures.

Frequently Asked Questions

Is Red-Braised Pork Belly Suitable for Vegetarians?

No, red-braised pork belly is not suitable for vegetarians. Pork belly is a type of meat, and the dish is prepared using animal-based ingredients, making it unsuitable for those following a vegetarian diet.

Can I Substitute the Pork Belly With Another Cut of Meat?

You can absolutely substitute the pork belly with another cut of meat. Try using chicken thighs, beef brisket, or even tofu for a vegetarian option. The key is to adjust the cooking time accordingly.

How Long Can the Dish Be Stored in the Refrigerator?

Stored leftovers can typically last 3-4 days in the refrigerator. Be sure to refrigerate the dish in an airtight container as soon as it's cooled down. This will help preserve the flavors and prevent spoilage.

Advertisement

Can I Use a Slow Cooker Instead of a Stovetop?

You can absolutely use a slow cooker instead of a stovetop. The slow cooking process will infuse the flavors and tenderize the meat, just like on the stovetop. Give it a try and see how it turns out!

Does the Dish Contain Any Gluten or Nut Ingredients?

The dish does not contain any gluten or nut ingredients. It's a gluten-free and nut-free recipe, so you don't have to worry about those dietary restrictions when preparing it.

Continue Reading

Chinese Cuisine

Chicken Feet (Dim Sum Style)

You’ll be surprised at the umami flavor and satisfying texture of these Cantonese dim sum delicacies – learn how to prepare chicken feet like a pro.

Published

on

dim sum chicken feet

Chicken feet are a delightful Cantonese dim sum delicacy that have been enjoyed for centuries! These savory nuggets start with a good boiling to make them nice and tender. Then, you'll sauté some garlic and ginger, add soy sauce and spices, and braise the feet until they're fork-tender. The result is a flavorful, chewy treat that's high in collagen – perfect for your skin and joints. While they may seem daunting at first, chicken feet offer a unique eating experience that'll have you exploring more of the diverse culinary traditions across Asia. Want to learn how to prepare them like a pro?

Key Takeaways

  • Chicken feet have been a staple in Cantonese dim sum for centuries, showcasing resourcefulness and respect for ingredients in Cantonese culinary culture.
  • The dish involves simmering, braising, and sautéing chicken feet with key ingredients like chicken stock, soy sauce, and spices for a flavorful and tender result.
  • Chicken feet offer a unique texture with cartilage and skin, providing an interesting chewing experience and promoting shared dining experiences in dim sum settings.
  • Chicken feet are high in collagen, beneficial for skin and joint health, and low in calories compared to other meat options.
  • Chicken feet are increasingly available in Asian grocery stores and restaurants, gaining popularity among adventurous eaters and foodies as a delicacy.

History

Dim sum, the Cantonese culinary tradition, has long been intertwined with the humble chicken foot. This unassuming part of the bird has been a beloved component of the dim sum experience for centuries, with its unique texture and savory flavor contributing to the vibrant and diverse flavors of this shared dining style.

The origins of chicken feet in dim sum can be traced back to the Cantonese region of China, where resourcefulness and a reverence for all parts of the animal have long been hallmarks of the local cuisine.

As dim sum evolved from a simple teahouse snack into the elaborate, family-style feasts we know today, the chicken foot became an integral part of the experience, showcasing the ingenuity and respect for ingredients that define Cantonese culinary culture.

Today, the chicken foot remains a beloved and iconic dim sum dish, beloved by locals and visitors alike who relish the opportunity to savor this unique and flavorful delicacy.

Recipe

Chicken feet are a beloved delicacy in Chinese cuisine, particularly in the dim sum tradition. When cooked properly, these seemingly unassuming ingredients transform into a flavorful and textural delight. The key to succulent chicken feet lies in a careful preparation process that involves braising and simmering to tenderize the tough cartilage and skin.

Advertisement

Dim sum-style chicken feet are typically served as bite-sized morsels, often accompanied by a zesty dipping sauce that complements the savory, slightly gelatinous texture. The dish isn't only a culinary experience but also a cultural one, as it has been a staple of Cantonese cuisine for generations.

Ingredients:

  • 1 lb chicken feet, cleaned and trimmed
  • 2 cups chicken stock
  • 1/4 cup soy sauce
  • 2 tablespoons rice vinegar
  • 1 tablespoon brown sugar
  • 3 cloves garlic, minced
  • 1-inch piece fresh ginger, peeled and sliced
  • 2 green onions, sliced
  • 1 teaspoon sesame oil
  • 1/2 teaspoon white pepper

Instructions:

In a large pot, combine the chicken feet, chicken stock, soy sauce, rice vinegar, brown sugar, garlic, and ginger. Bring the mixture to a boil, then reduce the heat and simmer for 1-1.5 hours, or until the chicken feet are tender and the skin is gelatinous.

Remove the pot from heat, stir in the green onions and sesame oil, and season with white pepper. Serve the chicken feet warm, with the cooking liquid drizzled over the top, along with your desired dipping sauce.

Tips:

Advertisement

When selecting chicken feet, look for those that are plump and free of blemishes. It's important to clean and trim the feet thoroughly before cooking to remove any excess skin or debris.

Additionally, be patient during the simmering process, as it may take some time for the tough cartilage to become tender and the skin to develop the desired gelatinous texture.

Cooking Steps

Okay, let's get cooking!

First, you'll boil the chicken feet in water to tenderize them. After that, drain and rinse the feet to get rid of any gunk.

Next, you'll sauté some garlic and ginger in a pan, then add soy sauce and other seasonings.

Advertisement

Step 1. Boil Chicken Feet in Water

boil chicken feet preparation

To begin, start by placing the chicken feet in a large pot and covering them with an ample amount of water.

You'll want to make sure the water level is at least an inch above the chicken feet. Now, turn on the heat and bring the water to a boil.

Once it's bubbling away, let the chicken feet simmer for about 45 minutes to an hour. This lengthy boiling time helps to soften the tough, leathery skin and release the natural gelatin from the bones.

As the chicken feet cook, you'll notice the water turning a cloudy, opaque color. This is a good sign – it means all the collagen and nutrients are being drawn out of the feet and into the broth.

Feel free to skim off any foam or impurities that rise to the surface. When the time is up, carefully remove the pot from the heat and let the chicken feet cool slightly before handling.

They're now ready to be seasoned and served as part of your delicious dim sum feast!

Advertisement

Step 2. Drain and Rinse Chicken Feet

drain and rinse chicken

Once the chicken feet have finished simmering, carefully drain them in a colander.

You'll want to make sure all the water has gone, so gently shake the colander to help it along.

Next, rinse the chicken feet under cool running water. This will wash away any remaining scum or impurities.

As you run your fingers through the feet, you might notice some small, hard nubs – these are the toe nails, and you'll want to remove them.

Simply pinch each one and pull it off.

Now your chicken feet are ready for the next step! Aren't they looking cleaner already?

Advertisement

With the water drained and the feet rinsed, you're one step closer to enjoying delicious, authentic dim sum.

Keep up the good work – the tasty payoff is almost here!

Step 3. Sauté Garlic and Ginger

saut garlic and ginger

With the chicken feet now washed and ready, you'll want to start by sautéing the garlic and ginger. This is a crucial step that will infuse your dish with mouthwatering aromas and flavors.

Heat a large skillet or wok over medium heat and add a couple tablespoons of oil. Once the oil is shimmering, toss in the minced garlic and grated ginger. Stir-fry for about a minute, until the garlic becomes fragrant and starts to turn golden. Be careful not to let it burn, as that can make the flavor bitter.

Next, add the blanched chicken feet to the pan. Toss everything together, making sure the feet are well coated in the garlicky-ginger oil. Let them sizzle and brown for a few minutes, stirring occasionally.

This will help develop a delicious crust on the outside of the chicken feet. Soon, your kitchen will be filled with the most tantalizing scents, getting you excited for the flavorful dim sum dish to come.

Advertisement

Step 4. Add Soy Sauce and Seasonings

add soy sauce seasonings

After the chicken feet have had a chance to brown, it's time to add the soy sauce and other seasonings.

First, pour in a few tablespoons of soy sauce – this will give the chicken feet a lovely, deep brown color and a savory flavor. Don't be shy with the soy sauce, as it's a key ingredient that really makes the dish pop.

Next, sprinkle in a pinch or two of white pepper. The peppery kick will complement the salty soy sauce perfectly.

You can also add a dash of sesame oil, which will add a nutty aroma and a silky mouthfeel.

Step 5. Braise Chicken Feet Until Tender

braise chicken feet tenderly

Having added the soy sauce and seasonings, it's time to braise the chicken feet until they become fork-tender.

First, place the seasoned chicken feet in a large pot and cover with water. Bring the pot to a boil over high heat, then reduce the heat to medium-low and let the feet simmer for 45 minutes to an hour.

You'll know they're done when you can easily pierce them with a fork. The long cooking time helps break down the tough connective tissues, making the feet wonderfully soft and gelatinous.

Advertisement

Once they're tender, you can remove the feet from the pot and serve them up hot. Don't forget to provide plenty of napkins – these juicy chicken feet can get a bit messy to eat!

With their savory, umami-packed flavor, these braised chicken feet make a truly delightful dim sum treat. Enjoy exploring this unique and tasty part of the chicken.

Final Thoughts

Though chicken feet dim sum may not be for everyone, the unique flavors and textures it offers can be a delightful experience for those willing to try it. The braise process transforms the tough, rubbery texture into something surprisingly tender and succulent. The aromatic spices and sauces infuse the chicken feet with a robust, savory taste that's unlike anything else.

For those feeling adventurous, chicken feet dim sum is a fun way to expand your culinary horizons. The cartilage and skin provide an interesting chewing experience, and the subtle flavors make each bite an enjoyable discovery.

Don't be afraid to get your hands a little messy – that's part of the fun! With a bit of practice, you'll be expertly plucking the meat off the bones in no time.

Advertisement

Whether you're a seasoned dim sum enthusiast or a curious newcomer, chicken feet offer a unique and tasty addition to your culinary adventures. Give them a try and see for yourself the pleasures of this unique dim sum delicacy.

Frequently Asked Questions

Are Chicken Feet Considered a Delicacy?

You might consider chicken feet a delicacy, as they're a popular appetizer in certain Asian cuisines. While they may not be everyone's cup of tea, they're prized for their unique texture and flavor.

Can I Find Chicken Feet at Regular Grocery Stores?

You can usually find chicken feet at regular grocery stores, though their availability may vary by location. Check the poultry section or ask a store employee for assistance in locating them.

How Do I Clean and Prepare Chicken Feet?

You can clean and prepare chicken feet by rinsing them thoroughly, trimming any excess skin or nails, and boiling them for about 30 minutes to tenderize the texture. Then, you're ready to use them in your desired recipe.

What's the Difference Between Cantonese and Sichuan-Style Chicken Feet?

The key difference between Cantonese and Sichuan-style chicken feet lies in the flavor profile. Cantonese-style is typically more mild and savory, while Sichuan-style features a bold, spicy kick from the use of Sichuan peppercorns and chili peppers.

Advertisement

How Long Do I Need to Cook Chicken Feet?

You'll need to simmer the chicken feet for about 1-2 hours until they're tender and the cartilage can be easily chewed. The longer they cook, the more the tough connective tissues will break down.

Continue Reading
Advertisement

Affiliate Disclaimer
As an affiliate, we may earn a commission from qualifying purchases. We get commissions for purchases made through links on this website from Amazon and other third parties.

Advertisement

Latest

delicious mini cheesecake treats delicious mini cheesecake treats
Graduations/Birthdays42 seconds ago

Cheesecake Bites

Bite-sized bliss that melts in your mouth, these cheesecake bites offer a creamy indulgence that will leave you craving more....

tangy citrus dessert squares tangy citrus dessert squares
Graduations/Birthdays6 mins ago

Lemon Bars

Unlock the secrets to making the perfect lemon bars, a classic American dessert that combines a buttery crust with a...

delicious chocolate dessert squares delicious chocolate dessert squares
Graduations/Birthdays12 mins ago

Brownies

Joyful and decadent, the story of brownies dates back to a historic culinary mishap, unveiling a rich legacy of chocolate-infused...

delicious homemade chocolate treats delicious homemade chocolate treats
Graduations/Birthdays17 mins ago

Chocolate Chip Cookies

Homemade chocolate chip cookies with their buttery, crispy edges and soft, chewy centers have captivated taste buds for generations, but...

celebratory dessert for gatherings celebratory dessert for gatherings
Graduations/Birthdays23 mins ago

Sheet Cake

Discover the delectable world of sheet cake, a versatile and crowd-pleasing dessert that has captured the hearts of celebrations for...

delicious baked sweet treats delicious baked sweet treats
Graduations/Birthdays29 mins ago

Cupcakes

Baking cupcakes is a delightful endeavor that unveils a world of endless possibilities, from classic flavors to imaginative creations.

creamy egg salad delight creamy egg salad delight
Graduations/Birthdays34 mins ago

Egg Salad Sandwiches

Unlock the secrets to crafting the perfect egg salad sandwich, a timeless classic that delights the senses and satisfies the...

fresh mozzarella tomato basil fresh mozzarella tomato basil
Graduations/Birthdays39 mins ago

Caprese Sandwiches

Indulge in the irresistible blend of creamy mozzarella, juicy tomatoes, and fragrant basil that makes the Caprese sandwich a beloved...

turkey avocado wrap recipe turkey avocado wrap recipe
Graduations/Birthdays44 mins ago

Turkey and Avocado Wraps

Craving a quick, nutritious, and delicious lunch that satisfies your taste buds? Discover the irresistible combination of Turkey and Avocado...

stuffed flatbread delights stuffed flatbread delights
Graduations/Birthdays49 mins ago

Pita Pockets

Juicy fillings, crisp veggies, and savory grilled meats come together in these versatile pita pockets that are easy to prepare...

bacon lettuce tomato delight bacon lettuce tomato delight
Graduations/Birthdays55 mins ago

BLT Sandwiches

A timeless classic, the BLT sandwich captivates with its harmonious blend of crisp bacon, fresh lettuce, and juicy tomatoes, leaving...

artisanal melted cheese delight artisanal melted cheese delight
Graduations/Birthdays1 hour ago

Gourmet Grilled Cheese

Mouth-watering gourmet grilled cheese sandwiches with artisanal breads and premium cheeses that transform this lunchtime classic into an indulgent culinary...

Advertisement

Trending