Chinese Cuisine
Chinese Steamed Egg
Discover the silky, savory delight of Chinese steamed egg, a centuries-old classic that showcases the natural flavors of eggs in a custard-like texture. And if you keep reading, you’ll discover even more amazing variations to try!
You'll love the silky, savory goodness of Chinese steamed egg – it's been delighting palates for centuries! This simple yet versatile recipe showcases the natural flavors of eggs, enhanced by a perfectly executed steaming technique that yields a custard-like texture. Whether you enjoy it as an appetizer, breakfast, or side, this comforting dish is a true delight for the senses. With just a few ingredients and some easy steps, you can master this beloved classic. And if you keep reading, you'll discover even more amazing variations to try! In Chinese cuisine, steamed egg is often prepared using Cantonese cooking techniques, which emphasize delicate flavors and precise execution. By mastering these techniques, you can create a silky and delicate texture that is truly irresistible. Whether you’re a seasoned chef or a novice in the kitchen, Chinese steamed egg is a dish that anyone can enjoy and appreciate. So why not give it a try and experience the deliciousness of this traditional Chinese dish?
Key Takeaways
- Chinese steamed egg, also known as 'water egg' or 'egg custard', has a history dating back to the Tang Dynasty and remains a versatile dish in Chinese cuisine.
- The dish showcases the natural flavors of eggs with a silky texture, achieved through precise techniques of whisking, straining, and steaming.
- Toppings like chopped scallions, sesame oil, or soy sauce can be added to enhance the flavor profile of the steamed eggs.
- Steaming is a healthy cooking method that retains more nutrients compared to boiling or frying, making it ideal for weight management.
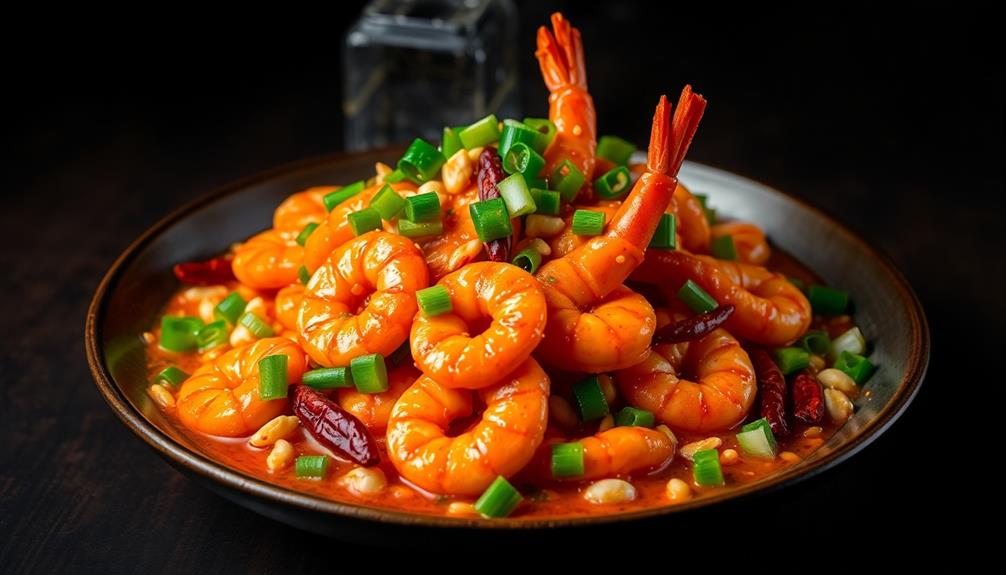
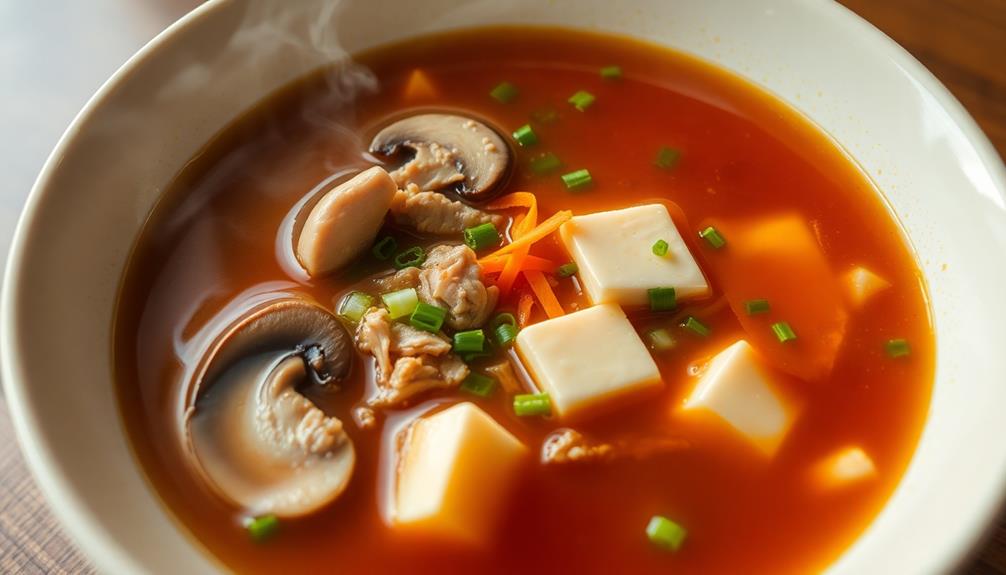
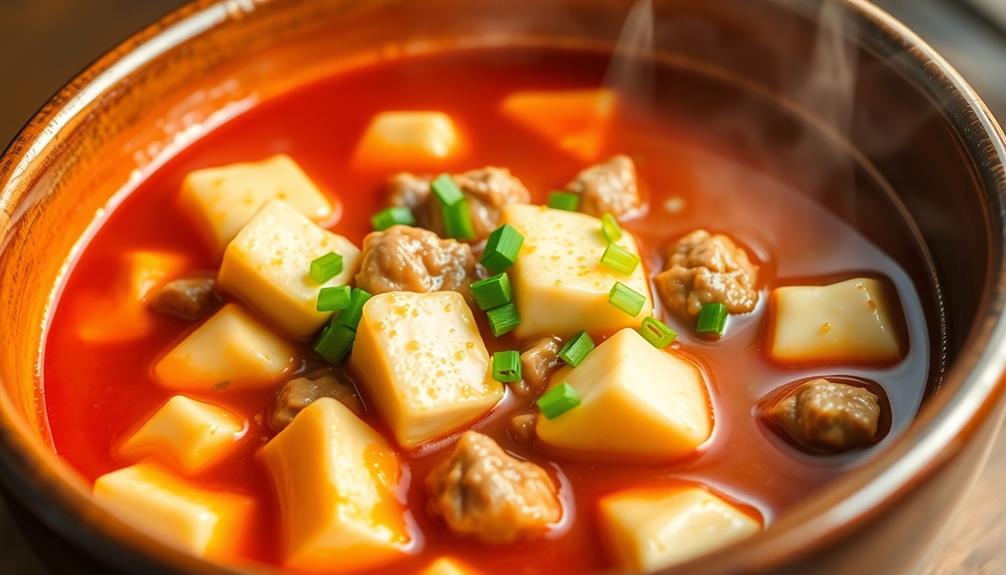
- Variations of Chinese steamed egg can include the addition of vegetables, seafood, or different cheeses for a personalized touch.
History
Tracing the origins of Chinese steamed egg, also known as 'water egg' or 'egg custard', takes us back centuries in Chinese culinary history.
This beloved dish has been a staple in Chinese homes for generations, with records of its preparation dating back to the Tang Dynasty in the 7th century. A well-loved comfort food, this dish consists of thinly sliced meat and vegetables stir-fried in a savory sauce, served over steamed rice. Its popularity has spread far beyond China, and variations can be found in Thai cuisine, such as the famous Thai dessert recipe, mango sticky rice. Despite its long history, this dish continues to be a favorite for its flavorful and satisfying qualities.
The simplicity of its ingredients – just eggs and water – belies the delicate balance of techniques required to achieve the signature silky, custardy texture.
Over time, creative cooks have experimented with additions like soy sauce, scallions, or minced meat to enhance the flavors.
Today, Chinese steamed egg remains a comforting and versatile dish, enjoyed at any time of day.
Whether served as a light appetizer, a nourishing breakfast, or a satisfying side, this timeless recipe continues to delight and nourish generations of Chinese families.
Recipe
Chinese Steamed Egg is a simple, delicate dish that showcases the natural flavors of eggs. The silky, custard-like texture is achieved by gently steaming the egg mixture, resulting in a comforting and nourishing dish.
Steaming the eggs is a technique that requires a delicate touch. The key is to maintain a consistent, gentle heat to avoid overcooking, which can result in a rubbery or watery texture. When done properly, the steamed egg will have a smooth, velvety consistency that melts in your mouth.
Ingredients:
- 4 large eggs
- 1 cup chicken or vegetable broth
- 1 teaspoon soy sauce
- 1/2 teaspoon sesame oil
- Salt and white pepper to taste
Instructions:
Lightly whisk the eggs in a heat-proof bowl or ramekin until just combined, being careful not to incorporate too much air. Slowly stir in the broth, soy sauce, and sesame oil until well blended. Season with salt and white pepper to taste.
Place the bowl or ramekin in a steamer basket over a pot of simmering water, making sure the water doesn't touch the bottom of the bowl. Cover and steam for 10-15 minutes, or until the egg mixture has set but is still slightly jiggly in the center. Avoid opening the lid during the steaming process, as this can disrupt the delicate cooking.
Tips:
For best results, use fresh, high-quality eggs. The type of broth used can also impact the flavor, so experiment with different broths to find your preferred taste.
Additionally, be mindful of the water temperature and steam level to ensure gentle, consistent cooking. Oversteaming can result in a rubbery texture, while understeaming may leave the eggs undercooked.
Cooking Steps
Crack those eggs into a bowl, then add a splash of water and whisk the mixture until it's nice and smooth.
Next, you'll need to steam this eggy goodness – just set it over simmering water and let it cook until it's firm and delightful.
Mmm, the fluffy, savory results are ready to enjoy right away!
Step 1. Crack Eggs Into a Bowl
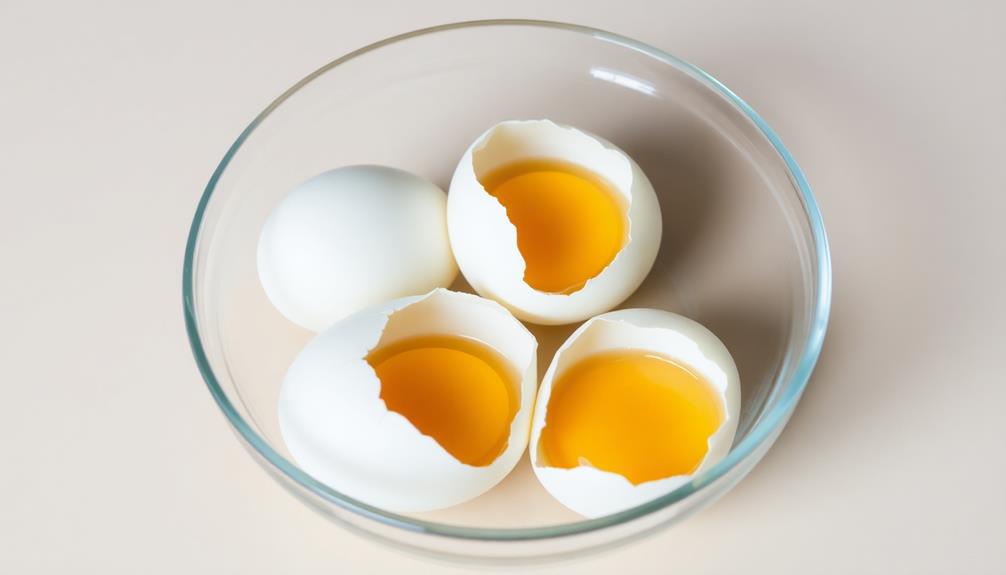
Egg-breaking ritual marks the start of this savory custard's creation. Gently tap the eggs against the side of your bowl until the shells crack. Carefully separate the shells and let the gooey insides slide into the waiting vessel. No need to be too delicate – these eggs are destined for something wonderful!
Make sure there are no stray bits of shell, then give the eggs a gentle whisk. This helps them blend together seamlessly. Add a splash of water and a pinch of salt, then whisk again until the mixture is smooth and uniform.
Your eggy base is now ready to be steamed to silky perfection. This simple start sets the stage for the tender, savory goodness to come. With the eggs cracked, your Chinese steamed egg is one step closer to the table. Time to move on to the next part of the recipe!
Step 2. Add Water
With the eggs now whisked, you can go ahead and add a splash of water. The amount you'll need is around 2 to 3 tablespoons per egg. This water will help create a smooth, silky texture in your Chinese steamed egg. Don't be shy – go ahead and pour it right in!
Gently stir the mixture with a fork or whisk to fully incorporate the water. You want a uniform consistency, without any pockets of dry egg. The batter should have a lovely, creamy appearance when you're done.
Next, you'll want to strain the mixture through a fine-mesh sieve. This step helps remove any tiny bits of cooked egg that may have formed during the whisking process. The result will be an extra smooth, refined texture.
Now that the water is added and the batter is strained, you're ready for the next step – steaming! Get your steamer basket prepped and let's get cooking.
Step 3. Whisk the Egg-Water Mixture
Once the water is incorporated, vigorously whisk the egg-water mixture. This step is crucial, as it helps create the signature silky, custard-like texture of Chinese steamed egg.
Using a quick, back-and-forth motion, quickly stir the eggs and water together until they're fully blended. You'll know you're done when the mixture becomes light and frothy, with no visible clumps or streaks of egg.
Don't be afraid to really put some muscle into it – the more air you can incorporate, the better! This step takes some elbow grease, but it's worth it. The more you whisk, the smoother and richer your final steamed egg will turn out.
Keep at it until the mixture is completely homogenized, with a consistency resembling warm honey.
Now that your eggs are ready, it's time to steam them to perfection!
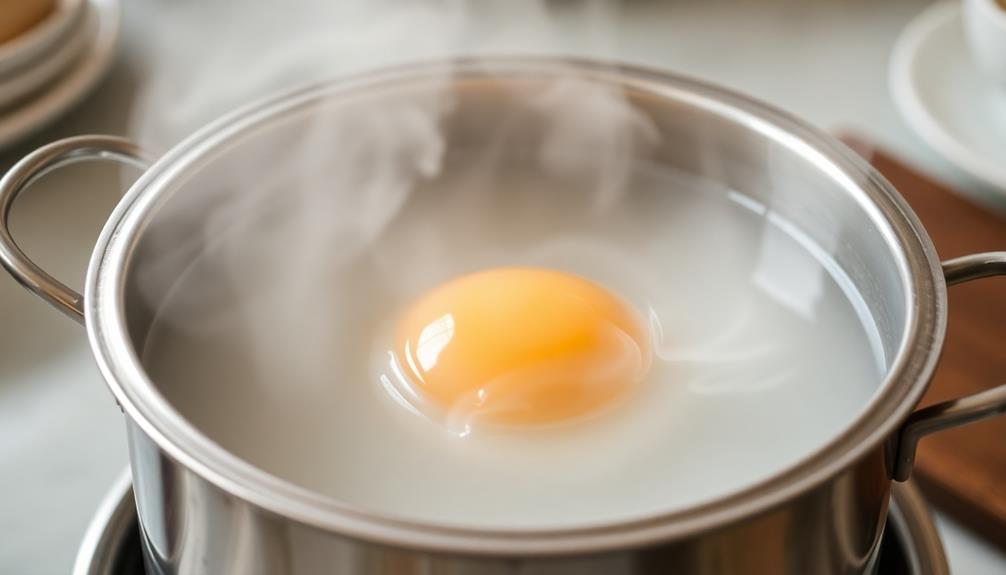
Step 4. Steam the Mixture
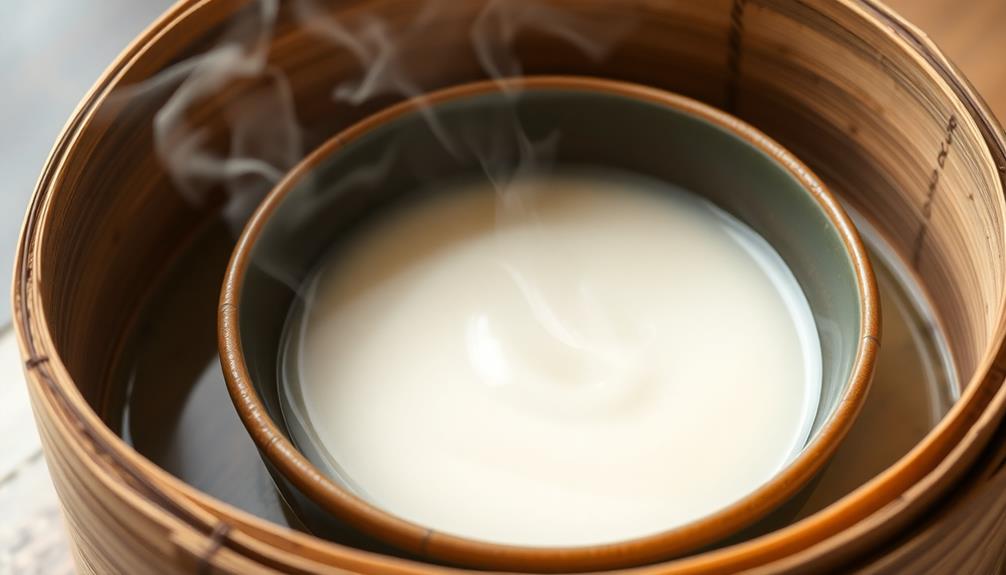
Into the steamer it goes! With your whisked egg-water mixture ready, it's time to start the steaming process.
Carefully pour the mixture into a heat-safe dish or bowl. Make sure the dish fits snugly inside your steamer.
Now, add water to the base of the steamer, being cautious not to let the water touch the bottom of the dish. Turn on the heat and let the water come to a gentle boil.
Once it's simmering, place the dish inside the steamer, cover the lid, and let the magic happen!
As the water vapors rise, they'll gently cook the egg, creating a soft, silky texture.
Keep an eye on it, as the steaming usually takes around 10-15 minutes. When the center is just set, with a slight jiggle, your Chinese steamed egg is ready!
Carefully remove the dish from the steamer and serve warm, garnished with your favorite toppings.
Step 5. Serve Immediately While Hot
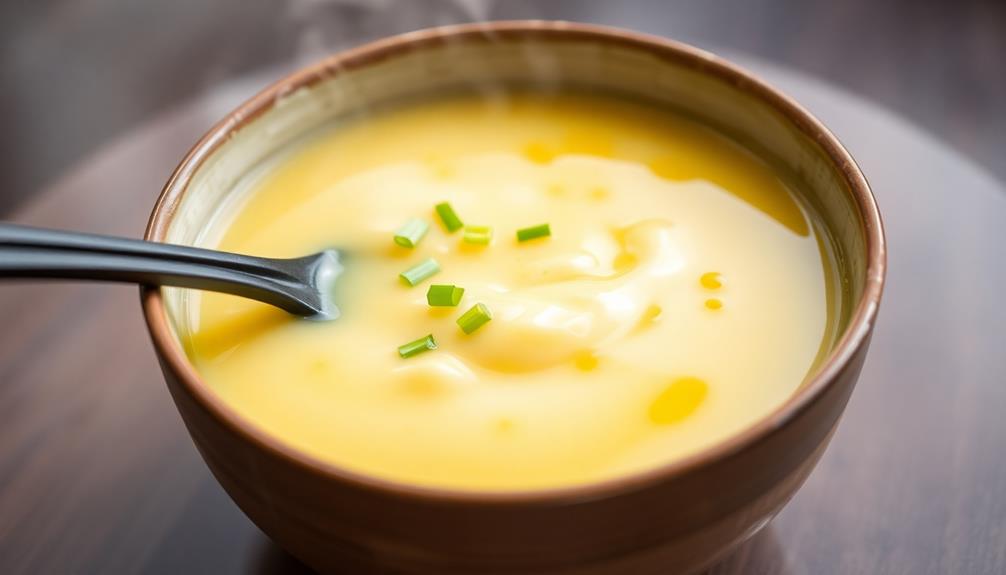
Your Chinese steamed egg is now ready to serve! Carefully remove the bowl from the steamer using oven mitts or a towel. The egg should be glistening and delicately quivering, releasing a heavenly aroma.
Don't let it sit for too long – this dish is best enjoyed hot!
Grab a spoon and scoop up a portion, making sure to get some of the silky smooth custard-like texture and the savory broth. The flavors will burst in your mouth, with the richness of the egg perfectly balanced by the salty soy sauce and aromatic ginger. Mmm, it's simply divine! As the warmth of the dish lingers on your palate, you can’t help but imagine pairing it with other bold flavors. Perhaps something with a kick, like a **Szechuan spicy eggplant recipe**, would be a perfect complement, adding a fiery contrast to the delicate custard. The combination of textures and seasoning would create a dining experience that’s both adventurous and comforting.
Feel free to add a sprinkle of chopped scallions or a drizzle of sesame oil on top for an extra layer of flavor.
Serve the steamed egg immediately while it's piping hot, so you can savor every last bit of its delicate, comforting goodness.
Dig in and enjoy this authentic taste of China!
Final Thoughts
Chinese steamed egg is a simple yet delicious dish that's a staple in many households.
Now that you've mastered the art of making this comforting classic, don't be afraid to get creative! Try experimenting with different ingredients like mushrooms, scallions, or even a sprinkle of cheese on top. The possibilities are endless.
Remember, the key to perfect Chinese steamed egg is patience. Take your time and resist the urge to peek while it's cooking – that'll ruin the delicate texture.
And don't forget to serve it piping hot, straight from the steamer. Trust us, your taste buds will thank you.
Steaming may seem like an old-fashioned cooking method, but it's actually one of the healthiest ways to prepare food. Not only does it lock in all the natural flavors and nutrients, but it's also super easy to clean up afterwards.
Frequently Asked Questions
Can I Use a Different Type of Egg in the Recipe?
You can absolutely use a different type of egg in the recipe. While the recipe may call for a specific egg, you can experiment with different options like quail, duck, or even a mix of eggs to find your preferred flavor and texture.
How Do I Adjust the Cooking Time for Smaller Portions?
To adjust the cooking time for smaller portions, start by reducing the time in 2-3 minute increments. Check the dish frequently and continue cooking until the egg is set but still tender. The exact time will depend on the size of your portions.
Is It Possible to Make Chinese Steamed Egg Ahead of Time?
Yes, you can make the dish ahead of time. Simply prepare the custard, cover, and refrigerate. When ready to serve, steam the custard until heated through. This makes the dish convenient to prepare in advance.
What Are Some Common Variations or Additions to the Dish?
You can add various ingredients to this dish to create different flavors. Common variations include adding minced meat, vegetables, seafood, or herbs. The possibilities are endless, so feel free to experiment and find your favorite combination.
How Does the Texture of Chinese Steamed Egg Differ From Regular Steamed Eggs?
The texture of Chinese steamed eggs differs from regular steamed eggs in that it's silkier, more delicate, and almost custard-like. The gentle steaming process results in a smooth, velvety consistency that sets it apart from its more basic counterpart.
Li Wei is an authentic Chinese cooking expert specializing in regional and classic Chinese dishes. From hand-pulled noodles to delicate dim sum and traditional stir-fries, his culinary expertise showcases the variety of Chinese cuisine. Li Wei’s recipes emphasize simplicity, tradition, and rich, flavorful sauces.
Chinese Cuisine
Mian Bao Xia: Chinese Shrimp Toast You’ll Want to Try
With its irresistible crunch and tender shrimp filling, this authentic Chinese shrimp toast is a must-try delicacy that will transport your taste buds to the vibrant streets of Cantonese cuisine.
Get ready to indulge in a mouthwatering Chinese classic – mian bao xia, or shrimp toast! This crispy delight has graced Cantonese tables for centuries, and it's easy to see why. Start with fresh, finely chopped shrimp that's mixed with savory seasonings. Spread the mixture onto slices of bread, then fry them to golden-brown perfection. The result is a harmony of textures – the satisfying crunch of toast and the tender sweetness of shrimp. Serve these up hot, and you'll understand why this beloved snack has become a global favorite. Keep reading to discover the easy steps to recreate this authentic Chinese treat at home.
Key Takeaways
- Shrimp toast is a classic Cantonese dish that has evolved over centuries, offering a delightful balance of flavors and textures.
- Preparing shrimp toast involves finely chopping fresh shrimp, mixing it with seasonings, and coating bread slices before frying for a crispy exterior.
- Spreading the shrimp mixture evenly on the bread and achieving the perfect golden-brown color are crucial steps for a successful shrimp toast.
- Serving shrimp toast immediately after frying ensures the warmth and crunchiness are preserved, enhancing the overall eating experience.
- Shrimp toast is a versatile and beloved snack that showcases the artistry of Cantonese cuisine and can be easily recreated at home.
History
Shrimp toast's origins can be traced back to the Cantonese cuisine of southern China. This tasty snack has been a beloved part of Chinese culinary tradition for centuries.
It's believed that shrimp toast first emerged during the Qing dynasty, when chefs experimented with creative ways to showcase the fresh seafood abundant in coastal regions.
Over time, the recipe evolved, with different variations developing across China. Some cooks added minced pork or other mix-ins to the shrimp filling, while others played with the shape and size of the toast.
Today, shrimp toast remains a staple in Cantonese restaurants and is cherished for its irresistible combination of crispy bread, savory shrimp, and aromatic seasonings.
Whether you're enjoying it as an appetizer or a snack, shrimp toast is a delightful taste of Chinese culinary history. Its popularity has even spread beyond China, making it a beloved dish around the world.
Cooking Steps
To begin the cooking process, gather all the necessary ingredients and equipment. You'll need shrimp, bread, egg, cornstarch, and oil for frying.
First, peel and devein the shrimp, then finely chop them into a paste. In a bowl, combine the shrimp, breadcrumbs, an egg, and a pinch of cornstarch. Mix everything together until it forms a sticky dough.
Next, take a slice of bread and spread the shrimp mixture evenly on one side. Gently press the mixture down to help it adhere.
In a skillet, heat up some oil over medium-high heat. Carefully place the shrimp toast, shrimp-side down, into the hot oil. Fry until golden brown, about 2-3 minutes per side. Drain the fried shrimp toast on a paper towel-lined plate.
Serve the crispy, golden shrimp toast warm, garnished with chopped scallions or sesame seeds if desired. Enjoy this delightful Chinese appetizer!
Step 1. Finely Chop Fresh Shrimp
First, take the fresh shrimp and finely chop them.
You'll want to make sure they're chopped into small, uniform pieces. Don't worry if it takes a little while – the key is to get them nice and fine so they'll blend perfectly into the toast mixture.
Use a sharp knife and take your time, making sure to mince the shrimp thoroughly.
Once they're all nicely chopped up, you can move on to the next step.
Don't be afraid to really get in there and chop away – the finer the shrimp, the better the toast will turn out.
Just be careful with your fingers!
With the shrimp all chopped up, you're one step closer to creating that delicious, authentic Chinese shrimp toast.
Keep going, you're doing great!
Step 2. Mix Shrimp With Seasonings
With the shrimp finely chopped, you'll now want to mix them with a few key seasonings. In a medium bowl, combine the chopped shrimp with a teaspoon of soy sauce, a dash of toasted sesame oil, and a sprinkle of white pepper. Stir everything together until the shrimp is evenly coated.
Next, add a couple of tablespoons of cornstarch to the bowl. The cornstarch will help bind the shrimp mixture and create a lovely, creamy texture.
Using your clean hands, gently mix the cornstarch into the shrimp, being careful not to overmix and toughen the shrimp.
Step 3. Spread Shrimp Mixture on Bread
With the shrimp seasoning ready, you'll now want to spread it evenly atop slices of bread. Use a butter knife or the back of a spoon to gently distribute the savory mixture across the surface of each slice.
Make sure to cover the bread completely, getting those delightful shrimp bits all the way to the edges.
Once the shrimp is spread, you can start to get creative! Grab some sharp kitchen scissors and snip the bread into fun shapes – triangles, rectangles, or even little shrimp-inspired designs. This will make your finished shrimp toasts look extra appetizing.
Now, it's time to get those toasts into the oven. Bake them at a high temperature, around 400°F, for about 10-12 minutes.
Keep an eye on them, as you want the bread to turn golden brown and the shrimp to become lightly crispy. When they're done, you'll have a tray of perfectly toasted shrimp bites, ready to delight your family and friends.
Step 4. Fry Coated Bread Slices
After spreading the shrimp mixture on the bread slices, you'll want to fry them to achieve that signature crispy texture.
Heat up a skillet or pan over medium-high heat and add a generous amount of oil. Carefully place the coated bread slices into the hot oil and let them sizzle for a minute or two on each side. Keep an eye on them, flipping gently, until they turn a beautiful golden-brown. The key is to fry them until they're crisp on the outside but still tender on the inside.
Once they're done, transfer the fried shrimp toast slices to a paper towel-lined plate to drain any excess oil. This helps create that delightful crunch that makes this dish so irresistible.
With the shrimp mixture sealed inside the crispy bread, you're well on your way to enjoying an authentic taste of Chinese cuisine right in your own kitchen. Get ready for the compliments to start rolling in!
Step 5. Serve Immediately While Hot
Once the shrimp toast slices have finished frying, don't let them sit around.
You'll want to serve them immediately while they're hot and crispy. The key is to enjoy these tasty bites at the peak of their flavor and texture.
As soon as they come out of the oil, transfer them to a paper towel-lined plate to drain off any excess grease. Then, waste no time getting them to the table.
Your guests will be eager to pop these little shrimp-filled toasts into their mouths. The combination of the crunchy bread, savory shrimp, and aromatic seasonings is simply irresistible when it's fresh off the stove.
Plus, the heat enhances the shrimp's natural sweetness and brings out the richness of the filling.
Don't let these shrimp toasts cool down – serve them up piping hot for the ultimate snacking experience.
Your family and friends will be delighted by this authentic Chinese appetizer.
Final Thoughts
Shrimp toast's timeless appeal lies in its perfect balance of flavors and textures.
Whether you're enjoying it as an appetizer or a snack, the warm, crispy bread combined with the savory, slightly sweet shrimp topping is simply irresistible.
What sets this dish apart is the care and attention to detail that goes into crafting it.
From the delicate shrimp mixture to the perfectly toasted bread, every component works together harmoniously.
And the best part? Shrimp toast is surprisingly easy to make at home, allowing you to savor its deliciousness anytime.
Frequently Asked Questions
What Is the Origin of the Name "Mian Bao Xia"?
The name "mian bao xia" refers to the Chinese dish of shrimp toast. It's a combination of the Mandarin words for "wheat bread" (mian bao) and "shrimp" (xia), reflecting the primary ingredients used in this popular snack.
Can I Use Other Types of Bread for the Toast?
You can certainly use other types of bread for the toast. White bread, sourdough, and even brioche would all work well. The key is to choose a bread that can hold up to the shrimp mixture.
How Long Can the Leftover Shrimp Toast Be Stored?
The leftover shrimp toast can be stored in the fridge for 2-3 days. Just make sure to keep it in an airtight container. You can reheat it in the oven or toaster before serving.
Can I Fry the Shrimp Toast Ahead of Time?
Yes, you can fry the shrimp toast ahead of time. Once fried, you can store it in the refrigerator for up to 3 days. Just reheat it in the oven or air fryer before serving to maintain its crispy texture.
Is There a Vegetarian or Vegan Version of This Dish?
You can easily make a vegetarian or vegan version of this dish by substituting the shrimp with finely chopped mushrooms, tofu, or a plant-based protein of your choice. Just follow the same cooking method for a delicious meatless alternative.
Nadia brings the warmth and depth of Lebanese cuisine to Cook if Ya. From classic mezze spreads like hummus and tabbouleh to rich, flavorful mains like shawarma and kibbeh, her recipes offer a delicious journey through the flavors of Lebanon, emphasizing fresh herbs, spices, and aromatic ingredients.
Chinese Cuisine
Yunnan Cross-Bridge Rice Noodles
Nestled in the heart of Yunnan, China, Yunnan cross-bridge rice noodles offer a mouthwatering journey through the province’s rich culinary heritage, leaving you craving for more.
Yunnan cross-bridge rice noodles are a mouthwatering dish hailing from the vibrant province of Yunnan, China. Tracing their roots to the late Qing dynasty, these noodles were accidentally created by Yunnanese scholars crossing the Long Bridge over the Yangtze River. Today, this UNESCO-recognized culinary treasure features a unique cooking method – you'll assemble the ingredients, then pour in hot, flavorful broth to create an unforgettable dining experience. Get ready to dive into tender rice noodles, fresh veggies, and succulent proteins, all expertly blended for a true taste of Yunnan's rich heritage. The versatility of Yunnan cross-bridge rice noodles reflects the region’s culinary diversity, with each bowl offering a comforting yet customizable experience. Much like **yangzhou fried rice ingredients**, which can vary but commonly include shrimp, char siu pork, peas, and eggs, the beauty of this dish lies in the freedom to choose your own medley of vegetables, meats, and toppings. Whether enjoyed in a local eatery or prepared at home, each bowl promises a delightful fusion of flavors, paying homage to Yunnan’s storied gastronomic traditions.
Key Takeaways
- Yunnan Cross-Bridge Rice Noodles have their origins in the late Qing dynasty of Yunnan province, created by Yunnanese scholars crossing the Long Bridge over the Yangtze River.
- This noodle dish is recognized as a UNESCO intangible cultural heritage, representing the rich heritage and culinary traditions of Yunnan province.
- The unique cooking method involves assembling ingredients and pouring hot broth over them, creating a multi-textural dining experience with robust flavors.
- Yunnan Cross-Bridge Rice Noodles are traditionally served at family gatherings and celebrations, reflecting the dish's cultural significance and symbolism of hospitality.
- The dish features a flavorful broth, chewy rice noodles, fresh vegetables, and various proteins, offering a balanced and customizable nutritional profile.
History
The origins of Yunnan cross-bridge rice noodles can be traced back to the late Qing dynasty, when Yunnan province's diverse culinary traditions began to take shape.
This unique dish was created by a group of diligent Yunnanese scholars who'd often carry their lunch with them as they crossed the Long Bridge over the Yangtze River. One day, as they were eating, the noodles fell into the hot soup below – and a tasty new dish was born!
The scholars quickly realized that submerging the noodles in the hot broth was actually the key to the dish's delectable flavor. The heat softened the rice noodles while infusing them with the rich, aromatic broth.
Over time, cross-bridge noodles became a beloved specialty in Yunnan, known for their springy texture and mouthwatering savory notes.
Today, this centuries-old recipe is still prepared with care, using fresh regional ingredients that celebrate Yunnan's vibrant culinary heritage.
Recipe
Yunnan cross-bridge rice noodles, also known as "Crossing the Bridge" noodles, is a popular dish originating from the Yunnan province in China. This dish is renowned for its flavorful broth and chewy rice noodles. The unique cooking method involves carefully assembling the ingredients and pouring hot broth over them, creating a visually stunning and delicious meal.
The dish is typically served family-style, with the broth and noodles presented separately, allowing each diner to customize their bowl to their liking. The process of "crossing the bridge" refers to the tradition of the chef bringing the hot broth to the table, creating a sense of anticipation and theater.
Ingredients:
- 8 oz rice noodles
- 4 cups chicken or vegetable broth
- 1 lb boneless, skinless chicken thighs, thinly sliced
- 2 eggs, beaten
- 1 cup thinly sliced cabbage
- 1 cup bean sprouts
- 1/2 cup thinly sliced green onions
- 2 cloves garlic, minced
- 1 tbsp soy sauce
- 1 tsp sesame oil
- 1/2 tsp white pepper
Cooking Instructions:
In a large pot, bring the broth to a boil. Reduce heat to low and keep the broth at a gentle simmer.
Arrange the chicken, eggs, cabbage, bean sprouts, and green onions on a serving platter. Serve the hot broth, noodles, and garnishes separately, allowing each diner to customize their bowl.
When cooking this dish, it's important to slice the ingredients thinly to ensure quick cooking and easy assembly. Additionally, make sure the broth is piping hot when served, as the contrast between the hot broth and the fresh, cool ingredients is a key part of the experience.
Enjoy your Yunnan cross-bridge rice noodles!
Cooking Steps
Soak those rice noodles in water until they're nice and soft.
Once the broth's bubbling away, you can start arranging everything – the noodles, the broth, and all the tasty toppings.
Don't forget to add your favorite fixings, then serve it up piping hot for the best slurping experience!
Step 1. Soak Rice Noodles in Water
Grab a large bowl and fill it with lukewarm water. This is where you'll soak your rice noodles to get them nice and soft.
Make sure the water covers the noodles completely, as they'll expand as they soak. Give the noodles about 20-30 minutes to soak, stirring them occasionally to ensure even softening. You'll know they're ready when they've become pliable and easy to bend without breaking.
Once the noodles have soaked, drain them in a colander. Rinse them under cool running water to remove any excess starch.
This step helps prevent the noodles from sticking together later on. Gently squeeze out any excess water, being careful not to damage the delicate noodles.
Now they're all set to be added to your hot broth or stir-fried dishes! Get ready to enjoy the chewy, slurpable goodness of your Yunnan cross-bridge rice noodles.
Step 2. Bring Broth to a Boil
Next, bring a large pot of broth to a rolling boil. This'll be the key to unlocking the mouthwatering flavors of your Yunnan cross-bridge rice noodles.
Make sure to use a generous amount of broth – you want enough to fully submerge the noodles. As the broth heats up, you'll start to see those lively bubbles burst on the surface. That's your cue that it's ready!
Don't be afraid to crank up the heat to get it going. Once it's at a full boil, you can reduce the heat slightly to maintain that steady simmer.
Now, grab your soaked rice noodles and gently add them to the hot broth. Stir them around to make sure they're fully submerged and separated.
Let the noodles cook for just a minute or two until they're tender and pliable. You want them to have a nice bite, not be mushy.
With the broth boiling and the noodles ready, you're one step closer to slurping up a delicious bowl of Yunnan goodness!
Step 3. Arrange Noodles, Broth, and Toppings
With the broth at a rolling boil and the noodles ready, it's time to assemble your Yunnan cross-bridge rice noodle dish.
First, grab a large bowl and carefully pour in some of the steaming hot broth.
Now, use your chopsticks to gently lower the freshly cooked noodles into the broth. Arrange them neatly, making sure they're fully submerged.
Next, it's time for the fun part – adding your favorite toppings! You can load up your bowl with slices of tender beef, juicy chicken, or crisp veggies like baby bok choy.
Don't forget to sprinkle on some chopped scallions and cilantro for extra flavor and color.
Finally, give everything a gentle stir to combine the ingredients.
Your Yunnan cross-bridge rice noodle masterpiece is now ready to enjoy! The hot, fragrant broth, chewy noodles, and tasty toppings make for a truly delightful and satisfying meal.
Step 4. Add Desired Toppings
With the noodles and broth ready, you can now start adding your desired toppings. The fun part is choosing all the tasty treats to top off your bowl!
First, you'll want to add some fresh, crunchy vegetables like thinly sliced cabbage, carrot, and green onion. These add great texture and flavor.
Next, consider adding a protein like roasted chicken, beef, or even soft-boiled eggs for extra heartiness.
Don't forget the herbs – fresh cilantro, mint, and Thai basil will really make the dish pop with their aromatic flavors.
For a bit of crunch, try topping it off with crispy wonton strips or peanuts.
Finally, a drizzle of chili oil or sriracha will give it a delightful kick of heat.
Get creative and customize your bowl exactly how you like it! With all these amazing toppings, your Yunnan Cross-Bridge Rice Noodles are about to be taken to the next level of deliciousness.
Step 5. Serve Immediately, While Hot
Once the noodles and toppings are ready, serve the dish immediately while it's hot. The steaming broth, tender noodles, and aromatic toppings are at their best when enjoyed right away.
Don't let the food cool down – dive in and savor every delicious bite!
Transfer the noodles and toppings to a big bowl, then ladle the hot broth over the top. The noodles will soak up the flavorful liquid, creating a comforting and satisfying meal.
Make sure to include all your favorite toppings for the ultimate Cross-Bridge Rice Noodle experience.
As you take that first slurpy spoonful, you'll be transported to the bustling markets of Yunnan. The combination of textures and flavors is simply irresistible.
Final Thoughts
As you've explored the depths of Yunnan's renowned cross-bridge rice noodles, it's clear that this culinary delight offers a unique and captivating dining experience.
From the artful preparation to the robust flavors, every bite transports you to the heart of this vibrant region. What truly sets these noodles apart is the dedication and passion of the chefs who've perfected the craft over generations. The spicy dan dan noodles recipe is a shining example of their expertise, with its balance of heat and savory flavors. Each bowl is a homage to tradition, a testament to the artistry and skill passed down through the years. With every mouthful, you can taste the history and culture of this celebrated dish.
As you reflect on your journey through this culinary adventure, take a moment to savor the memories.
Picture the steaming bowls, the aromatic broth, and the interplay of textures that make each mouthful a delightful discovery.
This is more than just a meal – it's a cultural experience that celebrates the rich heritage of Yunnan and the enduring power of food to bring people together.
Frequently Asked Questions
Can the Noodles Be Made With Different Types of Rice?
You can certainly use different types of rice to make rice noodles. The choice of rice variety will affect the texture and flavor, so experiment to find the one that suits your preferences best.
How Long Do the Noodles Typically Last After Being Cooked?
How long do the cooked noodles typically last? Well, it depends on the type of noodles, but generally, they'll stay fresh for 3-5 days when stored properly in the fridge. Just be sure to keep 'em covered to prevent drying out.
Are There Any Dietary Restrictions Associated With This Dish?
Regarding dietary restrictions, the dish may not be suitable for individuals with gluten or nut allergies. It's always best to inquire about the specific ingredients used to ensure it aligns with your dietary needs.
Can the Toppings Be Customized to Individual Preferences?
You can customize the toppings to your individual preferences. The dish is highly versatile, allowing you to tailor the ingredients to your liking and dietary needs. You have the freedom to create a personalized version of this dish.
Are There Any Health Benefits to Consuming Yunnan Cross-Bridge Rice Noodles?
When you consume rice noodles, you can enjoy some health benefits. They're typically low in fat and calories, and provide complex carbs that can fuel your body. Plus, they're gluten-free, making them a great option for those with dietary restrictions.
Li Wei is an authentic Chinese cooking expert specializing in regional and classic Chinese dishes. From hand-pulled noodles to delicate dim sum and traditional stir-fries, his culinary expertise showcases the variety of Chinese cuisine. Li Wei’s recipes emphasize simplicity, tradition, and rich, flavorful sauces.
Chinese Cuisine
Red-Braised Pork Belly
A succulent Hunan classic, red-braised pork belly is a melt-in-your-mouth delight that has captivated generations, with its rich soy and brown sugar flavors. Discover the secrets behind this…
Red-braised pork belly is a scrumptious Chinese dish from Hunan Province that's been passed down for generations. You'll start by searing the pork to get a mouthwatering crust, then simmer it in a rich soy and brown sugar sauce with fragrant spices like star anise and cinnamon. The long, slow cooking makes the pork belly melt-in-your-mouth tender. Garnish it with fresh green onions for a pop of color and crunch. Serve this comforting dish with steamed rice, and you'll see why it's considered a true culinary treasure. Want to learn more about the storied history and cooking techniques behind this irresistible dish?
Key Takeaways
- Red-Braised Pork Belly is a traditional Chinese dish originating from Hunan province, known for its savory, sweet, and aromatic flavors.
- The recipe features tender pork belly simmered in a rich sauce with key ingredients like soy sauce, rice wine, and brown sugar.
- Cooking techniques such as blanching, searing, and long braising are essential for achieving the desired tenderness and flavor complexity.
- The harmonious balance of flavors and textures, including the tender pork and the crunchy green onion garnish, creates an irresistible culinary experience.
- Patience and skill development are crucial in preparing this dish, as it can be improved by allowing the flavors to meld over time.
History
The origins of red-braised pork belly can be traced back to the Hunan province of China, where this savory and aromatic dish has been a beloved regional delicacy for centuries.
The heart of this classic recipe lies in the slow-cooking process, which allows the pork's natural flavors to mingle with the rich, caramelized sauce. As the pork simmers away, the fat renders down, creating a melt-in-your-mouth texture that's simply irresistible.
Over time, the dish has become a beloved part of Chinese culinary heritage, with families passing down their cherished techniques and secret ingredients from generation to generation.
Whether enjoyed as a family meal or a special occasion feast, red-braised pork belly remains a beloved staple that continues to delight taste buds across China and beyond. Red-braised pork belly, also known as “hong shao rou” in Mandarin, is a classic Chinese cuisine delicacy that is characterized by its rich, savory flavor and melt-in-your-mouth tenderness. The dish is often prepared by braising thick slices of pork belly in a flavorful mixture of soy sauce, ginger, garlic, and spices until the meat is succulent and the sauce has thickened to a luxurious glaze. Its popularity extends beyond China, as food enthusiasts around the world are drawn to its irresistible combination of sweet, savory, and umami flavors.
Its captivating combination of savory, sweet, and aromatic notes makes it a true culinary treasure, steeped in the rich traditions of Chinese cuisine.
Recipe
Red-Braised Pork Belly is a classic Chinese dish that features tender, flavorful pork belly slowly simmered in a rich, savory sauce. The long braising time allows the pork to become meltingly tender, while the aromatic spices and soy sauce infuse the meat with deep, complex flavors.
The key to the perfect red-braised pork belly is patience. The dish requires a bit of time and attention, but the results are well worth it. The pork belly is first seared to create a golden-brown crust, then simmered in a mixture of soy sauce, rice wine, and spices until the meat is fall-apart tender.
- 2 lbs pork belly, cut into 1-inch cubes
- 3 cloves garlic, minced
- 1 inch ginger, peeled and sliced
- 1/2 cup soy sauce
- 1/4 cup rice wine or Shaoxing wine
- 2 tablespoons brown sugar
- 2 star anise
- 2 cinnamon sticks
- 4 cups chicken or beef stock
In a large Dutch oven or heavy-bottomed pot, sear the pork belly over medium-high heat until golden brown on all sides, about 5-7 minutes. Remove the pork from the pot and set aside.
Reduce the heat to medium, add the garlic and ginger to the pot, and cook for 1-2 minutes until fragrant. Pour in the soy sauce, rice wine, brown sugar, star anise, and cinnamon sticks, and stir to combine.
Add the seared pork belly and stock, and bring the mixture to a boil. Reduce the heat to low, cover the pot, and simmer for 2-3 hours, or until the pork is tender and the sauce has thickened. Adjust the seasoning to taste, and serve the red-braised pork belly with steamed rice, a side of vegetables, and your favorite condiments.
For the best results, be patient and let the pork braise for as long as possible. The longer it cooks, the more tender and flavorful the pork will become.
Additionally, you can prepare the dish a day in advance and let the flavors meld together overnight before reheating and serving.
Cooking Steps
Slice that pork belly into chunky pieces, then blanch them in boiling water to get rid of any impurities.
Next, you'll caramelize the pork in a skillet to lock in the flavor.
Step 1. Slice Pork Belly Into Chunks
Before you can begin cooking the pork belly, you'll need to slice it into bite-sized chunks. First, grab a sharp knife and a sturdy cutting board.
Carefully place the pork belly on the board, then use the knife to cut the meat into 1-inch pieces. Don't worry if they're not perfectly uniform – the irregular shapes will add to the rustic charm of the dish.
As you work, try to keep the pieces evenly sized so they cook at the same rate. Once you've sliced the entire pork belly, you can give the chunks a quick rinse under cold water to remove any stray bits of fat or skin.
Dry them off with some paper towels, and you're ready to move on to the next step! Cooking the pork belly low and slow is the key to achieving that melt-in-your-mouth texture, so take your time and enjoy the process.
Your patience will definitely pay off in the end.
Step 2. Blanch Pork Belly in Boiling Water
The first step in the cooking process is to blanch the pork belly chunks in boiling water. This important step helps to remove any impurities or excess fat from the meat, giving you a cleaner, more refined flavor in the final dish.
Simply fill a large pot with water and bring it to a rolling boil over high heat. Once the water is bubbling vigorously, carefully add the sliced pork belly pieces. Let them soak for about 2 to 3 minutes, then use a slotted spoon to scoop them out and transfer them to a clean bowl or plate.
Don't worry if the pork looks a bit pale and bland at this stage – the real magic will happen during the next steps of the cooking process. With the pork belly now prepped and ready, you can move on to the next exciting phase of this delicious recipe!
Step 3. Caramelize Pork Belly in Skillet
With the pork belly now prepped and ready, grab a large, heavy-bottomed skillet and place it over medium-high heat.
Once the skillet is nice and hot, add a generous drizzle of oil and let it heat up for a minute or two.
Now, carefully add the blanched pork belly slices to the pan, making sure they don't overlap.
You'll want to let them sizzle and brown for about 2-3 minutes per side, turning them occasionally with tongs.
As the pork sears, you'll start to see the edges turn golden and crispy – that's exactly what you're going for!
Keep an eye on them, adjusting the heat as needed to prevent burning.
Once both sides are beautifully caramelized, transfer the pork to a plate and set it aside.
Don't worry, we're not done yet – there are still a few steps to go before this delicious pork belly is ready to enjoy!
Step 4. Simmer Pork in Aromatic Liquid
Next, add the caramelized pork belly slices to a Dutch oven or large, heavy-bottomed pot.
Pour in enough water or broth to just cover the pork. Toss in some fragrant ingredients like star anise, cinnamon sticks, cloves, and ginger slices. The pungent aroma will make your mouth water!
To complement your meal, consider serving it with a soothing cup of herbal tea, as many varieties can aid in digestion and enhance your dining experience, such as herbal teas with digestion benefits.
Bring the liquid to a boil, then reduce the heat to a gentle simmer. Let the pork slowly braise for about an hour, or until it's meltingly tender. The longer you simmer it, the more the flavors will blend together.
Be patient – it's well worth the wait! Occasionally, skim any foam or fat that rises to the surface. This will keep your dish nice and clean.
When the pork is super soft, you're ready for the next step. Get ready to experience the deep, rich flavors of this classic Chinese dish!
Step 5. Garnish With Green Onions
Finely slice some green onions to garnish the tender, red-braised pork belly. You'll want those vibrant, green slices to create a colorful contrast against the rich, caramelized meat. Sprinkle them generously over the top – the fresh, oniony flavor will perfectly complement the savory-sweet pork.
Don't be shy with the green onions! The more, the merrier. They'll add a lovely crunch and brightness to each bite. Plus, the pop of green makes the dish look extra appetizing. Imagine how nice those slender green onion pieces will look, nestled among the shiny, reddish-brown pork cubes.
Once you've added the green onions, your red-braised pork belly is ready to serve. Scoop it up and enjoy the delightful interplay of flavors and textures. The tender pork, the aromatic cooking liquid, and the crisp green onions – it's a harmony of yum that's sure to delight your taste buds.
Final Thoughts
Ultimately, the essence of this red-braised pork belly dish lies in its harmonious balance of flavors and textures. The tender, melt-in-your-mouth pork, combined with the rich, caramelized sauce, creates a truly irresistible experience.
The vibrant green onions you sprinkled on top not only add a pop of color but also a delightful crunch, complementing the dish perfectly.
As you savor the final bites, you can't help but feel a sense of accomplishment. This recipe has allowed you to explore the depths of Chinese cuisine and expand your culinary horizons.
The techniques you've learned, from searing the pork to expertly reducing the sauce, will undoubtedly serve you well in future culinary adventures.
Frequently Asked Questions
Is Red-Braised Pork Belly Suitable for Vegetarians?
No, red-braised pork belly is not suitable for vegetarians. Pork belly is a type of meat, and the dish is prepared using animal-based ingredients, making it unsuitable for those following a vegetarian diet.
Can I Substitute the Pork Belly With Another Cut of Meat?
You can absolutely substitute the pork belly with another cut of meat. Try using chicken thighs, beef brisket, or even tofu for a vegetarian option. The key is to adjust the cooking time accordingly.
How Long Can the Dish Be Stored in the Refrigerator?
Stored leftovers can typically last 3-4 days in the refrigerator. Be sure to refrigerate the dish in an airtight container as soon as it's cooled down. This will help preserve the flavors and prevent spoilage.
Can I Use a Slow Cooker Instead of a Stovetop?
You can absolutely use a slow cooker instead of a stovetop. The slow cooking process will infuse the flavors and tenderize the meat, just like on the stovetop. Give it a try and see how it turns out!
Does the Dish Contain Any Gluten or Nut Ingredients?
The dish does not contain any gluten or nut ingredients. It's a gluten-free and nut-free recipe, so you don't have to worry about those dietary restrictions when preparing it.
Li Wei is an authentic Chinese cooking expert specializing in regional and classic Chinese dishes. From hand-pulled noodles to delicate dim sum and traditional stir-fries, his culinary expertise showcases the variety of Chinese cuisine. Li Wei’s recipes emphasize simplicity, tradition, and rich, flavorful sauces.
-
Brazilian Cuisine3 months ago
Tacacá
-
Polish Comfort Food3 months ago
Krupnik (Barley Soup)
-
Brazilian Cuisine3 months ago
Caldeirada
-
Brazilian Cuisine3 months ago
Chicken in Brown Sauce
-
Southern Comfort Food3 months ago
Cheese Straws
-
African Cuisine3 months ago
Kedjenou (Ivory Coast)
-
Polish Comfort Food3 months ago
Vegetable Salad
-
American Diner Classics3 months ago
The Maillard Reaction: Understanding the Chemistry of Browning {Food Science and Cooking}