You'll love this classic Brazilian snack called paçoca! It's made from roasted peanuts, sugar, and salt – a delightful balance of flavors. First, the peanuts are toasted to bring out their natural nutty taste. Then, butter and milk are added to create a creamy, smooth texture. You can enjoy paçoca on its own or use it as a topping for all sorts of desserts. It's a versatile treat that's cherished by Brazilians of all ages. Dive deeper into the rich history and cultural significance of this beloved snack to uncover more about its culinary roots.
Key Takeaways
- Pação is a traditional Brazilian snack made from roasted, ground cassava flour and a blend of flavors like salty, sweet, and nutty.
- The dish originated from indigenous Tupi-Guarani people and evolved with the influence of European settlers, incorporating ingredients like salted meats, onions, and garlic.
- The main ingredients in modern pação are roasted unsalted peanuts, granulated sugar, and salt, which provide a balanced flavor profile.
- The traditional preparation method involves toasting the cassava flour to unlock its natural nutty flavor, then adding butter and milk to create a creamy, smooth texture.
- Pação can be enjoyed on its own or used as an ingredient in various Brazilian desserts, and it is considered a cherished part of the country's culinary heritage.
Top picks for "oca"
Open Amazon search results for this keyword.
As an affiliate, we earn on qualifying purchases.
History
Pa̧oca, a beloved Brazilian staple, has deep roots tracing back to the indigenous peoples of the region.
These ancient groups, like the Tupi-Guarani, would grind roasted and dried cassava roots into a coarse flour, then mix it with charred meat or fish. This simple, nourishing dish became a dietary mainstay, providing sustained energy for their active lifestyles.
Over time, Pa̧oca evolved as European settlers arrived and introduced new ingredients. They began incorporating salted meats, onions, and garlic, creating the savory, crunchy version we know today.
Pa̧oca's popularity spread throughout Brazil, becoming a cherished part of the national culinary heritage. Whether enjoyed as a snack, side dish, or ingredient in other recipes, this humble yet versatile food continues to delight Brazilians of all ages, connecting them to their ancestral roots and the rich tapestry of their country's history.
Recipe
Paçoca is a popular Brazilian peanut-based snack that's simple to make and bursting with flavor. It's a versatile treat that can be enjoyed on its own or used as an ingredient in various desserts and other dishes.
The key to a delicious paçoca is the perfect balance of salty and sweet flavors. The peanuts are the star of the show, providing a satisfying crunch and nutty taste that pairs beautifully with the sweetness of the sugar.
Ingredients:
- 2 cups roasted, unsalted peanuts
- 1 cup granulated sugar
- 1/4 teaspoon salt
Instructions:
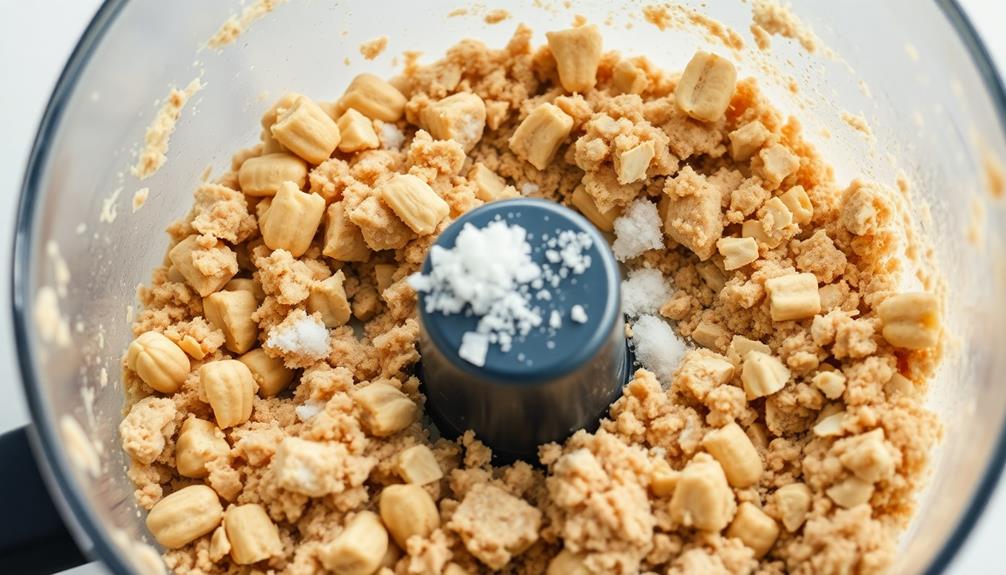
In a food processor, blend the peanuts until they form a coarse, crumbly mixture. Add the sugar and salt, then continue processing until the mixture becomes a smooth, cohesive paste.
Transfer the paçoca to an airtight container and store at room temperature for up to 2 weeks.
When serving, keep in mind that paçoca has a tendency to harden over time. If it becomes too firm, simply break off a piece and place it in your mouth, allowing the warmth of your hands to soften it before chewing.
Enjoy this delightful Brazilian treat on its own or use it as a topping or ingredient in your favorite desserts.
Cooking Steps
First, you'll need to toast the cassava flour to get that delightful nutty flavor.
Then, stir in some creamy butter and milk until everything's mixed together nicely.
Step 1. Toast the Cassava Flour

Toasting the cassava flour is a crucial step in creating the perfect paçoca. This simple technique unlocks the flour's natural nutty flavor and transforms its texture from powdery to delightfully crunchy.
Start by heating a large, dry skillet over medium heat. Once it's nice and hot, add the cassava flour and stir continuously with a wooden spoon or spatula.
Be patient and keep a close eye as the flour toasts – you'll know it's ready when it turns golden brown and releases a fragrant aroma. This usually takes about 5-7 minutes, but the time may vary depending on your stove.
Resist the urge to step away, as the flour can burn quickly. Once it's reached that perfect toasted state, immediately transfer the flour to a clean bowl to stop the cooking process.
Now you've got the foundation for a delicious paçoca! Just wait until you experience the difference the toasted flour makes.
Step 2. Add Butter

Next, melt a generous pat of butter in the same skillet you used for toasting the cassava flour. As the butter sizzles, swirl it around to coat the bottom of the pan. This will create a rich, golden hue and delightful aroma that'll have your mouth watering!
Once the butter is melted and bubbly, add the toasted cassava flour. Stir the mixture continuously, making sure the flour is fully incorporated. The butter will help the flour become even more fragrant and develop a deeper, toasted flavor.
Keep stirring and cooking for a minute or two, until the mixture has a smooth, creamy consistency. The butter adds a wonderful creaminess and velvety texture to the paçoca.
Taste as you go, adjusting the amount of butter to suit your preference.
Step 3. Add Milk

Once the toasted cassava flour and butter have come together, it's time to add the milk. Slowly pour in the cold milk, stirring constantly to create a smooth, creamy mixture.
Don't be afraid to add a bit more milk if the consistency seems too thick – you want a nice, pourable texture. As the milk blends in, you'll notice the paçoca taking on a luscious, velvety appearance.
Keep stirring until every last lump has disappeared, and the mixture is uniform throughout. This step helps develop the rich, comforting flavor that makes paçoca so irresistible.
Once the milk is fully incorporated, your paçoca is almost ready to enjoy. Take a moment to breathe in the enticing aroma – the sweet, toasted notes of the cassava flour mingling with the creamy dairy.
Get ready for a truly delightful experience as you savor your homemade paçoca.
Step 4. Mix Thoroughly
With the milk fully incorporated, it's time to thoroughly mix the paçoca to ensure a consistent, creamy texture. Grab your wooden spoon and get ready to work!
Start stirring the mixture gently, making sure to reach all the way to the bottom of the bowl. As you mix, you'll notice the paçoca transform from a dry, crumbly texture into a smooth, luscious consistency.
Keep stirring, picking up the pace as the mixture becomes more pliable. Don't be afraid to put some muscle into it – the more you mix, the creamier your paçoca will become.
Pause every now and then to scrape down the sides of the bowl, ensuring everything is evenly incorporated. Mix for about 5 minutes, or until the paçoca has a velvety, uniform appearance. Once the paçoca has reached the desired consistency, transfer it into individual serving containers. You can enjoy it as a dessert, a snack, or as a topping for your favorite acai bowl benefits. The rich flavor and smooth texture of the paçoca will be the perfect complement to the refreshing acai and fruit flavors in the bowl.
Now you're ready to move on to the next step in your culinary adventure!
Step 5. Serve Warm, Garnished With Nuts

Your freshly prepared paçoca is now ready to serve! Before diving in, let's add the finishing touches. Grab a handful of toasted nuts – perhaps some almonds or cashews – and sprinkle them over the top. The crunch and flavor they provide will be the perfect complement to the warm, comforting paçoca.
Now it's time to enjoy your creation! Scoop up a hearty portion and savor the blend of flavors and textures. The paçoca's warmth will envelop you, while the nuts add a delightful crunch with each bite.
Don't be afraid to get a little messy – this is a dish meant to be savored and truly appreciated. As you savor every morsel, let the paçoca's comforting nature nourish both your body and soul.
It's a simple yet extraordinary dish that's sure to bring a smile to your face. So go ahead, indulge in this delightful treat and bask in the joy of homemade paçoca!
Final Thoughts
Having explored the history, preparation, and cultural significance of paçoca, it's clear that this Brazilian staple is a versatile and beloved dish.
You can enjoy paçoca in so many ways – as a hearty breakfast, a tasty snack, or even as a side dish. The possibilities are endless!
The toasted cassava flour's slightly nutty flavor pairs beautifully with savory or sweet toppings. Why not try it with chopped roasted peanuts, or perhaps a drizzle of honey for a delightful twist?
No matter how you serve it, paçoca is sure to bring a smile to your face. It's a true taste of Brazilian culture that's just waiting to be discovered.
Frequently Asked Questions
What Is the Best Way to Store Paçoca?
To store it best, keep it in an airtight container at room temperature away from direct sunlight. This'll preserve its freshness and texture. Remember to consume it within a few weeks for optimal flavor and crunchiness.
Can Paçoca Be Made Ahead of Time?
Yes, you can make certain foods ahead of time. This allows you to save time and have them ready when you need them. Just be sure to store them properly to maintain freshness and quality.
How Long Does Paçoca Typically Last?
Generally, homemade food items last about a week when stored properly. The exact duration can vary depending on the recipe, ingredients, and storage conditions. Check for any signs of spoilage before consuming to ensure safety.
Is Paçoca Gluten-Free?
Yes, paçoca is generally gluten-free. It's made from toasted and ground cassava (a gluten-free root vegetable), so it's suitable for those following a gluten-free diet. However, it's always best to check the specific brand or recipe to confirm.
Can Paçoca Be Made With Different Nuts?
Yes, you can make paçoca with different nuts. The traditional version uses peanuts, but you can experiment with other nuts like cashews, almonds, or hazelnuts to create your own unique twist on this Brazilian snack.