Connect with us

Beverage Deep Dives

Gin Spritz

A refreshing summer cocktail, the gin spritz blends gin, sparkling white wine, and soda water for a delightfully bubbly and botanical-forward sip.

Published

on

refreshing gin cocktail delight

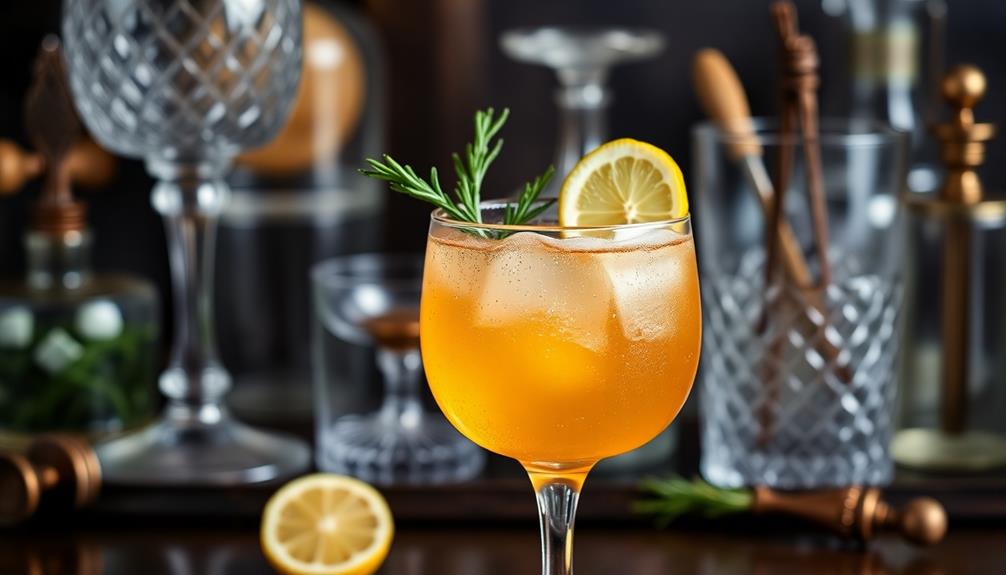
The gin spritz originates from northern Italy as a refreshing summer cocktail, blending gin, sparkling white wine, and soda water for a delightfully bubbly and botanical-forward sip. You'll find this drink features a harmonious balance of flavors, with the botanicals from the gin complemented by the effervescence and sweetness of the wine and soda. To craft the perfect spritz, you'll start by chilling a wine glass with ice, then add your gin, sparkling wine, and a splash of soda water, finishing with a lemon slice garnish. What's more, the gin spritz embodies the essence of la dolce vita – a symbol of relaxation and shared experiences.

Key Takeaways

  • A refreshing summer cocktail originated in northern Italy, featuring a blend of gin, sparkling white wine, and soda water.
  • Variations often include bitters and citrus garnishes, reflecting the essence of Italian la dolce vita.
  • The classic recipe calls for 2 oz gin, 2 oz sparkling white wine, and 1 oz soda water, with a lemon slice garnish.
  • Preparation involves chilling a wine glass with ice, adding the gin, topping with Prosecco and soda water, and garnishing with a lemon slice.
  • The Gin Spritz offers a harmonious balance of flavors and a visually appealing presentation, making it a popular choice for social gatherings.

History

understanding past human events

The origins of the gin spritz can be traced back to northern Italy, where the refreshing cocktail gained popularity as a way to beat the summer heat.

In the late 19th century, the Italians took to mixing their beloved gin with sparkling white wine, soda water, and a slice of lemon or orange. This simple but delightful concoction became a go-to drink for those seeking to quench their thirst on hot, sunny days.

Over time, the gin spritz evolved, with different variations emerging across the region. Some added a touch of bitters, while others experimented with various citrus garnishes.

No matter the specific recipe, the gin spritz remained a beloved part of Italian culture, a symbol of relaxation and good times shared with friends.

Today, the gin spritz continues to captivate palates worldwide, offering a refreshing and sophisticated taste of la dolce vita.

Advertisement

Recipe

cooking instructions and ingredients

The Gin Spritz is a refreshing cocktail that combines the botanical flavors of gin with the effervescence of sparkling wine. This versatile drink is perfect for sipping on a warm day or as a pre-dinner aperitif. For a unique twist, try adding a splash of citrus or a sprig of fresh herbs to enhance the flavors of the cocktail. Another delightful option is to swap out the sparkling wine for soda water for a lighter, more bubbly version of the drink. If you’re looking for a different kind of spritz, consider trying out a refreshing cynar spritz recipe to add a bitter and herbal note to your cocktail.

Originating in Italy, the Gin Spritz has gained popularity worldwide for its balance of flavors and easy-to-make formula. Its simplicity makes it an excellent choice for hosting gatherings or enjoying a quiet moment of relaxation.

  • 2 oz gin
  • 2 oz sparkling white wine
  • 1 oz soda water
  • 1 tbsp freshly squeezed lemon juice
  • 1 lemon slice for garnish

In a large wine glass, combine the gin, sparkling white wine, and soda water. Gently stir to combine.

Add the freshly squeezed lemon juice and stir again. Garnish with a lemon slice. Serve immediately, over ice if desired.

When making a Gin Spritz, be sure to use a high-quality gin that you enjoy the flavor of, as it will be the predominant spirit in the drink.

Additionally, opt for a dry, crisp sparkling wine to balance the botanicals of the gin. Adjust the ratios to your personal taste preferences, adding more or less soda water or lemon juice as desired.

Cooking Steps

step by step cooking instructions

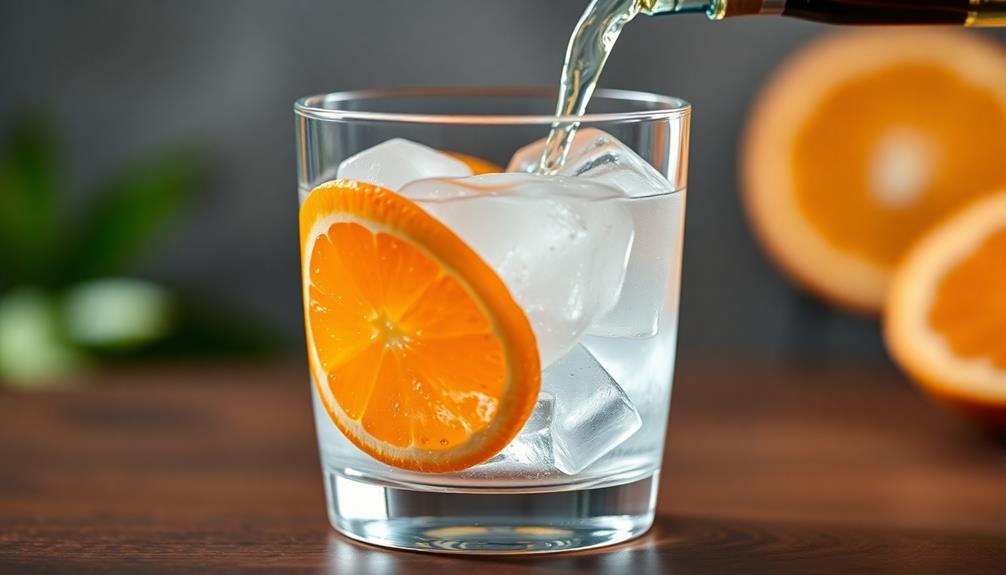
First, fill your wine glass with ice.

Next, add a measure of gin and top it off with Prosecco.

Advertisement

Step 1. Fill a Wine Glass With Ice

fill wine glass ice

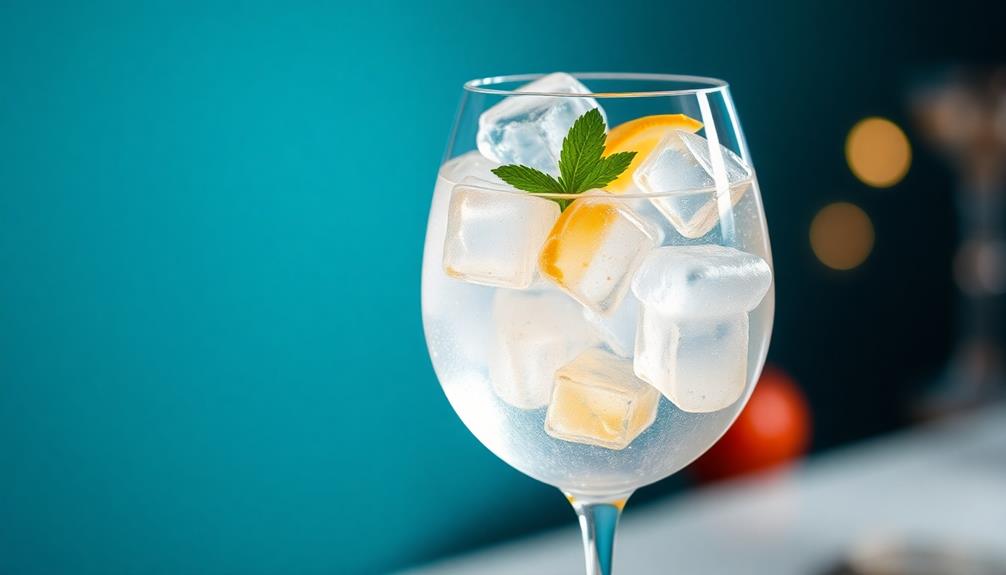
Fill a wine glass with crisp, clear ice cubes. The clink of the ice as you pour it into the glass sets the stage for the refreshing Gin Spritz to come.

Make sure to fill the glass to the top, leaving just a small bit of space at the rim. This ensures the drink will be properly chilled and diluted as the ice melts.

Take a moment to admire the way the light reflects off the ice, creating a sparkling effect. Now you're ready to add the other ingredients and craft your Gin Spritz.

The ice provides the foundation, cooling the gin and soda water to the perfect temperature. With the glass prepared, you can move on to the next step, pouring in the gin.

Step 2. Add Gin

add gin next step

After preparing the glass with ice, add 2 ounces of your preferred gin. Whether you choose a classic London Dry style or a more botanical-forward variety, the gin is the star of this spritz.

Swirl the glass gently to chill the gin. Gin's botanical flavors, like juniper, citrus, and spice, will come alive as the ice melts.

Next, top off the glass with 4 ounces of chilled club soda. The carbonation will create a delightful effervescence, helping to balance the gin's intensity.

Advertisement

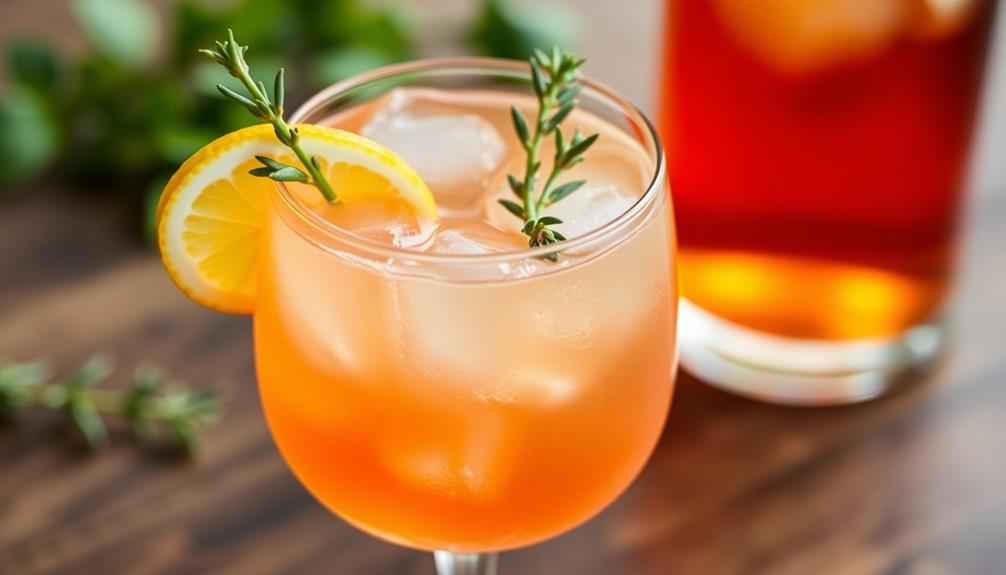
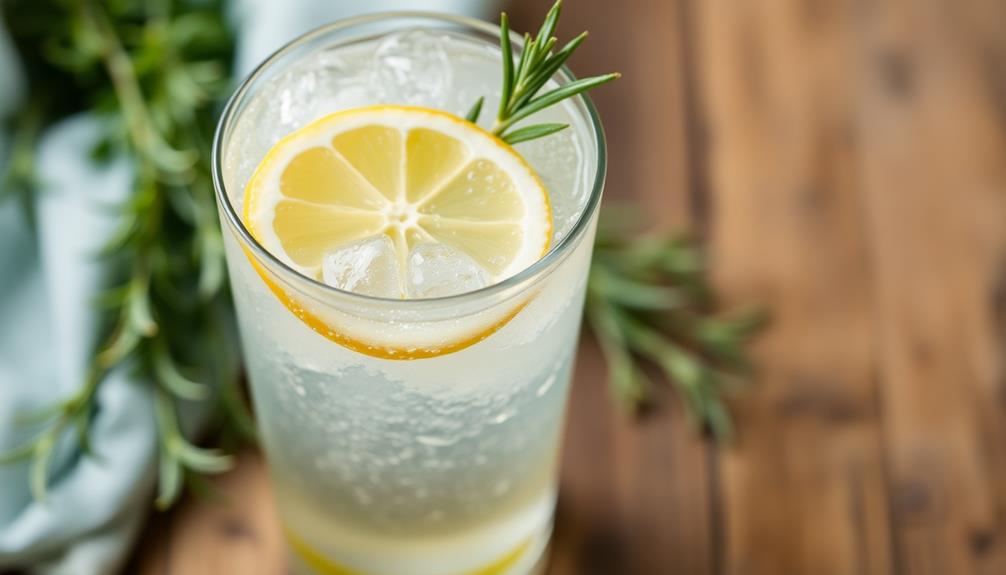
Stir the mixture briefly to combine. Garnish with a lemon twist or fresh herb sprig, like rosemary or thyme, for an extra layer of aroma and flavor.

The Gin Spritz is a refreshing and versatile cocktail, perfect for sipping on a warm day. The carbonation and botanicals make it a vibrant and invigorating libation.

Enjoy your creation and savor the balanced blend of gin and fizz.

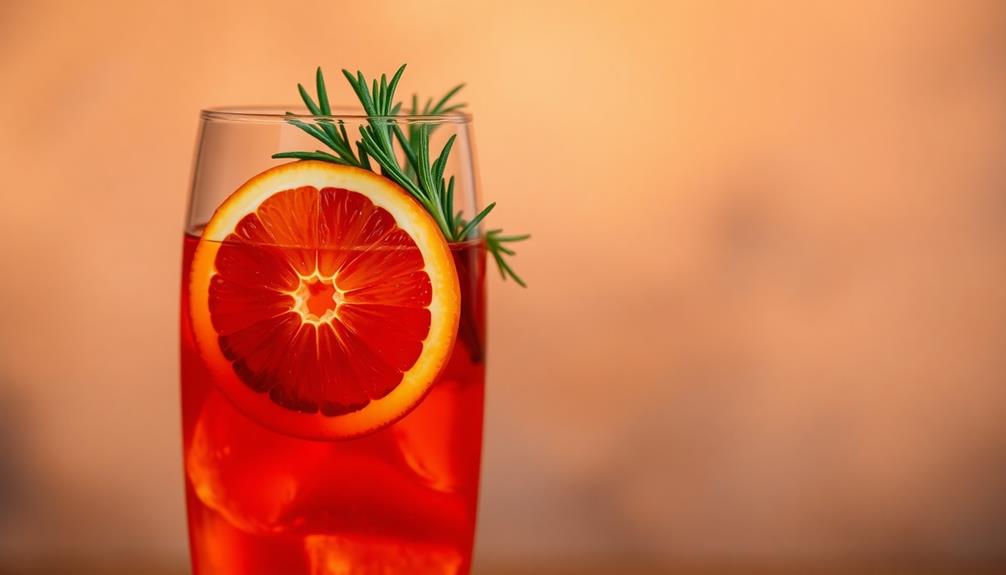
Step 3. Add Prosecco

pour in prosecco now

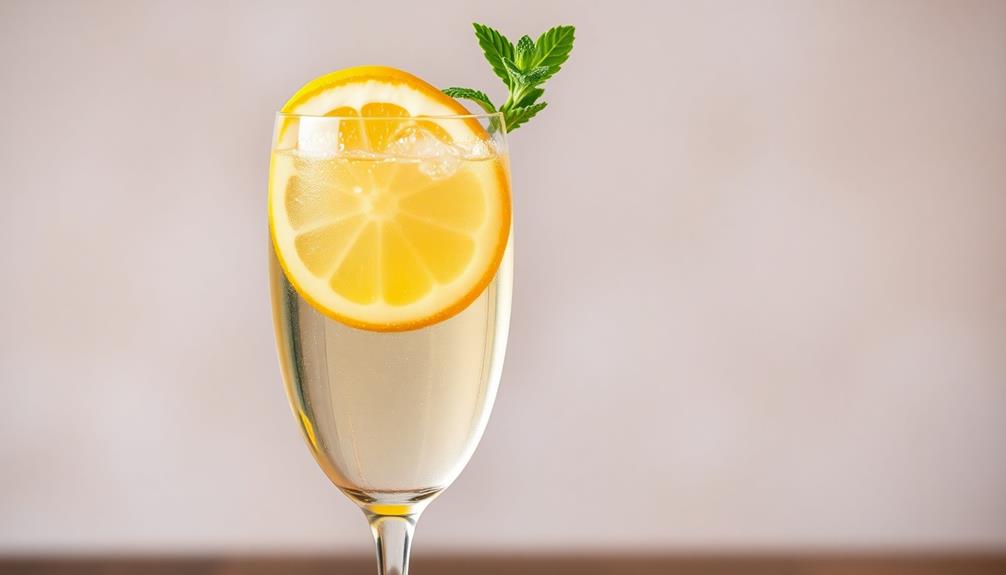
For the final touch, top off the gin-and-club soda mixture with 2 ounces of chilled Prosecco.

The sparkling wine adds a delightful effervescence and a subtle sweetness that perfectly complements the gin's botanical flavors. Slowly pour the Prosecco over the back of a spoon to create a lovely layered effect in the glass.

Once the Prosecco is added, give the drink a gentle stir to combine all the flavors.

Advertisement

Be careful not to overdo it, as you don't want to lose the fizz. The Prosecco should float atop the gin and club soda, creating a visually stunning and refreshing cocktail.

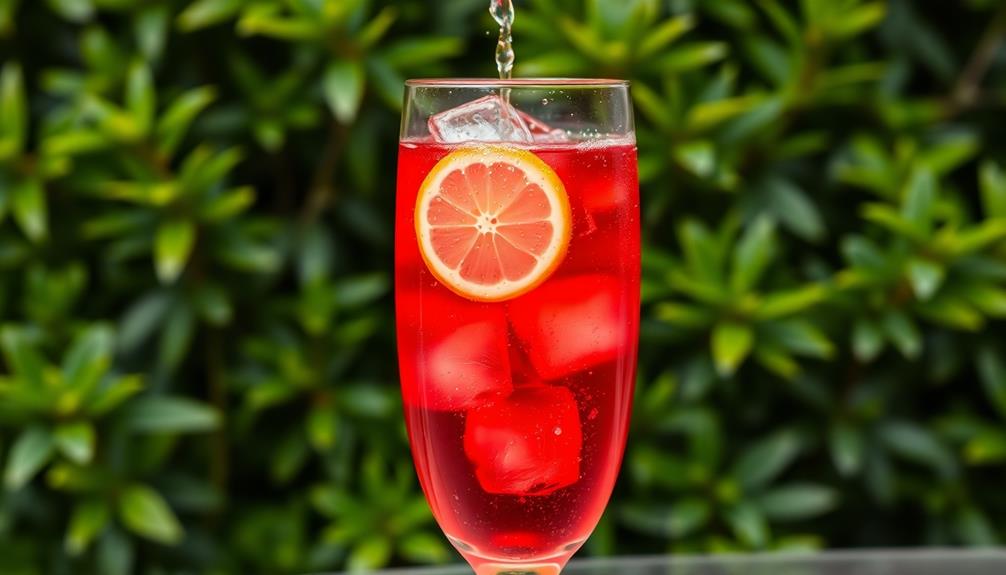
Garnish the Gin Spritz with a lemon twist or a few fresh berries to add a touch of color and extra flavor.

Serve immediately and enjoy the perfect balance of botanicals, bubbles, and refreshment.

Step 4. Add Splash of Soda

add soda for flavor

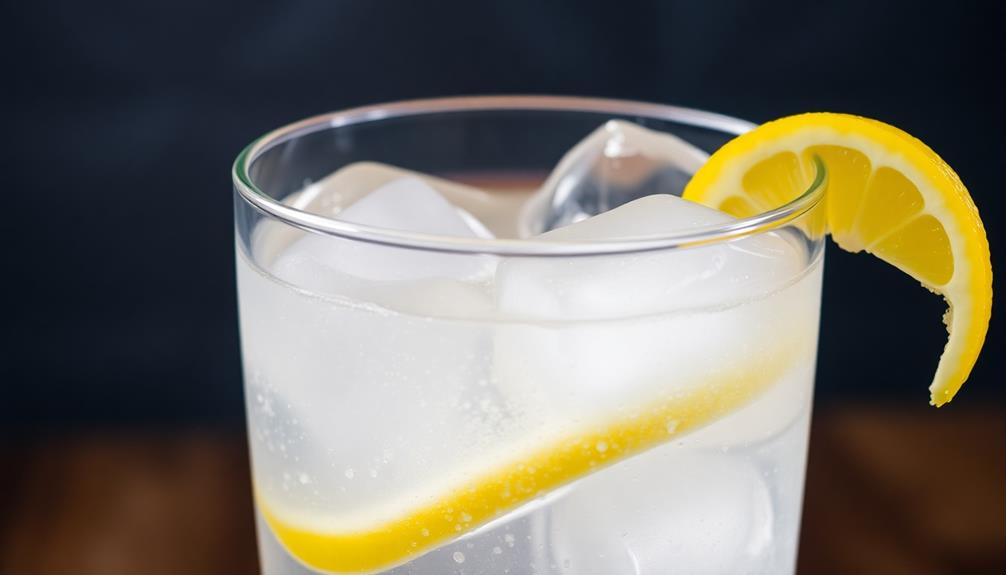
To create the perfect Gin Spritz, start by adding a splash of chilled club soda to the gin mixture. This fizzy addition will help to lighten the drink and create a refreshing, bubbly texture.

Be sure not to overdo it, though – you want just a subtle effervescence, not a full-blown soda pop.

Next, give the drink a gentle stir to incorporate the soda. You can use a bar spoon or simply give the glass a few gentle swirls.

Advertisement

This will help to blend the flavors and ensure each sip is perfectly balanced.

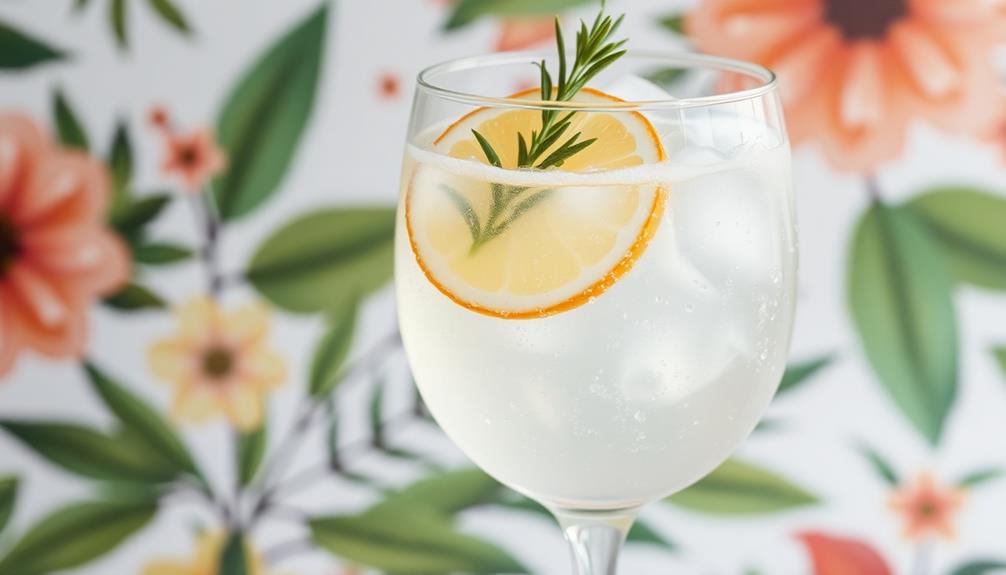
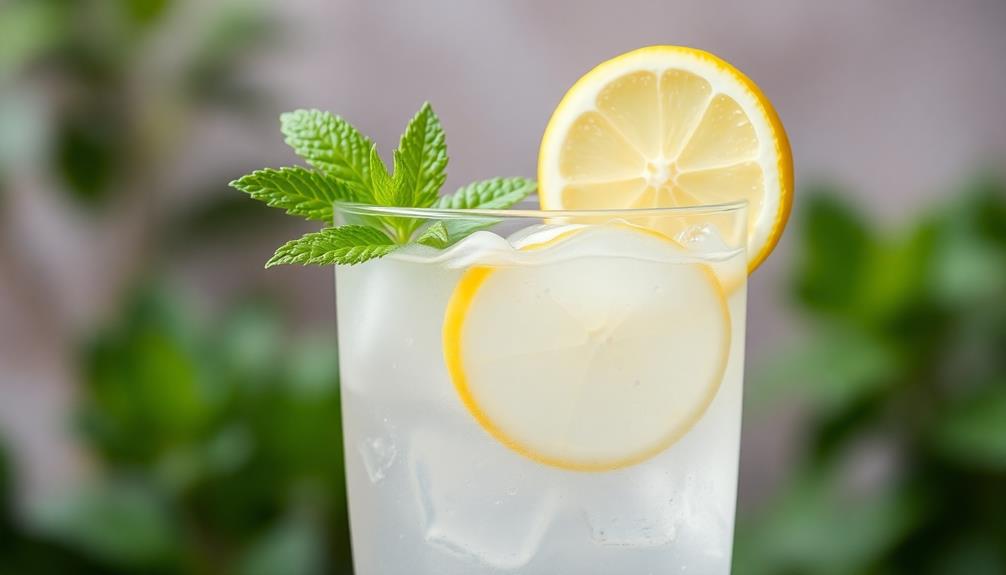
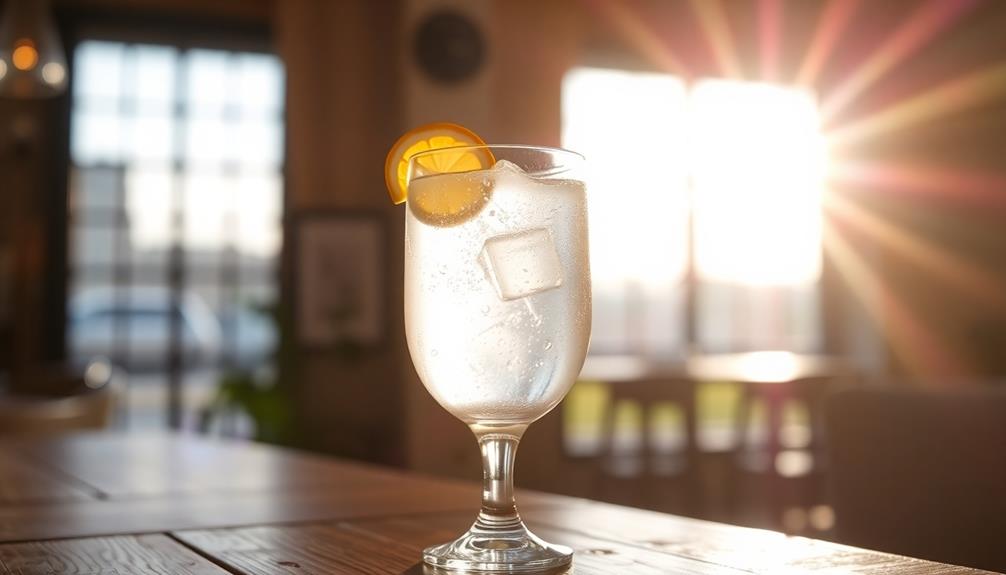
Step 5. Garnish With Lemon Slice

garnish with lemon slice

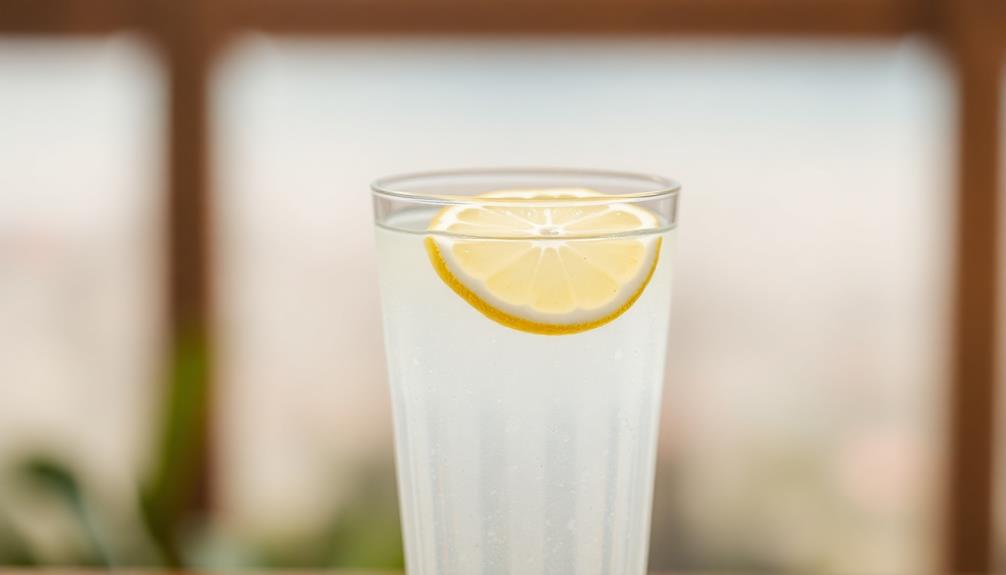
Garnish the Gin Spritz with a thin slice of fresh lemon. This simple yet elegant touch adds a bright, citrusy aroma and a pop of color to the drink.

Using a sharp knife, carefully cut a thin wheel from the lemon, about 1/4-inch thick. Gently place the lemon slice on the edge of the glass, allowing it to hang over the rim. You can even give it a gentle squeeze to release the oils and enhance the lemon flavor.

The lemon slice not only looks beautiful, but it also complements the botanical flavors of the gin. As you sip your Gin Spritz, the lemon will infuse the drink with its tangy, refreshing notes.

Feel free to experiment with the garnish, trying a curl or twist of lemon peel for a different visual effect. The key is to keep it simple and let the lemon's natural charm shine.

Final Thoughts

concluding reflections and insights

As you sip on your refreshing Gin Spritz, take a moment to reflect on the delightful experience you've just indulged in. This cocktail has transported you to a sun-drenched afternoon, capturing the essence of summer in a glass.

The combination of gin's botanical notes, the effervescence of sparkling wine, and the zesty lemon slice has created a harmonious balance of flavors that dance across your palate.

Advertisement

With each refreshing sip, you're reminded of the joy of simple pleasures. The Gin Spritz is a testament to the power of quality ingredients and careful execution.

It's a cocktail that invites you to slow down, savor the moment, and appreciate the little things that make life truly enjoyable.

As you finish your drink, you can't help but feel a sense of satisfaction and a desire to share this delightful experience with your friends and loved ones.

The Gin Spritz is a cocktail that brings people together, creating moments of laughter, conversation, and pure bliss.

Frequently Asked Questions

What Types of Gin Work Best for a Gin Spritz?

When making a gin spritz, you'll want to choose a gin that's on the lighter, more delicate side.

Advertisement

Avoid overly bold or heavily botanical gins, as you don't want them to overpower the other ingredients. Look for gins with citrus or floral notes, as they'll complement the sparkling wine or soda water perfectly.

Gin brands like Tanqueray, Bombay, or Beefeater work well, but feel free to experiment to find your personal favorite.

The key is to let the gin shine without dominating the spritz.

Can I Use Sparkling Wine Instead of Club Soda?

Sure, you can absolutely use sparkling wine instead of club soda in your gin spritz!

The effervescence from the sparkling wine will give your drink a lovely, bubbly finish.

Advertisement

Just keep in mind that the sweetness and flavor profile of the sparkling wine may impact the overall taste compared to using club soda.

But feel free to experiment and find the combination you enjoy most.

Have fun mixing up your gin spritz with sparkling wine!

How Long Will a Gin Spritz Stay Fizzy?

A gin spritz will stay fizzy for about 30 minutes to an hour, depending on the type of sparkling wine you use and how much you stir it.

The key is to drink it soon after you make it, as the carbonation will start to dissipate over time.

Advertisement

If you want to keep it fizzy longer, you can try chilling the glasses beforehand or using a more bubbly sparkling wine.

Just be sure to give it a gentle stir before sipping to revive the fizz.

Is a Gin Spritz Considered a Low-Calorie Cocktail?

Yes, a gin spritz can be considered a low-calorie cocktail option.

Most gin spritzes contain just a few simple ingredients – gin, sparkling wine or soda water, and perhaps a citrus twist or a few berries. This results in a cocktail that's typically under 150 calories per serving, making it a refreshing choice if you're watching your calorie intake.

Just be mindful of the gin and any additional mixers used, as those can add more calories.

Advertisement

Can I Make a Gin Spritz in Advance?

Yes, you can absolutely make a gin spritz in advance!

The great thing about this cocktail is that it's easy to prepare ahead of time. Simply mix the gin, vermouth, and any other ingredients in a pitcher or large jar, then chill it in the fridge until you're ready to serve.

When it's time to enjoy your spritz, just add the soda water and give it a quick stir. Easy peasy!

Your guests will love the convenience of a pre-made cocktail.

Advertisement

Advertisement

Beverage Deep Dives

Milkshake Madness: From Classic Flavors to Gourmet Creations

Tantalize your taste buds with a delicious dive into the world of milkshakes, from classic flavors to gourmet creations that will ignite your culinary adventure.

Published

on

classic to gourmet milkshakes

Dive into the delicious world of milkshakes! You'll find classic flavors like creamy vanilla and rich chocolate, as well as gourmet creations bursting with unique ingredients. Milkshakes have a long and fascinating history, tracing back to American soda fountains in the late 1800s. Today, you can enjoy the classic thick and creamy texture, or explore innovative twists like salted caramel and matcha. Whether you prefer nostalgic favorites or modern masterpieces, milkshakes offer a sweet journey of culinary creativity. It's a delectable adventure you won't want to miss!

Key Takeaways

  • Milkshakes have a rich history, originating in American soda fountains and evolving to include ice cream for a thick, creamy texture.
  • The classic milkshake recipe features essential ingredients like milk, ice cream, and flavorings, with optional toppings like whipped cream and cherries.
  • While classic flavors like vanilla, chocolate, and strawberry remain popular, gourmet milkshake creations feature innovative flavors and premium ingredients for a more indulgent experience.
  • Milkshake variations cater to diverse dietary preferences, including vegan, protein-packed, and seasonal options, as well as regional specialties.
  • The rise of social media and milkshake bars has led to a trend of increasingly extravagant milkshake presentations and customization, showcasing culinary creativity and nostalgia.

History

The origins of the milkshake can be traced back to the late 19th century, when soda fountains across America began experimenting with blended dairy beverages.

These early milkshakes were simple concoctions, often made with just milk, sweetener, and flavoring. As the years passed, soda jerks got more creative, adding ice cream to create the thick, creamy treat we know and love today.

By the early 20th century, milkshakes had become a staple of the classic American soda fountain. People flocked to these soda shops, eager to try the latest flavor combinations.

Vanilla, chocolate, and strawberry were always crowd-pleasers, but inventive soda jerks also experimented with more unique flavors like banana, coffee, and even malted milk.

The milkshake's popularity continued to grow, becoming a quintessential part of American culture.

Advertisement

From malt shops to drive-ins, the milkshake was a refreshing and indulgent way to cool off on a hot summer day.

Recipe

Milkshakes are a classic dessert that have the power to transport us back to simpler times. Whether you're craving a creamy vanilla delight or a decadent chocolate indulgence, a homemade milkshake can hit the spot like nothing else. In this recipe, we'll guide you through the steps to create a delightful milkshake that's sure to satisfy your sweet tooth.

Crafting the perfect milkshake requires a delicate balance of ingredients and technique. The key is to strike the right consistency – not too thick, not too thin – and to perfectly blend the flavors to create a harmonious treat. With a few simple steps, you can whip up a milkshake that will leave your taste buds dancing with joy.

  • 2 cups vanilla ice cream
  • 1 cup whole milk
  • 2 tablespoons chocolate syrup (or more to taste)
  • Whipped cream (optional)
  • Maraschino cherry (optional)

In a blender, combine the ice cream and milk. Blend on high speed until smooth and creamy, about 30 seconds to 1 minute. Add the chocolate syrup and blend again until fully incorporated. Pour the milkshake into a tall glass. If desired, top with whipped cream and a maraschino cherry.

For an extra-indulgent milkshake, try using a higher-quality vanilla ice cream or adding a scoop of your favorite chocolate or peanut butter ice cream to the mix. You can also experiment with different mix-ins, such as crushed Oreos, peanut butter, or bananas, to create your own signature flavor.

Enjoy your homemade milkshake and savor the nostalgia of a timeless treat.

Advertisement

Cooking Steps

First, chill all the ingredients beforehand to get that refreshingly cool milkshake texture.

Next, add the milk and ice cream, then blend until you've got a smooth and creamy consistency.

Step 1. Chill All Ingredients Beforehand

chill all ingredients beforehand

Before assembling your milkshake, be sure to chill all the ingredients. This simple step makes a big difference in the final result. When your milk, ice cream, and any other additions are cold, they'll blend together more smoothly and create a thick, creamy texture.

Take the time to let your ingredients cool in the fridge for at least 30 minutes. The colder they are, the better they'll combine. This helps prevent the milkshake from becoming too thin or watery. Plus, chilled ingredients maintain their fresh flavors better.

Once everything is nice and cold, you're ready to start blending. Toss the chilled ingredients into your blender and mix until smooth and creamy. The cold temperatures ensure your milkshake stays cool and indulgent from the first sip to the last.

With this simple prep step, you'll be sipping on a delightfully thick and flavorful treat in no time.

Advertisement

Step 2. Add Milk and Ice Cream

add milk and ice cream

Add the milk and ice cream to your blender. You'll want to use about 1 cup of milk and 2 scoops of ice cream for each milkshake you plan to make. Go ahead and toss them in – don't be shy!

The milk will help create that classic, creamy milkshake texture, while the ice cream adds a rich, decadent flavor.

Once everything is in the blender, put the lid on firmly. Now it's time to blend! Start on a low speed and gradually increase to high. Blend until the mixture is smooth and creamy, with no lumps or chunks. This should take around 30 seconds to 1 minute, depending on your blender's power.

Give the blender a few pauses during the blending process to scrape down the sides. This will ensure all the ingredients mix together evenly.

When it's nice and smooth, your milkshake is ready to pour and enjoy!

Step 3. Blend Until Smooth Consistency

blend until smooth consistency

With the milk and ice cream now in the blender, it's time to blend until the mixture reaches a smooth, creamy consistency.

Hold down the blender's lid firmly and turn it on to the highest setting. Listen as the blades whir and the ingredients begin to combine. Slowly, the mixture will start to thicken and become uniform in texture.

Advertisement

Keep blending for about 30 seconds to a minute, checking the consistency as you go. You'll know it's ready when the milkshake has a luxuriously smooth, velvety feel. No lumps or chunks should remain.

Once it reaches the perfect thickness, turn off the blender and take a peek. The milkshake should be thick enough to hold its shape when you scoop it out with a spoon.

If it seems too thick, add a splash of milk and blend again briefly. Now you're ready to pour the milkshake into a tall glass and enjoy!

Step 4. Top With Whipped Cream and Cherries

whipped cream and cherries

Now that you've blended the milkshake to perfection, it's time to take it to the next level. Grab a tall glass and get ready to add the final touches.

First, take a dollop of whipped cream and pile it high on top of your milkshake. Smooth it out with the back of a spoon, creating a fluffy cloud-like topping.

Next, add a vibrant maraschino cherry right in the center of the whipped cream. Watch as the deep red color pops against the white topping. For an extra special touch, add a few more cherries around the edge of the glass, creating a delightful display.

Advertisement

The combination of the creamy milkshake, the light and airy whipped cream, and the sweet burst of the cherries is simply irresistible.

Take a moment to admire your creation before diving in. This milkshake is sure to delight your taste buds and leave you craving more of this delicious treat.

Step 5. Drizzle Caramel or Chocolate Sauce

drizzle caramel or chocolate

Occasionally, you may want to elevate your milkshake even further by drizzling a decadent caramel or chocolate sauce over the whipped cream topping. This simple addition can take your milkshake to a whole new level of indulgence.

For a caramel drizzle, start by heating up some store-bought or homemade caramel sauce. You can use a spoon to carefully drizzle the warm, gooey caramel over the whipped cream, letting it cascade down the sides of the glass. The sweet, buttery flavor of the caramel will complement the creaminess of the milkshake perfectly.

Alternatively, melt some high-quality chocolate chips or chopped chocolate in a double boiler or the microwave. Once it's smooth and silky, use a spoon to drizzle the warm chocolate sauce over the whipped cream. The chocolate will harden slightly as it cools, creating a delightful contrast against the cold, creamy milkshake.

Final Thoughts

As the milkshake journey comes to a close, you can’t help but reflect on the remarkable varieties and flavors that have been explored. From the classic vanilla and chocolate to the more adventurous blended fruits and specialty toppings, the possibilities are truly endless. One standout milkshake that left a lasting impression was the classic french recipe, featuring rich custard and just a hint of nutmeg. In contrast, the tropical mango and coconut concoction transported taste buds to a beachside paradise. And let’s not forget the indulgent toppings like whipped cream, chocolate drizzle, and even a sprinkle of sea salt for a sweet and savory twist. Overall, the milkshake journey has been a delightful and delicious experience.

Advertisement

Who would've thought that a simple milkshake could be elevated to such gourmet heights?

The key is to experiment and have fun with it. Why not try a salted caramel shake or a mint chocolate chip masterpiece? The beauty of milkshakes is that they allow you to unleash your creativity and satisfy your sweet tooth all at once.

Whether you prefer a thick and creamy consistency or a lighter, frothy texture, there's a milkshake out there that's perfect for you.

As you savor the final sips, you can't help but feel a sense of satisfaction and excitement for the next milkshake adventure. The possibilities are truly limitless, and the journey has only just begun.

Frequently Asked Questions

How Long Do Milkshakes Stay Fresh?

Milkshakes typically stay fresh for 2-3 days when stored in the refrigerator. However, their quality and flavor can start to degrade over time. For best results, enjoy your milkshake shortly after it's been made.

Advertisement

Can Milkshakes Be Made Dairy-Free?

Yes, you can absolutely make dairy-free milkshakes! Simply swap the traditional dairy milk with plant-based milk like almond, oat, or coconut milk. Throw in your favorite non-dairy ice cream, and you've got a delicious, creamy dairy-free treat.

What's the Best Way to Store Leftover Milkshakes?

To store leftover milkshakes, pour them into an airtight container and place in the fridge. This will help maintain the thick, creamy texture for a few days. Remember to give it a good stir before enjoying your refreshing treat.

Can Milkshakes Be Made Ahead of Time?

Yes, you can make milkshakes ahead of time. Store them in an airtight container in the fridge for up to 3 days. When ready to serve, simply give it a good stir and enjoy your chilled, homemade treat.

How Do I Achieve the Perfect Milkshake Consistency?

To achieve the perfect milkshake consistency, blend the ingredients thoroughly, use the right ratio of ice cream to milk, and chill the mixture before serving. Don't overmix, as this can make the texture too thick and gritty.

Advertisement

Continue Reading

Beverage Deep Dives

The Art of Espresso: Perfecting the Perfect Shot

Luring coffee enthusiasts on a journey of rich flavors and artistry, “The Art of Espresso: Perfecting the Perfect Shot” unveils the captivating history and intricate techniques behind crafting the ultimate espresso.

Published

on

mastering espresso shot techniques

Espresso, the captivating elixir of Italian cafes, beckons coffee enthusiasts on a journey of flavor and artistry. From its humble beginnings to its current status as a celebrated craft, the history of espresso is a fascinating tale. Mastering the perfect shot requires precision – the right coffee, temperature, pressure, and extraction time. With freshly roasted beans and a keen eye for detail, you'll craft a rich, syrupy espresso brimming with aroma and crema. Balancing the variables takes practice, but the pursuit is a rewarding one that deepens your appreciation for this beloved beverage. There's so much more to explore about the art of espresso.

Key Takeaways

  • The art of espresso brewing involves mastering parameters like grind size, tamp pressure, water temperature, and extraction time for optimal flavor extraction.
  • Selecting high-quality, freshly roasted coffee beans is foundational to crafting a rich, balanced espresso with a signature crema.
  • Monitoring the espresso flow and adjusting temperature and pressure are crucial techniques for achieving the desired texture and flavor profile.
  • Serving espresso immediately in preheated cups preserves the peak aroma and maintains the integrity of the shot.
  • Continuous experimentation and practice are essential for developing the instincts and skills required to consistently produce the perfect espresso shot.

History

As the years passed, these early espresso machines became more advanced, incorporating innovative features like steam wands and programmable settings for enhanced brewing capabilities.

Inventors tinkered with the design, making them easier to use and producing an even more flavorful result.

By the 1930s, espresso had become a beloved part of Italian culture, with cafes popping up all over the country.

Today, the art of making the perfect espresso shot is still celebrated, with baristas honing their skills to extract the finest flavors, often utilizing high-quality brewing capabilities for home use.

Recipe

Crafting the perfect espresso is an art form that requires precision and attention to detail. The foundation of a delightful espresso lies in the careful selection and preparation of high-quality coffee beans. From the roast profile to the grind size, each step plays a vital role in unlocking the rich, complex flavors that define this beloved beverage.

Advertisement

Mastering the technique of espresso extraction is a journey of experimentation and fine-tuning. The interplay of water temperature, pressure, and brew time must be meticulously balanced to extract the optimal flavors and create a velvety, crema-topped espresso that can be enjoyed on its own or as the base for a variety of coffee-based drinks.

  • 18-22 grams of freshly ground coffee
  • 195-205°F (91-96°C) water temperature
  • 25-30 seconds of extraction time
  • 1-1.5 ounces (30-45 ml) of espresso

Begin by grinding the coffee beans to a fine, consistent texture. Tamp the ground coffee into the portafilter with a firm, even pressure. Attach the portafilter to the espresso machine and start the extraction process, ensuring the water temperature is within the optimal range.

Observe the flow of the espresso, aiming for a steady, even stream that produces a rich, golden-brown crema.

To ensure the best possible outcome, it's crucial to use freshly roasted coffee beans and to adjust the grind size, dose, and extraction time based on the specific characteristics of the beans and the espresso machine. Experiment with different brewing parameters to find the perfect combination that suits your personal taste preferences.

Cooking Steps

To make a perfect espresso, you'll need to start by grinding your beans to just the right consistency.

Next, tamp the ground coffee evenly in the portafilter.

Advertisement

Then, extract the water at the perfect temperature and pressure to pull a rich, aromatic shot.

Serve your espresso immediately in preheated cups for the ultimate coffee experience.

Step 1. Grind Beans to the Right Consistency

grind beans for consistency

Grinding your beans to the right consistency is a crucial step in brewing a perfect espresso. You'll want to aim for a fine, even grind – not too coarse, not too fine. Imagine sand, with each grain about the size of granulated sugar. This consistency helps water flow through the grounds evenly, extracting all the rich, delicious flavors.

Use a high-quality burr grinder for the best results. Burr grinders crush the beans between two abrasive surfaces, giving you precise control over the grind size. Adjust the grind setting until you achieve that perfect, sand-like texture.

Too fine, and the water won't flow through; too coarse, and you'll end up with a weak, watery shot.

Take your time and experiment to find the ideal grind for your beans and brewing method. The right grind is the foundation for crafting an exceptional espresso. Get this step just right, and you're well on your way to pulling the perfect shot.

Advertisement

Step 2. Tamp the Ground Coffee Evenly

evenly tamp ground coffee

After grinding your beans to the perfect consistency, it's time to tamp the ground coffee evenly. Tamping is a crucial step in making an espresso, and it's all about creating the right amount of pressure.

Start by placing your portafilter (the basket that holds the ground coffee) on a level surface. Gently spoon the ground coffee into the portafilter, filling it up to the top.

Now, it's time to tamp. Hold the tamper (a small, flat tool) firmly in your hand and press down with a steady, even pressure. Apply about 15-30 pounds of pressure, making sure to tamp the coffee down evenly.

The goal is to create a smooth, compact puck of coffee that will allow the water to flow through it at the perfect rate. If the tamp is uneven, the water will create channels through the coffee, resulting in an uneven extraction and a poor-quality espresso.

Take your time and practice to get the perfect tamp every time.

Step 3. Extract Water

extracting water process steps

Now that you've tamped the ground coffee evenly, it's time to extract the water. This is a crucial step in making a perfect espresso shot.

First, position your portafilter, the handle that holds the ground coffee, under the group head of your espresso machine. The group head is where the hot water will come out and extract the coffee.

Advertisement

Next, turn on your machine and let the water flow through the ground coffee. You'll see the espresso start to pour out, slowly at first, then picking up speed.

Keep a close eye on the extraction, watching for the perfect color and consistency. The ideal espresso should have a rich, syrupy texture and a beautiful crema, the foamy layer on top.

Once you've extracted the perfect amount, turn off the machine and remove the portafilter.

Admire your handiwork – you've just made a delicious, authentic espresso!

Step 4. Adjust Temperature and Pressure Accordingly

adjust temperature and pressure

The temperature and pressure settings of your espresso machine play a critical role in extracting the perfect shot. Getting these just right takes some practice, but it's worth the effort!

You'll want to ensure the water temperature is between 195°F and 205°F. Any cooler, and the espresso will taste sour; any hotter, and it'll taste burnt.

Advertisement

Additionally, just like achieving high refresh rates for gaming enhances the experience, finding the right balance in temperature and pressure elevates your espresso game.

Next, you'll need to adjust the pressure. The optimal pressure range is between 15 and 19 bars. This allows the water to be forced through the tightly packed coffee grounds, extracting all the delicious flavors.

Too little pressure, and the shot will be weak; too much, and it'll be over-extracted and bitter.

Keep experimenting with the temperature and pressure until you find the perfect combination for your espresso machine and coffee beans.

It may take some trial and error, but trust us, the reward of a perfectly balanced shot is worth it!

Advertisement

Step 5. Serve Immediately in Preheated Cups

serve immediately in cups

Once your espresso is brewed, it's crucial to serve it immediately in preheated cups. This helps maintain the perfect temperature and ensures your guests can enjoy the full flavor and aroma of the coffee. Preheating the cups prevents the espresso from cooling too quickly, allowing you to savor every sip.

To preheat your cups, simply run them under hot water or place them in a warm oven for a few minutes. Be careful not to overheat them, as this can affect the taste.

Once your cups are nice and toasty, carefully pour the freshly brewed espresso into each one. The rich, velvety crema should be immediately visible, signaling that your espresso is at its peak.

Serve the espresso straight away, without delay. This way, your guests can experience the coffee at its finest, with all the complexity of flavors and the perfect balance of bitterness and sweetness.

Enjoy your expertly crafted espresso in a preheated cup, and savor the moment!

Final Thoughts

Mastering the art of espresso takes dedication, but the rewards are unparalleled. As you've learned, crafting the perfect shot requires attention to detail at every step – from selecting the right beans to tamping the grounds just so.

Advertisement

But when you nail it, the result is a rich, intensely flavorful elixir that can transport you to the cafes of Italy.

Don't be discouraged if it takes some practice to get the hang of it. Each shot is a chance to refine your technique and develop your palate.

Pay close attention to the color, aroma, and mouthfeel of the espresso. Experiment with different bean origins, roasts, and brewing methods to find what you love.

Over time, you'll develop the instincts to consistently pull shots that satisfy your taste buds. The journey is half the fun! So keep exploring, savoring each sip, and enjoy the art of espresso. As you refine your skills, don’t be afraid to experiment with different beans, grinds, and techniques to elevate your coffee game even further. Pair your perfect shot of espresso with unique treats from around the world, like trying a delicious Vietnamese fruit cocktail recipe for a refreshing and vibrant complement. There’s always something new to discover in the world of flavors, so let your curiosity guide you.

Frequently Asked Questions

What Is the Optimal Water Temperature for Espresso Brewing?

The optimal water temperature for brewing espresso is between 195-205°F (91-96°C). This temperature range helps extract the coffee's flavors and aromas without burning the grounds or resulting in a bitter, over-extracted shot. Experiment to find your perfect temperature within this range.

Advertisement

How Do I Clean and Maintain My Espresso Machine?

To clean and maintain your espresso machine, regularly backflush the portafilter, descale the machine, and wipe down the exterior. Disassemble and wash the steam wand and group head to ensure optimal performance and longevity of your appliance.

What Are the Common Mistakes in Making Espresso at Home?

You might be making common mistakes like using stale beans, grinding too fine, tamping unevenly, or extracting for too long. Avoid these pitfalls to brew delicious espresso at home. Proper maintenance and attention to detail are key.

How Can I Achieve a Thicker Crema on My Espresso?

To achieve a thicker crema on your espresso, be sure to use freshly roasted beans, grind them fine, and tamp the grounds evenly. Experiment with water temperature and pressure to find the perfect balance for your setup.

What Are the Best Coffee Beans for Making Espresso?

For a rich, creamy espresso, choose dark-roasted arabica beans. Look for blends that emphasize body and sweetness. Experiment with single-origin beans too, as they can offer unique flavor profiles. The best coffee for you depends on your personal taste.

Advertisement

Continue Reading

Beverage Deep Dives

Mixology 101: The Science and Art of Cocktail Creation

Unlock the captivating realm of mixology, where the art of crafting cocktails blends tradition, creativity, and the pursuit of flavor perfection.

Published

on

cocktail creation fundamentals explained

Dive into the captivating world of mixology, where the science and art of cocktail creation come alive! Tracing its roots back to early 19th-century bartender innovations, this evolving craft has blossomed into a global phenomenon. Mastering the harmonious blending of flavors, precise measurements, and skillful presentation unlocks a delightful realm of libations. Explore the importance of premium spirits, thoughtfully selected ingredients, and the role of garnishes in elevating the cocktail experience. From muddling fresh mint to crafting the perfect balance of sweetness, this journey combines tradition and creativity, inviting you to discover the joy of mixology.

Key Takeaways

  • Mixology encompasses the harmonious blending of flavors, precise measurements, and skillful presentation to create delightful libations.
  • Mastering fundamental techniques, such as muddling, simple syrup preparation, and ice selection, unlocks the potential for crafting exceptional cocktails.
  • The choice of spirits and thoughtfully selected ingredients are crucial in shaping the character and balance of a cocktail.
  • Garnishes play a vital role in enhancing the overall cocktail experience, elevating aroma and visual appeal.
  • Mixology is an ever-evolving art that encourages creativity, personalization of classic cocktails, and a balanced approach between tradition and innovation.

History

Mixology can be traced back to the early 19th century, when bartenders began experimenting with various spirits, juices, and bitters to create unique cocktail recipes.

These early mixologists were pioneers, blending and shaking to find the perfect balance of flavors. Over time, their innovations led to the rise of classic cocktails like the Manhattan, Negroni, and Old Fashioned.

As the 20th century progressed, mixology evolved into a true art form. Bartenders became scientists, meticulously measuring and adjusting their creations.

Cocktail culture flourished, with speakeasies and glamorous lounges showcasing the creativity of these skilled professionals.

Today, mixology is a global phenomenon, with bartenders around the world pushing the boundaries of what's possible with a shaker and some ice.

Advertisement

From its humble beginnings to its current status as a culinary craft, the history of mixology is a fascinating journey.

Each cocktail tells a story, and every bartender is a storyteller, weaving together the flavors of the past and the present.

Recipe

Crafting the perfect cocktail is an art form that combines the harmonious blending of flavors, the precision of measurements, and the skill of presentation.

Whether you're a seasoned mixologist or a budding bartender, mastering the fundamentals of mixology is the key to unlocking a world of delightful libations.

In this recipe, we'll guide you through the creation of a classic cocktail that showcases the nuances of premium spirits, the depth of thoughtfully selected ingredients, and the beauty of thoughtful garnishes.

Advertisement

Get ready to impress your guests and tantalize their taste buds.

  • 2 oz of your preferred premium gin
  • 1 oz of fresh lemon juice
  • 3/4 oz of simple syrup
  • 1/2 oz of egg white (optional)
  • 4-5 fresh basil leaves
  • Ice cubes

In a cocktail shaker, combine the gin, lemon juice, simple syrup, and egg white (if using).

Shake vigorously for 10-15 seconds until the mixture is frothy.

Add several ice cubes and shake again for another 10-15 seconds to chill the cocktail.

Strain the mixture into a chilled coupe or martini glass.

Gently place the basil leaves on top of the drink, allowing their aroma to waft through the air.

Advertisement

Cooking Steps

First, you'll need to muddle some fresh mint leaves and lime wedges in the bottom of a glass.

Then, add a bit of simple syrup to sweeten things up.

Next, fill the glass with ice and pour in your favorite rum.

Step 1. Muddle Mint and Lime Wedges

muddle mint lime wedges

To begin, grab a sturdy muddling tool and place a handful of fresh mint leaves in the bottom of your cocktail shaker. Using the muddler, gently press down and twist the mint, releasing its fragrant oils.

This step is crucial for building layers of flavor in your cocktail and can be likened to the way mindfulness practices enhance emotional well-being.

Next, slice a lime in half and squeeze the juice of one half directly into the shaker. Add a few lime wedges as well, and continue muddling until the mint is well-bruised and the lime juice has fully combined.

Advertisement

You'll know you've done it right when the mixture takes on a vibrant, aromatic quality. The key is to muddle gently, without crushing the mint too aggressively, which can lead to bitterness.

Once you've achieved the perfect balance of mint and citrus, you're ready to move on to the next step in crafting your delicious cocktail. Get ready to shake things up! Fill your cocktail shaker with ice, add your carefully measured ingredients, and give it a vigorous shake to blend the flavors beautifully. As you pour your creation into a glass and garnish it to impress, don’t forget that attention to detail makes all the difference—just like when you follow perfect Vietnamese noodle soup tips to craft an ideal bowl of pho. The key is passion and precision, so raise your glass and enjoy the fruits of your effort!

Step 2. Add Simple Syrup

incorporate simple syrup

Now that you've perfectly muddled the mint and lime, it's time to add a touch of sweetness to balance the cocktail. Simple syrup is the perfect ingredient for this. It's made by dissolving sugar in water, creating a thick, syrupy liquid that adds a subtle sweetness to your drink.

To make simple syrup, combine equal parts sugar and water in a small saucepan. Heat the mixture, stirring frequently, until the sugar has completely dissolved.

Then, remove the pan from the heat and let the syrup cool. Once it's at room temperature, you can add it to your cocktail.

Start with just a splash of simple syrup and give your drink a good stir. Taste it, and add more syrup if you'd like it a little sweeter.

Advertisement

The amount you use will depend on your personal preference and the other flavors in your cocktail. With the simple syrup added, your drink will be perfectly balanced and ready to enjoy!

Step 3. Add Ice

ice addition step three

With your mint, lime, and simple syrup now perfectly incorporated, it's time to chill your cocktail.

Adding ice is an essential step in the mixology process. Not only does it cool down your drink, but it also helps to dilute the flavors, creating a smoother, more balanced taste.

To add ice, simply fill your cocktail shaker or glass with ice cubes. Be generous with the amount – you want to ensure that your drink is chilled to perfection.

Gently stir or shake the mixture to incorporate the ice, allowing the flavors to meld together. As the ice melts, it will slowly dilute the drink, bringing out the subtle notes and creating a refreshing, balanced cocktail.

Step 4. Add Rum

incorporate rum next step

Add the rum to your shaker or glass, pouring it in a gentle stream. The rich, aromatic spirit will instantly bring your cocktail to life. Rum adds a unique flavor that can range from smooth and subtle to bold and spicy, depending on the type you choose.

For a classic daiquiri, go with a light, white rum that will let the flavors of the lime juice and simple syrup shine. If you're mixing up a mojito, a gold or amber rum will provide a deeper, more caramelized taste.

Advertisement

And for a tropical vacation in a glass, try a dark, aged rum – its complex notes of vanilla, oak, and molasses will transport you to a Caribbean beach.

No matter which rum you select, be sure to pour with a steady hand, allowing it to gently blend with the other ingredients. The rum is the star of the show, so you want to make sure its personality shines through in every sip.

Step 5. Add Mint Sprig Garnish

mint sprig garnish added

To complete your cocktail, pluck a fresh sprig of mint from the garnish tray. The vibrant green leaves and fragrant aroma will elevate your drink, adding a burst of freshness and sophistication.

Gently place the mint sprig between your thumb and forefinger, then lightly slap it against your palm to release the essential oils. This simple action awakens the mint's flavor, allowing it to infuse the cocktail and tantalize your senses. Understanding the importance of self-regulation can also enhance your cocktail experience, as it encourages you to savor each sip mindfully.

Now, carefully place the mint sprig on top of the drink, positioning it just so. The leaves should fan out elegantly, showcasing their beauty.

As your guests take a sip, the mint will dance across their tongues, complementing the other flavors seamlessly. This final touch transforms your creation into a work of art, turning a simple cocktail into an experience to remember.

Advertisement

Final Thoughts

As you wrap up your bartending journey, remember that mixology is an ever-evolving art.

There's always more to learn and experiment with, whether it's trying new ingredients, techniques, or flavor combinations. The best part? You get to be a part of that exciting process.

Embrace your creativity and don't be afraid to put your own spin on classic cocktails.

Mixology is all about finding the balance between tradition and innovation. Keep an open mind, and you'll be surprised by the unique and delicious drinks you can create.

Frequently Asked Questions

What Equipment Is Essential for Home Cocktail Making?

You'll need a few essential tools for making cocktails at home: a cocktail shaker, a jigger for precise measurements, a bar spoon for stirring, a strainer, and a muddler for crushing herbs and fruits. With these basics, you can craft delicious drinks.

Advertisement

How Can I Create My Own Unique Cocktail Recipes?

To create your own unique cocktail recipes, start by understanding the basic flavor profiles and ratios of different spirits, mixers, and garnishes. Experiment with combining them in new ways to craft signature drinks that reflect your personal taste.

What Are the Best Ways to Garnish and Present Cocktails?

To garnish and present cocktails uniquely, consider using fresh herbs, citrus twists, edible flowers, or even dehydrated fruit. Experiment with glassware, ice shapes, and layering ingredients to create visually stunning and Instagram-worthy cocktails that'll impress your guests.

How Do I Properly Store and Maintain Cocktail Ingredients?

To properly store and maintain cocktail ingredients, keep them in airtight containers, refrigerate perishables, label everything, and rotate stock. Avoid direct sunlight and extreme temperatures to preserve freshness and prevent spoilage.

What Are Some Tips for Creating Balanced and Flavorful Cocktails?

To create balanced and flavorful cocktails, experiment with flavor combinations, use high-quality ingredients, and pay attention to proportions. Don't be afraid to adjust recipes to suit your personal taste preferences.

Advertisement

Continue Reading

Affiliate Disclaimer
As an affiliate, we may earn a commission from qualifying purchases. We get commissions for purchases made through links on this website from Amazon and other third parties.

Advertisement

Vetted

top local car washes top local car washes
Vetted2 months ago

14 Best Car Washes Near You for a Sparkling Clean Ride

I discovered the 14 best car washes near you that promise a sparkling clean ride, and you won't want to...

top mops for 2024 top mops for 2024
Vetted2 months ago

The 15 Best Mops of 2025 – Your Ultimate Guide to a Spotless Home

Find the perfect mop for your cleaning needs in 2025, and discover how these top choices can revolutionize your home...

top women s fragrances 2024 top women s fragrances 2024
Vetted2 months ago

15 Best Perfumes for Women in 2025 – A Fragrance Guide You Can’t Miss

Keen to discover the top 15 perfumes for women in 2025? Uncover unique scents that will elevate your fragrance game!

top local bars guide top local bars guide
Vetted2 months ago

14 Best Bars Near You for an Unforgettable Night Out

Looking for the perfect bar to elevate your night out? Discover the 14 best spots that promise unforgettable experiences!

luxurious beard oil selection luxurious beard oil selection
Vetted2 months ago

15 Best Beard Oils for a Luxurious Grooming Experience in 2025

Shop the 15 best beard oils for a luxurious grooming experience in 2025 and discover which ones will elevate your...

top college laptops 2024 top college laptops 2024
Vetted2 months ago

15 Best College Laptops of 2025: The Ultimate Guide for Students

With our guide to the 15 best college laptops of 2025, discover which powerful models will elevate your academic experience...

waterproof mascaras for tears waterproof mascaras for tears
Vetted2 months ago

15 Best Waterproof Mascaras That Will Survive Any Tear-Jerker

Outstanding waterproof mascaras await to keep your lashes flawless through any emotional moment; discover which ones made the top 15...

top flavorful disposable vapes top flavorful disposable vapes
Vetted2 months ago

15 Best Disposable Vapes of 2025: Top Picks for Flavor and Convenience

Prepare to discover the 15 best disposable vapes of 2025 that blend exceptional flavor and convenience, but which ones truly...

refreshing lunch salad ideas refreshing lunch salad ideas
Vetted2 months ago

15 Best Salads Near You That Will Freshen Up Your Lunch Routine

Transform your lunch with the 15 best salads nearby that will tantalize your taste buds and leave you craving more...

top convertible car seats top convertible car seats
Vetted2 months ago

15 Best Convertible Car Seats of 2025 – Safety and Comfort for Your Little One

Get ready to discover the top 15 convertible car seats of 2025 that blend safety and comfort—find out which models...

delicious fast food breakfast delicious fast food breakfast
Vetted2 months ago

15 Best Fast Food Breakfast Options That Will Make Your Mornings Delicious

Uncover the 15 best fast food breakfast options that will transform your mornings into a delicious experience you won't want...

stylish contacts for vision stylish contacts for vision
Vetted2 months ago

14 Best America’s Contacts for Clear Vision and Style

Browse through the 14 best contact lenses in America for clear vision and style, and discover which one perfectly complements...

Trending