Beverage Deep Dives
Discover the Magic of Wine Country: Plan Your Visit
Embark on a journey through wine country and experience the finest vineyards for unforgettable wine tasting tours and exquisite scenery. Plan your visit now!
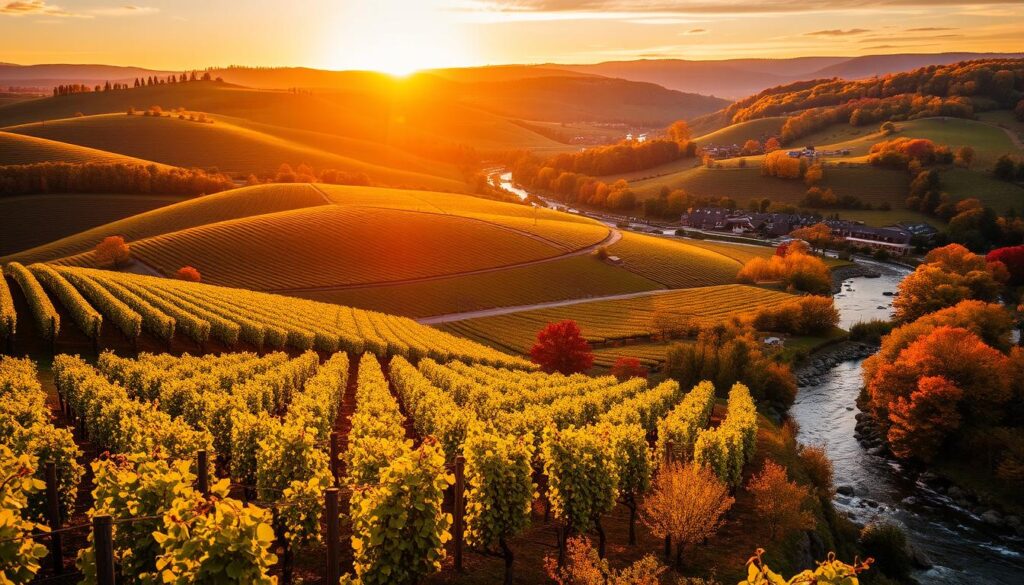
Imagine standing amidst rolling hills covered with lush vineyards, the sun casting a golden glow over the endless rows of grapevines. As you take a deep breath, the sweet aroma of ripening fruits dances in the air, inviting you to savor every moment. This is the allure of wine country, a place where time slows down, and every sip tells a story. Whether you’re a seasoned wine enthusiast or just beginning your exploration of wine travel experiences, the best wine country holds a treasure trove of memories waiting to be made.
From the iconic valleys of Napa to the hidden gems in Sonoma, each destination offers its own unique charm, dotted with family-owned wineries that pour their hearts into every bottle. Picture yourself enjoying an unforgettable pairing of wine and cuisine, or exploring the captivating landscapes that inspired generations of artists and writers. With an abundance of options, this guide will be your companion in uncovering the magic of wine country, ensuring that your visit is filled with delightful discoveries and meaningful connections.
Key Takeaways
- 95% of wineries in Napa Valley are family-owned and operated, offering a personal touch to each tasting.
- Each of Napa Valley’s 16 unique appellations boasts its own microclimates and terrain, contributing to distinct wine profiles.
- Both Sonoma Valley and Napa Valley feature a mix of history, fine dining, and breathtaking sights for visitors to enjoy.
- Exploration of legendary locations such as Jack London State Historic Park enhances your wine country experience.
- World-class wineries in Healdsburg are at the meeting point of three top winegrowing regions in Sonoma County.
Exploring the Best Wine Country Destinations
When you think of the best wine country in the United States, a few regions stand out for their exceptional offerings and experiences. Venture into Sonoma County, Santa Barbara, and Napa Valley to discover the top wine destinations that promise unforgettable memories.
Why Sonoma County Should Be Your First Stop
Choosing Sonoma County as your initial destination is a no-brainer. This area is renowned for its diverse range of varietals and the welcoming atmosphere that invites visitors to indulge in exceptional winemaking. From boutique wineries to sprawling estates, you’ll find more than 425 wineries sprinkled across this stunning landscape. The local wine scene is vibrant, offering everything from tastings in unique settings to engaging events that show off the beauty of Sonoma County.
Santa Barbara: A Hidden Gem in California Wine Country
Santa Barbara remains one of the hidden gems among the top wine destinations. Its urban wine trail boasts a myriad of diverse wineries and tasting rooms, making it a delightful stop for enthusiastic wine lovers. The coastal climate contributes to the distinctive flavor profiles in the wines produced here, particularly in varietals like Pinot Noir and Chardonnay. Enjoy a leisurely stroll as you explore the charming downtown area alongside the numerous wine tasting opportunities.
Napa Valley: Iconic Wineries and Scenic Views
Napa Valley, widely recognized as one of the world’s best wine destinations, is famed for its premium wines and luxurious estates. Home to over 400 wineries, you will find a variety of experiences, from exquisite tastings to breathtaking vineyard views. The mild, Mediterranean climate ensures that Napa Valley is a fantastic place to visit year-round. Whether you seek relaxing picnics at Lake Hennessey or are drawn to contemporary art at the Di Rosa Center, Napa Valley offers something for everyone.

Wine Tasting Tours: What to Expect
Embarking on wine tasting tours offers a delightful way to experience the rich world of wine. Travelers can find a variety of options tailored to their preferences, ensuring an unforgettable wine travel experience. Understanding the different types of tastings available and how to choose the right tour for your interests will make your journey even more rewarding. There are wine tours and tastings available in every major wine region around the world, from Napa Valley to Tuscany to Mendoza. Some tours may focus on a specific variety of wine, such as Pinot Noir or Chardonnay, while others may offer a more comprehensive experience, including visits to multiple wineries and vineyards. By researching and selecting the best wine tours and tastings for your preferences, you can ensure a truly immersive and enjoyable experience.
Types of Wine Tasting Experiences
Wine tasting experiences come in several forms, allowing each visitor to find what suits them best. Common types include:
- Self-Guided Tours: Ideal for those who want flexibility and independence.
- Public Group Tours: Great for meeting fellow wine enthusiasts and enjoying a shared experience.
- Private Guided Tours: Designed by wine experts, offering personalized insights and tailored experiences.
- Multi-Day Tours: Perfect for immersing yourself in the region’s wine culture over an extended period.
When selecting a tour, consider how it aligns with your wine preferences. If you’re a fan of Cabernet Sauvignon, Napa Valley should be on your itinerary. Pinot Noir enthusiasts may prefer Sonoma County, while Chardonnay lovers might find bliss in California’s Central Coast AVA.
How to Choose the Right Wine Tour for You
Choosing the right wine tour requires careful consideration of multiple factors. Start by defining your wine tasting goals and interests. You’ll want to explore the unique characteristics of wines from various sub-regions, such as the left bank and right bank in Bordeaux. It’s essential to plan your trip according to the operational hours of wineries since some may close during winter or harvest months.
Factors to keep in mind include:
- Accommodation Options: Decide whether you want to stay in nearby cities, traditional bed & breakfasts, or on-site at a winery’s hotel.
- Budget: Tasting fees can range significantly. Opting for premium tastings enhances the experience and may include valuable extras.
- Timing: Avoid the peak tourist seasons of August to October for a more tranquil experience; consider visiting in early November or during spring.
- Reservations: For specific tastings or smaller wineries, advanced reservations are often necessary to ensure your spot.
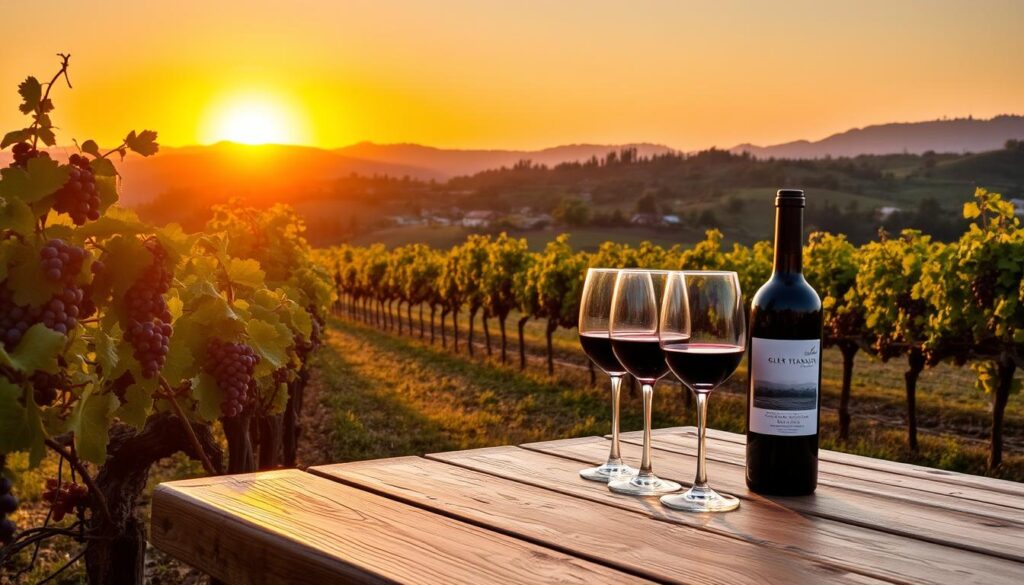
Remember, a well-planned itinerary can enhance your overall experience while promoting responsible wine consumption. Limiting yourself to three wineries a day allows for a balanced exploration of the region without overwhelming your palate.
Unforgettable Vineyard Tours and Wine Experiences
When you visit wine country, enriching your experience with vineyard tours is essential. These tours allow you to explore the inner workings of some of the finest wineries, offering an in-depth look at the art of winemaking. You can find a variety of unique wine experiences that cater to different interests and preferences, making each visit a memorable adventure.
Behind-the-Scenes Winery Tours
Many wineries provide exclusive behind-the-scenes tours that go beyond traditional tasting experiences. For instance, at Pine Ridge Vineyards in the Stags Leap District AVA, visitors enjoy an Explorer’s Tasting, which includes a guided walk through the vineyard and an exciting exploration of the wine caves. Judd’s Hill Winery offers a fun Bottle Blending Day Camp, where guests can create their own blend and take home a personalized bottle.
At Hess Persson Estate, you can traverse the vast 1000 acres on ATV tours that showcase the stunning landscape while learning about the vineyard’s history and techniques. Raymond Vineyards takes it a step further, allowing guests to be a ‘Winemaker for a Day,’ where you can design your own custom red blend and label.
Interactive Vineyard Activities
Interactive activities add a playful twist to vineyard tours. Shadybrook Estate Winery offers horseback riding through their picturesque vineyards, complemented by wine tasting and delicious cheese pairings. You can also head to Cuvaison Estate Wines, which features guided hikes through the scenic Carneros vineyards, making for an invigorating wine experience.
For those seeking a unique culinary adventure, Clif Family Winery hosts street food pairings and a delightful Rise & Wine brunch experience. The Napa Valley Wine Train presents an extraordinary combination of culinary experiences with carefully curated wine pairings while you enjoy breathtaking views of the valley.
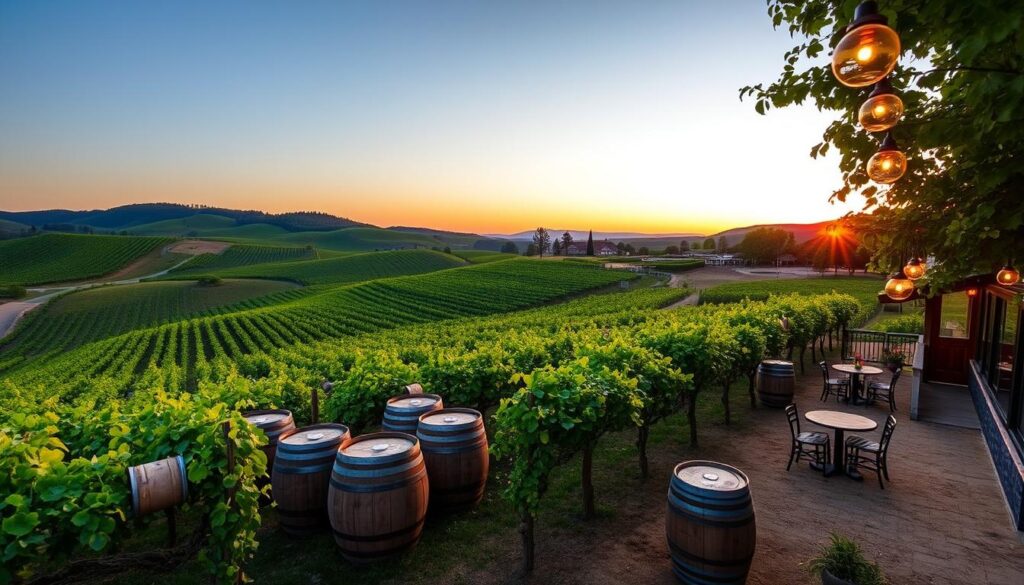
Planning Your Wine Country Vacations
Embarking on wine country vacations involves thoughtful planning to ensure you have the best experience possible. Understanding the best times to visit can significantly enhance your trip. Each season offers something unique, making it essential to tailor your visit according to what you wish to enjoy.
Best Times to Visit Wine Country
Wine country is known for its beautiful landscapes and rich traditions. The optimal times to visit largely depend on the specific region, with significant climate differences between the northern and southern hemispheres. Winter, particularly from January to early March, provides a peaceful atmosphere ideal for enjoying wineries without the hustle and bustle of crowds. During this period, you can experience average temperatures in Napa and Sonoma Counties ranging from 40 to 58 degrees Fahrenheit, with highs reaching up to 67 degrees by March.
For those interested in the harvest seasons, keep in mind that the southern hemisphere sees its harvest from February to April, while the northern hemisphere boasts harvest activities from August to October. Visiting during these months allows you to witness the winemaking process in action, often accompanied by various events and activities.
Essential Tips for First-Time Visitors
First-time visitors to wine country should prioritize booking winery visits in advance, particularly during peak months. Aim to book at least a month ahead to secure your preferred experiences. Differentiating between small, family-run boutique wineries and large, internationally recognized ones is vital for crafting a memorable itinerary.
Most wineries today offer more than just wine tastings; look for experiences like cooking classes, gourmet picnics, and traditional meals integrated into your visit. You don’t need extensive wine knowledge or tasting skills to enjoy these outings; the focus is on relaxation and savoring the atmosphere. When planning to bring wine back home, be strategic in packing, as many wineries abroad do not ship products to the US. Weekday visits are encouraged to sidestep crowds and make the most of your wine country vacations.
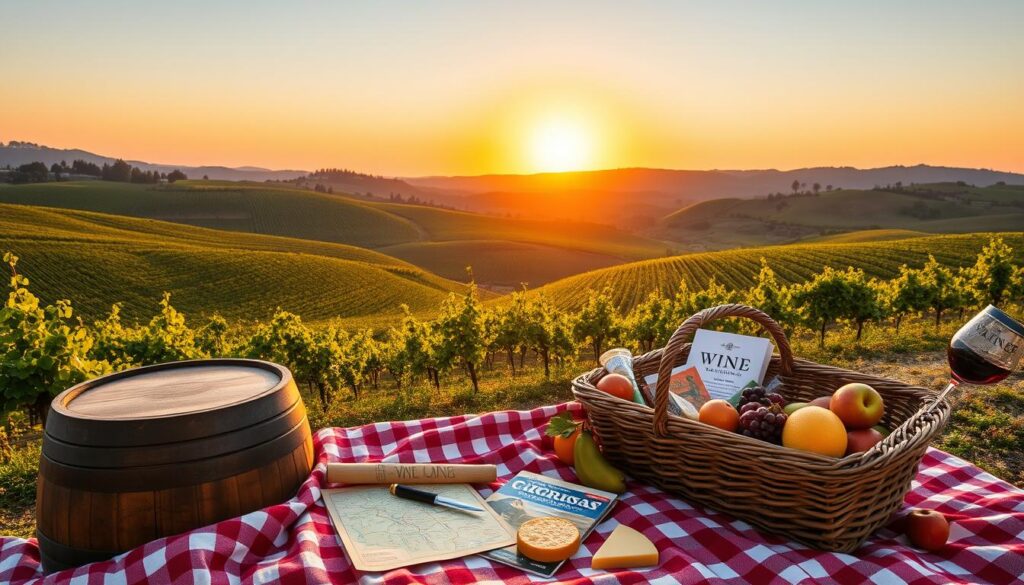
Dining and Culinary Treats in Wine Country
In wine country, the culinary scene rivals the breathtaking views and exceptional wines. You will discover a diverse range of dining options, highlighting local flavors and innovative pairings. From top-notch restaurants to vibrant food festivals, your taste buds are in for an unforgettable journey.
Top Restaurants Offering Perfect Wine Pairings
Explore the finest dining establishments where exceptional food meets exquisite wines. Notable locations include:
- La Toque: Offers a wine program with approximately 20,000 bottles, perfect for avid wine enthusiasts.
- French Laundry: Holds a Grand Award and features a 15,000-bottle cellar with over 2,400 selections.
- Brix Napa Valley: Houses a 3,000-bottle cellar focused entirely on California wines, ensuring a true local experience.
- St. Francis Winery: Provides a food and wine pairing experience curated by Executive Chef Peter Janiak.
- SingleThread Farm, Restaurant & Inn: A three Michelin star venue known for its highly sought-after seasonal menu.
Food and Wine Festivals You Shouldn’t Miss
The region comes alive during its annual food and wine festivals. Attending these events not only allows you to sample various culinary experiences but also to meet local chefs and winemakers. Look out for popular festivals, showcasing the best of what wine country has to offer.
Exciting festivals blend gourmet food and exquisite wines, enabling you to indulge in tastings and discover new favorites. Engaging directly with producers enhances your appreciation for local wines.
Local Farmers’ Markets and Artisanal Delights
For a genuine taste of wine country, visit local farmers’ markets. While exploring, you can find fresh ingredients directly from the source. Many restaurants in the area emphasize the importance of seasonal local produce from farms like:
- Shone Farm
- Lovelock Lettuce Laguna Farm
- Stemple Creek Ranch
Local markets offer everything from fruits and vegetables to artisan cheeses and handmade goods. These culinary experiences showcase the rich flavors of the region, enhancing your time spent in wine country.
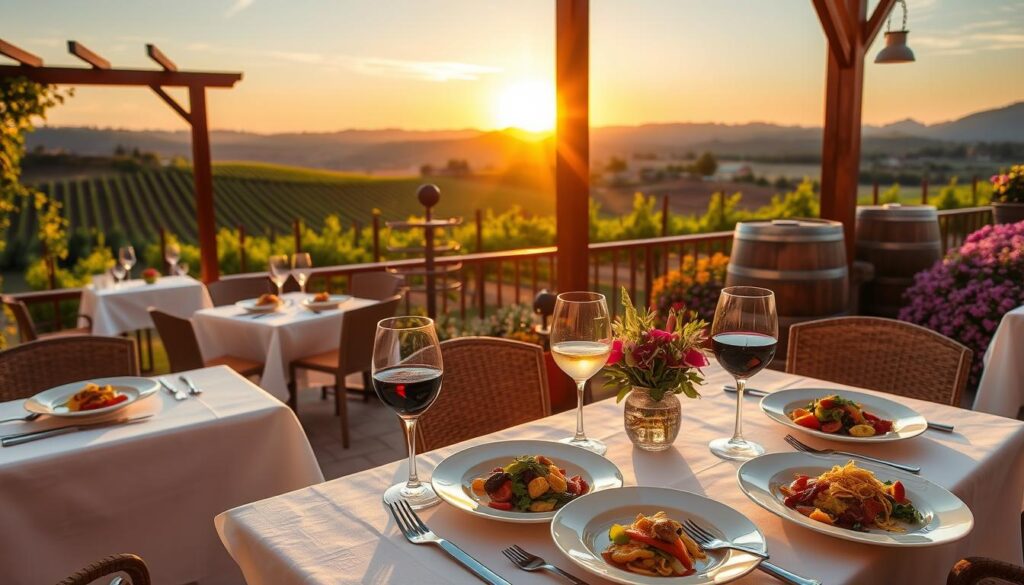
Choosing the Right Accommodation for Your Stay
Finding the perfect accommodation to complement your wine country adventure greatly enhances your experience. Whether you prefer the unique charm of boutique hotels or a memorable stay at a winery, there are numerous options to explore. Each accommodation type offers distinct atmospheres that will enrich your time in these scenic landscapes.
Charming Boutique Hotels in Wine Country
Wine country is home to a variety of boutique hotels, each equipped with its own style and character. Many of these accommodations provide intimate settings alongside exquisite services, ensuring a cozy and welcoming environment. For instance, Meadowood Napa Valley offers luxurious lodgings on expansive private grounds, allowing guests to unwind amidst nature. The Meritage Resort and Spa, with its modern amenities, provides a relaxing retreat close to the vineyards.
- Stanly Ranch: Spanning 712 acres, this resort features 78 standalone cottages designed for comfort.
- Wine Country Inn and Cottages: This property combines elegance with pet-friendly options, ideal for traveling with furry companions.
- Calistoga Motor Lodge: This hotel captures the nostalgic vibe of a 1950s motel while still providing modern comforts.
Staying at Wineries: A Unique Experience
Staying directly at a winery adds an extra layer of immersion in your wine country experience. Many wineries offer accommodations that allow you to wake up surrounded by picturesque vineyards. For example, Abbey Road Farm in Carlton, Oregon, integrates lodging as a crucial part of their hospitality experience. Guests at Youngberg Hill enjoy the inn’s welcoming atmosphere, with room options that boast stunning views of the surrounding vineyards.
Winery Accommodation | Location | Details |
---|---|---|
Abbey Road Farm | Carlton, Oregon | Lodging integral to events and vineyard stays. |
Youngberg Hill | McMinnville, Oregon | Nine rooms available for bed and breakfast. |
Lumos Wines | Philomath, Oregon | One-bedroom cabin for two guests. |
Colter’s Creek Winery | Moscow, Idaho | Four boutique rooms for self-check-in. |
Bianchi Vineyards | East Wenatchee, Washington | Two-bedroom house and RV spots. |
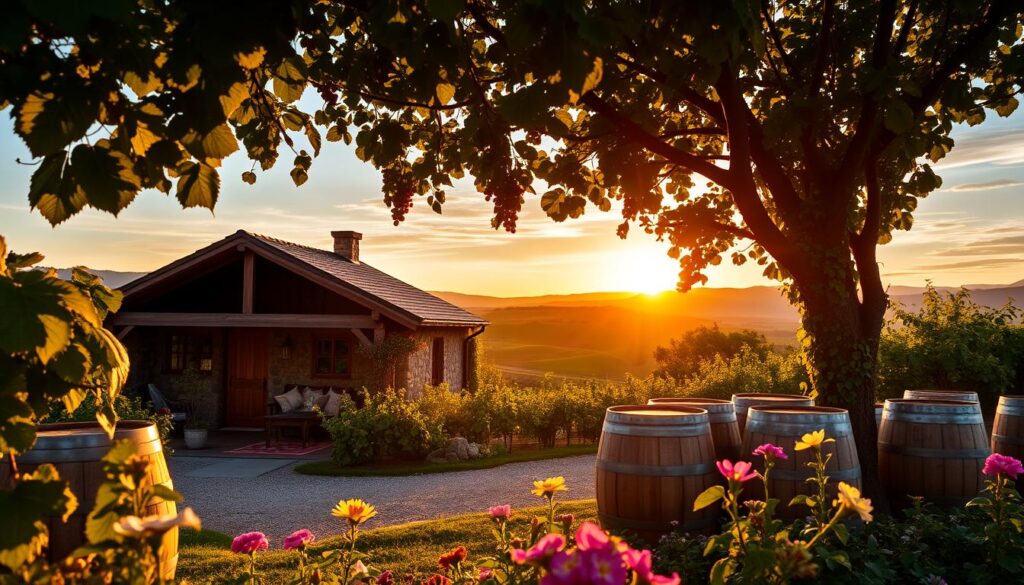
Wine Regions to Visit: An Overview
When exploring the wine regions to visit, understanding the unique qualities of each area can enhance your experience. Among the most celebrated are Napa Valley, Sonoma Valley, and Santa Barbara, each with distinct charm and exceptional wines. This overview highlights what makes these regions stand out.
Distinct Qualities of Napa Valley, Sonoma Valley, and Santa Barbara
Napa Valley is often regarded as the crown jewel of California’s wine production. Renowned for its stunning landscapes and luxurious wineries, this region primarily produces world-class Cabernet Sauvignon, Chardonnay, and Merlot. Visitors can enjoy scenic vineyard views along with countless tasting opportunities at renowned estates.
In contrast, Sonoma Valley is celebrated for its more organic and laid-back atmosphere. The region excels in producing quality Pinot Noir, Cabernet Sauvignon, and Chardonnay. With a rich agriculture scene, Sonoma boasts a diverse selection of vineyards, including smaller boutique wineries that offer personalized tasting experiences.
Santa Barbara, a less crowded but equally enchanting destination, offers a distinct mix of coastal breezes and sun-drenched vineyards. Known for its emphasis on artisanal wine production, the region produces excellent Pinot Noir and Chardonnay. The beautiful landscapes and charming towns create a welcoming environment for wine enthusiasts and travelers alike.
Each of these regions provides visitors with unique experiences that cater to different tastes and preferences, ensuring that your wine journey is both memorable and enjoyable.
Region | Key Varietals | Atmosphere | Highlight |
---|---|---|---|
Napa Valley | Cabernet Sauvignon, Chardonnay, Merlot | Luxe, Scenic | World-class wineries |
Sonoma Valley | Pinot Noir, Chardonnay, Cabernet Sauvignon | Relaxed, Diverse | Boutique wineries |
Santa Barbara | Pinot Noir, Chardonnay | Artisanal, Coastal | Beautiful landscapes |
Tips for Successful Wine Travel Experiences
Embarking on wine travel experiences can be both exciting and rewarding. To enhance your adventure, consider some essential tips for maximizing your enjoyment. Successful wine tasting involves more than just sampling; it’s about savoring each moment and flavor that you encounter. Following these insights will help you create unforgettable memories during your wine tour.
How to Savor Every Sip During Wine Tastings
Wine tastings offer unique opportunities to explore different varietals and regions. To truly appreciate each sip, engage your senses fully:
- Take your time: Allow yourself to enjoy each tasting, exploring the color, aroma, and flavor profiles.
- Ask questions: Interaction with knowledgeable staff or sommeliers can deepen your understanding and enhance your tasting experience.
- Note your favorites: Keeping a notebook will help you remember which wines you loved and wish to explore further.
- Stay hydrated: Drinking plenty of water between tastings can elevate your palate and help you enjoy the nuances of each wine.
- Pace yourself: Visiting multiple wineries in a day can be taxing, so spacing out your tastings is crucial.
Pro Tips for Collecting Wine While Traveling
For many, enhancing their wine collection during travel is a highlight. Follow these practical strategies to make wine collecting seamless:
- Plan for shipping: Many wineries offer shipping services, making it easy to send your purchases home without hassle.
- Understand local regulations: Familiarize yourself with state laws regarding alcohol shipments to avoid complications.
- Use a travel kit: Pack essential items such as bubble wrap, a sturdy box, and a cooler bag to protect your bottles.
- Be selective: With so many wines available, choose those that resonate most to ensure a collection you’ll treasure.
- Stay organized: Keep receipts and labels for easy reference when managing your collection at home.
Getting Around in Wine Country
Exploring wine country offers a variety of transportation options to make your adventure both enjoyable and convenient. Whether you prefer to drive yourself or take advantage of guided services, you have ample choices to suit your needs. This makes navigating the stunning landscapes and numerous wineries an exciting experience.
Transportation Options for Your Wine Adventure
Wine country features over 400 wineries, providing visitors with countless opportunities to indulge in tastings and tours. Convenient transportation methods include:
- Rental Cars – Companies like Sixt offer rental options at multiple locations, located in San Francisco International Airport and downtown, making it easy for you to drive through Napa Valley or Sonoma County.
- Trolley Tours – The Napa Valley Wine Trolley and Sonoma Valley Wine Trolley offer an entertaining way to visit 3 or 4 wineries, with scheduled stops and dining options along the way.
- Designated Driver Services – Hire a designated driver for private tours. Companies provide licensed drivers to ensure a fun and safe experience while you sample various wines.
- Private Tours – Enjoy personalized excursions with boutique operators such as Pure Luxury Transportation, offering dedicated drivers and access to exclusive wine experiences.
Exploring Wine Country by Bicycle: A Fun Choice
For the more adventurous spirits, exploring wine country by bicycle presents a fun and active alternative. The Napa Valley Vine Trail features a 47-mile bike path, allowing you to pedal through picturesque scenery and stop at some of the best wineries, including Seghesio Family Vineyards and Longboard Vineyards. Companies like Sonoma Valley Bike Tours and Ace It! Bike Tours can guide your biking adventure. Enjoy the sights while savoring the local wines in a unique way that integrates outdoor activity with wine appreciation.
Transportation Option | Details |
---|---|
Rental Cars | Flexibility to explore at your own pace. |
Trolley Tours | Guided tours stopping at multiple wineries. |
Designated Driver Services | Hire licensed drivers for a worry-free experience. |
Bicycle Tours | Active exploration with scenic stops at wineries. |
Private Tours | Customized experiences with dedicated drivers. |
Conclusion
As you embark on your journey through the wine country, you’ll discover a tapestry of breathtaking vineyards, rich history, and exceptional wines. Whether you find yourself enjoying the rolling hills of Sonoma County, known for its 400-plus wineries and remarkable soil diversity, or exploring Napa Valley’s vibrant towns, the experiences awaiting you are nothing short of magical. Each region offers unique attractions—from enthralling vineyard tours to immersive tastings—that ensure you gain a deeper appreciation of the winemaking process.
Remember to plan your visit wisely, as the wine country thrives during the harvest season from August to October. However, don’t overlook the serene beauty of winter’s Cabernet season or the vibrant life that spring brings to the vines. Whichever season you choose to visit, the charm of wine country will envelop you, inviting you to savor exquisite varietals like Pinot Noir and Zinfandel.
By embracing the full scope of what wine country has to offer, you can create unforgettable memories surrounded by stunning landscapes and delightful flavors. Get ready to sip, savor, and explore this captivating world, ensuring your time spent in wine country is as enriching as it is enjoyable.
FAQ
What is the best time to visit wine country?
How do I plan a wine tasting tour?
Are there family-friendly wineries in wine country?
What should I wear for a vineyard tour?
How do I choose the right accommodation in wine country?
Can I bring my dog to wineries in wine country?
What types of culinary experiences can I expect in wine country?
How can I safely collect and transport wine while traveling?
What transportation options are available in wine country?
Are there guided tours available for wine country trips?
Amara brings her deep knowledge of African cuisine to the table, with a focus on the rich and hearty flavors of Senegal. She loves to share slow-cooked dishes like thieboudienne (rice and fish), which reflect the warmth and hospitality of African cooking. Amara’s approach to food is all about creating comforting meals that nourish the soul.
Beverage Deep Dives
Mixology 101: Classic Cocktails
Longing for a new cocktail adventure? Dive into the captivating world of mixology, where the possibilities are endless.
Dive into the captivating world of mixology! It all started centuries ago, with ancient civilizations like the Egyptians, Greeks, and Romans experimenting with unique cocktail recipes using local ingredients. Fast forward to colonial America, where bartenders created signature drinks with the flavors of the land. Today, modern mixologists keep innovating, blending spirits, juices, and botanicals to craft unforgettable cocktails. Learning the basics – like balancing ingredient ratios and mastering mixing techniques – is key to becoming a confident cocktail maker. Whether you're stirring up a classic Negroni or dreaming up your own signature sip, the art of mixology is a journey filled with endless possibilities.
Key Takeaways
- The history of mixology traces back to ancient civilizations, with unique cocktail recipes incorporating diverse ingredients like honey, herbs, and spices.
- Mastering the basics of mixology, including understanding ingredient ratios, experimenting with measurements, and maintaining attention to detail, is crucial for crafting balanced cocktails.
- The process of crafting classic cocktails involves gathering the necessary ingredients and glassware, combining them in a shaker, straining into a chilled glass, and adding a complementary garnish.
- The Negroni, a classic cocktail made with equal parts gin, Campari, and sweet vermouth, originated in early 20th century Florence, Italy, and exemplifies the balance of flavors essential in mixology.
- Creativity in cocktail making is encouraged, allowing for the exploration of unique flavor combinations, the incorporation of seasonal ingredients, and the development of personalized presentation techniques to elevate the drinking experience.
History
Tracing its roots back to ancient civilizations, the practice of mixology has a rich and storied history. Did you know that people were mixing drinks thousands of years ago? The ancient Egyptians, Greeks, and Romans all had their own unique cocktail recipes, using ingredients like honey, herbs, and even spices!
As the centuries passed, the art of mixing drinks evolved and spread around the world. In the 1700s, bartenders in colonial America started creating signature cocktails using local ingredients.
Then, during the 1800s, classic drinks like the Old Fashioned and the Martini became popular. Bartenders became true artists, experimenting with different flavors and techniques.
Today, mixology is more exciting than ever. Bartenders continue to push the boundaries, dreaming up new and innovative cocktails.
Whether you prefer sweet, sour, or somewhere in between, there's a cocktail out there for everyone to enjoy. So grab a shaker and get ready to explore the fascinating history of mixology!
Recipe
Mixology is the art of crafting cocktails, and it's a skill that can be honed through practice and experimentation. Whether you're a seasoned bartender or a home mixologist, having a solid foundation in mixology techniques can elevate your cocktail game.
In this recipe, we'll explore the classic Negroni, a timeless and sophisticated aperitif that strikes the perfect balance between bitter, sweet, and aromatic flavors.
The Negroni is a simple yet elegant cocktail, made with equal parts gin, Campari, and sweet vermouth. It's believed to have originated in Florence, Italy, in the early 20th century, when Count Camillo Negroni requested his usual Americano cocktail (Campari, sweet vermouth, and club soda) to be made with gin instead of soda. This substitution created the iconic drink we know and love today.
Ingredients:
- 1 oz gin
- 1 oz Campari
- 1 oz sweet vermouth
Instructions:
Fill a mixing glass with ice. Add the gin, Campari, and sweet vermouth. Stir the mixture until well-chilled, about 20-30 seconds. Strain the cocktail into a chilled rocks glass filled with fresh ice. Garnish with an orange slice or a twist of orange peel.
When making a Negroni, be sure to use high-quality ingredients. The balance of the three components is crucial, so consider experimenting with different gins, vermouths, and even Campari alternatives to find your perfect ratio.
Additionally, the stirring technique is important, as it helps to properly dilute and integrate the flavors. Enjoy your Negroni as an aperitif or as a digestif, and savor the complexity of this timeless cocktail.
Cooking Steps
Alright, let's get started!
First, you'll need to gather all your ingredients and glassware.
Then, combine everything in a shaker and give it a good shake.
Step 1. Gather Ingredients and Glassware
Assembling the right ingredients and glassware is the foundation for crafting delectable cocktails. You'll want to gather all the essential liquors, mixers, and garnishes before you start shaking or stirring. Smooth vodka, crisp gin, or rich bourbon – the spirit you choose sets the tone.
Pair it with fresh juices, bubbly club soda, or zesty bitters. Don't forget the garnishes! A juicy orange slice or a sprig of mint adds the perfect finishing touch.
For the glassware, you'll need the right vessel to showcase your cocktail. Tall Collins glasses are perfect for long, refreshing drinks, while short rocks glasses are ideal for spirit-forward sips.
Delicate coupe or Martini glasses lend an elegant flair. Whichever you choose, make sure it's clean and chilled before you pour.
With your ingredients and glassware ready to go, you're all set to shake, stir, and sip your way to cocktail perfection!
Step 2. Combine Ingredients in Shaker
Now that you have gathered all the necessary elements, it's time to put them to use! Grab your trusty cocktail shaker and get ready to mix up a delightful drink.
First, add the base spirit, like vodka or gin, along with any other liquid ingredients like juices or syrups. Next, toss in some ice cubes – the more the merrier!
Put the lid on the shaker and give it a good, vigorous shake. You'll want to shake it for about 10-15 seconds, until the outside of the shaker gets nice and frosty. This helps chill the drink and dilute it just the right amount.
Once you're done shaking, carefully strain the mixture into your waiting glass. Voila! Your cocktail is now ready to enjoy.
Remember to garnish it with a slice of fruit, a sprig of herb, or any other fancy touch to make it look as good as it tastes. Cheers!
Step 3. Strain Into Chilled Cocktail Glass
After vigorously shaking the cocktail, it's time to strain the mixture into your chilled cocktail glass.
Grab your trusty cocktail strainer and gently place it over the top of the shaker. Slowly tilt the shaker, allowing the delicious liquid to pour through the strainer and into the waiting glass.
You'll see the ice-cold cocktail come to life, its colors dancing in the light. Isn't it beautiful?
Now, take a moment to admire your creation. The smooth, shiny surface is just begging to be sipped. Go ahead, give it a try! The flavors will burst in your mouth, leaving you refreshed and delighted.
Remember, the key is to strain the cocktail carefully, ensuring no unwanted bits make their way into your glass.
With a little practice, you'll be straining like a pro in no time. Cheers to your perfect pour!
Step 4. Add Garnish
With your chilled cocktail now perfectly poured, it's time to put the finishing touches on your creation. Adding a garnish is the perfect way to enhance the presentation and aroma of your drink.
Carefully select a garnish that complements the flavors of your cocktail. For example, a slice of lemon or lime adds a bright, citrusy note, while a sprig of fresh mint brings a refreshing, herbal touch. Get creative and let your imagination shine!
Gently place the garnish on the rim of the glass, or let it rest delicately on the surface of the drink. Avoid overpowering the cocktail with a large or bulky garnish. The goal is to create a visually appealing and inviting presentation that entices your senses.
Now that your cocktail is complete, take a moment to admire your handiwork. With the perfect balance of flavors and a beautiful garnish, you're ready to sit back, relax, and enjoy your masterpiece.
Step 5. Enjoy Your Classic Cocktail
Take a moment to savor the aromatic and visually captivating cocktail you've just created. Breathe in the inviting scent, notice the vibrant colors, and admire the elegant presentation. This is your masterpiece – a testament to your mixology skills!
Now, it's time to enjoy the fruits of your labor. Gently pick up the glass, feeling its weight and coolness in your hand. Bring the rim to your lips and take a sip, allowing the flavors to dance across your tongue. Savor the perfect balance of sweet, sour, and spirit. As you savor the perfect balance, notice how each note lingers, unfolding with subtle complexity. If you close your eyes, you might even detect hints of vanilla or citrus, enhancing the depth of the experience. It’s reminiscent of the smooth, playful texture of bubble tea tapioca pearls, offering a delightful contrast with each sip.
As you swallow, feel the liquid warmth travel down your throat, leaving a delightful sensation. Sit back, relax, and continue to sip your creation. Allow the cocktail to enhance your mood and conversation.
This is a moment to be savored, a chance to appreciate the art of mixology. Enjoy every last drop, knowing you've crafted a truly remarkable classic cocktail.
Final Thoughts
Mixology, the art of crafting remarkable beverages, is a journey of exploration and discovery. As you've learned about classic cocktails, you're now ready to take your skills to the next level. Mixing drinks is all about finding the perfect balance of flavors, textures, and aromas.
Don't be afraid to experiment and try new things. Swap out ingredients, adjust measurements, and see how it changes the final product. The more you practice, the better you'll become at creating your own unique concoctions.
Remember, the joy of mixology is in the process. Savor each step, from carefully measuring the ingredients to the satisfying final sip.
Whether you're hosting a party or simply enjoying a quiet evening at home, let your creativity shine. Impress your friends with your bartending prowess, or treat yourself to a delightful homemade cocktail.
The possibilities are endless when you embrace the art of mixology.
Frequently Asked Questions
What Is the Proper Glassware for Each Cocktail?
The proper glassware for a cocktail depends on the drink. You'll want to choose a glass that complements the flavors and presentation of the cocktail, whether it's a highball, coupe, or rocks glass.
How Can I Make My Cocktails Visually Appealing?
To make your cocktails visually appealing, focus on presentation. Use the right glassware, garnish creatively, and pay attention to color and texture. Experiment with ice shapes, citrus twists, and other eye-catching elements to elevate your drink's appearance.
What Are the Common Garnishes Used in Classic Cocktails?
To make your cocktails visually appealing, you can use a variety of common garnishes like citrus peels, olives, cherries, herbs, and spices. These simple additions can elevate the presentation and enhance the overall drinking experience.
How Do I Measure Ingredients Accurately for Cocktails?
To measure cocktail ingredients accurately, use a jigger or measured pour spout. Don't eyeball it – that'll throw off your ratios. Take the time to measure precisely for consistently great drinks.
What Are Some Tips for Perfecting the Ice for Cocktails?
To perfect the ice for cocktails, use filtered water and mold it into large, clear cubes or spheres. This will melt slowly, dilute your drink less, and create a visually appealing presentation.
Beverage Deep Dives
Smoothie Bowl Art: Instagram-Worthy Breakfasts
Joyful, colorful, and nutrient-rich, smoothie bowls have become a social media sensation, tempting you to discover the secrets behind these visually stunning and satisfying treats.
Smoothie bowls are all the rage these days, blending together delicious fruits and superfoods into a beautiful and nutritious breakfast. You'll be amazed at the vibrant colors and fun designs that people create, making these bowls totally Instagram-worthy. Just imagine a creamy smoothie as your base, topped with crunchy granola, juicy berries, and a sprinkle of toasted coconut – yum! Preparing these bowls at home lets you get creative, and the options are endless. Want to learn more about crafting your own smoothie bowl masterpieces? Keep reading to discover the secrets behind these visually stunning and satisfying treats.
Key Takeaways
- Smoothie bowls have gained immense popularity on social media due to their visually appealing and creative presentation, making them Instagram-worthy breakfast options.
- Vibrant ingredients, intricate designs, and themed arrangements contribute to the artistic appeal of smoothie bowls, allowing for self-expression and showcasing on social media platforms.
- Smoothie bowls are not only aesthetically pleasing but also nutritionally dense, with customizable ingredients providing essential vitamins, minerals, and fiber to support overall health.
- The transformation in flavor and texture, from blended smoothie to a frozen, ice cream-like consistency, creates a unique and refreshing breakfast experience.
- Topping suggestions such as crunchy granola, juicy berries, toasted coconut, and drizzles of honey or nut butter further enhance the visual appeal and flavor complexity of smoothie bowls.
History
Although smoothie bowls have been around for decades, the art of creating intricate designs and patterns on their surfaces has gained significant popularity in recent years. You can thank social media and the rise of "foodie" culture for this tasty trend!
Suddenly, people couldn't just blend up a nutritious smoothie – they'd to turn it into a colorful masterpiece, complete with fresh fruits, nuts, seeds, and all sorts of eye-catching toppings.
This Instagram-worthy craze started popping up in trendy cafes and health food stores, where baristas and chefs showcased their smoothie bowl creativity. Soon, home cooks got in on the action, experimenting with different flavor combinations and decorative techniques to make their breakfasts as beautiful as they're delicious.
From swirling nut butters to arranging berries in vibrant patterns, the possibilities for smoothie bowl art are endless. Whether you're a seasoned pro or just starting out, get ready to have fun and make your morning meal a true work of art!
Recipe
Smoothie bowls are a delightful way to enjoy a nutritious and visually appealing breakfast or snack. These frozen blended concoctions aren't only packed with essential vitamins and minerals but also allow for endless creative possibilities.
Transforming a simple smoothie into an edible work of art is a fun and engaging activity that the whole family can enjoy. Whether you're a seasoned smoothie enthusiast or new to the world of blended beverages, this recipe will guide you through the steps to create a visually stunning smoothie bowl.
Get ready to impress your friends and nourish your body with this delicious and Instagram-worthy treat.
Ingredients:
- 1 cup frozen mixed berries
- 1 banana, frozen
- 1/2 cup almond milk
- 1 tablespoon honey (optional)
- 1 tablespoon chia seeds
- 1 tablespoon granola
- Assorted fresh fruit (such as sliced kiwi, strawberries, and blueberries)
- Toasted coconut flakes (optional)
Instructions:
Combine the frozen mixed berries, banana, almond milk, and honey (if using) in a high-speed blender. Blend until smooth and creamy.
Pour the smoothie into a bowl. Sprinkle the chia seeds and granola on top. Arrange the assorted fresh fruit and coconut flakes (if using) in a visually appealing design on the smoothie. Serve immediately and enjoy your masterpiece!
Tips:
For a thicker consistency, use less almond milk. Adjust the sweetness to your liking by adding more or less honey.
Feel free to experiment with different fruit combinations and toppings to create your own unique smoothie bowl. Have fun and let your creativity shine through!
Cooking Steps
Blend your favorite frozen fruit and yogurt until smooth and creamy.
Pour the vibrant mixture into a bowl, then get creative by topping it with fresh fruit, nuts, seeds, or even a sprinkle of toasted coconut.
For an icy treat, stick the whole bowl in the freezer overnight and enjoy your delicious smoothie bowl the next day!
Step 1. Blend Frozen Fruit and Yogurt
Gather your blender and dive into the vibrant world of frozen fruit and creamy yogurt. The possibilities are endless when it comes to creating your own delectable smoothie bowl masterpiece. Start by choosing your favorite frozen fruit – maybe it's sweet and juicy mango, or perhaps tart and refreshing raspberries are more your style. Toss those frozen gems into your trusty blender, then add a generous scoop of thick, tangy yogurt.
For an added boost of nutrition, consider incorporating some fresh herbs like mint for a refreshing twist, as seen in unique combinations enhance flavor. Blend until the mixture is smooth and creamy, just the way you like it. You can also experiment by using these fresh herbs in classic cocktail recipes, adding a natural, healthful element to your drinks. Whether it’s muddling basil into a homemade mojito or garnishing a mint julep, these herbs provide layers of complexity while boosting both flavor and nutrition. Don’t hesitate to get creative and explore how fresh ingredients can transform both your beverages and your well-being.
Now, the real fun begins! Carefully pour your frozen fruit and yogurt blend into a bowl, creating a blank canvas for your edible artwork. Grab an assortment of fresh fruit, nuts, granola, and any other tasty toppings that catch your eye.
Artfully arrange these vibrant ingredients to transform your smoothie bowl into an Instagram-worthy breakfast that's almost too pretty to eat – almost! With each spoonful, savor the burst of flavors and the satisfying crunch of your customized creation.
Step 2. Pour Into Bowl
With your blended fruit and yogurt mixture ready, it's time to pour the luscious, creamy concoction into a bowl, creating a blank canvas for your edible masterpiece.
To enhance your smoothie bowl experience, consider adding a soothing herbal tea like chamomile on the side, known for its calming effects.
Grab your favorite bowl – maybe one with a pretty pattern or a bright, cheerful color. Slowly and carefully, pour the smooth, thick smoothie into the bowl, making sure to get every last delicious drop.
Watch as the vibrant purples, oranges, and greens swirl together, just waiting for you to transform them into a work of art.
Now it's time to get creative! Grab your toppings – things like fresh berries, toasted coconut, crunchy granola, or a drizzle of nut butter.
Arrange them in fun, colorful designs, letting your imagination run wild. Will you make a smiley face with banana slices? Or maybe a rainbow with vibrant fruit?
The possibilities are endless! Just have fun and get ready to impress your friends and family with your smoothie bowl masterpiece.
Step 3. Garnish With Fresh Toppings
After you've poured the smoothie into the bowl, it's time to add the finishing touches. Grab a handful of fresh, colorful toppings and start arranging them on top of the creamy smoothie base.
Slice up some juicy strawberries and scatter them around the edges, creating a bright red border. Strawberries aren't only delicious but also rich in vitamin C, which can help promote skin health and give you that radiant glow benefits of vitamin C.
Sprinkle on a few plump blueberries, their deep purple hue providing a nice contrast. Don't forget the banana slices – they add a sunny, tropical vibe to your creation.
For a finishing touch, sprinkle on a sprinkling of toasted coconut flakes, their sweet, nutty flavor complementing the smoothie perfectly.
Step back and admire your work – your smoothie bowl is now a true work of art, ready to be shared on Instagram and enjoyed.
With all these vibrant, fresh toppings, your breakfast isn't only delicious, but visually stunning too.
Step 4. Sprinkle With Toasted Coconut
To elevate your smoothie bowl even further, sprinkle a generous amount of toasted coconut flakes over the top. The golden-brown, crunchy pieces will add a delightful texture and a sweet, nutty flavor that perfectly complements the fresh fruit and creamy yogurt.
Imagine the aroma of the toasted coconut wafting through the air as you take your first bite.
The toasted coconut flakes are easy to prepare – simply place them in a dry skillet over medium heat and cook, stirring occasionally, until they turn a lovely golden brown.
Be sure to keep a close eye on them, as they can go from perfectly toasted to burnt in the blink of an eye!
Once they've reached that delicious, toasted perfection, remove the skillet from the heat and let the coconut cool slightly before sprinkling it over your smoothie bowl.
The combination of the smooth, creamy smoothie and the crunch of the toasted coconut is simply irresistible.
Go ahead, give it a try – your taste buds will thank you!
Step 5. Freeze Smoothie Bowl Overnight
Freeze your smoothie bowl overnight for a delightfully chilled and thick treat in the morning.
You'll be amazed at how the flavors meld and the texture transforms when your vibrant, fruity creation sits in the freezer. Simply prepare your smoothie as usual, then pour it into your favorite bowl.
Pop it in the freezer, and let the magic happen! In the morning, you'll have a deliciously frozen breakfast that's almost like ice cream. Just give it a few minutes to thaw slightly, then dig in with a spoon.
Top it with all your favorite toppings – maybe some crunchy granola, juicy berries, or toasted coconut. The frozen smoothie will keep you feeling full and satisfied until lunchtime.
It's a delightful way to start your day, and your Instagram followers will be drooling over your artful masterpiece!
Final Thoughts
Creativity in the kitchen can be a source of profound satisfaction. Crafting eye-catching smoothie bowls allows you to unlock your inner artist and share your masterpieces with the world.
Whether you prefer vibrant, fruit-filled creations or earthy, veggie-based designs, the possibilities are endless.
As you continue your smoothie bowl journey, don't be afraid to experiment. Mix and match different ingredients, textures, and colors to find what inspires you.
The best part? Your unique smoothie bowl art can brighten someone's day and spread joy through the power of a delicious, nutritious breakfast.
Frequently Asked Questions
What Are the Best Fruits to Use in a Smoothie Bowl?
When crafting your smoothie bowl, consider using a variety of fresh fruits like bananas, berries, mango, and pineapple. These vibrant ingredients not only taste great but also create a visually appealing and nutrient-dense foundation for your customized breakfast creation.
How Can I Make My Smoothie Bowl More Visually Appealing?
To make your smoothie bowl more visually appealing, try arranging your fruits and toppings in a decorative pattern. Add a drizzle of nut butter or honey for texture and contrast. Get creative with colorful ingredients to make your bowl pop.
Is It Necessary to Use a Blender for a Smoothie Bowl?
You don't necessarily need a blender to make a smoothie bowl. You can simply chop up the ingredients and mix them together in a bowl. This method may not create as smooth a texture, but it can still be visually appealing.
Can I Make a Smoothie Bowl the Night Before?
You can make a smoothie bowl the night before, but it's best to assemble it right before serving. Preparing it ahead of time may result in a watery or separated texture, so it's better to blend and layer it fresh.
How Do I Store Leftover Smoothie Bowl Ingredients?
You can store leftover smoothie bowl ingredients in airtight containers in the fridge. The fruits and veggies will stay fresh for 3-4 days, so you can easily prep them ahead of time for a quick breakfast.
Beverage Deep Dives
Bubble Tea: Tapioca Pearl Perfection
Nourish your taste buds with the captivating blend of black tea and chewy tapioca pearls that make up the irresistible treat known as bubble tea.
Bubble tea's tapioca pearls are the perfect chewy treat! This delightful drink was born in Taiwan in the 80s, mixing black tea with those irresistible pearls. Now, bubble tea shops around the world offer endless flavors – from classic milk tea to fruity fusions. You can customize your drink however you'd like, with different tea types, milks, and sweeteners. The pearls are soaked, boiled, and chilled to achieve that signature soft and bouncy texture. Exciting toppings like fruit jellies and popping boba take the experience to new heights. Bubble tea is a sensory delight that'll capture your taste buds – and you'll want to dive in for more!
Key Takeaways
- Bubble tea's signature feature is the chewy and satisfying tapioca pearls, which provide a unique texture and mouthfeel to the refreshing tea-based drink.
- The cooking process for tapioca pearls is crucial, involving soaking, boiling, and chilling to achieve the perfect soft yet bouncy consistency.
- Bubble tea offers endless customization options, allowing consumers to personalize their drink with a variety of tea bases, milk types, sweeteners, and toppings.
- The vibrant colors and playful presentation of bubble tea contribute to its widespread appeal, especially among younger generations and social media enthusiasts.
- Bubble tea has become a global phenomenon, transcending its Taiwanese roots and captivating taste buds around the world with its fusion of traditional tea culture and modern trends.
History
Bubble tea, also known as boba tea, has a rich and fascinating history that traces back to the 1980s in Taiwan.
Originating from a small tea shop, the beloved beverage was created by mixing black tea with chewy, tapioca pearls known as "boba." These unique pearls quickly became the star of the drink, adding a delightful textural contrast and fun, playful element.
As the trend spread throughout Asia, bubble tea's popularity skyrocketed, captivating taste buds with its irresistible blend of sweet and creamy flavors.
Soon, the refreshing concoction found its way to the Western world, where it continued to enchant new audiences.
Today, bubble tea shops can be found in every corner of the globe, offering a dazzling array of flavors and customization options to suit every palate.
From classic milk tea to innovative fruit-infused varieties, the humble beginnings of this beloved beverage have blossomed into a global phenomenon.
Recipe
Bubble tea, also known as boba tea, is a beloved Taiwanese beverage that has gained global popularity. This refreshing and customizable drink combines tea, tapioca pearls, and a variety of flavorful additives, creating a unique and delightful experience.
Originating in the 1980s, bubble tea has evolved over the years, with countless flavor combinations and variations. Whether you prefer a classic milk tea or a vibrant fruit-based concoction, the versatility of bubble tea allows you to explore and discover your perfect blend.
- Black tea
- Milk (dairy or non-dairy)
- Tapioca pearls
- Sugar (or alternative sweetener)
- Ice cubes
In a saucepan, bring water to a boil. Add the tapioca pearls and cook according to the package instructions, typically about 20-25 minutes. Drain the pearls and rinse them under cold water to stop the cooking process.
In a separate container, brew the black tea according to your preference. In a serving glass, combine the cooked tapioca pearls, brewed tea, milk, and sugar (or alternative sweetener) to taste. Stir well and add ice cubes.
When preparing bubble tea, it's important to ensure that the tapioca pearls are cooked to the desired texture, which should be chewy and bouncy. Additionally, you can experiment with different tea varieties, milk types, and sweeteners to find your personal favorite combination.
Enjoy your homemade bubble tea and explore the endless possibilities of this delightful beverage.
Cooking Steps
First, you'll need to soak the tapioca pearls in water until they're nice and plump.
Once they're ready, just pop them into a pot and boil 'em up until they're all nice and translucent.
Step 1. Soak Tapioca Pearls in Water
To prepare the tapioca pearls, you'll want to soak them in water for a specified duration. This crucial step helps the pearls soften and plump up, ensuring they've the perfect, chewy texture you'll love.
Start by grabbing a large bowl and filling it with clean, filtered water. Gently pour in the dry, uncooked tapioca pearls, making sure they're fully submerged. Let them soak for 30 minutes to an hour, depending on the size of the pearls. You'll know they're ready when they appear translucent and have a soft, pliable feel.
Drain the pearls in a mesh strainer, then transfer them to your pot or saucepan. From here, you'll cook the pearls according to the package instructions, simmering them until they float to the top.
With these juicy, bouncy pearls, you're well on your way to creating a delightful bubble tea masterpiece!
Step 2. Boil Tapioca Pearls Until Translucent
With the soaking step complete, the plump tapioca pearls are ready to be cooked.
Bring a pot of water to a rolling boil on the stove. Gently drop the soaked pearls into the boiling water and let them cook. As they heat up, you'll see them start to turn translucent and expand in size.
Stir the pearls occasionally to ensure they cook evenly. It'll take about 15-20 minutes for the tapioca to become fully cooked and transparent. Once they reach this stage, they're ready to be enjoyed!
The pearls should have a soft, chewy texture that's simply delightful. Now you can add the cooked tapioca to your favorite bubble tea recipe. For an extra layer of flavor, try infusing the tapioca pearls with a hint of brown sugar syrup before adding them to your drink. This method, much like the Japanese rolled omelette technique, requires careful attention to timing and temperature to achieve the perfect balance of sweetness and texture. With your pearls ready, all that’s left is to enjoy your delicious bubble tea!
Get ready to sip on a refreshing and fun treat that's bursting with flavor. The cooking process may take a bit of time, but it's worth it to achieve those perfectly cooked, glossy tapioca pearls.
Step 3. Add Milk and Sweetener
Now that you have perfectly cooked tapioca pearls, it's time to assemble the rest of your bubble tea. In a separate pitcher or container, combine your desired amount of milk and sweetener. You can use regular milk, almond milk, or even condensed milk for a creamier taste.
As for the sweetener, you've got plenty of options – try brown sugar, honey, or even maple syrup to give your bubble tea a unique flavor. Stir everything together until the sweetener has fully dissolved.
Now it's time to put it all together! Grab your glass and fill it about halfway with the cooked tapioca pearls. Gently pour the milk and sweetener mixture over the top, making sure to get an even distribution.
Give it a gentle stir to incorporate everything. Finally, add some ice cubes to chill your delightful bubble tea creation. The sweet milk, chewy tapioca, and refreshing ice make for an irresistible treat! Sip and enjoy your homemade bubble tea masterpiece.
Step 4. Chill Tapioca Pearls in Ice Bath
After cooking, you'll want to chill the tapioca pearls in an ice bath. This is a crucial step to get those pearls to the perfect texture – chewy, bouncy, and oh-so-satisfying!
Simply fill a large bowl with ice water and gently transfer the cooked pearls into the bath. Let them soak for about 15 minutes, stirring occasionally to ensure even cooling.
You'll see the pearls transform from sticky and soft to firm and springy. Mmm, can you just imagine biting into one of those delightful little orbs? The contrast of the cool, slippery exterior and the warm, gummy interior is what makes bubble tea so heavenly.
Once the pearls are perfectly chilled, drain them well and they're ready to be added to your favorite bubble tea recipe. Get ready for an explosion of flavor and texture in every refreshing sip!
Step 5. Serve With Desired Beverage
Once you've perfectly chilled the tapioca pearls, it's time to start building your bubble tea. Grab your favorite beverage – maybe it's sweet and creamy milk tea, or perhaps you're in the mood for a refreshing fruit-flavored tea. Whatever your preference, pour it into a tall glass, leaving a bit of room at the top.
Now, it's time to add those delightfully chewy tapioca pearls. Scoop up a generous helping from your ice bath and let them tumble into the tea. Watch as they sink to the bottom, ready to be sipped up through your wide bubble tea straw.
Don't forget to add any desired toppings, like fluffy whipped cream or a drizzle of sweet syrup. The possibilities are endless!
Give your drink a gentle stir, then grab that straw and take a sip. The burst of flavor and satisfying texture is sure to delight your taste buds. Enjoy your perfectly crafted bubble tea masterpiece!
Final Thoughts
Bubble tea, with its distinct visual appeal and delightful flavors, has undoubtedly captivated the hearts and taste buds of many. From the chewy tapioca pearls to the refreshing tea base, this unique beverage offers a sensory experience like no other. As you sip and savor each sip, you'll be transported to a world of pure joy and indulgence.
The beauty of bubble tea lies in its versatility. Whether you prefer fruity, creamy, or even coffee-inspired concoctions, there's a flavor to suit every palate. The vibrant colors and playful toppings add an element of fun, making it the perfect treat for both kids and adults alike.
As you embark on your bubble tea journey, embrace the opportunity to experiment and discover your personal favorite. With endless possibilities, the only limit is your imagination.
Frequently Asked Questions
How Long Do Tapioca Pearls Last After Being Cooked?
Freshly cooked tapioca pearls last up to 4 hours at room temperature. To extend their shelf life, you can store them in the refrigerator for up to 3 days or freeze them for longer term storage.
Can I Make Bubble Tea With Non-Dairy Milk Alternatives?
You can certainly make bubble tea with non-dairy milk alternatives. Almond, soy, or oat milk work well, providing a creamy base for the chewy tapioca pearls. Experiment to find your preferred non-dairy combination.
What Are the Health Benefits of Drinking Bubble Tea?
Drinking bubble tea can provide some health benefits, though the sugary content means you should enjoy it in moderation. The tapioca pearls offer a source of complex carbohydrates, while non-dairy milk alternatives may offer additional nutritional value depending on the type you choose.
How Can I Customize the Sweetness Level of My Bubble Tea?
To customize the sweetness level of your bubble tea, you can ask the provider to adjust the sugar content. Many shops offer options like 25%, 50%, or 75% sweetness, allowing you to control the level that suits your taste.
Is Bubble Tea Gluten-Free?
Yes, bubble tea is typically gluten-free. The primary ingredients in bubble tea, like tapioca pearls, milk, and tea, don't contain gluten. However, it's always a good idea to check with the café or vendor to confirm the specific recipe.
-
Southern Comfort Food1 month ago
Cheese Straws
-
Brazilian Cuisine1 month ago
Caldeirada
-
Southern Comfort Food1 month ago
Creamed Corn
-
Brazilian Cuisine1 month ago
Chicken in Brown Sauce
-
Brazilian Cuisine1 month ago
Tacacá
-
Southern Comfort Food1 month ago
Squash Casserole
-
Ethiopian Cuisine1 month ago
Buna (Coffee)
-
Polish Comfort Food1 month ago
Krupnik (Barley Soup)