
Sourdough baking's captivating journey unveils the science behind cultivating and baking with wild yeast. From ancient origins in the Fertile Crescent to unique global strains, this time-honored tradition offers a deeply rewarding sensory experience and potential health benefits. Mastering sourdough requires patience and dedication, involving understanding starter signs, timing, and techniques. Each loaf reflects the unique characteristics of wild yeast and skill. Embracing the unpredictability is part of the sourdough baking adventure. If you're ready to embark on this flavorful discovery, the science behind sourdough has much more to reveal.
Key Takeaways
- Sourdough relies on wild yeast and bacteria for fermentation, resulting in a unique flavor profile and improved digestibility.
- Cultivating a healthy sourdough starter is crucial for successful sourdough baking, requiring regular feeding and careful maintenance.
- The sourdough baking process involves a multi-step method, including feeding the starter, mixing the dough, proofing, and baking in a preheated oven.
- Sourdough offers various health benefits, such as improved gut health, lower glycemic index, and increased nutrient content due to the fermentation process.
- Mastering sourdough baking requires patience, dedication, and understanding of the environmental factors that affect the starter and the final product.
Top picks for "science sourdough cultivat"
Open Amazon search results for this keyword.
As an affiliate, we earn on qualifying purchases.
History
Tracing back to ancient civilizations, sourdough bread-making has long been a culinary tradition, with its origins rooted in the Fertile Crescent.
These early cultures discovered that by fermenting dough with wild yeasts, they could create a uniquely flavored and leavened bread. Over time, the art of sourdough baking spread across the globe, evolving with local ingredients and techniques.
In Europe, sourdough became a staple, with each region developing its own distinct style. French bakers, for instance, are renowned for their crusty, tangy sourdough loaves.
Meanwhile, in San Francisco, a unique strain of wild yeast produced a signature sourdough flavor that captivated bakers and bread enthusiasts alike.
Today, the rich history of sourdough continues to inspire new generations of bakers, who are rediscovering the joy of working with these ancient, living cultures to create truly exceptional bread.
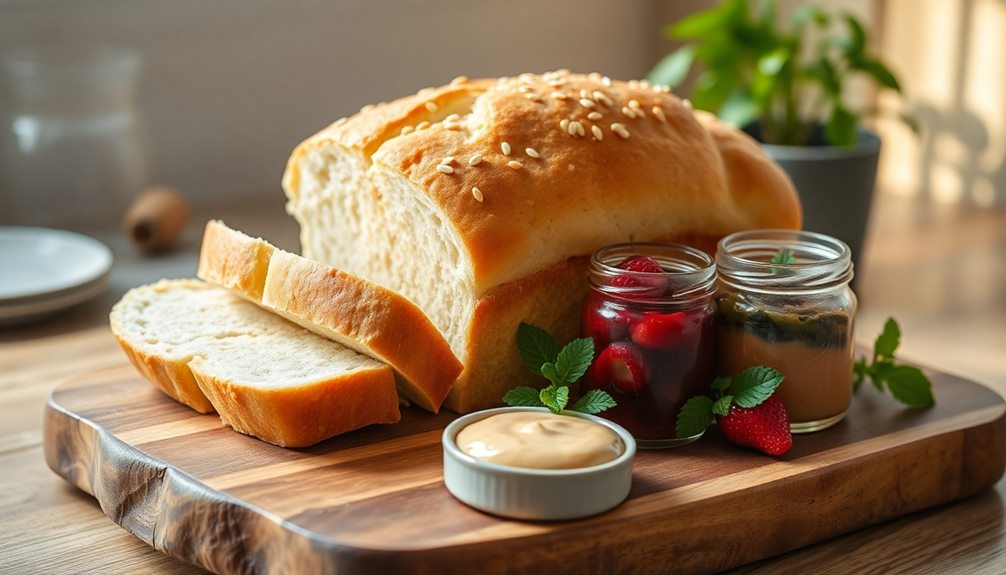
Recipe
Sourdough bread is a timeless classic that has stood the test of time. The slow fermentation process not only adds depth of flavor but also results in a chewy crumb and crisp crust. This recipe will guide you through the process of crafting your own delectable sourdough loaf.
The key to successful sourdough baking lies in the development of a healthy sourdough starter. This living culture of wild yeast and lactic acid bacteria is the foundation of your bread, imparting unique flavors and a signature tangy aroma. Proper sourdough bread starter creation requires a careful balance of flour, water, and time. By regularly feeding and maintaining your sourdough starter, you can ensure that it remains strong and active, ready to leaven your bread with its characteristic bubbles and rise. With a well-established sourdough starter, you can bring a depth of flavor and complexity to your homemade bread that can’t be replicated with commercial yeast.
Maintaining and feeding your starter is a rewarding process that requires patience and attention, but the results are well worth the effort.
Ingredients:
- 400g all-purpose flour
- 300g water
- 100g sourdough starter
- 10g salt
Instructions:
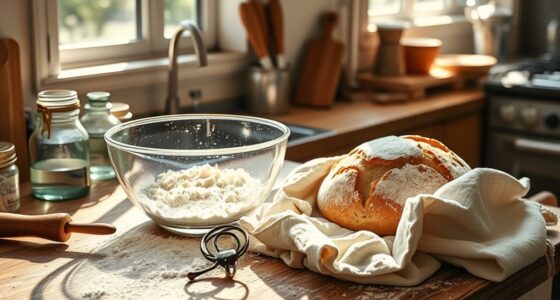
In a large mixing bowl, combine the flour, water, sourdough starter, and salt. Mix until a shaggy dough forms.
Let the dough rest for 30 minutes to allow the flour to fully hydrate. Then, knead the dough for 5-10 minutes until it becomes smooth and elastic.
Place the dough in a lightly oiled bowl, cover, and let it ferment for 8-12 hours at room temperature, or until it has doubled in size.
Tip: The long fermentation time allows the flavors to develop and the gluten to strengthen, resulting in a superior crumb and crust.
Cooking Steps
First, you'll need to feed your sourdough starter to get it nice and bubbly.
Then, mix the dough ingredients together until they form a smooth, elastic ball.
After that, let the dough proof, or rise, until it's doubled in size.
Step 1. Feed the Starter
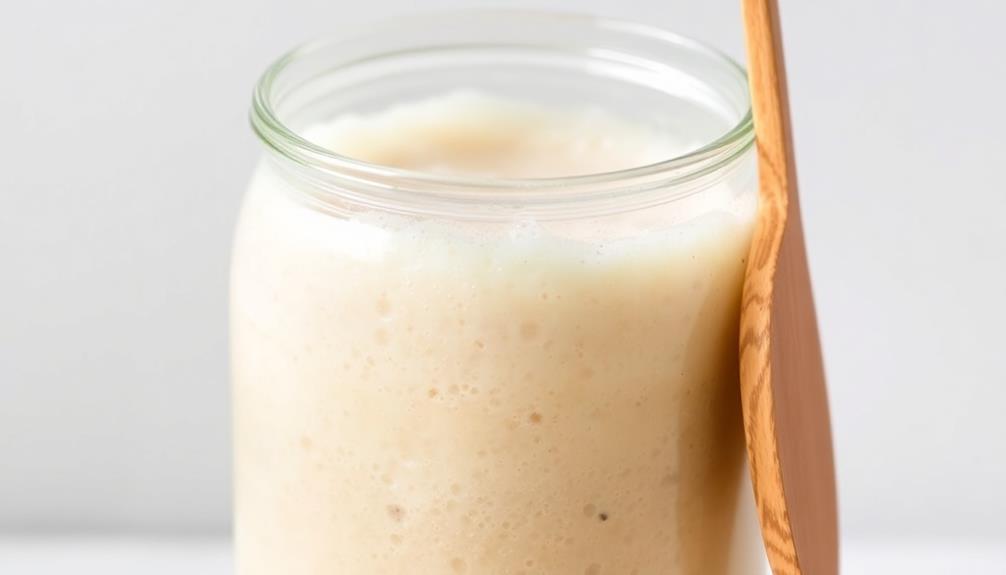
To kickstart your sourdough baking journey, you'll need to regularly feed your starter. This simple step is crucial for keeping your starter alive and healthy. It's like giving your little yeast buddies a delicious meal to help them grow strong!
First, you'll want to scoop out about half of your existing starter. Then, add an equal amount of fresh flour and water. This gives the yeast and bacteria in your starter new food to munch on. Stir it all together until it's smooth and bubbly.
You'll want to feed your starter at least once a day, or even twice if it's very active. The exact timing will depend on how quickly your starter uses up the food. Pay attention to the bubbles and rise – that's how you'll know when it's time to feed again.
With regular feedings, you'll soon have a thriving sourdough starter, ready to use in all kinds of delicious baked goods. Yum!
Step 2. Mix the Dough
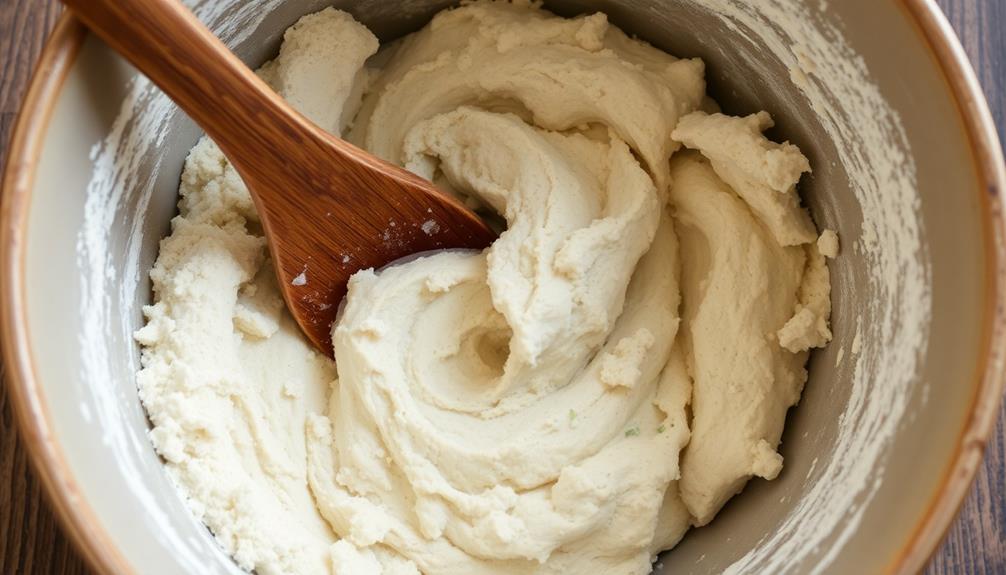
With a thriving starter at the ready, you can now move on to mixing the dough. First, gather your flour, water, and any other ingredients you'll need. In a large bowl, combine the starter with the measured water. Use a spoon to stir and break up the starter, making sure it's fully incorporated into the water.
Next, add the flour and any other dry ingredients. Using your hands, gently mix the dough until a shaggy mass forms. Don't overmix! The dough should feel slightly sticky. Cover the bowl and let the dough rest for 30 minutes. This allows the flour to fully hydrate.
After the rest, it's time to knead. Gently turn the dough out onto a lightly floured surface and knead for 5-10 minutes. You'll feel the dough become smoother and more elastic as you work it.
Once it passes the window pane test, your dough is ready to rise. Place it back in the bowl, cover, and let it do its thing!
Step 3. Proof the Shaped Dough
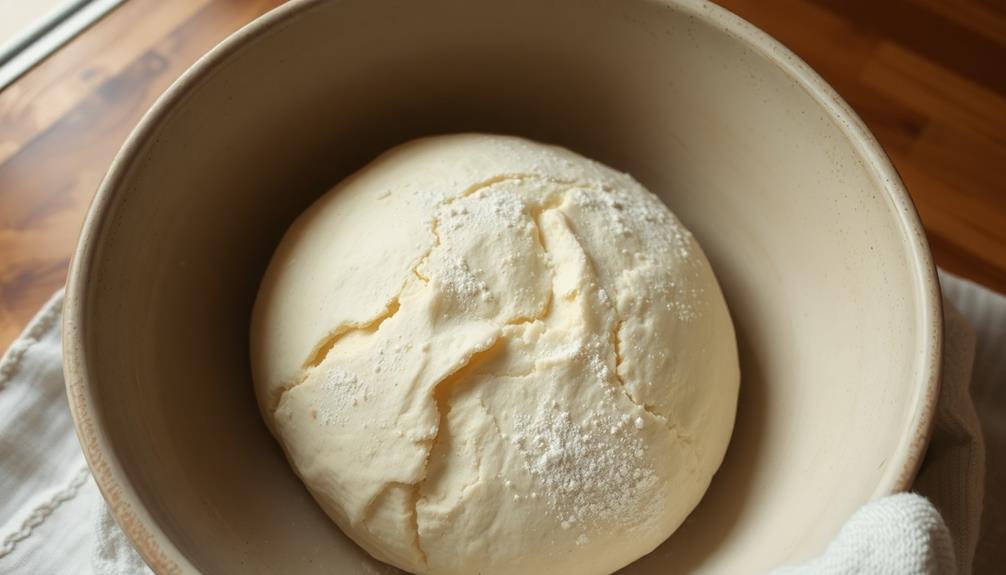
After the dough has risen, it's time to shape and proof the loaf. Gently punch down the dough to release any air bubbles. Then, use your hands to shape the dough into a smooth, round ball. Place the dough into a lightly greased bowl or on a parchment-lined baking sheet.
Now, it's time to let the dough proof, or rise, again. This step helps the dough develop its final shape and texture. Cover the dough with a clean, damp towel and let it proof at room temperature for 1-2 hours.
You'll know the dough is ready when it has doubled in size and springs back slowly when gently poked.
Once proofed, your dough is almost ready for baking! Remember to be gentle when handling the dough to preserve all the air pockets you've worked so hard to create. With a little patience, your homemade sourdough loaf will be ready to enjoy.
Step 4. Bake in Preheated Oven
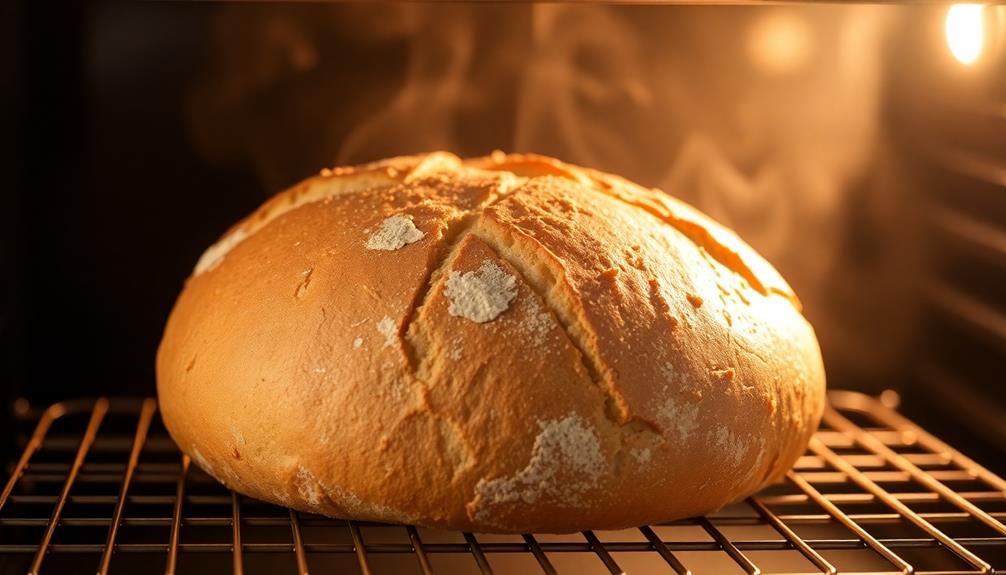
Preheat your oven to 450°F (230°C). This high temperature is key to getting that golden, crispy crust you've been dreaming of.
Once your oven is nice and hot, it's time to bake your sourdough.
Carefully transfer the shaped dough onto a baking sheet or into a Dutch oven. If you're using a Dutch oven, be sure to preheat it along with the oven. This helps create that signature sourdough steam that makes the crust so irresistible.
Bake your sourdough for 20-25 minutes. Keep an eye on it, as oven temperatures can vary. The crust should be a deep, beautiful brown when it's ready.
For the last 5-10 minutes, you can remove the lid of the Dutch oven or lower the temperature slightly to get that perfect color.
Once it's done, let the sourdough cool for at least 30 minutes before slicing into it. This allows the crumb to set and the flavors to develop.
Enjoy the fruits of your labor!
Step 5. Cool Down the Baked Loaf
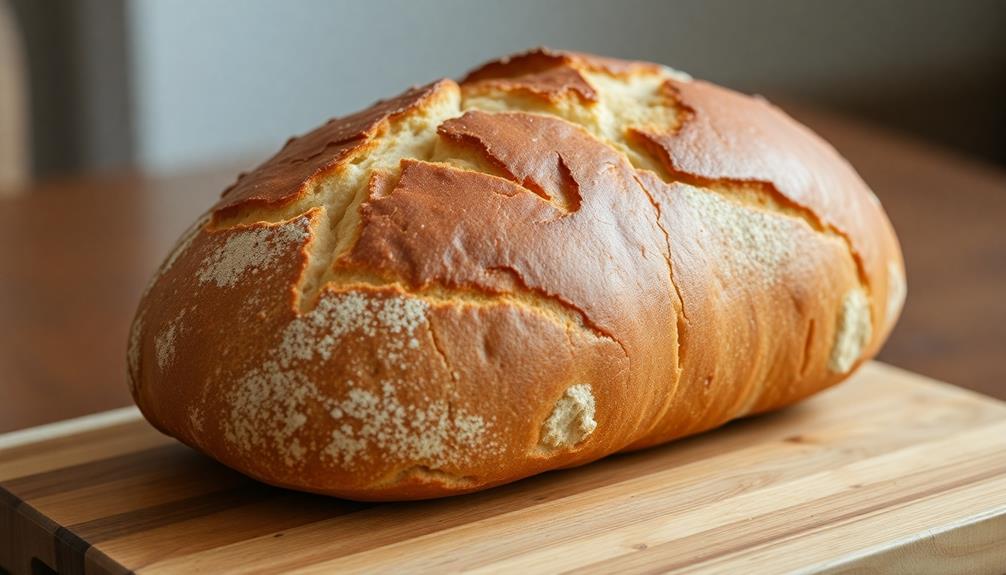
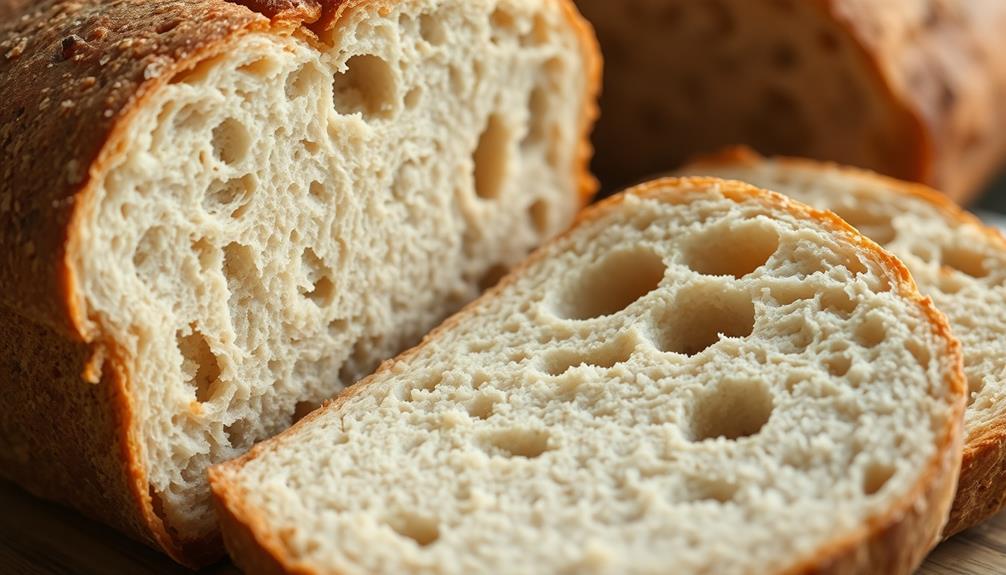
Once the sourdough has finished baking, remove it from the oven. Be careful – the loaf will be hot! Gently place it on a wire rack to cool. This step is crucial, as letting the bread cool properly ensures the perfect texture.
As the loaf cools, you'll notice the crust becoming crisp and golden. The interior will firm up, locking in all that delicious flavor. It's tempting to slice into it right away, but resist the urge!
Letting the bread cool completely, about 1-2 hours, allows the crumb to set. This prevents the texture from becoming gummy or doughy.
Once cooled, you can admire your handiwork – a beautifully baked sourdough loaf! The aroma will be heavenly.
Now it's time to slice into this labor of love and enjoy the fruits of your baking efforts. Serve the bread with your favorite toppings or savor it on its own.
Congratulations on mastering this essential step in sourdough baking!
Final Thoughts
Ultimately, sourdough baking demands patience and dedication. It's a journey that rewards your efforts with the most delicious and wholesome bread. Throughout the process, you'll learn to read the signs of your starter, adjust the timing, and fine-tune the techniques. Each loaf will be a unique work of art, shaped by the wild yeast and your own skill.
As you continue your sourdough adventure, remember to embrace the unexpected. The unpredictable nature of wild yeast is part of the charm. Some days, your dough may rise beautifully; other times, it might take a little more coaxing. Stay flexible and trust your instincts. With practice, you'll develop a sixth sense for when your loaf is ready.
Savor the simple pleasure of tearing into a fresh, crusty sourdough. The tangy aroma, the chewy texture, the satisfying crunch – it's a sensory delight that makes all the effort worthwhile.
Sourdough baking is a labor of love, but the rewards are truly exceptional.
Frequently Asked Questions
How Do I Store My Sourdough Starter Long-Term?
To store your sourdough starter long-term, you can refrigerate it and feed it once a week. This will keep it alive and ready to use when you need it for your baking.
Can I Use My Sourdough Starter for Other Baked Goods?
Yes, you can use your sourdough starter for other baked goods. It's a versatile ingredient that can be used in breads, pancakes, waffles, and even desserts to add delicious flavor and texture.
How Do I Troubleshoot Common Sourdough Issues Like Under-Proofing?
To troubleshoot under-proofing, check your starter's activity level. Increase feeding frequency or adjust ratios to get a more vigorous starter. Proof your dough longer, keeping it in a warmer environment. Experiment to find the right balance for your unique sourdough setup.
What Are the Health Benefits of Sourdough Bread?
Sourdough bread offers numerous health benefits. It's easier to digest, boosts gut health, and may even help regulate blood sugar levels. Plus, the fermentation process enhances the bread's nutrient content, making it a healthier choice than conventional yeasted bread.
Can I Use a Sourdough Starter in Place of Commercial Yeast?
You can certainly use a sourdough starter in place of commercial yeast. The starter contains wild yeast that'll leaven your bread, though the rise time may be longer. Give it a try – the flavor will be worth it!