
Craft tantalizing loaves right in your own kitchen! Artisan bread baking blends traditional techniques with modern innovations. You'll uncover the rich history, from ancient Egyptian roots to perfected sourdough in monasteries. Follow a foolproof recipe for a classic sourdough boule, mastering the steps for an airy crumb and deep golden crust. As you bake, you'll discover the principles behind artisan bread – the importance of patience, the thrill of experimentation, and the joy of overcoming challenges. With regular practice, you'll soon impress family and friends with your bakery-quality loaves. And there's so much more to explore in this fulfilling culinary journey.
Key Takeaways
- Master the art of slow fermentation to develop complex flavors and an airy crumb, emulating the quality of artisanal bakeries.
- Precisely measure ingredients and closely observe dough behavior to ensure consistent results and improve baking skills over time.
- Experiment with different flours, mix-ins, and techniques to cultivate a personal baking style and explore the creative potential of artisan bread.
- Embrace mistakes as valuable learning opportunities, adjusting recipes and techniques based on previous experiences to overcome challenges.
- Commit to regular baking practice to enhance skills and enjoy the satisfaction of creating high-quality, bakery-style loaves at home.
Top picks for "artisan bread creat"
Open Amazon search results for this keyword.
As an affiliate, we earn on qualifying purchases.
History
Artisan bread baking has a rich and storied history, dating back centuries to the early days of human civilization. From ancient Egyptian bakers crafting loaves in wood-fired ovens to European monasteries where monks perfected the art of sourdough, the traditions of artisanal bread-making have long been cherished.
Over time, these techniques evolved, with bakers experimenting with different grains, leavening agents, and shaping methods. The Industrial Revolution brought about mass production and standardized recipes, but a passion for handcrafted breads never faded.
In the late 20th century, a renewed interest in artisanal foods sparked a renaissance in small-scale, locally-sourced bread baking. Today, artisan bread enthusiasts around the world continue to celebrate this ancient craft, blending traditional methods with modern innovations.
Whether you're kneading dough by hand or using the latest baking equipment, the joy of creating bakery-quality loaves at home is a timeless pleasure.
Recipe
Artisan bread baking is a time-honored tradition that allows you to create delicious, crusty loaves right in your own kitchen. This recipe for a classic sourdough boule (round loaf) will guide you through the process, from mixing the dough to achieving the perfect bake.
The key to exceptional artisan bread lies in the fermentation process. By allowing the dough to slowly develop over the course of several hours, you'll cultivate a complex flavor profile and achieve a light, airy crumb. Patience and attention to detail are essential, but the end result is well worth the effort.
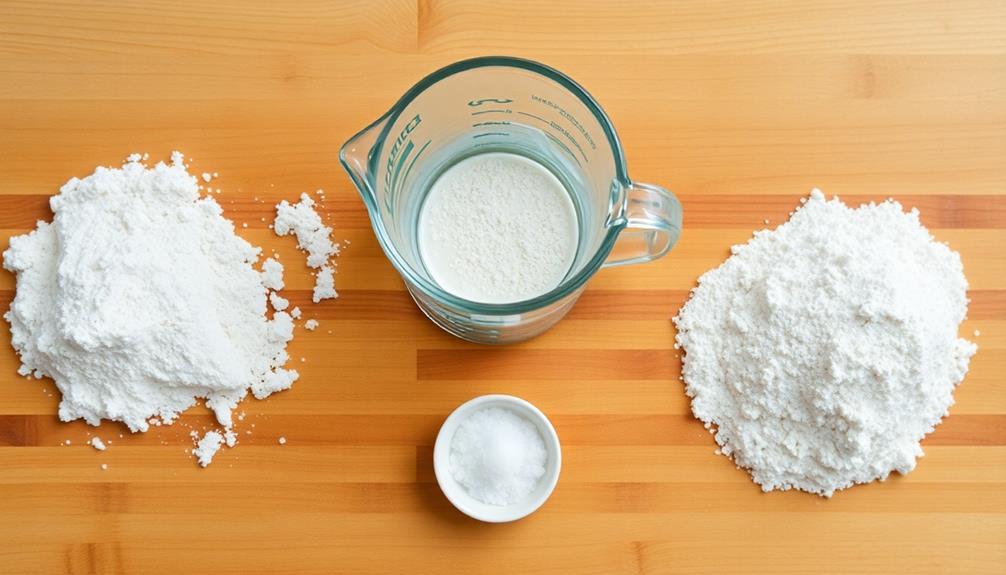
- 500g (3 1/3 cups) bread flour
- 350g (1 1/2 cups) water
- 100g (1/2 cup) sourdough starter
- 10g (2 teaspoons) salt
In a large mixing bowl, combine the bread flour, water, sourdough starter, and salt. Mix until a shaggy dough forms, then turn out onto a lightly floured surface and knead for 10-15 minutes until smooth and elastic.
Place the dough in a lightly greased bowl, cover, and let rise for 8-12 hours at room temperature.
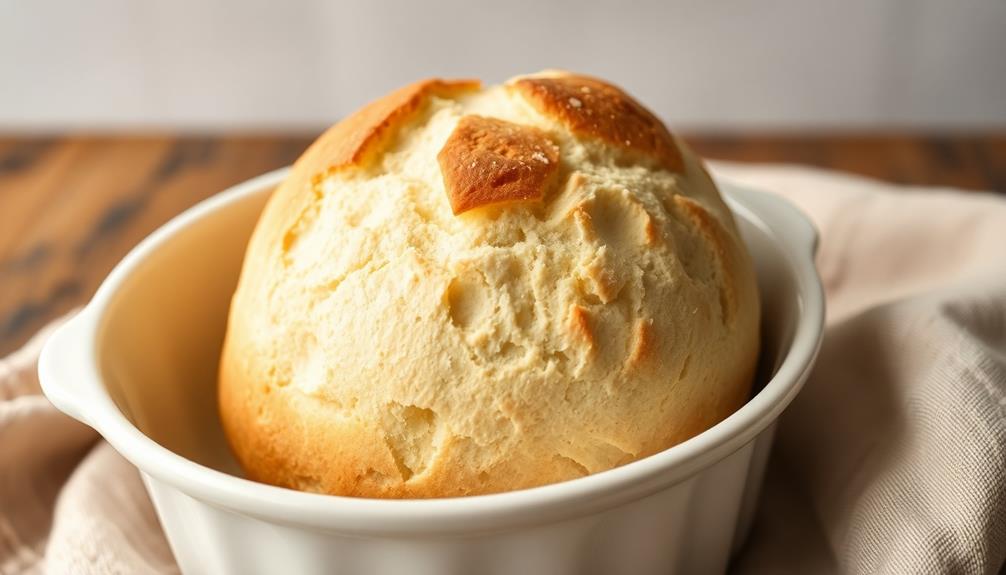
Once the dough has doubled in size, gently turn it out onto a lightly floured surface and shape it into a round boule. Place the shaped dough in a parchment-lined bowl or on a baking sheet, cover, and let it rest for an additional 1-2 hours.
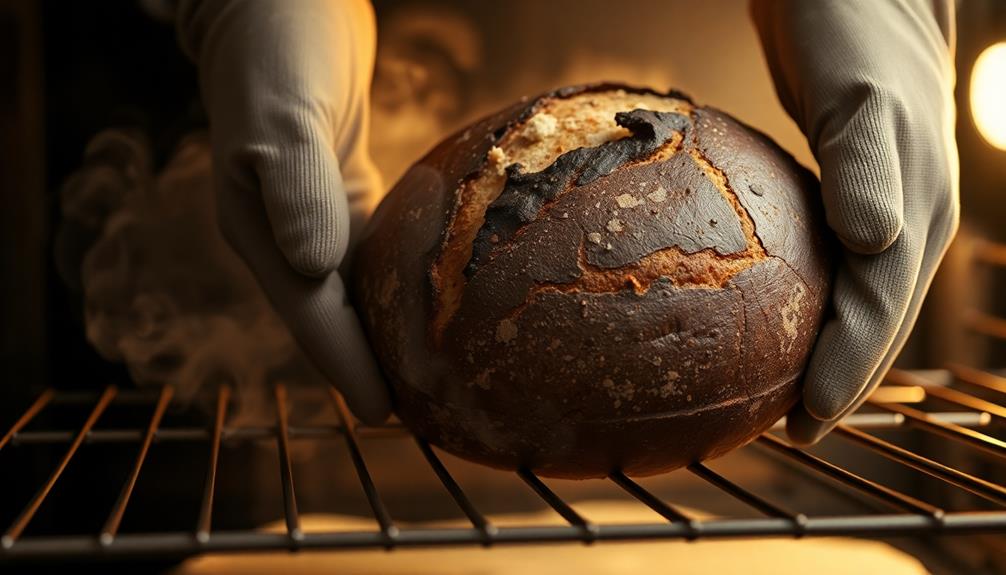
Preheat your oven to 450°F (230°C) and place a cast-iron pan or metal baking dish on the bottom rack. When ready to bake, score the top of the dough with a sharp knife or lame, then carefully transfer the dough to the preheated oven.
Pour 1 cup of hot water into the hot pan to create steam, which will help develop a crisp crust. Bake for 25-30 minutes, or until the crust is deep golden brown. Allow the bread to cool completely on a wire rack before slicing and enjoying.
Cooking Steps
Let's get started on the cooking steps!
First, you'll need to prepare the dough ingredients.
Next, let the dough proof at room temperature.
Then, it's time to shape the dough before baking the loaf in a preheated oven.
Step 1. Prepare the Dough Ingredients
Gathering the right ingredients is crucial when preparing the dough for artisan bread. You'll need flour, water, yeast, and salt – the building blocks of any great loaf.
Start by measuring the flour precisely, as the ratio of ingredients is key to achieving the perfect texture. Next, add the water and stir until the mixture forms a shaggy dough.
Don't worry if it seems a bit sticky – that's exactly what you want. Now, sprinkle in the yeast and salt, and give the dough a few more kneads.
It's important to work the dough just enough to develop the gluten, but not too much, or it'll become tough. Once you've got a smooth, elastic ball, you're ready for the rising stage. If you're considering glutenfree baking, it's important to note that the lack of gluten can make the dough more difficult to work with. You may need to use alternative binding agents or flours to achieve the desired texture. Pay close attention to the texture and consistency of the dough as you work it, as this will be crucial for the final product.
Cover the dough and let it rest, allowing the yeast to work its magic and the flavors to meld. With the right preparation, you're on your way to baking an incredible artisan loaf right in your own kitchen.
Step 2. Proof the Dough at Room Temperature
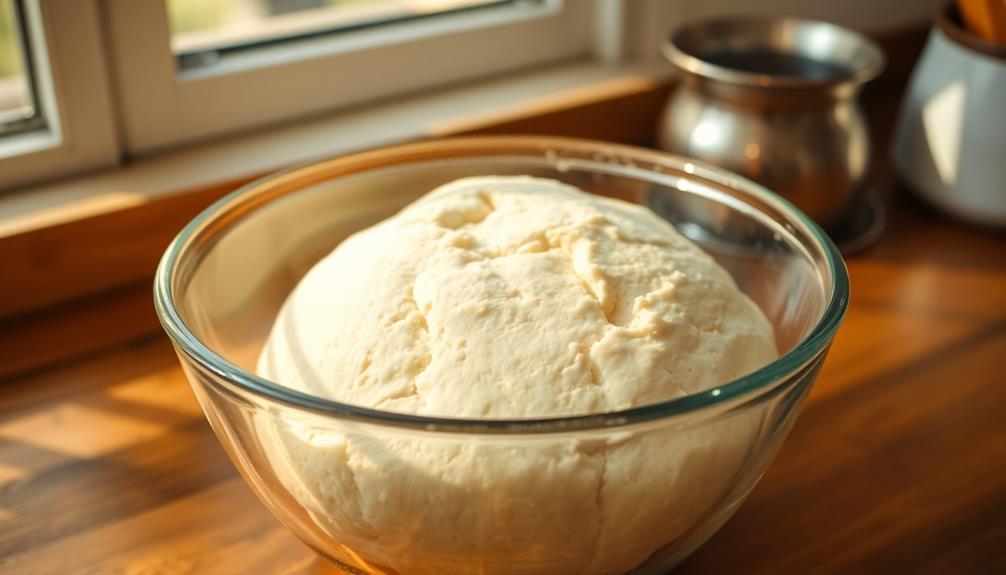
With the dough prepared, it's time to let it proof at room temperature. This step is crucial for developing the bread's flavor and texture. Simply place the dough in a lightly greased bowl, cover it with a damp towel or plastic wrap, and let it sit at room temperature for 1 to 2 hours.
During this time, the yeast will work its magic, causing the dough to rise and expand. As the dough proofs, you'll notice it becoming airy and light. Gently poke the surface with your finger – if the indent remains, the dough is ready for the next step.
Don't be tempted to rush this process. Allowing the dough to proof fully ensures you'll end up with a soft, chewy crumb and a beautiful, crisp crust.
Once it's ready, you can shape the dough and get it in the oven. Enjoy the delightful aroma as your homemade artisan bread bakes to perfection!
Step 3. Shape the Dough
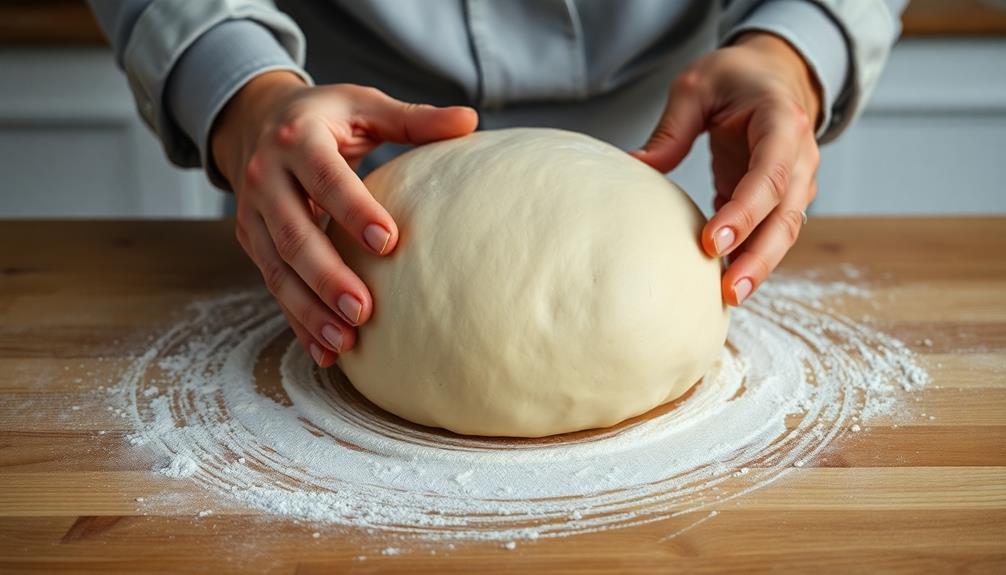
After the dough has completed its proof, it's time to start shaping it. Grab the dough gently and transfer it to a lightly floured surface. Using your hands, start to stretch and fold the dough, creating a smooth, taut surface on top.
As you work, be careful not to deflate the air pockets you've built up during proofing. Next, shape the dough into your desired loaf form. You can create a simple round loaf, a long baguette, or even a cottage-style oval.
Gently tuck the sides under to create a smooth, even shape. If the dough seems sticky, lightly dust your hands with flour to prevent it from sticking.
Once you've shaped the loaf, transfer it to a parchment-lined baking sheet or into a greased bread pan. Cover it loosely with a clean, damp towel and let it rest for 15-30 minutes before baking.
This final rest will help the dough hold its shape in the oven.
Step 4. Bake the Loaf in Preheated Oven
Preheat your oven to the specified temperature, typically between 400-450°F (200-230°C).
Once the oven is hot, carefully transfer the shaped dough onto a baking sheet or into a preheated Dutch oven. If using a baking sheet, you can line it with parchment paper for easy transfer and cleanup.
Gently score the top of the dough with a sharp knife or lame to create a decorative pattern. This allows the bread to expand properly during baking. Mist the dough lightly with water or brush it with an egg wash for a shiny crust.
Bake the loaf for 20-30 minutes, or until the crust is a deep golden brown. Rotate the pan halfway through baking for even browning.
To check for doneness, the internal temperature should read 205-210°F (96-99°C) on a digital thermometer.
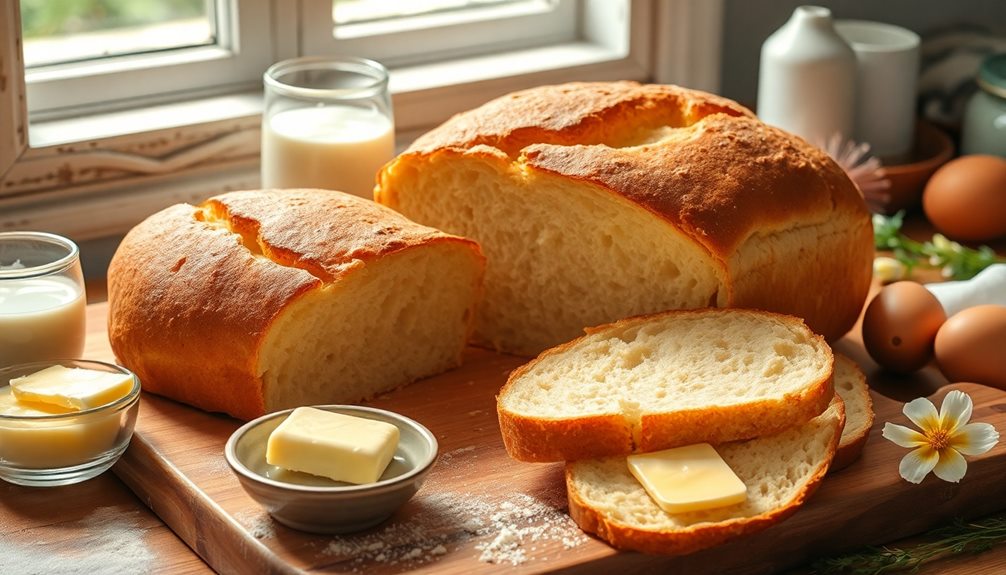
Allow the bread to cool completely on a wire rack before slicing and serving. Enjoy your freshly baked artisan bread!
Step 5. Allow to Cool Completely
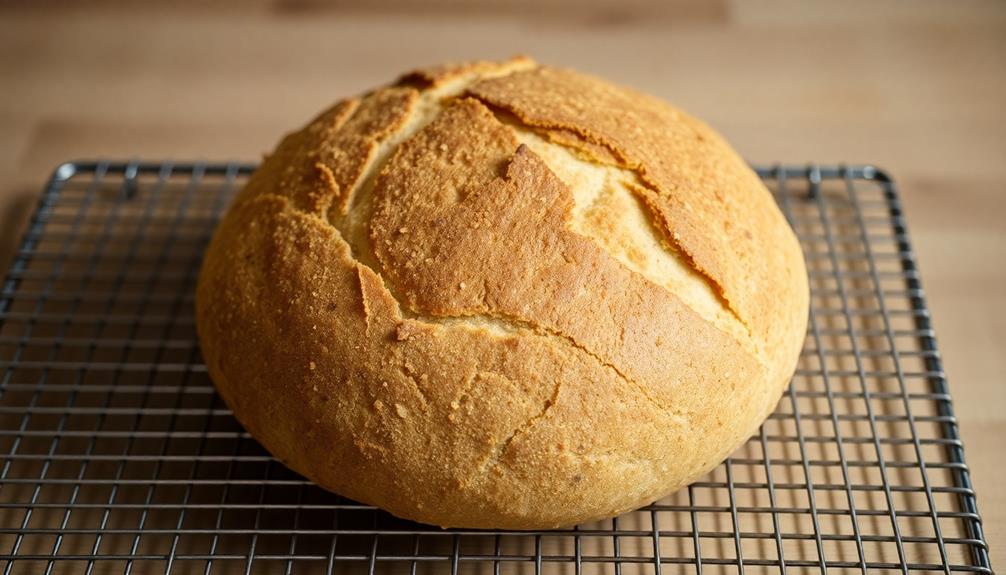
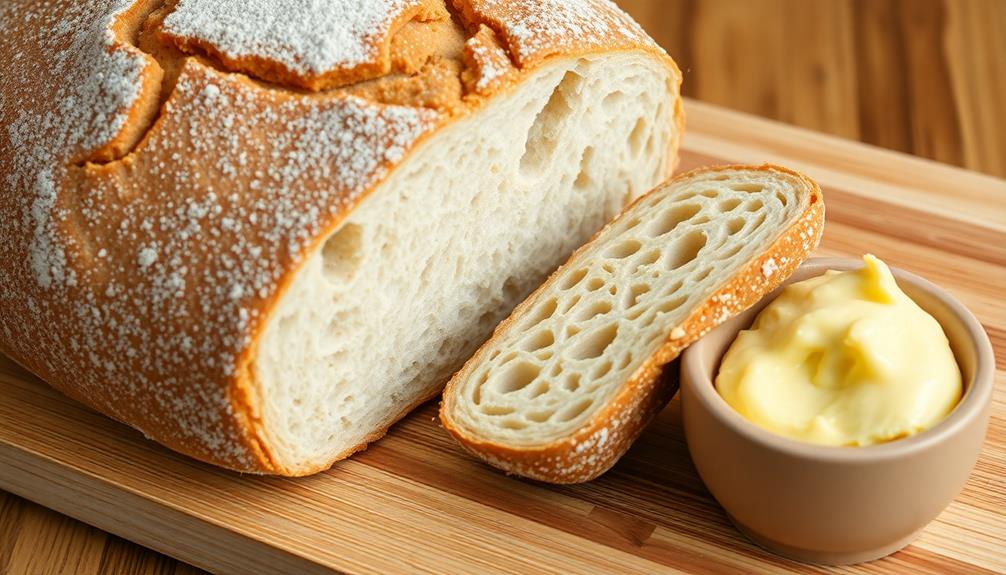
Once the bread has finished baking, it's essential to allow it to cool completely on a wire rack before slicing. This step is crucial for the bread's texture and flavor. As the loaf cools, the internal structure and crumb solidify, locking in all the delicious aromas and giving the bread a perfect, bakery-quality appearance.
Be patient during the cooling process, which can take up to an hour or more, depending on the size of your loaf. Resist the temptation to slice into the bread too soon, as this can cause the crust to tear and the interior to be gummy.
Instead, let the bread cool completely, then slice it with a sharp serrated knife for clean, even cuts.
Once cooled, you'll be rewarded with a beautifully textured, crusty loaf of artisan bread that's ready to be enjoyed. The wait is well worth it, as the flavors and aroma will have fully developed, making every bite a true delight.
Final Thoughts
Amidst the satisfying aroma and the gratifying crunch of homemade artisan bread, we arrive at the final thoughts.
Congratulations! You've successfully navigated the journey of artisan bread baking, from mixing the dough to shaping the loaves and baking them to perfection. Feel proud of the delicious, bakery-quality results you've achieved right in your own kitchen.
As you continue on your baking adventures, remember the importance of patience and attention to detail. Artisan bread takes time and care, but the rewards are well worth it.
Experiment with different flours, mix-ins, and techniques to discover your personal style and preferences.
Most importantly, don't be afraid to make mistakes – they're part of the learning process. Each loaf is an opportunity to grow and improve your skills.
Keep practicing, and you'll soon be impressing family and friends with your artisanal bread-baking prowess. Enjoy the process, savor the results, and happy baking!
Frequently Asked Questions
How Long Does Homemade Artisan Bread Last Before Going Stale?
Your homemade artisan bread can stay fresh for 3-5 days when stored properly. It'll last longer if you keep it at room temperature in a paper or cloth bag, rather than plastic which can trap moisture and cause it to go stale faster.
What's the Best Way to Store Leftover Artisan Bread?
To store leftover artisan bread, wrap it tightly in plastic or aluminum foil. You can also place it in a paper bag or bread box to keep it fresh for 3-5 days.
Can I Use Bread Flour Instead of All-Purpose Flour for Artisan Bread?
You can absolutely use bread flour instead of all-purpose flour for artisan bread. Bread flour has a higher protein content, which will result in a chewier, more structured crumb. Just adjust the hydration level accordingly.
How Can I Achieve a Crisp Crust on My Homemade Artisan Bread?
To achieve a crisp crust on your homemade artisan bread, try baking it in a preheated Dutch oven or on a baking stone. Mist the interior of the oven with water to create steam, which will enhance the crust's crispness.
Can I Make Artisan Bread With a Stand Mixer Instead of Kneading by Hand?
You can absolutely make artisan bread with a stand mixer instead of kneading by hand. The stand mixer will develop the gluten effectively, giving you the structure you need for a delicious, crusty loaf.