American Diner Classics
Chicken Pot Pie
Mouthwatering chicken pot pie has been a beloved American comfort food for generations, with a rich history and delicious recipes waiting to be explored.
Chicken pot pie is a classic American comfort food that's been warming hearts for generations. Its origins trace back to ancient Greece and Rome, where folks baked meat and veggies in a tasty crust. Over time, it evolved into a beloved dish for thrifty home cooks who could use up leftover chicken and produce. Nowadays, you can find it in both homemade and frozen forms, but nothing beats the aroma of a freshly baked pot pie straight from the oven. With its flaky crust and creamy, veggie-packed filling, it's no wonder this dish continues to be a family favorite. There's more to discover about the history and recipes for this comforting classic.
Key Takeaways
- Chicken pot pie is a classic American comfort food with origins tracing back to ancient Greece and Rome.
- The dish evolved in the United States during the 1800s as a way for thrifty homemakers to utilize leftover chicken and vegetables.
- The recipe typically involves combining diced chicken, vegetables, and a creamy filling, then baking it in a pie crust.
- Proper preheating of the oven to 375°F ensures the crust develops a golden-brown texture and the filling cooks thoroughly.
- Allowing the baked pie to cool for 10-15 minutes helps the filling set and the crust firm up for easy slicing.
History
Where did the chicken pot pie originate? Believe it or not, this comforting dish has been around for centuries! The origins of chicken pot pie can be traced back to ancient Greece and Rome, where people would bake meat and vegetables inside a crust.
Over time, the recipe evolved, and the chicken pot pie we know and love today started taking shape in the United States during the 1800s. Back then, it was a way for thrifty homemakers to use up leftover chicken and vegetables.
The flaky crust and savory filling made it a hit with families. As the years went by, chicken pot pie became a classic American comfort food, bringing back memories of home-cooked meals and warm, cozy kitchens. Many people have their own cherished chicken pot pie recipe, passed down through generations and cherished as a family heirloom. Just like a pot roast recipe, everyone has their own little twist or secret ingredient that makes their version stand out. Whether it’s adding extra veggies, using a special seasoning blend, or even a unique pastry topping, the variations on this classic dish are as diverse as the families who enjoy it. Regardless of the recipe, one thing remains constant: the comforting, satisfying feeling of enjoying a warm slice of homemade chicken pot pie.
Today, it's still a beloved dish that brings people together and provides a taste of nostalgia in every bite. Whether you make it from scratch or grab a frozen version, chicken pot pie is a true classic that's here to stay.
Cooking Steps
Preheat your oven to 375°F (190°C).
Grab a large mixing bowl and combine the diced chicken, carrots, celery, potatoes, onions, and peas.
In a separate bowl, whisk together the cream of chicken soup, milk, and seasonings until smooth.
Pour the soup mixture over the vegetables and chicken, then stir everything together until well combined.
Roll out the pie dough and line a 9-inch pie dish with one of the crusts.
Spoon the chicken and vegetable filling into the crust.
Top with the remaining pie dough, crimp the edges to seal, and cut a few slits in the top to allow steam to escape.
Bake for 40-45 minutes, or until the crust is golden brown and the filling is bubbling.
Let the pie cool for 10 minutes before slicing and serving.
Enjoy your homemade chicken pot pie!
Step 1. Preheat Oven to 375°F
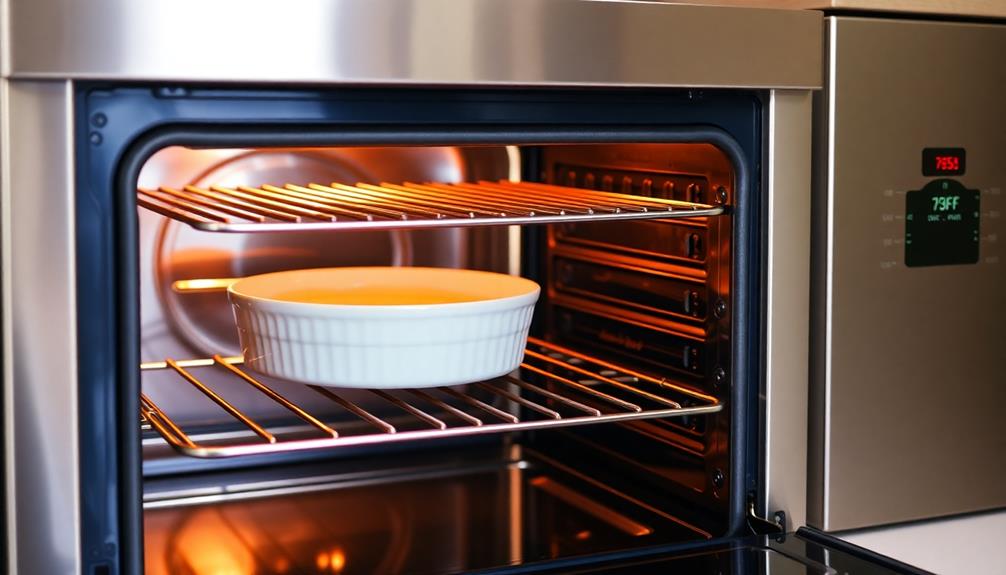
Preheating the oven to the optimal temperature is a crucial first step in the baking process. You'll want to set your oven to 375°F, which is the perfect heat level for ensuring your chicken pot pie cooks through evenly and develops that delightful golden-brown crust.
This temperature strikes the right balance, providing enough heat to bake the pie thoroughly without burning the exterior. Once you've adjusted the oven dial, it's important to give the appliance a few minutes to reach the desired temperature.
This allows the internal components to fully heat up and stabilize, creating the ideal conditions for baking. Be patient during this time – it's worth the wait to have your pie turn out picture-perfect!
While the oven is preheating, you can start preparing the other ingredients and assembling your chicken pot pie. This efficient multitasking will help you get the dish in the oven as soon as it's ready, maximizing the freshness and flavor.
Step 2. Prepare Vegetables for Sautéing
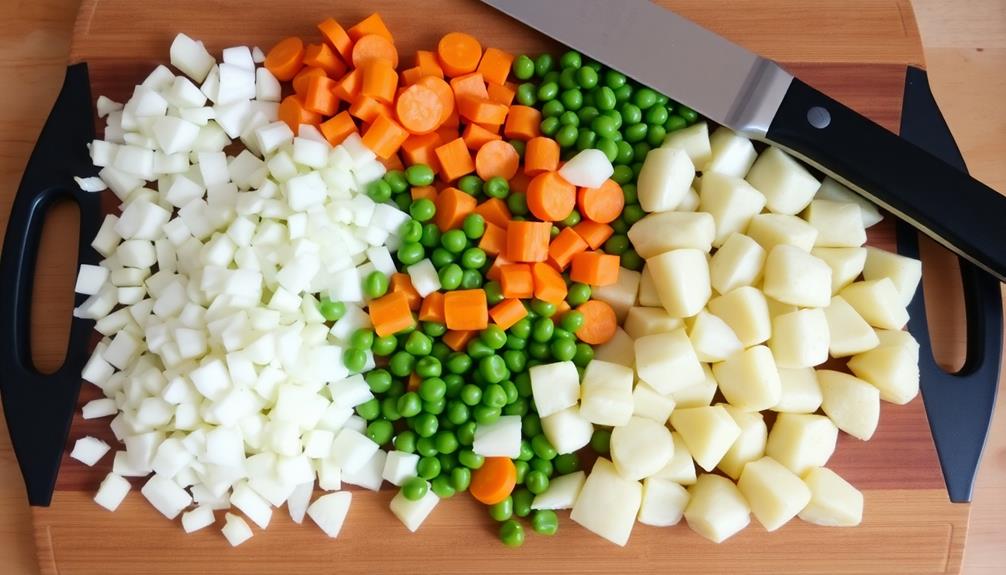
With the oven now preheating, it's time to turn your attention to preparing the vegetables. First, grab a sharp knife and a cutting board. You'll need to dice the onion, carrot, and celery into small, uniform pieces. Be careful with the knife – go slowly and watch your fingers!
Once the veggies are chopped, it's time to sauté them in a large skillet. Drizzle in a bit of olive oil and turn the heat to medium. Toss in the onion and let it cook for a minute or two until it starts to soften.
Then add the carrot and celery. Sauté the vegetables, stirring frequently, until they're tender and the onion is translucent, about 5-7 minutes. You want them to be cooked through but still have a bit of bite.
When they're done, remove the skillet from the heat and set the veggies aside. They'll get added to the filling later on.
Step 3. Make the Pie Dough
To make the pie dough, you'll need to combine the dry ingredients first. In a large bowl, whisk together 2 cups of all-purpose flour, 1 teaspoon of salt, and 1 teaspoon of sugar.
Cut in 1/2 cup of cold unsalted butter and 1/4 cup of chilled shortening using a pastry blender or two forks until the mixture resembles coarse crumbs.
Now, make a well in the center and pour in 1/4 cup of ice-cold water. Use a fork to gently mix the water into the dry ingredients, just until the dough starts to come together. Be careful not to overmix.
Shape the dough into a disk, wrap it in plastic wrap, and refrigerate for at least 30 minutes. This resting period allows the gluten to relax, making the dough easier to roll out.
When you're ready to use the dough, lightly flour your work surface and roll it out into a circle large enough to fit your pie dish.
Carefully transfer the dough to the dish and trim any excess. Now you're ready to fill the pie and bake!
Step 4. Assemble and Bake the Pie
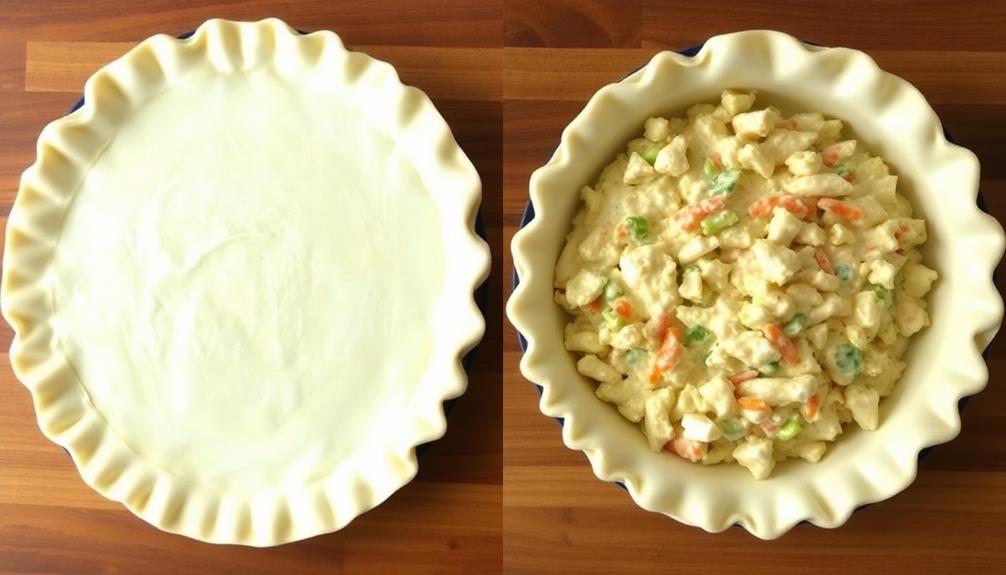
Once the pie dough is chilled, it's time to assemble and bake the pie. Preheat your oven to 400°F (200°C).
On a lightly floured surface, roll out the bottom crust dough into a circle large enough to fit your pie dish. Carefully transfer the dough into the dish, gently pressing it into the bottom and sides.
Next, add the chicken filling to the crust. Spread it out evenly, making sure to reach the edges.
Roll out the top crust dough into a circle slightly larger than your pie dish. Carefully place the top crust over the filling. Crimp the edges of the top and bottom crusts together to seal. Cut a few slits in the top crust to allow steam to escape during baking.
Bake the pie for 30-40 minutes, or until the crust is golden brown. Let it cool for 10-15 minutes before slicing and serving.
Enjoy your delicious homemade chicken pot pie!
Step 5. Allow Pie to Cool
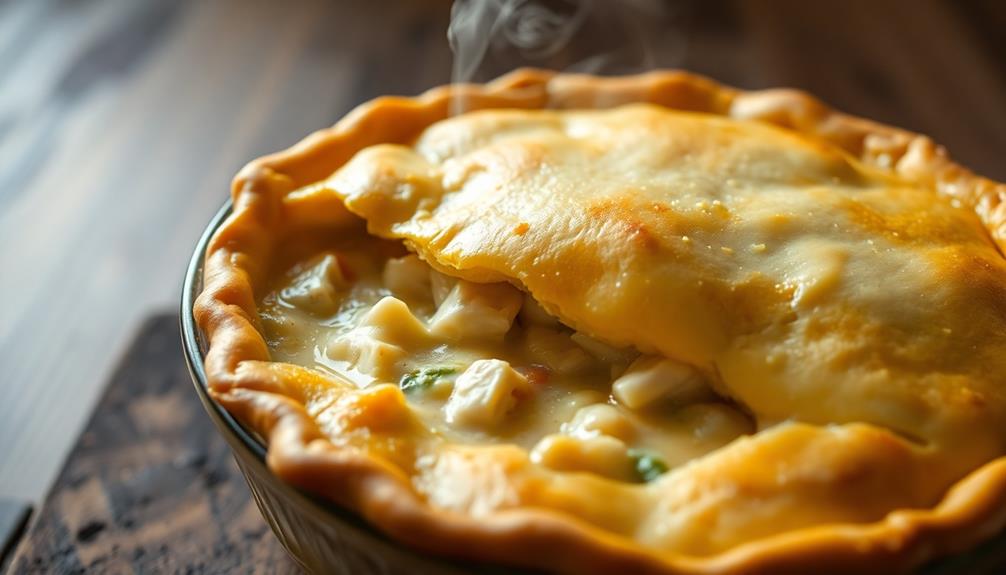
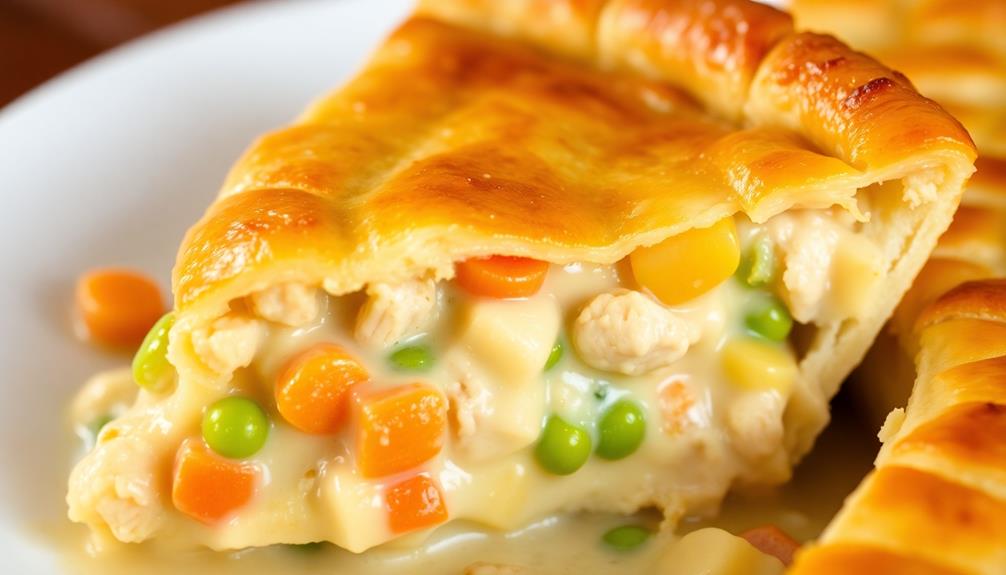
After the pie has finished baking, let it cool for 10-15 minutes before slicing and serving. This gives the filling time to set up, so you don't end up with a runny mess when you cut into it.
The crust also needs a chance to firm up a bit. During this time, the aromas of the chicken, vegetables, and herbs will fill your kitchen, making your mouth water in anticipation.
Once the pie has had a chance to cool, it's time to dive in! Use a sharp knife to slice through the golden-brown crust, revealing the steaming hot, creamy filling inside.
Scoop out generous portions, making sure to get a bit of that delicious crust in each bite. Serve the chicken pot pie warm, with a side salad or some crusty bread for dipping in the savory sauce.
Enjoy every last morsel – this homemade dish is sure to become a new family favorite!
Final Thoughts
Ultimately, a delightful chicken pot pie can be the perfect comfort food, filling your home with its aromatic blend of savory flavors.
After all the effort you've put into crafting this dish, you can sit back, relax, and enjoy the fruits of your labor.
The golden, flaky crust and the creamy, chicken-filled interior are sure to delight your taste buds.
As you savor each bite, you'll be transported to a cozy, homey feeling that only a homemade pot pie can provide.
Frequently Asked Questions
What Is the Best Type of Chicken to Use?
For the best chicken in your recipe, you can't go wrong with a nice, juicy chicken breast!
Chicken breasts are lean and tender, making them perfect for all your cooking needs. Whether you're grilling, baking, or sautéing, chicken breasts will give you that delicious, homemade flavor you're looking for.
Plus, they're so versatile – you can season them however you like to make your dish truly your own.
Get ready to enjoy a mouthwatering meal with the best chicken around!
Can I Use Store-Bought Pie Crust?
Absolutely! Using store-bought pie crust is a great option for making homemade chicken pot pie.
It's quick, convenient, and gives you a delicious flaky crust without all the work. Just make sure to follow the package instructions for best results.
The store-bought crust will bake up perfectly and complement the rich, creamy filling.
Give it a try – you'll be surprised how easy it's to make a tasty chicken pot pie with store-bought crust.
How Long Can I Store Leftover Chicken Pot Pie?
Leftover chicken pot pie can be stored in the fridge for 3-4 days.
Just pop it in an airtight container, and you're good to go!
When you're ready to enjoy it again, simply reheat it in the oven or microwave.
The flaky crust and savory filling will taste just as delicious as the day you made it. Yum!
Just be sure to eat it up before it goes bad.
Enjoy those leftovers!
Can I Make It Ahead of Time?
Yes, you can definitely make chicken pot pie ahead of time!
It's a great make-ahead dish that can be stored in the fridge or freezer. Just prepare the pie as usual, then either bake it right away or freeze it unbaked.
When you're ready to enjoy it, simply pop it in the oven and let it bake until hot and bubbly.
This makes it super easy to have a delicious, home-cooked meal ready to go whenever you need it!
What Side Dishes Pair Well With Chicken Pot Pie?
When it comes to side dishes that pair well with a hearty main course, you've got plenty of tasty options!
You could go for a fresh, crisp salad to balance out the richness of the dish.
Or how about some roasted veggies, like carrots, Brussels sprouts, or green beans?
And don't forget the classics – fluffy mashed potatoes or buttery dinner rolls would be the perfect accompaniment.
The key is to choose sides that complement the flavors and textures of the main event.
Rachel is all about nostalgic comfort food with a modern twist. She brings the flavors of classic American diners to Cook if Ya, with her takes on burgers, fries, and milkshakes. Rachel’s love for simple, hearty meals brings a bit of retro flair to the table, reminding us all of the joys of classic diner dishes.
American Diner Classics
The Maillard Reaction: Understanding the Chemistry of Browning {Food Science and Cooking}
Dive into the complex chemistry behind the Maillard reaction, the process that transforms the flavors and appearance of your favorite cooked foods. Unlock the secrets to elevating your own cooking.
The Maillard reaction is a complex chemical process that transforms the flavors and appearance of cooked foods. Discovered in 1912, this reaction occurs between amino acids and reducing sugars, resulting in the rich browning, enticing aromas, and delectable tastes you love. It's essential for culinary excellence, influencing everything from seared meats and roasted vegetables to coffee and chocolate. You can harness the power of the Maillard reaction by cooking at high temperatures, keeping meats dry, and allowing for proper rest times. Dive deeper into this fascinating chemistry and unlock the secrets to elevating your own cooking.
Key Takeaways
- The Maillard reaction is a complex chemical process between amino acids and reducing sugars that is responsible for the browning, flavor development, and aroma creation in cooked foods.
- The Maillard reaction is essential for achieving culinary excellence, enhancing the sensory experience of meals, and influencing a wide range of foods, including meats, baked goods, coffee, and chocolate.
- High cooking temperatures, dry surfaces, and proper cooking techniques are crucial for maximizing the Maillard reaction and achieving desired flavor and color profiles in dishes.
- The Maillard reaction plays a significant role in consumer perception and enjoyment of food, contributing to the unique flavor profiles and desired textures in various culinary traditions.
- Ongoing research continues to explore the nuances of the Maillard reaction, providing insights that can help improve cooking techniques and enhance the overall quality of cooked foods.
History
The Maillard reaction was first discovered in 1912 by French chemist Louis-Camille Maillard. Maillard observed that when amino acids and reducing sugars were heated together, they underwent a complex series of chemical reactions that produced hundreds of different flavor compounds.
This process, now known as the Maillard reaction, is responsible for the distinctive aromas and flavors of many cooked foods, from roasted meats and baked breads to coffee and chocolate.
Over the past century, scientists have continued to study the Maillard reaction in depth, unraveling its intricate chemistry and understanding its role in food preparation and processing.
They've found that the specific compounds produced depend on factors like temperature, pH, and the types of amino acids and sugars involved.
The Maillard reaction is now recognized as a fundamental phenomenon in food science, with applications in areas like flavor development, color enhancement, and nutrient retention.
Recipe
The Maillard reaction is a chemical process that occurs when foods are cooked at high temperatures, resulting in the development of hundreds of different flavor compounds. This complex reaction is responsible for the delicious aromas and flavors associated with many of our favorite cooked dishes, from crispy-skinned roasted meats to golden-brown baked goods.
In this recipe, we'll explore how to harness the power of the Maillard reaction to create a flavorful and visually appealing dish. By carefully controlling the cooking temperature and time, we can unlock the full potential of this fascinating chemical process.
Ingredients:
- 4 boneless, skinless chicken breasts
- 2 tablespoons olive oil
- 1 teaspoon garlic powder
- 1 teaspoon onion powder
- 1 teaspoon paprika
- Salt and pepper to taste
Cooking Instructions:
Preheat your oven to 400°F (200°C). Pat the chicken breasts dry with paper towels and season them evenly with the garlic powder, onion powder, paprika, salt, and pepper.
Heat the olive oil in a large, oven-safe skillet over medium-high heat. Sear the chicken breasts for 2-3 minutes per side, or until they develop a golden-brown crust. Transfer the skillet to the preheated oven and roast the chicken for 15-20 minutes, or until the internal temperature reaches 165°F (75°C).
Tips:
To maximize the Maillard reaction, it's important to ensure the chicken is dry before searing. This will help create a crisp, caramelized surface.
Additionally, allowing the chicken to rest for a few minutes before slicing will help the juices redistribute, resulting in a more tender and flavorful final dish.
Cooking Steps
Preheat your oven to 400°F.
Coat the meat with seasoned flour, then sear it in a hot pan.
Bake the meat in the oven and let it rest before serving.
Step 1. Preheat Oven to 400°F
Before you can begin baking, it's important to preheat your oven to 400°F. This temperature is crucial for the Maillard reaction to occur effectively.
As the oven heats up, the air inside will become hotter and drier, creating the perfect environment for the chemical reactions that produce the rich, complex flavors and appetizing brown color we associate with baked goods. This process, known as the Maillard reaction, is responsible for the delicious aromas and flavors that emanate from the oven as our favorite dishes bake. The same reaction is what gives the bestloaded baked potato recipe its irresistible golden crust and savory taste. Understanding the science behind baking can help home chefs to master the art of creating mouthwatering, perfectly cooked dishes.
Additionally, ensuring the kitchen is well-ventilated can enhance the cooking process, much like how regular cleaning is essential for optimal performance in air purifiers.
Once the oven has reached the desired temperature, you'll want to wait a few minutes to ensure it's fully stabilized. This helps maintain a consistent temperature throughout the baking process, which is essential for achieving even cooking and browning.
Remember to use an oven thermometer to verify the temperature, as relying on the oven's display alone can be inaccurate.
Step 2. Coat Meat With Seasoned Flour
Having preheated your oven to the optimal 400°F, you'll now want to coat the meat in a seasoned flour mixture. This serves a dual purpose – it helps create a delightful, crispy crust on the exterior of the meat, while also thickening the natural juices to make a tasty gravy.
Start by combining all-purpose flour, salt, pepper, and any other desired spices in a shallow bowl. Using your hands or a pair of tongs, thoroughly coat the meat on all sides with the seasoned flour. Ensure every nook and cranny is covered, as this will maximize the Maillard reaction and result in the most flavorful crust.
With your meat now coated, you're ready to transfer it to a baking sheet or roasting pan. Make sure to shake off any excess flour before placing the meat in the preheated oven. This will prevent the flour from burning and creating a bitter taste.
Get ready for the magic of the Maillard reaction to begin!
Step 3. Sear Meat in Hot Pan
Once the meat is coated, you'll want to sear it in a hot pan. Heat a large skillet or cast-iron pan over high heat until it's ripping hot.
Add a bit of oil to the pan, and let it shimmer. Carefully place the coated meat in the pan, making sure not to crowd the pieces. This ensures even browning.
Let the meat sear undisturbed for 2-3 minutes, until a golden-brown crust forms. Flip the pieces and sear the other side. The high heat creates the perfect conditions for the Maillard reaction to occur, caramelizing the sugars and proteins on the surface and developing that rich, savory flavor.
Once the meat has a nice sear all over, you can lower the heat and continue cooking to your desired doneness. Searing locks in the juices and creates a wonderful texture contrast between the crisp exterior and tender interior.
Don't skip this crucial step – it's the key to unlocking the Maillard magic.
Step 4. Bake Meat in Oven
With the meat seared to perfection, the stage is set for the next step – baking it in the oven. Preheat your oven to the desired temperature, usually between 375°F and 425°F, depending on the cut of meat and your preferred level of doneness.
Interestingly, baking can also enhance flavors in a way similar to how coffee enhances athletic performance, as the Maillard reaction continues to develop rich, complex flavors in the meat.
Place the seared meat on a rimmed baking sheet or in a shallow roasting pan, ensuring it's not overcrowded. This allows the hot air to circulate freely, promoting even cooking.
As the meat bakes, the Maillard reaction continues, further deepening the flavor and creating a delectable crust. Keep a close eye on the meat, basting it occasionally with the pan juices to maintain moisture.
Use a meat thermometer to monitor the internal temperature, removing the meat from the oven when it reaches your target doneness. Allow the meat to rest for a few minutes before slicing, enabling the juices to redistribute throughout the cut.
This oven-baking technique leverages the power of the Maillard reaction to elevate the meat's taste and texture.
Step 5. Let Meat Rest Before Serving
After the meat has finished baking in the oven, don't rush to slice into it. Allow it to rest for about 10-15 minutes. This resting period is crucial as it allows the juices to redistribute throughout the meat, making it moist and tender.
If you cut into the meat right away, those precious juices will spill out, leaving you with a dry, disappointing dish.
During the resting time, the temperatures inside the meat will continue to rise, bringing the meat to its desired level of doneness. This carryover cooking is an important factor to consider, as it can affect the final texture and flavor of the dish.
To ensure your meat is cooked to perfection, use a meat thermometer to check the internal temperature before removing it from the oven, then let it rest as directed.
This simple step can make all the difference in creating a juicy, flavorful meal your guests will rave about.
Final Thoughts
The Maillard reaction's intricate dance of molecules and flavors is a captivating subject that continues to intrigue food scientists and enthusiasts alike.
As you've learned, this complex chemical process is responsible for the mouthwatering aromas and rich, caramelized hues that elevate our favorite dishes. From seared steaks to freshly baked breads, the Maillard reaction is the unsung hero, transforming simple ingredients into culinary masterpieces.
While we've only scratched the surface of this remarkable phenomenon, one thing is clear – the Maillard reaction is a testament to the incredible complexity of the food we enjoy.
As you continue your culinary journey, keep this knowledge in mind. Experiment, observe, and marvel at the alchemy that takes place in your kitchen.
For it's through a deeper understanding of the Maillard reaction that we can unlock the full potential of the ingredients we love, creating dishes that not only nourish the body but also delight the senses.
The possibilities are endless, so embrace the science and let your creativity soar.
Frequently Asked Questions
What Is the Optimal Temperature Range for the Maillard Reaction?
The optimal temperature range for the Maillard reaction is typically between 285°F (140°C) and 320°F (160°C). This temperature range allows for the complex chemical reactions that create the distinctive flavors and colors associated with browned foods.
How Does the Maillard Reaction Affect the Nutritional Value of Food?
The Maillard reaction can impact the nutritional value of food both positively and negatively. It can improve flavor and appearance, but it can also reduce the bioavailability of certain nutrients like amino acids and vitamins.
Can the Maillard Reaction Be Used to Enhance the Flavor of Plant-Based Foods?
Yes, the Maillard reaction can be used to enhance the flavor of plant-based foods. By carefully controlling the temperature and time, you can create delicious, complex flavors that make plant-based dishes even more appealing.
How Does the Maillard Reaction Differ Between Dry and Wet Cooking Methods?
The Maillard reaction differs between dry and wet cooking methods. In dry cooking, it's more intense, creating deeper, richer flavors. In wet cooking, it's less pronounced, yielding more subtle taste changes.
What Are the Health Implications of Over-Browning Food Due to the Maillard Reaction?
Overcooking food can lead to the formation of harmful compounds like acrylamide and heterocyclic amines, which may increase your risk of certain health issues like cancer. It's best to avoid heavily browned or charred foods.
Rachel is all about nostalgic comfort food with a modern twist. She brings the flavors of classic American diners to Cook if Ya, with her takes on burgers, fries, and milkshakes. Rachel’s love for simple, hearty meals brings a bit of retro flair to the table, reminding us all of the joys of classic diner dishes.
American Diner Classics
Tater Tots
A classic American snack that became a sensation in the 1950s, tater tots are a crispy, delicious treat that is perfect for snacking or serving with…
Tater tots are a classic American snack that became a sensation in the 1950s! They were created by a grocery company to use up odd-shaped potato pieces, and soon folks were gobbling them up for their crispy texture and delicious flavor. The secret is preheating your oven to 400°F, grating the potatoes into small pieces, and mixing in seasonings before forming them into bite-sized balls. Pop 'em in the oven until they're golden brown, and you've got a tasty treat that's perfect for snacking or serving up with your favorite dips. Tater tots are a true crowd-pleaser – you'll definitely want to keep reading to learn more about this beloved comfort food!
Key Takeaways
- Tater tots are potato-based snacks or side dishes that originated in the 1950s in the United States.
- They are made by shredding potatoes, mixing with seasonings, forming into bite-sized balls, and baking until crispy.
- Tater tots are known for their crunchy exterior and fluffy interior, making them a popular comfort food.
- The cooking process involves preheating the oven to 400°F, greasing a baking sheet, and baking the tots for 15-20 minutes.
- Tater tots are versatile and can be enjoyed in various settings, from casual gatherings to formal meals.
History
The origins of tater tots can be traced back to the 1950s in the United States. The story begins with a potato processing company called Griggs Grocery and Frozen Food. They were looking for a way to use up all the odd-shaped potato pieces that were left over from making hash browns and french fries. That's when the brilliant idea for tater tots was born!
The first tater tots were created in 1953 and quickly became a hit. People loved the crunchy, bite-sized potato snacks.
Over the years, tater tots have become a staple in American cuisine. Today, they're enjoyed at home, in school cafeterias, and even at fancy restaurants.
Whether you like them plain, loaded with cheese and bacon, or dipped in ketchup, there's no denying the irresistible appeal of tater tots. Their unique shape and satisfying crunch have made them a beloved comfort food for generations of Americans.
Cooking Steps
Preheat your oven to 400°F. You're about to make some delicious tater tots!
First, grab a baking sheet and grease it with a bit of oil or cooking spray. This will keep your tots from sticking.
Next, in a large bowl, combine grated potatoes, flour, salt, and any other seasonings you like. Mix everything together until the potatoes are evenly coated.
Now, scoop up small handfuls of the potato mixture and roll them into bite-sized balls. Gently place the tots on your prepared baking sheet, making sure they're not touching.
Bake for 20-25 minutes, flipping halfway, until they're golden brown and crispy.
Once they're done, let the tater tots cool for a minute or two. Then, dig in! You can serve them as a tasty snack or even as a side dish.
Top them with cheese, salsa, or your favorite dipping sauce. Enjoy!
Step 1. Preheat Oven to 400°F
Preheat your oven to a toasty 400°F. This crucial first step is the foundation for perfectly golden, crispy tater tots.
You'll want to make sure your oven is nice and hot before you even think about putting those little potato nuggets in. Heating the oven to the right temperature ensures even cooking and that irresistible crunch you crave.
Once your oven is preheated, you can start preparing your tater tots. Grab a baking sheet and give it a light coating of nonstick spray or oil.
This will help prevent sticking and make for easy cleanup later. Arrange the tots in a single layer on the sheet, giving them a bit of breathing room so they can get all nice and crispy.
Now you're ready to pop those tots in the oven and get to snackin'! Set a timer so you don't forget about them.
In just 15-20 minutes, you'll have a batch of piping hot, perfectly crunchy tater tots ready to enjoy.
Step 2. Shred Potatoes Into Small Pieces
To begin, you'll need to shred the potatoes into small, uniform pieces. This is key for getting that perfect tater tot texture. Grab a box grater or the shredding disc of your food processor and get to work. Run the potatoes across the large holes, creating long, thin shreds. Work in batches if needed to avoid overcrowding.
Once you've shredded all the potatoes, give the pile a good squeeze to remove any excess moisture. This will help the tots hold their shape during baking. You can even wrap the shredded potatoes in a clean kitchen towel and twist to wring out that extra liquid.
With your potatoes nice and dry, you're ready for the next step. Sprinkle in a bit of salt and any other seasonings you'd like. Then, scoop up small handfuls and gently compress them into little tot shapes. Smooth the edges with your fingers to get that classic rounded look.
Now you're all set to bake up a batch of crispy, golden tater tots!
Step 3. Mix Potatoes With Seasonings
Now that you've shredded the potatoes, it's time to season them up! This is where the magic really happens. Grab a big bowl and toss in your freshly shredded spuds.
Now, let's add some flavor! Sprinkle in a generous pinch of salt and a dash of black pepper. Give it a good stir to coat the potatoes evenly.
Next, let's kick things up a notch with a sprinkle of garlic powder and a touch of onion powder. These seasonings will add a savory depth that'll make your taste buds dance.
Don't be shy – go ahead and give the mixture a few more good stirs to make sure everything is well combined.
Step 4. Form Into Small Balls
With your potatoes now seasoned to perfection, it's time to shape them into those classic tater tot bites.
Grab a handful of the seasoned potato mixture and roll it between your palms to form small, bite-sized balls. Work quickly, as the heat from your hands will help the tots hold their shape. Make them all about the same size, around an inch in diameter, for even cooking.
Once you've shaped all the tots, it's time to get them ready for the oven.
Arrange the tots on a baking sheet, making sure they're not touching each other. This will allow them to get nice and crispy all over.
Pop the sheet into a hot oven and let the magic happen. In just 20-25 minutes, your homemade tater tots will be golden brown and irresistible.
Serve them hot and enjoy the crispy outside and fluffy inside in every delicious bite.
Step 5. Bake Until Golden Brown
After shaping the tots, arrange them in a single layer on a baking sheet, making sure they don't touch. This allows them to cook evenly and get nice and crispy.
Now, pop the baking sheet into a preheated oven at 400°F. Keep a close eye on them, because tater tots can go from perfectly golden to burnt in no time!
Bake for 15-20 minutes, flipping them halfway through, until they're a beautiful golden-brown color. The outside should be delightfully crispy, while the inside stays soft and fluffy.
Once they're done, carefully remove the tray from the oven. Be careful – those tots will be hot!
Let them cool for a minute or two, then dig in and enjoy your perfectly baked tater tots. Mmm, doesn't that sound delicious? Get ready for a tasty treat.
Final Thoughts
As we reach the end of our exploration of tater tots, it's clear that these humble potato nuggets have captured the hearts and stomachs of countless individuals.
From their crispy golden-brown exteriors to their fluffy, melt-in-your-mouth interiors, tater tots have become a beloved comfort food and a staple in many households.
Whether you enjoy them as a side dish, a snack, or even the main event, there's no denying the pure joy they bring.
As you've learned, the secret to perfectly baked tater tots lies in achieving that irresistible crunch.
But beyond the culinary delights, tater tots also hold a special place in our cultural fabric, evoking nostalgic memories of childhood and family gatherings.
So, as you continue your tater tot journey, remember to savor every bite and share the love with friends and loved ones.
After all, these versatile potato bites aren't just food – they're a delicious piece of joy that brings us all a little closer together.
Frequently Asked Questions
Are Tater Tots Made From Real Potatoes?
You'll be happy to know that tater tots are indeed made from real potatoes!
Potato shreds are carefully cut, then fried and seasoned to create those delicious, crispy bites.
So when you're enjoying a plate of tater tots, you can feel good knowing you're snacking on a tasty treat made from wholesome, all-natural ingredients.
It's the perfect way to satisfy your cravings for something savory and satisfying.
Can Tater Tots Be Cooked in an Air Fryer?
Absolutely! Air fryers are a fantastic way to cook tater tots.
They use hot air to crisp up the outside while keeping the inside nice and fluffy.
All you need to do is preheat your air fryer, add the tater tots in a single layer, and cook for about 10-12 minutes, flipping halfway through.
The result? Perfectly golden-brown tater tots that are just as delicious as the fried version, but with less oil and mess. If you’re looking for a healthier alternative to traditional tater tots, try baking them in the oven. The end result is a crispy homemade potato fries recipe that will satisfy your craving for that classic crispy texture without all the extra grease. Plus, you can season them with your favorite spices for a customizable flavor profile.
How Long Do Tater Tots Last in the Freezer?
Tater tots can actually last a pretty long time in the freezer! If you store them properly, they'll stay fresh and delicious for up to 12 months.
Just make sure to keep them in an airtight container or freezer bag to prevent freezer burn.
That way, you can enjoy your crispy, golden tater tots anytime – no need to worry about them going bad.
Isn't that exciting? You'll always have a tasty treat on hand when the craving strikes.
Can Tater Tots Be Reheated in the Microwave?
Yes, you can absolutely reheat tater tots in the microwave!
Just pop them in for a minute or two, and watch as they get hot and crispy all over again.
Be careful though, as they might be super hot when they come out.
Let them cool for a bit before digging in.
Microwave reheating is a quick and easy way to enjoy those tasty little potato bites anytime you're craving them.
What Are the Best Dipping Sauces for Tater Tots?
When it comes to dipping sauces for tater tots, the possibilities are endless!
You could go for a classic ketchup or ranch dressing, or get a little more adventurous with spicy mayo, cheese sauce, or even barbecue sauce.
The great thing about tater tots is that they pair perfectly with all sorts of dips and sauces, so you can have fun experimenting to find your personal favorite.
Get creative and enjoy this tasty snack in new and exciting ways!
Rachel is all about nostalgic comfort food with a modern twist. She brings the flavors of classic American diners to Cook if Ya, with her takes on burgers, fries, and milkshakes. Rachel’s love for simple, hearty meals brings a bit of retro flair to the table, reminding us all of the joys of classic diner dishes.
American Diner Classics
Loaded Baked Potato
Your taste buds will be delighted by the classic loaded baked potato, a satisfying dish that combines fluffy potatoes with rich toppings – discover the simple steps to create this flavor-packed delight.
You're gonna love the loaded baked potato – it's a classic that'll take you on a satisfying flavor journey! These spuds started back in the early 1900s when home cooks got creative, topping their baked potatoes with crispy bacon, melted cheese, tangy sour cream, and fresh chives. The fluffy potato combined with those rich toppings creates a meal that'll have your taste buds dancing. Over time, folks have put their own spin on the recipe, but it's still a beloved favorite at dinner tables everywhere. Wanna learn the easy steps to make these taters taste like pure bliss? Just keep reading!
Key Takeaways
- Loaded baked potatoes originated in the early 20th century as home cooks experimented with toppings like bacon, cheese, sour cream, and chives.
- Baking the potatoes until crispy and fluffy creates a base for the rich and satisfying toppings.
- The combination of a tender potato and indulgent toppings makes loaded baked potatoes a beloved classic comfort food dish.
- Cooking steps involve preheating the oven, baking the potatoes until tender, scooping out the flesh, and stuffing the skins with toppings.
- Loaded baked potatoes have evolved over time with new flavor combinations while retaining their timeless appeal as a family dinner favorite.
History
The origins of the loaded baked potato can be traced back to the early 20th century, when resourceful home cooks began experimenting with new ways to dress up the humble baked potato.
As people became more adventurous in the kitchen, they started topping their baked potatoes with an array of delicious ingredients, like crispy bacon, melted cheese, sour cream, and chives.
This creative approach quickly caught on, and the loaded baked potato became a beloved classic. Families would gather around the dinner table, eagerly anticipating the perfectly baked spuds, ready to be customized with their favorite toppings.
The combination of the fluffy, warm potato and the rich, flavorful toppings made for a truly satisfying and comforting meal.
Over the years, the loaded baked potato has evolved, with chefs and home cooks alike experimenting with new flavor combinations, but the classic version remains a timeless favorite.
Cooking Steps
Preheat your oven to 400°F (200°C). Grab a fork and poke some holes all over the potatoes. This will let the steam escape as they bake.
Pop the potatoes onto a baking sheet and slide them into the hot oven.
Bake the potatoes for 50-60 minutes, until they're nice and soft when you squeeze them.
Carefully remove the potatoes from the oven – they'll be piping hot! Use a sharp knife to slice them open down the middle.
Grab a fork and fluff up the insides.
Now for the fun part! Top your baked potatoes with all your favorite toppings.
Sour cream, shredded cheese, crumbled bacon, chives, and a sprinkle of salt and pepper will make these potatoes utterly delicious.
Get creative and add whatever toppings you love most.
Dig in and enjoy your perfectly baked, loaded potatoes!
Step 1. Wash and Prick Potatoes
First, rinse the potatoes under cool running water to remove any dirt or debris. This helps ensure you have a clean canvas to work with.
Next, use a fork to prick the potatoes several times all over. This allows steam to escape while they bake, preventing the potatoes from bursting in the oven.
Once the potatoes are washed and pricked, place them directly on the oven rack. Baking them right on the rack, rather than a baking sheet, helps the skins get nice and crispy.
Set the oven to 400°F and let the potatoes bake for 50-60 minutes, or until a knife can easily pierce through the center. The skins should look wrinkly and the insides should be soft and fluffy.
When the potatoes are done, use tongs to carefully remove them from the oven. Be cautious, as they'll be piping hot!
Now you're ready to move on to scooping out the insides and loading them up with all your favorite toppings.
Step 2. Bake Potatoes Until Tender
Once the potatoes are washed and pricked, place them directly on the oven rack. Set the temperature to 400°F. As the oven heats up, the insides of the potatoes will start to steam and soften. Bake the potatoes for 50-60 minutes, or until a fork can easily pierce through the center.
During the baking process, the skins will become crispy and golden brown. This is exactly what you want! The contrast between the fluffy interior and the crispy exterior is what makes a baked potato so delicious.
To check if the potatoes are done, gently squeeze the potato. If it gives easily and feels soft, it's ready. You can also insert a fork into the center – it should slide in with minimal resistance.
Once the potatoes are tender, use tongs to carefully remove them from the oven. Be cautious, as the potatoes will be very hot. Set them aside to cool for a few minutes before moving on to the next step.
Step 3. Remove Potato Skins
With a fork, gently pierce the baked potato and slice it open lengthwise. Careful not to burn your fingers! Once the potato is sliced open, use a spoon to carefully scoop out the fluffy interior, being sure to leave the skin intact. You can then mash the potato with a bit of butter and seasoning for a delicious side dish. And for a tasty dessert, be sure to try out this classic apple pie recipe that has been passed down for generations. With a flaky crust and sweet, cinnamon-spiced apple filling, it’s sure to become a family favorite.
Now, use a spoon to scoop out the fluffy, steaming insides, leaving behind a thin layer of potato attached to the skin. Feel the warmth of the potato as you transfer it to a plate.
Don't toss those potato skins just yet – they're about to get a tasty makeover.
Using a sharp knife, trim off any blemishes or darkened areas on the potato skins. Discard those bits and give the skins a good rinse under cool water. Pat them dry with a paper towel.
Now you're ready to load up those crispy skins with all your favorite toppings. Shredded cheddar, crumbled bacon, a dollop of sour cream – the possibilities are endless!
Pop the stuffed skins back into the oven for a few minutes to melt the cheese and warm everything through. Get ready for a flavor explosion in every bite.
Step 4. Scoop Out Potato Flesh
Now that you've carefully removed the skins, it's time to scoop out the fluffy potato flesh.
Using a sturdy spoon, gently dig into the baked potato, taking care not to tear the delicate insides. Scoop out the soft, cloud-like interior, transferring it to a large mixing bowl. Be sure to leave a thin layer of potato attached to the skin, as this will help maintain the potato's structural integrity.
Once you've scooped out all the flesh, give it a good mash with a potato masher or fork. This will help break down any stubborn lumps, creating a smooth, creamy consistency.
Now, it's time to add your favorite toppings and seasonings. Stir in a generous helping of butter, a splash of warm milk, and a sprinkle of salt and pepper. Mix everything together until the potato is light and fluffy, ready to be piled back into the crispy potato skins.
Step 5. Mash Potato Flesh With Ingredients
Take the mashed potato flesh and stir in a generous amount of butter. The butter will melt right in, making the potatoes extra creamy and delicious.
Next, add a splash of milk or cream and keep mashing and mixing until the potatoes are nice and smooth. Don't be afraid to really get in there and work the potatoes with a potato masher or fork.
Now it's time to add some tasty toppings! Sprinkle in shredded cheddar cheese, crumbled bacon, and chopped green onions. The cheese will melt into the hot potatoes, the bacon will add a salty crunch, and the green onions will provide a fresh, oniony flavor.
Stir everything together until well combined.
Final Thoughts
Savoring the final morsels of this loaded baked potato, you can't help but reflect on the satisfying journey of its preparation.
From selecting the perfect potato to deftly mashing the flesh with a medley of creamy ingredients, each step has culminated in this delectable result.
As you take the last bite, you savor the harmonious blend of flavors – the fluffy potato, the tangy sour cream, the smoky bacon, and the sharp cheddar cheese.
This truly is a comfort food masterpiece, one that has left you feeling nourished and content.
With a sense of accomplishment, you take a moment to appreciate the care and attention that went into crafting this masterful dish.
Though the plate is now empty, the memory of this loaded baked potato will linger, reminding you of the joys that can be found in simple, homemade pleasures.
Frequently Asked Questions
Can I Use Sweet Potatoes Instead of Regular Potatoes?
Absolutely! You can definitely use sweet potatoes instead of regular potatoes in your recipe.
Sweet potatoes have a delicious, natural sweetness that would be a great addition. They're also packed with vitamins and minerals, making them a healthy choice.
Just be sure to adjust your cooking time and temperature, as sweet potatoes may cook a bit differently than regular potatoes.
Give it a try – your taste buds will thank you!
How Long Do the Baked Potatoes Need to Cool Before Topping?
You'll want to give your baked potatoes a little time to cool before adding all the delicious toppings. Aim for about 5-10 minutes of cooling time.
This'll make it easier to handle the potatoes and prevent the toppings from melting too quickly. Once they've had a chance to cool, you can get to work loading them up with all your favorite fixings.
Just be careful not to wait too long, or the potatoes might start to harden up. Enjoy your tasty baked potato creation!
Can I Prepare the Loaded Toppings in Advance?
Absolutely! You can prepare the loaded toppings for your baked potatoes in advance.
This is a great way to save time and have everything ready to go when it's time to assemble your delicious loaded potatoes. Just chop up the bacon, shredded cheese, chives, and any other tasty toppings you want.
Store them in separate containers in the fridge until you're ready to top your hot, fresh-baked potatoes. Easy peasy!
Now, all you have to do is sit back and enjoy your awesome loaded potato creation.
Is It Possible to Make This Dish in the Air Fryer?
Absolutely! The air fryer is a fantastic way to make a loaded baked potato.
It's quick, easy, and gives you that irresistible crispy skin. You can even prepare the toppings in advance, so when it's time to assemble, it'll be a breeze.
Just pop the potato in the air fryer, let it get all nice and crispy, then load it up with your favorite toppings.
It's a delicious and hassle-free way to enjoy a loaded baked potato!
Can I Substitute the Bacon With a Vegetarian Alternative?
Sure, you can absolutely swap the bacon for a tasty vegetarian alternative!
There are lots of great options out there, like crispy veggie bacon or tempeh bacon.
These plant-based substitutes will give you that same smoky, savory flavor without the meat.
Just toss them in the air fryer alongside your other toppings, and you'll have a delicious, meatless loaded baked potato in no time.
Get creative and enjoy!
Rachel is all about nostalgic comfort food with a modern twist. She brings the flavors of classic American diners to Cook if Ya, with her takes on burgers, fries, and milkshakes. Rachel’s love for simple, hearty meals brings a bit of retro flair to the table, reminding us all of the joys of classic diner dishes.
-
Southern Comfort Food1 month ago
Cheese Straws
-
Brazilian Cuisine1 month ago
Caldeirada
-
Southern Comfort Food1 month ago
Creamed Corn
-
Brazilian Cuisine1 month ago
Chicken in Brown Sauce
-
Brazilian Cuisine1 month ago
Tacacá
-
Southern Comfort Food1 month ago
Squash Casserole
-
Southern Comfort Food1 month ago
Chocolate Gravy
-
African Cuisine1 month ago
Poulet DG (Cameroon)