Connect with us

African Cuisine

Ugba: The Fermented African Oil Bean Salad

Traverse the vibrant flavors of Nigeria’s traditional Ugba, a fermented African oil bean salad that captivates the senses with its umami-rich profile and cultural heritage.

Published

on

fermented african oil bean

Ugba, the fermented African oil bean salad, is a traditional Nigerian dish with a rich cultural heritage. The Igbo people have passed down the unique fermentation process for generations, showcasing their culinary ingenuity. The umami-rich taste of the fermented beans, combined with fresh vegetables and a vibrant dressing, creates a refreshing and nutritious salad. You'll love how the careful preparation and seasoning bring out the remarkable depth of flavor in this dish. With its vibrant colors and appealing presentation, ugba salad is a delightful treat that represents the rich tapestry of African culinary traditions. Intrigued? Keep reading to learn the step-by-step cooking process.

Key Takeaways

  • Ugba is a traditional Nigerian salad with a rich cultural heritage, integral to the lives of the Igbo people.
  • The fermentation process of the African oil bean seeds is passed down through generations, showcasing culinary ingenuity.
  • Ugba's popularity has spread across Nigeria, becoming a beloved dish that represents the rich tapestry of African culinary traditions.
  • The cooking process involves boiling, draining, and slicing the oil bean seeds, then marinating them in a blend of spices.
  • Ugba salad offers a refreshing and nutritious dish with a unique umami-rich taste from the fermented African oil bean.

History

past events and narratives

Ugba, a traditional Nigerian salad, has a rich cultural heritage that dates back centuries. Originally, the oil bean tree was an integral part of the lives of the Igbo people, who used its seeds, leaves, and bark for various purposes.

The process of fermenting and preparing the ugba salad was passed down through generations, becoming a beloved dish that showcased the resourcefulness and culinary ingenuity of the Igbo community.

Over time, the popularity of ugba spread beyond its regional origins, making its way into the kitchens of households across Nigeria. Today, this flavorful salad is enjoyed not only as a delicious side dish but also as a testament to the rich tapestry of African culinary traditions.

The fermentation process, which involves soaking, boiling, and fermenting the oil bean seeds, imparts a unique nutty flavor and firm texture that makes ugba a truly remarkable and versatile ingredient.

Cooking Steps

recipe preparation instructions

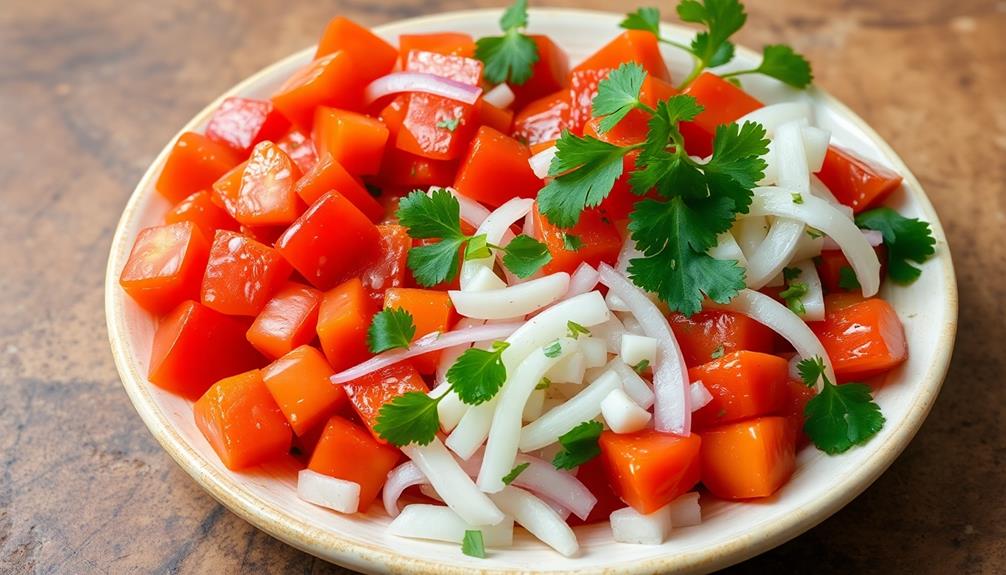
To begin the cooking process, gather all the necessary ingredients and equipment. You'll need a cutting board, a sharp knife, a large bowl, and a whisk or fork. For the salad, you'll be using ugba (fermented African oil bean), onions, tomatoes, peppers, and a few other fresh veggies.

First, rinse the ugba under cold water and let it drain. Then, thinly slice the onions, dice the tomatoes, and chop the peppers. Add all the chopped veggies to the large bowl.

Advertisement

Next, prepare the dressing. In a small bowl, whisk together some olive oil, lemon juice, salt, and pepper. Pour the dressing over the salad and toss everything together until the ingredients are evenly coated.

Let the salad sit for a few minutes to allow the flavors to meld. Then, serve and enjoy your delicious ugba salad! The combination of the savory ugba, crunchy veggies, and tangy dressing creates a refreshing and satisfying meal.

Step 1. Boil the Oil Bean Seeds

boil oil bean seeds

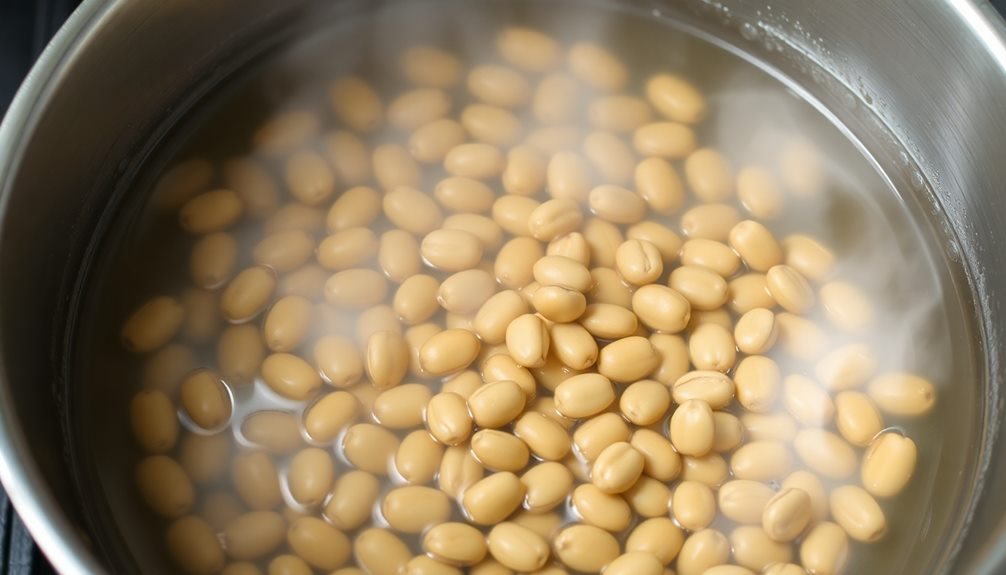
The oil bean seeds, the backbone of this vibrant salad, require a straightforward boiling process to unlock their earthy flavors.

Start by gathering the seeds and giving them a good rinse under cool running water. This helps remove any debris or impurities.

Next, place the seeds in a pot and cover them with plenty of fresh water. Bring the water to a boil over high heat, then reduce the heat to medium-low and let the seeds simmer for about 30 minutes.

You'll know they're ready when you can easily pierce them with a fork. Drain the seeds and rinse them one more time.

Advertisement

Now they're prepped and ready to be transformed into the star of your delicious ugba salad! The boiling step softens the seeds and mellows their distinctive taste, making them the perfect base for all the vibrant flavors to come.

Get ready to experience the delightful crunch and rich, savory goodness of this African delicacy.

Step 2. Drain and Rinse the Seeds

drain and rinse seeds

After the oil bean seeds have finished simmering for about 30 minutes, you'll want to drain and rinse them.

Place a colander in the sink and carefully pour the cooked seeds into it, allowing the hot water to drain away. Once the seeds have drained, give them a good rinse under cool, running water. This will help remove any remaining cooking liquid and prepare the seeds for the next step.

As you rinse the seeds, you may notice a thin, papery skin starting to peel off. That's perfectly normal – just gently rub the seeds between your fingers to help remove the skins.

Don't worry if you can't get every bit of skin off; the important thing is to get the seeds nice and clean. Once they're rinsed, give the colander a gentle shake to remove any excess water.

Advertisement

The drained and rinsed seeds are now ready to be used in your delicious Ugba salad. Get ready for the incredible flavor and texture that's about to come!

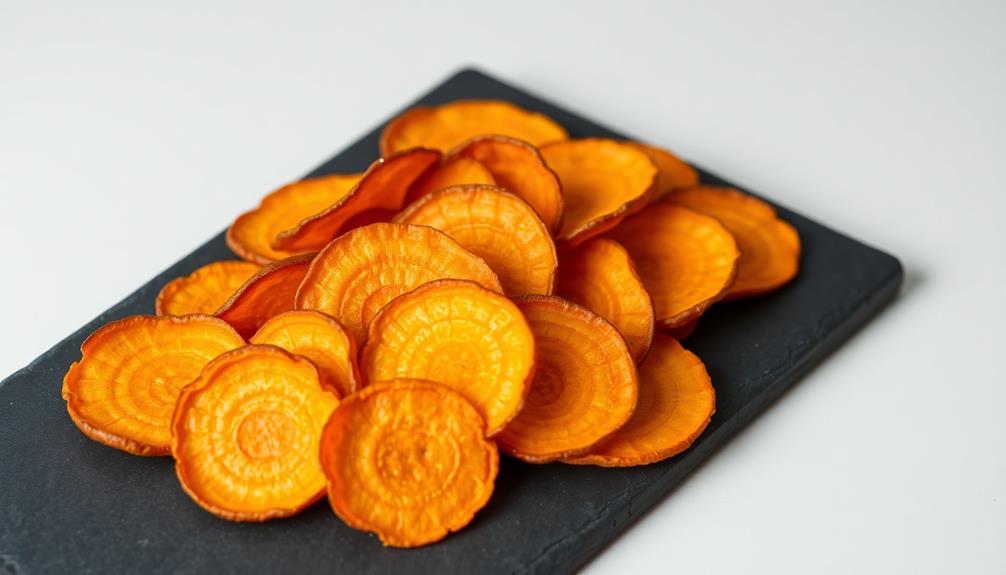
Step 3. Slice the Fermented Oil Bean Seeds

slice fermented oil beans

With the seeds drained and rinsed, you'll want to slice them into thin pieces. Using a sharp knife, carefully cut each fermented oil bean seed into thin, even slices. This will help them cook evenly and give your salad a nice texture.

Don't worry if the slices aren't perfect – a little unevenness adds character! As you slice, you'll notice the seeds have a firm, almost crunchy texture. This is normal and exactly what you want.

The slicing process might take a bit of time, but it's an important step that will pay off in the end. Once all the seeds are sliced, you can move on to the next step of preparing your delicious ugba salad.

The thinly sliced seeds will be the star of the show, so take your time and do it right. With a little patience, you'll have perfectly prepped oil beans ready to be tossed with the other fresh ingredients.

Step 4. Marinate Fermented Seeds in Spices

marinate fermented seeds spices

Now that you've sliced the fermented oil bean seeds, it's time to marinate them in a flavorful spice mixture. Start by gathering your favorite seasonings – maybe some cayenne pepper, garlic powder, and onion flakes. Sprinkle these over the sliced ugba and give everything a good stir.

The next step is to add a bit of oil and lemon juice. You want just enough to coat the seeds and help the spices stick. Mix it all together until the ugba is nicely seasoned. Don't be afraid to get your hands in there and give it a good massage. This helps the flavors really soak into the beans.

Advertisement

Now, let the marinated ugba sit for about 15 minutes. This allows the spices to meld and the seeds to absorb all that delicious seasoning.

When the time's up, give it one last gentle stir. Your ugba salad is now ready to enjoy! The vibrant colors and tantalizing aromas will have your mouth watering in no time.

Step 5. Add Desired Seasonings

add preferred flavor enhancements

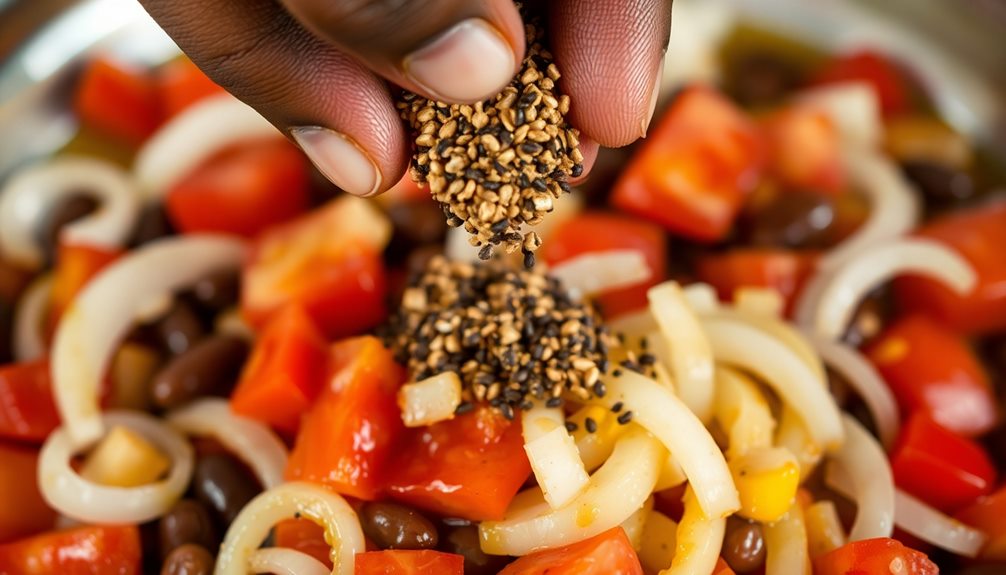
Gather your desired seasonings – perhaps a touch of cayenne pepper for heat, garlic powder for savory depth, and onion flakes for a hint of sweetness.

These spices will enhance the already bold flavor of the fermented ugba seeds. Start by adding a pinch or two of your chosen seasonings, then give the salad a gentle stir to incorporate them evenly.

Taste as you go, adjusting the amounts to suit your preferences. Don't be afraid to experiment! You can also try other spices like smoked paprika, cumin, or dried herbs. The possibilities are endless.

Remember, the key is to find the perfect balance of flavors that tantalizes your taste buds. With a little trial and error, you'll have a delightful ugba salad that's seasoned to perfection.

Advertisement

Serve it chilled or at room temperature, and enjoy the complex, satisfying flavors in every bite.

Final Thoughts

concluding reflections and insights

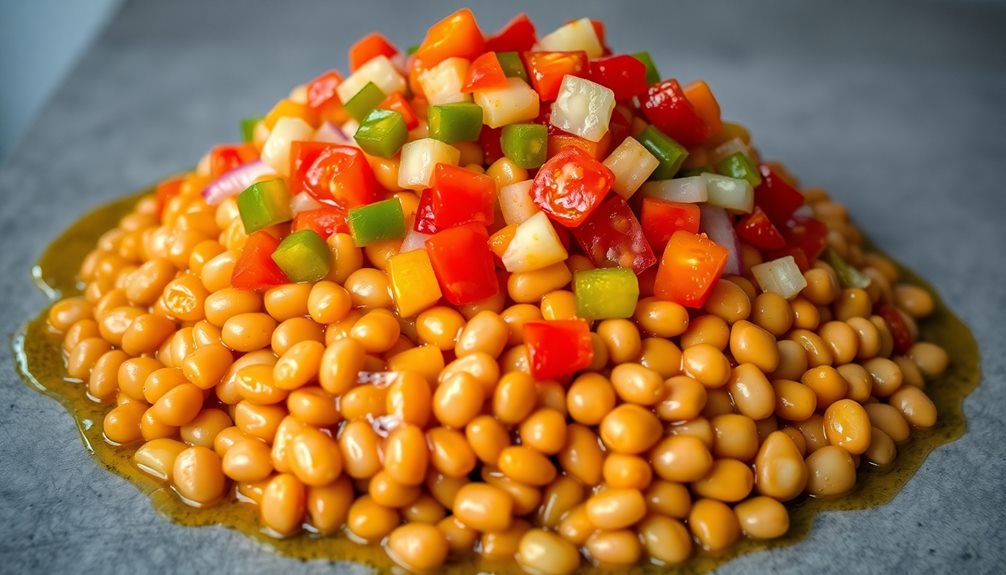
Ultimately, the Ugba Salad is a refreshing and nutritious dish that offers a delightful balance of flavors and textures. The fermented African oil bean, or Ugba, gives the salad a unique umami-rich taste that pairs perfectly with the crunchy vegetables and tangy dressing.

Whether you enjoy it as a light meal or a flavorful side, this salad is sure to delight your taste buds. As you savor each bite, you'll appreciate the care and attention that goes into preparing this traditional African dish.

The careful fermentation process and the blend of spices and seasonings create a depth of flavor that's truly remarkable. And with its vibrant colors and appealing presentation, the Ugba Salad isn't just delicious but a feast for the eyes as well.

Frequently Asked Questions

What Are the Health Benefits of Consuming Ugba?

Consuming ugba can provide you with essential nutrients like protein, fiber, and vitamins. It may also support digestion, boost your immune system, and lower your risk of chronic diseases. Incorporating this fermented food into your diet can be a healthy choice.

How Long Does Ugba Keep After It Has Been Prepared?

Once prepared, ugba will typically keep for 3-5 days when stored in the refrigerator. To maximize its shelf life, be sure to store it in an airtight container and consume it within this timeframe.

Advertisement

What Are the Best Ways to Serve Ugba as a Salad?

You can serve ugba as a salad in various ways – toss it with fresh vegetables, mix it with a tangy dressing, or use it as a topping for your favorite greens. Get creative and enjoy its unique flavor!

Can Ugba Be Used in Other African Dishes Besides Salads?

Absolutely! Ugba can be incorporated into various African dishes beyond just salads. You can use it to add texture and flavor to stews, rice dishes, and even as a topping for grilled meats or roasted vegetables.

Are There Any Variations in the Recipe for Ugba Across West Africa?

Yes, there are variations in the ugba recipe across West Africa. Each region has its own unique twist, using local ingredients and techniques to create distinctive flavors and textures in this fermented oil bean dish.

Advertisement

African Cuisine

The Nigerian Staple: What Exactly Is Garri?

Aromatic, flaky, and deeply rooted in West African culinary heritage, garri is a captivating Nigerian staple that offers a world of delectable flavors and cultural history.

Published

on

nigerian staple food garri

Garri, the beloved Nigerian staple, is a versatile cassava-based food with a rich history and delightful taste! For centuries, West African communities have been peeling, grating, fermenting, and toasting cassava roots to create this flaky, slightly sour treat. The preparation involves several steps, including dewatering the grated cassava pulp and roasting the fermented mixture to achieve the signature nutty flavor. Enjoyed as a snack or hearty meal, garri can be paired with a variety of toppings like fried fish, eggs, or roasted groundnuts. The creation process takes time and expertise, but the end result is truly worth it – and there's so much more to discover about this captivating Nigerian staple!

Key Takeaways

  1. Garri is a staple food in West Africa, made from peeled, grated, fermented, and toasted cassava roots, preserving nutrients and providing a distinct flaky texture and slightly sour taste.
  2. The preparation of garri involves a multi-step process, including dewatering the grated cassava pulp, fermenting the dewatered pulp, and roasting the fermented pulp to enhance its flavor.
  3. Garri can be consumed in various forms, such as porridge or as a side dish, often paired with toppings like fried fish, egg, or roasted groundnuts.
  4. Garri has gained global recognition and is enjoyed beyond West Africa, with its unique texture and flavor adaptable for different culinary applications.
  5. The traditional methods of garri production have evolved over time, but the essence of the dish remains unchanged, reflecting the rich cultural heritage of West African communities.

History

knowledge of past events

Garri's origins trace back centuries, emerging as a staple food among West African communities. This versatile cassava-based product has been a beloved part of cultural traditions for generations.

Traditionally, garri was made by peeling, grating, fermenting, and then toasting cassava roots. This process not only preserves the root's nutrients but also gives garri its signature flaky texture and slightly sour taste.

Over time, the preparation methods have evolved, but the core essence of this nourishing food remains unchanged.

Garri's popularity has spread far beyond its West African roots, making it a recognized global food. Today, it's enjoyed in various forms, from the classic dry granules to creamy porridge-like dishes.

Whether as a quick snack or a hearty meal, garri continues to be a cherished part of many communities' culinary heritage.

Advertisement

Recipe

cooking instructions and ingredients

Garri, also known as gari or cassava flour, is a staple food in many parts of Africa, particularly West Africa. It's made from the cassava root, which is peeled, grated, fermented, and then toasted to create the dry, granular product we know as garri.

Garri is incredibly versatile and can be enjoyed in a variety of ways. One popular way to prepare it is by cooking it into a porridge-like dish, often served as a breakfast or snack.

Ingredients:

  • 1 cup garri
  • 2 cups water
  • 1 teaspoon salt
  • 2 tablespoons sugar (optional)
  • 1 cup milk (optional)

Cooking Instructions:

Bring the water to a boil in a saucepan. Gradually add the garri, stirring constantly to prevent lumps from forming.

Reduce the heat to low and continue cooking, stirring frequently, for 5-10 minutes until the garri has thickened to your desired consistency. Stir in the salt and sugar (if using). For a creamier porridge, stir in the milk.

Tips:

Advertisement

When cooking garri, it's important to add the garri gradually and stir constantly to prevent the formation of lumps.

The texture of the final dish can be adjusted by adding more or less water, depending on your preference. Garri can also be enjoyed with additional toppings such as fried fish, egg, or roasted groundnuts.

Cooking Steps

sequential culinary instructions

Peel and grate that cassava with care, then squeeze out the liquid to get the pulp just right.

Next, let the pulp ferment for a bit – this'll make the flavor divine!

Step 1. Peel and Grate the Cassava

peel grate cassava preparation

The next step in the garri-making process involves carefully peeling and grating the cassava roots.

First, you'll need to grab a sharp knife and peel off the tough, brown outer skin of the cassava. Be sure to remove all the peel, leaving only the white, starchy flesh.

Next, you'll take the peeled cassava and grate it using a traditional grater or a modern food processor. Grate the cassava into long, thin shreds, being careful to avoid grating your fingers! This step is crucial, as the grated cassava is what'll be used to make the final garri product.

Advertisement

Once you've grated enough cassava, it's time to move on to the next step in the process.

The grated cassava will need to be fermented and dried before it can be toasted into the delicious garri we all know and love. Get ready for the next exciting stage of the garri-making journey!

Step 2. Dewater the Cassava Pulp

dewater cassava pulp process

After grating the cassava, the next crucial step is to dewater the cassava pulp.

You'll want to squeeze out as much liquid as possible from the freshly grated roots. This can be done by using your hands or a clean, heavy cloth. Grab a handful of the pulp and firmly squeeze, letting the liquid drip out. Keep squeezing and squeezing until the pulp feels drier to the touch.

Next, spread the dewatered cassava pulp out on a large, clean surface. This could be a table, a tarp, or even the floor, as long as it's clean.

Let the pulp air-dry for several hours, stirring occasionally to ensure even drying. The goal is to reduce the moisture content as much as possible, making the pulp ready for the next step of processing into garri.

Advertisement

With the cassava pulp properly dewatered, you're one step closer to creating this beloved Nigerian staple.

Keep up the good work – the garri-making process is just getting started!

Step 3. Ferment the Dewatered Cassava Pulp

ferment dewatered cassava pulp

Next, you'll want to ferment the dewatered cassava pulp. This key step develops the signature sour taste of garri.

First, gather the pulp in a clean container. Add a bit of water, just enough to moisten the mixture. Then, cover the container and let it sit for 2-3 days. As the pulp ferments, it will release gases and develop that classic garri aroma.

Once the pulp has fully fermented, it's time to sieve it. Use a large mesh strainer to separate the coarse, fibrous parts from the soft, smooth garri. Discard the tough bits and keep the fine garri flour.

Now, you can start the roasting process! Spread the garri evenly over a wide, flat pan and heat it over a medium flame. Stir constantly to prevent burning and achieve an even, golden-brown color. The roasting brings out the garri's nutty, toasted flavors.

Advertisement

Get ready – the best part is coming up next!

Step 4. Roast the Fermented Cassava Pulp

roast fermented cassava pulp

With the fermented cassava pulp ready, it's time to roast it! Get ready for the sizzling sounds and delightful aromas that will fill your kitchen.

First, spread the fermented pulp evenly on a large, shallow pan. It's important to create a thin layer to ensure even cooking.

Next, place the pan over medium heat and let the magic begin! Stir the pulp occasionally, making sure it doesn't burn. As it cooks, the pulp will start to dry out and turn a golden-brown color.

Keep an eye on it, and when the pulp has reached your desired level of roastiness, remove the pan from the heat. Let it cool slightly, and then transfer the roasted cassava pulp to a clean bowl.

This is the final step in creating the beloved Nigerian staple, garri. Get ready to enjoy this versatile and delicious ingredient in all sorts of tasty dishes!

Advertisement

Step 5. Sieve the Roasted Cassava Granules

sieve roasted cassava granules

Once the cassava pulp has been roasted to your desired doneness, it's time to sieve the granules.

Grab your trusty sieve and get ready to shake, shake, shake! Gently pour the roasted cassava onto the sieve and start shaking. The fine granules will fall through, leaving behind the larger, coarser pieces.

Now, don't be too rough – you want to keep those precious garri granules intact! Shake the sieve back and forth, side to side, until you've separated all the small, fluffy bits.

These are the star of the show – the garri that will be used to make your favorite dishes.

  • Collect the sieved garri in a bowl or container.
  • Discard the larger pieces that didn't make it through the sieve.
  • Repeat the sieving process until you've gathered all the delightful garri granules.

With your freshly sieved garri, you're one step closer to enjoying the delicious, versatile staple of Nigerian cuisine!

Final Thoughts

reflective conclusion insights

Garri is a staple food in many parts of the world, particularly in Africa, where it serves as a vital source of sustenance. This versatile cassava-based product can be enjoyed in a variety of ways, from a simple snack to a hearty meal.

Whether you're sprinkling it on top of your favorite stew or mixing it into a porridge, garri is a fantastic addition to any culinary adventure.

As you've learned, the process of creating garri is a labor of love, requiring patience and expertise. From sieving the roasted cassava granules to drying them to perfection, each step is crucial in producing the delightful texture and flavor that garri is known for.

Advertisement

But the best part? Garri is incredibly adaptable, allowing you to get creative in the kitchen.

Frequently Asked Questions

How Long Can Garri Be Stored?

You can store garri for up to 6 months if you keep it in an airtight container in a cool, dry place. Proper storage helps maintain the texture and flavor of this versatile West African staple.

Is Garri Suitable for People With Diabetes?

Garri can be suitable for people with diabetes, as it has a low glycemic index. You can enjoy garri in moderation as part of a balanced diet, but always consult your healthcare provider for personalized dietary guidance.

Can Garri Be Frozen for Later Use?

You can definitely freeze garri for later use. Just place it in an airtight container or freezer bag, and it'll stay fresh for several months. This makes it a convenient pantry staple for busy households.

What Are the Health Benefits of Garri?

Garri is a nutritious cassava-based food that offers several health benefits. It's rich in carbohydrates, providing sustained energy, and contains vitamins and minerals essential for overall wellbeing. Incorporating garri into your diet can support a healthy lifestyle.

Advertisement

How Do I Know if the Garri Is Authentic?

To know if the garri is authentic, look for a fine, granular texture and a light, creamy color. Authentic garri should also have a mild, nutty flavor and a lack of impurities or foreign matter.

Continue Reading

African Cuisine

Tuwo Shinkafa: A Taste of Northern Nigeria’s Favorite Dish

You’ll be captivated by the aromatic, communal delight of Tuwo Shinkafa, a beloved staple dish that showcases the rich culinary heritage of Northern Nigeria.

Published

on

northern nigeria s favorite dish

Tuwo Shinkafa, a beloved staple of Northern Nigeria, whisks you away to the region's vibrant culinary heritage. This mouthwatering dish combines the aroma of steamed rice with the warmth of communal gatherings, creating a symphony of flavors. Crafted with care over generations, Tuwo Shinkafa reflects the resilience and ingenuity of the Northern Nigerian people. Served during special occasions like weddings and festivals, it symbolizes joy and connection. The meticulous cooking process, using local ingredients and traditional methods, ensures authenticity. Tuwo Shinkafa's comforting texture and rich flavor leave a lasting impression, inviting you to further explore the depths of Northern Nigerian cuisine.

Key Takeaways

  • Tuwo Shinkafa is a traditional dish from Northern Nigeria, reflecting the region's cultural heritage and community traditions.
  • The dish is made by soaking, grinding, and cooking rice into a smooth, fluffy paste, which is then shaped into round balls.
  • Tuwo Shinkafa is often served with various stews and sauces, offering a unique and comforting flavor profile.
  • Preparation of Tuwo Shinkafa involves careful attention to detail, including continuous stirring during cooking to achieve the desired texture.
  • Tuwo Shinkafa serves as a gateway to exploring Northern Nigerian cuisine, fostering cultural exchange and appreciation for traditional culinary practices.

History

historical events and timelines

Tuwo Shinkafa's origins can be traced back to the rich culinary traditions of Northern Nigeria. For centuries, this beloved dish has been a staple in the region, reflecting the local culture and ingredients.

Traditionally, it's made from steamed and pounded rice, creating a fluffy, pillowy texture that's simply irresistible.

The process of making Tuwo Shinkafa is a labor of love. First, the rice is carefully selected and soaked, then steamed until perfectly cooked.

Next, it's pounded and kneaded by hand, a technique passed down through generations. This attention to detail ensures the final product is smooth, consistent, and packed with flavor.

Tuwo Shinkafa is often enjoyed during special occasions, such as weddings, festivals, and family gatherings.

Advertisement

It's commonly served with a variety of delectable stews and sauces, each offering a unique taste experience.

Whether you're a seasoned Tuwo Shinkafa enthusiast or a newcomer to this culinary delight, it's a dish that's sure to leave you craving more.

Recipe

cookinginstructions and ingredients

Tuwo Shinkafa is a traditional staple dish from Northern Nigeria. It's a thick, soothing porridge made from rice flour that's a beloved comfort food in the region. The dish is often served as a side or as the main course, accompanied by various stews and sauces.

Preparing Tuwo Shinkafa requires a bit of patience and technique, but the end result is a nourishing and satisfying meal. The process involves carefully cooking the rice flour to achieve the desired creamy and smooth texture.

Ingredients:

  • 2 cups rice flour
  • 6 cups water
  • 1 teaspoon salt

Instructions:

Bring the water to a boil in a large pot. Gradually whisk in the rice flour, stirring continuously to prevent lumps from forming.

Advertisement

Reduce the heat to low and continue to cook, stirring frequently, for about 15-20 minutes until the mixture thickens to a smooth, porridge-like consistency. Add salt and stir to combine. Serve hot, accompanied by your choice of stew or sauce.

Tips:

When cooking Tuwo Shinkafa, it's important to add the rice flour gradually and stir continuously to ensure a lump-free texture.

The porridge should be cooked at a low heat to allow the flour to fully hydrate and reach the desired thickness. If the mixture becomes too thick, you can add a bit of hot water to thin it out.

Tuwo Shinkafa is best enjoyed freshly made, but it can also be reheated if needed.

Advertisement

Cooking Steps

recipe preparation instructions

First, you'll want to soak the rice in water overnight.

Drain it well, then grind the soaked rice into a smooth batter.

Next, heat and stir the ground rice until it thickens into a soft, doughy consistency.

Step 1. Soak Rice in Water Overnight

overnight rice soaking process

The overnight rice-soaking process is a crucial initial step in crafting the beloved Tuwo Shinkafa.

You'll want to start by rinsing the rice thoroughly, removing any impurities. Then, transfer the rice to a large bowl and cover it completely with clean water. Let it soak overnight, or for at least 8 hours. This step softens the grains, making them easier to grind into a smooth, lump-free batter.

In the morning, you'll notice the rice has absorbed the water, swelling to a plump, fluffy texture.

Drain the soaked rice, discarding the water. Now, you're ready to move on to the next step – grinding the rice into a fine paste. This ensures your Tuwo Shinkafa will have that signature silky-smooth consistency that Northern Nigerians adore.

Advertisement

Get ready to savor the delicious flavors and comforting aromas of this beloved traditional dish!

Step 2. Drain and Grind the Soaked Rice

drain and grind rice

After draining the soaked rice, you're ready to grind it into a fine paste. This step is crucial for achieving the smooth, creamy texture that makes Tuwo Shinkafa so special.

Grab your mortar and pestle or a high-powered blender, and get to work!

Start by pouring the drained rice into the mortar or blender. Slowly add small amounts of water, just enough to help the rice break down into a smooth, lump-free consistency.

Be patient and take your time – the goal is to create a silky-smooth puree, without any gritty bits.

Once the rice is fully ground, the mixture should have a thick, pudding-like texture.

Advertisement

Taste it and add a pinch of salt if desired, to enhance the flavors.

Now, you're ready to move on to the next step of the Tuwo Shinkafa preparation process!

Step 3. Heat and Stir the Ground Rice

heat and stir rice

Next, place the ground rice puree into a heavy-bottomed pot and set it over medium heat. As the pot heats up, start stirring the rice continuously with a wooden spoon.

You'll want to keep a close eye on it, as the rice can thicken up quickly.

Stir, stir, stir! The rice should start to come together into a smooth, velvety mound. Don't be afraid to put some elbow grease into it – the more you stir, the better the texture will be.

As the rice cooks, you'll notice it becoming thicker and more cohesive.

Advertisement

Keep stirring until the rice has reached your desired consistency, about 10-15 minutes. It should have a soft, porridge-like texture that's perfect for scooping and serving.

Taste it occasionally to check the doneness. Once it's ready, remove the pot from the heat and get ready to enjoy this northern Nigerian delicacy!

Step 4. Shape Into Balls

form into round shapes

With the tuwo shinkafa now at the desired consistency, you can begin shaping it into balls. Grab a palm-sized portion of the steaming hot dough and gently roll it between your palms, forming a smooth, round ball. Be careful not to squeeze too hard, as the delicate texture can easily be disrupted.

As you work, envision the joyful faces of your family and friends eagerly awaiting these tasty tuwo shinkafa balls. Imagine their delight as you present the platter, each sphere a perfect golden-brown. The anticipation will be palpable, their mouths watering in anticipation of sinking their teeth into the soft, fluffy interior.

Continue shaping the tuwo shinkafa, creating a uniform batch that will ensure every bite is as satisfying as the last. With each ball you form, let your excitement build, knowing that you're about to share a beloved Northern Nigerian tradition with those you love.

Step 5. Serve Warm With Stew or Soup

serve warm with stew

Serve the freshly shaped tuwo shinkafa balls warm alongside your preferred stew or soup. This classic pairing is a beloved tradition in Northern Nigeria, bringing families and communities together.

The soft, fluffy texture of the tuwo shinkafa complements the rich, flavorful stew or hearty soup perfectly. Ladle the hot stew or soup over the tuwo shinkafa balls, allowing the flavors to mingle. The combination of the comforting warmth and the delightful aromas will tantalize your senses.

Advertisement

Encourage everyone to dig in and enjoy the satisfying meal. For a festive gathering, arrange the tuwo shinkafa balls on a platter and surround them with various stew or soup options. This allows your guests to customize their dish to their liking.

Encourage them to experiment and discover their favorite pairings. Whether it's a weeknight dinner or a special occasion, serving tuwo shinkafa with stew or soup is a delightful way to savor the rich culinary heritage of Northern Nigeria.

Final Thoughts

concluding remarks and insights

Tuwo shinkafa has long been a staple in Northern Nigeria, cherished for its comforting texture and rich flavor. As you savor this delectable dish, you can't help but feel a sense of nostalgia and connection to the vibrant culture that birthed it.

Whether enjoyed at a family gathering or a community celebration, tuwo shinkafa has the power to bring people together, sharing in the warmth and joy that radiates from every bite.

Beyond its gastronomic delights, this staple holds a deeper significance. It represents the resilience and ingenuity of the Northern Nigerian people, who've thoughtfully crafted and perfected this recipe over generations.

Each step, from the careful selection of ingredients to the meticulous preparation, is imbued with tradition and a deep appreciation for the land that nourishes them.

Advertisement

As you bid farewell to this culinary journey, remember that tuwo shinkafa is more than just a dish – it's a testament to the rich tapestry of Northern Nigerian heritage, a flavor that will linger long after the last morsel has been savored.

Frequently Asked Questions

What Is the Nutritional Value of Tuwo Shinkafa?

Tuwo shinkafa is a nutritious dish packed with carbohydrates, providing sustained energy. It's also a good source of fiber, which supports digestive health. Don't forget the essential vitamins and minerals it contains, making it a well-rounded meal option.

How Long Can Tuwo Shinkafa Be Stored?

You can store tuwo shinkafa for up to 3 days in the fridge. However, it's best consumed fresh as it'll start to dry out and lose its soft, fluffy texture over time. Enjoy it at its prime!

What Are the Traditional Serving Accompaniments for Tuwo Shinkafa?

Traditionally, tuwo shinkafa is often served with various savory stews or soups, like miyan kuka or miyan taushe. You can also enjoy it with grilled or fried fish, meat, or vegetables for a complete and flavorful meal.

Are There Any Vegetarian or Gluten-Free Variations of Tuwo Shinkafa?

Yes, there are vegetarian and gluten-free variations of tuwo shinkafa. You can make it with alternative flours, like millet or sorghum, and serve it with vegetable stews or soups instead of the traditional meat-based accompaniments.

Advertisement

Does Tuwo Shinkafa Have Any Cultural Significance in Northern Nigeria?

Tuwo shinkafa holds deep cultural significance in Northern Nigeria. It's a staple dish that's often served at important events, reflecting the region's heritage and traditions. Its preparation and consumption are woven into the fabric of Northern Nigerian culture.

Continue Reading

Ethiopian Cuisine

Ethiopian Delight: Discovering the Flavors of Quanta Firfir

Behold the captivating dance of flavors in Quanta Firfir, an Ethiopian staple that has enchanted palates for centuries. Delve deeper to unravel its rich cultural heritage and culinary delights.

Published

on

ethiopian quanta firfir flavors

Unravel the captivating flavors of Quanta Firfir, a beloved Ethiopian staple that's been delighting taste buds for centuries! This vibrant dish combines tender beef or lamb with the aromatic punch of berbere spice and fragrant niter kibbeh. Tear into fluffy injera to scoop up the zesty sauce, savoring the comforting warmth and cultural heritage with every bite. Quanta Firfir is a true culinary delight, reflecting Ethiopia's rich culinary tradition and the importance of shared meals. Discover more about this delectable dish and the intriguing world of Ethiopian cuisine.

Key Takeaways

  • Quanta Firfir is a traditional Ethiopian dish that showcases the country's rich culinary heritage and cultural identity through its spice blends and communal dining experience.
  • The dish combines injera, a staple flatbread, with a flavorful sauce made from meat, berbere spice, and niter kibbeh, reflecting the ingenuity of Ethiopian cooks.
  • Quanta Firfir offers a harmonious blend of tangy, spicy, and earthy flavors, inviting exploration of the diverse and vibrant cuisine of Ethiopia.
  • Sharing meals and using injera to scoop up the food are central to Ethiopian dining culture, fostering connection and strengthening relationships among family and friends.
  • Discovering Quanta Firfir can serve as an introduction to the broader culinary landscape of Ethiopia, encouraging culinary curiosity and a deeper appreciation for its rich cultural heritage.

History

historical events and narratives

Originating from the ancient Ethiopian tradition, quanta firfir's history can be traced back to the country's gastronomic roots. This beloved dish has been a staple in Ethiopian cuisine for centuries, passed down through generations and celebrated as a symbol of cultural identity.

The term "quanta firfir" refers to the technique of tearing injera, the spongy, sourdough flatbread, into bite-sized pieces and mixing it with a spicy, flavorful sauce. This method not only adds texture and depth to the dish but also allows the flavors to mingle and infuse the injera, creating a harmonious culinary experience.

The signature spices that define quanta firfir, such as berbere and niter kibbeh, are carefully blended to strike the perfect balance of heat, aromatics, and richness.

These spice mixes have been perfected over time, reflecting the ingenuity and culinary artistry of Ethiopian cooks.

Recipe

culinary instructions for preparation

Quanta Firfir is a beloved traditional Ethiopian dish that combines the vibrant flavors of berbere spice, niter kibbeh (seasoned clarified butter), and injera (spongy flatbread). This dish is a staple in many Ethiopian households and is often enjoyed as a comforting, flavorful meal.

The key to a delicious Quanta Firfir lies in the careful preparation of the berbere spice blend and the niter kibbeh. Berbere is a complex seasoning that lends a warm, earthy, and slightly spicy character to the dish, while the niter kibbeh adds a rich, aromatic depth.

Advertisement
  • 1 lb (450g) beef or lamb, cut into bite-sized pieces
  • 1 onion, diced
  • 3 cloves garlic, minced
  • 2 tablespoons berbere spice blend
  • 2 tablespoons niter kibbeh (or clarified butter)
  • 1 cup (240ml) beef or chicken stock
  • Salt and pepper to taste
  • Injera, for serving

In a large skillet or heavy-bottomed pot, heat the niter kibbeh over medium-high heat. Add the diced onion and sauté until translucent, about 5-7 minutes.

Add the minced garlic and cook for an additional 1-2 minutes, until fragrant. Stir in the berbere spice blend and the cubed meat, and sauté for 5-7 minutes, or until the meat is lightly browned.

Pour in the stock and season with salt and pepper to taste. Bring the mixture to a boil, then reduce the heat to low, cover, and simmer for 30-40 minutes, or until the meat is tender and the flavors have melded together. Adjust seasoning as needed.

Serve the Quanta Firfir hot, accompanied by fresh injera. The spongy texture of the injera pairs beautifully with the rich and flavorful Quanta Firfir. Enjoy this authentic Ethiopian delight!

Cooking Steps

step by step cooking process

First, you'll want to soak the dried anchovies overnight to soften them up.

Then, sauté the onions in a pan until they're nice and translucent.

Once that's done, add in the chopped garlic and ginger for an extra burst of flavor.

Advertisement

Step 1. Soak Dried Anchovies Overnight

soak dried anchovies overnight

Soak the dried anchovies in water overnight. This helps soften them up and brings out their delightful, savory flavors.

Just place the anchovies in a bowl, cover them with water, and let them soak until morning. The anchovies will plump up and become nice and tender, ready to add to your Quanta Firfir.

Once the anchovies have soaked, drain them and give them a quick rinse. This removes any excess saltiness.

Then, you're all set to chop them up and toss them into your Quanta Firfir. The anchovies will add a tasty umami punch that complements the other flavorful ingredients perfectly.

Get ready for an explosion of Ethiopian delight in every bite!

Step 2. Sauté Onions Until Translucent

saut onions until translucent

Next, sauté the onions until they become translucent. This step is crucial for building the foundation of flavor in your quanta firfir.

Grab your trusty skillet and heat it over medium heat. Add a drizzle of oil, just enough to coat the bottom. Once the oil is shimmering, toss in the chopped onions. Stir them around, making sure they're in an even layer.

Advertisement

Now, be patient and let them cook, stirring occasionally, until they turn soft and transparent. This should take about 5-7 minutes. Keep a close eye, as you don't want the onions to burn. They should gently sizzle and release their sweet aroma.

Once they reach that perfect translucent stage, you're ready to move on to the next step in your Ethiopian culinary adventure. Get excited, because the flavors are about to intensify!

Step 3. Add Chopped Garlic and Ginger

add garlic and ginger

With the onions now softened and translucent, it's time to ramp up the aromatics. Grab a few cloves of fresh garlic and give them a good chop. The sharp, pungent aroma will instantly fill your kitchen, awakening your senses and setting the stage for the bold flavors to come.

Next, grab a knob of ginger and slice it into thin matchsticks. The warm, slightly spicy notes of the ginger will complement the garlic perfectly, adding depth and complexity to the dish. Be generous with the ginger – you want to make sure its flavor shines through!

Once the garlic and ginger are prepped, toss them into the pan with the sautéed onions. Stir everything together, allowing the flavors to meld and the aromas to intensify. The sizzling sound and enticing scents will have your mouth watering in anticipation.

Get ready for the next step in this flavorful Ethiopian adventure!

Advertisement

Step 4. Add Spices and Simmers

add spices simmer mixture

With the aromatic garlic and ginger now sizzling in the pan, it's time to introduce the spices that will truly elevate this Ethiopian dish. First, add a generous pinch of cumin, its earthy aroma mingling with the fragrant garlic.

Next, sprinkle in some paprika, which will lend a warm, smoky flavor. Don't forget the turmeric – its vibrant golden hue will transform the dish into a vibrant medley of colors. For an added health boost, consider incorporating nutritional benefits like chia seeds, which are high in fiber and omega-3 fatty acids.

Now, it's time to let the flavors mingle. Reduce the heat to low and let the mixture simmer gently, allowing the spices to infuse the firfir with their bold and tantalizing essence.

Stir occasionally, ensuring every morsel is coated in the harmonious blend of spices. As the minutes tick by, the kitchen will be filled with the most inviting aroma, making your mouth water in anticipation.

With just a few simple steps, you're well on your way to creating an authentic and delightful Ethiopian delight.

Step 5. Add Lemon Juice and Serve

add lemon juice serve

After the spices have simmered and infused the firfir with their robust flavors, it's time to add the final touch – a bright and tangy burst of lemon juice.

Simply squeeze a generous amount of fresh lemon over the steaming firfir, allowing the tart and citrusy notes to dance with the earthy spices. Stir everything together, ensuring the lemon juice is evenly distributed.

Advertisement

The lemon juice not only brightens the dish but also helps balance the richness of the butter and spices. It adds a refreshing zing that'll make your taste buds tingle with delight.

Serve the Quanta Firfir hot, garnished with a sprinkle of chopped parsley or cilantro for a vibrant pop of color.

The combination of the firfir's comforting warmth and the lemon's zesty punch creates a truly irresistible dish that'll transport you straight to the heart of Ethiopia. Enjoy every flavorful bite!

Final Thoughts

concluding reflections and insights

As you savor the last bites of this Ethiopian delight, Quanta Firfir, let the flavors linger on your palate. The tangy, spicy blend of injera, vegetables, and seasoned meat creates a symphony of tastes that dance on your tongue. The aroma of the berbere spice mix, with its earthy notes and subtle heat, will have you craving more.

Quanta Firfir is a true celebration of Ethiopian cuisine. Vibrant colors, bold flavors, and a sense of community come together in this dish.

Whether shared with family or friends, it's a meal that brings people together and fosters connection.

Advertisement

As you reflect on your experience, remember the joy of discovering new culinary horizons. Ethiopian food is a delightful adventure, and Quanta Firfir is just the beginning.

Embrace the flavors, explore the culture, and let your taste buds be your guide on this delicious journey.

Frequently Asked Questions

What Is the Origin of the Name "Quanta Firfir"?

You wonder about the origin of the name "quanta firfir." It's likely a local Ethiopian term, combining the word "quanta" which refers to a type of injera, and "firfir" which describes the shredded, spicy preparation of the dish.

How Long Can Quanta Firfir Be Stored For?

Quanta firfir can be stored for up to a week when refrigerated in an airtight container. The spices and herbs used in its preparation help preserve its fresh flavors, allowing you to enjoy this delightful dish for several days.

Is Quanta Firfir Suitable for Vegetarians or Vegans?

Quanta firfir is suitable for vegetarians and vegans, as it's a plant-based dish made from shredded kale or other leafy greens. You can enjoy this flavorful Ethiopian staple without any animal-derived ingredients.

Advertisement

Can Quanta Firfir Be Served as a Standalone Dish?

Yes, quanta firfir can certainly be served as a standalone dish. It's a flavorful and nutrient-dense option that can make for a satisfying meal on its own, without the need for additional accompaniments.

Are There Any Variations or Regional Differences in Quanta Firfir?

Yes, there are regional variations in quanta firfir. Different parts of Ethiopia may use distinct spice blends, ingredients, or cooking methods that lend unique flavors and textures to this traditional dish.

Continue Reading

Affiliate Disclaimer
As an affiliate, we may earn a commission from qualifying purchases. We get commissions for purchases made through links on this website from Amazon and other third parties.

Advertisement

Vetted

top local car washes top local car washes
Vetted2 months ago

14 Best Car Washes Near You for a Sparkling Clean Ride

I discovered the 14 best car washes near you that promise a sparkling clean ride, and you won't want to...

top mops for 2024 top mops for 2024
Vetted2 months ago

The 15 Best Mops of 2025 – Your Ultimate Guide to a Spotless Home

Find the perfect mop for your cleaning needs in 2025, and discover how these top choices can revolutionize your home...

top women s fragrances 2024 top women s fragrances 2024
Vetted2 months ago

15 Best Perfumes for Women in 2025 – A Fragrance Guide You Can’t Miss

Keen to discover the top 15 perfumes for women in 2025? Uncover unique scents that will elevate your fragrance game!

top local bars guide top local bars guide
Vetted2 months ago

14 Best Bars Near You for an Unforgettable Night Out

Looking for the perfect bar to elevate your night out? Discover the 14 best spots that promise unforgettable experiences!

luxurious beard oil selection luxurious beard oil selection
Vetted2 months ago

15 Best Beard Oils for a Luxurious Grooming Experience in 2025

Shop the 15 best beard oils for a luxurious grooming experience in 2025 and discover which ones will elevate your...

top college laptops 2024 top college laptops 2024
Vetted2 months ago

15 Best College Laptops of 2025: The Ultimate Guide for Students

With our guide to the 15 best college laptops of 2025, discover which powerful models will elevate your academic experience...

waterproof mascaras for tears waterproof mascaras for tears
Vetted2 months ago

15 Best Waterproof Mascaras That Will Survive Any Tear-Jerker

Outstanding waterproof mascaras await to keep your lashes flawless through any emotional moment; discover which ones made the top 15...

top flavorful disposable vapes top flavorful disposable vapes
Vetted2 months ago

15 Best Disposable Vapes of 2025: Top Picks for Flavor and Convenience

Prepare to discover the 15 best disposable vapes of 2025 that blend exceptional flavor and convenience, but which ones truly...

refreshing lunch salad ideas refreshing lunch salad ideas
Vetted2 months ago

15 Best Salads Near You That Will Freshen Up Your Lunch Routine

Transform your lunch with the 15 best salads nearby that will tantalize your taste buds and leave you craving more...

top convertible car seats top convertible car seats
Vetted2 months ago

15 Best Convertible Car Seats of 2025 – Safety and Comfort for Your Little One

Get ready to discover the top 15 convertible car seats of 2025 that blend safety and comfort—find out which models...

delicious fast food breakfast delicious fast food breakfast
Vetted2 months ago

15 Best Fast Food Breakfast Options That Will Make Your Mornings Delicious

Uncover the 15 best fast food breakfast options that will transform your mornings into a delicious experience you won't want...

stylish contacts for vision stylish contacts for vision
Vetted2 months ago

14 Best America’s Contacts for Clear Vision and Style

Browse through the 14 best contact lenses in America for clear vision and style, and discover which one perfectly complements...

Trending