Ethiopian Cuisine
Ethiopian Kale Recipe: A Nutritious Side Dish Full of Flavor
Prepare a vibrant Ethiopian kale dish that’s bursting with flavor and nutrition; discover the secret ingredients that elevate this simple recipe to new heights!
You're gonna love making Ethiopian kale, or "gomen"! Start by washing and chopping fresh kale into bite-sized pieces. Sauté chopped onions in olive oil until they're soft, then add minced garlic and your favorite spices like cumin and turmeric for a flavorful punch. Stir in the kale until it wilts, then cover it and steam for a few minutes. This nutritious dish is packed with vitamins and pairs perfectly with rice or lentils. It's not just healthy, but also a wonderful way to bring family and friends together! Ready to explore more delicious ways to enjoy this vibrant dish?
Key Takeaways
- Ethiopian kale, or "gomen," is rich in vitamins A, C, and K, making it a highly nutritious side dish.
- The recipe emphasizes sautéing and steaming, preserving kale's flavor and nutrients while achieving tender texture.
- Key ingredients include fresh kale, onions, garlic, and spices like cumin and turmeric for enhanced flavor.
- This dish pairs well with grains like injera or rice and proteins such as lentils or chicken.
- Sharing this recipe fosters community connections and celebrates the rich culinary traditions of Ethiopia.
History
When you explore the history of Ethiopian kale, you'll discover that this leafy green has been a staple in Ethiopian cuisine for centuries. Known as "gomen," it's not just a vegetable; it's a part of family gatherings and celebrations. People in Ethiopia have been enjoying gomen for generations, making it a beloved dish that connects them to their roots.
Ethiopian kale grows well in the highlands of the country, where the cool climate helps it flourish. Farmers have cultivated it for its nutritional value, rich flavor, and versatility. It's packed with vitamins and minerals, making it a healthy choice for everyone.
Traditionally, it's often cooked with spices, garlic, and onions, bringing out its natural taste and making it a delicious side dish.
As you delve deeper into its history, you'll find that gomen is more than just food; it represents community and togetherness. Families often gather around a big plate of injera topped with gomen, sharing stories and laughter.
Cooking Steps
To make a delicious Ethiopian kale dish, start by preparing your ingredients. Gather fresh kale, a chopped onion, minced garlic, and some spices like turmeric and cumin. You'll also need a bit of olive oil for cooking.
Now, heat the olive oil in a large skillet over medium heat. Add the chopped onion and sauté it for about five minutes, or until it turns soft and golden.
Then, toss in the minced garlic, stirring for another minute. The aroma will be amazing!
Next, add the kale to the skillet. Stir it well, and let it cook down for about five to seven minutes.
As the kale wilts, sprinkle in the turmeric and cumin. These spices will give your dish that yummy Ethiopian flavor.
Keep stirring until the kale is tender and bright green.
Step 1. Wash and Chop Kale
Before you dive into cooking, you'll want to thoroughly wash and chop the kale. Start by rinsing the kale under cold water to remove any dirt or tiny bugs. Gently rub the leaves with your hands to make sure they're nice and clean.
Once you're done washing, shake off the excess water. You can also use a salad spinner if you have one, which makes drying the kale super easy!
Now, it's time to chop! Lay the kale leaves flat on a cutting board. Grab a sharp knife and remove the tough stems by cutting along each side. Don't worry if you're not perfect; just try to keep the leaves intact.
After removing the stems, stack a few leaves together, and slice them into bite-sized pieces. Aim for pieces about one to two inches long—this makes them easier to cook and eat.
Once you've chopped all the kale, look at that beautiful green pile! You're one step closer to creating a delicious Ethiopian dish. Isn't it exciting?
With your kale all prepped, you're ready to move on to the next cooking steps!
Step 2. Sauté Onions Until Translucent
Start by heating a tablespoon of oil in a large skillet over medium heat. As the oil warms, take a moment to enjoy the sizzle you'll soon hear.
Next, slice one medium onion into thin rings or half-moons. Once the oil is hot, carefully add the onions to the skillet. You'll want to stir them gently, making sure they get coated in the oil.
Cook the onions for about five to seven minutes, stirring occasionally. Keep an eye on them, as they'll start to soften and change color. You're looking for that lovely, translucent look, which means they're perfectly cooked! If the heat feels too high, don't hesitate to lower it a bit. We want those onions to become sweet and flavorful, not burnt.
As the onions sauté, they'll fill your kitchen with a warm, inviting aroma. It's a sign that you're on the right track!
Once the onions are translucent, you're ready to move on to the next step. This is just the beginning of creating a delicious Ethiopian kale dish that everyone will love! Enjoy the process—it's all part of the fun!
Step 3. Add Garlic and Spices
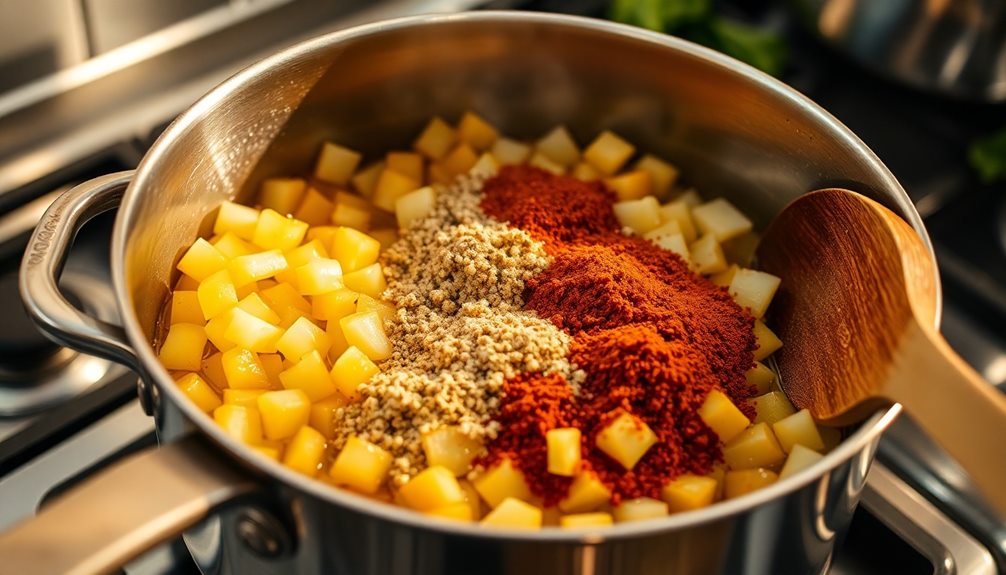
With the onions now perfectly translucent, it's time to elevate the flavor by adding garlic and spices. Grab some minced garlic—about three cloves should do the trick. When you toss it into the pan, you'll notice the delightful aroma filling your kitchen. Stir the garlic around for about a minute, just until it turns golden. Be careful not to let it burn!
Chia seeds, which are high in omega-3 fatty acids and rich in dietary fiber, are a fantastic addition to your meals for enhancing digestive health.
Now, let's spice things up! You can't go wrong with a teaspoon of ground cumin and a half teaspoon of turmeric. These spices are like a warm hug for your taste buds! Sprinkle them in, and stir everything together. The colors will become vibrant, and the smell will make your mouth water.
If you want a little kick, consider adding a pinch of cayenne pepper. Just a little bit goes a long way! Stir everything well, letting the spices coat the onions and garlic. This step is super important because it brings out all those wonderful flavors.
Once you're happy with the aroma, you're ready for the next step! Your dish is already smelling amazing, and it's only going to get better from here!
Step 4. Add Kale and Stir Well
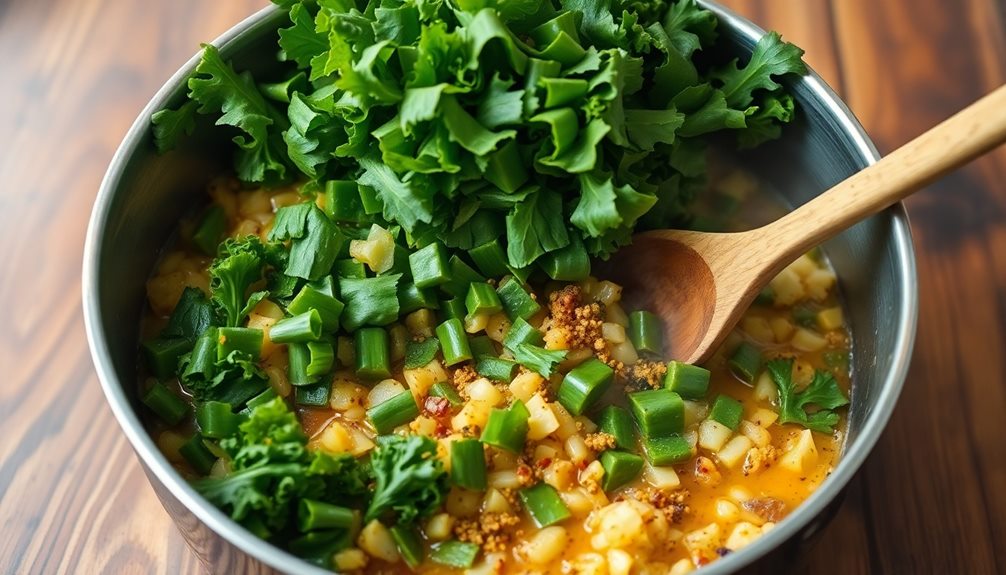
Now that the spices have melded beautifully with the garlic and onions, it's time to introduce the kale. Grab a bunch of fresh, vibrant kale and wash it thoroughly. Once it's clean, tear the leaves into bite-sized pieces. This will make it easier to eat later.
Add the kale to your pan, and watch it transform as it mixes with the delightful flavors already cooking.
Stir well! You want each piece of kale to get coated in that spicy, garlicky goodness. As you stir, the kale will start to wilt and become tender. This is where the magic happens! The bright green leaves will soak up all those delicious flavors, making each bite a treat.
Keep stirring for a few minutes, and don't forget to scrape the bottom of the pan so nothing burns.
You might notice that the kale shrinks a bit, and that's just fine. It'll still pack a nutritious punch! Once the kale is bright and tender, you'll be ready for the next step in this exciting recipe.
Just think about how tasty this dish is going to be—your taste buds are in for a real treat!
Step 5. Cover and Steam Kale
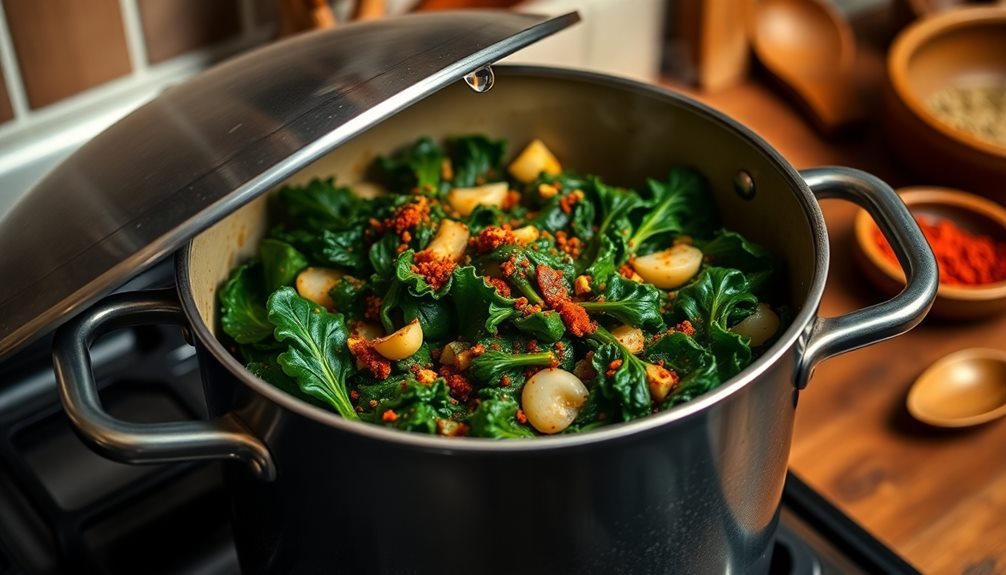
Covering the kale is essential for the steaming process, which locks in moisture and enhances the flavors. Once you've added the kale to your pot, grab a lid and put it on top. This helps create a mini sauna for your kale, allowing it to cook just right!
Turn the heat to medium-low and let it steam for about 5 to 7 minutes. You'll notice the vibrant green color deepening, and that's a sign it's getting tender and delicious. During this time, try not to peek too often; letting steam escape can make it take longer to cook.
When the timer goes off, carefully remove the lid—watch out for steam! Give the kale a gentle stir to mix in all those lovely flavors. You can even taste it to see if it's to your liking. If you want it a bit softer, cover and steam for a couple more minutes.
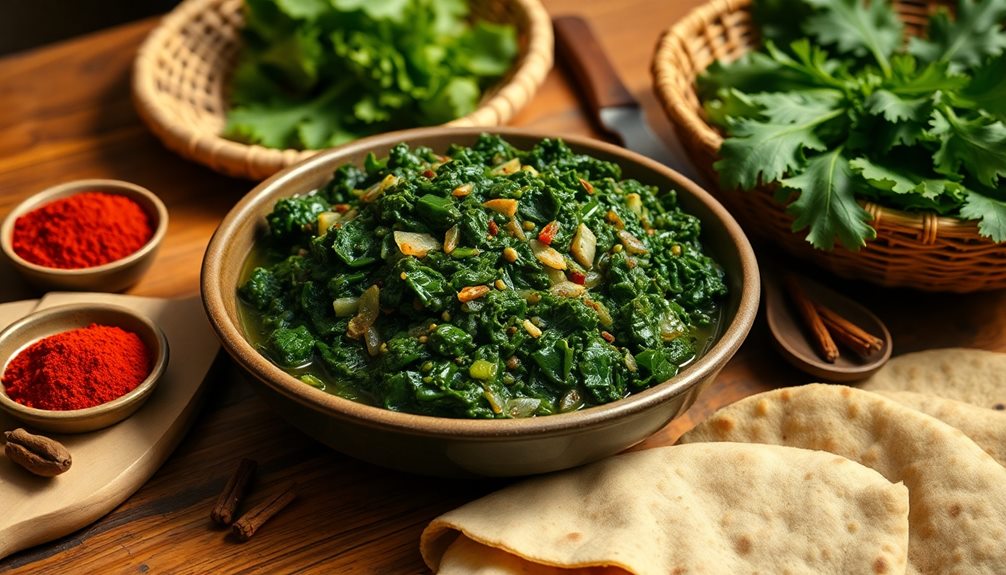
Once you're happy with the texture, it's ready to serve. This Ethiopian kale dish is full of goodness and pairs well with many meals. Enjoy every bite of your tasty creation!
Final Thoughts
As you reflect on this Ethiopian kale recipe, you'll find that it's not just a delicious dish but also a celebration of vibrant flavors and healthy eating.
You've learned how to make tender, flavorful kale that's packed with nutrients. This dish is perfect for sharing with family and friends, showing off the rich culture of Ethiopian cuisine.
By adding spices like garlic and ginger, you've transformed simple kale into a dish that dances on your taste buds. It's amazing how a few ingredients can come together to create something so special!
You can feel proud knowing that you're serving something not only tasty but also good for you.
Next time you prepare this dish, consider pairing it with your favorite grains or proteins to make a complete meal.
Don't forget to share your experience with others—who knows, you might inspire someone else to try cooking Ethiopian food!
Frequently Asked Questions
What Are the Health Benefits of Ethiopian Kale?
Ethiopian kale's packed with vitamins A, C, and K, boosting your immune system and promoting healthy skin. It also offers fiber, aiding digestion, and antioxidants, which help protect your cells from damage. Enjoy its numerous benefits!
Can I Use Other Greens Instead of Kale?
Absolutely, you can use other greens instead of kale! Spinach, Swiss chard, or collard greens work great. Just adjust the cooking time and seasonings to suit the greens you choose for a delicious result.
How Do I Store Leftover Ethiopian Kale?
To store leftover kale, cool it to room temperature, then transfer it to an airtight container. Refrigerate for up to five days. If you want to freeze it, use freezer bags for longer storage.
Is Ethiopian Kale Suitable for Vegan Diets?
Yes, Ethiopian kale's perfect for vegan diets. It's packed with nutrients and flavor, making it a great choice. You'll enjoy its versatility in various dishes, ensuring you maintain a healthy, plant-based lifestyle effortlessly.
What Dishes Pair Well With Ethiopian Kale?
When you're pairing dishes, Ethiopian kale complements spicy lentil stew, injera, or roasted vegetables beautifully. You'll find its earthy flavor enhances the meal, making it a perfect addition to any Ethiopian-inspired spread.
Amara brings her deep knowledge of African cuisine to the table, with a focus on the rich and hearty flavors of Senegal. She loves to share slow-cooked dishes like thieboudienne (rice and fish), which reflect the warmth and hospitality of African cooking. Amara’s approach to food is all about creating comforting meals that nourish the soul.
Ethiopian Cuisine
Ethiopian Green Beans: A Flavorful Vegetable Side Dish
Get ready to elevate your meals with Ethiopian green beans, a vibrant side dish that will have you craving more flavor and culture!
Ethiopian green beans are a tasty and colorful side dish that can brighten up any meal! These beans are quick to cook and packed with vitamins. You just wash and trim them, then blanch in boiling water. After that, sauté them with garlic and olive oil for a yummy flavor. Add some fresh lemon juice and zest for a zesty kick, and season with salt and pepper to taste. They pair well with stews and grains, making your meal exciting and full of culture. Want to find out more about how to make this special dish?
Key Takeaways
- Ethiopian green beans are rich in vitamins A, C, and K, providing essential nutrients and promoting digestive health.
- Simple to prepare, they require minimal ingredients and can be cooked through steaming, sautéing, or stir-frying.
- Blanching enhances their vibrant color and crisp texture, making them visually appealing on the plate.
- They complement various main dishes, adding a unique flavor and encouraging the exploration of Ethiopian cuisine.
- The dish is perfect for gatherings, showcasing culinary skills while fostering community and sharing culture through food.
History
The history of Ethiopian green beans is rich and intertwined with the country's agricultural practices and culture. These vibrant green veggies have been grown in Ethiopia for centuries, thriving in the highlands' fertile soil. You might be surprised to learn that green beans aren't just a common vegetable; they hold a special place in Ethiopian meals and traditions.
Farmers in Ethiopia have perfected the art of growing these beans, using methods passed down through generations. They've cultivated many varieties, each bringing unique flavors and textures to the table.
When you visit Ethiopia, you'll find green beans served in delicious ways, often prepared alongside spices and other scrumptious ingredients.
In Ethiopian culture, meals are a time for families to gather, share stories, and enjoy each other's company. Green beans are usually part of these special gatherings, bringing a splash of color and nutrition to the feast.
Cooking Steps
Cooking Ethiopian green beans involves a few simple yet essential steps that bring out their vibrant flavors. First, gather your ingredients! You'll need fresh green beans, garlic, onion, and spices like cumin and paprika.
Wash and trim the green beans, cutting off the ends. This makes them look nice and neat! Butter can also be a delightful addition to enhance the flavor of your dish, offering a rich and creamy texture that complements the spices well. This dairy product is known for its ability to add moisture and depth to various recipes, including vegetable dishes like this one butter adds flavor.
Next, heat some olive oil in a large pan over medium heat. Once it's hot, toss in the chopped onion and sauté until it's soft and golden.
Then, add minced garlic and stir for about a minute—this will make your kitchen smell amazing!
Now it's time to add the green beans. Stir them around in the pan, coating them with the oil and mixing in the onion and garlic.
Sprinkle in your spices, and let them cook for about 5 to 7 minutes. You want them tender but still a bit crisp—perfect for that delicious crunch!
Step 1. Wash and Trim Beans
Start by rinsing the green beans under cool running water to remove any dirt or debris. This step is super important because you want your beans to be clean and ready to cook!
Once they're rinsed, grab a cutting board and a sharp knife.
Now, let's trim those beans! Hold a green bean in one hand and use the knife to cut off the little stem end. You can also snap it off with your fingers if you prefer. Make sure to trim about an inch from the other end, too. This way, your beans will look neat and tidy.
Repeat this process for all the beans until they're all trimmed. It might take a little time, but it's worth it for that fresh taste! Plus, you can enjoy the colorful sight of the beans as you work.
Don't forget to keep an eye on your workspace, making sure everything stays clean.
Once you've finished washing and trimming, you're one step closer to enjoying tasty Ethiopian green beans. Get ready for the next steps in cooking them!
Step 2. Blanch in Boiling Water
Now that your green beans are clean and trimmed, it's time to blanch them in boiling water. This step is super important because it helps keep your green beans bright and crunchy!
First, fill a large pot with water and bring it to a rolling boil. You'll want to add some salt to the water, too, as it adds flavor.
Once the water is boiling, carefully drop in your green beans. Make sure they're fully submerged. Let them cook for about three to five minutes. You'll know they're ready when they turn a vibrant green color. But watch closely; you don't want them to get mushy!
When the time is up, grab a slotted spoon or use a strainer to remove the beans from the hot water. Immediately transfer them to a bowl filled with ice water. This process, called shocking, stops the cooking and helps keep that beautiful color.
Let them sit in the ice water for a few minutes, then drain them well. Your green beans are now perfectly blanched and ready for the next delicious step! Enjoy the fun of cooking!
Step 3. Sauté With Garlic and Olive Oil
Sautéing your blanched green beans with garlic and olive oil brings out their natural flavors and adds a delightful aroma to your dish.
To start, grab a large skillet and heat a couple of tablespoons of olive oil over medium heat. Once the oil is shimmering, it's time to add minced garlic! The smell will make your mouth water.
Next, toss in your blanched green beans. Stir them around gently, making sure they're coated in the garlicky goodness. You'll want to sauté them for about 5 to 7 minutes. This is when the magic happens! The green beans will become tender yet still have a nice crunch. Keep an eye on them, so they don't get too soft.
Don't forget to season with a pinch of salt and pepper! This little step makes a big difference in flavor.
As you cook, the garlic will turn golden and crispy, adding a lovely texture. When they're done, take them off the heat and get ready to enjoy.
These sautéed green beans aren't just a side dish; they're a burst of flavor that'll brighten any meal! Enjoy your delicious creation!
Step 4. Add Lemon Juice and Zest
Adding lemon juice and zest elevates your sautéed green beans to a whole new level of freshness.
Once your green beans are beautifully sautéed with garlic and olive oil, it's time to add that zesty punch. Grab a fresh lemon, and roll it on the counter for a few seconds. This helps release the juice! Next, cut the lemon in half and squeeze the juice over your green beans. You'll want to catch any seeds that might fall in, so be careful.
Now, for the zest! Using a grater or a zester, gently scrape the yellow outer layer of the lemon. Just a little bit goes a long way, so don't overdo it. The zest adds a bright flavor and wonderful aroma that'll make your dish even more exciting.
Stir everything together gently, making sure the lemon juice and zest coat the green beans evenly.
Take a moment to admire your creation! The vibrant green beans with the sparkling lemon juice and zest look absolutely delicious. This simple step not only enhances the flavor but also adds a lovely brightness to your dish.
Enjoy the refreshing taste of your Ethiopian green beans!
Step 5. Season With Salt and Pepper
To enhance the flavor of your Ethiopian green beans, seasoning them with salt and pepper is essential. After you've added the lemon juice and zest, it's time to take your dish to the next level.
Grab your salt and pepper shakers and sprinkle a little bit of each over the beans. Start with a pinch of salt; you can always add more later if needed.
Mix the beans gently, coating them evenly with the salt and pepper. This step helps bring out the delicious flavors in the beans and ties everything together.
Remember, too much salt can overpower your dish, so it's better to start small. Taste the beans after mixing, and if they need more flavor, feel free to season them again.
Don't forget, the pepper adds a nice kick, but again, just a dash will do! You want the seasoning to enhance the natural taste of the beans, not mask it.
Once you're happy with the flavor, your Ethiopian green beans are almost ready to serve. Get excited; you're about to enjoy a tasty side dish that's bursting with flavor!
Final Thoughts
Ultimately, Ethiopian green beans offer a unique and delightful twist to your culinary repertoire. When you try these vibrant beans, you're not just eating a vegetable; you're tasting a piece of Ethiopian culture. The spices and flavors create a beautiful harmony that will make your taste buds dance with joy.
Making Ethiopian green beans is easy and fun! You can enjoy them as a side dish or even as a main meal. Imagine serving them at your next family dinner or sharing them with friends at a gathering; everyone will be amazed by your cooking skills!
Plus, these beans are packed with nutrients, so you're not just treating your taste buds, but your body too.
If you haven't tried Ethiopian green beans yet, what're you waiting for? Grab some fresh beans, spices, and get cooking! You'll find that this dish isn't only delicious but also colorful and inviting.
It's a delightful way to explore new flavors and impress those around you. So, go ahead, add Ethiopian green beans to your meal plan, and enjoy the wonderful journey they bring to your table!
Frequently Asked Questions
What Are the Nutritional Benefits of Ethiopian Green Beans?
Ethiopian green beans offer numerous nutritional benefits. They're rich in vitamins A and C, fiber, and antioxidants, which support your immune system, improve digestion, and promote overall health. Eating them regularly can boost your well-being significantly.
Can I Substitute Ethiopian Green Beans With Other Vegetables?
Yes, you can substitute Ethiopian green beans with other vegetables like green bell peppers or snap peas. Just keep in mind that the flavors and textures will change, so adjust your seasoning accordingly for the best results.
Where Can I Buy Fresh Ethiopian Green Beans?
You can find fresh Ethiopian green beans at local farmers' markets, specialty grocery stores, or international markets. If you can't locate them nearby, consider checking online retailers that offer fresh produce delivery to your area.
Are Ethiopian Green Beans Suitable for Vegan Diets?
Yes, Ethiopian green beans are suitable for vegan diets. They're plant-based, nutritious, and packed with flavor. You can enjoy them as part of various dishes or as a stand-alone side, enhancing your meals effortlessly.
How Do I Store Leftover Ethiopian Green Beans?
To store leftover Ethiopian green beans, place them in an airtight container and refrigerate. They'll stay fresh for about three to five days. Reheat them gently in the microwave or on the stove before serving.
Amara brings her deep knowledge of African cuisine to the table, with a focus on the rich and hearty flavors of Senegal. She loves to share slow-cooked dishes like thieboudienne (rice and fish), which reflect the warmth and hospitality of African cooking. Amara’s approach to food is all about creating comforting meals that nourish the soul.
Ethiopian Cuisine
Azifa: Ethiopian Lentil Salad With a Zesty Twist
Hungry for a vibrant and refreshing lentil salad that’s been a beloved part of Ethiopian cuisine for generations? Discover the zesty delight of Azifa.
Azifa, the refreshing Ethiopian lentil salad, delivers a zesty twist that'll delight your taste buds. This vibrant dish has been a beloved part of Ethiopian cuisine for generations, showcasing the versatility and culinary traditions surrounding the humble lentil. First, you'll rinse the lentils thoroughly under cool running water to remove any dirt or debris. After a 30-minute soak, you'll drain and rinse the lentils again before cooking them until tender. Then, you'll combine the cooked lentils with a zesty dressing, fresh veggies, and herbs. Bursting with bold flavors, Azifa is a healthy and filling option – and if you keep reading, you'll discover even more delightful details about this tempting traditional dish.
Key Takeaways
- Azifa is a refreshing Ethiopian lentil salad featuring a zesty dressing made with olive oil, lemon juice, and Dijon mustard.
- Lentils are a dietary staple in Ethiopia and provide essential nutrients like protein and fiber in the Azifa dish.
- Preparation of Azifa involves cooking lentils until tender, then combining them with fresh vegetables like tomatoes and onions.
- The versatility of Azifa allows for customization with additional herbs or ingredients to suit personal preferences.
- Azifa is a healthy and filling meal option that showcases the diverse culinary traditions of Ethiopian cuisine.
History
Lentils have long been a dietary staple in Ethiopia, with their cultivation dating back thousands of years. These tiny, lens-shaped legumes have been a crucial part of the Ethiopian diet, providing essential nutrients and contributing to the rich culinary traditions of the region.
Over time, Ethiopians have developed unique ways of preparing lentils, infusing them with the vibrant flavors and spices that define their cuisine. One such dish is Azifa, a refreshing lentil salad that offers a zesty twist on the classic legume.
This dish showcases the versatility of lentils, as they're combined with a tangy dressing and a variety of fresh herbs and vegetables to create a harmonious blend of textures and flavors.
The history of Azifa is deeply intertwined with the cultural heritage of Ethiopia, reflecting the country's diverse culinary influences and the ingenuity of its people.
As you delve into the flavors of this remarkable dish, you'll uncover the rich tapestry of Ethiopian culinary history, one bite at a time.
Cooking Steps
Once you've gathered all the necessary ingredients, the next step is to thoroughly rinse the lentils under cool running water. This helps remove any dirt or debris.
After rinsing, add the lentils to a medium-sized pot and cover them with fresh water. Bring the pot to a boil over high heat, then reduce the heat and let the lentils simmer for 15-20 minutes, until they're tender but still firm.
Drain the cooked lentils and transfer them to a large mixing bowl. Add the diced onion, tomatoes, parsley, and the zesty lemon dressing.
Gently toss everything together until the lentils are evenly coated. Season with salt and pepper to taste. For best flavor, let the salad chill in the fridge for at least 30 minutes before serving. This allows the flavors to meld together.
When ready to serve, scoop the chilled lentil salad onto plates or bowls and enjoy its delightful, vibrant taste!
Step 1. Rinse Lentils Thoroughly Under Water
The first step in crafting this delectable Ethiopian lentil salad is to thoroughly rinse the lentils under running water.
You'll want to do this to remove any dirt, debris, or impurities that may have come along with the dried lentils.
Simply place the lentils in a fine-mesh strainer and hold it under cool, running water, gently stirring the lentils with your fingers.
Continue rinsing until the water runs clear, ensuring you've washed away any unwanted particles.
This step is crucial for ensuring your final salad has a clean, fresh flavor.
Once the lentils are rinsed, you're ready to move on to the next part of the recipe.
Get excited, because the zesty, aromatic flavors of this Ethiopian-inspired dish are about to come to life! Get excited, because the zesty, aromatic flavors of this Ethiopian-inspired dish are about to come to life! Infused with warm spices and bold, earthy undertones, each bite brings you closer to the heart of African cuisine. While it draws inspiration from Ethiopia’s rich culinary tapestry, it also shares a kinship with West Africa’s iconic rice dish, celebrating the diversity and depth of flavors across the continent.
Step 2. Soak Lentils for 30 Minutes
After rinsing the lentils, you'll want to soak them in water for about 30 minutes. This step is crucial for softening the lentils and making them easier to cook.
Simply place the rinsed lentils in a bowl and cover them with water. Let them sit and soak, giving the lentils time to absorb the liquid. This helps break down the tough outer shell, preparing them for the next steps in the recipe.
Once the 30 minutes are up, you can drain the lentils and they'll be ready to go. Soaking ensures the lentils cook evenly and develop a creamy, tender texture.
It's an important part of the process, so don't skip it! With the lentils soaked and drained, you can now move on to the next step in making this delicious Ethiopian-inspired salad.
Get ready for a zesty and flavorful dish that's sure to delight your taste buds.
Step 3. Drain and Rinse Soaked Lentils
Drain the soaked lentils through a fine-mesh sieve, discarding the soaking liquid. This important step helps remove any impurities and excess water, preparing the lentils for the next phase of the recipe.
Once the lentils are drained, give them a gentle rinse under cool running water. This quick rinse ensures the lentils are clean and ready to be seasoned and combined with the other salad ingredients.
After rinsing, you'll notice the lentils have a vibrant, earthy color. They should be soft but still retain a slight bite, perfect for the flavorful salad you're about to create.
Gently shake or tap the sieve to remove any excess water clinging to the lentils. Now they're ready to be tossed with the zesty dressing and fresh vegetables, transforming into a delightful and nutritious Ethiopian-inspired dish.
Step 4. Cook Lentils Until Tender
Once the lentils are drained and rinsed, you'll want to transfer them to a medium-sized saucepan. Add in just enough water to cover the lentils by about an inch.
Bring the pot to a boil over high heat, then reduce the heat to low and let the lentils simmer gently. It'll take around 15-20 minutes for the lentils to become nice and tender. Be sure to give them a stir every few minutes to prevent sticking.
You'll know the lentils are done when they've a soft, creamy texture. Drain any excess liquid, then transfer the cooked lentils to a large mixing bowl.
This is where the fun really begins! You can now start adding in all the tasty ingredients that will transform these humble lentils into an exciting Ethiopian-inspired salad.
Get ready to awaken your taste buds with a vibrant blend of flavors and textures. The next step is to add the remaining salad ingredients – let's dive in!
Step 5. Combine Lentils With Dressing
With your lentils now cooked to tender perfection, it's time to build the lively salad. In a large bowl, combine the warm lentils with the zesty dressing.
The dressing is a tantalizing blend of olive oil, lemon juice, and a touch of Dijon mustard – it'll give your salad a bold, tangy kick. Don't be afraid to get in there and toss the lentils and dressing together until everything is well-coated.
Next, stir in the diced tomatoes, red onion, and fresh parsley. The colors and flavors will start to mingle, creating a vibrant, appetizing dish.
Finally, season with a pinch of salt and pepper to taste. Give the salad a final gentle toss to marry all the ingredients.
And that's it! Your Ethiopian-inspired lentil salad is now ready to serve and share. The lentils provide heartiness, while the dressing, veggies, and herbs deliver a refreshing, zesty punch. Get ready for deliciousness with every bite.
Final Thoughts
This Ethiopian lentil salad makes a satisfying and nutritious meal. You'll be amazed by the vibrant flavors and textures in every bite. The zesty dressing perfectly complements the tender lentils, creating a truly delightful experience.
Preparing this dish is a breeze, and you can easily customize it to your liking. Feel free to add your favorite veggies or herbs for an extra burst of flavor.
The best part? It's a healthy and filling option that the whole family will enjoy.
Whether you're looking for a side dish or a main course, this Ethiopian lentil salad is sure to impress. It's a wonderful way to explore new cuisines and expand your culinary horizons.
Give it a try, and you'll be wondering why you didn't make it sooner. Get ready to savor the bold and satisfying taste of this remarkable dish.
Frequently Asked Questions
What Is the Origin of the Name "Azifa"?
The origin of the name "azifa" is rooted in Ethiopian culinary traditions. It's believed the term derives from the Amharic language, though its precise meaning and etymology remain somewhat ambiguous within the diverse cultural tapestry of the region.
How Can I Adjust the Spice Level of the Dish?
To adjust the spice level of the dish, you can start by using less of the spices and seasonings called for in the recipe. Add them in gradually, tasting as you go, until you reach your desired level of spiciness.
Can I Substitute Other Legumes for the Lentils?
Certainly, you can substitute other legumes for the lentils in this dish. Chickpeas, black beans, or even kidney beans would work well, providing a similar texture and nutritional profile. Feel free to experiment and find your preferred combination.
How Long Does Azifa Keep in the Refrigerator?
Azifa, the Ethiopian lentil salad, can be stored in the refrigerator for up to 3-5 days. The zesty flavors will remain fresh, and you can enjoy it as a side or a light meal throughout the week.
Is Azifa Suitable for Vegetarian or Vegan Diets?
Yes, azifa is suitable for vegetarian and vegan diets. It's a plant-based dish made with lentils, which are a great source of protein and fiber for those following meat-free lifestyles.
Amara brings her deep knowledge of African cuisine to the table, with a focus on the rich and hearty flavors of Senegal. She loves to share slow-cooked dishes like thieboudienne (rice and fish), which reflect the warmth and hospitality of African cooking. Amara’s approach to food is all about creating comforting meals that nourish the soul.
Ethiopian Cuisine
Injera With Doro Wat: Ethiopian Feast
Peel back the layers of tradition as you uncover the rich history and complex flavors of injera and doro wat, the cornerstones of Ethiopian cuisine.
Injera and doro wat are the foundations of traditional Ethiopian cuisine, tracing their origins back centuries. You'll find the spongy, fermented injera flatbread paired with the aromatic, spicy chicken stew of doro wat at gatherings and celebrations, symbolizing the country's cultural identity. Preparing these dishes requires precise techniques, from the injera's 2-3 day fermentation process to the long, slow simmering of the doro wat. As you dive into this quintessential Ethiopian feast, you'll uncover the rich history, complex flavors, and communal spirit that make it an unforgettable culinary experience.
Key Takeaways
- Injera and Doro Wat are ancient staple dishes in Ethiopian cuisine, tracing their origins to the 4th century AD and reflecting the country's cultural heritage.
- The communal dining experience of sharing Doro Wat stew with injera flatbread promotes social bonding and represents traditional Ethiopian hospitality.
- Injera's unique preparation involves a multi-day fermentation process, while Doro Wat combines marinated chicken, aromatic spices, and a rich tomato-based sauce.
- The dishes feature a complex, balanced flavor profile with earthy spices, tender chicken, and the soft, spongy texture of injera creating a satisfying dining experience.
- The growing global popularity of Ethiopian cuisine encourages culinary exploration and a deeper appreciation for the country's rich culinary traditions.
History
Tracing the origins of Injera with Doro Wat, you'll find that this iconic Ethiopian dish has roots dating back centuries. The spongy flatbread, Injera, has been a staple in the Ethiopian diet since the 4th century AD, while the spicy chicken stew, Doro Wat, has been a beloved accompaniment for just as long.
Together, they form the foundation of traditional Ethiopian cuisine, a culinary legacy that's been passed down through generations.
The recipes have evolved over time, but the core ingredients and preparation methods have remained largely unchanged. Injera is still made from the ancient grain, teff, and Doro Wat still features the complex blend of spices that give it its distinctive flavor.
These dishes aren't just meals – they're a reflection of Ethiopian culture, history, and identity. Every bite tells a story of a resilient people and their enduring culinary traditions.
Recipe
Injera is a spongy, fermented flatbread that serves as the foundation for many Ethiopian dishes, including the beloved Doro Wat. This fragrant chicken stew, with its complex blend of spices, is the perfect accompaniment to the tangy and slightly sour injera.
To create an authentic Ethiopian dining experience, it's important to prepare both the injera and the Doro Wat with care. The injera requires a bit of forethought, as the batter needs to ferment for several days before cooking. The Doro Wat, on the other hand, is a dish that rewards patience, with the flavors deepening the longer it simmers.
Ingredients:
- 2 cups teff flour
- 1 cup warm water
- 1 teaspoon active dry yeast
- 1/4 teaspoon salt
- 1 lb boneless, skinless chicken thighs, cut into bite-sized pieces
- 1 onion, diced
- 3 cloves garlic, minced
- 2 tablespoons berbere spice mix
- 1 cup chicken stock
- 1 (6 oz) can tomato paste
- 2 hard-boiled eggs, peeled and quartered
- 2 tablespoons niter kibbeh (Ethiopian spiced butter)
To prepare the injera, combine the teff flour, warm water, yeast, and salt in a large bowl. Cover and let the batter ferment for 2-3 days at room temperature.
When ready to cook, heat a large non-stick skillet over medium heat and pour about 1/4 cup of the batter, swirling to create a thin, round flatbread. Cook for 2-3 minutes, or until the edges start to lift, then flip and cook for another minute.
For the Doro Wat, sauté the onion and garlic in the niter kibbeh until softened. Add the chicken, berbere spice, and chicken stock, and bring to a simmer.
Reduce heat and let the stew simmer for 45-60 minutes, until the chicken is cooked through and the flavors have melded. Stir in the tomato paste and season with salt to taste. Serve the Doro Wat over the injera, garnished with the hard-boiled egg quarters.
When preparing this dish, be mindful of the fermentation time for the injera, and allow the Doro Wat to simmer slowly to develop its rich, complex flavors. Enjoy this authentic taste of Ethiopia!
Cooking Steps
First, gather the injera and the necessary spices.
Next, marinate the chicken for a few hours to let the flavors develop.
Then, sauté the onions in spiced butter, add the berbere spice, and simmer the chicken in the flavorful sauce.
Step 1. Gather Injera and Spices
To prepare the perfect Injera and Doro Wat, you'll need to gather a few key ingredients. First, you'll want to ensure you have fresh Injera, the spongy Ethiopian flatbread that serves as the base for this dish. You can either make it from scratch or purchase it from a local Ethiopian market.
Next, gather the spices for the Doro Wat, the signature Ethiopian chicken stew. You'll need berbere, a vibrant spice blend that's the heart of many Ethiopian dishes. Turmeric, ginger, garlic, and cardamom are also essential. Don't forget onions, tomatoes, and chicken thighs or drumsticks. For a traditional accompaniment, consider making an Ethiopian salad recipe with fresh, crisp vegetables and a zesty dressing. To complete your meal, be sure to have plenty of injera on hand, the spongy flatbread that is a staple in Ethiopian cuisine. With all the flavors and textures at play, your Doro Wat dinner will be a memorable and delicious experience.
Once you have all your ingredients, it's time to start cooking. Prepare the Injera according to the instructions, then move on to the Doro Wat, simmering the chicken in the aromatic spices until the meat is tender and the flavors have melded.
Serve the Doro Wat on top of the Injera, and get ready to embark on a delicious Ethiopian culinary adventure.
Step 2. Marinate Chicken for Flavor Development
With the Injera and spices ready, let's turn our attention to marinating the chicken. The key to developing rich, complex flavors in the Doro Wat is a well-executed marinade.
Start by combining the garlic, ginger, onion, and berbere spice blend in a large bowl. Generously season the chicken thighs and drumsticks with the fragrant mixture, making sure to coat every nook and cranny.
Cover the bowl and let the chicken marinate for at least 2 hours, or up to 24 hours in the refrigerator. The longer the chicken marinates, the more time the flavors have to penetrate and meld.
When you're ready to cook, remove the chicken from the fridge and let it come to room temperature. This will ensure even cooking.
Now you're one step closer to an authentic Ethiopian feast of Injera and Doro Wat. The aromas wafting from the kitchen will have your guests' mouths watering in anticipation.
Step 3. Sauté Onions in Spiced Butter
Next, heat a large skillet or Dutch oven over medium heat and add the spiced butter.
Once it's melted, toss in the diced onions. Sauté the onions, stirring occasionally, until they're translucent and softened, about 5-7 minutes.
Don't let them brown too much – you want them to retain their sweetness.
As the onions cook, they'll release their natural juices, which will combine with the fragrant spiced butter, creating a delightful aromatic base for the stew.
Keep an eye on the heat and adjust it if needed to prevent the onions from burning.
Once the onions have reached the perfect texture, add the garlic and cook for another minute or two until it becomes fragrant.
Be careful not to let the garlic burn, as that can impart a bitter flavor.
Now your aromatic onion and garlic mixture is ready to serve as the foundation for the flavorful Doro Wat stew.
The next step is to add the spices and continue building the complex flavors of this authentic Ethiopian dish.
Step 4. Add Berbere Spice
After sautéing the onions and garlic, it's time to add the berbere spice blend. This fragrant mix of chili peppers, ginger, cardamom, cloves, and other aromatic spices will infuse your doro wat with bold, complex flavors.
Sprinkle the berbere over the onion mixture and stir to coat everything evenly. The spices will start to toast and release their oils, filling your kitchen with an intoxicating aroma. Let the berbere cook for a minute or two, stirring constantly, to allow the flavors to meld.
Be careful not to let it burn, as that can create a bitter taste. Once the mixture is fragrant and the spices have bloomed, you can add the chicken and continue cooking the doro wat.
The berbere will lend a distinctive Ethiopian flair, with its earthy, slightly smoky notes and gentle heat. Don't be shy with the spice – this is a dish meant to be bold and flavorful.
Step 5. Simmer Chicken in Spiced Sauce
Now that you've added the aromatic berbere spice, it's time to introduce the chicken to the simmering sauce. Gently place the chicken pieces into the pot, ensuring they're fully submerged in the rich, fragrant mixture.
Let the chicken simmer, stirring occasionally, for about 30 minutes. This allows the meat to become deliciously tender and infused with the complex flavors of the sauce.
As the chicken simmers, the sauce will thicken, creating a velvety texture that coats the meat beautifully. Be sure to taste the sauce periodically, adjusting the seasoning as needed. You may want to add a splash of lemon juice or a pinch of sugar to balance the flavors.
The goal is to achieve a harmonious blend of spices that complements the chicken perfectly.
Once the chicken is cooked through, remove it from the heat. The dish is now ready to be served alongside the fluffy injera, allowing the flavors to meld together in every bite.
Final Thoughts
Ultimately, the combination of injera and doro wat is a true delight for the senses. The spongy, slightly sour injera provides the perfect canvas for the rich, aromatic doro wat. Each bite is a symphony of flavors – the earthy spices, the tender chicken, the silky sauce, all coming together in perfect harmony.
What makes this dish so special is the way it encourages interaction and shared experience. Tearing off a piece of injera and using it to scoop up the stew creates a tactile, communal dining experience that brings people together.
The act of sharing a meal in this intimate way fosters connection and a deeper appreciation for the food.
As you savor the final bites, you're left with a sense of satisfaction and a longing to experience this Ethiopian feast again. The flavors linger, beckoning you to return and delve deeper into the complex and captivating world of Ethiopian cuisine.
Frequently Asked Questions
What Is the Typical Serving Size of Injera With Doro Wat?
The typical serving size of injera with doro wat can vary, but a common portion is a large piece of injera accompanied by a generous portion of the savory doro wat stew. The exact amount may depend on individual appetite and preferences.
How Long Can Leftover Injera and Doro Wat Be Stored?
Leftover injera and doro wat can typically be stored in the refrigerator for 3-4 days. Be sure to store them in airtight containers to maintain freshness. When ready to enjoy, simply reheat the dishes before serving.
Are There Any Vegetarian Alternatives to the Doro Wat Recipe?
There are several vegetarian alternatives you can try instead of the traditional doro wat recipe. Consider a lentil stew, chickpea curry, or a veggie-packed saucy dish to pair with your injera.
Can I Use a Different Type of Flour to Make the Injera?
Absolutely, you can use different types of flour to make injera. Try teff, sorghum, or a blend of flours to create a unique version of this traditional Ethiopian flatbread. Experiment and find the flavor profile you enjoy most.
Is It Necessary to Have a Special Pan for Cooking Injera?
You don't necessarily need a special pan to cook injera. While a dedicated injera pan can make the process easier, you can use a regular nonstick skillet or griddle as long as it's large enough to accommodate the batter.
Alem is our Ethiopian cuisine specialist, bringing Ethiopia’s bold, aromatic flavors to Cook if Ya. From the spicy, earthy flavors of doro wat to the fragrant, spongy injera, Alem’s recipes showcase Ethiopian cuisine’s unique and flavorful dishes. His cooking emphasizes the communal nature of Ethiopian meals, perfect for sharing with friends and family.
-
Brazilian Cuisine3 months ago
Tacacá
-
Brazilian Cuisine3 months ago
Caldeirada
-
Polish Comfort Food3 months ago
Krupnik (Barley Soup)
-
Southern Comfort Food3 months ago
Cheese Straws
-
Brazilian Cuisine3 months ago
Chicken in Brown Sauce
-
Polish Comfort Food3 months ago
Vegetable Salad
-
American Diner Classics3 months ago
The Maillard Reaction: Understanding the Chemistry of Browning {Food Science and Cooking}
-
African Cuisine3 months ago
Kedjenou (Ivory Coast)