Connect with us

African Cuisine

African Greens Recipe: Nutritious and Flavorful Leafy Greens

Prepare to delight your taste buds with this nutritious African greens recipe that combines vibrant flavors and creamy goodness—discover the secrets to a perfect dish!

Published

on

nutritious african leafy greens

African greens, like collard greens and kale, are both nutritious and delicious! To prepare them, you'll first wash and chop the greens. Then, sauté chopped onion and garlic in a pan until soft. Add the greens and season with salt, pepper, and a splash of lemon juice for brightness. Stir in coconut milk and let it simmer to create a creamy goodness. Serve these flavorful greens over rice or quinoa for a delightful meal. They're a perfect addition to family tables or gatherings, and there's so much more to discover about cooking these vibrant greens!

Key Takeaways

  • African greens, such as collard greens and kale, are nutrient-dense, rich in vitamins A, C, and K, and low in calories.
  • To prepare, wash and chop greens, then sauté with garlic and onion for enhanced flavor.
  • Season with salt, pepper, paprika, and herbs, and add coconut milk for a creamy texture.
  • Serve over rice or quinoa for a balanced meal, and consider garnishing with fresh herbs for added freshness.
  • These versatile greens can be incorporated into various dishes, including soups, salads, and grain bowls, for nutritious meals.

History

When you delve into the history of African greens, you'll discover that these vibrant vegetables have been a staple in various cultures for centuries. People in Africa have grown and enjoyed greens like collard greens, amaranth, and kale for generations. These leafy treasures aren't just tasty; they're packed with nutrients that keep families strong and healthy.

In many African communities, greens are often grown in home gardens, making them easily accessible for cooking. Traditionally, they're combined with grains and proteins, creating delicious meals that bring families together.

You might be surprised to learn that these greens are celebrated for their importance in festivals and gatherings, symbolizing abundance and health.

As you explore different regions, you'll find unique ways people prepare and enjoy these greens, from spicy stews to simple sautéed dishes. The rich history of African greens reflects the creativity and resourcefulness of those who cultivate them.

It's exciting to think about how these vegetables connect cultures, families, and generations. So, as you learn more about African greens, remember their story—it's one of nourishment, tradition, and love shared around the dinner table.

Advertisement

Cooking Steps

To prepare delicious African greens, you'll want to gather your ingredients and get cooking without delay.

Start by washing your leafy greens thoroughly to remove any dirt. Next, chop them into bite-sized pieces. You'll also need some onion, garlic, and spices like salt and pepper to make the greens flavorful.

Now, heat a bit of oil in a large pan over medium heat. Add the chopped onion and garlic, cooking until they're soft and fragrant. This usually takes about 2-3 minutes.

Then, toss in your greens and stir them well. If they seem a bit dry, don't hesitate to add a splash of water or broth. Cover the pan and let them cook for about 5-7 minutes, stirring occasionally.

Once the greens are tender, season them with salt, pepper, and any other spices you like. Give everything a good stir, and your tasty African greens will be ready to serve!

Advertisement

Enjoy them as a side dish or mix them into your favorite meals. Remember, cooking is all about having fun, so don't be afraid to experiment with flavors!

Step 1. Wash and Prepare Greens
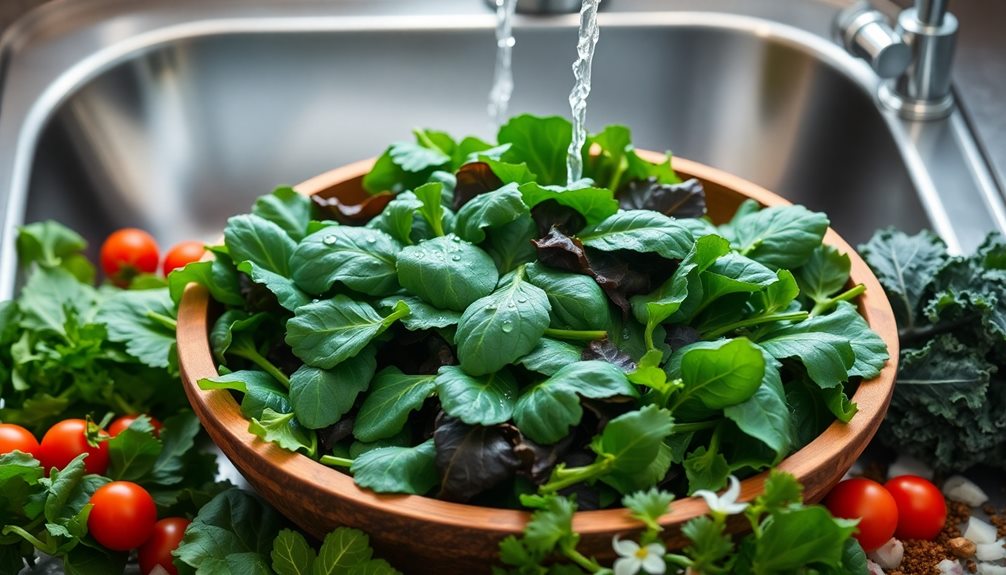
wash and prep greens

Start by rinsing your greens thoroughly under cool running water to remove any dirt or grit.

It's important to make sure your greens are clean, so give them a good shake in the water to help dislodge any stubborn bits of soil.

Once they're rinsed, place the greens in a colander or on a clean kitchen towel to drain.

Next, you'll want to chop them if they're large.

Grab a sharp knife and slice the greens into bite-sized pieces. This makes them easier to cook and eat later on.

Advertisement

If you're working with tougher leaves, like collard greens, you might want to remove the stems, as they can be a bit chewy.

After chopping, give your greens one last rinse to wash away any leftover bits of dirt.

Now, shake off the excess water or pat them dry with a towel.

You've done such a great job preparing your greens!

They're now clean, chopped, and ready for the next step in your delicious African greens recipe.

Advertisement

Trust me, you're going to love how they taste once you cook them!

Step 2. Sauté With Garlic and Onion
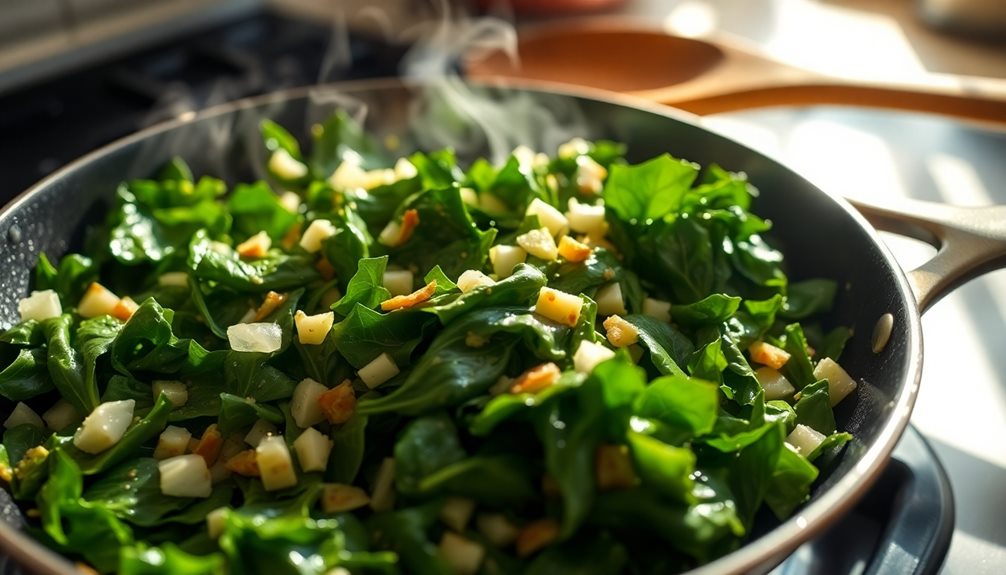
saut garlic and onion

Sautéing garlic and onion creates a fragrant base that enhances the flavor of your greens. To start, gather your ingredients: fresh garlic and onion, along with a splash of oil. You can use olive oil, vegetable oil, or whatever you have handy.

Heat a pan over medium heat and add the oil. Once it's hot, toss in the chopped onion. Stir it around for about two minutes, letting it soften and turn a light golden color.

Next, add the minced garlic. It only takes a minute or so for garlic to release its wonderful aroma, so keep an eye on it! Stir frequently to prevent it from burning. You want that beautiful, fragrant mixture to blend perfectly.

Once the garlic and onion are ready, you can add your washed and prepared greens to the pan. The heat will help the greens wilt nicely, absorbing all those yummy flavors.

Step 3. Add Spices and Seasoning
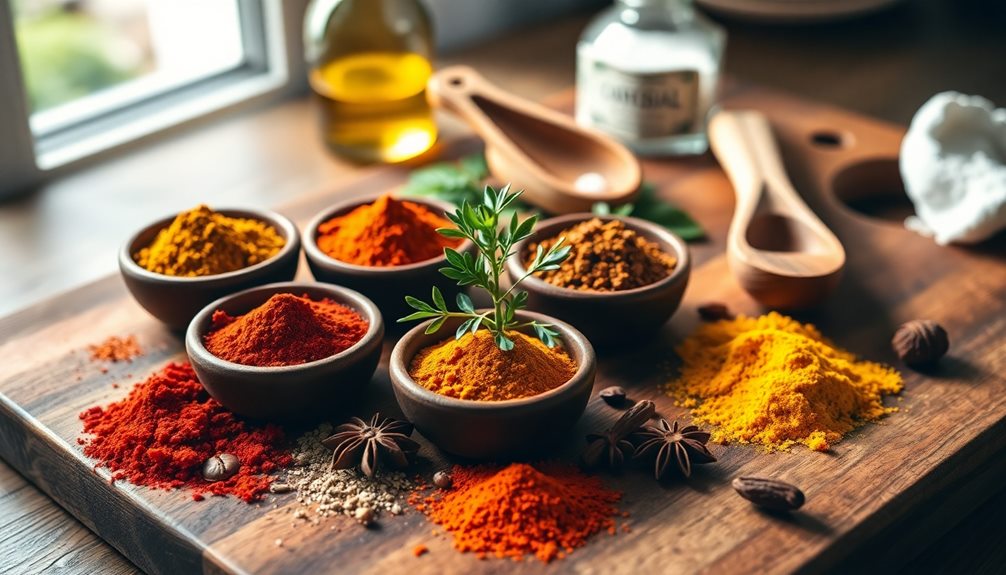
incorporate flavors and enhancements

With the garlic and onion beautifully softened and fragrant, it's time to elevate your greens with spices and seasoning. Start by adding a pinch of salt and pepper. This simple step brings out the natural flavors of the greens.

Next, sprinkle in some paprika for a little kick and a warm color. You can also try adding a touch of cayenne pepper if you like things spicy!

Advertisement

Don't forget about the herbs! Toss in a teaspoon of dried thyme or oregano to give your dish a delightful aroma. If you have fresh herbs like cilantro or parsley, chop them up and add them at the end to keep their bright flavor.

If you want to mix things up, consider adding a splash of lemon juice or vinegar. This little zing balances the richness of the greens and spices, making every bite exciting.

Stir everything together and let it all cook for a few more minutes. You'll notice how the spices blend beautifully with the greens, creating a colorful and tasty dish.

The aroma will fill your kitchen, making everyone eager to dig in! Enjoy your flavorful creation!

Step 4. Stir in Coconut Milk
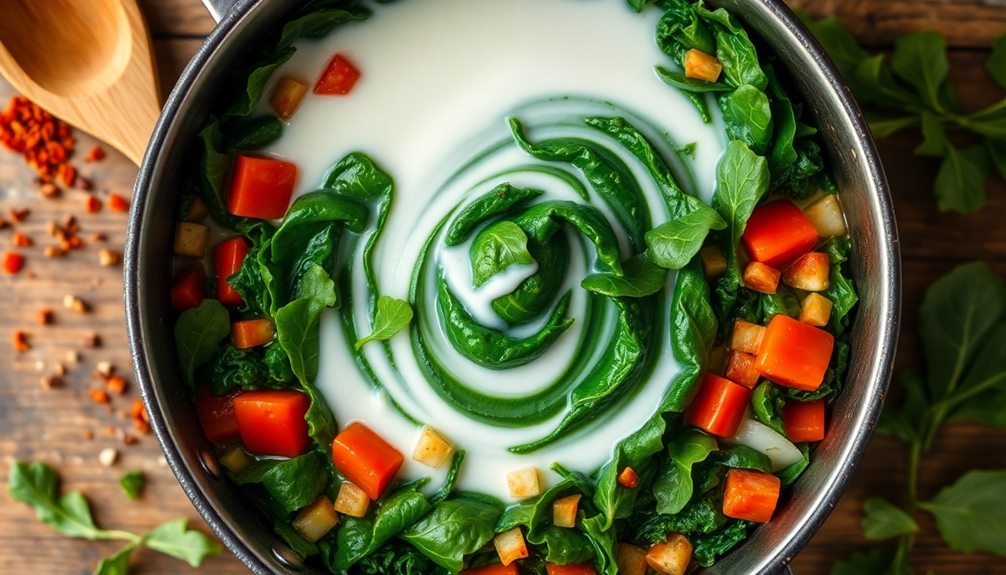
incorporate coconut milk thoroughly

Now that your greens are seasoned to perfection, it's time to add a creamy touch with coconut milk. Grab a can of coconut milk and shake it well before you open it. This helps mix up the cream and liquid inside.

Pour the coconut milk into your pot, stirring it gently into the greens. The rich, creamy texture will make your dish even more delicious!

Advertisement

As you stir, watch the greens change color and become glossy. This step adds a wonderful tropical flavor that pairs beautifully with the spices you've used.

Let the mixture simmer for about five to ten minutes. This will allow the coconut milk to soak into the greens, making them tender and flavorful.

Don't forget to taste as you go! If you think it needs a little more seasoning, feel free to add a pinch of salt or a dash of pepper. You want every bite to be bursting with flavor!

Once it's all combined and heated through, you'll have a bowl of vibrant, creamy greens that's sure to impress everyone. Get ready for the next step, because this dish is getting even better!

Step 5. Serve With Rice or Quinoa
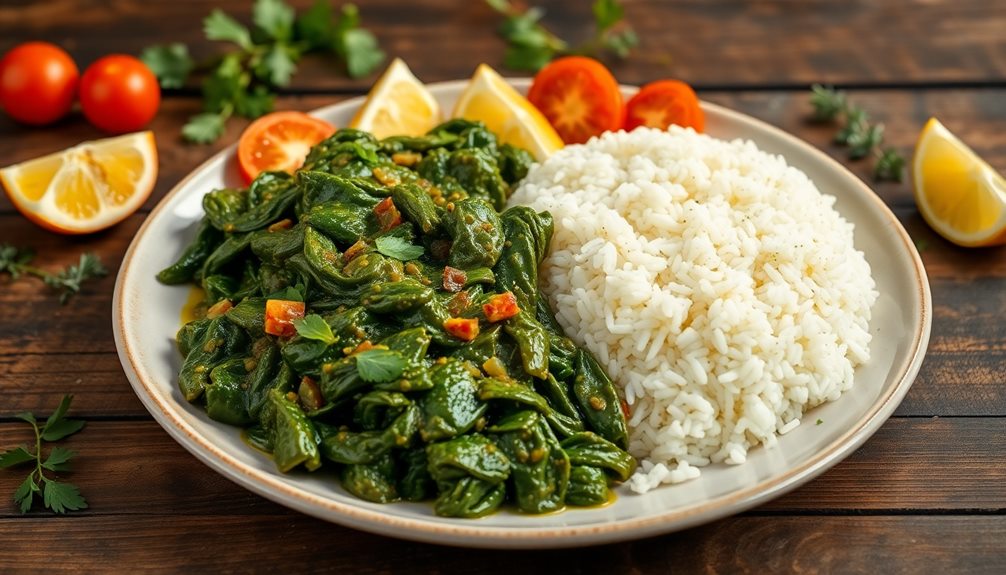
serve with rice quinoa

Once your creamy greens are simmered to perfection, it's time to complement them with a hearty base. You can choose rice or quinoa, both of which are nutritious and will make your meal even more delicious.

If you pick rice, start by rinsing one cup of it under cold water. This helps remove extra starch and keeps it fluffy. Then, boil two cups of water, add the rice, and let it simmer for about 18 minutes until it's tender and the water is absorbed.

Advertisement

If you prefer quinoa, rinse it too, just like rice. Use a ratio of one part quinoa to two parts water. Bring the water to a boil, add the quinoa, and reduce the heat. Let it simmer for about 15 minutes until it's light and fluffy.

Once your base is ready, serve the creamy greens over the rice or quinoa. This not only makes your plate colorful but also adds an amazing texture to each bite.

Enjoy the mix of flavors, and feel free to sprinkle some fresh herbs or nuts on top for an extra kick! Your healthy, hearty meal is now ready to be shared and savored!

Final Thoughts

African greens offer a delightful culinary experience that can transform any meal into a vibrant feast. These nutritious leafy greens aren't only packed with vitamins and minerals but also bring a unique flavor to your table.

When you try cooking them, you'll discover how easy it's to create a colorful dish that everyone will love. Additionally, incorporating these greens can enhance your meal's nutritional value, much like how educational toys stimulate cognitive growth in preschoolers.

Advertisement

Incorporating African greens into your meals is a fantastic way to explore new flavors while enjoying health benefits. You can sauté, steam, or stir-fry them, making them a perfect side dish or even a main course.

Pair them with rice, quinoa, or your favorite protein for a complete meal.

Don't forget to experiment with spices and herbs to enhance their taste! Whether you're cooking for family or friends, these greens will surely impress. Plus, you'll feel great knowing you're serving something good for everyone.

Frequently Asked Questions

What Are the Health Benefits of African Greens?

You'll find that African greens are packed with vitamins, minerals, and antioxidants. They boost your immune system, enhance digestion, and support overall health. Incorporating them into your diet can really elevate your nutrient intake.

Can I Substitute African Greens With Other Leafy Greens?

Yes, you can substitute African greens with other leafy greens like kale, collard greens, or spinach. Just keep in mind that flavors and textures might differ, so adjust your cooking methods and seasonings accordingly.

Advertisement

How Do I Store Leftover African Greens?

To store leftover greens, cool them to room temperature, then place them in an airtight container. Keep them in the refrigerator, and they'll stay fresh for about three to five days. Enjoy them later!

Are African Greens Suitable for Vegan Diets?

Yes, African greens are perfect for vegan diets! They're packed with nutrients, and you can enjoy them in various dishes. Just make sure to prepare them without any animal products to keep it entirely plant-based.

Where Can I Buy African Greens?

You can buy African greens at local farmers' markets, specialty grocery stores, or international markets. If you can't find them nearby, consider ordering online from reputable sellers that focus on fresh produce.
Advertisement

African Cuisine

African Eggplant Recipes: Creative Ways to Enjoy Eggplant

Plunge into the world of African eggplant recipes that will tantalize your taste buds and inspire your culinary creativity—discover delicious ideas waiting for you!

Published

on

delicious african eggplant dishes

African eggplant is a tasty and healthy ingredient you can enjoy in many creative ways! Start by slicing the eggplant into rounds, sprinkling them with salt, and letting them rest. This helps bring out their flavor. You can then grill, roast, or sauté them for a yummy dish. Try making grilled eggplant pancakes, a savory curry, or crispy fritters for a fun meal! Don't forget to pair it with spices like cumin and garlic for extra taste. Each recipe is an exciting adventure waiting for you, and there's so much more to explore!

Key Takeaways

  • African eggplant can be prepared in various ways, including roasting, grilling, sautéing, and baking to enhance its natural flavors.
  • Popular recipes include eggplant curry, crispy fritters, stuffed eggplant, grilled dishes, and comforting stews featuring tomatoes and spices.
  • Pair African eggplant with spices like cumin, coriander, and turmeric for added depth and flavor in your dishes.
  • Experiment with different vegetables and grains, like quinoa or couscous, to create diverse and balanced meals featuring eggplant.
  • Embrace the cultural significance of African eggplant by celebrating its nutritional benefits and the traditions of the families who cultivate it.

History

The rich history of African eggplant, also known as African nightshade, reflects a deep connection to the agricultural traditions of many African cultures. This unique vegetable has been cultivated for centuries, making it an important part of everyday life in various regions.

You might be surprised to learn that it's not just a tasty treat but also a source of nutrition and income for many families. Farmers across Africa have been growing African eggplant in their gardens for generations. They've passed down knowledge about planting, harvesting, and cooking this versatile veggie.

You'll find it in many traditional dishes, often enjoyed alongside rice or in stews. People appreciate African eggplant not only for its delicious taste but also for its health benefits. It's packed with vitamins and minerals, making it a great addition to your meals.

This little vegetable has a big history, linking communities together through shared recipes and farming practices. Embracing the history of African eggplant means celebrating the hardworking farmers and families who've nurtured it for so long.

Cooking Steps

To create a delicious dish with African eggplant, start by gathering all your ingredients and tools. You'll need fresh African eggplants, tomatoes, onions, garlic, and your favorite spices. Don't forget a sharp knife and a cutting board!

Advertisement

First, wash the eggplants and cut them into bite-sized pieces. If you like, you can sprinkle some salt on them and let them sit for about 15 minutes. This helps draw out bitterness and makes them taste even better!

While they're resting, chop your onions, garlic, and tomatoes.

Next, heat some oil in a pan over medium heat. Add the onions and garlic, cooking until they're soft and smell amazing. Then, toss in the eggplant pieces and stir them around. Let them cook for about 10 minutes until they're tender.

Now, add the chopped tomatoes and your spices. Stir everything together and let it simmer for another 5-10 minutes.

Once it's all cooked, taste it! You can adjust the seasoning if needed. Serve your African eggplant dish with rice or bread, and enjoy the wonderful flavors you've created! Happy cooking!

Advertisement

Step 1. Prepare Eggplant for Cooking

prepare eggplant for cooking

Before you start cooking, it's essential to prepare the eggplant properly. First, you'll want to choose a fresh eggplant. Look for one that's firm and shiny, with no soft spots or blemishes.

Once you've picked the perfect eggplant, rinse it under cool water to wash away any dirt.

Next, it's time to remove the bitter taste that some eggplants have. You can do this by slicing the eggplant into cubes or rounds and sprinkling it with salt. Let it sit for about 30 minutes. The salt will draw out moisture and bitterness.

After that, rinse the eggplant pieces under water to wash away the salt, and then pat them dry with a clean towel.

If you prefer a less salty preparation, you can skip the salting process and simply slice it up. Just remember, fresh eggplant has a mild flavor that really absorbs whatever seasonings you use.

Now you're ready to cook! You can grill, fry, or bake your eggplant, and it'll be delicious. Enjoy the process, and get excited about the wonderful dishes you'll create!

Advertisement

Step 2. Slice Eggplant Into Rounds

slice eggplant into rounds

Your eggplant is now ready to be sliced into rounds, a step that will enhance its texture and cooking time. First, grab a sharp knife and place your eggplant on a cutting board. Make sure it's stable so you can slice safely.

Start by trimming off both ends of the eggplant. This helps get rid of any tough parts. Next, cut the eggplant into even rounds, about half an inch thick. If they're too thin, they might get mushy when cooked, and if they're too thick, they might take longer to cook.

As you slice, notice the beautiful purple skin and the creamy white flesh inside. Isn't it lovely? You can also experiment with the size of your rounds. Some people like them thicker for grilling, while others prefer thinner slices for baking.

Once you've sliced all your eggplant, you'll be amazed at how quickly you can turn these rounds into a delicious dish. Whether you're planning to grill, bake, or fry them, those slices are going to soak up flavors beautifully.

Get ready to enjoy the delightful taste of eggplant!

Step 3. Sprinkle With Salt and Rest

season rest enhance flavor

After slicing your eggplant into rounds, the next essential step is to sprinkle them with salt and let them rest. This process is super important because it helps draw out the bitter moisture from the eggplant. Just grab some salt and sprinkle a good amount over each round, making sure to cover them evenly. Don't be shy—this is where the magic starts!

Once you've salted your eggplant, let it sit for about 30 minutes. During this time, you might notice some little beads of moisture forming on the surface. That's a sign it's working!

Advertisement

As the eggplant rests, the salt will work its way in, making the eggplant tastier and less bitter. This step also helps to improve the texture, making your cooked eggplant more tender and delicious.

You can use this waiting time to prepare other ingredients or get your cooking area ready. It's like a mini-break for you and your eggplant!

Step 4. Rinse and Pat Dry

rinse and pat dry

Once the eggplant has finished resting, the next step is to rinse it under cold water to remove the excess salt and drawn-out moisture. This is super important because it helps keep the eggplant from being too salty and makes it taste just right! Hold the eggplant under the water, giving it a gentle rub to wash away all that salt.

After rinsing, it's time to pat it dry. Grab a clean kitchen towel or some paper towels. Carefully place the eggplant on the towel and softly press down. You want to soak up any leftover water without squishing it too much. If you're using paper towels, you might need a few extra ones since eggplant can hold onto moisture.

Once it's nice and dry, your eggplant is ready for the next step in your cooking adventure! This process makes sure your eggplant is perfect for frying, grilling, or roasting.

Trust me, you'll love how much better it tastes when you take the time to rinse and pat it dry. Now you're one step closer to enjoying delicious African eggplant recipes!

Advertisement

Step 5. Coat With Olive Oil

coat food in olive

Now that the eggplant is clean and dry, it's time to coat it with olive oil. This step is super important because the oil helps add flavor and keeps the eggplant from getting too dry while cooking. Grab a clean bowl and pour in about two to three tablespoons of olive oil. You can always add more later if you need it!

Next, take your eggplant and cut it into slices or cubes, depending on your recipe. If you want to make it even easier, you can place the eggplant pieces directly into the bowl with the olive oil.

Now, use your hands to toss the eggplant around gently. Make sure every piece is coated well with that yummy oil. If you like, you can sprinkle some salt, pepper, or your favorite spices into the bowl. This will make your eggplant taste even better!

Once you've finished tossing, it's time to get cooking. You can roast, grill, or sauté the eggplant. The oil will help it cook evenly and become nice and tender. Enjoy the delicious flavors that come from this simple step!

Final Thoughts

Exploring the diverse world of African eggplant recipes can be a delightful culinary adventure. You've discovered so many tasty ways to enjoy this unique vegetable, from savory stews to grilled delights.

Each recipe offers a chance to bring warmth and flavor to your table, making every meal special. Trying out these dishes not only expands your cooking skills but also lets you share exciting flavors with family and friends.

Advertisement

Imagine the smiles on their faces as they taste a delicious eggplant curry or crispy eggplant fritters! Plus, cooking with eggplant is a great way to introduce healthy ingredients into your meals.

As you dive into the world of African eggplant, don't be afraid to experiment. Mix different spices, add your favorite veggies, or even try new cooking methods.

The possibilities are endless, and each try can lead to a new favorite dish.

Frequently Asked Questions

What Are the Nutritional Benefits of African Eggplant?

African eggplant's packed with nutrients! It's low in calories, high in fiber, and rich in antioxidants. You're getting vitamins A, C, and K, plus minerals like potassium, which all support your overall health and wellness.

Can I Substitute African Eggplant With Regular Eggplant?

You can substitute African eggplant with regular eggplant, but expect some flavor and texture differences. Regular eggplant may be milder, so adjust your seasonings to enhance the dish's overall taste and appeal.

Advertisement

Where Can I Buy African Eggplant?

You can buy African eggplant at specialty grocery stores, farmers' markets, or online retailers. Look for stores that focus on international or African cuisine. Don't hesitate to ask local vendors for assistance in finding it.

How Do I Store Leftover Cooked African Eggplant?

To store leftover cooked eggplant, let it cool down, then transfer it to an airtight container. You can keep it in the fridge for up to three days or freeze it for longer storage.

Are There Any Common Allergies Related to Eggplant?

Yes, some people have allergies to eggplant, often related to certain proteins in the vegetable. If you experience symptoms like itching or swelling after eating it, you should consult a healthcare professional for advice.

Continue Reading

African Cuisine

Sadza Food: Zimbabwe’s Comforting Staple Dish

Published

on

Sadza, Zimbabwe’s cherished staple dish, has nourished families for generations. This comforting porridge-like delicacy’s roots reach back centuries, blending indigenous culinary traditions with the flavors of ground cornmeal. To make sadza, you’ll start by bringing water to a full rolling boil, then gradually add the cornmeal while stirring continuously to prevent lumps. As the mixture thickens, you’ll cover and simmer it, allowing the flavors to meld. Served hot with a savory relish, sadza is a beloved centerpiece of Zimbabwean cuisine, symbolizing community and cultural identity. If you’d like to learn more about this delightful dish, keep reading.

Key Takeaways

  • Sadza is a centuries-old staple dish in Zimbabwe, rooted in the country’s indigenous culinary traditions and often accompanied by stews or vegetables.
  • The preparation process involves gradually adding cornmeal to boiling water while continuously stirring to achieve a smooth, creamy texture.
  • Cooking sadza requires patience and attention, with simmering and stirring essential steps to develop the desired thickness and flavor.
  • Sharing sadza symbolizes community bonding and cultural significance, and it is often served hot with a complementary relish or stew.
  • Sadza embodies Zimbabwe’s rich food culture and tradition, representing nourishment, warmth, and a testament to the country’s culinary heritage.

History

Sadza’s history dates back centuries, rooted in the culinary traditions of Zimbabwe’s indigenous people. This beloved staple dish evolved from the ground corn or millet flour that local communities have been cultivating and consuming for generations.

Over time, the preparation process refined, with families passing down their secret recipes and techniques from one generation to the next.

Today, sadza remains a central part of Zimbabwean cuisine and culture. Its comforting, filling nature makes it a cherished meal, often accompanied by savory stews, grilled meats, or fresh vegetables.

The act of sharing sadza together is more than just eating – it’s a time-honored tradition that brings families and communities closer. Whether enjoyed during special celebrations or as a daily sustenance, this humble dish continues to nourish both bodies and souls across Zimbabwe.

Recipe_

Sadza, a staple dish in Zimbabwe, is a thick porridge made from finely ground maize flour. It’s a comforting and nourishing food that has been a part of Zimbabwean cuisine for generations. Sadza is often served with a variety of relishes, stews, or grilled meats, creating a satisfying and well-balanced meal.

The process of preparing sadza involves careful attention to detail and patience. The key is to achieve the perfect consistency, which can be slightly different depending on personal preferences and regional variations.

Advertisement

Ingredients:

  • 2 cups maize flour (finely ground)
  • 4 cups water
  • 1 teaspoon salt

To Cook:
In a large saucepan, bring the 4 cups of water to a boil. Gradually add the maize flour, stirring constantly with a wooden spoon to prevent lumps from forming. Reduce the heat to low and continue stirring the mixture until it thickens to your desired consistency, usually about 10-15 minutes. Add the salt and stir well.

When the sadza has reached the desired thickness, you can serve it immediately, or cover and keep it warm until ready to serve.

Sadza is commonly enjoyed with a variety of relishes, such as vegetables, meat stews, or a simple side of grilled or fried fish.

Cooking Steps

Prepare the cornmeal by slowly pouring it into a pot of simmering water, stirring constantly to prevent lumps from forming.

Once the cornmeal has thickened, reduce the heat and continue stirring for about 10 minutes, until the sadza reaches the desired consistency. It should have a smooth, creamy texture.

Next, scoop the sadza into a serving bowl. Use a wooden spoon to create a well in the center, which will be filled with your chosen relish or stew.

Advertisement

For a traditional accompaniment, try a savory vegetable or meat-based stew. Ladle the stew into the well, allowing it to mingle with the sadza.

Grab a spoon and dig in, scooping up the flavorful combination of the comforting cornmeal and the tantalizing stew.

Savor each bite, appreciating the harmony of textures and tastes that make sadza a beloved Zimbabwean staple.

Step 1. Bring Water to Rolling Boil

Begin by bringing a large pot of water to a full rolling boil over high heat. This is the crucial first step in preparing delicious sadza, Zimbabwe’s beloved staple dish.

You’ll want the water to be bubbling vigorously, with rapid, continuous movement throughout the pot. This high heat is essential for cooking the sadza flour to perfection.

Once the water is at a full boil, it’s time to slowly sprinkle in the sadza flour, while constantly stirring the mixture with a wooden spoon or whisk.

Advertisement

The key is to add the flour gradually, a little at a time, to prevent lumps from forming. Keep stirring and incorporate the flour thoroughly. The sadza will thicken quickly, transforming from a thin, watery consistency to a thick, smooth paste.

Maintain the high heat throughout this process, ensuring the sadza cooks evenly and develops the desired texture.

With the right technique, you’ll end up with a rich, creamy sadza that’s ready to be enjoyed as the comforting centerpiece of your meal.

Step 2. Add Cornmeal to Boiling Water

With the water at a vigorous boil, you’ll want to gradually add the cornmeal. Start by sprinkling in a small amount, stirring constantly to prevent lumps from forming.

As you continue to add the cornmeal, you’ll notice the mixture thickening quickly. Keep stirring vigorously to ensure a smooth, lump-free consistency.

It’s important to add the cornmeal slowly, about a quarter cup at a time, allowing each addition to fully incorporate before adding more. This gradual approach helps the sadza develop its signature thick, creamy texture.

Advertisement

Be patient and keep a close eye on the pot, as the cornmeal can quickly go from perfectly cooked to burnt if you don’t stay attentive.

Once all the cornmeal has been added, continue cooking the sadza, stirring frequently, until it reaches your desired consistency. The cornmeal will continue to absorb the hot liquid, transforming into a rich, velvety porridge that’s ready to be served.

Step 3. Stir Continuously Until Thickened

Continuously stir the thickening sadza, ensuring it cooks through evenly. As you whisk the cornmeal mixture, you’ll notice it start to transform from a watery consistency to a thick, porridge-like texture.

Don’t stop stirring! This constant motion helps the sadza develop its signature creamy, smooth mouthfeel. Keep a close eye and adjust the heat as needed to prevent burning or sticking to the bottom of the pot.

The key is to stir persistently until the sadza reaches your desired thickness. This can take 5-10 minutes, so be patient and put in the effort.

You’ll know it’s ready when the mixture becomes dense and pulls away from the sides of the pot as you stir. At this point, the sadza should have a soft, pillowy consistency that’s easy to scoop and serve.

Advertisement

Congratulations, you’ve now mastered the art of thickening this beloved Zimbabwean staple. Get ready to enjoy the comforting, filling results of your hard work!

Step 4. Cover and Simmer

Once the sadza has reached the desired thick, creamy consistency from your persistent stirring, you can now cover the pot and let it simmer.

This step is crucial to fully cook the cornmeal and develop its comforting, porridge-like texture. Cover the pot with a tight-fitting lid, leaving a small gap for steam to escape.

Turn the heat down to low, allowing the sadza to gently simmer for 10-15 minutes. This gradual cooking process allows the starch granules to swell and the flavors to meld together, creating the signature smooth and velvety mouthfeel.

Resist the urge to lift the lid too often, as this can disrupt the simmering and cause the sadza to become lumpy. Instead, let the pot do its work, filling your kitchen with the delightful aroma of this beloved Zimbabwean staple.

After the simmering is complete, your sadza will be ready to serve, warm and inviting, a true taste of Zimbabwean home cooking.

Advertisement

Step 5. Serve Sadza Hot, With Relish

Upon completing the simmering, it’s time to serve the sadza hot, accompanied by a relish or stew of your choice.

Grab your bowl and ladle up a generous portion of the smooth, creamy sadza. Don’t be shy – this dish is meant to be enjoyed heartily! The key is to serve it piping hot, so the texture is just right.

Pair it with a flavorful relish, like a tomato-onion salsa or a spicy peanut stew. The contrast of the warm, comforting sadza and the zesty, tangy relish is simply divine.

Take your first bite and let the flavors dance on your tongue. The slight chewiness of the sadza balanced by the burst of acidity from the relish is a true delight.

Savor each mouthful, feeling the nourishing warmth spread through your body. This is a meal that feeds both the stomach and the soul, a taste of Zimbabwe’s rich culinary heritage.

Final Thoughts

Zimbabwe’s sadza dish exemplifies the country’s rich culinary heritage and cultural identity. As you’ve learned, sadza is more than just a simple porridge – it’s a beloved staple that brings families and communities together.

Whether enjoyed with savory relishes or sweet toppings, this comforting dish is a true taste of Zimbabwean hospitality.

Advertisement

One of the best things about sadza is its versatility. It can be prepared in countless ways, allowing home cooks to put their own spin on this traditional favorite.

From creamy, smooth textures to heartier, chunkier varieties, there’s a sadza to suit every palate. And the range of accompaniments, from saucy stews to tangy pickles, means you’ll never tire of this staple.

As you savor your next plate of sadza, take a moment to appreciate the generations of Zimbabweans who’ve cherished this dish.

It’s a testament to the country’s vibrant food culture and the power of simple, nourishing fare to bring people together.

Embrace the comfort and community that sadza represents – it’s a true taste of Zimbabwe.

Advertisement

Frequently Asked Questions

How Long Does It Take to Prepare Sadza?

Preparing sadza takes around 30-45 minutes. You’ll need to simmer the corn flour in water, stirring constantly until it reaches the desired thick consistency. The exact time may vary depending on the quantity you’re making.

What Are the Health Benefits of Eating Sadza?

Eating sadza provides key nutrients like carbohydrates, fiber, and minerals. It’s a filling and satisfying dish that can help you feel fuller for longer, supporting a healthy diet. Plus, it’s a traditional part of Zimbabwean cuisine and culture.

Can Sadza Be Served With Any Type of Relish?

Yes, you can serve sadza with a variety of relishes. From savory meat stews to tangy vegetable dishes, the versatile sadza pairs well with an array of complementary flavors to create a satisfying and nourishing meal.

Is Sadza Suitable for Vegetarians or Vegans?

Yes, sadza can be suitable for vegetarians and vegans. You can serve it with plant-based relishes like peanut butter, vegetable stew, or sautéed greens, making it a versatile and nourishing option for those following a meat-free diet.

Does Sadza Have Any Cultural Significance in Zimbabwe?

Sadza holds deep cultural significance in Zimbabwe. It’s more than just a staple dish – it’s a unifying element that connects the nation, crossing ethnic and social boundaries. Zimbabweans take pride in their cherished sadza tradition.

Advertisement
Continue Reading

African Cuisine

Jollof Rice: The West African Staple

A beloved West African staple, Jollof rice unites diverse culinary traditions, with its rich tomato-based flavors and techniques passed down through generations.

Published

on

west african jollof rice

Jollof rice is the cherished West African staple that unites diverse culinary traditions. Originating in Senegambia, this iconic dish has evolved through cultural exchange, becoming a symbol of unity and pride. You'll find it at celebrations, where communities come together over its rich tomato-based flavors and techniques passed down through generations. From proper rice rinsing to infusing spices, crafting the perfect pot of Jollof requires skill. Delve deeper, and you'll discover how this enduring dish represents the shared experiences and culinary prowess of West Africans.

Key Takeaways

  • Jollof rice is a staple dish in West Africa, originating from the Senegambia region and representing unity and shared culinary traditions across the region.
  • The dish is characterized by the use of long-grain rice, tomatoes, onions, bell peppers, garlic, and ginger, with the addition of scotch bonnet or habanero peppers for heat.
  • Proper cooking techniques, such as thorough rice rinsing, slow simmering in a rich, spiced tomato-based sauce, and gentle fluffing, are crucial for achieving the ideal texture and flavor.
  • Jollof rice is deeply rooted in West African culture, serving as a symbol of identity and pride, often featured in celebrations and gatherings.
  • The global recognition and adaptability of Jollof rice showcase the culinary prowess of West African cooks and the evolving nature of the dish across different cuisines.

History

Jollof rice, a beloved West African dish, has a rich and vibrant history that dates back centuries. Originating in the Senegambia region, this iconic meal has evolved over time, reflecting the cultural exchange and culinary traditions of the region.

The name "Jollof" is derived from the Wolof people, who are credited with creating the dish. Throughout history, Jollof rice has been a staple food, nourishing communities and serving as a symbol of unity and identity.

As West African nations gained independence, Jollof rice became a source of national pride, with each country developing its own unique variations. Today, the dish continues to be a beloved part of West African cuisine, transcending borders and uniting people through the shared experience of its flavors. In addition to Jollof rice, other dishes like Nigerian fufu and Ghanaian banku also hold a special place in the hearts of West Africans. However, perhaps the most well-known staple in the region is the Ugali recipe, a simple yet satisfying dish made from maize flour, enjoyed in countries like Kenya, Tanzania, and Uganda. These traditional recipes serve as a reminder of the rich culinary diversity that exists within West Africa, reflecting the unique cultural heritage of each nation. Ivorian street food, such as alloco (fried plantains) and attiéké (cassava couscous), also plays a significant role in showcasing the diverse flavors and culinary traditions of West Africa. These popular dishes are often enjoyed by locals and visitors alike, adding to the vibrant tapestry of West African cuisine. Whether it’s the aromatic Jollof rice, comforting Ugali, or mouthwatering Ivorian street food, the region’s culinary landscape is a testament to the rich and dynamic food culture that continues to thrive.

From its humble beginnings to its current status as a global culinary phenomenon, the history of Jollof rice is a testament to the enduring power of traditional culinary traditions.

Recipe

Jollof rice is a beloved West African rice dish that's bursting with flavor. Originating in Nigeria, it has become a staple across the region and is often the centerpiece of celebrations and gatherings. The key to a delicious Jollof rice lies in the careful balance of spices and the slow cooking process that allows the flavors to meld together seamlessly.

Advertisement

The vibrant red color of Jollof rice comes from the use of tomatoes, which are an essential ingredient in the dish. The rice is cooked in a rich, spiced tomato-based sauce, creating a truly unique and mouthwatering experience.

  • Long-grain rice
  • Tomatoes, diced
  • Onions, diced
  • Bell peppers, diced
  • Garlic, minced
  • Ginger, minced
  • Scotch bonnet or habanero peppers, minced
  • Tomato paste
  • Vegetable or chicken stock
  • Spices (such as cumin, paprika, thyme, bay leaves)
  • Salt and pepper to taste
  • Cooking oil

In a large pot, heat the cooking oil over medium heat. Add the onions, garlic, and ginger, and sauté until fragrant. Stir in the bell peppers, scotch bonnet or habanero peppers, and sauté for a few more minutes.

Add the diced tomatoes, tomato paste, and spices. Simmer the mixture for about 15-20 minutes, or until it thickens into a rich, flavorful sauce.

To ensure your Jollof rice is cooked to perfection, soak the rice in water for at least 30 minutes before cooking. This helps the grains to cook evenly and prevents them from becoming too dry or sticky.

When ready to assemble, add the soaked rice to the tomato sauce, and stir to combine. Add the stock, cover the pot, and simmer on low heat for about 30-45 minutes, or until the rice is tender and has absorbed all the flavors.

Be sure to stir the rice occasionally to prevent sticking or burning. Serve hot and enjoy the vibrant, aromatic, and delicious Jollof rice.

Advertisement

Cooking Steps

Thoroughly rinse the rice before cooking to remove any excess starch.

Next, add the tomatoes and onions to the pot.

Then, pour in the stock and seasonings, and simmer until the rice is tender.

Fluff the rice gently with a fork before serving.

Step 1. Rinse Rice Thoroughly Before Cooking

rinse rice thoroughly before cooking

First, you'll want to thoroughly rinse the rice before cooking. This crucial step helps remove any excess starch, dirt, or impurities that may be clinging to the grains.

Simply place the rice in a fine-mesh strainer and run it under cool, running water, gently stirring the rice with your hands. Continue rinsing until the water runs clear, usually about 2-3 minutes.

Advertisement

Next, allow the rinsed rice to drain for a few minutes, shaking the strainer gently to remove as much excess water as possible. This will help ensure the rice cooks evenly and doesn't become overly sticky or mushy.

Once drained, the rice is ready to be added to the cooking pot, along with the other Jollof rice ingredients. Following this simple step will result in perfectly fluffy, separate grains of Jollof rice that are full of flavor.

Step 2. Add Tomatoes and Onions

add tomatoes and onions

Next, add the tomatoes and onions to the cooking pot. Slice the tomatoes and onions into small pieces, then add them to the pot with the rice. Stir the mixture well to ensure the vegetables are evenly distributed.

The tomatoes will release their juices, adding moisture and flavor to the rice. The onions will also contribute their distinct aroma and sweetness. Be sure to cook the tomatoes and onions for a few minutes, allowing them to soften and meld with the other ingredients.

This step is crucial for developing the rich, cohesive taste of the jollof rice. As the vegetables cook, the mixture will become fragrant and the flavors will begin to come together. Remember to stir occasionally to prevent sticking or burning.

With the tomatoes and onions now incorporated, you're one step closer to achieving the perfect jollof rice.

Advertisement

Step 3. Add Stock and Seasoning

incorporate stock and seasoning

Now, add the stock and seasonings to the pot. Pour in the chicken or vegetable stock, stirring it into the tomato-onion mixture. Bring the liquid to a simmer, then season with a blend of aromatic spices.

Typically, this includes garlic powder, ginger, thyme, bay leaves, and a pinch of cayenne pepper for a kick of heat. Stir everything together thoroughly, allowing the flavors to meld.

Cover the pot and let the rice cook, simmering until the liquid is absorbed and the grains are tender, about 20-25 minutes. Be sure to check on it periodically, giving it a gentle stir to prevent sticking.

The stock and seasonings are crucial for infusing the rice with its signature robust, savory taste. Once the rice is cooked, fluff it with a fork before serving hot, garnished with fresh parsley or scallions if desired.

Step 4. Simmer Until Rice Is Tender

simmer rice until tender

With the stock and seasonings added, it's time to let the rice simmer until it's tender. Reduce the heat to low, cover the pot, and let the Jollof rice simmer for about 20-25 minutes.

Occasionally stir the rice to prevent sticking or burning on the bottom. Keep a close eye on the pot, adding a splash of water if the rice begins to dry out. You'll know the rice is done when it's soft and fluffy, with each grain separate. The liquid should be absorbed, but the rice shouldn't be dry.

Once the rice is tender, remove the pot from the heat and let it sit, covered, for another 5-10 minutes. This resting period allows the rice to finish cooking and the flavors to meld.

Advertisement

Fluff the Jollof rice with a fork before serving, ensuring an even distribution of the vegetables and seasonings. Now you're ready to enjoy the aromatic and flavorful Jollof rice, a beloved West African staple.

Step 5. Fluff Rice With Fork Gently

fluff rice gently fork

After the rice has finished its resting period, it's time to fluff it with a fork gently. This step is crucial to ensure the rice grains separate and become light and fluffy.

Carefully insert the fork into the pot, avoiding any harsh movements that could break the delicate grains. Gently lift and turn the rice, taking care not to mash or compact it. The goal is to create a light, airy texture that will perfectly complement the rich flavors of the Jollof seasoning.

Work slowly and patiently, fluffing the rice until you can see the individual grains clearly. This step may take a minute or two, but it's well worth the effort.

Once you're satisfied with the rice's texture, it's ready to be served. Fluffing the rice is the final touch that transforms it from a simple side dish into a true West African delicacy.

Final Thoughts

Jolliff rice is a quintessential West African dish that has captivated the hearts and palates of food enthusiasts worldwide.

Advertisement

It's more than just a recipe – it's a cultural tapestry that weaves together the vibrant flavors and traditions of the region. As you've journeyed through the preparation process, you've unlocked the secrets to crafting the perfect pot of Jollof, from selecting the right ingredients to mastering the art of fluffing the rice.

Now, as you take that final bite, you can't help but feel a sense of accomplishment and appreciation for this beloved dish.

It's a testament to the ingenuity and culinary prowess of West African cooks, who've refined this recipe over generations. As you savor the last grain, you know that Jollof rice will continue to captivate palates, bringing people together and preserving the rich cultural heritage of its origins.

Frequently Asked Questions

Is Jollof Rice Gluten-Free?

Yes, jollof rice is typically gluten-free as it's made from rice, tomatoes, onions, and spices. The main ingredient, rice, does not contain gluten, making jollof a safe option for those with gluten intolerance or celiac disease.

Can Jollof Rice Be Frozen?

Yes, you can freeze jollof rice. Simply let it cool completely, then transfer it to an airtight container or freezer bag. It'll keep for 2-3 months. Just reheat it when you're ready to enjoy it again.

Advertisement

How Long Does Jollof Rice Last?

Properly stored, your jollof rice can last 3-5 days in the fridge. For longer storage, you can freeze it for up to 3 months. Just be sure to thaw it in the refrigerator before reheating.

Is Jollof Rice Spicy?

Jollof rice can be spicy, but the level of spiciness can vary. Some recipes use milder spices, while others incorporate hotter ingredients like habanero peppers. The spice level is largely dependent on the ingredients used in the dish.

Can Jollof Rice Be Made in a Rice Cooker?

Yes, you can make jollof rice in a rice cooker. The cooking process is straightforward – just combine the rice, tomatoes, onions, spices, and broth, then let the cooker do its work. It's a convenient way to enjoy this flavorful dish.

Continue Reading

Affiliate Disclaimer
As an affiliate, we may earn a commission from qualifying purchases. We get commissions for purchases made through links on this website from Amazon and other third parties.

Advertisement

Latest

nutritious african leafy greens nutritious african leafy greens
African Cuisine2 hours ago

African Greens Recipe: Nutritious and Flavorful Leafy Greens

Prepare to delight your taste buds with this nutritious African greens recipe that combines vibrant flavors and creamy goodness—discover the...

korean stir fried seafood dish korean stir fried seafood dish
Korean Cuisine7 hours ago

Osam Bulgogi: Korean Stir-Fried Squid and Pork Belly

Taste the irresistible combination of tender squid and crispy pork belly in Osam Bulgogi, and discover the secrets to this...

soft fluffy milk bread soft fluffy milk bread
Baking and Pastry10 hours ago

Milk Bread Recipe by King Arthur: Soft and Fluffy Bread

A delightful milk bread recipe by King Arthur promises soft, fluffy goodness, but wait until you see the secret tips...

ramen s cultural origins explored ramen s cultural origins explored
Asian Cuisine10 hours ago

Is Ramen Korean? The Origins of Your Favorite Noodle Dish

Diving into the remarkable history of ramen, this article explores the dish's deep-rooted connections to Chinese cuisine and its evolution...

vietnamese ginger chicken recipe vietnamese ginger chicken recipe
Vietnamese Cuisine10 hours ago

Gà Kho Gừng: Vietnamese Ginger Chicken You Need to Try

Whet your appetite with the bold, aromatic flavors of Gà Kho Gừng, a captivating Vietnamese ginger chicken dish that's a...

vietnam s steamed rice cake vietnam s steamed rice cake
Vietnamese Cuisine10 hours ago

Vietnam’s Traditional Bánh Đúc: A Steamed Rice Cake Favorite

Flavors of Vietnam's heritage shine in the beloved Bánh Đúc, a steamed rice cake that has captivated the hearts and...

crispy vietnamese banh cam crispy vietnamese banh cam
Vietnamese Cuisine10 hours ago

Sweet and Crispy: Vietnamese Banh Cam Recipe

Flaunting a golden-brown crust and a soft, chewy interior, Vietnamese Banh Cam is a beloved treat that's a must-try for...

perfect tofu kimchi combo perfect tofu kimchi combo
Korean Cuisine11 hours ago

Dubu Kimchi: The Perfect Korean Tofu and Kimchi Combo

Savor the harmonious blend of silky tofu and bold, tangy kimchi in this beloved Korean comfort food dish that's packed...

homemade dressings over bottled homemade dressings over bottled
Homemade Condiments and Sauces15 hours ago

Homemade Salad Dressings: Never Buy Bottled Again

You'll be amazed at the flavor and freshness of homemade salad dressings, and never want to go back to bland,...

whole seeds to spreads whole seeds to spreads
Homemade Condiments and Sauces15 hours ago

Crafting Mustard: From Whole Seeds to Gourmet Spreads

Overcome the mundane with the ancient art of crafting mouthwatering mustard spreads from whole seeds, transforming your cooking into a...

quick pressure cooker recipes quick pressure cooker recipes
One-Pot Wonders16 hours ago

Instant Pot Revolution: Quick and Easy Pressure Cooker Recipes

Pressure cooking has never been easier with the Instant Pot, a game-changing appliance that unlocks a world of quick and...

essential knife maintenance techniques essential knife maintenance techniques
Kitchen Hacks and Tips19 hours ago

Knife Sharpening: Maintaining Your Most Important Tool

Blades that are razor-sharp unlock a world of culinary possibilities, transforming even the simplest tasks into a delightful experience. Discover...

Trending