
Crostata is an irresistible Italian tart that'll make your taste buds dance! This classic dessert boasts a buttery, flaky crust and a sweet, fruity filling – it's a match made in heaven. You can fill it with all sorts of seasonal fruits, like juicy apples or tangy cherries. And let's not forget the delightful aroma that fills the kitchen as it bakes to perfection. Crostata's timeless appeal means it's perfect for sharing with loved ones, whether as a comforting breakfast treat or a showstopping finale to a family feast. Intrigued? Keep reading to discover the full story behind this beloved Italian delight.
Key Takeaways
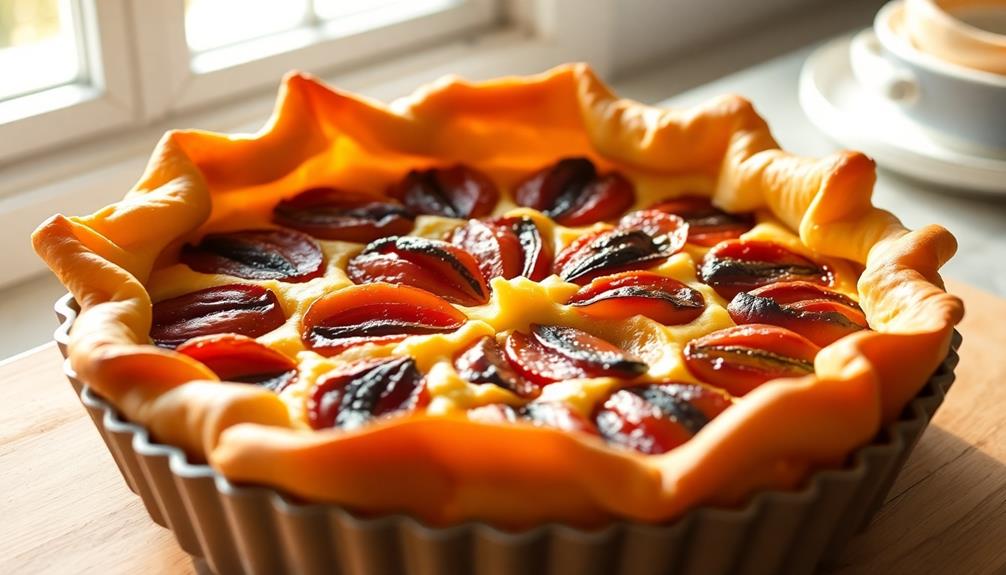
- Crostata is a traditional Italian dessert featuring a buttery, flaky crust filled with sweet fruit preserves or fresh seasonal fruits.
- The origins of crostata date back to the Renaissance era in Italy, where it started as a simple tart and evolved over time.
- Crostata di marmellata, which features fruit preserves, has become a household staple in Italian cuisine.
- Crostata offers a delightful combination of textures and flavors, making it a versatile dish suitable for dessert or breakfast.
- The versatility of crostata allows for various fruit fillings, including apples, cherries, and seasonal berries, catering to different preferences.
History
Originating in Italy, the crostata has a rich history that dates back to the Renaissance era.
You'll be delighted to learn that this beloved pastry first emerged as a simple tart made with a buttery crust and fresh, seasonal fruit. Over the centuries, the crostata evolved, with bakers experimenting with different fillings, from sweet jams to savory meats and vegetables.
One of the most famous variations is the crostata di marmellata, which features a luscious fruit preserve tucked inside the flaky pastry. This version became a staple in Italian households, often served as a special treat during holidays and celebrations.
The crostata's popularity eventually spread beyond Italy's borders, enchanting pastry lovers worldwide with its irresistible combination of crisp crust and fruity or creamy filling.
Today, the crostata remains a cherished part of Italian culinary heritage, a delightful treat that brings families and friends together to savor the flavors of la dolce vita.
Recipe
Crostata is a classic Italian tart that features a buttery pastry crust and a sweet filling. This versatile dish can be enjoyed as a dessert or even as a breakfast treat. The filling can be customized to suit individual tastes, making it a great option for any occasion.
To prepare a crostata, you'll need to create a flaky, homemade pastry dough and then fill it with your desired ingredients. The process may seem a bit involved, but the results are well worth the effort.
Ingredients:
- 2 cups all-purpose flour
- 1/2 cup unsalted butter, cold and cubed
- 1/4 cup granulated sugar
- 1 egg
- 1/4 cup cold water
- 1/2 teaspoon salt
- Filling of your choice (e.g., fruit preserves, nutella, lemon curd)
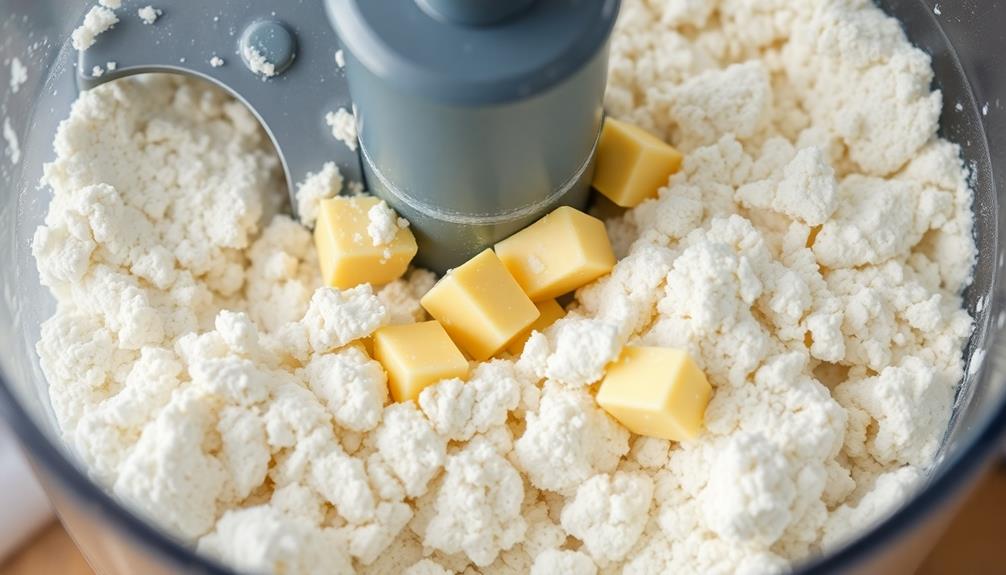
To make the crostata, start by preparing the pastry dough. In a food processor, combine the flour, butter, sugar, and salt until the mixture resembles coarse crumbs.
Slowly add the egg and cold water, and process until the dough just begins to come together. Form the dough into a disc, wrap it in plastic, and chill it in the refrigerator for at least 30 minutes.
Once the dough has chilled, roll it out on a lightly floured surface to a 12-inch circle. Carefully transfer the dough to a 9-inch tart pan with a removable bottom. Gently press the dough into the pan, trimming any excess from the edges.
Fill the tart shell with your desired filling, spreading it evenly. Bake the crostata in a preheated 375°F oven for 30-35 minutes, or until the crust is golden brown and the filling is bubbly.
Allow the tart to cool completely before removing it from the pan. Serve the crostata at room temperature or chilled, and enjoy the perfect balance of flaky crust and sweet filling.
Cooking Steps
First, you'll need to prepare the pie dough – it's the foundation of your crostata!
Next, whip up a delicious fruit filling to add that sweet, juicy touch.
Then, carefully arrange the dough in a baking dish and pop it in the oven until it's golden brown.
Step 1. Prepare Pie Dough
To prepare the pie dough, you'll first need to gather your ingredients. You'll want to have all-purpose flour, unsalted butter, granulated sugar, and a pinch of salt.
Once you have everything ready, it's time to start mixing!
Begin by combining the flour, sugar, and salt in a large bowl. Cut the cold butter into small pieces and add it to the dry ingredients. Use your fingertips to work the butter into the flour until the mixture resembles coarse crumbs. Be careful not to overwork the dough.
Next, add a few tablespoons of ice-cold water, one at a time, mixing gently until the dough just starts to come together. Be careful not to add too much water, or the dough will become sticky.
Once the dough is ready, shape it into a disc, wrap it in plastic wrap, and refrigerate for at least 30 minutes.
Step 2. Prepare Fruit Filling

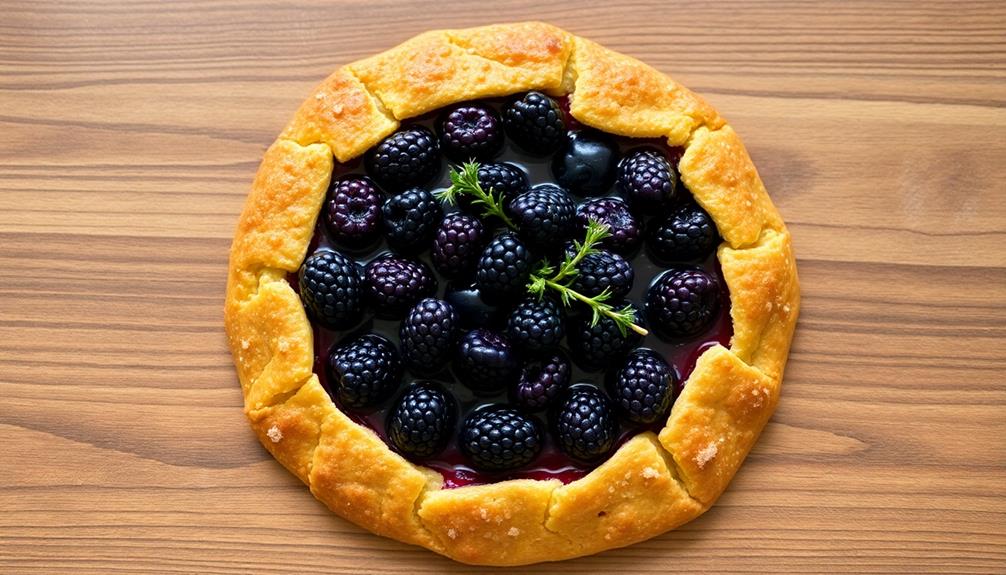
With the pie dough chilling, it's time to turn your attention to the fruit filling. Grab your favorite seasonal fruits – maybe juicy apples, ripe berries, or tangy lemon slices. Give them a good rinse and slice or chop them into bite-sized pieces.
In a big bowl, toss the fruit with a sprinkle of sugar, a dash of cinnamon, and a squeeze of lemon juice. The sugar will bring out the natural sweetness, while the cinnamon and lemon add a delightful zing.
Now, it's time to thicken up that filling! Sprinkle in a bit of cornstarch and give it a good stir. The cornstarch will help the filling set, preventing a soggy crostata.
Taste the mixture and adjust the seasonings as needed – a little more sugar for extra sweetness or a pinch of salt to balance the flavors.
Your vibrant, flavorful fruit filling is now ready to be piled into the chilled pie dough. Let's get baking!
Step 3. Arrange Dough in Baking Dish

Take the chilled pie dough and roll it out on a lightly floured surface into a circle large enough to fit your baking dish. Carefully transfer the dough to the dish, gently pressing it into the bottom and up the sides. Trim any excess dough, leaving about an inch overhang. Tuck the overhang under itself, creating a neat, crimped edge.
Next, spoon the prepared fruit filling into the dough-lined dish, spreading it out evenly. If you'd like, you can create a lattice top by cutting the remaining dough into strips and weaving them over the filling. Pinch the edges to seal the crostata.
Brush the top with a beaten egg or milk, and sprinkle with a bit of sugar for a golden, shimmery finish.
Now your crostata is ready to bake! Pop it in the oven and let the delicious aromas fill your kitchen. Soon, you'll have a gorgeous, homemade dessert that's sure to delight your family and friends.
Step 4. Bake Until Golden Brown
Place the prepared crostata in the preheated oven and bake it for 35 to 40 minutes, or until the crust is golden brown and the filling is bubbly.
Keep a close eye on it, as you don't want the crust to burn! Once it's done, the aroma will fill your kitchen and have everyone's mouths watering.
Carefully remove the crostata from the oven using oven mitts or a towel. The pan will be hot, so be extra careful.
Let it cool on a wire rack for a few minutes. This allows the filling to set and the crust to crisp up even more.
When you're ready, slice into the crostata and serve it up! Scoop out a warm, gooey piece and top it with a dollop of whipped cream or a scoop of vanilla ice cream, if desired.
The flaky crust and sweet filling make for a truly irresistible dessert. Enjoy every bite of your homemade crostata!
Step 5. Let Crostata Cool Before Serving

Once the crostata has been baked to a golden brown, it's important to let it cool before slicing and serving. This allows the filling to set and the crust to firm up, ensuring a perfect slice every time.
Don't be tempted to dig in right away – your patience will be rewarded!
As the crostata cools, you'll start to smell the delicious aroma wafting through the kitchen. This is the perfect time to set the table and gather your family.
When the crostata has had a chance to rest, about 30 minutes, it will be ready to enjoy. Slice it up and serve it with a dollop of whipped cream or a scoop of vanilla ice cream for an extra-special treat.
Your loved ones will be delighted by the flaky crust and the sweet, fruity filling. Savor each bite and relish in the fruits of your baking labor. With a little time and care, you've created a masterpiece!
Final Thoughts
The beauty of the crostata lies in its simplicity. This rustic Italian tart is a delightful treat that's perfect for any occasion, from a casual family gathering to a festive holiday celebration.
The best part? It's easy to make and even easier to enjoy.
Once your crostata has cooled, it's time to dive in. The buttery, flaky crust provides the perfect base for the sweet, jammy fruit filling.
Whether you opt for classic fruit flavors like apple or cherry, or get creative with seasonal berries, each bite will burst with flavor.
Serve the crostata with a scoop of vanilla ice cream or a dollop of whipped cream for an extra special touch.
It's a dessert that's sure to bring smiles to everyone's faces. So, gather your loved ones, slice into the crostata, and savor the simple pleasures of this timeless Italian treat. And as you enjoy the delicious flavors of the crostata, let the warmth of family and love fill your heart. The combination of flaky pastry and sweet, fruity filling is a true delight for the senses. And for a complete Italian culinary experience, be sure to also try our homemade ravioli recipe, passed down through generations to bring authentic flavors to your table. Buon appetito!
Frequently Asked Questions
What Is the Difference Between Crostata and Pie?
You'll find that pies have a top and bottom crust, while a crostata has just a bottom crust with the filling exposed. Pies are baked in a dish, while a crostata is baked on a baking sheet.
Can Crostata Be Made Gluten-Free?
Yes, you can absolutely make crostata gluten-free. Just replace the regular flour with a gluten-free flour blend, and you'll have a delicious, flaky gluten-free crostata that's just as good as the original.
How Long Can a Baked Crostata Be Stored?
You can store a baked crostata for up to 4 days at room temperature in an airtight container. For longer storage, it's best to refrigerate the crostata, where it'll keep for up to a week.
Can I Use Different Types of Fruit for Crostata?
Yes, you can definitely use different types of fruit for your crostata. Feel free to experiment with apples, berries, stone fruits, or even a combination for a unique and flavorful dessert.
Is Crostata a Traditional Italian Dessert?
Yes, crostata is a traditional Italian dessert. It's a rustic, open-faced tart that's been enjoyed in Italy for centuries, often featuring a variety of seasonal fruits baked into a buttery, flaky crust.