Enjoy the seasonal flavors of a fresh fruit galette! This rustic-style tart showcases nature's bounty with a buttery, flaky crust that perfectly complements the juicy fruit filling. The galette's origins trace back to the French countryside, where it evolved from simple tarts to refined desserts. To create your own, simply roll out pastry dough, arrange vibrant fruit slices in the center, and fold the edges over for a charming, homemade look. Bake until golden, then serve warm or with a scoop of vanilla ice cream. This classic treat is easy to make and offers endless opportunities to experiment with seasonal fruit combinations.
Key Takeaways
- Fresh Fruit Galette is a classic French dessert that showcases seasonal produce in a flaky, buttery crust.
- The galette features a rustic, freeform shape that allows the natural sweetness of the fruit to shine.
- Preparation involves rolling out pastry dough, arranging sliced fruits, and baking at a high temperature for a crisp, golden crust.
- Serving options include pairing the galette with vanilla ice cream or whipped cream for a creamy contrast.
- Experimenting with different fruit combinations and adding spices can create unique flavor profiles for the Fresh Fruit Galette.
History
The origins of the fruit galette can be traced back to the French countryside, where resourceful bakers would craft these rustic tarts to showcase the season's freshest produce. As time passed, the galette gained popularity and spread to other European countries, each putting their own unique spin on the traditional recipe. One popular variation included a dollop of sweetened whipped cream or a scoop of vanilla ice cream on top. Another inventive twist was to serve the galette alongside a refreshing elderflower cordial recipe, adding a sweet and floral element to complement the tart’s fruit filling. Today, the fruit galette continues to be a beloved dessert, cherished for its simplicity and delicious blend of flavors.
Over time, the galette evolved from a simple, free-form pastry to a more refined and structured dessert. Its name comes from the French word "galet," meaning "pebble," a nod to the original round, flat shape of the tart.
Traditionally, galettes were made with a buttery, flaky crust and filled with a variety of seasonal fruits, such as apples, pears, or berries. The dough would be rolled out and then gently folded over the fruit, creating a rustic, yet elegant presentation.
This free-form style allowed bakers to highlight the natural beauty of the fruit without the constraints of a traditional pie or tart pan.
Today, the fruit galette remains a beloved and versatile treat, enjoyed for its simplicity, flavor, and the ability to showcase the best of the season's bounty.
Recipe
A fresh fruit galette is a rustic and delightful pastry that showcases the natural sweetness of ripe, seasonal fruit. The flaky crust provides a perfect contrast to the juicy filling, making this dessert a crowd-pleaser.
Preparing a fruit galette is a simple yet rewarding process that allows you to showcase your culinary creativity. By using a versatile dough and a variety of fresh fruits, you can experiment with different flavor combinations to suit your personal taste preferences.
Ingredients:
- 1 1/2 cups all-purpose flour
- 1/2 teaspoon salt
- 1 cup unsalted butter, chilled and cubed
- 1/4 cup ice water
- 3 cups assorted fresh fruit (such as peaches, berries, or plums), sliced or chopped
- 1/4 cup granulated sugar
- 1 tablespoon all-purpose flour
- 1 egg, beaten with 1 tablespoon water for the egg wash
Preheat your oven to 400°F (200°C). On a lightly floured surface, roll the dough into a circle approximately 12 inches in diameter. Transfer the dough to a parchment-lined baking sheet.
In a large bowl, gently toss the sliced fruit with the sugar and 1 tablespoon of flour. Arrange the fruit mixture in the center of the dough, leaving a 2-inch border. Fold the border over the fruit, pleating the dough as you go. Brush the dough with the egg wash.
Baking the galette at a high temperature allows the crust to become crisp and golden, while the fruit filling bubbles and caramelizes. Serve the galette warm or at room temperature, either on its own or with a scoop of vanilla ice cream for an extra-special treat.
Cooking Steps
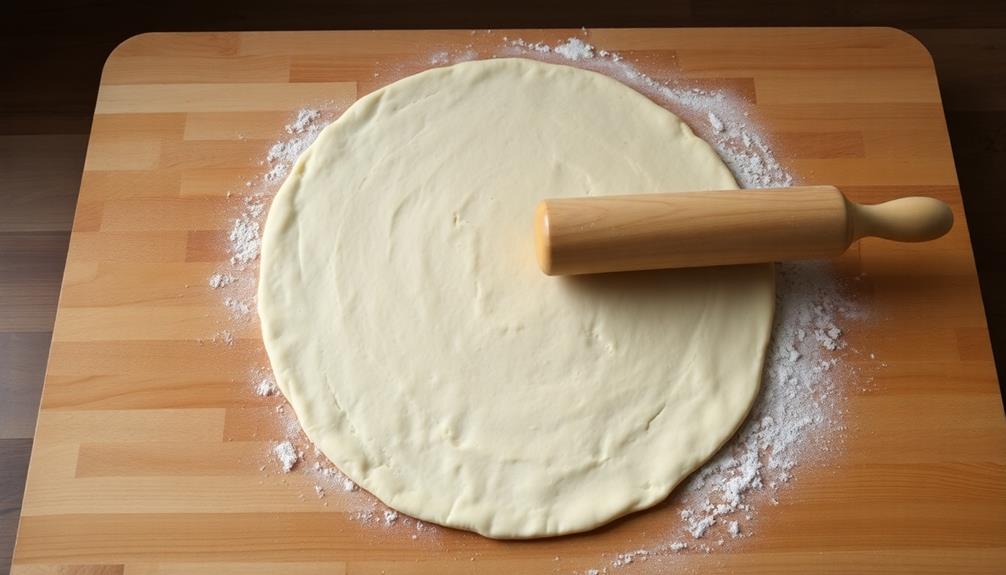
Roll out the pastry on a lightly floured surface until it's about 1/8-inch thick.
Arrange the sliced fruit in an overlapping pattern in the center of the pastry.
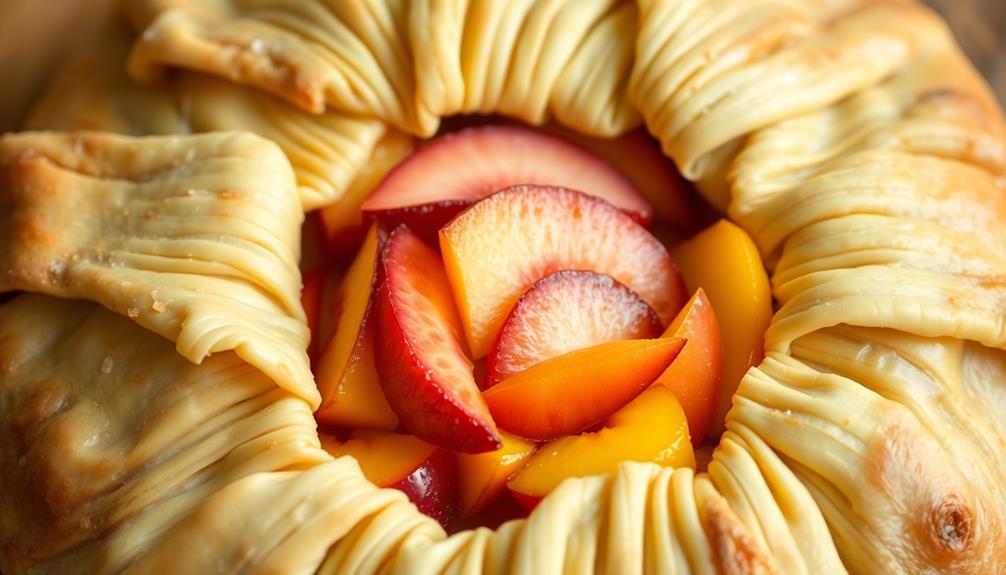
Fold the pastry edges over the fruit, creating a rustic, free-form tart.
Step 1. Roll Out the Pastry

Typically, you'll want to roll out the pastry on a lightly floured surface. This helps prevent the dough from sticking as you work it.
Use a rolling pin to gently roll the dough out into a large circle, about 12 inches in diameter. Don't worry if the edges are a bit uneven – that's part of the rustic charm of a galette.
As you roll, occasionally lift the dough and add a light dusting of flour underneath to keep it from sticking. Apply gentle, even pressure, rolling from the center outwards. This helps create a nice, even thickness throughout.
When the dough is your desired size, transfer it to a parchment-lined baking sheet. Gently fold the dough in half, then in half again, to make it easier to transfer. Unfold the dough on the baking sheet, ready for the next step.
Step 2. Arrange Fruit in Overlapping Pattern

Next, begin arranging the fresh fruit in an overlapping pattern across the center of the dough, leaving a 2-inch border around the edges.
Start with your larger fruit pieces, like sliced peaches or nectarines, and layer them in a circular or spiral design. Fill in the gaps with smaller berries, like raspberries or blueberries, creating a vibrant, colorful arrangement.
Overlap the fruit slightly so there are no gaps between the pieces. This not only looks beautiful, but it also helps the fruit cook evenly.
As you work, be mindful of the border – you want to leave enough room for the dough to fold up and over the fruit. Tuck any stray fruit pieces under the edges to keep them in place.
Step back and admire your work – the galette should resemble an elegant, rustic tart, ready for baking.
Step 3. Fold Pastry Edges Over Fruit

With the fruit arranged, it's time to fold the pastry edges over the fruit. Gently lift the pastry edges and begin folding them inwards, overlapping each piece as you go.
The folds don't need to be perfect – a rustic, imperfect look is part of the charm of a galette. Work your way around the fruit, folding the pastry over to create a lovely, free-form shape.
As you fold, be mindful not to tear the pastry. If it cracks or splits, simply pinch it back together. The overlapping folds will help hold the shape.
Once you've gone all the way around, take a step back and admire your handiwork. The fruit should be peeking out between the folds, creating a beautiful, artful presentation.
With the pastry folded, your galette is almost ready for the oven. Just a few more steps to go before you can enjoy the delicious, flaky pastry and juicy, fresh fruit.
Step 4. Bake Until Pastry Is Golden

Preheat your oven to 400°F (200°C). Once it's nice and hot, pop that gorgeous fruit galette right in. Let it bake for 25-30 minutes, until the pastry turns a lovely golden brown.
Keep an eye on it, though – you don't want the edges to get too dark. As the galette bakes, your kitchen will fill with the most amazing aroma. The fruit juices will bubble up, caramelizing around the edges.
It's going to look absolutely scrumptious when it comes out of the oven. Once the timer goes off, carefully remove the galette and let it cool for about 10 minutes. This gives the fruit a chance to set up a bit.
Then, you can slice into that flaky, golden crust and enjoy the sweet, jammy filling. Serve it warm, maybe with a scoop of vanilla ice cream on the side. Mmm, what a delightful way to savor the season's freshest fruit!
Step 5. Brush Pastry With Egg Wash

Before popping the galette into the oven, you'll want to give the pastry a quick egg wash. This step helps the crust achieve a beautiful golden-brown color and a lovely shine.
Simply crack an egg into a small bowl, add a splash of water, and whisk it together until it's nicely combined. Then, use a clean pastry brush to gently brush the egg wash all over the exposed pastry, being careful not to drip any onto the fruit filling.
Make sure to get into all the nooks and crannies for even coverage. This extra step may seem small, but it makes a big difference in the final appearance of your rustic galette.
After the egg wash, the galette is ready to bake until the crust is golden and the fruit is bubbling. The egg wash seals in the flakiness and gives the pastry an appetizing sheen.
A simple touch that elevates your homemade masterpiece.
Final Thoughts
The Fresh Fruit Galette is a delightful dessert that's perfect for any occasion. You'll be amazed by how easy it's to create a rustic, homemade treat that looks and tastes like it came from a professional bakery.
The combination of the flaky, golden pastry crust and the vibrant, juicy fruit filling is simply irresistible.
Once you've mastered the art of the galette, you can experiment with different fruit combinations and seasonal flavors. Try a classic apple galette in the fall or a berry medley in the summer. The possibilities are endless!
Just remember to brush the pastry with an egg wash before baking to achieve that beautiful golden-brown color and sheen.
With its impressive appearance and mouthwatering flavors, the Fresh Fruit Galette is sure to impress your family and friends. Serve it warm, with a scoop of vanilla ice cream or a dollop of whipped cream for an extra special touch.
Frequently Asked Questions
Can the Galette Be Made With Frozen Fruit?
Absolutely, you can make a galette with frozen fruit. The frozen fruit will work just as well as fresh, providing you thaw it properly and drain any excess liquid before assembling your galette.
How Long Does the Galette Typically Take to Bake?
The baking time for a galette typically ranges from 30 to 45 minutes, depending on the size and filling. You'll know it's done when the crust is golden brown and the fruit is bubbling. Keep an eye on it during the last 10 minutes.
Can the Dough Be Made in Advance?
You can definitely make the dough in advance. Prepare the dough, wrap it in plastic, and refrigerate it for up to 3 days. This allows you to save time when you're ready to assemble and bake the galette.
Is the Galette Suitable for Special Dietary Needs?
Yes, the galette can be suitable for special dietary needs. You can make it gluten-free, dairy-free, or vegan by using alternative ingredients. Just be sure to adjust the recipe accordingly to accommodate your dietary requirements.
Can the Galette Be Served Warm or Cold?
The galette can be served warm or cold, depending on your preference. Warm, it'll have a cozy, comforting feel, while cold, it'll offer a refreshing treat. Choose whichever temperature suits your mood and the occasion best.


