Connect with us

Korean Cuisine

Myulchi Bokkeum: Korean Stir-Fried Anchovies With Sesame

The delightful Myulchi Bokkeum offers a savory twist on anchovies that will leave you craving more—discover the secrets to this irresistible dish!

Published

on

stir fried anchovies with sesame

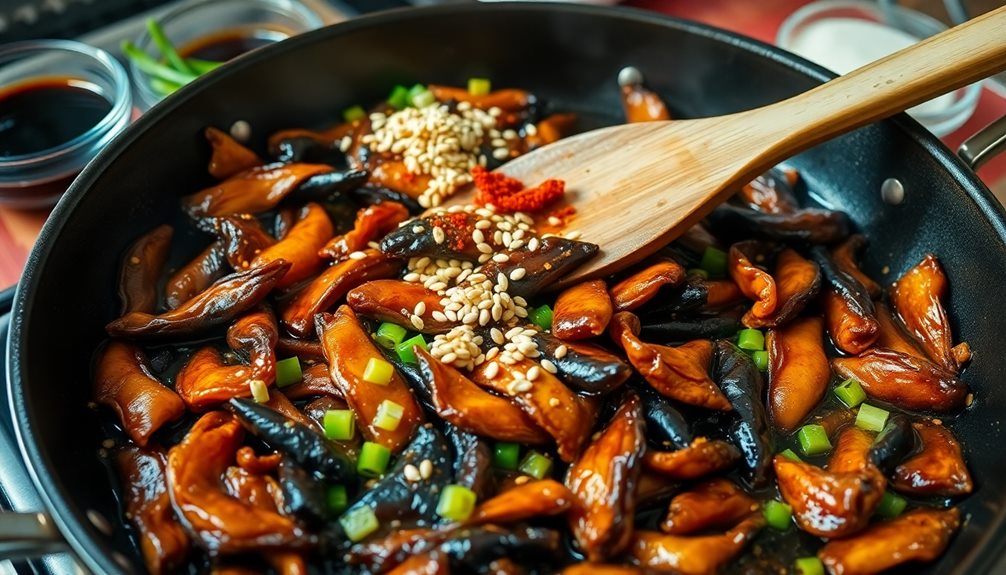
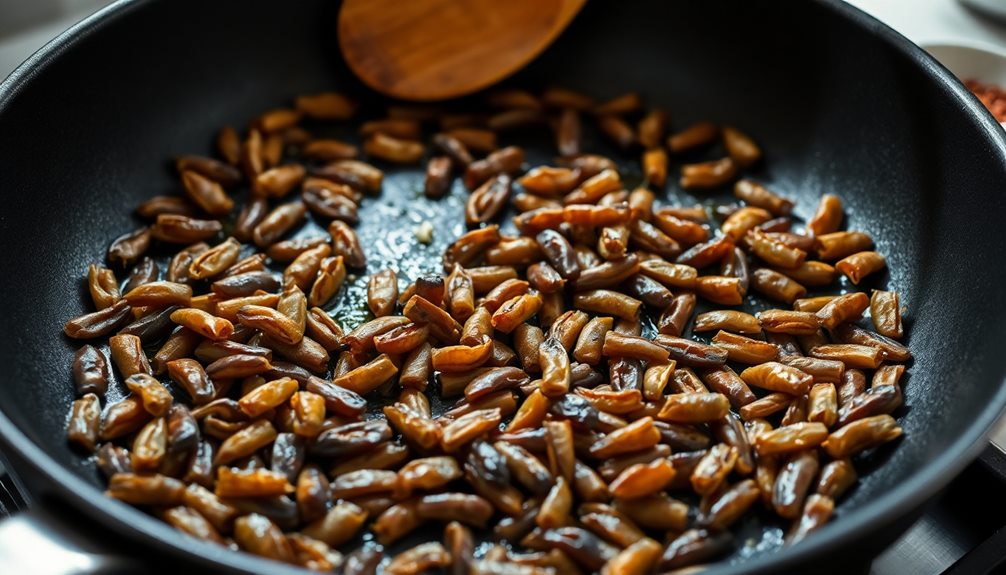
Myulchi Bokkeum is a tasty Korean dish featuring stir-fried anchovies with sesame seeds. You'll love how easy it is to make! First, rinse and dry the anchovies, then fry them until they're crispy. Next, mix soy sauce and sugar to create a flavorful coating. Don't forget to sprinkle sesame seeds on top for an extra crunch! You can even add colorful veggies like carrots and bell peppers for fun. This dish is not only delicious but also packed with omega-3s and can be enjoyed at gatherings with family and friends. Want to know more about this delightful dish?

Key Takeaways

  • Myulchi Bokkeum is a traditional Korean dish made by stir-frying anchovies with a savory seasoning mix, enhancing their flavor profile.
  • The dish includes sesame seeds, which add a delightful crunch and nutty flavor when toasted with the anchovies.
  • It is rich in omega-3 fatty acids, protein, and essential vitamins, making it a nutritious snack option.
  • Myulchi Bokkeum fosters social connections, making it ideal for sharing with family and friends during communal meals.
  • The cooking process is simple and quick, allowing for creativity and experimentation with ingredients for varied flavor outcomes.

History

When you dive into the history of Myulchi Bokkeum, you'll find that it's more than just a dish; it's a reflection of Korea's culinary evolution. This tasty stir-fried anchovy dish has roots that stretch back centuries. Anchovies, or "myulchi," have been an important part of Korean diets because they're packed with nutrients and flavor.

You'll discover that people started using these tiny fish in various ways long before Myulchi Bokkeum became popular. In the past, Koreans often relied on preserved and fermented foods due to the country's changing seasons. Myulchi Bokkeum emerged as a practical way to cook with anchovies and enhance their taste.

Families would gather in the kitchen, sharing stories and laughter while preparing this dish. The combination of anchovies with sweet and spicy seasonings made it a favorite for many!

As Korea modernized, Myulchi Bokkeum remained a beloved staple. It symbolizes not just tradition but also adaptation. Today, you might find it served as a side dish in homes and restaurants, bringing people together over a shared love of flavor and culture.

Isn't it exciting to think about how a simple dish can tell such a rich story?

Advertisement

Cooking Steps

To prepare Myulchi Bokkeum, start by gathering all your ingredients, ensuring you have dried anchovies, cooking oil, garlic, and your choice of seasonings ready.

Once you've got everything, heat a pan over medium heat and add a splash of cooking oil. When the oil's hot, toss in the dried anchovies. You'll want to stir them around for about 2-3 minutes until they start to get crispy and golden.

Next, chop up some garlic and add it to the pan. The smell will be amazing! Keep stirring for another minute or so, making sure the garlic doesn't burn.

Now it's time for the fun part: adding your seasonings! You can use soy sauce, sugar, or even a sprinkle of sesame seeds for some extra flavor. Mix everything together well, letting the anchovies absorb all those delicious flavors.

After about 1-2 more minutes, your Myulchi Bokkeum should be ready! Turn off the heat and let it cool for a bit.

Advertisement

Serve it warm, and enjoy your tasty Korean dish that's perfect as a side or snack! Happy cooking!

Step 1. Prepare Anchovies for Frying
prepare anchovies for frying

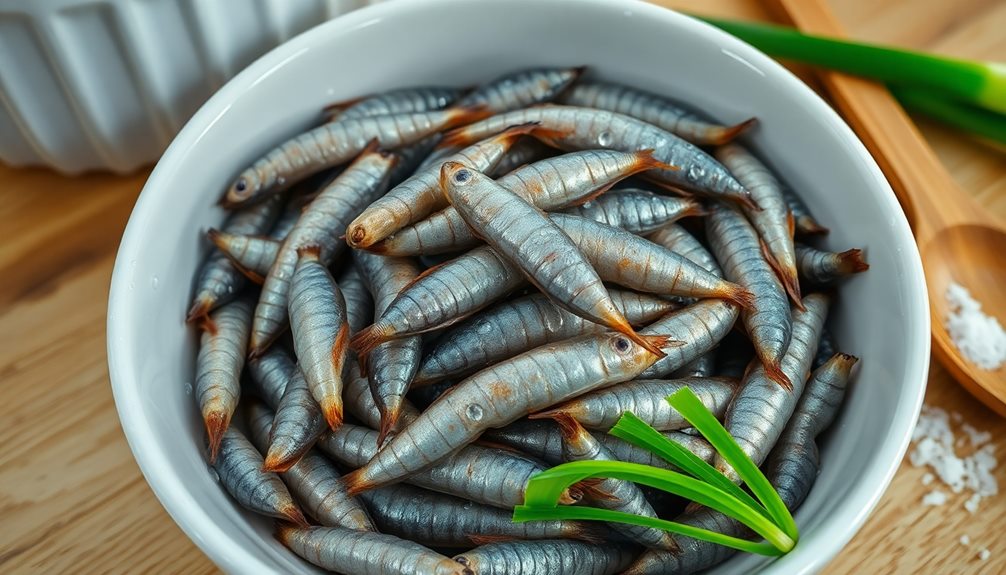
How do you ensure your anchovies are ready for frying? First, you'll want to gather your anchovies. If they're fresh, rinse them gently under cold water. This helps to remove any sand or dirt. If you're using dried anchovies, you don't need to rinse them, but check for any excess moisture.

Next, lay the anchovies out on a clean kitchen towel to dry. This step is super important because any moisture left on them can cause splattering during frying.

While they're drying, take a moment to inspect each anchovy. Remove any heads or guts if they're still attached. You can use kitchen scissors or your fingers for this task. It might seem a bit tricky, but with practice, you'll get the hang of it!

Once you've prepped your anchovies, you can arrange them in a single layer on a plate. This makes it easier to fry them evenly later on.

When you're done, you'll have a beautiful pile of ready-to-fry anchovies that'll soon become a delicious Myulchi Bokkeum dish. You're almost there, and it's going to be tasty!

Advertisement

Step 2. Add Seasoning Mix

incorporate seasoning blend thoroughly

With your anchovies prepped and ready, it's time to create a flavorful seasoning mix. Start by grabbing a small bowl. You'll need some soy sauce, sugar, and a pinch of garlic powder to make it extra tasty.

Pour about two tablespoons of soy sauce into the bowl. Then, add one tablespoon of sugar. This will help balance the saltiness of the soy sauce and add a lovely sweetness to your dish. Next, sprinkle in half a teaspoon of garlic powder. If you love garlic, you can add a bit more!

Now, stir everything together until the sugar dissolves and all the ingredients blend nicely. You should have a shiny, sweet-salty mixture. Once that's done, set the seasoning mix aside for a moment.

When your anchovies are sizzling in the pan, it's time to add this mix. Pour it over the anchovies and watch them soak up all that delicious flavor.

Keep stirring gently to ensure every little anchovy gets coated. This step is super important because it'll make your dish really special. Get ready for the yummy smell that'll fill your kitchen!

Step 3. Add Sesame Seeds
incorporate sesame seeds

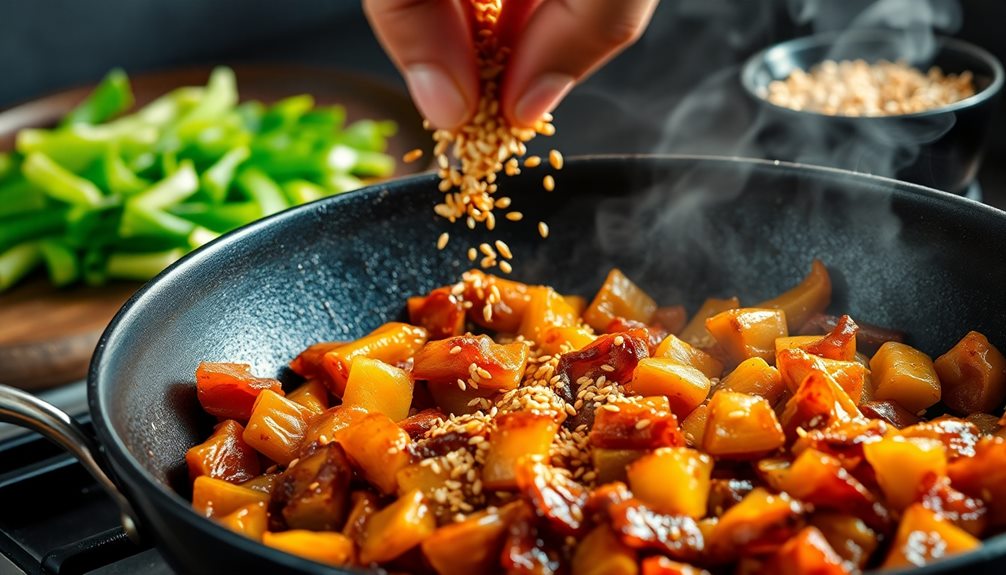
After the anchovies have absorbed the flavorful seasoning mix, it's time to enhance their taste and texture with sesame seeds. These tiny seeds pack a big punch of flavor and add a delightful crunch to your dish!

Start by measuring out about two tablespoons of sesame seeds. You can use either white or black seeds, depending on what you like best.

Advertisement

Next, sprinkle the sesame seeds over the anchovies in the pan. Give them a gentle stir to make sure every little fish gets coated with those nutty seeds. This step not only boosts the flavor, but it also makes your dish look even more appetizing.

Now, let the anchovies and sesame seeds cook together for an additional minute or two. This will help the seeds toast slightly, bringing out their rich, roasted flavor.

Keep an eye on them to avoid burning. Once you smell that wonderful aroma, you know they're ready!

Step 4. Add Vegetables for Flavor
incorporate vegetables for taste

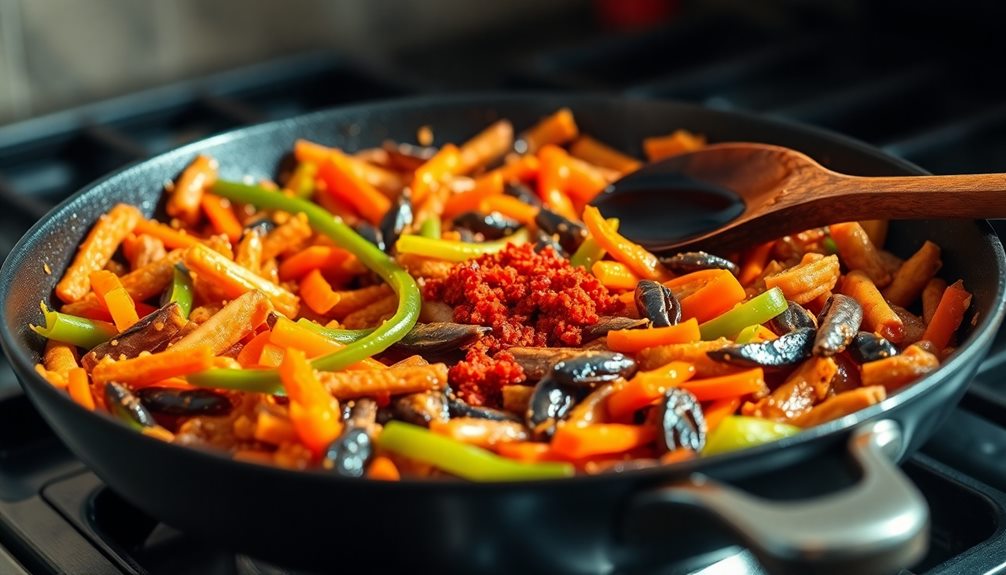
To elevate the flavor of your Myulchi Bokkeum, adding vegetables is a fantastic step. Veggies bring a pop of color and a delicious taste that complements the anchovies perfectly!

Start by choosing some vegetables you love. Carrots, bell peppers, and green onions work great. Chop them into small pieces so they cook quickly and mix well with the anchovies.

Once you've got your vegetables prepped, heat a bit of oil in your pan over medium heat. Add the chopped veggies first and stir-fry them for a few minutes. You want them to become tender but still crunchy. This brings out their natural sweetness and makes your dish even tastier!

Advertisement

After your veggies are ready, toss in the fried anchovies. Mix everything together gently, so the flavors blend beautifully. At this point, you can also add a splash of soy sauce or a sprinkle of sugar if you want a touch more sweetness.

Keep stirring for another minute or so, making sure everything is well-coated and heated through.

Now, your Myulchi Bokkeum is bursting with flavors from both the anchovies and the colorful veggies. Enjoy this delightful dish with rice or as a side!

Step 5. Adjust Heat for Crispiness

crispiness heat adjustment process

Once your vegetables are tender and mixed with the anchovies, adjusting the heat is key to achieving the perfect crispiness. Start by turning up the heat to medium-high. This helps the anchovies get that nice, crunchy texture you want.

Keep an eye on them, though! You don't want them to burn. Stir the mixture gently but often, making sure everything cooks evenly.

As the heat rises, you'll hear that delightful sizzle. This means your dish is coming to life! If you notice that things are starting to cook too quickly, don't worry—just lower the heat a bit. You want to find that sweet spot where everything's crisping up but not turning black.

Advertisement

After about five to seven minutes, check in on your anchovies. They should be golden and crispy. Once you're happy with the texture, remove the pan from the heat.

Let it cool for a minute, and then it's time to savor the deliciousness you've created. The aroma will fill your kitchen, and you'll know you've nailed it! Enjoy your Myulchi Bokkeum, and get ready to impress your friends and family!

Final Thoughts

When you savor Myulchi Bokkeum, you're not just enjoying a dish; you're experiencing a delicious blend of savory flavors and cultural tradition.

This Korean stir-fried anchovy dish is more than just a meal; it's a connection to a rich culinary heritage that's been passed down through generations. Each bite brings a delightful crunch and a burst of umami that dances on your taste buds.

Making Myulchi Bokkeum can be a fun adventure in the kitchen! You can experiment with different spices and adjust the sweetness to match your personal taste.

Advertisement

Plus, it's a fantastic way to introduce your friends and family to Korean cuisine. They'll be amazed at how simple ingredients can come together to create something so special.

Frequently Asked Questions

What Are the Nutritional Benefits of Myulchi Bokkeum?

When you explore the nutritional benefits, you'll find it's rich in protein, omega-3 fatty acids, and essential vitamins. These elements support heart health, boost brain function, and provide energy, making it a nutritious addition to your diet.

Can I Substitute Anchovies With Other Fish?

You can definitely substitute anchovies with other fish, like sardines or mackerel. Just keep in mind that different fish have unique flavors and textures, so adjust your seasoning and cooking time accordingly for the best results.

How Should I Store Leftover Myulchi Bokkeum?

To store leftovers, let them cool completely, then transfer to an airtight container. Refrigerate for up to a week. Reheat gently on the stovetop or microwave before serving for the best taste.

Is Myulchi Bokkeum Gluten-Free?

You'll find that many traditional Korean dishes can be gluten-free, but it depends on the ingredients used. Always check for any sauces or seasonings that might contain gluten to ensure your dish remains safe.

Advertisement

What Dishes Pair Well With Myulchi Bokkeum?

When pairing dishes, you'll enjoy myulchi bokkeum alongside steamed rice, kimchi, or a light soup. These combinations enhance the flavors, making your meal balanced and satisfying, creating a delightful dining experience you won't forget.

Advertisement

Korean Cuisine

Galbi Wings: Korean BBQ Chicken Wings With Bold Flavors

Perfectly crispy and packed with Korean barbecue flavors, these galbi wings will transport your taste buds on an unforgettable culinary adventure.

Published

on

bold korean bbq wings

You'll love the bold, umami-packed flavors of galbi wings! These tantalizing fusion dishes take the beloved Korean barbecue marinade and transform it into crispy chicken wings. The sweet and savory soy-based marinade enhances the meat's natural flavors. Simply marinate the wings, then grill or bake them until perfectly crispy. Toss the wings in a flavorful galbi sauce and garnish with toasted sesame seeds for an unforgettable taste experience. Galbi wings are a delicious way to explore the mouthwatering world of Korean cuisine – let's dive in!

Key Takeaways

  • Galbi wings are a fusion of traditional Korean barbecue flavors and the popular chicken wing dish.
  • The wings are marinated in a sweet and savory soy-based marinade, infusing them with bold Korean flavors.
  • The wings can be baked or grilled, resulting in crispy skin and juicy meat.
  • A gochujang-based glaze is tossed with the cooked wings, adding a touch of heat and depth.
  • Garnishes like sesame seeds and green onions complement the overall Korean-inspired taste profile.

History

historical knowledge and events

The origins of Galbi Wings can be traced back to the traditional Korean barbecue dish known as "galbi," a marinated and grilled beef short rib.

Galbi is a beloved Korean staple, featuring a sweet and savory soy-based marinade that tenderizes the meat and infuses it with incredible flavor.

Over time, enterprising cooks decided to take the essence of galbi and apply it to another popular food – chicken wings.

Cooking Steps

step by step cooking instructions

Preheat your oven to 400°F (200°C). Line a large baking sheet with foil or parchment paper.

In a large bowl, combine the chicken wings, soy sauce, brown sugar, garlic, ginger, and sesame oil. Toss everything together until the wings are evenly coated.

Arrange the marinated wings in a single layer on the prepared baking sheet. Bake for 30-35 minutes, flipping the wings halfway through, until they're crispy and cooked through.

Advertisement

While the wings are in the oven, make the glaze. In a small saucepan, whisk together the gochujang, brown sugar, soy sauce, rice vinegar, and sesame oil. Bring the mixture to a simmer and cook for 5-7 minutes, stirring occasionally, until it thickens slightly.

Remove the wings from the oven and transfer them to a large bowl. Pour the hot glaze over the wings and toss to coat evenly.

Sprinkle with toasted sesame seeds and green onions before serving.

Step 1. Marinate Chicken in Soy-Based Mixture

marinate chicken in soy

Begin by placing the chicken wings in a large resealable bag or airtight container.

Pour in the soy sauce, brown sugar, garlic, ginger, and sesame oil.

Now, use your hands to massage the marinade into the wings, making sure each one is evenly coated.

Advertisement

Don't be shy – get in there and really work the flavors into the meat.

Once the wings are fully coated, seal the bag or container and pop it in the fridge.

Let them marinate for at least 30 minutes, but feel free to leave them in there for up to 4 hours.

The longer you let them soak, the more intense the flavor will be.

When you're ready to cook, remove the wings from the marinade and discard any leftover liquid.

Advertisement

Now you're all set to toss them on the grill or in the oven.

Get ready for a mouthwatering, tangy-sweet explosion of Korean BBQ goodness!

Step 2. Grill Wings Over High Heat

grill wings high heat

Once the wings have marinated, it's time to fire up the grill! Get that grill nice and hot – we're talking about high, sizzling heat here.

You'll want to oil the grates so the wings don't stick. Then, carefully place the marinated wings onto the hot grill.

As the wings start to cook, you'll see them begin to brown and char in spots. That's exactly what you want! Flip the wings every few minutes, making sure they cook evenly on both sides.

The high heat will help lock in all that delicious, soy-based flavor from the marinade.

Advertisement

Keep a close eye on the wings, and don't be afraid to move them around the grill if any start to brown too quickly. You want them to be cooked through, with a nice, crispy skin.

Once they're done, transfer the wings to a serving platter and get ready to dig in. The bold, Korean-inspired flavors are about to blow your taste buds away!

Step 3. Toss Wings in Sauce

coat wings with sauce

After the wings have finished grilling, you'll want to toss them in the delectable galbi sauce. This savory, sweet, and slightly spicy sauce is the star of the show.

First, grab a large mixing bowl and add the grilled wings. Now, drizzle the galbi sauce all over the wings, making sure each one is coated evenly. Using a pair of tongs, gently toss the wings until they're completely covered in the vibrant, glossy sauce.

The sauce sinks into all the nooks and crannies, infusing the wings with an incredible depth of flavor. As you toss, you'll notice the wings taking on a beautiful, lacquered appearance. The sticky sauce clings to the crispy skin, creating a mouthwatering contrast of textures.

Keep tossing until every inch of the wings is slicked with the irresistible sauce. Now they're ready to be served hot, garnished with sesame seeds and green onions for a final flourish of flavor and color.

Advertisement

Step 4. Brush Wings With Sesame Oil

brush wings with oil

Before placing the wings on the grill, you'll want to brush them lightly with sesame oil. This step is crucial for adding a beautiful golden-brown color and a delightful nutty aroma to your Galbi Wings.

Simply dip a pastry brush into the sesame oil and gently sweep it over the surface of the wings, making sure to cover them evenly.

The sesame oil will help the wings caramelize and develop a crispy, delicious skin as they cook. It also adds a subtle yet complex flavor that pairs perfectly with the bold Korean barbecue seasonings.

Be careful not to use too much oil, though – you just want a light, even coating to help the wings sizzle and shine.

Once the wings are brushed with the sesame oil, you're ready to place them on the hot grill and start cooking. This quick step will take your Galbi Wings to the next level, creating a truly mouthwatering and authentic Korean BBQ experience right in your own backyard.

Step 5. Garnish With Toasted Sesame Seeds

garnish with sesame seeds

To finish off your Galbi Wings, you'll want to garnish them with a sprinkle of toasted sesame seeds. This simple step adds a delightful crunch and nutty flavor that complements the bold Korean BBQ seasoning.

Start by heating a small skillet over medium heat. Add the sesame seeds and toast them, stirring frequently, until they're lightly golden brown and fragrant. This should take only a minute or two, so keep a close eye on them to prevent burning.

Advertisement

Once your sesame seeds are perfectly toasted, remove the skillet from the heat and let the seeds cool slightly. Then, grab a pinch of the warm, fragrant seeds and sprinkle them generously over the top of your freshly cooked Galbi Wings.

The contrast of the crunchy sesame and the tender, saucy chicken will make your tastebuds dance with joy. Garnishing with toasted sesame seeds is the final touch that takes these Galbi Wings to the next level of flavor and texture.

Get ready for a truly mouthwatering experience!

Final Thoughts

reflective conclusions summary

In the end, the Galbi Wings offer a unique and delectable twist on the classic chicken wing. These wings are a true delight, bursting with the bold and savory flavors of Korean BBQ. The sticky, caramelized glaze coats each wing, creating a mouthwatering experience with every bite. The toasted sesame seeds sprinkled on top add a delightful crunch, complementing the tender meat beneath.

What sets these wings apart is the amazing fusion of Eastern and Western cuisine. The familiar comfort of chicken wings is elevated by the robust and complex flavors of the Korean-inspired marinade, reminiscent of Fried Catfish, which also embodies a rich culinary tradition.

It's a harmonious blend that will have your taste buds dancing with joy. Whether you're hosting a party or just craving an extraordinary snack, the Galbi Wings are sure to impress.

Advertisement

With their irresistible combination of sweet, savory, and a touch of heat, these wings are a true culinary adventure that you won't soon forget.

Frequently Asked Questions

Where Can I Buy the Ingredients for Galbi Wings?

You can find the ingredients for these wings at your local grocery store or Asian market. Look for soy sauce, brown sugar, garlic, ginger, and other savory seasonings to create the bold Korean flavors you're after.

What Is the Best Side Dish to Serve With Galbi Wings?

When serving Galbi wings, you'll want a complementary side dish that enhances the bold flavors. Consider a refreshing cabbage slaw, fragrant jasmine rice, or roasted vegetables to balance the richness of the wings.

How Long Do the Wings Need to Marinate?

For best results, marinate the wings for at least 2-4 hours, or up to 24 hours. The longer they soak in the flavorful marinade, the more intense and delicious the final wings will be. Don't skimp on the marinating time.

Can I Use a Different Type of Soy Sauce?

You can certainly use a different type of soy sauce. Feel free to experiment with various soy sauce varieties, such as low-sodium, gluten-free, or even coconut aminos, to find the flavor profile that best suits your preferences.

Advertisement

How Do I Make the Wings Extra Crispy?

To make the wings extra crispy, you can try drying them thoroughly before cooking, using a high-heat cooking method like deep-frying or broiling, and tossing the cooked wings in a crunchy coating like cornstarch or panko breadcrumbs.

Continue Reading

Korean Cuisine

Duruchigi: Korean Spicy Pork Stir-Fry

On a quest for a flavorful dish that brings joy to the table? Discover the secrets behind the vibrant and spicy duruchigi!

Published

on

spicy korean pork stir fry

Duruchigi, or Korean spicy pork stir-fry, is a tasty dish packed with vibrant flavors that your whole family will love! You start by marinating tender pork in a mix of gochujang, soy sauce, and garlic. Then, slice the marinated pork into strips and stir-fry it with colorful veggies like bell peppers and carrots. After everything's cooked, add a spicy sauce and let it simmer for a bit. Finally, sprinkle some sesame seeds on top for a nice crunch. It's not just food; it's a cheerful feast! Stick around to discover some fun tips for making it even more special!

Key Takeaways

  • Duruchigi, also known as Jeyuk Bokkeum, is a popular Korean spicy pork stir-fry made with marinated pork and colorful vegetables.
  • The dish features pork marinated in gochujang, soy sauce, sesame oil, and garlic, providing vibrant flavors and a spicy kick.
  • Fresh vegetables like bell peppers, carrots, and onions are added, maintaining their crispness during the stir-frying process.
  • After cooking the pork and vegetables, a spicy sauce is added and simmered to enhance flavor integration.
  • Garnish with toasted sesame seeds to add a nutty flavor and crunchy texture, enhancing the dish's appeal.

History

Korean spicy pork stir-fry, known as "jeyuk bokkeum," often finds its roots in the rich culinary traditions of Korea. This dish has a long and flavorful history that brings people together.

It's believed that jeyuk bokkeum originated in the southern regions of Korea, where farmers would cook fresh pork with local vegetables and spices. They wanted to create something delicious and easy to share with family and friends.

Over time, jeyuk bokkeum became a popular choice for special occasions, family gatherings, and even everyday meals. The dish is loved for its vibrant flavors, spicy kick, and bright colors.

You might notice that it's often enjoyed with a side of rice and kimchi, making it a complete meal that satisfies your taste buds.

As Korean culture spread around the world, so did the popularity of jeyuk bokkeum. You can now find it in many Korean restaurants, and it's a favorite dish for those wanting to explore Korean cuisine.

Advertisement

Cooking Steps

To create a flavorful Korean spicy pork stir-fry, you'll want to start by marinating the pork in a mixture of gochujang, soy sauce, sesame oil, and garlic. Let it soak up all those spicy, savory flavors for at least 30 minutes.

While the pork is marinating, chop up your favorite vegetables, like bell peppers, carrots, and onions. They'll add color and crunch to your dish!

Next, heat a large pan or wok over medium-high heat and add some oil. Once it's nice and hot, toss in the marinated pork. Stir-fry it for about 5 to 7 minutes until it's cooked through and starts to caramelize.

Then, add in your chopped vegetables and cook for another 3 to 5 minutes. You want them to stay crispy, so don't overdo it!

Step 1. Prepare Pork and Marinade

prepare pork with marinade

For a delicious Korean spicy pork stir-fry, the key lies in the pork's preparation and marinade. First, you'll want to choose the right cut of pork. Pork shoulder or pork belly works best since they're flavorful and tender when cooked.

Once you have your pork, it's time to make the marinade! In a bowl, mix together soy sauce, gochujang (Korean red pepper paste), sugar, minced garlic, and sesame oil. This combination creates an amazing flavor that'll make your dish pop!

Advertisement

Don't forget to add a bit of grated ginger for an extra zing. Now, cut your pork into chunks and place them in the marinade. Make sure every piece is well-coated; this is where the magic happens!

Let the pork marinate for at least 30 minutes. If you have more time, letting it sit for a few hours or overnight in the fridge will make the flavors even better.

While you're waiting, you can start preparing your vegetables. By the time you're ready to cook, the pork will be bursting with flavor, setting you up for a fantastic stir-fry!

Step 2. Slice Pork Into Thin Strips

slice pork into strips

Start by slicing the marinated pork into thin strips, about ¼ inch thick. It's important to use a sharp knife for this step, as it'll make cutting easier and safer.

Place the pork on a cutting board and hold it steady with one hand. Use your other hand to guide the knife, slicing across the meat. Aim for even thickness so that the pork cooks evenly later on.

If you find the pork is a bit slippery, you can pop it in the freezer for about 15 minutes to firm it up. This makes it easier to slice!

Advertisement

Once you've got your strips, arrange them neatly on a plate. This way, you'll be ready for the next step in your cooking adventure, and it'll look nice too!

Remember, the marinated pork is packed with flavor, so you're in for a treat.

As you slice, you might catch a whiff of those delicious spices. It's hard not to get excited!

Enjoy this moment, knowing you're one step closer to making a fabulous Korean dish that'll impress your family and friends. Happy cooking! Soon, the delicious aromas of sizzling ingredients will fill your kitchen, making everyone eager to taste what’s in store. Whether you’re a seasoned chef or trying out your first Korean BBQ beef recipe, the flavors are sure to delight. Get ready to serve up a meal that’s both satisfying and unforgettable!

Step 3. Add Vegetables and Stir-Fry

add veggies stir fry

Once you've got your sliced pork ready, it's time to bring in the vibrant vegetables that will elevate your stir-fry. Start by choosing colorful veggies like bell peppers, carrots, and onions. They not only add flavor but also make your dish look amazing!

Heat a large pan or wok over medium-high heat and add a splash of oil. Once the oil's hot, toss in the sliced pork. As it cooks, it'll start to sizzle and smell delicious. This is the perfect moment to add your chopped vegetables. Stir them in quickly so they can soak up all that tasty flavor from the pork.

Advertisement

Keep stirring everything together for about 5 to 7 minutes. You want the veggies to stay crisp but get a little tender. Pay attention to their colors; bright and vibrant means they're just right!

Don't forget to season them with a pinch of salt and pepper while you stir. This little touch makes a big difference!

Once everything's nicely cooked, you're almost ready to take it to the next level. Just wait until you add that special sauce—your stir-fry will be out of this world!

Step 4. Add Sauce and Simmer

add sauce then simmer

Now it's time to bring in that delicious sauce that ties everything together. Pour your spicy sauce mixture into the skillet with the cooked pork and veggies. This sauce is what makes your dish pop with flavor! Stir everything together so that the sauce coats the meat and vegetables evenly. You'll want to see that vibrant red color shining through.

Once everything is mixed, it's time to let it simmer. Turn the heat down to medium-low and cover the skillet. Allow the dish to simmer for about 5 to 7 minutes. This will help the flavors blend beautifully, making each bite a yummy experience.

As it simmers, the sauce will thicken slightly, clinging to the pork and veggies like a warm hug. Don't forget to stir occasionally! This way, nothing will stick to the bottom of the pan, and you'll keep that tasty sauce moving around.

Advertisement

The aroma will fill your kitchen, making your mouth water in anticipation. Trust me, the wait will be worth it! Your delicious Duruchigi is almost ready, and you're just a few steps away from enjoying this delightful dish.

Step 5. Garnish With Sesame Seeds

garnish using sesame seeds

As the savory aroma of your Korean Spicy Pork Stir-Fry fills the air, it's time to add the finishing touch: sesame seeds.

These tiny seeds aren't just for decoration; they pack a nutty flavor that makes your dish even more delicious!

First, grab a small bowl and measure about two tablespoons of sesame seeds. You can use either toasted or raw seeds, but toasted ones have a richer flavor.

If you like, you can toast them in a dry pan over medium heat for a few minutes until they turn golden brown. Just be careful not to burn them!

Next, sprinkle the sesame seeds evenly over your stir-fry. You can use your fingers or a spoon to spread them around.

Advertisement

This won't only make your dish look pretty but also add a delightful crunch.

Final Thoughts

Creating a delicious Korean spicy pork stir-fry at home can be a rewarding culinary adventure. You'll find that cooking can be fun and exciting, especially when you're making a dish like duruchigi. The vibrant colors and spicy aroma will fill your kitchen, making everyone eager to taste what you've prepared.

Once you gather your ingredients and start cooking, you'll discover how simple it's to create bold flavors. The combination of tender pork, fresh vegetables, and spicy sauce is truly delightful. As you cook, remember to enjoy the process! It's not just about the end result; it's about the experience, too.

Don't forget to share your creation with family and friends. Watching their faces light up as they take a bite is one of the best parts of cooking.

Feel free to experiment with the recipe, adding your favorite veggies or adjusting the spice level to suit your taste.

Advertisement

Frequently Asked Questions

What Type of Pork Is Best for Duruchigi?

When choosing pork for stir-fry, you'll want tender cuts like pork shoulder or pork belly. These options absorb flavors well and stay juicy during cooking, ensuring your dish turns out delicious every time you make it.

Can I Make Duruchigi With Chicken Instead of Pork?

Yes, you can definitely make it with chicken instead of pork. Just adjust the cooking time since chicken cooks faster. You'll still enjoy a flavorful dish; just make sure to season it well!

Is Duruchigi Gluten-Free?

Yes, duruchigi can be gluten-free if you choose gluten-free soy sauce or other sauces. Always check ingredient labels to ensure no hidden gluten ingredients. With the right choices, you can enjoy a flavorful dish safely!

What Side Dishes Pair Well With Duruchigi?

You'll love pairing your dish with kimchi, pickled radishes, or a refreshing salad. Steamed rice balances the spice perfectly, and a light soup can add warmth. Enjoy exploring these combinations for a delightful meal!

How Can I Store Leftover Duruchigi?

To store leftovers, let them cool down, then transfer to an airtight container. You can keep it in the fridge for up to three days or freeze it for longer storage. Just reheat before serving!

Advertisement

Continue Reading

Korean Cuisine

Gimmari Korean: The Crispy Seaweed Rolls You’ll Love

Crispy, golden-brown gimmari are the irresistible Korean seaweed rolls with an ancient heritage that’ll have you hooked – dive deeper to discover their secrets.

Published

on

crispy korean seaweed rolls

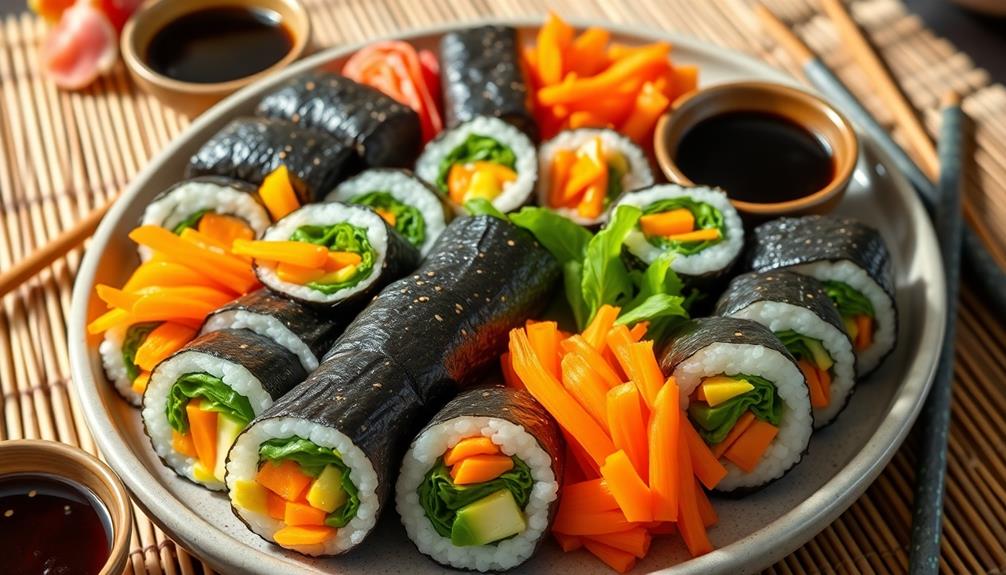
You'll love sinking your teeth into these crispy, golden-brown gimmari – the irresistible Korean seaweed rolls that'll have you hooked. These tasty bites have an ancient heritage, starting as a preservation method in coastal Chinese communities. Over time, clever chefs experimented with seasonings and cooking techniques, spreading gimmari's crunchy deliciousness across East Asia. In Korea, gimmari is a beloved staple, enjoyed as comfort food and at festive celebrations. The key is soaking the seaweed, mixing in savory fillings, then frying until perfectly crisp. Packed with vitamins and minerals, gimmari makes for a guilt-free snack you won't be able to resist. Let's dive deeper into what makes these rolls so special.

Key Takeaways

  • Gimmari, also known as crispy seaweed rolls, originated in ancient Chinese coastal communities and evolved into a beloved staple in Korean cuisine.
  • Gimmari features a crunchy texture and salty-umami flavor, reflecting Korean culinary traditions and often associated with comfort food and celebrations.
  • The key ingredients in gimmari are nori (seaweed) and seasoned rice, which can be supplemented with additional fillings like vegetables or protein.
  • Seaweed used in gimmari is rich in vitamins, minerals, and antioxidants, making it a guilt-free and nutritious snack option.
  • Gimmari can be served as an appetizer or snack, with dipping sauces like soy sauce or gochujang, and pairs well with various beverages.

History

historical events and narratives

Crispy seaweed rolls have a rich history that can be traced back to ancient Chinese coastal communities. These savory treats were originally created as a way to preserve and enjoy the abundant seaweed found along the shores.

Over time, the recipe evolved, with local cooks experimenting with different seasonings and preparation methods. As people traveled and traded, the crispy seaweed rolls spread throughout East Asia, each region putting its own unique spin on the dish.

In Korea, they became known as "gimmari," and the crunchy texture and salty-umami flavor quickly won the hearts of food lovers. These snacks were often enjoyed as a quick bite or a accompaniment to meals, providing a delightful contrast to the other dishes.

Today, crispy seaweed rolls remain a beloved staple in many Asian cuisines, with each culture celebrating its own interpretation of this timeless treat.

Whether you're savoring them as a snack or incorporating them into your favorite dishes, these crispy rolls are sure to delight your taste buds with their rich history and unforgettable flavor.

Advertisement

Cooking Steps

step by step cooking instructions

To begin, heat a large skillet or wok over medium-high heat. Once it's nice and hot, add a drizzle of vegetable oil. Toss in the seaweed sheets and let them sizzle for a minute or two, stirring constantly. You want them to get nice and crispy!

Next, remove the seaweed from the heat and let it cool slightly. Grab a sharp knife and slice the sheets into 1-inch wide strips. Don't worry if they break a bit – that's part of the charm!

Now it's time to assemble your rolls. Place a strip of seaweed onto your work surface. Add a small spoonful of the filling ingredients, like cooked rice, sautéed veggies, or even a bit of protein. Carefully roll it up, tucking in the sides as you go. Secure with a toothpick if needed.

Repeat this process until you've used up all your seaweed and fillings. Serve the crispy seaweed rolls hot and enjoy every bite of this tasty Korean treat! For an extra kick, pair your crispy seaweed rolls with soy sauce or a spicy dipping sauce to elevate the flavors. Korean deepfried seaweed rolls are perfect as an appetizer or snack, offering a satisfying crunch with every bite. Whether you’re hosting a dinner or enjoying them as a treat, these rolls are sure to impress your guests!

Step 1. Soak Dried Seaweed in Water

soak seaweed in water

Start by soaking the dried seaweed in water. It's an essential first step to preparing your crispy seaweed rolls. Fill a bowl with cool water and gently submerge the dried seaweed sheets.

Let them soak for about 10-15 minutes, until the seaweed becomes soft and pliable. This will make it much easier to roll up the filling later.

As the seaweed soaks, take a moment to prepare your other ingredients. Chop any vegetables you plan to include, like carrots or spinach.

Advertisement

Gather your seasonings, like soy sauce or sesame oil. Having everything ready to go will make the rolling process a breeze.

Once the seaweed is softened, remove it from the water and gently pat it dry with a paper towel. Be careful not to tear the delicate sheets.

Now you're ready to start assembling your crispy seaweed rolls! The soaking step ensures the seaweed will wrap around the filling seamlessly.

Step 2. Drain and Pat Dry Seaweed

drain and dry seaweed

Having soaked the dried seaweed, gently remove it from the water and pat it dry with a paper towel. This step is crucial to ensure your Gimmari rolls have that perfect crispy texture. You don't want any excess moisture, so be sure to squeeze and dab the seaweed until it's completely dry. This will help it crisp up beautifully when you fry it later.

Additionally, ensuring optimal air quality while cooking can enhance your culinary experience; consider using an air purifier to reduce allergens and odors in the kitchen air quality benefits.

Once the seaweed is dry, give it a quick inspection. Check for any tough or stringy parts and trim them off with a pair of scissors. You want nice, even pieces that will roll up neatly.

Advertisement

With the seaweed prepped and ready, you're one step closer to enjoying those delightfully crispy Gimmari rolls. The next stage is to get your filling ingredients prepped, so let's move on to that next.

Step 3. Mix Ingredients

combine ingredients thoroughly

With the seaweed prepped, let's move on to mixing the filling ingredients. In a large bowl, you'll combine ground pork, finely chopped carrots, and diced onions.

Don't forget to add a pinch of salt and pepper – this will bring out all the delicious flavors. Next, you'll stir in some sesame oil and soy sauce. The sesame oil adds a lovely nutty taste, while the soy sauce provides a savory kick.

Mix everything together until the filling is well-combined. Now, it's time to start assembling your crispy seaweed rolls. Scoop a spoonful of the pork mixture onto the center of each dried seaweed sheet.

Gently fold the sides over the filling, then tightly roll it up. Repeat this process until you've used up all the filling. Your crispy seaweed rolls are now ready to be fried to golden perfection.

Get ready for a flavor explosion in every bite!

Advertisement

Step 4. Roll Seaweed With Filling

roll seaweed with filling

To assemble the crispy seaweed rolls, you'll first take a dried seaweed sheet and place a spoonful of the pork filling mixture in the center.

Gently fold the sides of the seaweed over the filling, then tightly roll it up into a cylinder. Make sure to secure the roll by moistening the edge of the seaweed with a bit of water to help it stick.

Next, you'll want to heat up some oil in a skillet or wok over medium-high heat.

Carefully add the seaweed rolls, making sure not to overcrowd the pan. Fry the rolls for a few minutes on each side until they're golden brown and crispy. Be careful when turning them, as the hot oil can splatter.

Once they're nicely crisped up, remove the rolls from the oil and place them on a paper towel-lined plate to drain any excess oil.

Serve the crispy seaweed rolls hot, either on their own or with a side of your favorite dipping sauce. Enjoy the delicious combination of savory pork and crunchy seaweed in every bite!

Advertisement

Step 5. Fry the Seaweed Rolls Until Crisp

fry seaweed rolls crispy

Next, heat up some oil in a skillet or wok over medium-high heat. Once the oil is hot and shimmering, gently add the seaweed rolls. Fry them until they're golden brown and deliciously crispy, turning them occasionally to ensure even cooking.

The savory aroma of the frying rolls will create a warm and inviting atmosphere, similar to the benefits of aromatherapy for stress relief. Be careful not to overcrowd the pan – work in batches if needed to maintain that perfect crunch.

As the rolls sizzle away, you'll start to smell the savory aroma wafting through the kitchen. That's a good sign! Keep a close eye on them, as they can go from perfectly crisp to burnt in the blink of an eye.

Once they're a beautiful golden-brown color, use tongs or a slotted spoon to transfer the crispy seaweed rolls to a paper towel-lined plate. This will help drain off any excess oil, leaving you with the most wonderfully crispy texture.

Final Thoughts

concluding reflections and insights

The crispy seaweed rolls make for a delightful and versatile appetizer. You'll be amazed by how easy they're to prepare and how much flavor they pack. Imagine biting into a golden, crunchy roll that gives way to the savory, umami-rich seaweed inside. It's a truly addictive snack that will have your guests asking for more.

These rolls are perfect for any occasion, from casual gatherings to more formal events. Serve them alongside your favorite dipping sauces, or enjoy them on their own as a quick and satisfying treat.

The best part? They're made with simple, wholesome ingredients, so you can feel good about indulging.

Advertisement

Whether you're a seasoned seaweed lover or trying it for the first time, these crispy rolls are sure to delight your taste buds. So why not give them a try and experience the deliciousness for yourself? Your taste buds will thank you!

Frequently Asked Questions

What Is the Nutritional Value of Gimmari Korean?

The nutritional value of gimmari Korean varies, but it's typically low in calories and high in fiber. It may provide some vitamins and minerals, but the exact nutrients depend on the ingredients used in its preparation.

How Can I Make Gimmari Vegan or Vegetarian?

To make gimmari vegan or vegetarian, you can substitute the traditional seafood filling with plant-based alternatives like tofu, mushrooms, or a combination of vegetables. You'll need to adjust the seasoning to match your preferred flavors.

Where Can I Purchase the Best Quality Gimmari Ingredients?

To purchase the best quality gimmari ingredients, you can check your local Asian grocery store or search online specialty retailers. Look for high-quality seaweed, sticky rice, and vegetable fillings to create delicious vegan or vegetarian gimmari at home.

How Long Do Homemade Gimmari Rolls Last in the Fridge?

Homemade gimmari rolls will last 3-5 days in the fridge if stored properly in an airtight container. They'll maintain their crispy texture and flavor, but the longer they sit, the softer they'll become.

Advertisement

Can I Freeze Gimmari Rolls for Later Consumption?

Yes, you can freeze gimmari rolls for later consumption. Freezing them will help preserve their crispy texture and fresh flavor. Simply wrap them tightly in plastic wrap or foil before placing them in the freezer for up to 2 months.

Continue Reading

Affiliate Disclaimer
As an affiliate, we may earn a commission from qualifying purchases. We get commissions for purchases made through links on this website from Amazon and other third parties.

Advertisement

Latest

top picks for 2024 top picks for 2024
Vetted54 seconds ago

15 Best Choice Products of 2024 That You Can’t Miss

Navigate through the 15 best choice products of 2024 that you can't miss, and discover what makes each item a...

top wireless gaming headsets top wireless gaming headsets
Vetted3 minutes ago

14 Best Wireless Gaming Headsets of 2024 for an Immersive Experience

Looking for the ultimate gaming headset? Discover the 14 best wireless options of 2024 that promise an immersive experience like...

top 2024 washing machines top 2024 washing machines
Vetted9 minutes ago

15 Best Washing Machines of 2024: Efficient, Reliable, and Built to Last

Discover the top 15 washing machines of 2024 that combine efficiency and reliability—find out which model will revolutionize your laundry...

best buy return policy tips best buy return policy tips
Vetted12 minutes ago

The 7 Best Buy Return Policy Tips You Need to Know Before Shopping

Navigate Best Buy's return policy like a pro with these essential tips—discover what you need to know before making your...

affordable comfort at americas affordable comfort at americas
Vetted12 minutes ago

8 Best Americas Value Inn Locations for a Comfortable Stay on a Budget

Plan your next budget-friendly getaway with the 8 best Americas Value Inn locations that promise comfort and value—discover what awaits...

maximize travel rewards cards maximize travel rewards cards
Vetted16 minutes ago

The 15 Best Airline Credit Cards of 2024 – Maximize Your Travel Rewards

Navigate the top airline credit cards of 2024 to elevate your travel rewards, but which one will truly maximize your...

powerful portable handheld vacuums powerful portable handheld vacuums
Vetted20 minutes ago

15 Best Handheld Vacuums of 2024 – Power and Portability Combined

You won't want to miss the top 15 handheld vacuums of 2024, where power meets portability for effortless cleaning solutions!...

hilarious south park episodes hilarious south park episodes
Vetted21 minutes ago

7 Best South Park Episodes That Will Make You Laugh Out Loud

With hilarious adventures and outrageous moments, discover seven South Park episodes that will leave you in stitches and begging for...

top massage guns 2024 top massage guns 2024
Vetted23 minutes ago

15 Best Massage Guns of 2024 for Ultimate Muscle Recovery and Relaxation

You won't believe the incredible benefits these 15 best massage guns of 2024 offer for ultimate muscle recovery and relaxation....

expert recommended hair care expert recommended hair care
Vetted26 minutes ago

15 Best Shampoo and Conditioner Combinations for Luxurious Hair, According to Experts

Keep reading to discover the top 15 expert-recommended shampoo and conditioner combinations that will transform your hair into a luxurious...

top facial sunscreens 2024 top facial sunscreens 2024
Vetted30 minutes ago

15 Best Sunscreens for Your Face in 2024 – Protect Your Skin Like a Pro

Navigate the top 15 sunscreens for your face in 2024 and discover which ones will shield your skin from harmful...

top dividend stocks 2024 top dividend stocks 2024
Vetted35 minutes ago

6 Best Dividend Stocks to Invest in for 2024 – Expert Picks and Analysis

Navigate the top six dividend stocks for 2024 that promise consistent growth and reliable returns—discover which investments could enhance your...

Trending