Vietnamese Cuisine
Xôi Bắp: Vietnamese Sticky Rice With Corn
Treat yourself to the delightful flavors of Xôi Bắp, a Vietnamese sticky rice dish with sweet corn that brings families together in celebration. Discover how to make it!
Xôi Bắp is a tasty Vietnamese dish made with sticky rice and sweet corn. It's perfect for special occasions, family gatherings, and celebrations! This dish is filled with flavor, thanks to the creamy coconut milk and a hint of sugar. First, you'll soak the glutinous rice overnight, then steam it until shiny and tender. After that, mix in warm coconut milk and fold in the corn for sweetness. Finally, sprinkle some toasted sesame seeds on top for a delightful crunch! Enjoy it in a communal bowl with family, and you'll feel the warmth of togetherness. There's so much more to discover!
Key Takeaways
- Xôi Bắp is a traditional Vietnamese dish made from sticky rice and fresh corn, known for its sweet and savory flavors.
- The dish symbolizes community and togetherness, often enjoyed during family gatherings and festive celebrations in Vietnam.
- Key ingredients include glutinous rice, fresh corn, coconut milk, sugar, and salt, creating a harmonious blend of flavors.
- The preparation involves soaking, steaming the rice, mixing in sweetened coconut milk, and folding in corn for texture.
- Xôi Bắp is best served in communal bowls, enhancing the experience of sharing and enjoying it with loved ones.
History
The history of Vietnamese sticky rice with corn is deeply rooted in the country's agricultural traditions. This tasty dish, known as "xôi bắp," has been enjoyed by families for generations.
Imagine farmers working hard in the rice fields, celebrating their harvest with a delightful treat made from sticky rice and sweet corn.
You might be surprised to learn that sticky rice is special in Vietnam. It's different from regular rice because it's stickier when cooked, making it perfect for holding together. Corn adds a lovely sweetness and bright yellow color, making the dish even more inviting.
Traditionally, people would prepare xôi bắp for festivals and special occasions, sharing it with friends and family. The combination of flavors and textures creates a warm, comforting experience that brings everyone together.
As you dive into the history, think about how this dish symbolizes celebration and community. It's not just food; it represents the love and hard work of the people who grow it.
You can almost feel the joy and laughter that fills the air when families gather to enjoy this delicious treat!
Ingredients:
- 2 cups glutinous rice
- 1 cup fresh or frozen corn kernels
- 1/2 teaspoon salt
- 1 cup water (for steaming)
- 1/2 cup coconut milk (optional)
- Additional salt to taste (for serving)
Cooking this dish involves soaking the glutinous rice for at least 4 hours or overnight to ensure it cooks evenly and retains its sticky texture. After soaking, drain the rice and mix it with the corn and salt.
Place the mixture in a steamer lined with cheesecloth or a banana leaf, and steam over boiling water for about 30-40 minutes, or until the rice is fully cooked and tender. If you prefer, drizzle coconut milk over the rice after it's done steaming for added creaminess.
When preparing Vietnamese Sticky Rice with Corn, it's essential to soak the rice properly, as this helps achieve the perfect texture. You can also experiment with different toppings, such as crushed peanuts or sesame seeds, to add a delightful crunch.
If you wish to enhance the dish further, serve it with a side of sweetened coconut milk for dipping, which complements the flavors beautifully. Enjoy your cooking!
Cooking Steps
When you're ready to make Vietnamese sticky rice with corn, start by rinsing the glutinous rice under cold water until the water runs clear. This helps remove any extra starch, making your rice nice and sticky!
Next, soak the rice in water for at least four hours, or even overnight if you can. This step is super important because it helps the rice cook evenly.
After soaking, drain the rice and put it in a steamer lined with cheesecloth or a clean kitchen towel. Then, sprinkle some salt on top for extra flavor.
Steam your rice for about 30 to 40 minutes. While it's steaming, prepare the corn by either using fresh kernels or canned corn. If you're using fresh, just boil it for a few minutes until tender.
Once the rice is done, gently mix in the cooked corn. You can add a touch of coconut milk if you want it creamier.
Step 1. Soak Sticky Rice Overnight
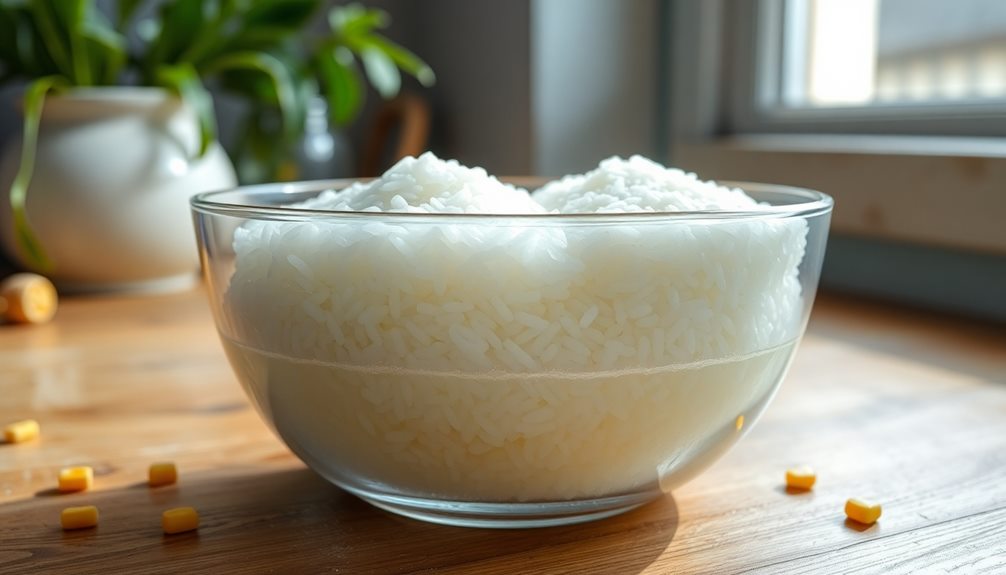
To achieve the perfect texture for your sticky rice, soaking it overnight is essential. This step helps the rice absorb water, making it soft and chewy when cooked. It's super simple!
Start by measuring out the amount of sticky rice you need. A cup or two should be just fine for a tasty treat.
Next, rinse the rice under cold water until the water runs clear. This removes any excess starch, which helps keep your rice from becoming too sticky.
Once it's clean, place the rice in a bowl and cover it with water. Make sure the water is about an inch above the rice, as it'll soak up some while it sits.
Now, just let it chill overnight! You can leave it on your kitchen counter, where it'll be ready for you in the morning.
Soaking the rice not only improves the texture but also enhances the flavor, making your xôi bắp even more delicious.
You'll be so excited to see how plump and ready the rice looks when you're ready to cook it! Enjoy the process, and get ready for a delightful meal ahead! The possibilities are endless when it comes to creating delicious dishes, and your rice cooker can do so much more than just cook rice. Explore unexpected rice cooker recipes that can transform your cooking routine, from fluffy pancakes to savory soups. Let your creativity shine, and turn every meal into a surprise worth savoring!
Step 2. Steam the Soaked Rice
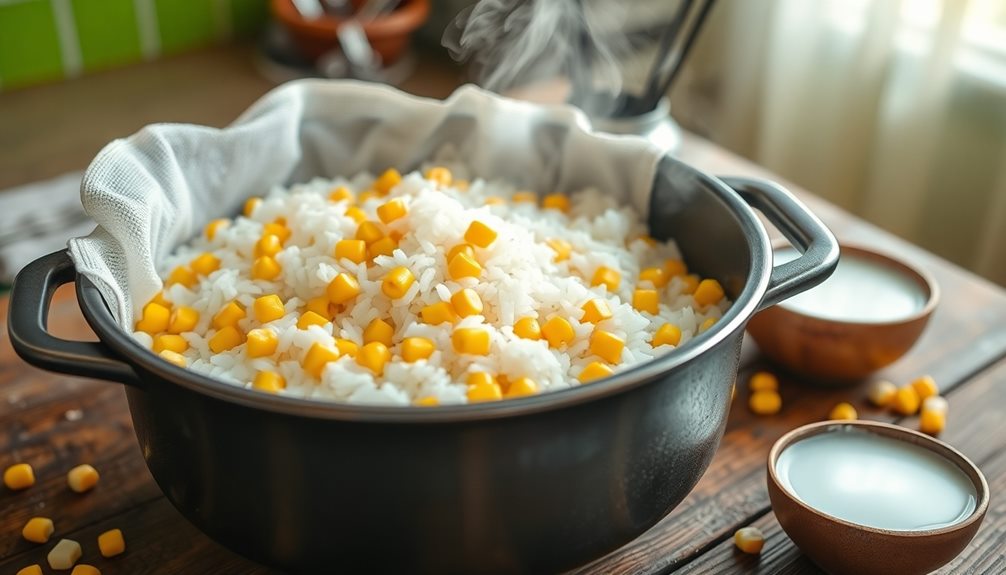
After soaking the rice overnight, it's time to bring it to life by steaming. First, grab a steamer basket and line it with a clean cheesecloth or banana leaves. This will help keep the rice from falling through the holes.
Next, drain the soaked rice and spread it evenly in the steamer basket. Make sure it's not piled too high, or it won't cook evenly!
Now, fill a pot with water and bring it to a boil. Once it's bubbling, carefully place the steamer basket on top, making sure the water doesn't touch the rice. Cover it with a lid and let it steam for about 20-30 minutes.
You'll know it's done when the rice looks shiny and feels tender to the touch. While it's steaming, the wonderful aroma will fill your kitchen, making everyone excited for what's coming next!
After the time is up, carefully lift the lid, and watch out for the steam. Fluff the rice gently with a fork, and you're almost ready for the final touch that'll make your sticky rice truly special. Enjoy the process, and get ready for a delicious treat!
Step 3. Add Sweetened Coconut Milk
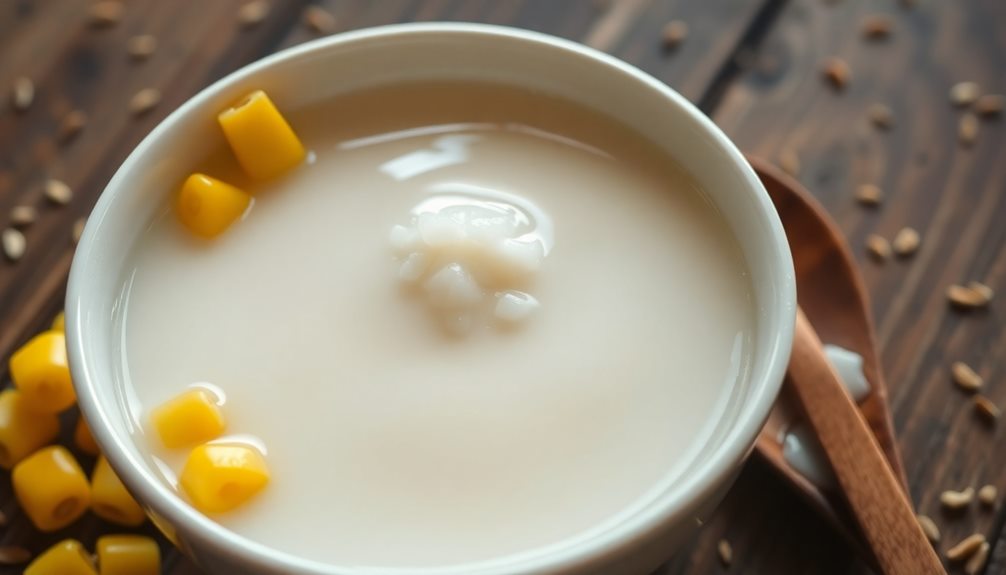
Once the rice is steamed to perfection, it's time to enhance its flavor with sweetened coconut milk. This creamy addition will make your sticky rice taste even more delicious!
First, grab a small saucepan and pour in about one cup of coconut milk. If you want it to be sweet, add a few tablespoons of sugar. Stir it together until the sugar dissolves completely.
Next, place the saucepan over medium heat. You want to warm the coconut milk gently, so it doesn't boil. Keep stirring for a few minutes as it heats up. You're looking for a lovely, fragrant aroma that fills your kitchen!
Once your coconut milk is warm, it's time to pour it over the steamed rice. Carefully drizzle it all over the rice, making sure every bit gets that tasty coconut flavor.
Now, use a spatula to gently mix the rice and coconut milk together. Be gentle so you don't mash the rice!
Let the rice sit for a few minutes, allowing the coconut milk to soak in. Your sweetened sticky rice is now ready for the next exciting step! Enjoy the wonderful flavors!
Step 4. Fold in Sweet Corn
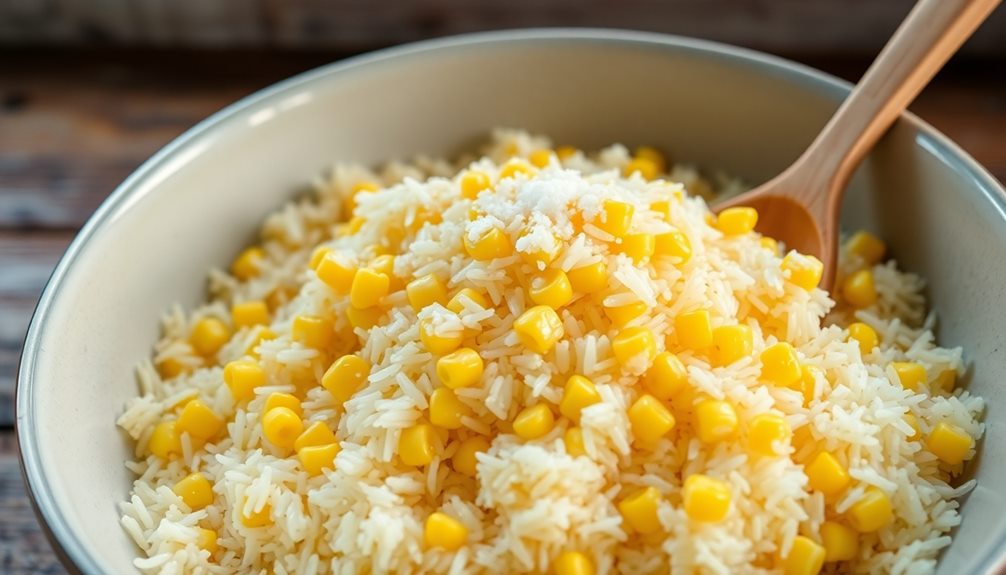
Now that your sticky rice has absorbed the sweetened coconut milk, it's time to fold in the sweet corn for added flavor and texture.
Take a moment to admire how creamy and fragrant your rice looks! Grab a cup of fresh or frozen sweet corn—either works perfectly. If you're using frozen corn, just make sure it's thawed.
Using a spatula, gently scoop under the rice and lift it up, folding it over the corn. You want to mix them together without smashing the rice. This helps keep the sticky rice fluffy and lets the sweet corn shine through.
As you fold, you'll notice the bright yellow color of the corn blending with the white rice—it's such a pretty sight!
Keep folding until the corn is evenly distributed throughout the rice. This should only take a few minutes, so don't rush! The sweet corn will add little bursts of sweetness, making every bite even more delicious.
Once everything is mixed, take a moment to taste and adjust the sweetness if needed. You're almost there! Enjoy the fun of bringing this delightful dish together—your friends and family are going to love it!
Step 5. Serve With Toasted Sesame Seeds
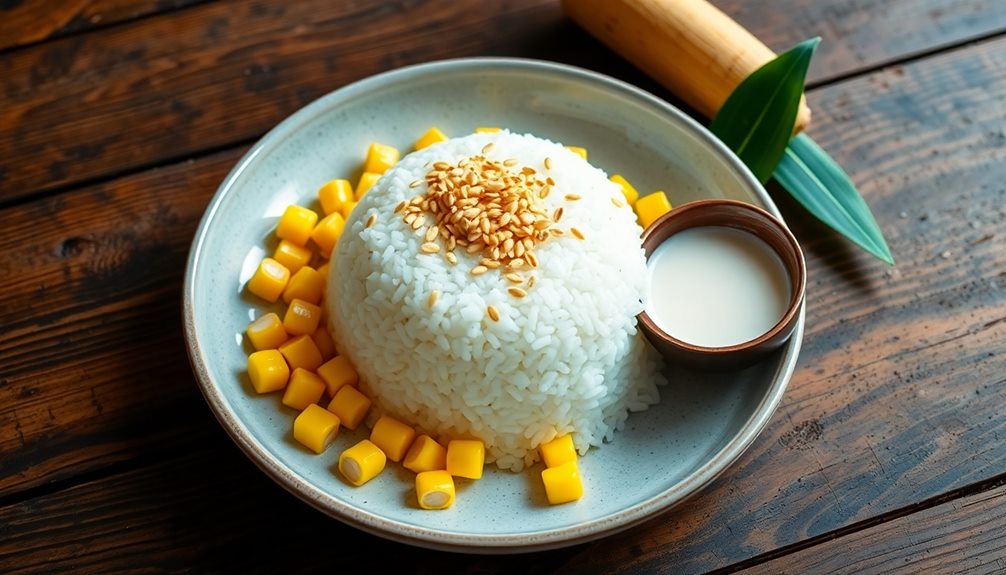
To elevate your Vietnamese sticky rice with corn, sprinkle a generous amount of toasted sesame seeds on top just before serving. These little seeds add a delightful crunch and nutty flavor that perfectly complements the sweet corn.
First, make sure you've toasted your sesame seeds. You can do this by placing them in a dry skillet over medium heat. Stir them around for about 3 to 5 minutes until they turn golden brown and smell amazing. Just be careful not to burn them, as they can go from perfectly toasted to burnt quickly!
Once your sticky rice is ready and you've folded in the sweet corn, transfer it to a serving dish. Now, grab those toasted sesame seeds and sprinkle them evenly over the top. You can use your hands or a spoon—whatever feels right!
This simple step not only makes your dish look beautiful but also adds a yummy texture that everyone will love. Your family and friends will be so impressed when they take their first bite!
Final Thoughts
As you savor the delightful combination of sweet corn and sticky rice, it's clear that this dish embodies the essence of Vietnamese comfort food. Each bite brings a warm feeling, reminding you of home and happy gatherings.
You might find that the creamy texture of the sticky rice pairs perfectly with the pops of sweet corn, creating a delightful harmony that dances on your taste buds.
Making Xôi Bắp isn't just about the food; it's about sharing moments with family and friends. Imagine gathering around the table, passing bowls, and enjoying this delicious treat together.
It's a dish that invites laughter and stories, making it a wonderful addition to any meal or celebration.
Frequently Asked Questions
What Ingredients Are Essential for Making Xôi BắP?
To make this dish, you'll need sticky rice, fresh corn, coconut milk, sugar, and salt. These ingredients blend together to create a deliciously sweet and savory treat that you won't want to miss!
Can I Use Frozen Corn for This Recipe?
Yes, you can use frozen corn for this recipe. Just make sure to thaw and drain it properly before adding. It'll work well, giving you that sweet flavor and texture you're looking for!
Is Xôi BắP Gluten-Free?
Yes, it is gluten-free! You'll find that the main ingredients are sticky rice and corn, neither of which contain gluten. Just ensure any additional toppings or ingredients you use are also gluten-free to be safe.
How Long Does Xôi BắP Last in the Fridge?
Xôi bắp can last in the fridge for about 3 to 5 days. Just make sure you store it in an airtight container to keep it fresh and prevent any unwanted odors. Enjoy your leftovers!
What Are Some Common Toppings for Xôi BắP?
When you enjoy sticky rice, consider adding toppings like shredded coconut, roasted peanuts, mung beans, or sesame seeds. These enhance the flavor and texture, making your dish even more delicious and satisfying.
Mai is a passionate chef specializing in Vietnamese cuisine. From fragrant pho to fresh spring rolls and banh mi, Mai’s dishes showcase the balance of sweet, salty, sour, and spicy that defines Vietnamese cooking. Her recipes emphasize fresh herbs, flavorful broths, and the light, vibrant ingredients that make Vietnamese food so special.
Vietnamese Cuisine
Vietnamese Jerky: Sweet and Savory Snack With a Kick
Indulge in the irresistible flavors of Vietnamese jerky, a sweet and savory snack with a kick that will leave you craving more—discover how to make it at home!
Vietnamese jerky is a tasty snack that mixes sweet and savory flavors, with a delightful kick that'll make your taste buds dance! It's made by marinating thin strips of meat in a mix of soy sauce, sugar, and spices, like garlic and pepper. After marinating, you dehydrate the meat until it's chewy and full of flavor. Each bite offers a fun blend of textures—from chewy to crunchy—that keeps you coming back for more. You can even try making your own at home with your favorite spices! Stick around to discover the steps to create this delicious treat!
Key Takeaways
- Vietnamese jerky combines sweet and savory flavors, featuring spices like garlic, pepper, and sugar for a complex taste profile.
- It has a rich history, integral to Vietnamese celebrations, reflecting cultural heritage and traditional meat preservation techniques.
- The jerky-making process involves marinating thinly sliced meat, dehydrating it, and enhancing flavor with additional spices.
- Homemade jerky allows customization of flavors and the use of high-quality ingredients, catering to personal preferences.
- Proper storage in airtight containers maintains freshness, ensuring the jerky remains flavorful and enjoyable for longer periods.
History
The rich history of Vietnamese jerky snack, known as "thit kho," reflects a blend of tradition and innovation. This tasty treat has roots that go back centuries, when families needed ways to preserve meat for longer periods. They discovered that marinating and drying strips of meat not only kept it fresh but also made it delicious!
As you enjoy thit kho today, you're tasting the work of many generations. Vietnamese people have always been creative with their flavors, using spices like garlic, pepper, and sugar to give the jerky a unique sweet and savory taste. This snack isn't just food; it's a part of celebrations and gatherings, showing how food brings people together.
Over time, thit kho has evolved. While traditional methods are still cherished, modern twists have come into play. Now, you might find different meats and exciting flavors that make each bite an adventure.
When you savor thit kho, you're also experiencing a story—one of culture, family, and the joy of sharing good food. So, the next time you reach for a piece of this jerky, remember the history that makes it so special!
Cooking Steps
In preparing your Vietnamese jerky snack, you'll want to start by marinating the meat to infuse it with authentic flavors. Choose thin slices of beef or pork, and place them in a bowl.
Mix together soy sauce, fish sauce, sugar, garlic, and a touch of black pepper. Pour this tasty marinade over the meat, making sure every piece is coated. Cover the bowl and let it marinate in the fridge for at least four hours, or even overnight if you can wait!
Once your meat is marinated, preheat your oven to 175°F (80°C). Line a baking sheet with foil or parchment paper for easy cleanup.
Spread the marinated meat in a single layer on the sheet, making sure the pieces don't touch each other. Now, pop it in the oven and let it dry out for about 4-6 hours. Keep an eye on it to make sure it doesn't overcook!
When it's done, the jerky should be chewy but not hard. Let it cool before you snack on it. Enjoy your sweet and savory treat, and share it with friends for extra fun!
Step 1. Marinate Meat With Spices
To create flavorful Vietnamese jerky, start by marinating your choice of meat with a blend of spices. First, gather your ingredients—soy sauce, fish sauce, sugar, garlic, and black pepper. These ingredients will give your jerky that tasty, sweet, and savory flavor everyone loves.
Next, cut your meat into strips, making sure they're not too thick. Then, in a large bowl, mix together the soy sauce, fish sauce, and sugar until the sugar dissolves. Add minced garlic and black pepper to the mix.
Now, it's time to add your meat! Coat each strip well in the marinade, making sure all surfaces are covered.
Cover the bowl with plastic wrap and let it sit in the fridge for at least four hours. If you have time, leaving it overnight will make the flavor even better! The longer the meat soaks, the more delicious the jerky will be.
Once the marinating is done, you'll be ready to move on to the next step. You're one step closer to enjoying your homemade Vietnamese jerky, and it's going to be so yummy!
Step 2. Slice Meat Thinly
Slicing the meat thinly is crucial for achieving that perfect jerky texture. When you cut the meat into thin strips, it helps the flavors soak in better, and it also makes the jerky chewier and more enjoyable.
Start by choosing a lean cut of meat, like beef or chicken, because it'll make the best jerky. Place the meat in the freezer for about 30 minutes. This makes it firmer and easier to slice.
Once it's slightly frozen, grab a sharp knife and a cutting board. Cut the meat against the grain into strips about 1/8 to 1/4 inch thick. Remember, the thinner you slice, the quicker it'll dry out later, so don't rush! If you're unsure, just take your time and aim for even slices.
If you want uniform pieces, you can use a meat slicer if you have one at home. It's a handy tool that makes slicing so much easier! Just keep an eye on your fingers while you slice.
After you've cut all the meat, you're one step closer to making your delicious Vietnamese jerky.
Step 3. Dehydrate Until Firm
After slicing the meat into thin strips, the next step is to dehydrate it until firm. This process is super important because it helps remove moisture, making your jerky chewy and flavorful.
You can use a food dehydrator, which is easy and efficient, or your oven if you don't have one.
If you're using a dehydrator, just arrange the meat strips in a single layer on the trays. Make sure they're not overlapping, so the air can circulate freely. Set the temperature to around 160°F and let it work its magic for about 4 to 6 hours. Keep an eye on it, as you want the jerky to be firm but not too hard.
If you're going for the oven method, preheat it to the same temperature and line a baking sheet with aluminum foil. Place a cooling rack on top and lay your meat strips on it. This helps air flow around the meat. Bake for 4 to 6 hours, flipping the strips halfway through to ensure they dry evenly.
Once you've reached that perfect firmness, your jerky is ready for the next exciting steps!
Step 4. Season With Additional Spices
Now that your jerky has reached the perfect firmness, it's time to elevate its flavor by seasoning it with additional spices. This step is where the fun begins! You can sprinkle on spices that excite your taste buds, like garlic powder, crushed red pepper, or black pepper. Each sprinkle adds a new layer of deliciousness.
Start by placing your jerky in a large bowl. Then, take a teaspoon of your chosen spices and sprinkle them over the meat. Don't be shy! If you like things spicy, add more red pepper. For a little sweetness, consider a pinch of brown sugar or even a splash of soy sauce.
Mix everything together, using your hands to make sure every piece is coated evenly. After seasoning, let the jerky sit for a few minutes. This helps the flavors blend together, making every bite even tastier.
You can taste a tiny piece to see if it needs more seasoning. Remember, this is your snack, so make it just how you like it! Once you're happy with the flavor, you're ready to enjoy your homemade Vietnamese jerky!
Step 5. Store in Airtight Container
Preserving the freshness of your homemade Vietnamese jerky is essential for maintaining its delicious flavor and texture. Once your jerky has cooled down after cooking, it's time to store it properly!
Start by grabbing an airtight container. This could be a glass jar or a plastic container with a tight-sealing lid.
Next, place your jerky pieces inside the container. Make sure they're not stacked too high, so they don't squish each other. If you have a lot of jerky, consider using multiple containers to keep everything safe and sound. You want to prevent air from sneaking in because it can make your jerky tough and lose its yummy taste.
After you've filled the container, seal it tightly. For extra protection, you can also wrap the jerky in parchment paper before placing it in the container. This helps keep moisture away!
Store your jerky in a cool, dry place, away from sunlight. If you plan to keep it for a longer time, consider putting it in the fridge or freezer. That way, you can enjoy your tasty treat for weeks to come! Happy snacking!
Final Thoughts
As you explore the delightful world of Vietnamese jerky snacks, it's clear that these flavorful treats offer more than just a quick bite.
They're a fun mix of sweet, savory, and spicy flavors that dance on your taste buds. Whether you enjoy them as a snack on the go, while watching a movie, or sharing with friends, you can't help but smile with each delicious piece.
One of the best things about Vietnamese jerky is its unique taste. You might find yourself craving it after just one try!
Plus, making your own jerky at home can be an exciting adventure. You can experiment with different spices and flavors to create your perfect snack.
It's also a great way to learn about Vietnamese culture and cooking traditions.
Frequently Asked Questions
What Types of Meat Can Be Used for Vietnamese Jerky?
You can use various meats for jerky, including beef, pork, chicken, or even turkey. Each type offers a unique flavor profile, allowing you to create your own delicious and personalized jerky experience at home.
How Should I Store Leftover Vietnamese Jerky?
To store leftover jerky, keep it in an airtight container or vacuum-sealed bag. Place it in a cool, dry place or refrigerate for longer freshness. Avoid exposing it to moisture to maintain its quality.
Is Vietnamese Jerky Gluten-Free?
You'll want to check the ingredients for potential gluten sources. Many recipes use rice-based marinades, which are gluten-free, but always verify labels or ask the seller to ensure it fits your dietary needs.
Can I Make Vegetarian Vietnamese Jerky?
Yes, you can make vegetarian Vietnamese jerky! Use ingredients like mushrooms, tofu, or eggplant, marinate them in a savory sauce, and dehydrate until chewy. You'll enjoy a delicious, plant-based snack that's packed with flavor!
What Are Common Side Dishes to Pair With Vietnamese Jerky?
When enjoying Vietnamese jerky, you can pair it with fresh cucumber slices, pickled vegetables, or steamed rice. A side of spicy dipping sauce also complements the flavors nicely, enhancing your overall snack experience.
Mai is a passionate chef specializing in Vietnamese cuisine. From fragrant pho to fresh spring rolls and banh mi, Mai’s dishes showcase the balance of sweet, salty, sour, and spicy that defines Vietnamese cooking. Her recipes emphasize fresh herbs, flavorful broths, and the light, vibrant ingredients that make Vietnamese food so special.
Vietnamese Cuisine
Bánh Chưng Tết: Vietnamese Rice Cake for Lunar New Year
Fascinating Vietnamese rice cake, Bánh Chưng, holds centuries-old traditions and symbolism, making it a must-have for Lunar New Year festivities. Discover the captivating history and preparation behind this cherished delicacy.
Banh Chung, the iconic Vietnamese rice cake, is a must-have for Lunar New Year celebrations. This square treat dates back centuries, symbolizing the harmony between earth and sky. To make it, you'll soak sticky rice overnight, then wrap it in fragrant banana leaves before boiling for hours. The result? A delightfully chewy, aromatic rice cake that brings families together. Unwrapping the warm, vibrant package is a time-honored ritual, and savoring each bite creates lasting memories. It's a tradition that connects generations and captures the spirit of Tet – and if you keep reading, you'll discover the fascinating history and step-by-step process behind this cherished Vietnamese delight.
Key Takeaways
- Bánh Chưng is a traditional Vietnamese rice cake that dates back centuries and is integral to the Lunar New Year (Tết) celebrations.
- The rice cake symbolizes the earth and sky, originating from the creation story of the ancient Hùng kings.
- Preparation of Bánh Chưng involves soaking glutinous rice, wrapping it in banana leaves, and boiling the packages for 5-6 hours.
- Unwrapping the cooked Bánh Chưng reveals a fragrant, sticky rice cake that is often served with savory dipping sauces.
- The ritual of making and enjoying Bánh Chưng during Tết fosters a sense of togetherness and preserves the cultural heritage of Vietnam.
History
Vietnamese rice cake, known as bành chưng, has a rich history that dates back centuries. This traditional treat is a staple of the Lunar New Year festivities, or Tết, in Vietnam.
The origins of bành chưng can be traced back to the ancient Hùng kings, who ruled the region thousands of years ago. According to legend, one of the kings asked his sons to create a special food that represented the earth and sky. The eldest son crafted a square rice cake, bành chưng, which symbolized the earth, while the younger son made a round rice cake, bánh dày, to represent the sky.
The king was so impressed that he declared bành chưng the official food of the New Year celebration. Today, families across Vietnam continue this tradition, gathering together to meticulously prepare the rice cakes.
The process can take hours, even days, as the rice, mung bean filling, and bamboo leaves must be carefully selected and assembled. But the effort is well worth it, as biting into a warm, fragrant bành chưng is a beloved part of welcoming the new year.
Cooking Steps
To begin the cooking process, you'll need to soak the glutinous rice in water for at least 4 hours or up to overnight. This softens the rice, making it easier to work with later.
Once the rice is soaked, drain it well and transfer it to a large pot. Add fresh water, just enough to cover the rice, and bring it to a boil over high heat.
Next, you'll need to wrap the rice in banana leaves. Cut the leaves into square shapes, about 8 inches wide. Place a spoonful of the cooked rice in the center of each leaf, then bring the corners together and tie them with kitchen string to form a little package.
Carefully lower the wrapped rice cakes into the boiling water. Let them cook for about 3 to 4 hours, flipping them occasionally, until they're firm and cooked through.
Step 1. Soak Sticky Rice Overnight
Soaking the sticky rice overnight is a crucial first step in making traditional Vietnamese rice cakes for the Lunar New Year. This simple process helps to soften the grains, ensuring they'll be pliable enough to wrap around the savory fillings.
Start by rinsing the rice until the water runs clear, then transfer it to a large bowl. Cover the rice with plenty of water and let it soak for at least 8 hours, or even overnight.
The longer the rice soaks, the better. This allows the individual grains to fully expand and become tender.
When you're ready to assemble the rice cakes, the soaked rice will be soft and easy to work with. Drain the rice well, discarding the soaking water.
Now you're one step closer to creating the perfect Banh Chung – the quintessential Vietnamese treat for the Tet holiday. With the rice prepared, you can move on to the next stage of wrapping and steaming these delightful parcels.
Step 2. Wrap Sticky Rice in Banana Leaves
With the rice soaked and drained, you can now begin wrapping the sticky rice in banana leaves.
First, take a large banana leaf and lay it shiny side down. Place a handful of the sticky rice in the center, forming a square shape.
Fold the bottom of the leaf up and over the rice, then fold in the sides, creating a tight package. Secure the package with kitchen string, tying it firmly at the top.
Repeat this process, making several packages until all the rice is used up. Be sure to keep the banana leaves moist as you work to prevent cracking.
The key is to wrap the rice tightly, ensuring a compact and uniform shape. This step takes some practice, but don't worry – the more you do it, the easier it becomes.
With each fragrant package, you're one step closer to enjoying the delicious flavors of traditional Vietnamese rice cake for Lunar New Year.
Step 3. Boil the Wrapped Rice Cakes
Once the rice packages are wrapped, place them in a large pot and add enough water to just cover the packages.
Be sure to add some extra water, as the rice will absorb a lot during cooking. Bring the water to a boil over high heat, then reduce the heat to maintain a gentle simmer.
Let the rice cakes cook for about 5-6 hours, topping up the water as needed to keep them submerged.
As the cakes cook, the banana leaves will turn a deep green and the rice will become soft and infused with the aromatic flavors.
You'll know they're done when you can easily pierce through the center with a chopstick.
Carefully remove the hot packages from the pot and let them cool slightly before unwrapping.
Serve the fragrant, steaming Banh Chung alongside your Lunar New Year feast.
The soft, savory rice cakes are a beloved tradition that brings families together in celebration.
Step 4. Unwrap and Serve Warm
After the rice cakes have simmered for 5-6 hours, it's time to unwrap and serve them warm.
Carefully, use a knife to slice open the banana leaves. Don't discard them just yet – you can use them as a serving plate!
Gently remove the fragrant rice cakes and place them on the banana leaves. Admire the stunning green and white colors that have blossomed from the long cooking process.
Now, it's time to enjoy the fruits of your labor. Invite your family and friends to gather around and dig in.
The warm, sticky rice cakes will melt in your mouth, releasing a delightful blend of flavors. You can serve them as is, or pair them with a savory dipping sauce for an extra burst of taste.
As you savor each bite, let the flavors transport you to the vibrant streets of Vietnam during the Lunar New Year celebration.
This timeless tradition is sure to bring joy and togetherness to your holiday festivities.
Step 5. Enjoy the Sticky Rice Cake
Now that you've delicately unwrapped the rice cakes, it's time to savor their delightful flavors.
The soft, sticky texture of the rice cake is a true delight. Gently peel back the banana leaf or parchment paper to reveal the steaming, aromatic treat within. Breathe in the enticing scent of the sweet rice, blended with the nutty aroma of mung bean or savory pork.
Take a bite and feel the satisfying chewiness as the rice cake melts in your mouth. The combination of flavors is a harmonious dance, with the sweetness of the rice balanced by the subtle saltiness of the filling.
Enjoy each morsel, savoring the unique texture and taste that makes this Vietnamese delicacy so special. As you savor the banh chung, let the flavors transport you to the joyous celebrations of Tet, the Lunar New Year.
This cherished tradition brings family and friends together, creating lasting memories of the holiday season.
Final Thoughts
The celebratory essence of Lunar New Year lives on in the time-honored tradition of crafting Vietnamese rice cakes. As you've learned, these sticky, savory delights symbolize prosperity and good fortune.
Preparing them is a true labor of love, requiring patience and skill. But the rewards are well worth it – the satisfying texture, the burst of flavors, and the sense of connection to your heritage.
Even as modern life marches on, these rice cakes remain a cherished part of the Lunar New Year festivities. Families gather to shape the cakes, share stories, and pass down the knowledge to younger generations.
It's a ritual that transcends time, uniting people across cultures and continents. So as you enjoy this iconic Vietnamese treat, remember that you're partaking in a timeless tradition, one that celebrates the enduring spirit of the Lunar New Year.
Savor each bite, and let it inspire you to embrace the joy and promise of the season.
Frequently Asked Questions
What Are the Main Ingredients in Bánh ChưNg?
The main ingredients in bánh chưng are glutinous rice, mung bean, and pork. You'll also need banana leaves, salt, and spices to create this traditional Vietnamese New Year's cake.
How Long Does It Take to Cook Bánh ChưNg?
Cooking bánh chưng takes a significant amount of time, typically around 12 hours. The process involves wrapping the glutinous rice, mung bean, and pork filling in banana leaves and boiling the packages for half a day.
Can Bánh ChưNg Be Frozen for Later Use?
Yes, you can freeze bánh chưng for later use. Simply wrap each cake tightly in plastic wrap or aluminum foil and store in the freezer for up to 3 months. When ready to serve, thaw at room temperature.
How Do You Wrap Bánh ChưNg in the Traditional Way?
To wrap bánh chưng in the traditional way, start by layering banana leaves and placing the rice, mung bean, and pork filling in the center. Fold the leaves over, tying them with string to secure the package.
What Is the Significance of the Square Shape of Bánh ChưNg?
The square shape of bánh chưng represents the four cardinal directions, symbolizing harmony and balance in the universe. It's a traditional form that's been passed down for generations, embodying the essence of Vietnamese culture.
Mai is a passionate chef specializing in Vietnamese cuisine. From fragrant pho to fresh spring rolls and banh mi, Mai’s dishes showcase the balance of sweet, salty, sour, and spicy that defines Vietnamese cooking. Her recipes emphasize fresh herbs, flavorful broths, and the light, vibrant ingredients that make Vietnamese food so special.
Vietnamese Cuisine
Vietnamese Yogurt: Tangy, Creamy, and Perfectly Sweet
Nourish your taste buds with Vietnamese yogurt’s tangy, creamy goodness—discover the secret to making this delightful treat at home!
Vietnamese yogurt, or "sữa chua," is an amazing treat you'll love! Its tangy flavor and creamy texture make it so special. It all started in Vietnam, influenced by French cuisine, and now, it's enjoyed by everyone. You can easily make it at home with just whole milk, plain yogurt, and a bit of sugar! The best part is, after you mix everything and let it sit for a while, you can add your favorite fruits or toppings. It's a delicious snack or dessert that brings people together. Stick around to discover tips for perfecting your homemade yogurt!
Key Takeaways
- Vietnamese yogurt, known as "sữa chua," features a tangy and creamy texture, enhanced by local flavors like sweetened condensed milk.
- It is traditionally served in charming clay pots, making it a delightful and culturally significant treat.
- The yogurt is rich in probiotics, calcium, and protein, promoting gut health and overall well-being.
- Customizable with fruits, honey, or nuts, it offers endless flavor variations to suit individual tastes.
- Easy to prepare at home, Vietnamese yogurt makes for a refreshing snack or dessert, perfect for sharing and entertaining.
History
Vietnamese yogurt, often enjoyed as a refreshing dessert, has roots that trace back to French colonial influence in Vietnam during the late 19th century. When the French came, they brought with them the concept of yogurt, introducing it to the local culture. This creamy treat quickly gained popularity, blending perfectly with traditional Vietnamese flavors.
As time went on, local chefs began experimenting with this new ingredient. They added sweetened condensed milk, making the yogurt taste even better. You might find it served in charming clay pots, making it feel extra special. The yogurt became a beloved part of Vietnamese cuisine, enjoyed by people of all ages.
Today, you can find Vietnamese yogurt in homes, street food stalls, and restaurants all over Vietnam. It's often eaten as a dessert or snack, sometimes topped with fruits or sweet syrup.
The unique tangy flavor and creamy texture make it a delightful treat that you'll love. So, whether you're in the bustling streets of Hanoi or at home, Vietnamese yogurt is a delicious reminder of how cultures can blend together, creating something truly special and tasty!
Cooking Steps
To make delicious Vietnamese yogurt, you'll want to start by gathering your ingredients and equipment. You'll need sweetened condensed milk, plain yogurt, and warm water. Don't forget a mixing bowl, whisk, and some small jars for storage!
First, pour one can of sweetened condensed milk into your mixing bowl. Add two cups of warm water and stir until it's well blended.
Now, add one cup of plain yogurt into the mixture. This yogurt will act as your starter culture, so mix it gently until everything's combined.
Next, divide the mixture evenly into your small jars. Make sure to leave a little space at the top. Then, cover each jar with a lid or plastic wrap.
It's time to let the magic happen! Place the jars in a warm spot for about 6 to 8 hours. You can wrap them in a towel to keep them cozy.
Once the yogurt has thickened, move it to the fridge to chill for a few hours.
And there you have it! Your homemade Vietnamese yogurt is ready to enjoy. Serve it plain or with fruit for a tasty treat!
Step 1. Gather Yogurt-Making Ingredients
Have you gathered all the essentials for making your own delicious yogurt? Let's make sure you have everything you need.
First, you'll need some whole milk, as it creates that rich, creamy texture we all love. You can use about four cups of milk, but feel free to adjust if you want more yogurt.
Next, grab a small container of plain yogurt. This will be your starter culture, so pick one that has live active cultures. You only need a couple of tablespoons, but it's important to choose a good quality yogurt for the best flavor.
Now, let's not forget the sugar! You'll want about half a cup, but you can adjust this according to your taste. If you love it sweeter, add more!
And finally, consider some flavorings like vanilla extract or fresh fruit to make your yogurt even more delicious.
Once you've gathered all these ingredients, you're ready to start your yogurt-making adventure. It's going to be fun and rewarding, and soon you'll have a tasty treat that's perfect for breakfast or a snack. Enjoy the process!
Step 2. Warm Milk to 110°F
Warming the milk to 110°F is a crucial step in the yogurt-making process. This temperature is just right for the good bacteria to thrive and turn your milk into delicious yogurt.
To get started, pour your milk into a large pot and place it on the stove over medium heat. Stir the milk gently as it heats up to prevent it from sticking to the bottom of the pot.
You'll want to keep an eye on it because milk can boil over quickly! Use a food thermometer to check the temperature. When it reaches around 110°F, take it off the heat immediately.
If you don't have a thermometer, you can test it with your finger; it should feel warm but not hot.
Once it's at the right temperature, let it sit for a moment to cool down if necessary. This part is super important because if it's too hot, it can kill the good bacteria you'll add later.
Step 3. Add Yogurt Starter Culture
Now that your milk is at the perfect temperature, it's time to add the yogurt starter culture. This is where the magic begins!
Take a small bowl and scoop out about two tablespoons of your favorite plain yogurt. Make sure it has live active cultures; that'll help your yogurt become creamy and delicious.
Next, gently mix the yogurt with a little bit of the warm milk in the bowl. This helps to create a smoother mixture.
Once it's well combined, pour this yogurt mixture back into your pot of warm milk. Give it a gentle stir, but don't overdo it. You want to keep those cultures intact!
After you've added the starter culture, it's important to keep the mixture warm. This helps the cultures grow and turn your milk into yogurt.
You're almost there!
Step 4. Incubate Mixture for Eight Hours
After adding the yogurt starter culture, it's time to let the mixture work its magic. You'll want to find a warm spot in your kitchen, as the right temperature helps the yogurt to ferment.
Pour the mixture into clean jars or a container and cover it with a lid or a clean cloth. This keeps everything cozy and safe.
Now, you'll need to let it incubate for about eight hours. That might sound like a long wait, but it's super important! During this time, the starter culture will do its job, turning the milk into creamy yogurt.
You can even check on it occasionally, but try not to disturb it too much. If you want to play a little game, see if you can guess how thick and tangy it'll be when you finally take a peek!
After the eight hours are up, you'll discover a delicious, homemade treat waiting for you. Just remember, the longer you let it sit, the tangier it'll be, so keep that in mind for your next batch.
Your patience will definitely pay off with a delightful yogurt that's perfect for snacking!
Step 5. Chill Yogurt Before Serving
Once the eight-hour incubation is complete and your yogurt has thickened to perfection, it's crucial to chill it before serving. This step helps enhance its creamy texture and tangy flavor, making each spoonful even more delicious!
Start by transferring your yogurt jars to the refrigerator. Let them chill for at least two hours. This cooling time is essential because it allows the yogurt to set up nicely, giving it that lovely, smooth consistency you want.
Plus, the cold yogurt feels refreshing, especially on a warm day!
While you wait, you can think about how you'll serve it. Will you add fresh fruits, sweetened condensed milk, or maybe a sprinkle of nuts? The possibilities are endless, and you'll want to be ready to impress your family or friends!
Once the yogurt is nice and cold, it's time to dig in. Scoop some into a bowl, add your favorite toppings, and enjoy the yummy flavors of your homemade Vietnamese yogurt.
Final Thoughts
Vietnamese yogurt stands out as a delightful treat that combines creaminess with a hint of tang, leaving a lasting impression on anyone who tries it.
It's not just a dessert; it's an experience that can brighten your day. You'll love how easy it's to make at home, and the best part is, you can customize it just the way you like. Whether you prefer it sweetened with honey, topped with fresh fruits, or enjoyed plain, there's a version for everyone.
Sharing this yogurt with friends and family can turn any ordinary gathering into a special occasion. Imagine everyone sitting together, enjoying the tasty flavors, and sharing stories. It's a simple way to create lasting memories. Plus, you'll impress your loved ones with your cooking skills!
Next time you want a snack that's both delicious and unique, reach for Vietnamese yogurt. It's a fun treat that's sure to please your taste buds.
Frequently Asked Questions
What Are the Health Benefits of Vietnamese Yogurt?
You'll find that Vietnamese yogurt offers probiotics for gut health, calcium for strong bones, and protein for energy. Its low sugar content makes it a nutritious snack, helping you maintain a balanced diet and overall wellness.
Can I Use Non-Dairy Milk for Vietnamese Yogurt?
You can definitely use non-dairy milk for Vietnamese yogurt. Just make sure it's fortified and has a similar consistency. Experiment with different types to find your favorite flavor and texture combination!
How Long Does Vietnamese Yogurt Last in the Fridge?
Vietnamese yogurt typically lasts about one to two weeks in the fridge. Make sure you store it in an airtight container. Always check for any off smells or changes in texture before consuming.
Is Vietnamese Yogurt Safe for Lactose-Intolerant Individuals?
If you're lactose-intolerant, you might still enjoy Vietnamese yogurt. The fermentation process reduces lactose levels, making it easier to digest. However, it's best to test a small amount first to see how your body reacts.
What Toppings Pair Well With Vietnamese Yogurt?
When enjoying yogurt, consider toppings like fresh fruits, honey, granola, or nuts. You'll enhance the flavor and texture, making each bite more delightful. Experimenting with different combinations can lead to your perfect bowl!
Mai is a passionate chef specializing in Vietnamese cuisine. From fragrant pho to fresh spring rolls and banh mi, Mai’s dishes showcase the balance of sweet, salty, sour, and spicy that defines Vietnamese cooking. Her recipes emphasize fresh herbs, flavorful broths, and the light, vibrant ingredients that make Vietnamese food so special.
-
Brazilian Cuisine3 months ago
Tacacá
-
Brazilian Cuisine3 months ago
Caldeirada
-
Polish Comfort Food3 months ago
Krupnik (Barley Soup)
-
Southern Comfort Food3 months ago
Cheese Straws
-
Brazilian Cuisine3 months ago
Chicken in Brown Sauce
-
Polish Comfort Food3 months ago
Vegetable Salad
-
American Diner Classics2 months ago
The Maillard Reaction: Understanding the Chemistry of Browning {Food Science and Cooking}
-
African Cuisine3 months ago
Kedjenou (Ivory Coast)