Vietnamese Cuisine
Trứng Muối: Vietnamese Salted Egg You’ll Want to Try
Discover the delicious world of Trứng Muối, Vietnamese salted eggs, and unlock their unique flavor and cultural significance that will elevate your culinary adventures!
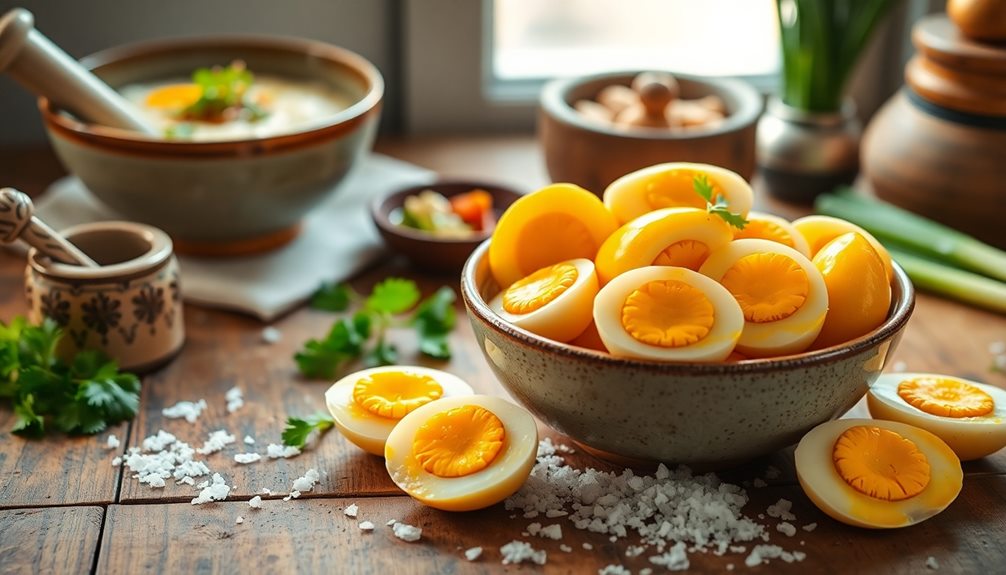
Trứng muối, or Vietnamese salted eggs, are a tasty treat that you'll definitely want to try! They come from fresh duck eggs that are brined to enhance their savory flavor. You'll find these special eggs used in many traditional dishes, adding a delightful burst of taste. The process involves selecting fresh eggs, preparing a salt brine, sealing them in jars, and letting them ferment for about 3-4 weeks. After that, they're ready to eat! Whether you sprinkle them on rice or mix them into salads, these eggs will surprise your family and friends with their unique flavor. There's even more to discover about their cultural significance and cooking tips!
Key Takeaways
- Trứng Muối, or Vietnamese salted egg, is a traditional preservation method that enhances flavor and texture of duck eggs.
- The salting process takes 3-4 weeks, yielding a rich, savory taste perfect for various dishes.
- Fresh duck eggs, a clean brine solution, and proper fermentation are essential for successful salted eggs.
- Versatile in culinary uses, salted eggs add depth to rice, salads, and sauces, making them a delightful ingredient.
- A must-try for food enthusiasts, Trứng Muối connects you to Vietnamese heritage and unique flavors.
History
Tracing its roots back centuries, Vietnamese salted egg has become a beloved delicacy in Vietnamese cuisine. You might be surprised to learn that this tasty treat has been enjoyed by many generations.
Originally, people salted eggs to preserve them, making them last longer without refrigeration. They discovered that the salting process gave the eggs a unique flavor and texture, which made them even more appealing!
As time went on, salted eggs became a staple in many Vietnamese dishes. Families would often prepare them to celebrate special occasions or simply enjoy them with rice. You can find these delicious eggs in various meals, adding a savory twist that makes every bite exciting.
Salted eggs aren't just popular in Vietnam; they've spread to other Asian countries, too! Each culture has its own twist on the recipe, but the love for this delightful treat remains the same.
Whether you're snacking on them or enjoying them in a meal, Vietnamese salted eggs hold a special place in the hearts of food lovers everywhere. So, the next time you taste one, remember the rich history behind this delicious delicacy!
Cooking Steps
Creating Vietnamese salted eggs is a rewarding culinary adventure that brings rich flavors to your dishes. To start, gather fresh duck eggs, salt, and water.
First, prepare a brine by mixing one cup of salt with four cups of water in a large bowl. Stir until the salt dissolves completely.
Next, gently place the duck eggs into the brine, ensuring they're fully submerged. You might want to use a plate to weigh them down. Cover the bowl with plastic wrap and let it sit in a cool, dark place for about two to four weeks. The longer they soak, the saltier and more flavorful they become!
After the soaking period, remove the eggs from the brine and rinse them under cold water. Now, you can boil them for about ten minutes or steam them until they're cooked through.
Once they've cooled, you can peel the shells to reveal the beautiful orange yolk inside.
Enjoy these delicious salted eggs on rice, in soups, or even in salads. You'll love how they add a unique twist to your meals! Dive in and relish this delightful treat!
Step 1. Select Fresh Duck Eggs
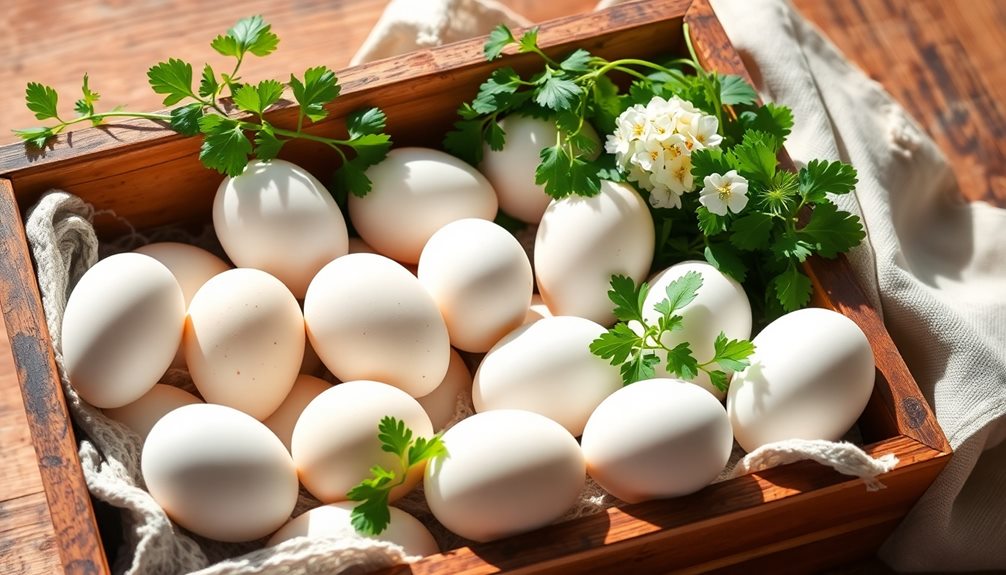
When selecting fresh duck eggs, it's essential to check for quality consistently. You want to look for eggs that feel heavy in your hand, as this indicates they're fresh. Gently hold the eggs and give them a little shake. If you hear a sloshing sound, that means the egg is old, and you should skip it.
Next, examine the shells. Fresh duck eggs should have clean, uncracked shells. If you find any cracks or dirt, it's better to choose another egg. You'll also want to pay attention to the color. While most duck eggs are white or pale blue, the color isn't as important as the freshness.
Another fun tip is to check the date on the carton if they come in one. Look for the most recent date, which usually means fresher eggs. If you're at a local market, don't hesitate to ask the seller about the eggs' freshness. They often have great insights!
Once you've selected your fresh duck eggs, you're one step closer to making delicious Vietnamese salted eggs. Enjoy the process, and happy cooking!
Step 2. Prepare the Brine Solution
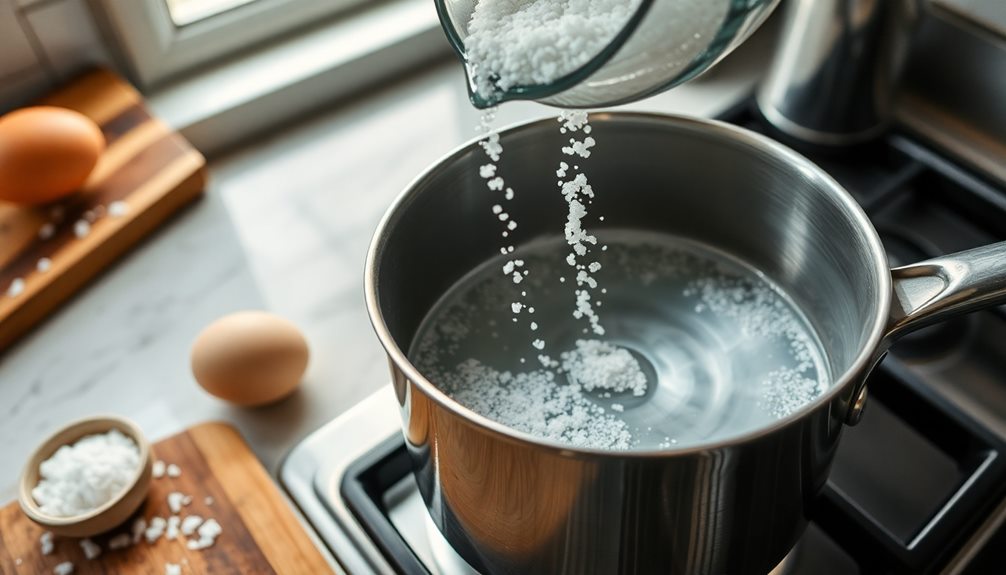
To prepare the brine solution for your salted eggs, you'll need to gather a few simple ingredients. First, grab some water, salt, and a pot. You'll need about four cups of water and one cup of salt. This will create a strong brine that helps the eggs absorb the salty flavor.
Next, pour the water into the pot and add the salt. Stir the mixture well until the salt completely dissolves. This might take a minute, but it's super important! You want to make sure there are no salt grains left floating around.
Once you're done mixing, bring the brine to a gentle boil on the stove. Let it boil for about five minutes, then remove it from the heat. This step helps to make sure your brine is nice and clean.
Let the brine cool to room temperature before using it.
And that's it! You've just prepared a tasty brine solution. Now, you're ready to move on to sealing the eggs in jars. Your delicious Vietnamese salted egg adventure is just beginning!
Step 3. Seal Eggs in Jars
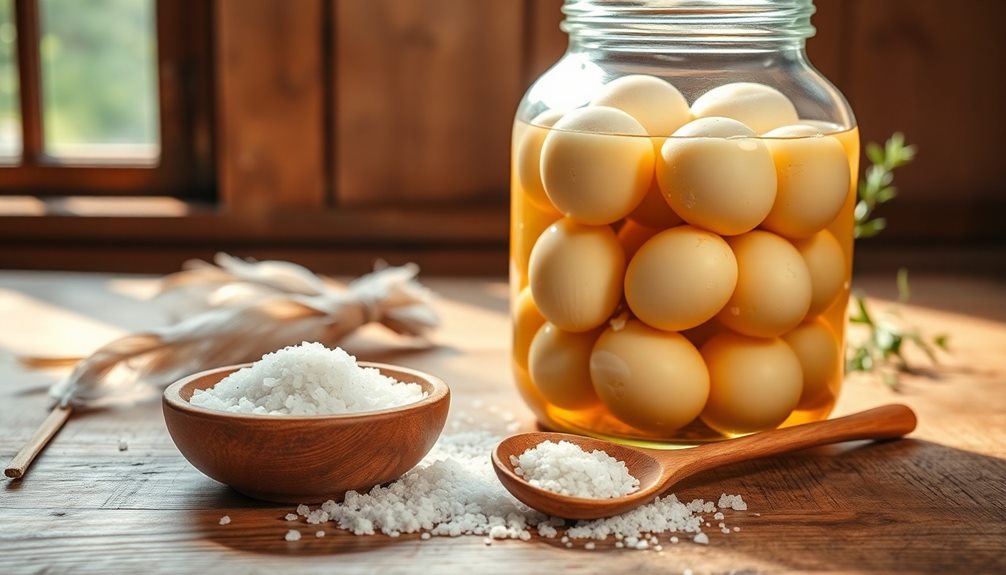
With your brine solution cooled and ready, it's time to seal the eggs in jars. First, gather your clean glass jars and make sure they're dry. You'll want to place a few eggs inside each jar, but don't overcrowd them. Aim for about four to six eggs per jar, depending on their size.
It's also a good idea to ensure that the jars are stored in an environment with proper airflow, similar to maintaining an air purifier's efficiency by avoiding high dust areas air purifier maintenance.
Next, pour the brine solution over the eggs, making sure they're completely submerged. This is important because the brine needs to cover the eggs to work its magic. If you notice any air bubbles, gently tap the jars to release them, then add more brine if needed.
Once the eggs are covered, seal each jar tightly with a lid. You want to keep everything secure so the flavors can blend beautifully during the fermentation process. It's like giving the eggs a cozy little home!
Lastly, label the jars with the date so you'll remember when you started this exciting journey. Now, find a cool, dark place to store them. You're one step closer to enjoying delicious Vietnamese salted eggs, and that's something to celebrate!
Step 4. Ferment for 3-4 Weeks
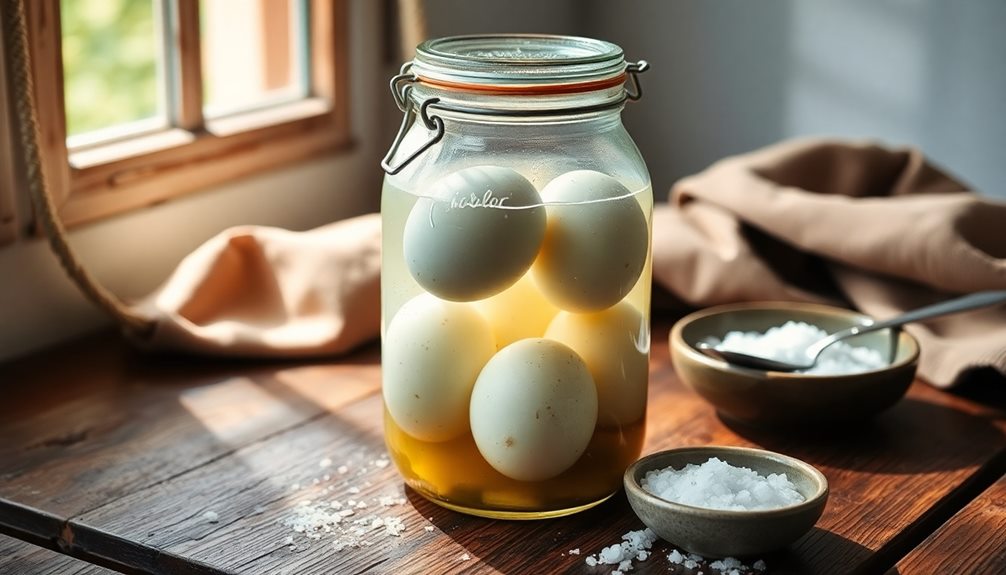
Now that your jars are sealed and ready, it's time to let the magic happen as the eggs ferment for 3-4 weeks. This part is super exciting! During this time, the salt works its wonders, transforming ordinary eggs into something special.
Find a cool, dark place to store your jars. A pantry or cupboard works great! Check on them every week to see how they're doing. You might notice some bubbles forming, which is totally normal. It means the fermentation is happening!
Make sure to keep the jars tightly sealed; this helps create the right environment for the eggs. If you see any mold on the surface, don't worry too much—just skim it off gently.
Patience is key here! The longer you let them ferment, the richer the flavor will become. You can even mark your calendar to remind yourself when the 3-4 weeks are up. The excitement will build as you wait for these delicious salted eggs to be ready.
After this magical waiting period, you'll be ready to taste your amazing creation! So, hang tight and enjoy the process.
Step 5. Taste for Doneness
After the 3-4 weeks of fermentation, it's time to check if your salted eggs are ready.
You'll want to start by gently removing an egg from the jar. Rinse it off to get rid of any salt or brine.
Now, let's get to the exciting part—cooking! Boil the egg in water for about 10-12 minutes. This will help you taste the magic of your hard work.
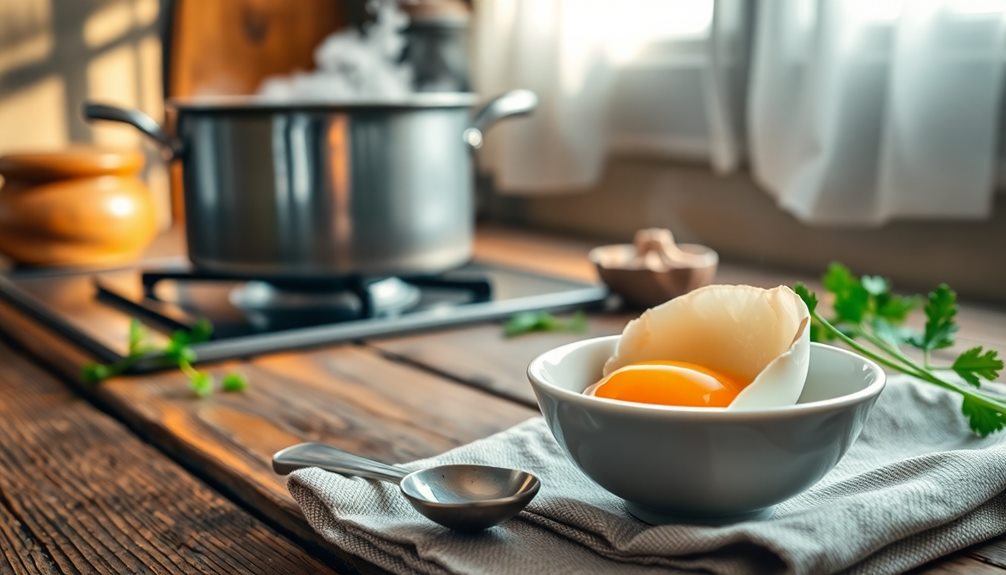
Once the egg is cooked, peel it carefully. Take a moment to admire the bright orange yolk, which is a sign of a good salted egg.
Now, it's time for your taste test! Take a small bite of the yolk and see if it has that rich, savory flavor you're looking for. If it's a bit too salty, don't worry; you can always adjust the time for your next batch.
If the flavor is just right, congratulations! You've made delicious salted eggs. Enjoy them on rice, in salads, or just on their own.
You've earned it! So, go ahead and share your tasty creation with family and friends. They'll be impressed!
Final Thoughts
Vietnamese salted egg has carved out a special place in the culinary world, and it's easy to see why. This unique treat isn't just a food; it's an experience that combines flavor, texture, and a bit of cultural history. When you take a bite, you'll discover a burst of savory goodness that's unlike anything else.
You can enjoy salted eggs in many ways. Whether you sprinkle them on rice, mix them in salads, or use them in sauces, the possibilities are endless! They add a special touch to any meal.
Plus, they're fun to cook with and can surprise your friends and family when they try them for the first time.
If you haven’t tasted Vietnamese salted eggs yet, now’s the time! Grab some and dive into a world of delicious flavors. You’ll find that they’re not just a food item; they’re a way to connect with Vietnamese culture and cuisine. If you’re feeling adventurous, try incorporating Vietnamese salted eggs into your cooking. They make a great addition to salads, stir-fries, and even as a topping for avocado toast. And for a truly authentic experience, why not try making your own Vietnamese salted eggs to use in your favorite Vietnamese sausage recipe? The possibilities are endless, and you’ll be amazed at the depth of flavor they bring to your dishes.
Frequently Asked Questions
Where Can I Purchase TrứNg MuốI in the US?
You can find trứng muối at Asian grocery stores or online retailers like Amazon. Check local Vietnamese markets too, as they often carry it. Don't hesitate to ask for recommendations from friends or local food enthusiasts!
What Are the Health Benefits of Salted Eggs?
Salted eggs offer various health benefits. They're high in protein, rich in essential fatty acids, and provide vitamins like A and D. Enjoying them in moderation can enhance your diet and satisfy your savory cravings.
Can I Make TrứNg MuốI With Duck Eggs?
Yes, you can make trứng muối with duck eggs! Just follow the traditional salting process, and you'll achieve that rich flavor and unique texture. Enjoy experimenting with this delicious ingredient in your dishes!
How Long Can Salted Eggs Be Stored?
Salted eggs can be stored in the refrigerator for up to four to six weeks. If you want them to last longer, consider freezing them, but they're best enjoyed fresh for optimal flavor.
Are There Any Vegetarian Alternatives to TrứNg MuốI?
Yes, you can try using tofu or chickpea-based products as vegetarian alternatives. Marinate them in a mixture of soy sauce and spices to mimic the salty, umami flavor that salted eggs provide. Enjoy experimenting!
Mai is a passionate chef specializing in Vietnamese cuisine. From fragrant pho to fresh spring rolls and banh mi, Mai’s dishes showcase the balance of sweet, salty, sour, and spicy that defines Vietnamese cooking. Her recipes emphasize fresh herbs, flavorful broths, and the light, vibrant ingredients that make Vietnamese food so special.
Vietnamese Cuisine
Vietnamese Nem Chua: The Savory Fermented Snack You’ll Love
Acaptivating blend of sweet, sour, and umami flavors, Nem Chua is a beloved Vietnamese fermented pork snack that’ll have your taste buds craving more. Learn the steps to craft this Vietnamese treasure at home.
Get ready to dive into the savory world of Nem Chua, a beloved Vietnamese culinary delight! This fermented pork snack boasts a tantalizing blend of sweet, sour, and umami flavors that'll have your taste buds dancing. Originating in northern Vietnam centuries ago, Nem Chua has become a cultural staple, often shared during festive gatherings. The key lies in the meticulous fermentation process, where the pork develops its signature chewy texture and captivating aroma. Wrap it in banana leaves, pair it with pickled veggies, and prepare to embark on a flavor adventure that'll leave you craving more. Want to learn the steps to craft this Vietnamese treasure at home?
Key Takeaways
- Nem Chua is a traditional Vietnamese fermented pork snack with a unique savory, sour, and umami flavor profile.
- The fermentation process is essential for developing the distinct taste and chewy texture of Nem Chua.
- Nem Chua is often served with pickled vegetables, enhancing the contrast of flavors and textures.
- Nem Chua is a culturally significant dish, widely enjoyed during festive occasions and family gatherings in Vietnam.
- Preparing Nem Chua at home involves a straightforward process, allowing for customization to personal taste preferences.
History
Nem Chua, the beloved Vietnamese fermented pork sausage, traces its roots back to the northern regions of the country. This savory snack has been a beloved part of Vietnamese cuisine for centuries, passed down through generations.
The origins of Nem Chua can be traced to the 15th century, when the dish was first mentioned in historical records. Back then, it was a simple affair – just pork, salt, and rice bran. As the dish evolved, additional ingredients like chilies, garlic, and fish sauce were added, creating the distinct flavor profile we know and love today.
Traditionally, Nem Chua was a staple food for farmers and laborers, providing a protein-packed and portable snack. Over time, it became a beloved part of Vietnamese culture, often served at festivals, celebrations, and family gatherings.
Today, Nem Chua remains a cherished treat, enjoyed by people of all ages across the country.
Recipe
Nem Chua, also known as Vietnamese cured meat, is a popular snack food in Vietnam. It's a fermented meat product that has a unique and complex flavor profile, combining the savory, salty, and slightly sour notes of the cured meat with the crunch of vegetables and the heat of chili peppers.
The traditional method of making Nem Chua involves carefully selecting and preparing the ingredients, followed by a meticulous curing process that can take several days. While it may seem like a laborious task, the resulting flavor and texture of the finished product make it well worth the effort.
Ingredients:
- 2 lbs ground pork
- 1 tbsp salt
- 1 tbsp sugar
- 1 tbsp fish sauce
- 1 tsp ground black pepper
- 2 cloves garlic, minced
- 2 Thai chili peppers, finely chopped
- 1 cup shredded carrots
- 1 cup shredded daikon radish
- 1 cup finely chopped green onions
- Banana leaves or rice paper wrappers, for serving
Instructions:
In a large bowl, combine the ground pork, salt, sugar, fish sauce, black pepper, garlic, and Thai chili peppers. Mix well until all the ingredients are evenly distributed.
Cover the bowl and refrigerate for at least 24 hours, or up to 48 hours, to allow the flavors to develop.
After the curing process, add the shredded carrots, daikon radish, and green onions to the pork mixture. Stir to combine.
Divide the mixture into small portions and wrap them in banana leaves or rice paper wrappers. Secure with toothpicks or string.
Tips:
For best results, let the wrapped Nem Chua ferment at room temperature for an additional 2-3 days before serving. This will further enhance the flavor and texture of the cured meat.
Serve Nem Chua as a snack or appetizer, accompanied by fresh herbs, vegetables, and dipping sauces like fish sauce, chili sauce, or nuoc cham.
Cooking Steps
Combine the juicy pork, fragrant herbs, and zesty spices in a bowl.
Wrap the pork mixture tightly in banana leaves and let it ferment for 3 to 5 days.
Once it's ready, slice the flavorful, fermented pork and serve it alongside tasty pickled veggies.
Step 1. Combine Pork, Herbs, and Spices
With the pork, herbs, and spices at the ready, you can now bring them together to craft the quintessential filling for the Vietnamese nem chua. First, dice the pork into small, bite-sized pieces, ensuring even cooking and texture.
Next, chop the fragrant cilantro, savory garlic, and zesty lime leaves, blending their flavors to create a delightful aroma. Don't forget the warm spices – a pinch of ground black pepper and a dash of chili powder will add a subtle kick to the mixture.
Now, combine all the ingredients in a large bowl, using your hands to thoroughly mix them together. Knead the mixture, working the flavors into the pork until it's well-incorporated.
You'll want the filling to be cohesive, with the herbs and spices evenly distributed. Taste as you go, adjusting the seasoning to your liking. With the perfect balance of salty, sour, and spicy, you're ready to stuff the nem chua and begin the fermentation process.
Step 2. Wrap Pork Mixture in Banana Leaf
Grab a clean banana leaf and gently lay it flat on your work surface. This large, green leaf will act as the wrapping for your savory pork mixture.
Spoon a generous portion of the seasoned pork onto the center of the leaf. Fold the sides of the leaf over the pork, then roll it up tightly, creating a neat little package. Secure the roll with a toothpick or a thin strip of the leaf.
Now, repeat this process with the remaining pork mixture and leaves. Line them up neatly as you go. These handheld wraps are perfect for sharing with friends and family at your next gathering.
The fragrant banana leaf adds an extra layer of flavor and aroma. Once your nem chua are all wrapped up, you're ready for the final step – fermentation! Get ready to enjoy this delicious Vietnamese specialty.
Step 3. Ferment Wrapped Pork for 3-5 Days
To ferment the wrapped pork, place the neatly arranged nem chua packages in a large, clean container. Cover them completely with a brine solution made from salt and water. Be sure the pork is fully submerged.
Now, let the container sit in a warm spot for 3-5 days. As the pork ferments, you'll notice a tantalizing sour aroma. This is a good sign – the flavors are developing!
During this time, you'll need to check on the container daily. Skim off any foam or scum that rises to the surface. This helps keep the fermentation process healthy.
When the 3-5 day mark arrives, your nem chua is ready! The pork should have a firm, chewy texture and a delightful sour-savory taste. Unwrap the leaves and enjoy this classic Vietnamese snack. The fermentation process has transformed the pork into a delectable treat!
Step 4. Slice Fermented Pork Before Serving
The fermented pork's firm, chewy texture and delightful sour-savory flavor are ready to be enjoyed. Before serving, you'll want to slice the pork into thin, bite-sized pieces. This allows everyone to easily pick up and savor each delectable morsel.
First, grab a sharp knife and carefully slice the fermented pork log into discs about 1/4-inch thick. Try to make the slices as even as possible for a neat, uniform presentation. If the pork seems a bit stubborn, don't be afraid to apply a gentle rocking motion to the knife as you cut through.
Once sliced, arrange the pork pieces on a serving platter or plate. You can garnish them with:
- Thinly sliced chilies for a pop of color and heat
- Chopped cilantro or mint leaves for a fresh, herbal note
- Crushed peanuts for a satisfying crunch
Now your Vietnamese nem chua is ready to be shared and savored by all! The combination of flavors and textures is truly irresistible.
Step 5. Serve With Pickled Vegetables
Pairing your sliced Vietnamese nem chua with a selection of pickled vegetables takes the dish to new flavor heights. The tangy, crunchy veggies provide a perfect foil to the rich, savory pork. Try thinly sliced carrots, daikon radish, and cucumbers – they'll add a refreshing zing that balances the bold fermented taste of the nem chua.
Prepare the pickled vegetables in advance for maximum flavor. Simply mix the sliced veggies with a brine of vinegar, sugar, and salt. Let them sit for at least 30 minutes, or up to a few days in the fridge. The longer they pickle, the more intense the flavors will become.
Arrange the pickled veggies on a platter alongside your sliced nem chua. Encourage your guests to build their own little bites, layering the pork and crunchy veggies on a crisp lettuce leaf or rice paper wrap.
The contrasting textures and tastes will delight your senses and have everyone coming back for more.
Final Thoughts
Ultimately, Nem Chua's versatility and captivating flavors make it a Vietnamese culinary gem. You can enjoy this savory fermented snack any time, whether as an appetizer, a quick bite, or even a meal accompaniment.
Its complex taste is sure to delight your senses – the perfect balance of sweet, sour, and umami.
What's more, Nem Chua is incredibly easy to prepare at home. With a bit of patience and the right ingredients, you can recreate this beloved treat and share it with family and friends.
Imagine the joy of gathering around a table, dipping into the tangy pork, and savoring each flavorful bite. It's a moment of pure Vietnamese culinary bliss.
Frequently Asked Questions
How Long Does It Take to Ferment Vietnamese Nem Chua?
It typically takes 2-3 days to ferment Vietnamese nem chua. The fermentation process allows the flavors to develop and the texture to become firm. Be patient, as rushing it won't give you the same authentic taste.
What Are the Health Benefits of Eating Vietnamese Nem Chua?
Eating Vietnamese nem chua can provide you with beneficial probiotics, boost your immune system, and aid digestion. It's also a good source of protein and may even help reduce inflammation in your body.
Can I Store Leftover Vietnamese Nem Chua, and if So, How?
Yes, you can store leftover Vietnamese nem chua. Keep it in an airtight container in the refrigerator for up to a week. The fermentation process will continue, so the flavor may change slightly, but it'll still be tasty.
Is Vietnamese Nem Chua Safe for Pregnant Women to Consume?
Consuming fermented foods like Vietnamese nem chua during pregnancy is generally safe, but it's best to consult your doctor. They can provide personalized guidance on any potential risks or precautions you should consider.
Where Can I Purchase the Necessary Ingredients to Make Vietnamese Nem Chua?
To make Vietnamese nem chua, you can purchase the necessary ingredients like ground pork, rice paper, and spices from Asian grocery stores or online specialty retailers. Be sure to follow proper food safety guidelines when handling raw meat.
Mai is a passionate chef specializing in Vietnamese cuisine. From fragrant pho to fresh spring rolls and banh mi, Mai’s dishes showcase the balance of sweet, salty, sour, and spicy that defines Vietnamese cooking. Her recipes emphasize fresh herbs, flavorful broths, and the light, vibrant ingredients that make Vietnamese food so special.
Vietnamese Cuisine
Gỏi Tôm Thịt: Vietnamese Shrimp and Pork Salad
With fresh shrimp, tender pork, and vibrant veggies, Gỏi Tôm Thịt offers a taste of Vietnamese culture that you won’t want to miss!
Gỏi Tôm Thịt is a tasty Vietnamese salad that combines fresh shrimp and tender pork, making a delightful dish perfect for sharing! You start by preparing the shrimp and pork, then chop fresh herbs and mix a zesty dressing. Next, you assemble everything on a bed of greens, adding vibrant veggies for crunch. Finally, sprinkle roasted peanuts on top for an extra layer of flavor! This colorful salad is not just delicious; it also represents togetherness in Vietnamese culture, making it a wonderful choice for gatherings. Stick around, and you'll discover more exciting details about this refreshing dish!
Key Takeaways
- Gỏi Tôm Thịt is a Vietnamese salad featuring a combination of fresh shrimp, pork, and vibrant vegetables, offering a refreshing taste experience.
- The dish symbolizes togetherness and love, often enjoyed during family gatherings and celebrations in Vietnamese culture.
- Preparation involves rinsing, peeling shrimp, chopping fresh herbs, mixing a zesty dressing, and assembling ingredients for a colorful presentation.
- Customization options include adding favorite vegetables, proteins, and adjusting spice levels to suit personal preferences.
- Best served chilled or at room temperature, Gỏi Tôm Thịt pairs well with rice or rice noodles for a complete meal.
History
Vietnamese shrimp and pork salad, known as "Gỏi tôm thịt," boasts a rich history that reflects the vibrant culinary traditions of Vietnam. This delicious dish has roots that go back centuries, blending flavors and ingredients from various regions. You'll find that its creation was influenced by the fresh ingredients available in the lush landscapes of Vietnam, like shrimp from the ocean and pork from local farms.
As you explore the history of Gỏi tôm thịt, you'll discover how it embodies the essence of Vietnamese cooking. Families would gather to prepare this salad, celebrating special occasions and sharing stories while enjoying the meal together. It's not just food; it's a symbol of togetherness and love.
Over time, different regions of Vietnam have added their unique twists, making each version special. The dish often reflects local tastes, showcasing the creativity and resourcefulness of Vietnamese cooks.
Ingredients:
- 200g shrimp, peeled and deveined
- 200g pork tenderloin, thinly sliced
- 1 cup lettuce, shredded
- 1 cup cabbage, shredded
- 1 carrot, julienned
- 1 cucumber, thinly sliced
- 1/2 cup fresh herbs (mint, cilantro, and basil)
- 2 tablespoons roasted peanuts, crushed
- 3 tablespoons fish sauce
- 2 tablespoons lime juice
- 1 tablespoon sugar
- 1 clove garlic, minced
- 1 chili pepper, sliced (optional)
Cooking Instructions:
Start by boiling a pot of water and adding the shrimp, cooking until they turn pink (about 2-3 minutes) before removing them and placing them in an ice bath to stop the cooking process.
In the same pot, add the pork and cook until fully cooked through (about 5-7 minutes). Once cooked, let the pork cool before slicing it into thin strips.
In a large bowl, combine the lettuce, cabbage, carrot, cucumber, shrimp, and pork. In a separate bowl, whisk together the fish sauce, lime juice, sugar, garlic, and chili pepper to create the dressing.
Pour the dressing over the salad, toss to combine, and top with fresh herbs and crushed peanuts just before serving.
Extra Tips:
For an authentic touch, consider using grilled pork instead of boiled pork for a smoky flavor.
Additionally, feel free to customize the salad with your favorite vegetables or herbs—Thai basil, for example, can add a unique twist. If you prefer a bit more heat, adjust the amount of chili pepper in the dressing to cater to your taste.
Lastly, let the salad sit for a few minutes after dressing to allow the flavors to meld together before serving.
Cooking Steps
To prepare this delicious shrimp and pork salad, you'll want to start by gathering all your ingredients. You'll need shrimp, pork, fresh herbs, carrots, and a few other tasty items. Once you have everything, it's time to cook!
First, boil a pot of water and add the shrimp. Cook them for about 2-3 minutes until they're pink and firm. Then, take them out and let them cool.
Next, cook the pork in the same water until it's fully cooked. After that, slice the pork into thin pieces.
Now, grab a big bowl and mix together your shrimp, sliced pork, grated carrots, and fresh herbs like mint and cilantro. Don't forget to add your favorite dressing to make it extra yummy!
Toss everything together gently so the flavors blend well.
Step 1. Prepare Fresh Shrimp
Typically, you'll want to start by rinsing the fresh shrimp under cold running water to remove any impurities. This step is super important because it helps keep your salad clean and tasty!
Once you've rinsed them, it's time to peel the shrimp. Hold the shrimp in one hand and gently pull off the shell with the other. Don't forget to remove the legs too!
After peeling, you'll need to devein the shrimp. Look for a dark line along the back; that's the vein. Using a small knife, make a shallow cut along the back and carefully pull out the vein. This makes your shrimp look nice and keeps them yummy.
Now, you can give the shrimp one more rinse to ensure they're clean. If you're feeling adventurous, you can marinate them in a bit of lime juice and salt for extra flavor! Let them sit for about 15 minutes to soak up all those tasty flavors.
When you're done, you'll have fresh shrimp ready to add to your Vietnamese salad, and everyone will love it! Enjoy the process, and get ready for some deliciousness!
Step 2. Chop Fresh Herbs Finely
Once you've prepared your shrimp, it's time to chop the fresh herbs finely, as they'll add vibrant flavor and freshness to your salad. Start by gathering your herbs, like cilantro, mint, and basil. These herbs are going to make your dish smell amazing!
If you're looking to enhance the freshness even further, consider incorporating a few drops of essential oils for hair growth like rosemary oil, which can promote a healthy scalp environment.
Rinse them under cool water to remove any dirt. After that, gently pat them dry with a paper towel. Now, grab a cutting board and a sharp knife. Pick up a handful of your favorite herb, and with a steady hand, start chopping it into small pieces. Remember, the smaller the pieces, the more flavor you'll release!
If you're using multiple herbs, you can chop them together for a delightful mix. Just be careful when you're chopping—keep your fingers tucked in!
Once you've chopped enough herbs, take a moment to smell them. Doesn't it smell fantastic?
Now, you're ready to add these flavorful bits into your salad. These fresh herbs not only taste great, but they also make your dish look colorful and inviting. Enjoy the process, and get excited about how delicious your salad will be!
Step 3. Mix Dressing Ingredients Thoroughly
With all your fresh herbs ready, it's time to whip up the dressing that will tie your Vietnamese shrimp and pork salad together. Start by gathering all the ingredients you'll need: fish sauce, lime juice, sugar, and minced garlic. Each ingredient brings a burst of flavor that makes this dressing special!
In a bowl, combine three tablespoons of fish sauce, the juice of two limes, and a tablespoon of sugar. Stir it all together until the sugar dissolves completely. This part is super important because it helps balance the salty, sour, and sweet flavors.
Next, add in a clove of minced garlic for that zesty kick.
Now, if you like a bit of heat, feel free to toss in some sliced chili for an extra burst of flavor. Mix everything well, making sure all the ingredients are blended smoothly.
Don't be afraid to taste it! You can adjust the levels of lime or sugar to suit your taste. Once it's just right, set it aside. You're now one step closer to enjoying your delicious salad!
Step 4. Assemble Salad Ingredients Together
Now that your dressing is ready, it's time to assemble your salad ingredients. First, grab a big bowl to hold all those delicious flavors!
Start by adding your fresh greens, like lettuce or cabbage. These crunchy veggies will give your salad a great base. Next, toss in the cooked shrimp and sliced pork. They're the stars of this dish and will make it super tasty!
Now, it's time for some color! Add in vibrant veggies like shredded carrots and thinly sliced bell peppers. Don't forget the fresh herbs! Chopped mint and cilantro will make your salad smell amazing and add a burst of flavor.
Once everything is in the bowl, gently mix it all together. You want the ingredients to be evenly distributed, so every bite is flavorful.
Finally, drizzle your prepared dressing over the salad. Make sure you coat everything well! It's okay if you save a little dressing for later; you can always add more if needed.
Now, step back and admire your beautiful creation. It's almost time to dig in! Just make sure to stir it one last time before serving.
Enjoy your delicious Vietnamese shrimp and pork salad!
Step 5. Garnish With Roasted Peanuts
To add the finishing touch to your Vietnamese shrimp and pork salad, sprinkle some roasted peanuts on top. This simple step makes your dish not only look fantastic but also adds a delightful crunch.
First, grab a handful of roasted peanuts. You can buy them already roasted or make your own by toasting raw peanuts in a pan for a few minutes until they're golden brown. Just be careful not to burn them!
Once your peanuts are ready, chop them into small pieces. You want them to be bite-sized so they blend perfectly with the salad.
Now, it's time to sprinkle those tasty bits over the salad. Make sure to cover it evenly, so every bite gets that yummy peanut flavor.
If you want, you can even add a few whole peanuts for decoration. They'll look great and make your salad even more exciting!
Final Thoughts
How can a dish like Vietnamese shrimp and pork salad leave such a lasting impression? This delicious salad is a beautiful blend of flavors and textures that dance on your taste buds. You've got fresh shrimp, tender pork, crunchy vegetables, and zesty herbs, all coming together to create a meal that's not just tasty, but also vibrant and colorful.
When you take a bite, you can feel the freshness. The way the flavors mix makes it special and unforgettable. Plus, it's so easy to make! You can whip it up at home and impress your friends or family. Imagine everyone gathered around the table, enjoying this amazing dish together.
Don't forget, you can customize it too! Add your favorite veggies or adjust the spices to make it just right for you.
Vietnamese shrimp and pork salad isn't just food; it's an experience that brings people together. So next time you want something flavorful and fun, remember this salad. It might just become your new favorite dish! Enjoy every bite, and don't hesitate to share it with others. They'll love it just as much as you do!
Frequently Asked Questions
What Are the Main Ingredients in GỏI Tôm ThịT?
When considering the main ingredients in a dish, you'll typically find proteins, vegetables, and seasonings. For many salads, fresh herbs, shrimp, and pork often make a delicious combination that enhances flavor and texture.
How Many Servings Does This Recipe Yield?
This recipe typically yields about four servings, perfect for sharing with friends or family. Adjust the ingredients if you want more or less, but keep the balance for that delightful flavor everyone loves. Enjoy!
Can I Substitute Shrimp With Other Proteins?
Yes, you can substitute shrimp with other proteins like chicken, tofu, or even beef. Just ensure the flavors complement the dish, and adjust cooking times accordingly to achieve the best results with your chosen protein.
Is GỏI Tôm ThịT Suitable for Meal Prep?
Yes, it's suitable for meal prep! You can prepare it ahead, store it in the fridge, and enjoy it throughout the week. Just keep the dressing separate until you're ready to eat for freshness.
What Drinks Pair Well With GỏI Tôm ThịT?
When pairing drinks, consider light options like iced tea, coconut water, or a refreshing citrus soda. If you prefer alcohol, a crisp white wine or a light beer complements the flavors beautifully. Enjoy your meal!
Mai is a passionate chef specializing in Vietnamese cuisine. From fragrant pho to fresh spring rolls and banh mi, Mai’s dishes showcase the balance of sweet, salty, sour, and spicy that defines Vietnamese cooking. Her recipes emphasize fresh herbs, flavorful broths, and the light, vibrant ingredients that make Vietnamese food so special.
Vietnamese Cuisine
Cơm Gà Hải Nam: Hainanese Chicken Rice With a Vietnamese Twist
Flavorful, aromatic, and comforting, this Vietnamese take on the classic Hainanese chicken rice promises to transport you on a culinary adventure.
Hainanese chicken rice, a beloved dish from China's Hainan province, has found a scrumptious home in Vietnam. You'll start by rinsing and cleaning the chicken to remove any impurities, then cutting it into perfect serving pieces. Next, you'll bring the chicken to a boil, simmering it until it's juicy and tender. Don't forget to skim the broth, removing any foam or unwanted bits for a clear, rich liquid. Serve the chicken over fragrant, oily rice cooked in the same broth for an authentic taste. This Vietnamese twist on a classic dish is sure to delight your taste buds – and there's more to discover about this beloved comfort food.
Key Takeaways
- Incorporate Vietnamese flavors and ingredients into the traditional Hainanese chicken rice recipe for a unique and flavorful twist.
- Utilize Vietnamese spices like lemongrass, fish sauce, and nuoc cham to enhance the overall taste profile of the dish.
- Explore alternative rice cooking methods, such as using a rice cooker or steaming the rice, to achieve the desired texture and aroma.
- Experiment with different garnishes and accompaniments, like pickled vegetables or fresh herbs, to complement the chicken and rice.
- Highlight the cultural fusion by presenting the dish in a visually appealing manner, blending Hainanese and Vietnamese culinary aesthetics.
History
Hainanese chicken rice traces its origins back to the Hainan province of China, where it was a staple dish among the local Hainanese people.
These folks had a knack for cooking chicken to perfection, poaching it in a flavorful broth that kept the meat juicy and tender. The cooked chicken was then paired with fragrant, oily rice that had been prepared using the same broth.
This humble yet delicious dish quickly became a beloved part of Hainan's culinary heritage.
Over time, as the Hainanese people migrated to other parts of Southeast Asia, they brought their signature chicken rice with them. In Singapore and Malaysia, the dish evolved, with local ingredients and cooking techniques being incorporated to create the mouthwatering versions we know and love today.
From its humble beginnings in Hainan, Hainanese chicken rice has become a beloved global phenomenon, delighting food lovers around the world with its unique blend of flavors and textures.
Cooking Steps
To prepare the perfect Hainanese chicken rice, begin by thoroughly rinsing the chicken. Pat it dry, then rub the bird all over with salt.
Place the chicken in a large pot and cover it with water. Bring the pot to a boil, then reduce the heat and simmer for 1 to 1 1/2 hours, until the chicken is cooked through.
Once the chicken is done, remove it from the pot and let it cool slightly. Shred the meat into bite-sized pieces. Strain the cooking liquid and reserve it for the rice.
In a clean pot, toast the rice over medium heat until it's lightly golden. Add the reserved cooking liquid and a bit of salt.
Bring it to a boil, then cover, reduce the heat to low, and simmer for 15-20 minutes, until the rice is tender and fluffy.
Serve the chicken over the fragrant, oily rice, garnished with sliced cucumber, coriander, and a drizzle of the savory cooking liquid. Enjoy this comforting, flavorful dish!
Step 1. Rinse and Clean the Chicken
The first step in preparing the perfect Hainanese Chicken Rice is to thoroughly rinse and clean the chicken.
You'll want to start by removing the chicken from its packaging and placing it under cool, running water. Gently rub the skin with your fingers to loosen any dirt or impurities.
Be sure to pay close attention to the nooks and crannies, like the cavity and under the wings, to ensure the whole bird is clean.
Once the chicken looks sparkling, pat it dry with some paper towels.
This step may seem simple, but it's crucial for getting the best flavor and texture in your final dish.
By removing any residual bacteria or impurities, you're setting the stage for a moist, flavorful chicken that will be the star of your Hainanese Chicken Rice.
With the chicken prepped, you're now ready to move on to the next step in this delicious cooking process.
Step 2. Prepare Chicken by Cutting
Next, grab a sharp chef's knife and carefully cut the chicken into desired serving pieces.
Start by separating the chicken legs and thighs from the body. Gently slice along the joints to detach them.
Then, cut the chicken breasts in half, creating four equal-sized portions. For the wings, simply snip them off the body at the joint.
Lastly, use the knife to slice the chicken breast pieces in half horizontally, creating thin, tender fillets. This will ensure the chicken cooks evenly and absorbs all the delicious flavors of the dish.
Be mindful of your fingers as you work, keeping them clear of the blade. Take your time and use smooth, controlled motions to get clean, uniform cuts.
With the chicken prepped, you're well on your way to an authentic Hainanese chicken rice experience!
Step 3. Bring Chicken to a Boil
With the chicken prepped, it's time to get cooking. Bring a large pot of water to a boil over high heat. Carefully lower the whole chicken into the boiling water. The water should cover the chicken completely.
Let the chicken simmer for about 30 minutes, or until the juices run clear when you pierce the thickest part of the thigh with a fork.
Use a pair of tongs to gently remove the chicken from the pot. Transfer it to a cutting board and let it rest for 10 minutes. This allows the juices to redistribute throughout the meat, ensuring your chicken stays moist and flavorful.
While the chicken rests, keep the pot of chicken broth simmering on the stove. You'll use this flavorful broth later to serve with the rice.
Now, it's time to carve the chicken. Slice it into bite-sized pieces, keeping the skin intact. The chicken is now ready to be served with the fragrant Hainanese rice.
Step 4. Simmer Chicken Until Tender
How do you ensure the chicken simmers until it's tender? First, you'll want to gently lower the chicken into the simmering broth. Make sure the liquid covers the chicken completely.
Then, set the heat to medium-low and let the chicken simmer for about 30 minutes. As it cooks, the meat will become increasingly tender and juicy.
To test for doneness, use a pair of tongs to lightly squeeze the thickest part of the chicken. If it feels firm but still has a bit of give, it's ready. You can also insert a thermometer – the internal temperature should reach 165°F.
Be careful not to overcook, as that can make the chicken dry and tough.
Once the chicken is cooked through, use the tongs to carefully transfer it to a cutting board. Let it rest for 5-10 minutes before slicing into it.
This allows the juices to redistribute, ensuring every bite is moist and flavorful. With a little patience, you'll have perfectly tender Hainanese chicken, ready to serve over fragrant rice.
Step 5. Skim and Discard Chicken Broth
After the chicken has simmered to tenderness, skim any impurities or foam that have risen to the surface of the broth. This step is crucial to ensure your broth is crystal clear and free of any undesirable bits.
Carefully use a ladle or spoon to gently scoop away the layer of foam or scum that has accumulated. Don't worry, this is completely normal and happens when you're cooking meat.
Once you've removed all the impurities, discard them. You don't want those floating around in your final dish. This step may take a few minutes, but it's worth it to get a clean, flavorful broth.
With the broth now skimmed and purified, you're well on your way to creating an authentic Hainanese Chicken Rice dish. The clear, aromatic broth will be the foundation for the rice and provide the perfect accompaniment to the tender, juicy chicken.
Final Thoughts
Ultimately, Hainanese chicken rice remains a beloved and iconic dish that has stood the test of time. Its combination of juicy, flavorful chicken and aromatic, oily rice has captivated the hearts and taste buds of countless people around the world.
Whether you enjoy it in the bustling streets of Singapore or a cozy Vietnamese kitchen, this dish never fails to bring a smile to your face and a sense of comfort to your soul.
As you've discovered, the key to perfecting Hainanese chicken rice lies in the meticulous attention to detail, from the careful poaching of the chicken to the precise seasoning of the rice.
By incorporating the Vietnamese twist, you've added your own unique flair to this classic, creating a dish that's both familiar and refreshingly different.
The skim and discard method for the broth has ensured a clear, rich liquid that enhances the overall experience.
Frequently Asked Questions
How Did Hainanese Chicken Rice Become Popular in Vietnam?
You know, Hainanese chicken rice became popular in Vietnam because Vietnamese immigrants brought the dish with them when they settled in the country. Over time, they adapted it to local tastes, creating a unique Vietnamese variation.
What Distinguishes the Vietnamese Version From the Singaporean Version?
The Vietnamese version of Hainanese chicken rice differs from the Singaporean version in its use of more herbs, pungent fish sauce, and a spicier dip. It has a distinct Southeast Asian flair that sets it apart.
Can the Dish Be Made With Other Types of Protein?
You can absolutely make the dish with other proteins like pork, beef, or shrimp. The key is to cook the protein using the same flavorful rice cooking method to infuse it with the signature taste.
What Are Some Common Side Dishes Served With This Dish?
Common side dishes served with this dish include cucumber salad, pickled vegetables, and steamed or stir-fried greens. You can also serve it with a variety of sauces and condiments to enhance the flavors.
How Can the Dish Be Made More Healthier?
To make the dish healthier, you can use lean chicken breasts, brown rice instead of white, and add more vegetables like carrots, broccoli, or spinach. You can also use low-sodium soy sauce and limit the oil used in cooking.
Mai is a passionate chef specializing in Vietnamese cuisine. From fragrant pho to fresh spring rolls and banh mi, Mai’s dishes showcase the balance of sweet, salty, sour, and spicy that defines Vietnamese cooking. Her recipes emphasize fresh herbs, flavorful broths, and the light, vibrant ingredients that make Vietnamese food so special.
-
Brazilian Cuisine3 months ago
Tacacá
-
Brazilian Cuisine3 months ago
Caldeirada
-
Polish Comfort Food3 months ago
Krupnik (Barley Soup)
-
Southern Comfort Food3 months ago
Cheese Straws
-
Brazilian Cuisine3 months ago
Chicken in Brown Sauce
-
Polish Comfort Food3 months ago
Vegetable Salad
-
American Diner Classics3 months ago
The Maillard Reaction: Understanding the Chemistry of Browning {Food Science and Cooking}
-
African Cuisine3 months ago
Kedjenou (Ivory Coast)