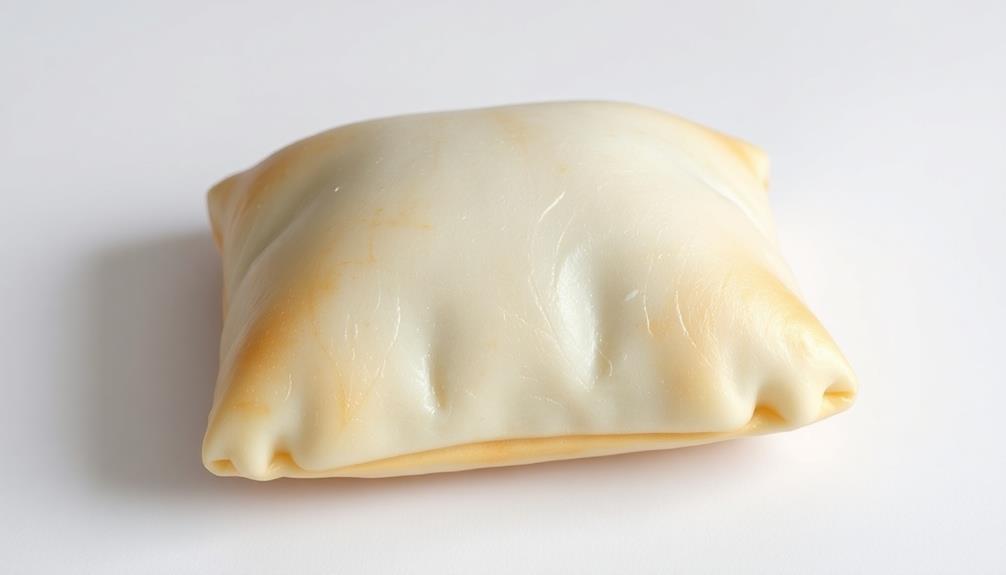
Pillow cake is a delightful Vietnamese treat that'll transport you to bustling markets with its fragrant spices and soft, pillowy texture. This unique dessert combines fluffy dough with a creamy, sweet filling – it's the perfect comfort food for sharing with family and friends. The secret's in the soaked glutinous rice, which gives the cake its signature pillowy softness. As you take a bite, you'll be captivated by the blend of diverse cultural traditions and the storied history behind each delectable morsel. Prepare to be amazed by the simple pleasures this special cake has to offer.
Key Takeaways
- Pillow Cake is a traditional Vietnamese dessert with a fluffy, cloud-like texture and a creamy, sweet filling.
- The recipe combines glutinous rice, coconut milk, and sugar to create a unique and comforting treat.
- Pillow Cake has a rich history, tracing its origins to ancient civilizations and showcasing the diversity of culinary traditions.
- Serving Pillow Cake is a social experience, fostering joyful conversations and strengthening relationships among family and friends.
- Pillow Cake's aroma and flavors create a lasting impression, evoking nostalgia and a sense of cultural identity.
Top picks for "pillow cake"
Open Amazon search results for this keyword.
As an affiliate, we earn on qualifying purchases.
History
Centuries ago, the origins of pillow cake can be traced back to ancient civilizations where bakers experimented with soft, cloud-like pastries.
These early confections were often made with simple ingredients like flour, eggs, and honey, creating a delightfully airy and comforting texture.
As the art of baking evolved, pillow cake recipes spread across cultures, each region adding its own unique twist.
In Asia, the beloved banh goi emerged, with its pillowy exterior and savory fillings.
Meanwhile, in Europe, similar soft, pillowy cakes became a cherished treat, perfect for sharing with loved ones.
Over time, the art of pillow cake-making was perfected, with bakers honing their techniques to produce the most heavenly, cloud-like creations.
Today, this timeless delight continues to bring joy to people around the world, reminding us of the simple pleasures that have endured for centuries.
Recipe
Pillow Cake is a delightful and fluffy dessert that combines the soft texture of a cake with the indulgence of a creamy filling. This recipe is perfect for any occasion, from family gatherings to special celebrations.
The secret to the cake's pillowy softness lies in the careful balance of ingredients and the gentle mixing technique. By incorporating air into the batter, the cake develops a light and airy crumb that melts in your mouth.
Ingredients:
- 2 cups all-purpose flour
- 1 1/2 teaspoons baking powder
- 1/2 teaspoon salt
- 1/2 cup unsalted butter, softened
- 1 cup granulated sugar
- 3 large eggs
- 1 teaspoon vanilla extract
- 1 cup whole milk
- 2 cups heavy cream
- 1/4 cup powdered sugar
Instructions:
Preheat the oven to 350°F (177°C). Grease and flour a 9-inch round cake pan.
In a medium bowl, whisk together the flour, baking powder, and salt. In a large bowl, beat the butter and granulated sugar until light and fluffy, about 3 minutes.
Add the eggs one at a time, beating well after each addition, then stir in the vanilla. Alternately add the flour mixture and milk, mixing just until incorporated.
Pour the batter into the prepared pan and bake for 30-35 minutes, or until a toothpick inserted into the center comes out clean. Allow the cake to cool in the pan for 10 minutes, then transfer to a wire rack to cool completely.
For the filling, whip the heavy cream and powdered sugar together until stiff peaks form.
Slice the cooled cake horizontally into two equal layers. Spread the whipped cream filling between the layers and on top of the cake.
Refrigerate the cake for at least 2 hours before serving to allow the filling to set.
Cooking Steps
First, you'll need to soak the glutinous rice overnight.
Drain and rinse it well the next day.
Then, steam the rice until it's soft and fluffy.
Next, add rich coconut milk and sweet sugar, and shape the mixture into pillowy bites.
Get ready to enjoy this delightful, traditional treat!
Step 1. Soak Glutinous Rice Overnight
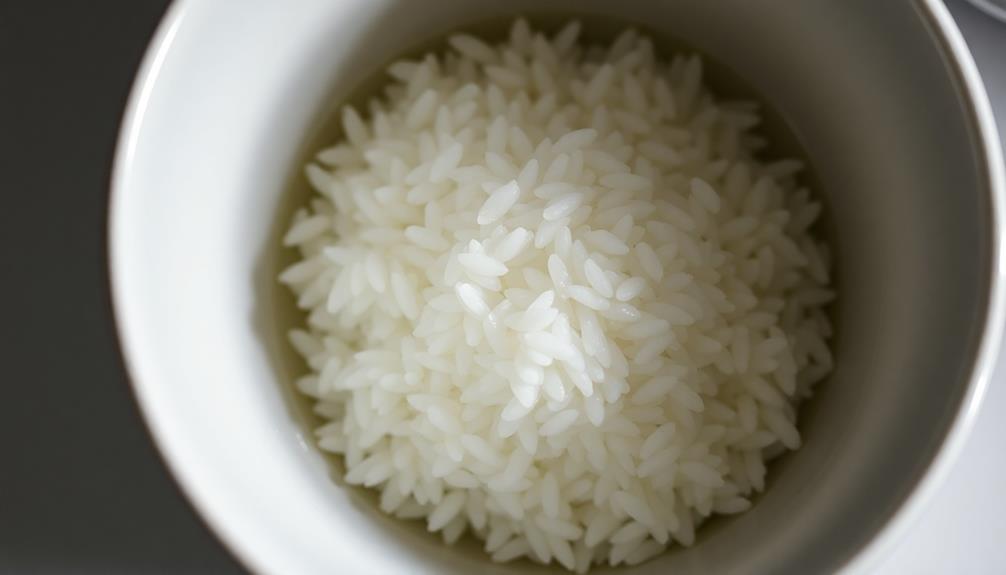
To begin the process of making the pillowy cake, you'll want to soak the glutinous rice overnight. Find a large bowl or container and fill it with water. Gently add the glutinous rice, making sure all the grains are submerged. Once the glutinous rice is fully submerged, cover the bowl with a lid or plastic wrap and let it soak overnight. This will help soften the rice for a smoother and more pliable texture when making the cylindrical sticky rice cake. The next day, the rice will be ready to be steamed and shaped into the delicious, pillowy cake.
Cover the bowl and let it sit at room temperature for at least 8 hours, or even overnight. This soaking step is crucial, as it softens the rice and helps it achieve that signature pillow-like texture.
In the morning, you'll notice the rice has expanded and absorbed the water. Drain the rice in a colander, then give it a quick rinse under cool running water.
The soaked rice is now ready to be steamed, which is the next step in creating these delectable Vietnamese treats. Get ready for fluffy, cloud-like perfection!
With the rice prepared, you're one step closer to enjoying the pillowy goodness of homemade Banh Goi.
Step 2. Drain and Rinse Glutinous Rice
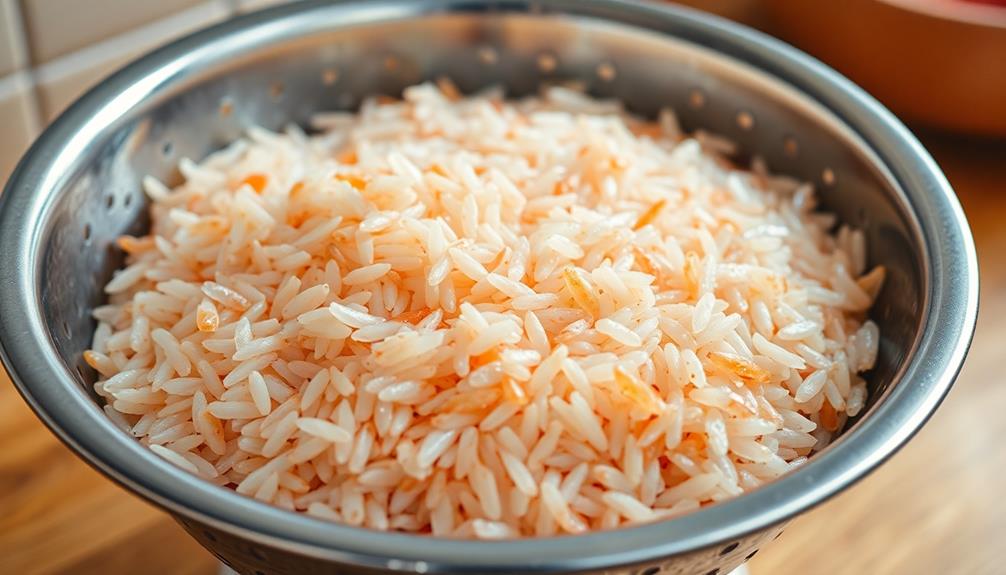
After letting the glutinous rice soak overnight, you'll need to drain and rinse it. This step is crucial to prepare the rice for the next part of the recipe.
Grab a colander or mesh strainer and carefully pour the soaked rice into it. The rice should feel plump and soft to the touch now. Run cool, clean water over the rice, gently stirring it with your fingers to remove any excess starch.
You'll see the water turn cloudy as you do this – that's perfectly normal! Keep rinsing until the water runs clear. Shake the colander to let the excess water drain off, then transfer the rinsed rice to a bowl, ready for the next step.
This simple yet important step ensures your pillow cakes will have the perfect soft, fluffy texture. With the rice prepped, you're one step closer to enjoying these delightful Vietnamese treats!
Step 3. Steam the Glutinous Rice
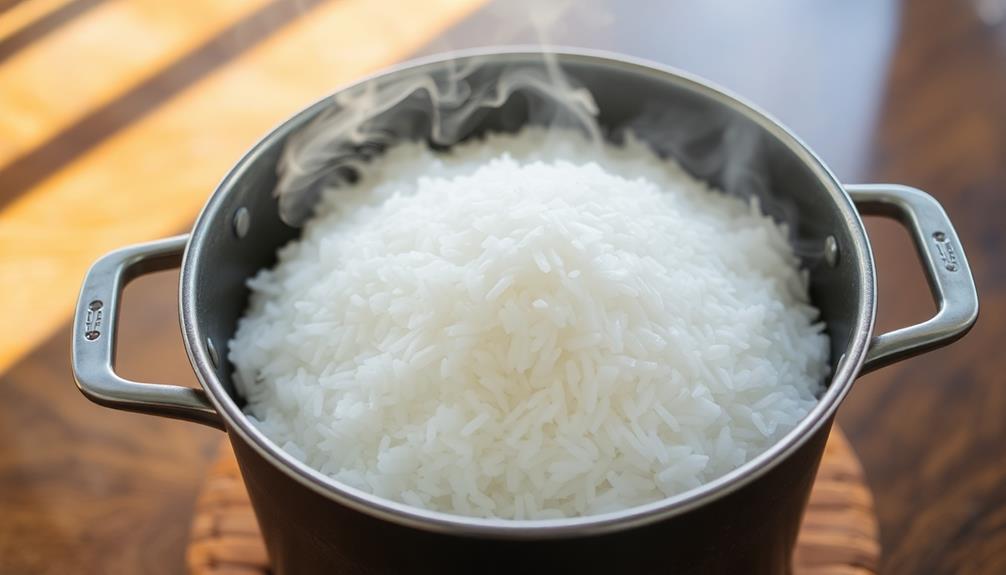
Having drained and rinsed the glutinous rice, you'll steam it to achieve the perfect soft, pillowy texture for your cakes.
First, grab your trusty steamer and fill it with water, making sure the water level is just below the steaming basket.
Place the rinsed glutinous rice in the steaming basket, then cover and bring the water to a boil over high heat.
Once the water is boiling, reduce the heat to maintain a gentle simmer and steam the rice for about 25-30 minutes, or until it's tender and translucent.
Be sure to check the water level occasionally and add more if needed to prevent the rice from drying out.
The rice should have a sticky, gelatinous texture when it's done.
Carefully remove the steaming basket and set it aside to cool slightly before using the rice to assemble your delicious pillow cakes.
Step 4. Add Coconut Milk and Sugar
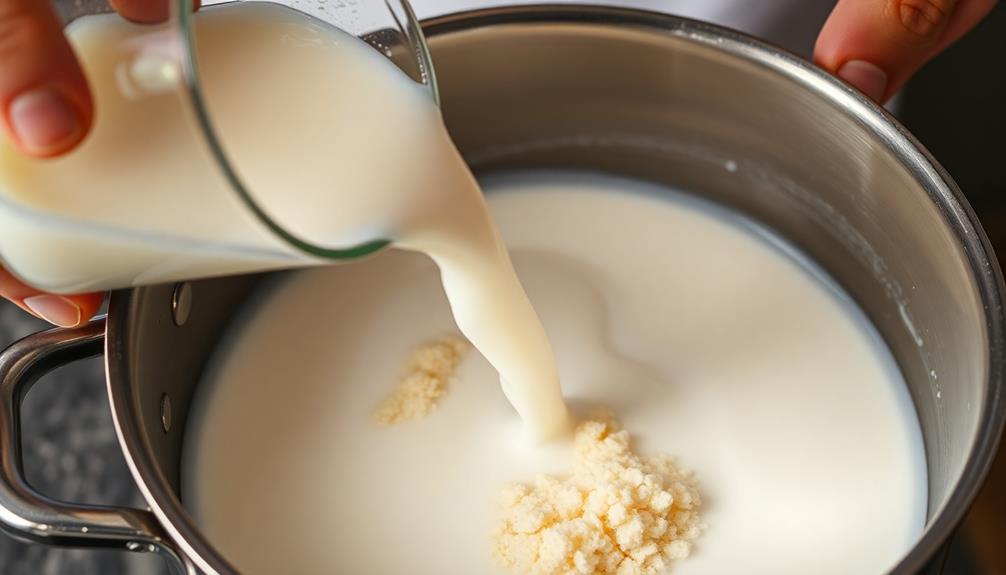
Next, you'll add the coconut milk and sugar to the steamed glutinous rice. Slowly pour in the rich, creamy coconut milk, stirring gently to combine. The sweet, tropical aroma will fill the air, making your mouth water with anticipation.
Sprinkle in the granulated sugar, a little at a time, mixing well after each addition. The sugar will dissolve into the coconut milk, creating a luscious, syrupy coating for the soft, chewy rice. Keep tasting and adjusting the sweetness until it's just right for your personal preference.
Now, the mixture should have a smooth, velvety texture. The grains of rice will be evenly coated and glistening.
Can't you just imagine sinking your teeth into a pillowy-soft bite, the coconut and sugar flavors melting on your tongue? Get ready, because the best part is about to come!
Step 5. Shape Into Pillows
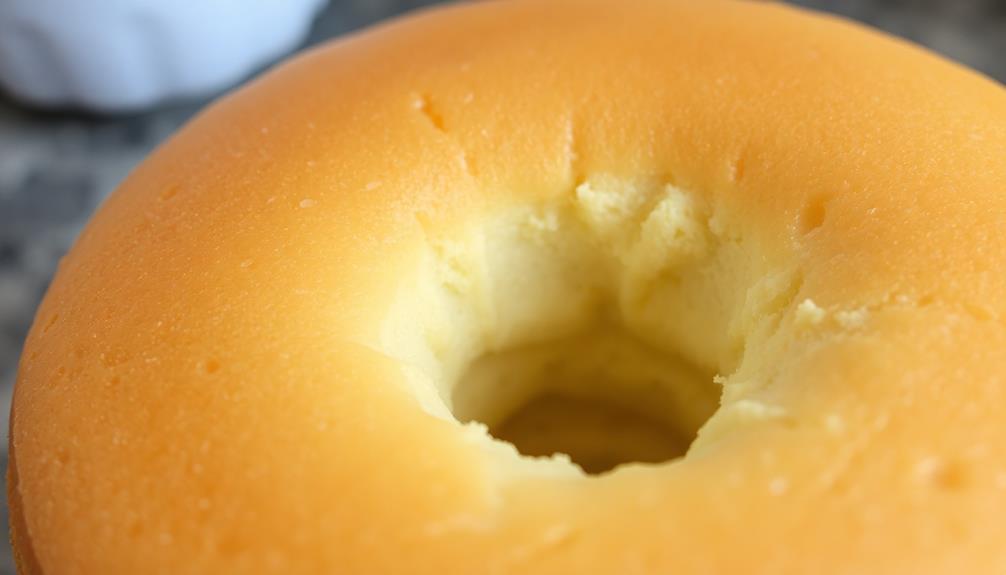
Grab a handful of the coconut milk-coated rice and gently shape it into a soft, pillowy mound. Cupping your hands around the mixture, slowly mold it into an oval shape, pressing lightly to create the signature "pillow" look. Smooth out any rough edges, ensuring the surface is evenly rounded and inviting.
Now, with the most delicate touch, pinch the center of your pillow-shaped rice, gently pulling up to form a slight indentation. This will give your banh goi that classic dimpled appearance, just like a real fluffy pillow! Be careful not to press too hard – you want to maintain that light, airy texture.
Once you're satisfied with the shape, carefully transfer your handiwork to a greased baking sheet. Arrange the pillows with enough space between them, so they can bake up perfectly puffed and golden brown.
Get ready for the most irresistible, cloud-like pastries you've ever tasted!
Final Thoughts
Reflecting on the pillow cake journey, you may find that the simplicity of this recipe belies its ability to delight. With its soft, cloud-like texture and irresistible flavor, this Vietnamese treat is a true culinary wonder.
Imagine sinking your teeth into the fluffy, buttery pastry, the savory filling melting in your mouth. The gentle aroma of freshly baked dough and fragrant spices fills the air, creating a sensory experience that transports you to a bustling Vietnamese market.
What makes the pillow cake so special is its ability to bring people together. Sharing this delectable creation with family and friends can spark joyful conversations and cherished memories.
Each bite is a celebration of cultural heritage, a delicious bridge between diverse traditions. So, as you savor the last morsel, take a moment to appreciate the simple pleasures that this humble pillow cake has to offer.
Its warmth and comfort are sure to leave a lasting impression on your heart and taste buds.
Frequently Asked Questions
How Long Does It Take to Prepare Banh Goi?
It typically takes around an hour to fully prepare this dish. You'll need to gather the necessary ingredients, then carefully assemble and cook the components to create the perfect texture and flavor.
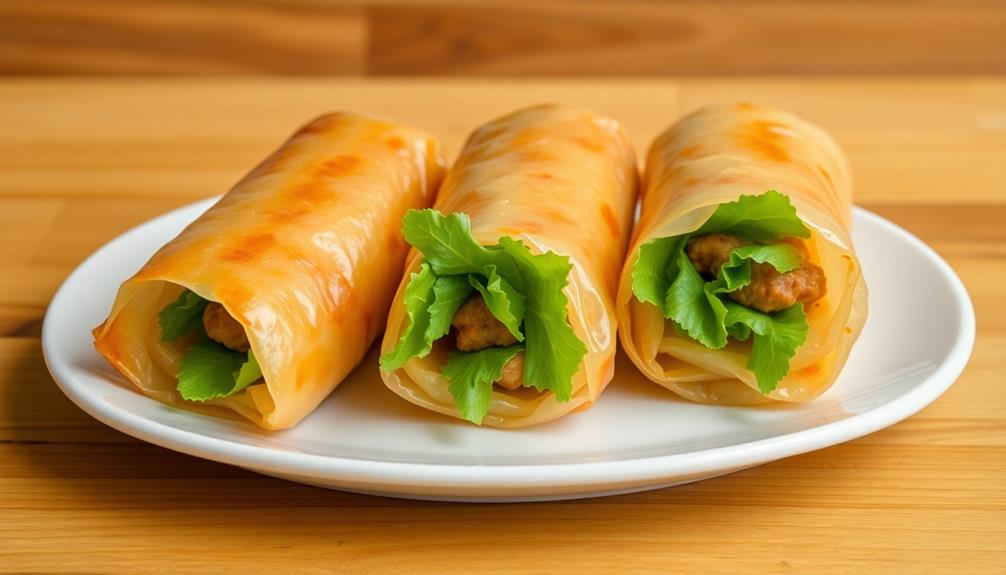
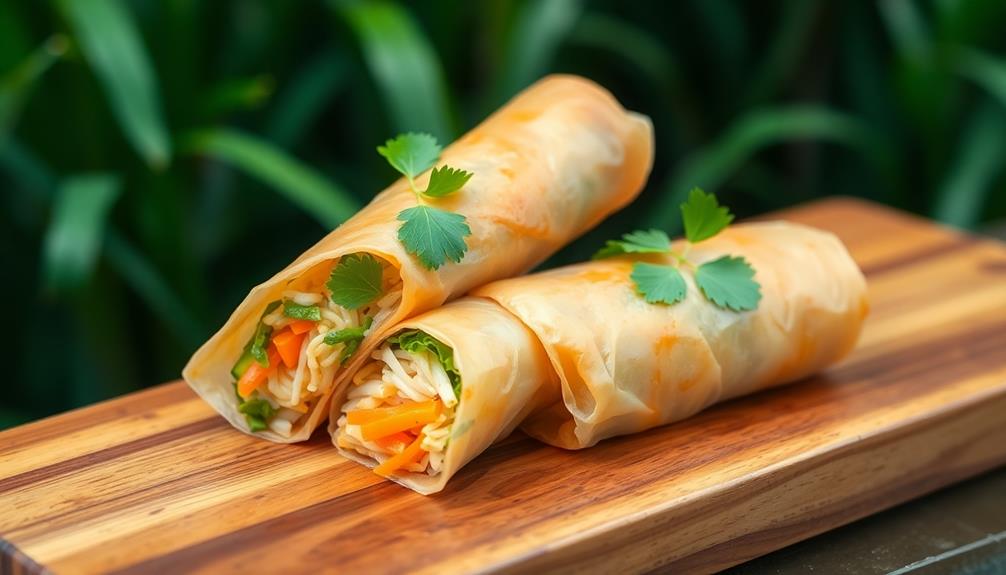
What Are the Common Fillings Used in Banh Goi?
The most common fillings used in this type of dish are ground pork, mushrooms, glass noodles, and onions. You can also find versions with shrimp, chicken, or a mix of different vegetables.
Can Banh Goi Be Frozen and Reheated?
You can freeze and reheat banh goi, though the texture may change slightly. To preserve its quality, let it thaw completely before reheating in the oven or air fryer until warmed through.
How Do I Store Leftover Banh Goi?
To store leftover banh goi, you can keep it in an airtight container in the fridge for up to 3-4 days. For longer storage, freeze the cakes, then thaw and reheat them when you're ready to enjoy them again.
Is Banh Goi Gluten-Free or Suitable for Dietary Restrictions?
You'll be pleased to know that banh goi can be a great option for those with dietary restrictions. It's typically made with rice flour, making it gluten-free and suitable for many dietary needs.